
A handmade DIY pencil pouch is one of those quick sewing projects that is practical, beginner-friendly, and surprisingly fun to customize. Whether you need a new pencil case for school, a small zipper pouch for your purse, or a handmade gift for a teacher or student, this simple project is a great way to use up leftover fabric from your sewing stash.
This easy DIY pencil pouch sewing tutorial walks you through every step, from cutting the fabric to installing the zipper and finishing the corners. You can make the pouch with quilting cotton, canvas, denim, corduroy, or other medium-weight woven fabrics.
Easy back-to-school sewing projects for beginners can help you turn leftover fabric pieces into practical handmade accessories. Once you understand the basic construction, it is easy to change the dimensions and create cosmetic bags, travel organizers, art-supply pouches, or small project bags using the same technique.
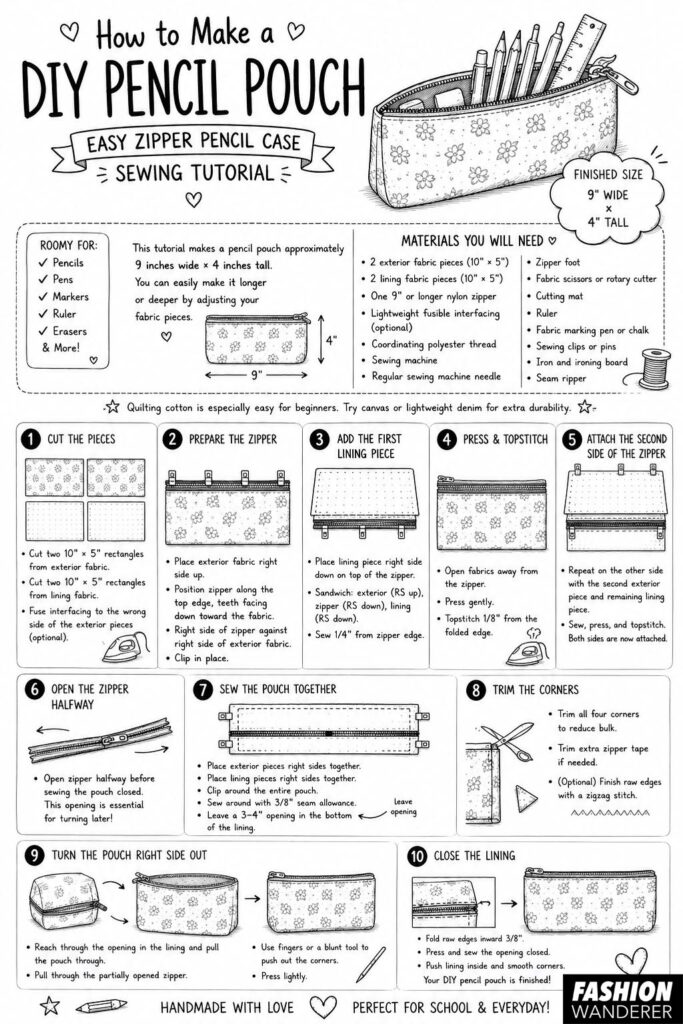
DIY Pencil Pouch Finished Size
This tutorial makes a pencil pouch approximately:
9 inches wide × 4 inches tall
The size is roomy enough for standard pencils, pens, markers, a small ruler, erasers, and other school supplies.
You can easily make it longer or deeper by adjusting the measurements of your fabric pieces.
Materials You Will Need
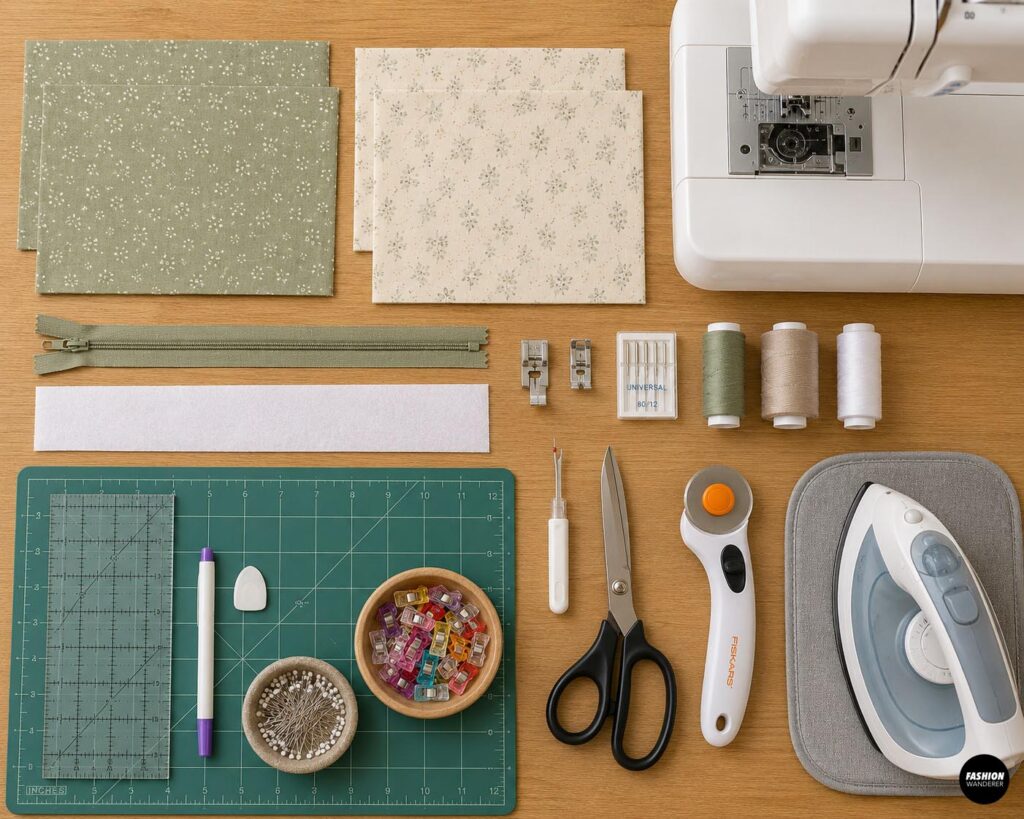
To make one DIY pencil pouch, gather:
- 2 exterior fabric pieces measuring 10″ × 5″
- 2 lining fabric pieces measuring 10″ × 5″
- One 9″ or longer nylon zipper
- Lightweight fusible interfacing, optional
- Coordinating polyester thread
- Sewing machine
- Regular sewing machine needle
- Zipper foot
- Fabric scissors or rotary cutter
- Cutting mat
- Ruler
- Fabric marking pen or chalk
- Sewing clips or pins
- Iron and ironing board
- Seam ripper
Quilting cotton is especially easy for beginners. If you want a sturdier pencil pouch, try canvas or lightweight denim.
Easy Pencil Pouch Tutorial
Step 1: Cut the Pencil Pouch Pieces
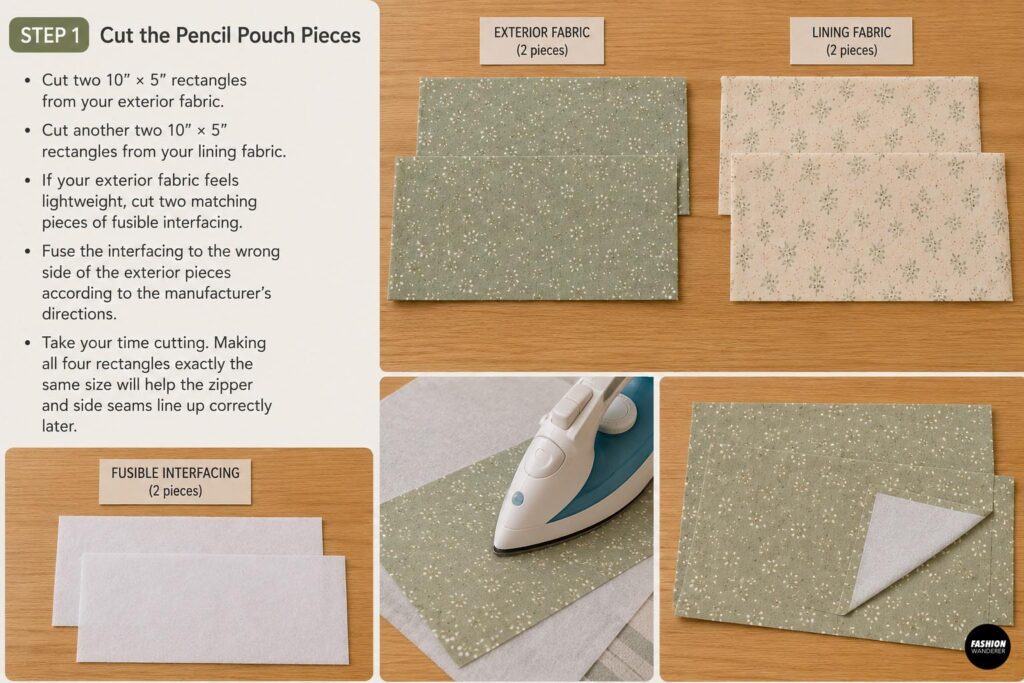
Cut two 10″ × 5″ rectangles from your exterior fabric.
Cut another two 10″ × 5″ rectangles from your lining fabric.
If your exterior fabric feels lightweight, cut two matching pieces of fusible interfacing.
Fuse the interfacing to the wrong side of the exterior pieces according to the manufacturer’s directions.
Take your time cutting. Making all four rectangles exactly the same size will help the zipper and side seams line up correctly later.
Step 2: Prepare the Zipper
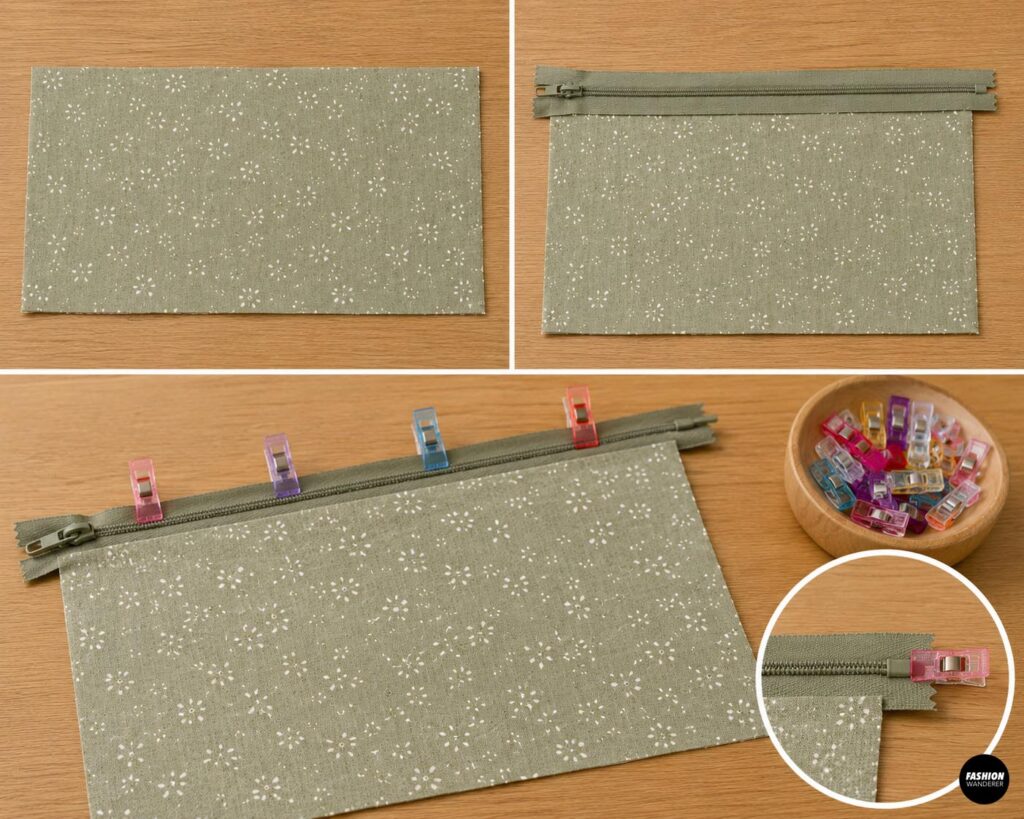
Place one exterior fabric piece on your work surface with the right side facing up.
Position the zipper along the upper 10-inch edge with the zipper teeth facing down toward the fabric.
The right side of the zipper should be touching the right side of the exterior fabric.
If your zipper is longer than the fabric, center it so the zipper pull and stopper extend beyond the edges.
Use sewing clips to hold the zipper in place.
Step 3: Add the First Lining Piece
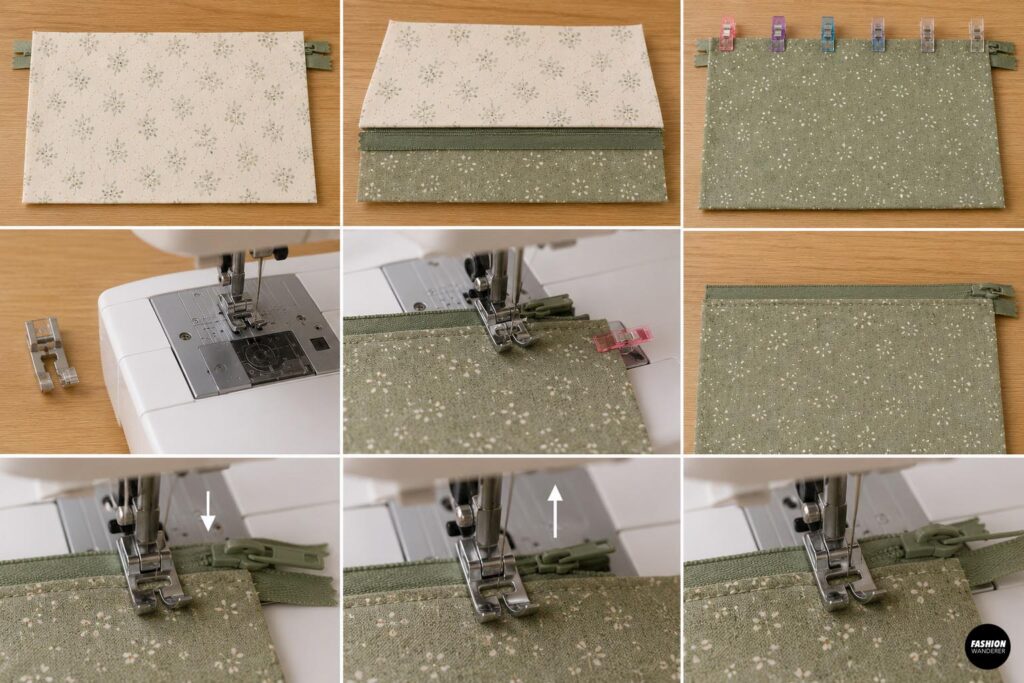
Take one lining piece and position it right side down on top of the zipper.
You should now have a sandwich:
Exterior fabric right side up
Zipper right side down
Lining right side down
Match all three raw edges along the top.
Clip everything securely together.
Attach a zipper foot to your sewing machine.
Sew approximately 1/4 inch from the zipper edge, stitching through the exterior fabric, zipper tape, and lining.
Move slowly as you sew.
When you approach the zipper pull, stop with the needle down, raise the presser foot, and gently slide the zipper pull behind the foot. Lower the presser foot and continue sewing.
Step 4: Press and Topstitch
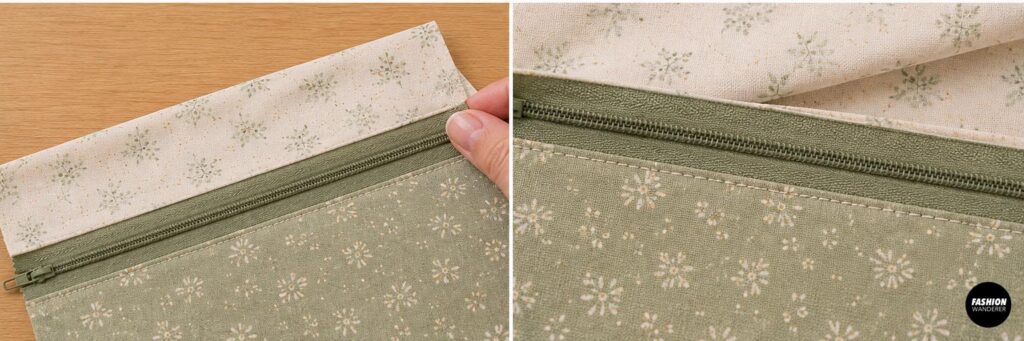
Open the exterior fabric and lining away from the zipper.
Press both fabrics gently away from the zipper teeth.
Be careful not to place a very hot iron directly against plastic zipper teeth.
Topstitch approximately 1/8 inch from the folded fabric edge.
This step keeps the fabric from catching in the zipper and gives your handmade pencil pouch a clean, professional finish.
Step 5: Attach the Second Side of the Zipper
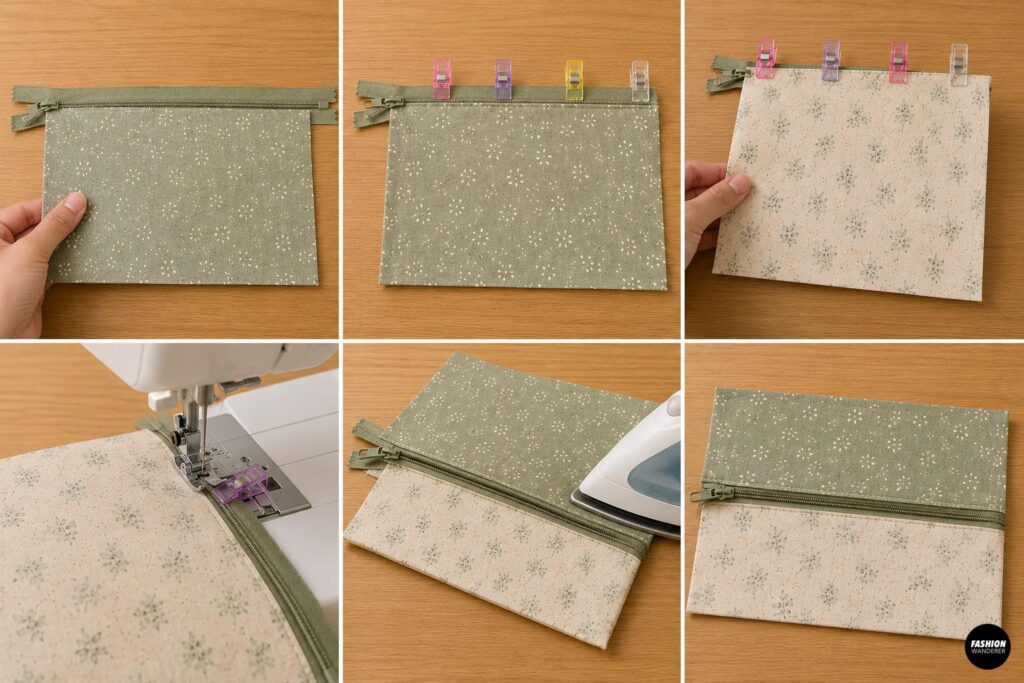
Place the second exterior fabric piece right side up.
Position the unsewn side of the zipper along the upper edge, right side down.
Place the remaining lining piece over everything with its right side facing down.
Align the raw edges.
Clip the layers together.
Using your zipper foot, sew along the zipper tape just as you did on the first side.
Open the fabrics away from the zipper, press, and topstitch.
You should now have exterior fabric on both sides of the zipper with lining fabric underneath.
Step 6: Open the Zipper Halfway
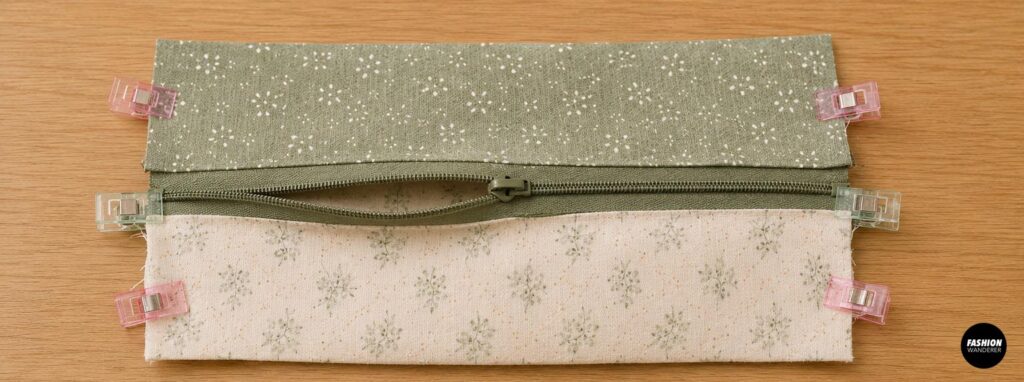
This step is extremely important.
Open the zipper halfway before sewing the pouch closed.
If you accidentally sew the pouch together while the zipper is completely closed, turning the finished pencil pouch right side out becomes much more difficult.
Leaving it halfway open gives you an opening for turning later.
Step 7: Sew the Pencil Pouch Together
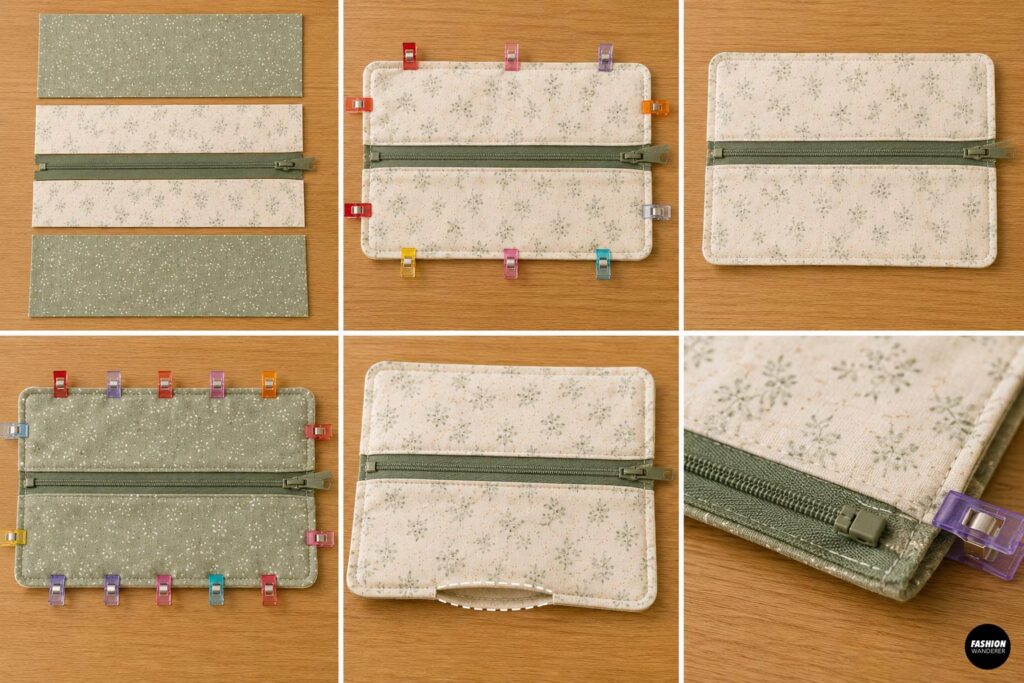
Arrange the project so the two exterior pieces are right sides together.
Place the two lining pieces right sides together as well.
The zipper should run through the center.
Match the zipper seams carefully.
Clip around the entire pouch.
Using approximately a 3/8-inch seam allowance, sew around the exterior and lining.
Leave a 3- to 4-inch opening along the bottom edge of the lining.
Do not sew this opening closed yet.
When sewing across the zipper ends, move slowly and avoid stitching directly over metal zipper stops.
Step 8: Trim the Corners
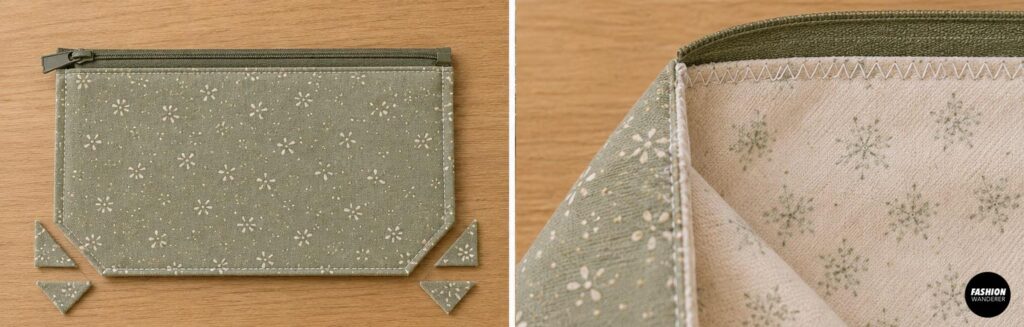
Trim the four corners without cutting through your stitches.
Removing this extra fabric reduces bulk and helps the pencil pouch corners look sharper after turning.
If the zipper extends beyond the side seams, trim away the excess zipper tape after the seams have been securely sewn.
For additional durability, you can finish the seam allowances with a zigzag stitch, especially if your fabric frays easily.
Step 9: Turn the Pencil Pouch Right Side Out
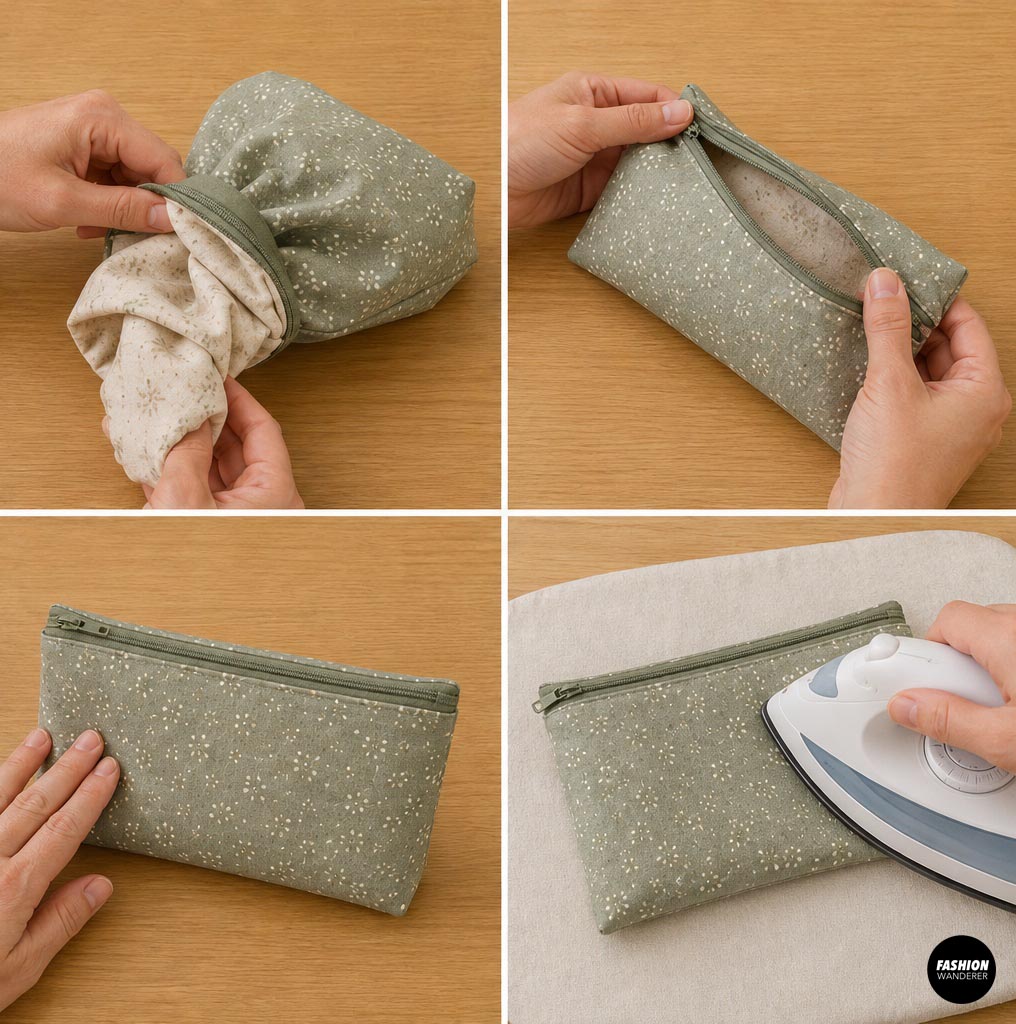
Reach through the opening you left in the lining.
Carefully pull the exterior pouch through the opening.
Then pull the pouch through the partially opened zipper.
Use your fingers or a blunt turning tool to gently push out the corners.
Avoid using scissors because the sharp tips can accidentally poke through the fabric.
Give the pencil pouch a light press.
Step 10: Close the Lining
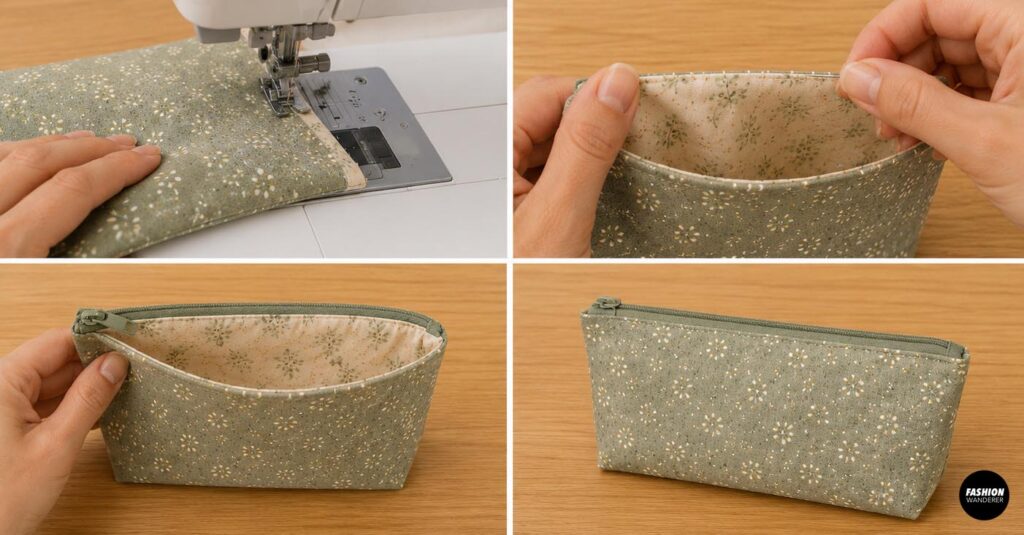
Fold the raw edges of the lining opening inward by approximately 3/8 inch.
Press the opening flat.
Sew close to the folded edge with your sewing machine.
For an almost invisible finish, you can also close the opening by hand using a ladder stitch.
Push the lining inside the pouch and smooth the corners.
Your DIY pencil pouch is finished!
Easy Ways to Customize Your Pencil Pouch
Once you have mastered the basic construction, have fun experimenting with your design. Try color-blocked fabric, floral prints, denim, embroidered initials, iron-on patches, fabric labels, pom-pom zipper pulls, or contrasting lining.
You can even piece together smaller fabric scraps before cutting the exterior rectangles for a cute patchwork pencil case.
For extra structure, use fusible fleece instead of lightweight interfacing.
Final Tips for Sewing a Pencil Pouch
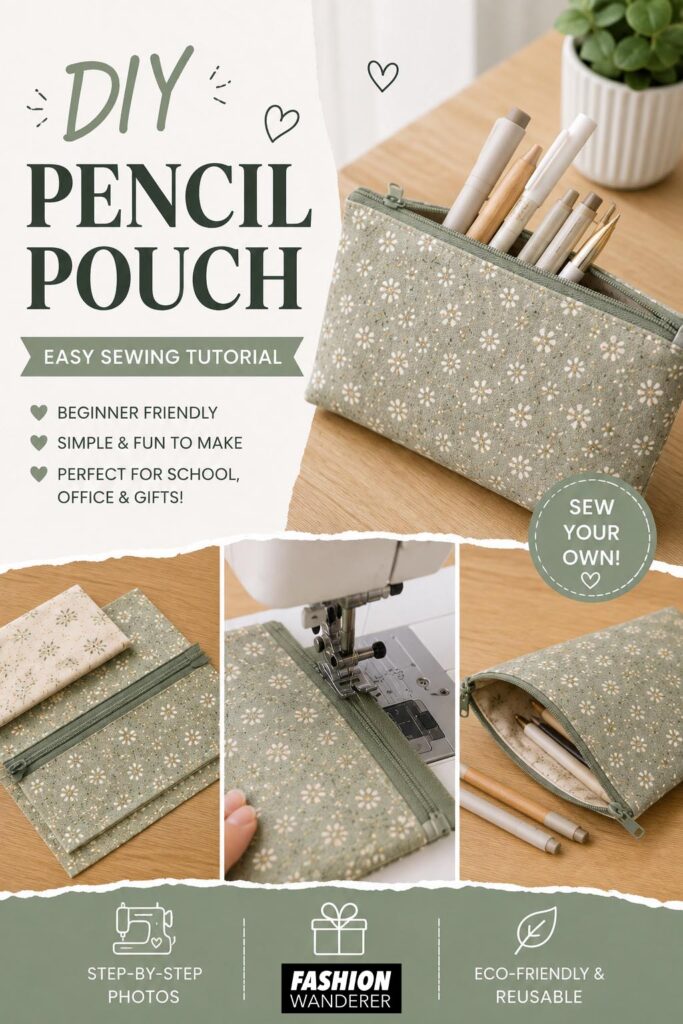
A DIY pencil pouch is an ideal beginner sewing project because it teaches several useful skills in one small project: sewing straight seams, inserting a zipper, adding lining, topstitching, and turning corners.
The biggest beginner tip is simply to take your time around the zipper. Use a zipper foot, keep the fabric flat, and move the zipper pull whenever it gets in the way of your presser foot.
Once you make one, you will probably want to make several. These handmade zipper pencil cases are perfect for back-to-school sewing, teacher gifts, stocking stuffers, craft storage, travel accessories, and scrap-busting projects.
With just a little fabric and one zipper, you can turn leftover sewing supplies into a practical handmade accessory you will actually use.