
If you’re looking for a cozy, beginner-friendly knitting project that works up quickly, these easy fingerless mittens are a perfect place to start. They’re warm, practical, simple to customize, and much easier to knit than traditional gloves because there are no individual fingers to shape.
This fingerless mittens knitting pattern for beginners uses basic knit and purl stitches, simple ribbing, and straightforward seaming. You’ll knit each mitten flat on two needles, which means you do not need to know how to knit in the round or use double-pointed needles.
The finished mittens are ideal for chilly mornings, working at a computer, walking the dog, driving, or keeping your hands warm while still leaving your fingers free.
Skill Level
Beginner.
You should be comfortable with:
- Casting on
- Knit stitch
- Purl stitch
- Binding off
- Simple hand sewing
If you’re still learning, this is an excellent project for practicing ribbing and maintaining even tension.
Finished Size
This pattern makes an average adult-size pair of fingerless mittens.
Approximate finished measurements:
- Length: 7½ to 8 inches
- Width when laid flat: about 4 inches
- Thumb opening: approximately 2 inches
- Wrist cuff: approximately 2 inches
The knitted fabric stretches, so the mittens will comfortably fit most adult hands.
For smaller hands, cast on fewer stitches. For larger hands, add several stitches while keeping the total compatible with your ribbing pattern.
Materials You Will Need
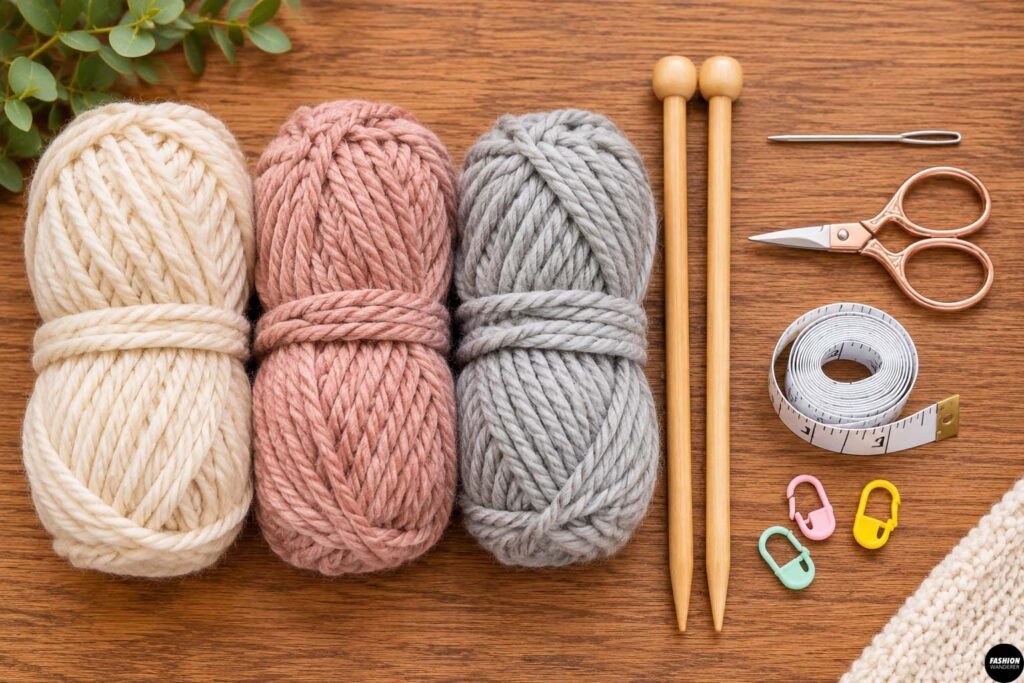
For one pair of fingerless mittens, gather:
- 100–150 yards worsted-weight yarn
- US size 7 or 8 knitting needles
- Yarn needle
- Scissors
- Measuring tape
- Stitch marker, optional
A soft wool, acrylic, wool-blend, or washable merino yarn works well.
For beginners, choose a smooth, medium-colored yarn. Very dark yarn can make stitches harder to see, while fuzzy yarn can make fixing mistakes more difficult.
Gauge
Approximately:
18 stitches x 24 rows = 4 inches in stockinette stitch
Gauge does not have to be absolutely perfect for this project, but checking it will help your mittens fit correctly.
DIY Fingerless Mittens Knitting Pattern for Beginners
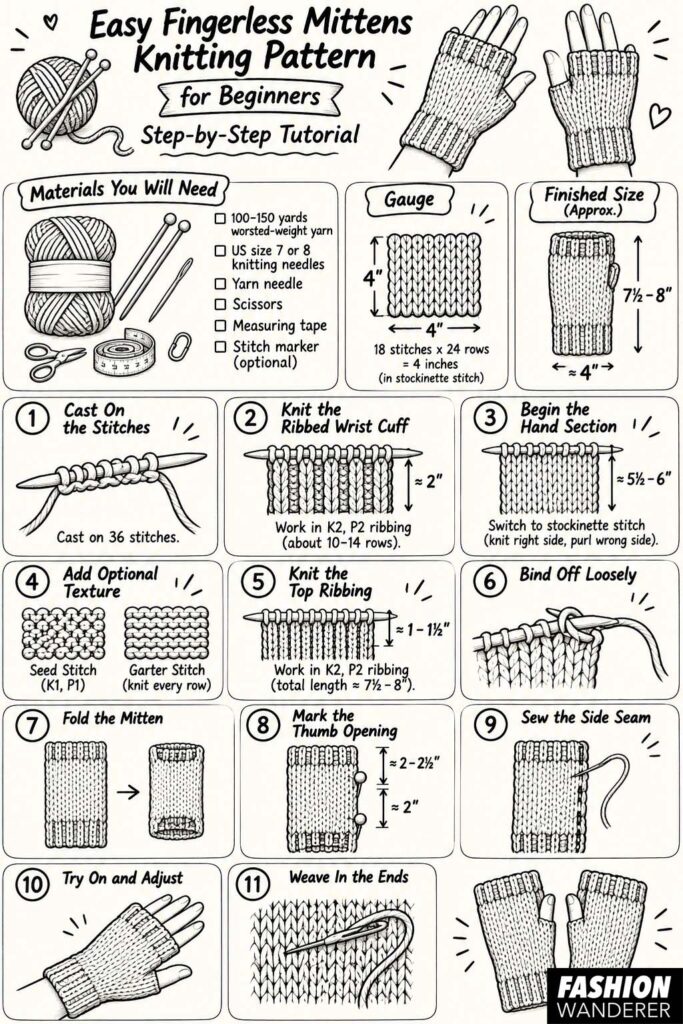
Step 1: Cast On the Stitches
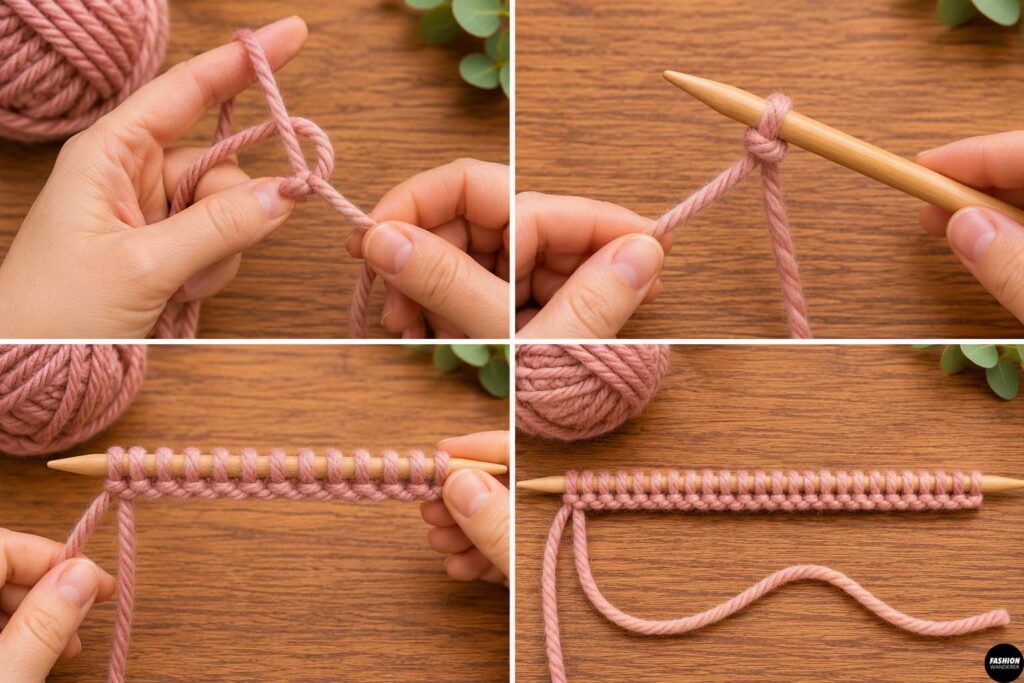
Using your preferred cast-on method, cast on:
36 stitches
Leave a yarn tail approximately 10 to 12 inches long. You can use this later when seaming the mitten.
Try not to cast on too tightly. The cuff should stretch comfortably around your wrist.
Step 2: Knit the Ribbed Wrist Cuff
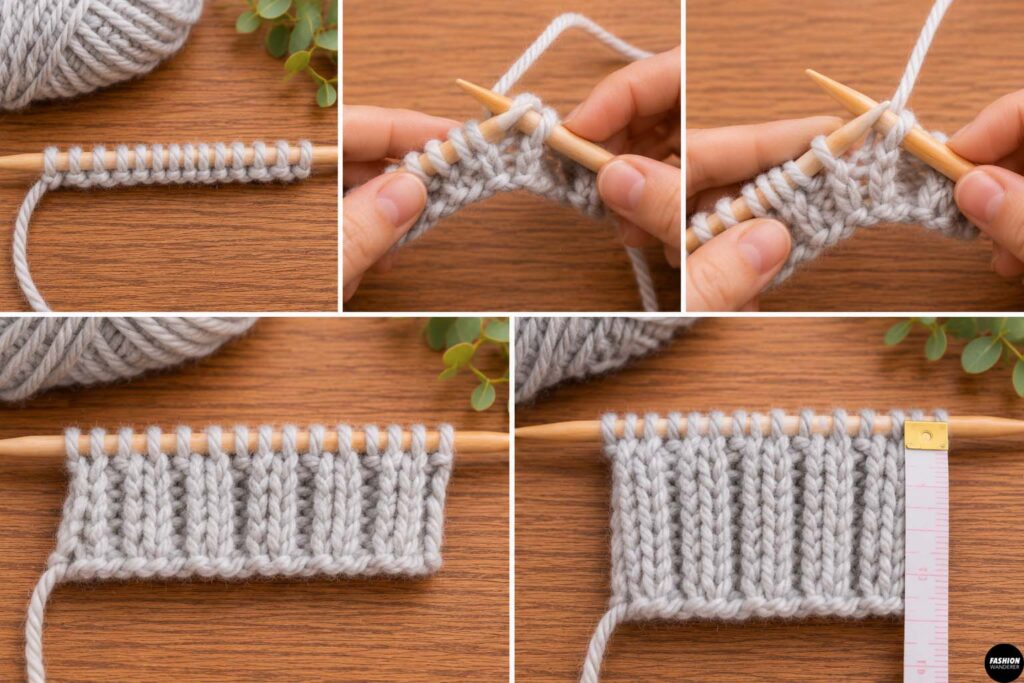
The ribbed cuff helps keep the mittens snug and comfortable.
Work in K2, P2 ribbing.
Row 1:
Knit 2, purl 2.
Repeat across the entire row.
Row 2:
Continue knitting the knit stitches and purling the purl stitches as they appear.
Repeat these two rows until the cuff measures approximately:
2 inches
This will usually take around 10 to 14 rows depending on your yarn and knitting tension.
Step 3: Begin the Hand Section
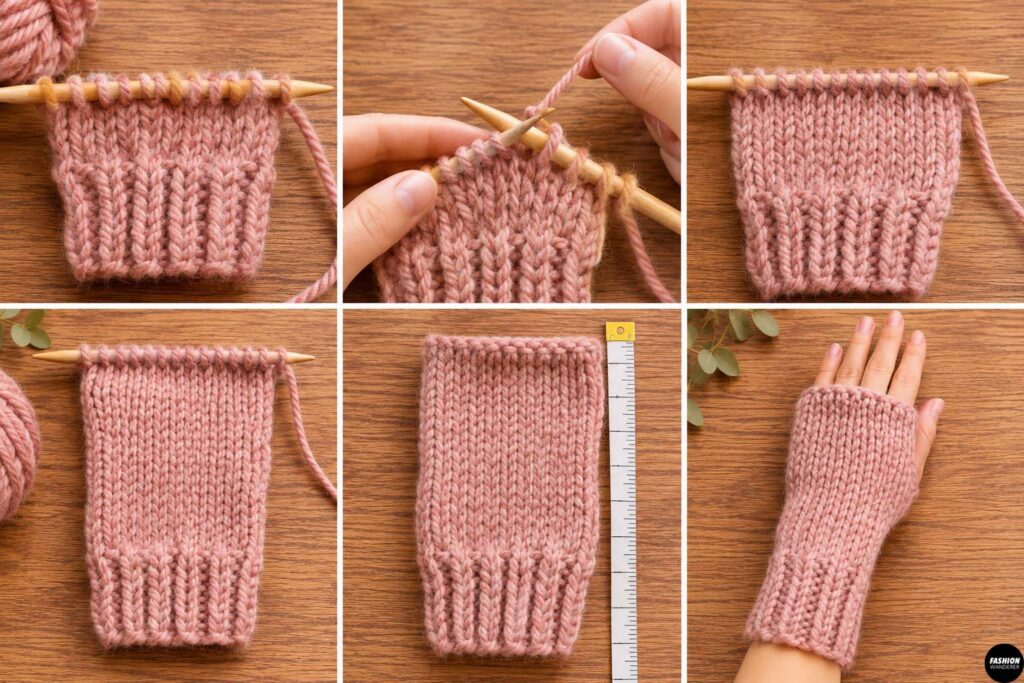
Once the cuff is finished, switch to stockinette stitch.
Work as follows:
Right-side row: Knit all stitches.
Wrong-side row: Purl all stitches.
Continue alternating these two rows.
Stockinette stitch creates a smooth surface on the outside of the mitten while the reverse side has the familiar bumpy texture.
Continue until the entire piece measures approximately:
5½ to 6 inches from the cast-on edge.
You can hold the piece against your hand to check the length.
The top should reach approximately to the base of your fingers.
Step 4: Add Optional Texture
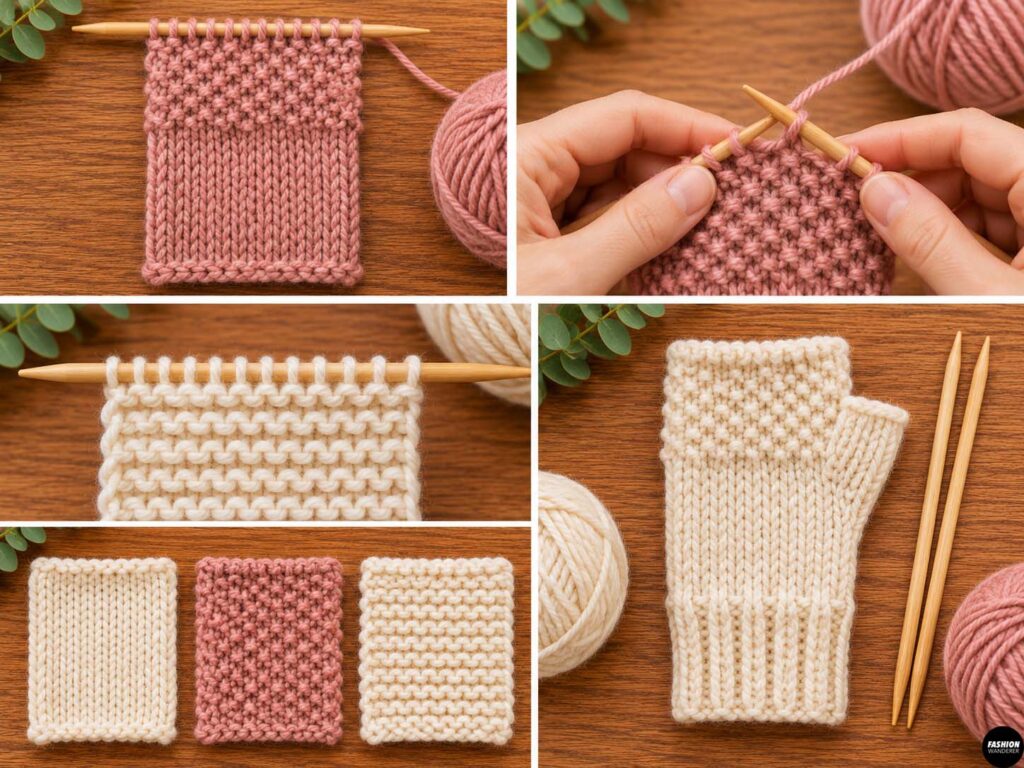
If you want your fingerless mittens to look a little more decorative, you can add a simple texture section.
Instead of working plain stockinette, try:
Seed stitch
Knit 1, purl 1 across the row.
On the next row, purl the knit stitches and knit the purl stitches.
Or try:
Garter stitch
Knit every row.
For your first pair, plain stockinette is usually the easiest option.
Step 5: Knit the Top Ribbing
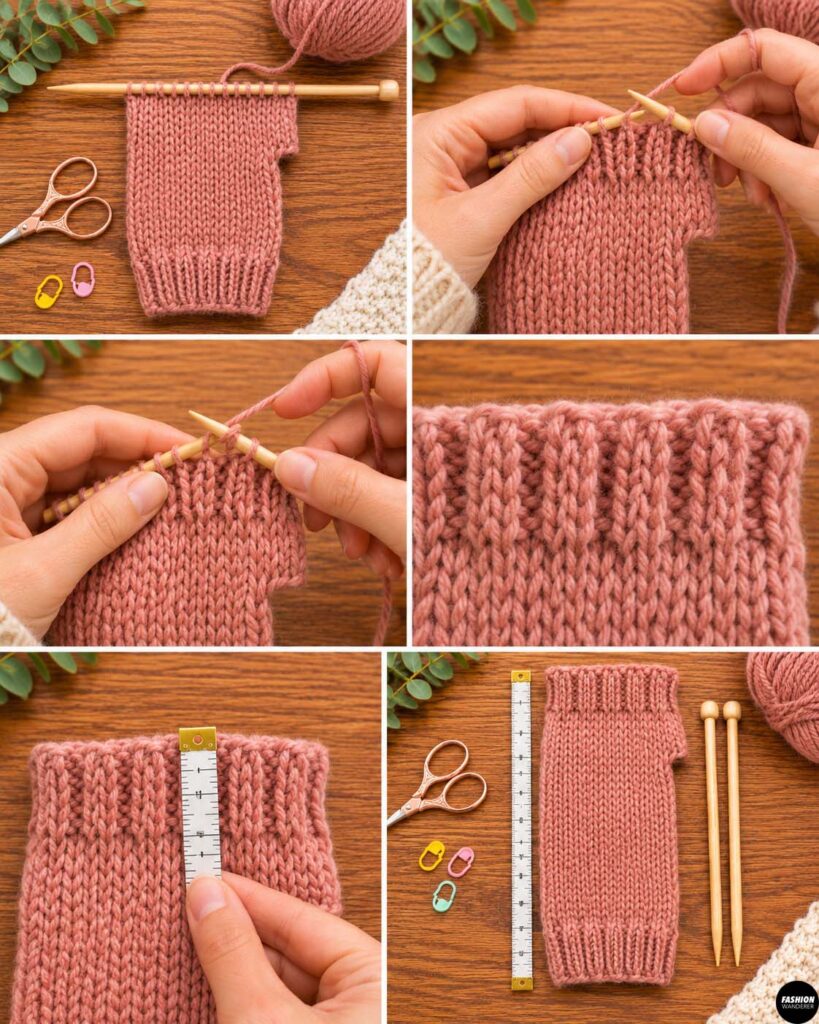
To help the upper edge stay stretchy and neat, return to the K2, P2 rib pattern.
Work:
Knit 2, purl 2 across each row.
Continue until the upper ribbing measures approximately:
1 to 1½ inches
The total mitten length should now be approximately 7½ to 8 inches.
Step 6: Bind Off Loosely
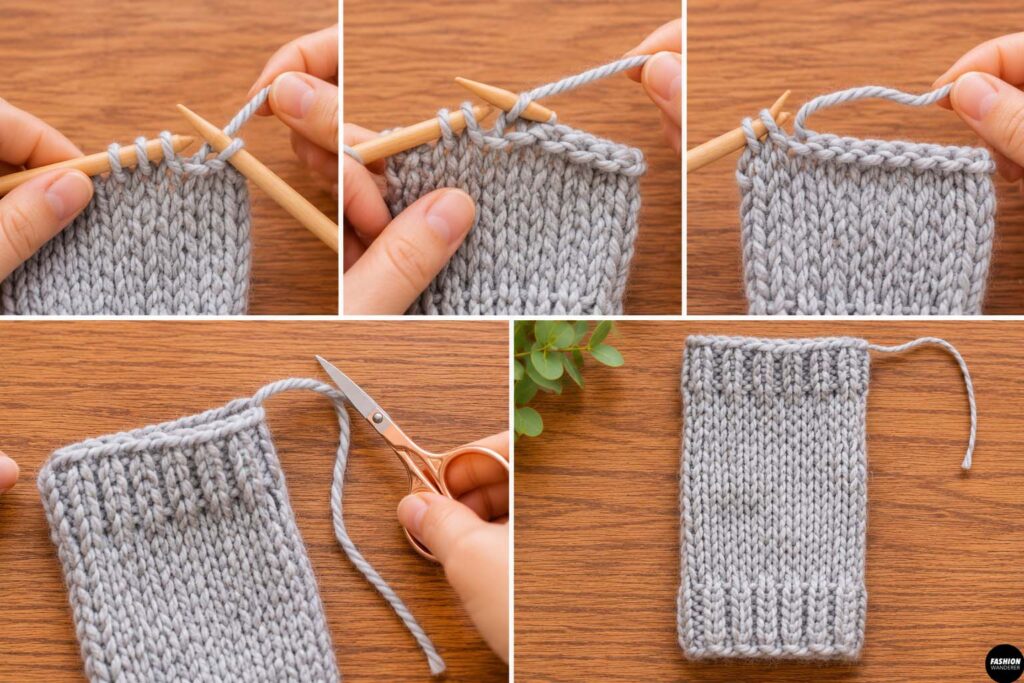
Bind off all stitches using a relaxed tension.
Avoid binding off tightly because the top edge needs to stretch around your hand.
Cut the yarn, leaving another 10 to 12-inch tail for sewing.
Your knitted piece should now look like a simple rectangle with ribbing at both ends.
Step 7: Fold the Mitten
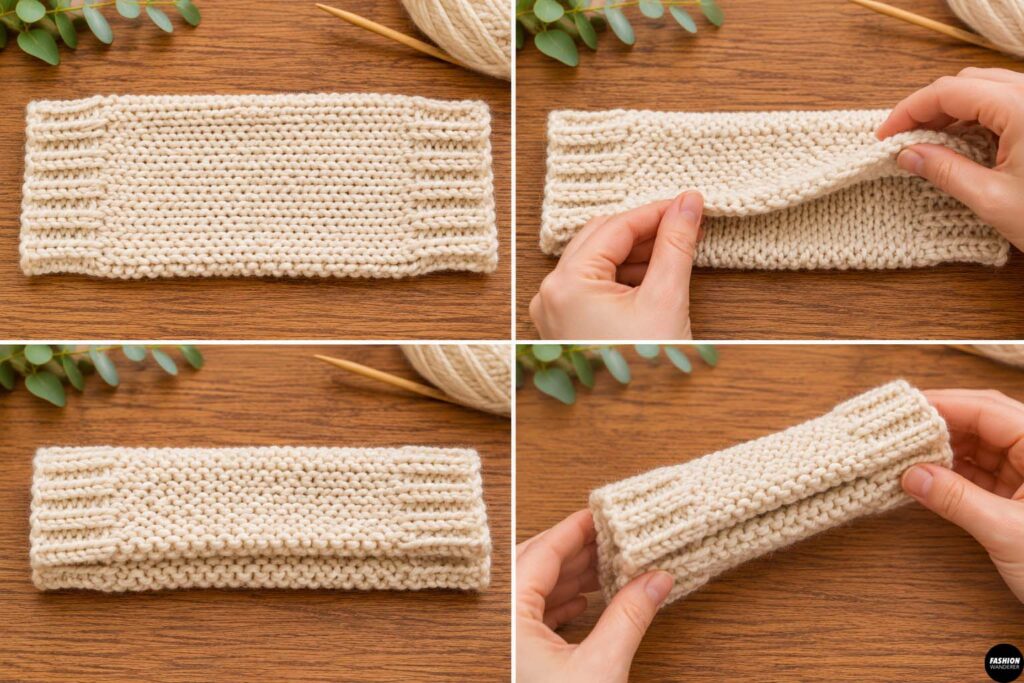
Place the knitted rectangle on a flat surface with the right side facing upward.
Fold the rectangle in half lengthwise so the long edges meet.
The wrong side of the knitting should now be facing outward.
Line up the top and bottom edges carefully.
Step 8: Mark the Thumb Opening
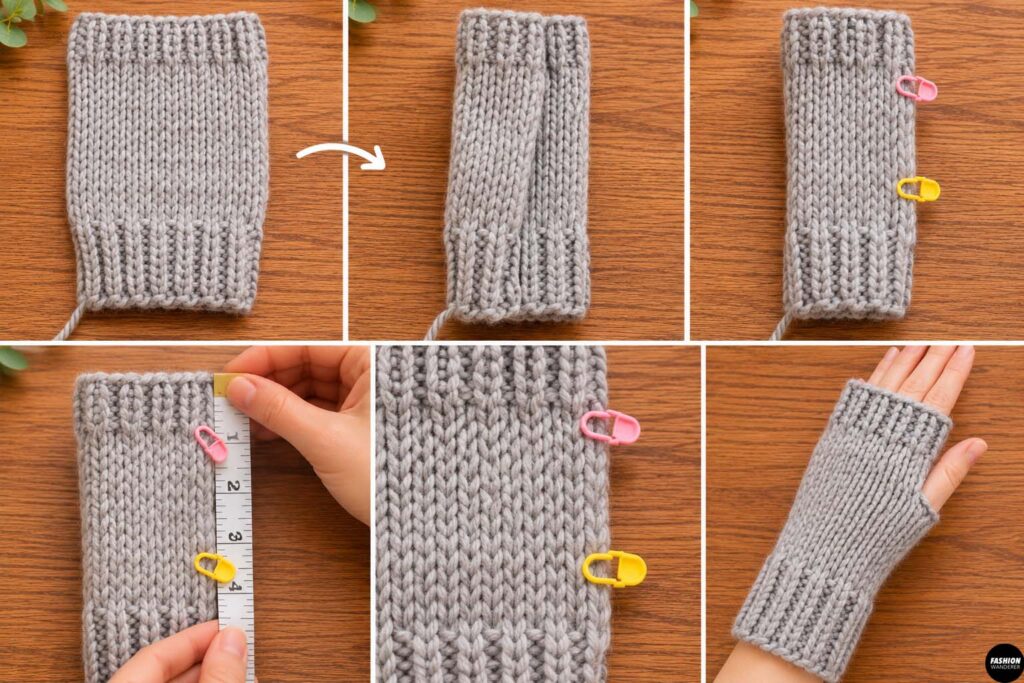
Before sewing the side seam, determine where the thumb opening should sit.
From the top edge, measure approximately:
2 to 2½ inches downward.
Place a stitch marker or pin.
Measure another:
2 inches downward.
Place a second marker.
The space between these two markers will remain unsewn and become the thumb opening.
You can adjust the position slightly by wrapping the folded mitten around your hand.
Step 9: Sew the Side Seam
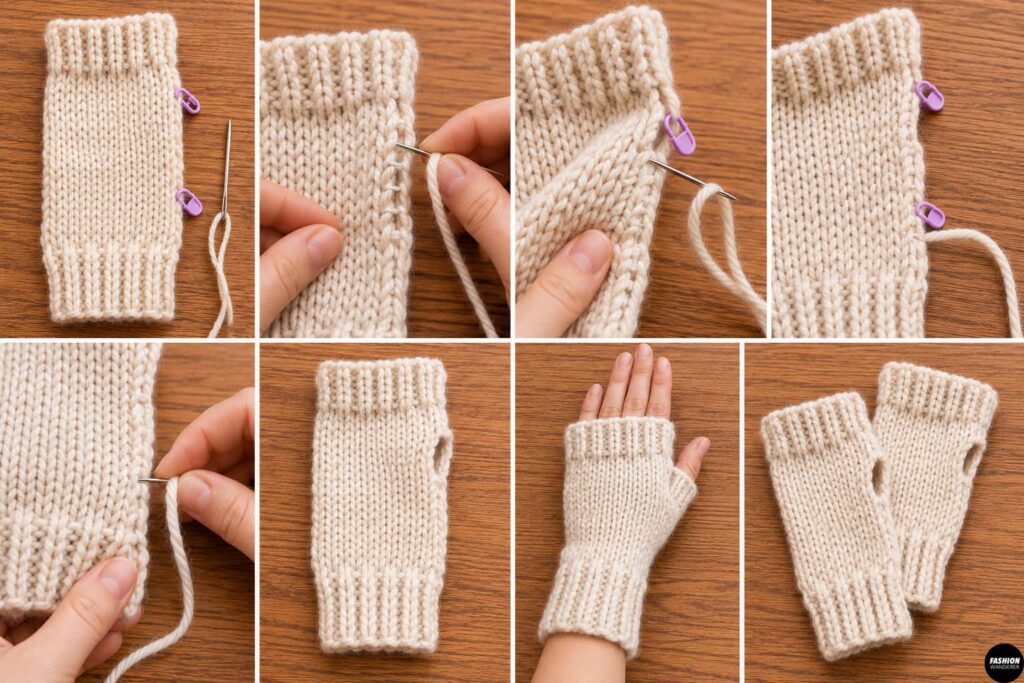
Thread a yarn needle with the yarn tail.
Starting at the top of the mitten, sew the two long edges together using mattress stitch or whipstitch.
Stop when you reach the first thumb marker.
Secure the yarn and weave in the end.
Next, begin sewing again at the second thumb marker.
Continue sewing all the way down to the wrist cuff.
Keep your stitches firm but not overly tight.
Turn the mitten right side out.
You should now have a simple fingerless glove with a thumb opening along the side.
Step 10: Try On and Adjust
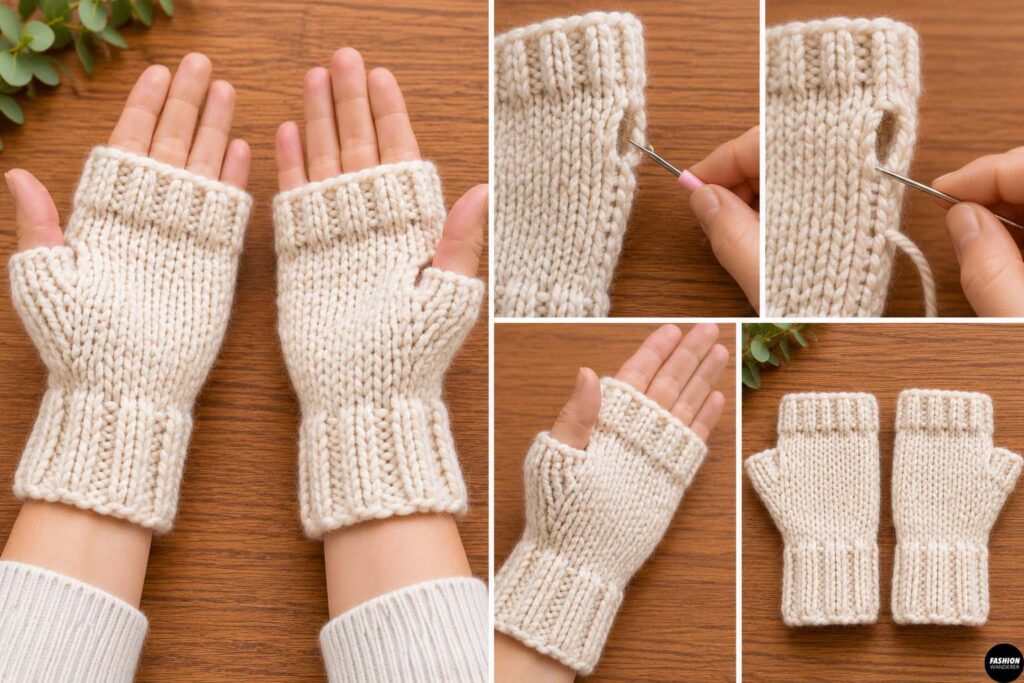
Slide your hand into the mitten.
Your fingers should extend comfortably through the top opening, while your thumb fits through the side opening.
If the thumb opening feels too small, carefully remove a few stitches from the seam.
If it feels too large, sew the opening slightly smaller.
Repeat the same steps to make the second mitten.
Step 11: Weave In the Ends
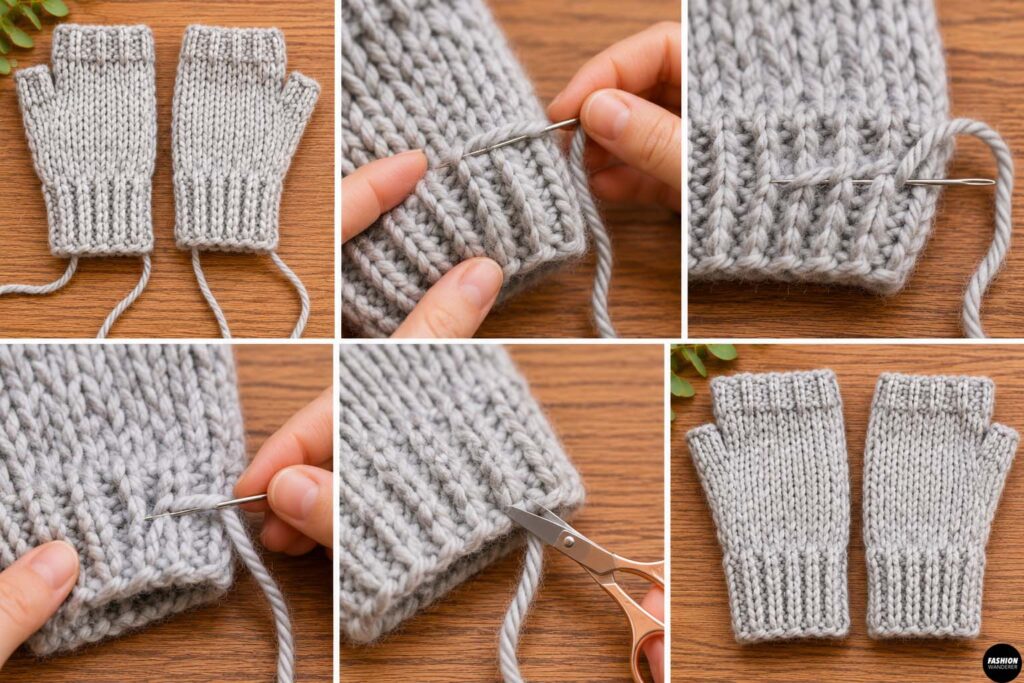
Use a yarn needle to weave all loose yarn tails into the inside of the mittens.
Trim the excess yarn carefully.
Avoid cutting too close to the knitting because the yarn ends could work loose over time.
Easy Ways to Customize Your Fingerless Mittens
Once you understand the basic construction, you can easily create several versions.
Try adding:
- Contrasting cuffs
- Striped yarn
- Small embroidered flowers
- Wooden buttons
- Tiny bows
- Duplicate-stitch hearts
- Ribbed texture throughout
- Seed stitch panels
You can also make the mittens longer for extra wrist coverage or shorter for a lightweight everyday pair.
Beginner Knitting Tips
Keep your stitches relaxed and consistent. Tight knitting can make the mittens stiff and uncomfortable.
Count your stitches occasionally so you catch mistakes early.
When working ribbing, remember:
Knit the knit stitches and purl the purl stitches.
And before seaming, always test the rectangle around your hand. This makes it easy to adjust the thumb opening before everything is sewn permanently.
Final Thoughts
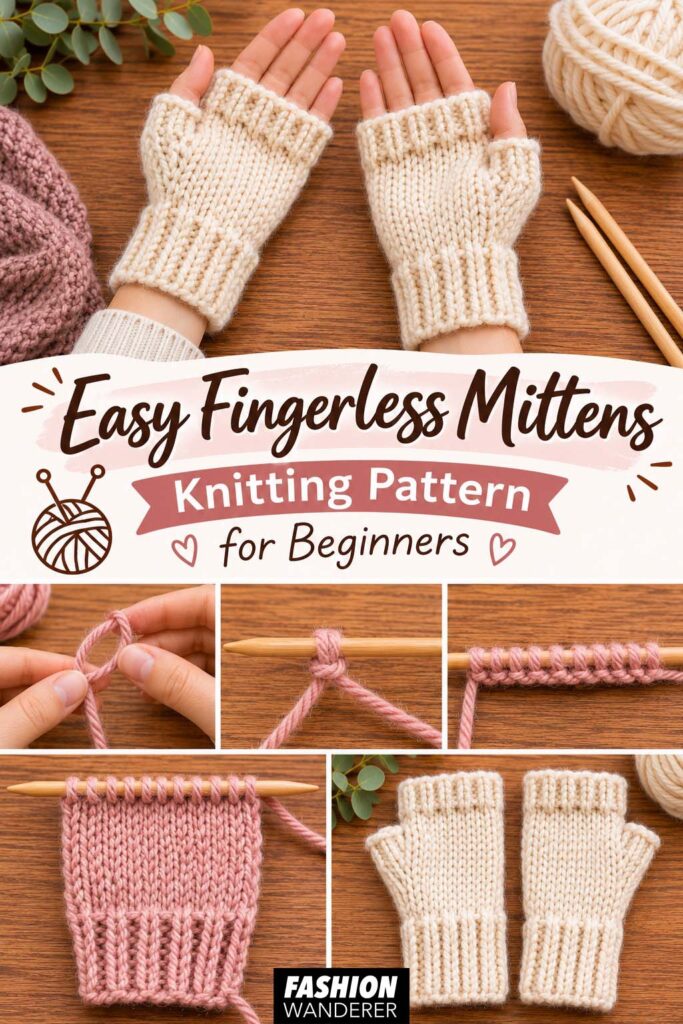
This easy fingerless mittens knitting pattern for beginners is a great first wearable knitting project. The simple flat construction removes the need for complicated shaping, circular needles, or individual fingers, while still producing cozy handmade mittens you can actually use.
Once you make your first pair, try changing the yarn color, adding texture, or adjusting the length to create your own version. They also make quick handmade gifts for fall, winter, holiday baskets, and craft fairs.
With just basic knit and purl stitches, a small amount of yarn, and a couple of relaxing evenings, you can knit a cozy pair of fingerless mittens from start to finish.