
Looking for an easy knit beanie pattern that is beginner-friendly, cozy, and quick to make this fall? This simple knitted beanie is a great first hat project if you already know the basic knit and purl stitches.
The design uses a classic ribbed brim and smooth stockinette body, making it easy to customize with different yarn colors, pom-poms, folded cuffs, or embroidered details. You can make this hat in a solid neutral shade for an everyday wardrobe staple or use bright yarn for a fun handmade gift.
This tutorial includes materials, sizing tips, knitting instructions, crown shaping, and finishing steps so you can create a comfortable handmade beanie from start to finish.
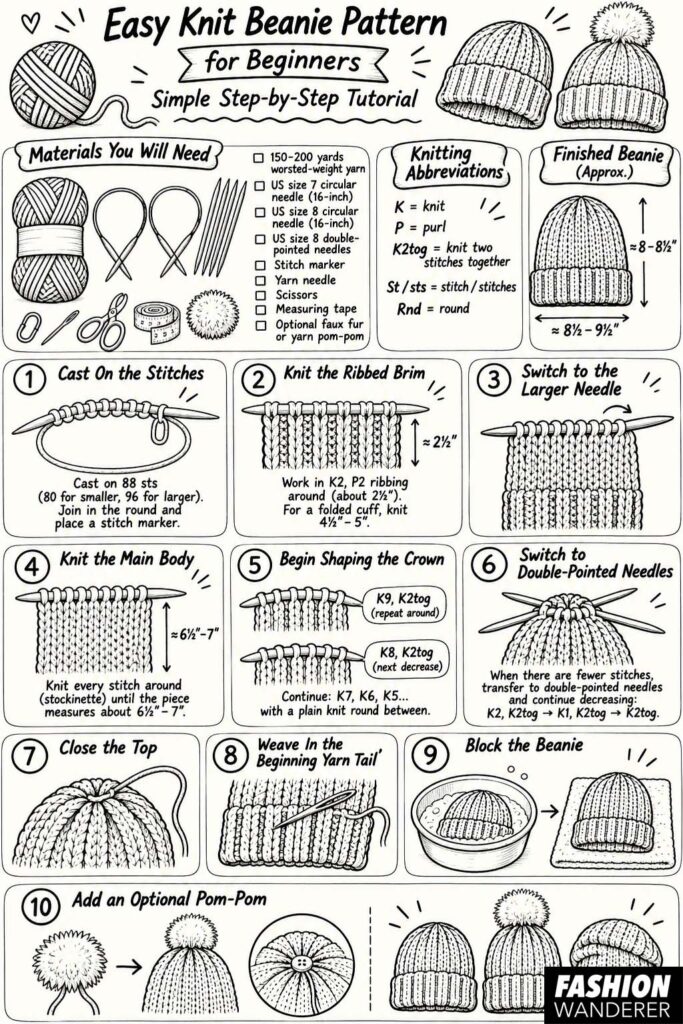
Easy Knit Beanie Pattern Details
Skill level: Beginner
Finished style: Classic fitted knit beanie with ribbed brim
Construction: Knit in the round from the bottom up
Approximate adult finished size:
- Circumference: 18–20 inches unstretched
- Height: 8½–9½ inches
- Brim depth: approximately 2½ inches
The ribbing stretches comfortably to fit most adult head sizes around 21–23 inches.
For a looser slouchy beanie, simply knit the body approximately 1–2 inches longer before beginning the decreases.
Materials You Will Need
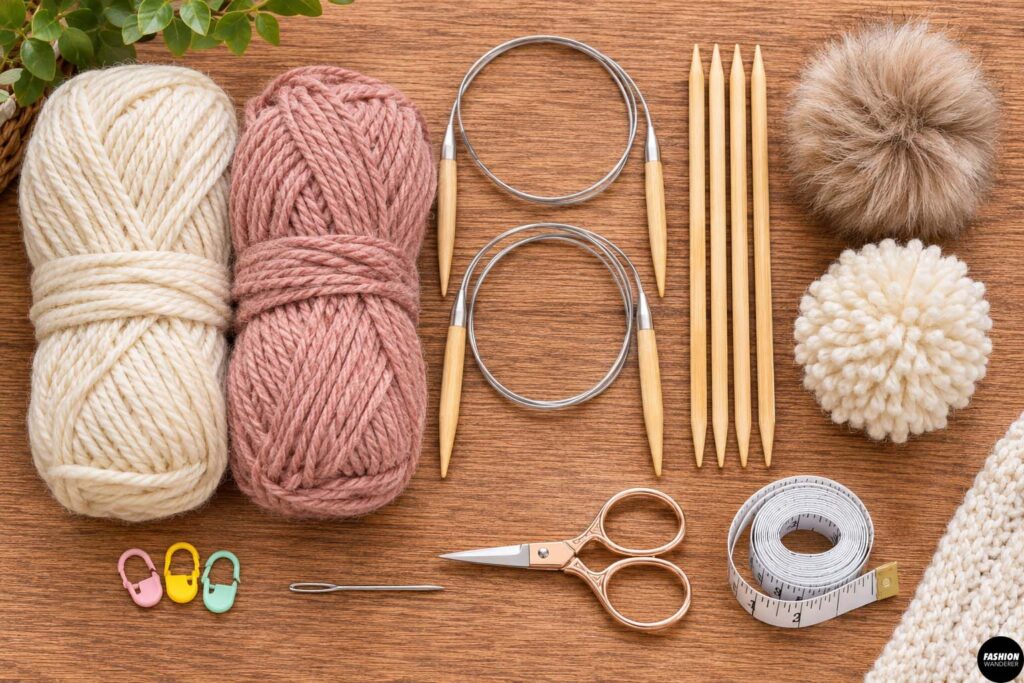
For one adult knit beanie, gather:
- 150–200 yards worsted-weight yarn
- US size 7 circular knitting needle, 16-inch length
- US size 8 circular knitting needle, 16-inch length
- Set of US size 8 double-pointed needles
- Stitch marker
- Yarn needle
- Scissors
- Measuring tape
- Optional faux fur or yarn pom-pom
Choose a soft worsted-weight yarn that feels comfortable against the skin.
Wool and wool blends provide warmth and elasticity, while acrylic yarn is affordable, washable, and beginner-friendly.
Knitting Abbreviations
This pattern uses common knitting abbreviations:
K – knit
P – purl
K2tog – knit two stitches together
St / sts – stitch / stitches
Rnd – round
DIY Knit Beanie Pattern for Beginners
Step 1: Cast On the Stitches
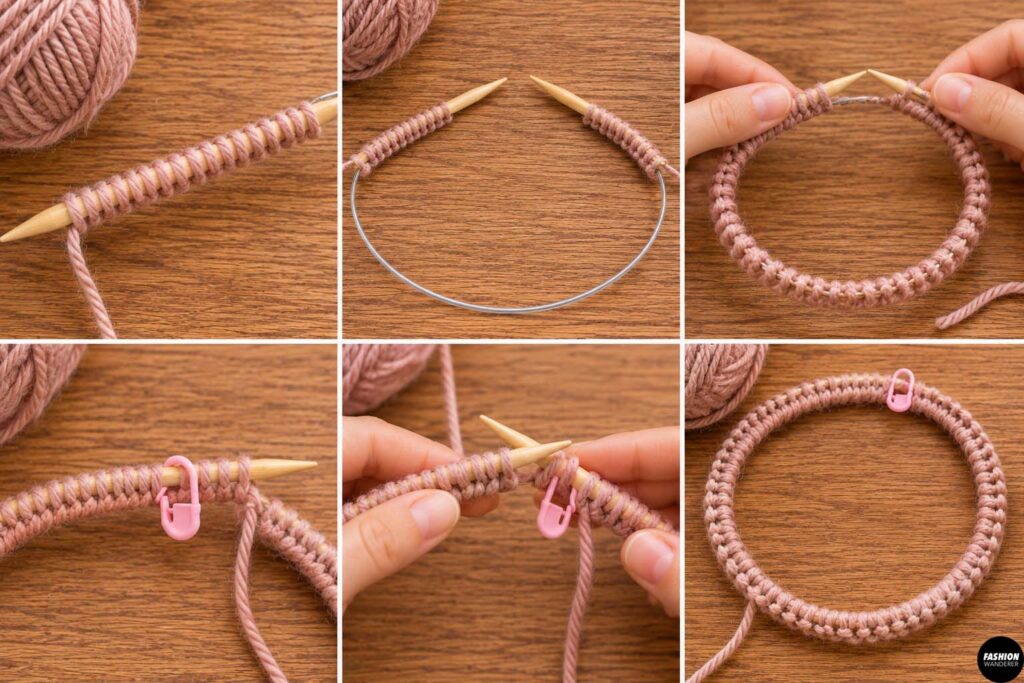
Using the smaller US size 7 circular needle, cast on 88 stitches.
For a slightly smaller beanie, cast on 80 stitches.
For a slightly larger beanie, cast on 96 stitches.
Make sure your stitch count is divisible by four because the brim will use a K2, P2 rib pattern.
Before joining in the round, check that the cast-on edge is not twisted around the cable.
Place a stitch marker on your right needle to mark the beginning of the round.
Join the stitches carefully.
Step 2: Knit the Ribbed Brim
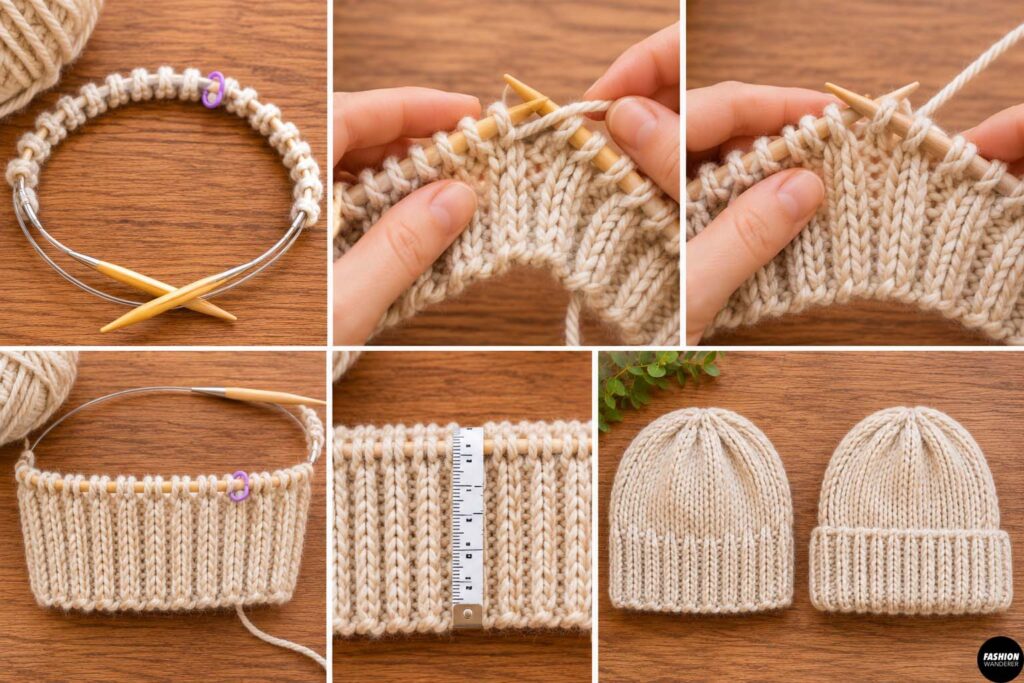
Begin working in a repeating rib pattern:
Knit 2 stitches, purl 2 stitches.
Continue repeating K2, P2 around the entire round.
Repeat the ribbing for approximately 2½ inches.
The ribbed section creates a stretchy brim that helps the hat stay comfortably in place.
If you want a folded cuff beanie, continue the ribbing until it measures approximately 4½ to 5 inches.
Later, the brim can be folded upward for a thicker, warmer finish.
Step 3: Switch to the Larger Needle
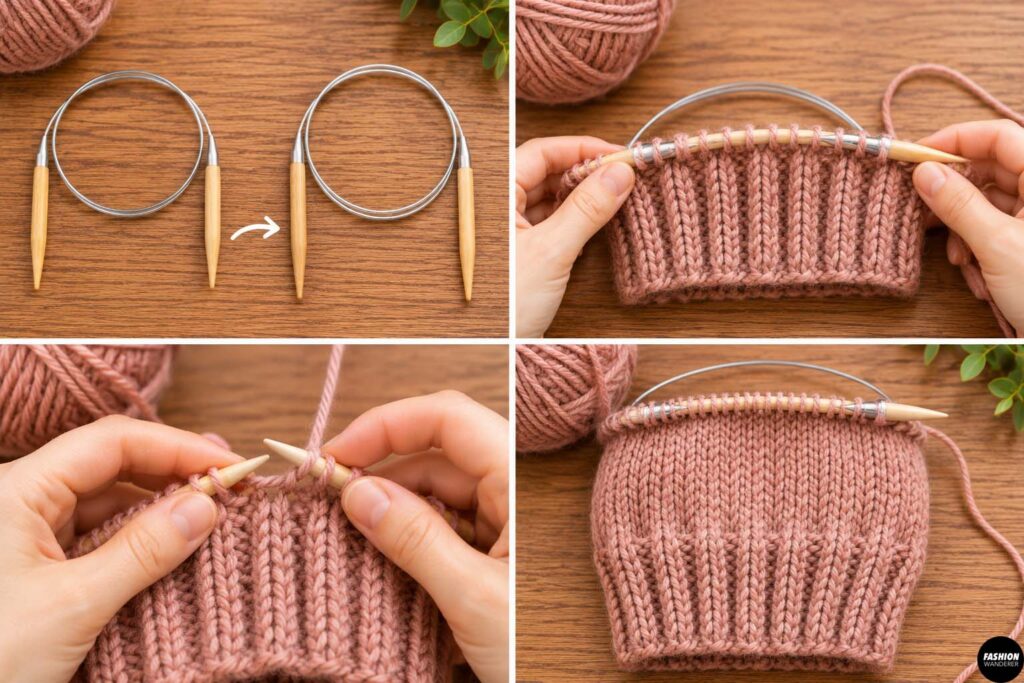
Once the ribbed brim reaches your desired length, switch to the US size 8 circular needle.
You do not need to cut the yarn.
Simply begin knitting the next round using the larger needle.
This slight increase in needle size allows the main body of the hat to relax compared with the tighter ribbed brim.
Step 4: Knit the Main Body
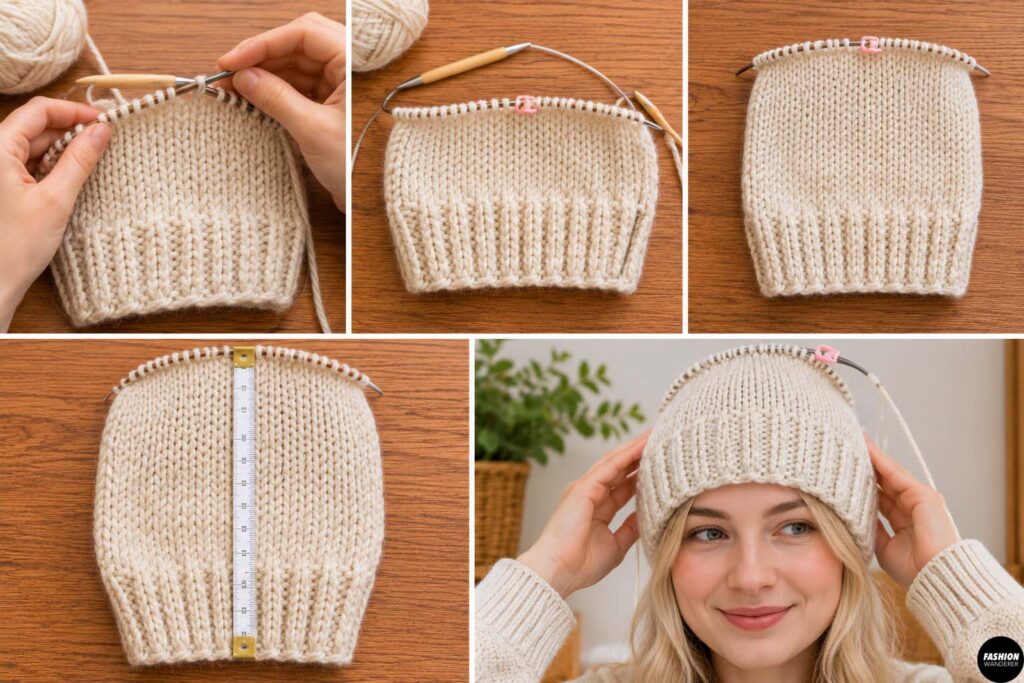
Knit every stitch around.
Because you are working in the round, knitting every stitch creates stockinette stitch automatically.
Continue knitting until the hat measures approximately 6½ to 7 inches from the cast-on edge.
Measure from the bottom of the brim to the top of your knitting.
For a taller or slouchier hat, continue until the piece measures approximately 8 inches before beginning the crown shaping.
Try the unfinished hat against your head occasionally if possible.
The top should reach roughly where you want the crown shaping to begin.
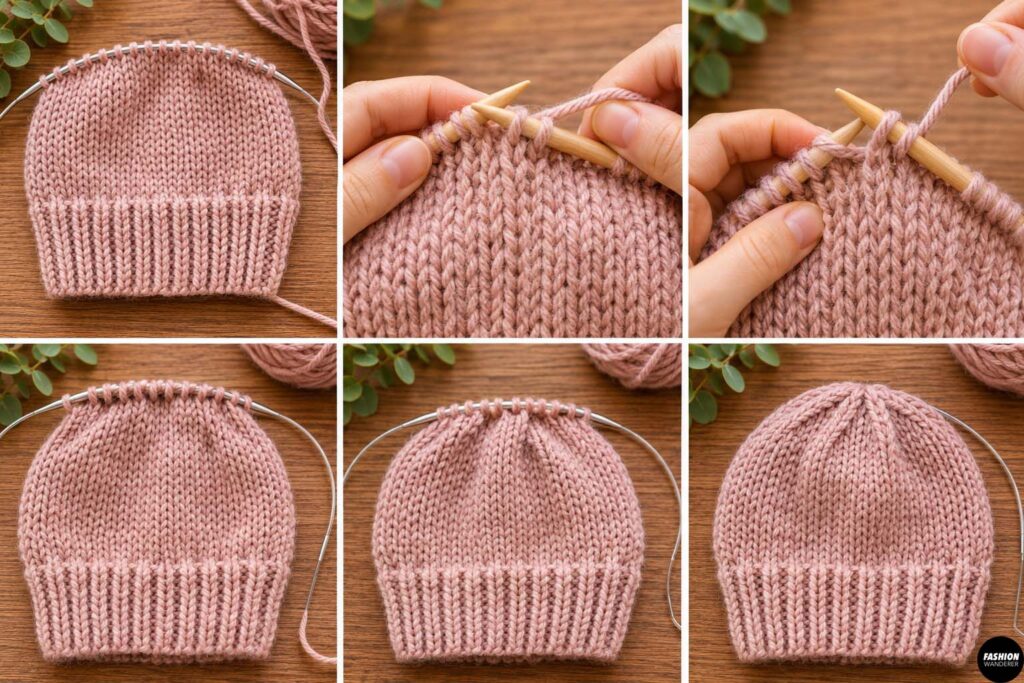
Step 5: Begin Shaping the Crown
Now you will gradually decrease the number of stitches to create the rounded top of the beanie.
For the first decrease round, work:
K9, K2tog
Repeat around the entire hat.
Knit the next round without decreasing.
For the following decrease round, work:
K8, K2tog
Repeat around.
Knit one plain round.
Continue decreasing in this pattern, reducing the number of knit stitches before each K2tog.
For example:
- K7, K2tog
- Knit one round
- K6, K2tog
- Knit one round
- K5, K2tog
As the number of stitches becomes smaller, the circular needle will eventually become uncomfortable to use.
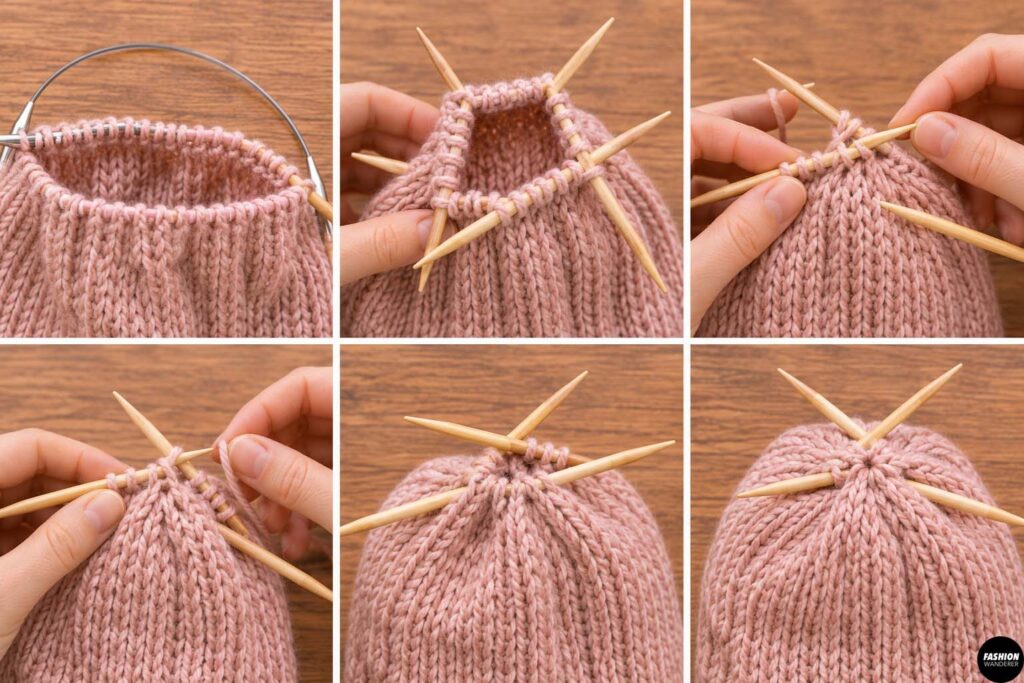
Step 6: Switch to Double-Pointed Needles
When there are too few stitches to comfortably stretch around the circular needle, transfer the stitches onto double-pointed needles.
Divide the stitches evenly across three or four needles.
Continue working in the round.
Take your time during this step and make sure no stitches accidentally slip off the needle tips.
Continue the decrease sequence until you reach:
K2, K2tog
around.
Then work:
K1, K2tog
around.
Finally, work:
K2tog
around the entire round.
You should now have approximately 8–10 stitches remaining.
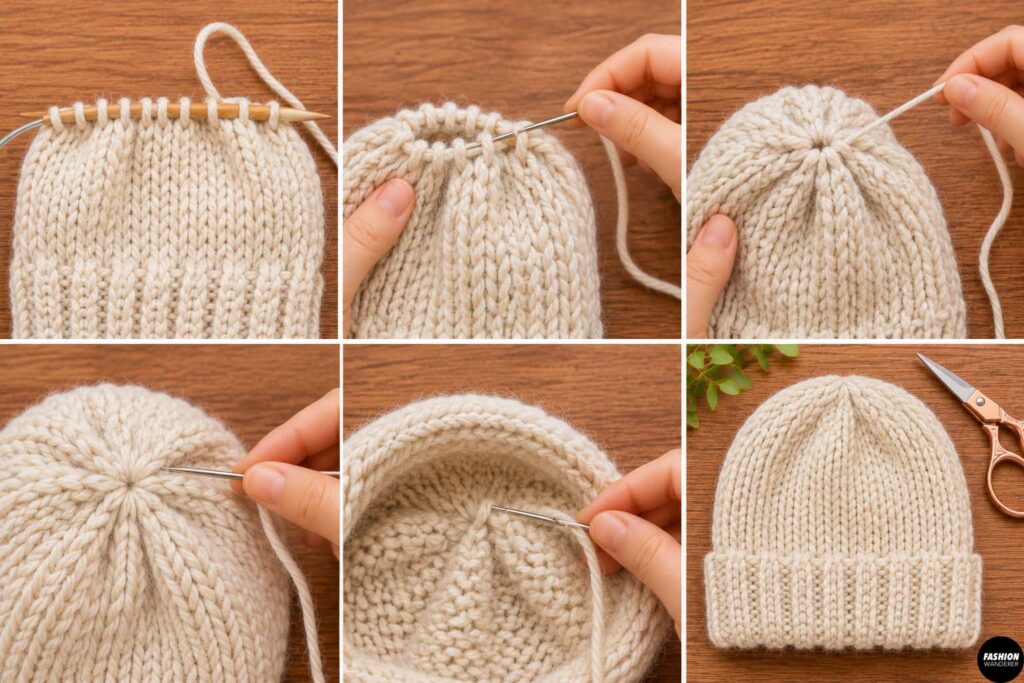
Step 7: Close the Top of the Beanie
Cut the working yarn, leaving a tail approximately 8–10 inches long.
Thread the yarn tail through a yarn needle.
Slide the needle through all remaining live stitches.
Remove the knitting needles carefully.
Pull the yarn tail firmly to close the opening at the top of the hat.
Pass the yarn needle through the center opening once or twice more for extra security.
Turn the hat inside out and weave the yarn tail through several stitches.
Trim the excess yarn.
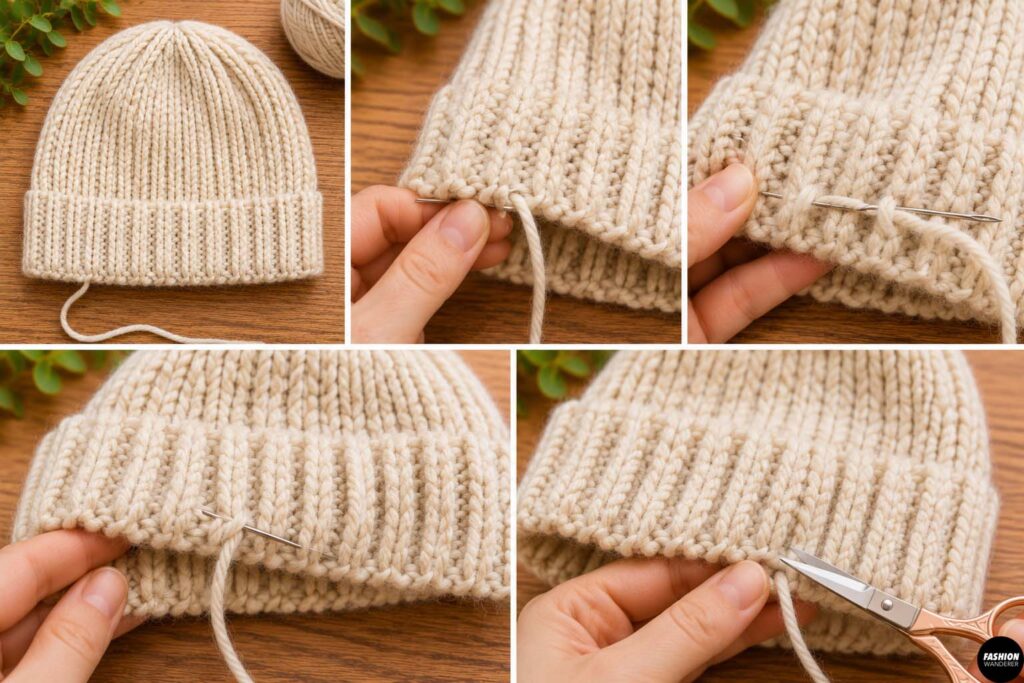
Step 8: Weave In the Beginning Yarn Tail
Return to the bottom edge of the beanie.
Thread the cast-on yarn tail through your yarn needle.
Weave the tail through several rib stitches on the inside of the hat.
Change direction once or twice so the yarn cannot easily pull loose.
Trim the excess.
Try not to weave the yarn too tightly because the ribbed brim needs to stretch.
Step 9: Block the Knit Beanie
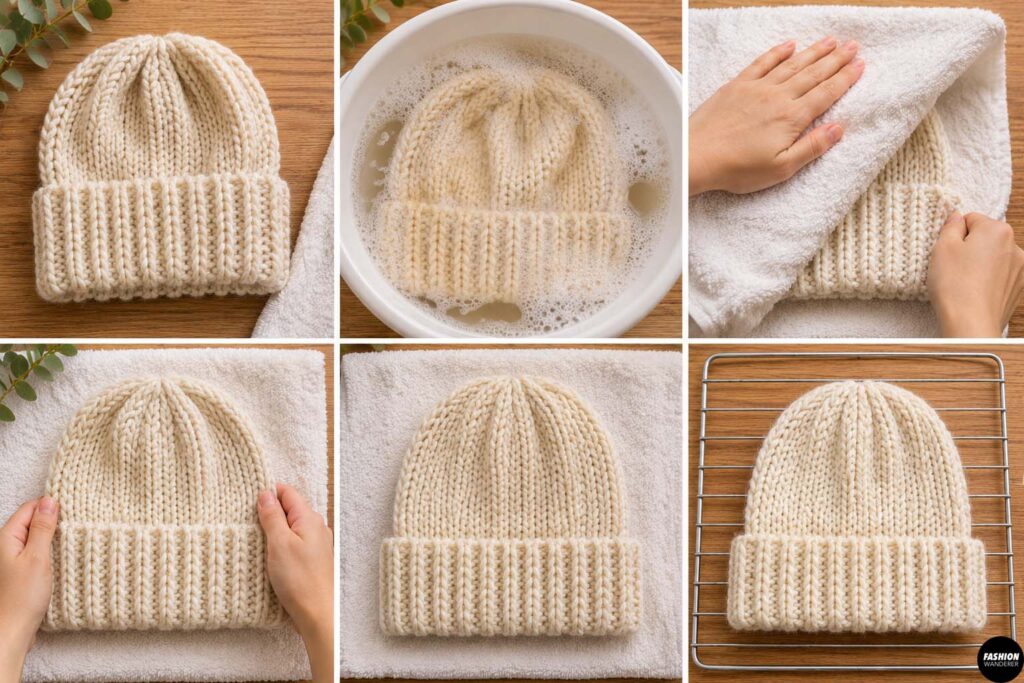
Blocking helps even out your stitches and gives the finished beanie a polished shape.
Check your yarn label before washing.
For most washable yarns, gently soak the hat in lukewarm water with a small amount of mild detergent.
Press out the excess water without twisting.
Lay the hat flat on a clean towel.
Reshape the brim and crown with your hands.
Allow the beanie to dry completely.
Avoid stretching it too aggressively because you want the ribbed brim to keep its elasticity.
Step 10: Add an Optional Pom-Pom
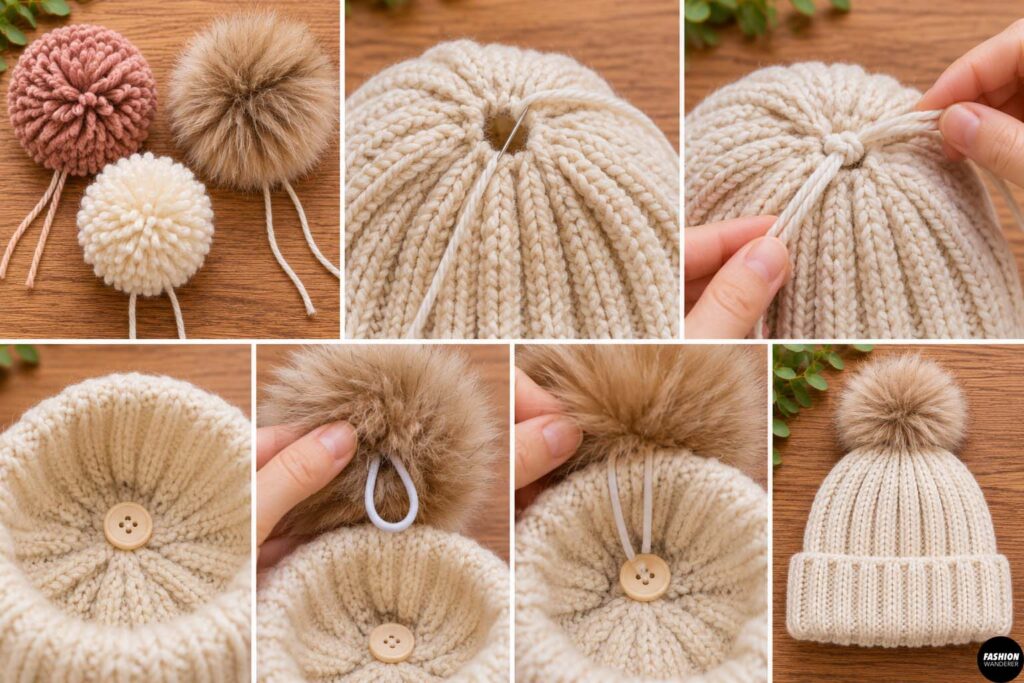
A pom-pom is an easy way to change the style of your knit beanie.
You can use:
- A handmade yarn pom-pom
- A detachable faux fur pom-pom
- A fluffy wool pom-pom
Thread the pom-pom ties through the small opening at the top of the hat.
Tie securely on the inside.
For a removable pom-pom, sew a small button inside the crown and attach an elastic-loop pom-pom to the button.
This makes washing the beanie easier.
Easy Knit Beanie Customization Ideas
Once you understand the basic construction, this easy knit beanie pattern is simple to customize.
Try making the brim in one color and the body in another. You can also add horizontal stripes, embroidered flowers, duplicate-stitch initials, or a contrasting pom-pom.
For a minimalist look, use oatmeal, cream, camel, gray, black, or sage yarn.
For a cozy winter gift, use burgundy, forest green, navy, rust, or mustard.
You can even knit several hats from the same pattern in different colors for holiday gifts or handmade market inventory.
Final Thoughts
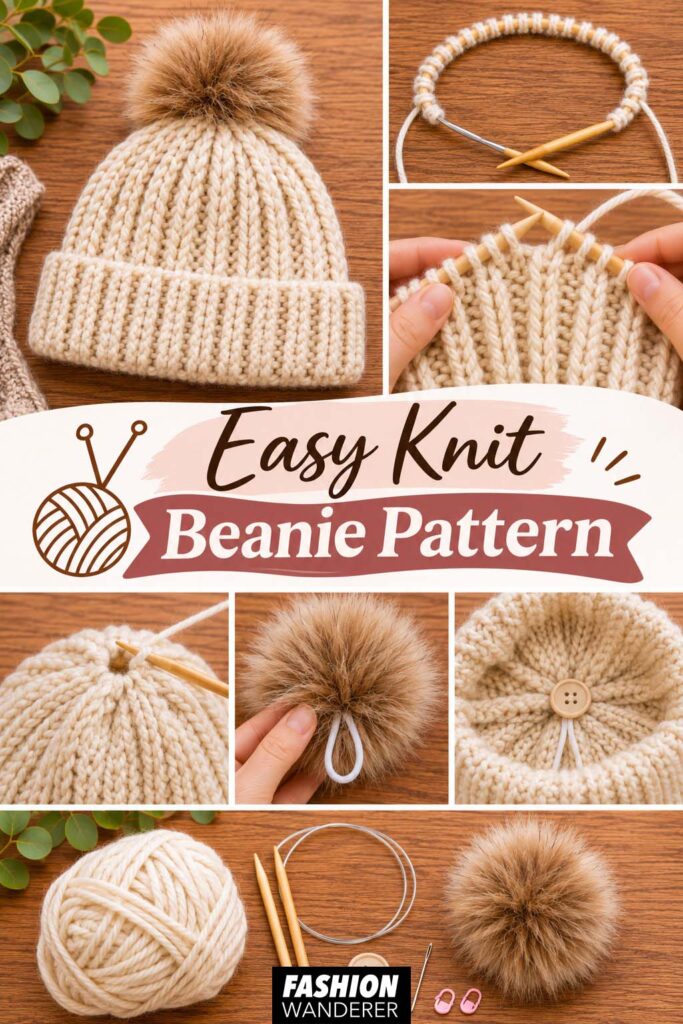
This beginner-friendly knit beanie pattern is a practical project for learning how to knit in the round, create ribbing, shape a crown, and finish a knitted hat neatly.
Once you make the first one, the construction becomes very easy to repeat. Change the yarn color, brim length, body height, or pom-pom style and you can create dozens of different looks from one simple pattern.
Whether you are making a cozy winter accessory for yourself or searching for an easy handmade gift, this classic knitted beanie is a useful pattern to keep in your project library.