
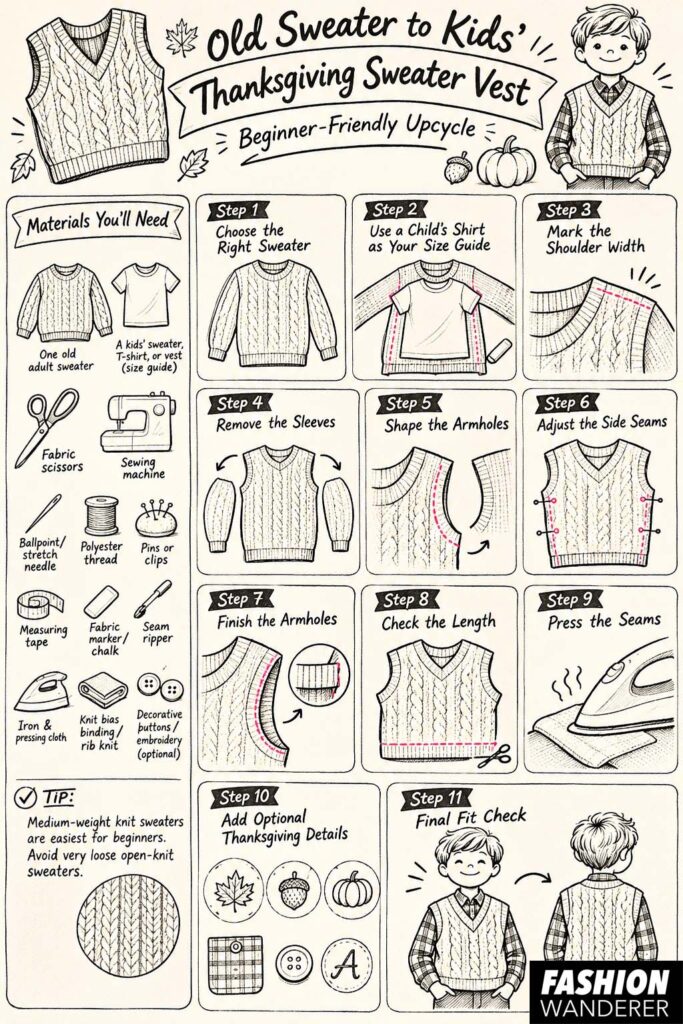
Looking for an easy Thanksgiving sewing project that turns something old into something adorable? This Old Sweater to Kids’ Thanksgiving Sweater Vest is a simple beginner-friendly fall upcycle that transforms an adult sweater into a cozy little vest perfect for fall dinners, family photos, school celebrations, or Thanksgiving Day.
This project is especially useful if you have an old knit sweater that no longer fits, has damaged sleeves, or simply needs a new purpose. Instead of tossing it, you can reuse the soft knit fabric and create a stylish children’s sweater vest with very little sewing.
The finished vest can be worn over a button-up shirt, long-sleeve tee, turtleneck, or dress. Choose warm autumn colors like camel, rust, cream, olive, mustard, chocolate brown, or burgundy for an easy Thanksgiving-inspired look.
Why This Thanksgiving Upcycle Is Beginner-Friendly
Sweater vests are one of the easiest garments to make from an existing sweater because most of the difficult work is already done for you. The sweater already has finished side seams, a neckline, and often a finished hem.
For this project, you mainly reshape the sweater to fit a child, remove the sleeves, finish the armholes, and make a few simple fit adjustments.
It is a great beginner sewing project because you do not need to draft a complicated pattern from scratch.
Materials You’ll Need
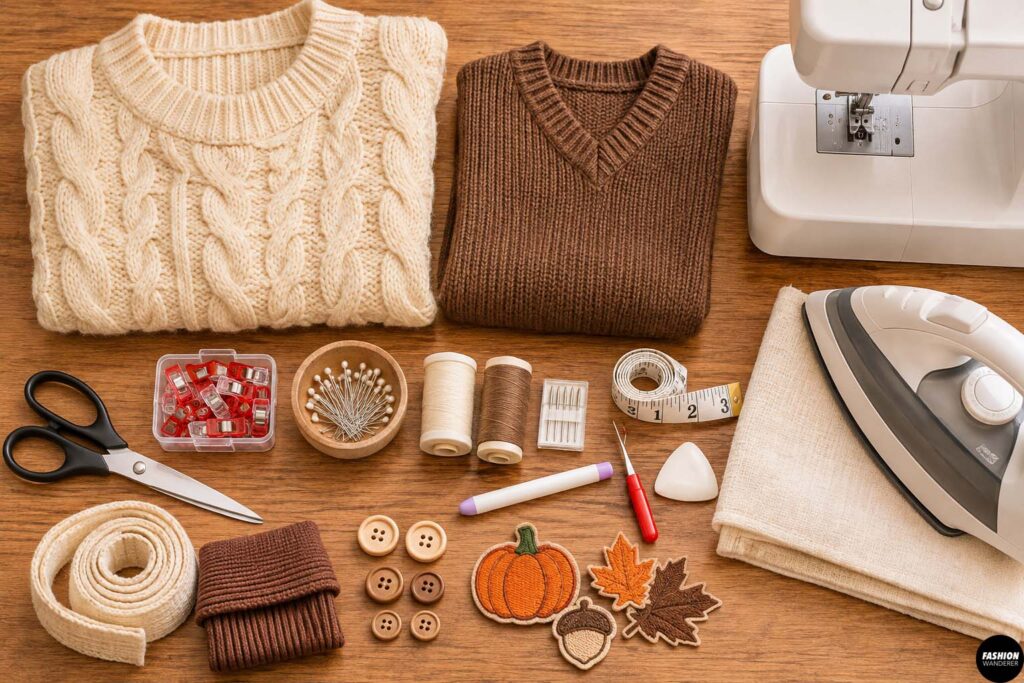
You will need:
- One old adult sweater
- A kids’ sweater, T-shirt, or sweater vest that fits well
- Fabric scissors
- Sewing machine
- Ballpoint or stretch sewing machine needle
- Coordinating polyester thread
- Pins or sewing clips
- Measuring tape
- Fabric marker or tailor’s chalk
- Seam ripper
- Iron and pressing cloth
- Optional knit bias binding or rib knit fabric for armhole finishing
- Optional decorative buttons, patches, embroidery, or appliqué
Medium-weight knit sweaters are easiest for beginners. Try to avoid very loose open-knit sweaters for your first project because they can unravel more easily.
Transform Old Sweater into Kids’ Thanksgiving Sweater Vest
Step 1: Choose the Right Sweater
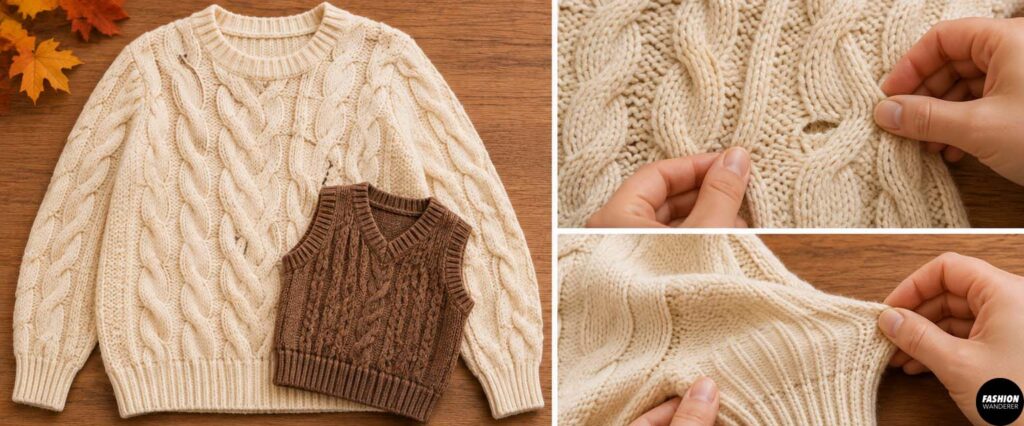
Start with an adult sweater that is larger than the child’s finished vest size.
Lay the sweater flat and inspect the fabric for holes, stains, stretched areas, or damaged seams. Minor damage near the sleeves is fine because those sections will be removed.
Look for a sweater with a neckline you already like. A crew neck, V-neck, or mock neck can all work beautifully.
If the original sweater has a ribbed bottom hem, try to preserve it. Keeping the existing hem saves time and gives your finished vest a professional appearance.
Step 2: Use a Child’s Shirt as Your Size Guide
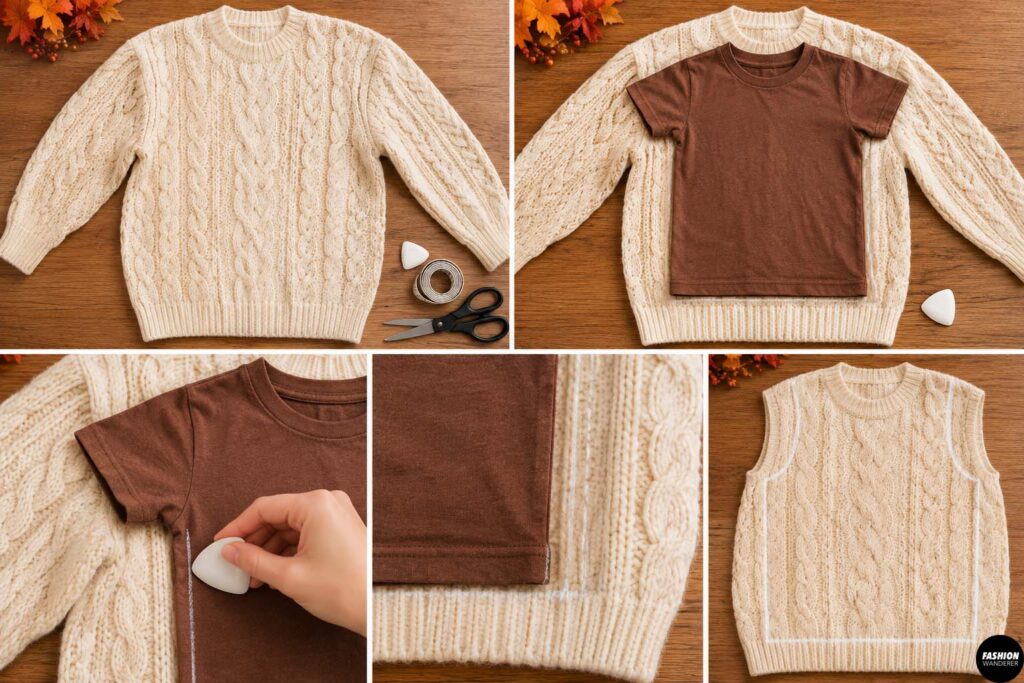
Place the adult sweater flat with the front facing upward.
Lay a well-fitting child’s T-shirt, sweater, or vest on top. Center it carefully so the shoulders and neckline are evenly positioned.
Use chalk to lightly mark the desired vest width.
Leave approximately 1/2 inch of extra fabric on each side for seam allowance.
You can keep the vest slightly oversized for a cozy Thanksgiving look, especially if it will be layered over a button-up shirt.
Step 3: Mark the Shoulder Width
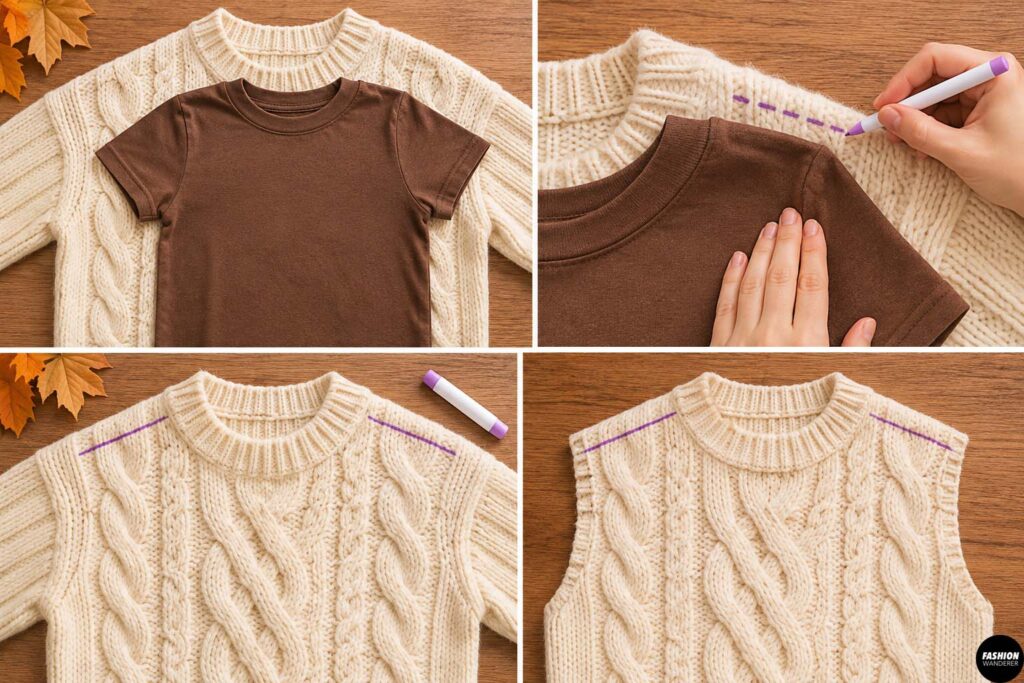
Compare the adult sweater shoulders with the child’s shirt.
If the sweater is much wider, mark a new shoulder line.
Do not make the shoulders too narrow. Sweater vests often look better when the shoulder extends slightly past the natural shoulder line.
Make sure both sides are symmetrical before cutting.
Step 4: Remove the Sleeves
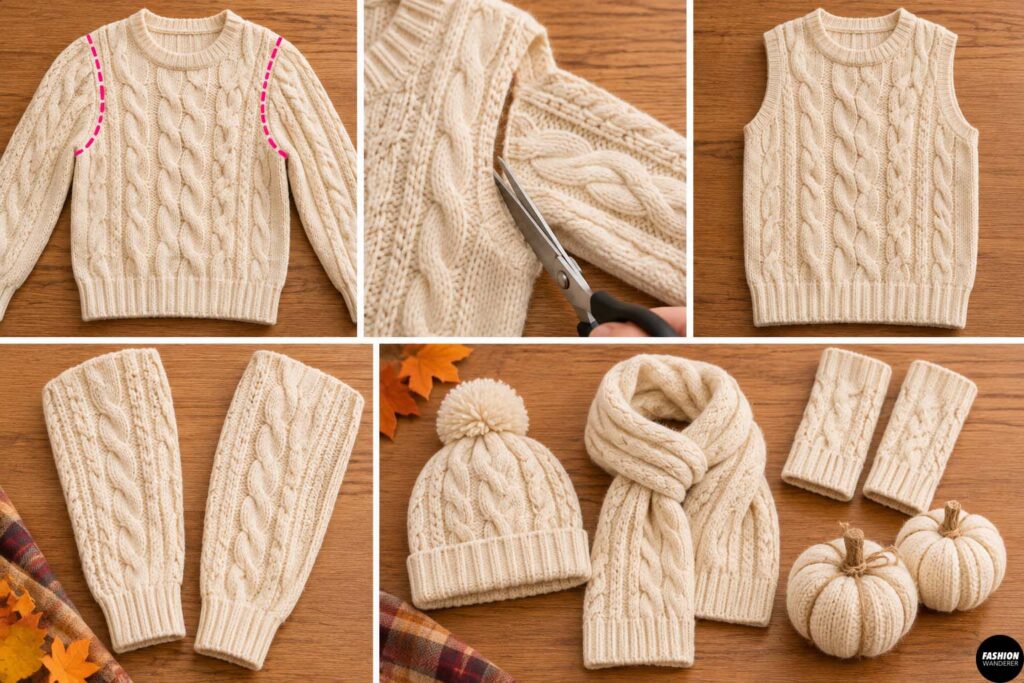
Cut along the sweater’s armhole seams to remove both sleeves.
If possible, cut just outside the existing seam first. This gives you extra fabric to adjust the armhole shape.
Save the sleeves.
You can use them later to make matching accessories such as wrist warmers, a small scarf, fabric pumpkins, or even a child’s beanie.
Step 5: Shape the Armholes
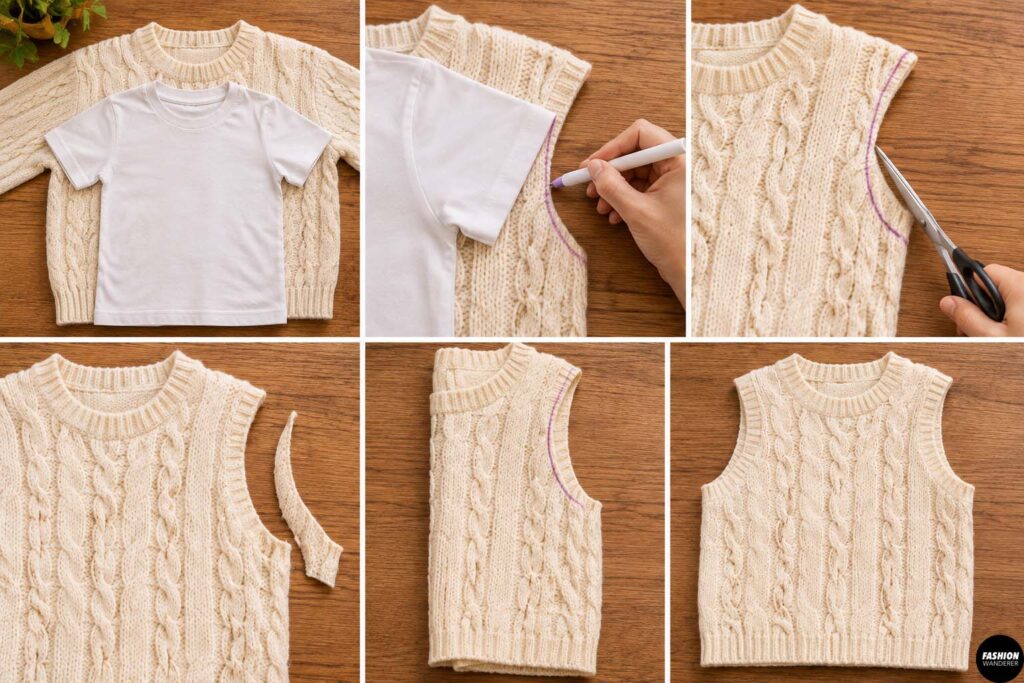
Place the child’s shirt back over the sweater.
Use the shirt’s armhole as a general guide and mark a smooth curve from the shoulder toward the underarm.
Avoid making the armholes too deep because this can make the vest feel oversized around the chest.
Cut one armhole first.
Fold the sweater carefully in half and use the first side as a template for the second armhole. This helps keep both sides even.
Step 6: Adjust the Side Seams
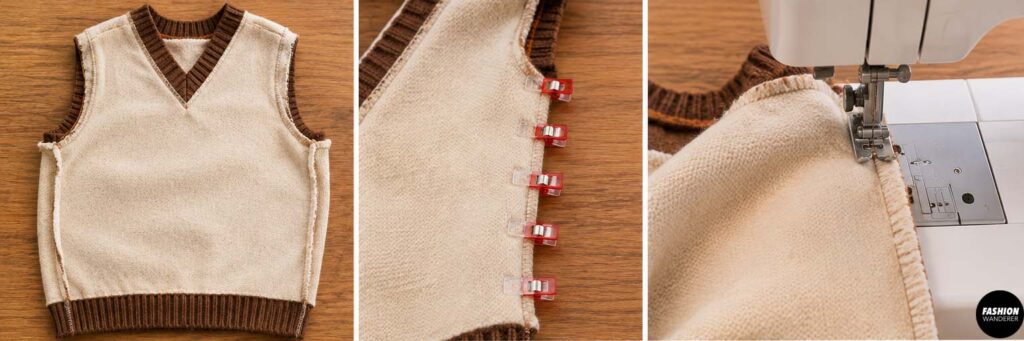
Turn the sweater inside out.
Pin from the bottom of each armhole down toward the hem.
Try to follow the shape of the child’s shirt while still leaving enough ease for comfortable layering.
Sew the new side seams using a stretch stitch, narrow zigzag stitch, or serger.
Use approximately a 3/8- to 1/2-inch seam allowance.
Try the vest on the child before trimming away large amounts of excess fabric.
Step 7: Finish the Armholes
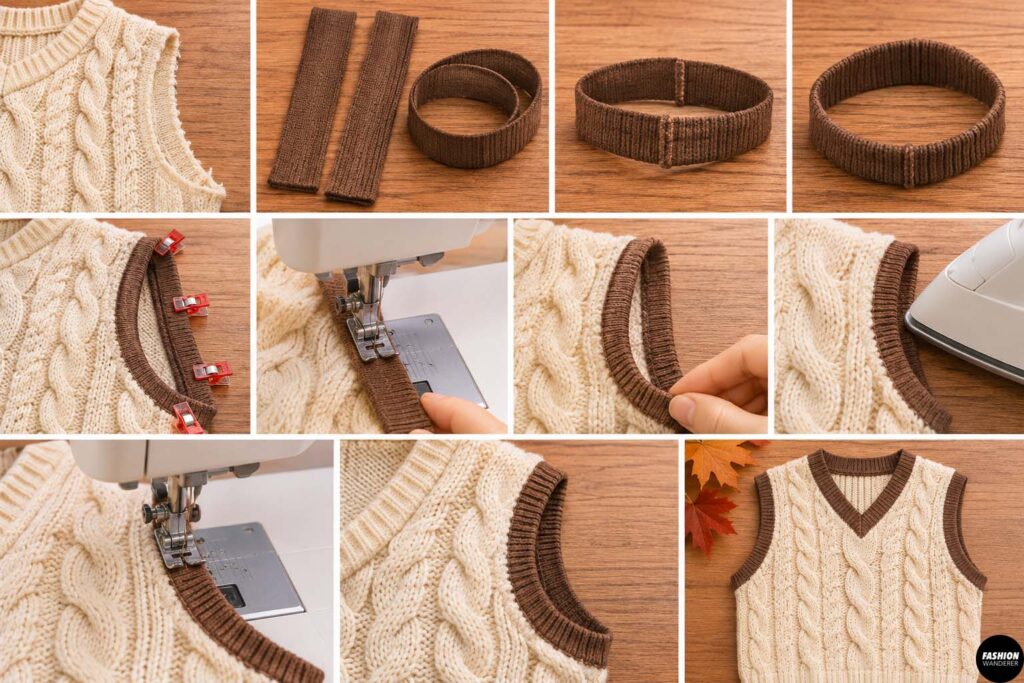
The easiest method depends on the sweater fabric.
For a stable knit sweater, fold the raw armhole edge toward the inside by approximately 1/4 inch. Fold again if the fabric allows, then sew around the opening using a narrow zigzag stitch.
For thicker sweaters, you can finish the armholes using knit bias binding or rib knit fabric.
Cut two strips of stretchy knit fabric slightly shorter than the armhole circumference.
Sew each strip into a loop.
With right sides together, gently stretch the binding around the armhole and sew it in place.
Fold the binding toward the inside and topstitch.
This method creates a neat ready-to-wear sweater vest finish.
Step 8: Check the Length
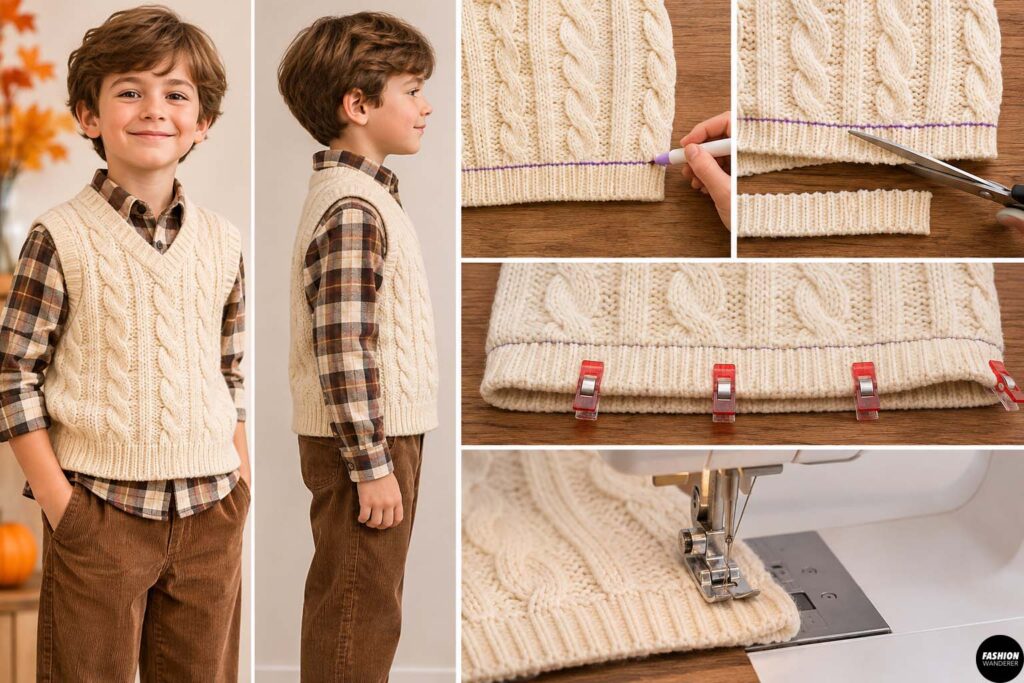
Try the vest on the child.
For a classic sweater vest, the bottom should usually fall around the upper hip.
If the original sweater hem is already at the right length, leave it untouched.
If the sweater is too long, mark the desired finished length.
Cut the excess fabric while leaving about 1 inch for hemming.
Fold the raw edge toward the inside and stitch using a stretch stitch.
Step 9: Press the Seams
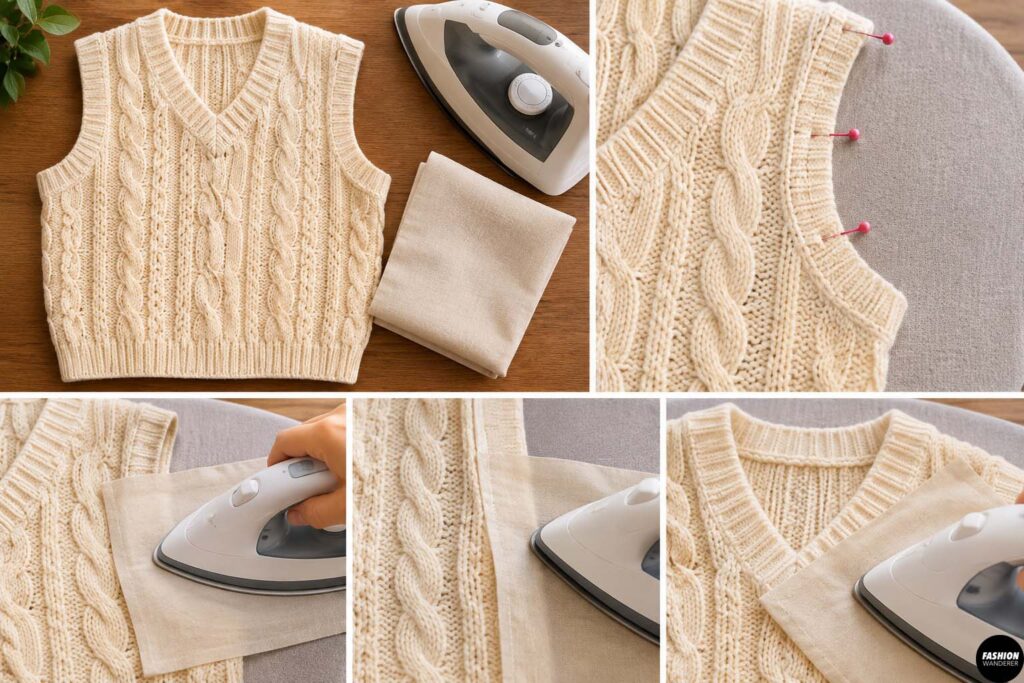
Set your iron to a temperature appropriate for the sweater fiber.
Place a pressing cloth between the iron and the knit fabric.
Gently press the side seams and armhole finishes.
Avoid stretching the fabric while pressing.
This small step makes the finished sweater vest look much cleaner and more professional.
Step 10: Add Optional Thanksgiving Details
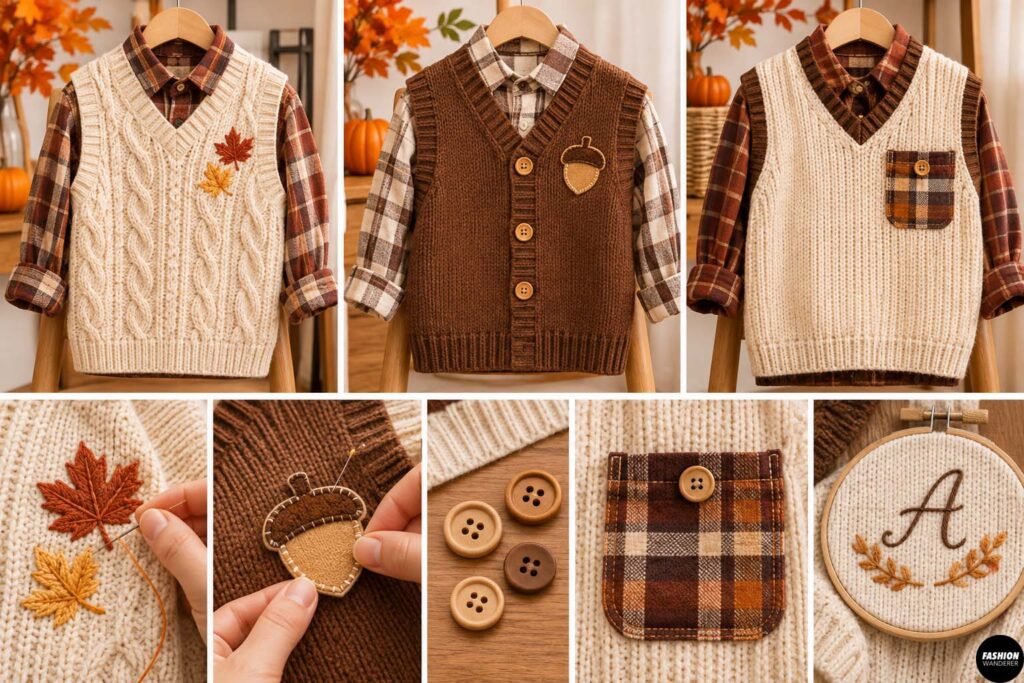
Your vest can stay simple and minimalist, or you can give it a subtle Thanksgiving-inspired detail.
Try adding a tiny embroidered leaf near the chest, a small acorn appliqué, wooden-style buttons, a plaid fabric pocket, or a simple embroidered initial.
For a more modern look, keep the decorations minimal.
A cream sweater vest layered over a rust plaid shirt, for example, already creates a cozy Thanksgiving outfit without needing extra embellishment.
Step 11: Final Fit Check
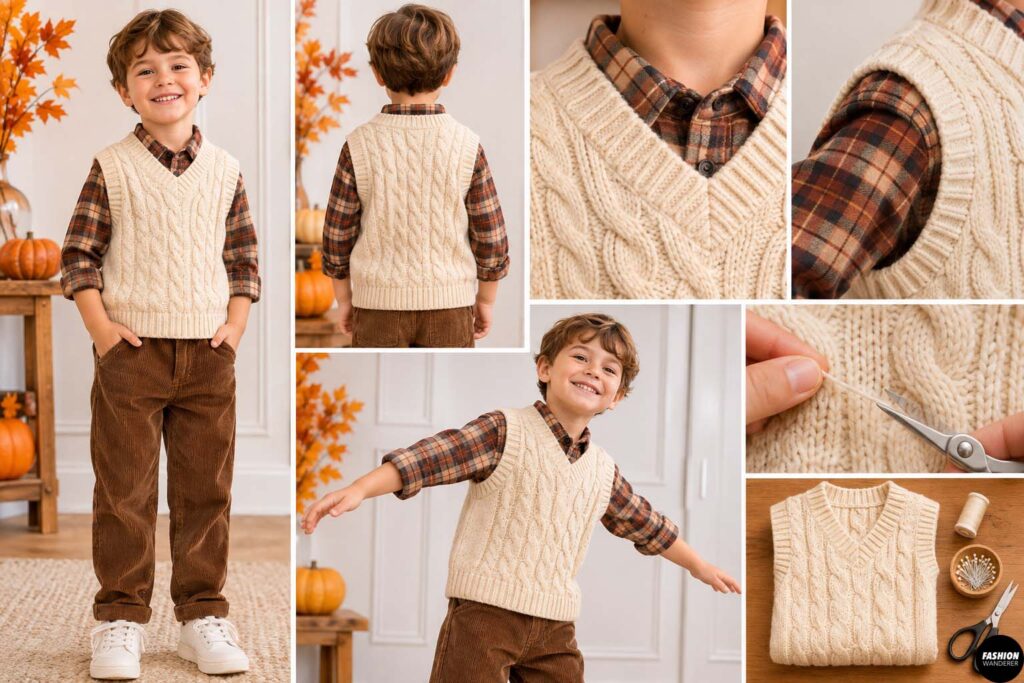
Have the child try on the finished vest over the shirt they plan to wear underneath.
Check that the neckline lies flat, the armholes are comfortable, and the side seams are not too tight.
Make sure the child can easily move their arms.
Trim loose threads and inspect the raw knit edges for any signs of unraveling.
Your old sweater is now a cozy new Thanksgiving sweater vest.
Styling Your DIY Thanksgiving Sweater Vest
For a classic Thanksgiving outfit, pair the vest with a white button-up shirt, brown chinos, and loafers or sneakers.
For a casual look, layer it over a long-sleeve tee with jeans and boots.
Girls can also wear the sweater vest over a simple fall dress with tights and ankle boots.
Neutral sweater colors photograph beautifully, making this project perfect for family Thanksgiving pictures.
Final Thoughts
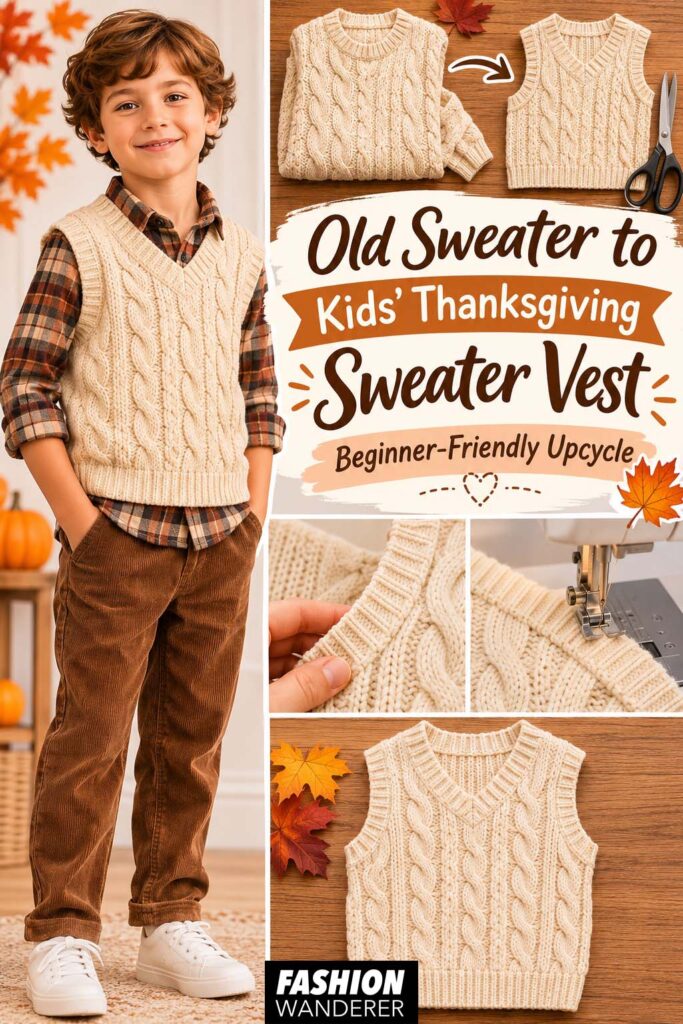
Turning an old sweater into a kids’ Thanksgiving sweater vest is an easy way to create something useful without buying new fabric. It is quick, budget-friendly, beginner-friendly, and perfect for giving forgotten clothing a second life.
Once you learn the basic technique, you can use the same method to make sweater vests for different seasons, school outfits, holiday photos, and everyday layering.
Before donating that oversized sweater at the back of your closet, give it one more look. It might be the perfect material for your child’s next cozy fall outfit.