
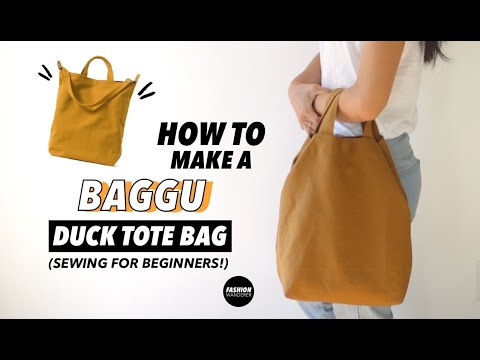
I’ve put together a free tote bag pattern for you to copy along with a step-by-step video tutorial on how to make a DIY tote bag from scratch. The bag making tutorial is perfect for beginners because it also includes detailed instructions and photos to help you along, here is functional tote with adjustable shoulder strap that you can find on my Etsy store.
In addition, here are sewing tips and techniques to make this DIY tote bag easier to accomplish. Included below are helpful hints and simple tricks to help you complete this simple tote bag DIY.


Tote Bag Sewing Pattern


You will love this DIY tote bag because…
- This tutorial comes with free bag pattern for you to use.
- Learn how to place snap button and sew an adjustable buckle on the shoulder strap.
- Sew a pocket inside the tote bag.
- Easy sewing project for beginners.
- Become familiar with how to sew recycled cotton canvas fabric.
From brand logos to cool print designs, tote bags come in various shapes, sizes and colors. This DIY tote bag tutorial offers so many ways to add your own customized features like inside pocket, snap button closures, flat bottom, lining, handles and shoulder strap.
Appreciate a simple bag even more when you make one by yourself using this free bag pattern. There are a variety of options to choose between, so pick your favorite features and let’s get started!
How do you make a simple bag?
Making your own reusable tote bag is actually not that hard. To tell you the truth, it is perfect sewing project for beginners!
Use recycled cotton fabric and follow this DIY tote bag tutorial for an easy beginners sewing project featuring an eco-friendly material, timeless design and extremely durable tote that lasts a long time.
Customize the look by using exciting patterns, attractive colors and by adding your own DIY embroidery. As a result, you can easily match it together with your casual styles and chic outfit ideas.
It’s easy to pair your cute casual outfit with a custom tote bag. It’s really easy to make a simple bag following this custom tote bag tutorial. But, have you realized that not all fabrics are created equal?


DIY Tote Bag Tutorial Material:
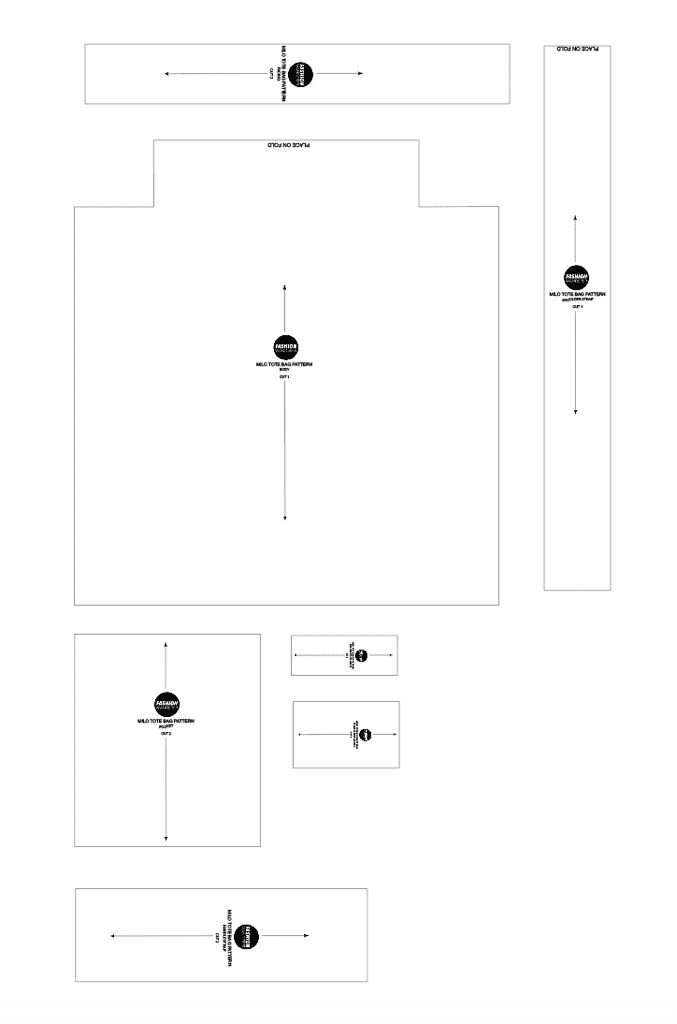
- Milo Tote Bag Sewing Pattern
- Recycled Canvas Fabric
- Heavy Duty Cotton Thread
- Adjustable Slide Buckles
- Rectangle Rings
- Heavy Duty Snap Buttons
- Snap Button Pliers
- Fabric Chalk
- Measuring Tape
- Ruler
- Pins
Prepare the short list of supplies and pick your favorite color recycled canvas fabric beforehand. I’ve put together tips to help you execute this DIY tote bag on your own.
What is tote bag made of?
Totes serve the purpose as reusable shopping bags. The typical tote bag is commonly made of a durable cloth material, thick leather and occasionally vinyl. In general, the fabrics are dyed and treated to resist moisture and prevent mold.
Decorative features, a flat bottom and the addition of handles, pockets, buttons, lining and shoulder straps are all options to consider.
The design featured in this DIY tote bag tutorial uses a thick cloth fabric. However, you can easily substitute any of these materials when executing this free tote bag pattern.
What fabric is best for tote bags?
A lightweight fabric requires a stiff interfacing compared to a heavy fabric. Interfacing is used around the opening of this tote bag pattern.
A stiff fabric works best in terms of durability. I used a heavy-duty recycled canvas for the outside and interfacing as well. Choose a sturdy muslin, colorful canvas, or an attractive cotton print for a more decorative bag.
Cotton fabrics are also an excellent choice for a tote bag lining. However, a variety of craft materials are now available as viable alternatives.
How are tote bags measured?
Measure tote bags by either the finished dimensions of the design or perhaps by volume.
The measurements for this free tote bag pattern are 11” x 15” with a 3” side panel. The finished bag has the capacity to hold approximately 8 liters.
How much fabric do I need for a tote bag?
Less than a yard of fabric is required to complete this free tote bag pattern. However, it’s best to have a little extra fabric to work with so that you don’t have to cut corners.
½ yard is required to make the outside of the bag. ¼ of a yard is used for interfacing, pocket, handles and the adjustable shoulder strap.
How do you sew sides on a bag?
Sides on a tote bag can either be independent pieces, or extensions of the original bag body. This tote bag pattern includes the side tabs in the bag body piece.
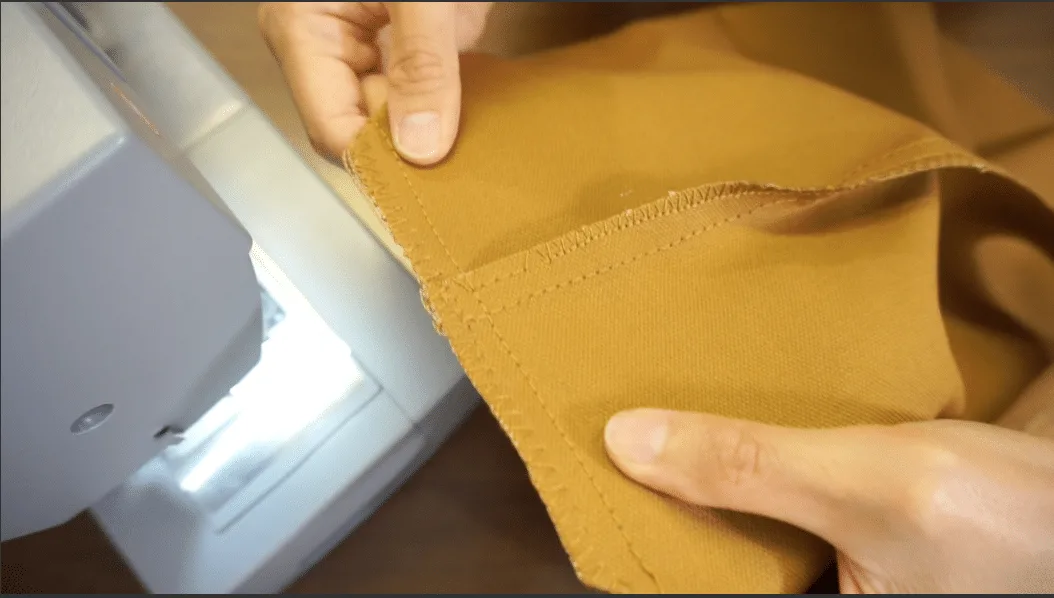
With the right sides facing each other, sew topstitch along the side seam. Then, finish with zigzag stitch.


What is the difference between a shoulder bag and a tote?
A shoulder bag is only carried over the shoulder because it has a long strap. However, totes have a bit more versatility and can be carried by hand or over the shoulder. Tote bags usually feature long handles that work well for both hand held and over the shoulder situations.
This free bag pattern includes both short handles and also an adjustable shoulder strap.
How do you sew bag handles?
To strengthen the bag handles, double fold the material and edge topstitch. As a result, the handles will be much more durable to withstand the extra wear they receive.
Bag handles are attached between the interfacing and the outside of the bag. Measure the handle placement, mark and then secure with edge topstitch. Finish with zigzag stitch to make the seams even more durable and longer lasting.


How long should tote bag straps be?
When worn over the shoulder, long shoulder straps allow the bag to hang down near the hip area. Generally speaking, 40” shoulder straps will allow the bag to hang around the hips.
For a more petite person, this length can be used as a traditional cross body style bag. Depending on how short or tall you are, make the final adjustments to this tote bag design based on the desired bag position that works best for you.


DIY Tote Bag Sewing Tips
From work to school, having multiple tote bag options is smart idea. They are classic essential item that never goes out of style. If you are new to sewing, then cotton fabric and lots of straight stitching makes this project the perfect go-to beginners project.
I’ve put together sewing tips and techniques to make it easier for you to work with the heavy canvas material:
- Thread: When you sew canvas, always use a heavy-duty thread that is made of polyester, cotton-wrapped polyester or cotton. Size 40 is recommended because it is well suited to work with heavier-weight canvas fabric. Wool and upholstery thread is another strong thread option that is often used as well.
- Stitch: The key to sewing a tote bag is to use a proper stitch to increase durability. The strongest stitch on a sewing machine is a straight stitch. It is very hard to tear when combined with tough thread, and you’ll get heavy duty result. In addition, adjust the stitch length to 3.0 to 3.5 to create a professional looking finish.
- Needle: Choosing the right needle for your sewing machine is critical. Go with 90/14 or 100/16 universal woven needle for heavy fabrics, especially when sewing cotton canvas or jeans material.
- Pins: Unfortunately, double or multiple layer canvas fabric can be difficult to pin. Instead, hold the seams with clips or double-sided tape to make it easier to work with.
- Ironing: Always iron when sewing a seam to give crisp corners and lines. If you have minor wrinkles or folds in the fabric, simply sprinkle with water and let it soak a little bit. Then, use a hot iron set to press and hold it over the spot to firm up the fabric.
More bag making projects to try next time:


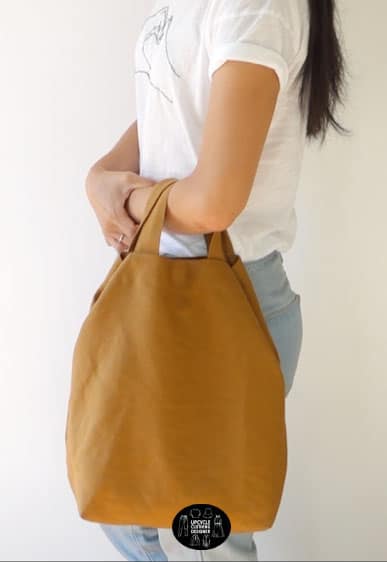

DIY Tote Bag Tutorial
Learn to sew a simple bag by using this DIY tote bag sewing pattern and tutorial. With the step by step pictures and video instructions, this tote bag tutorial for beginners is really easy to follow.
Making a bag is actually not as hard as it looks. Practice lots of straight stitches and let’s learn how a simple tote bag is made. Enjoy making and customizing your tote by adding embroidery detail or even painting on the surface to add your very own personal touch.
Materials
- Milo Tote Bag Sewing Pattern
- Recycled Cotton Fabric
- Heavy Duty Cotton Thread
- Adjustable Slide Buckles
- Rectangle Rings
- Heavy Duty Snap Buttons
Tools
- Sewing Machine
- Snap Button Pliers
- Fabric Chalk
- Measuring Tape
- Ruler
- Straight Pins
Instructions
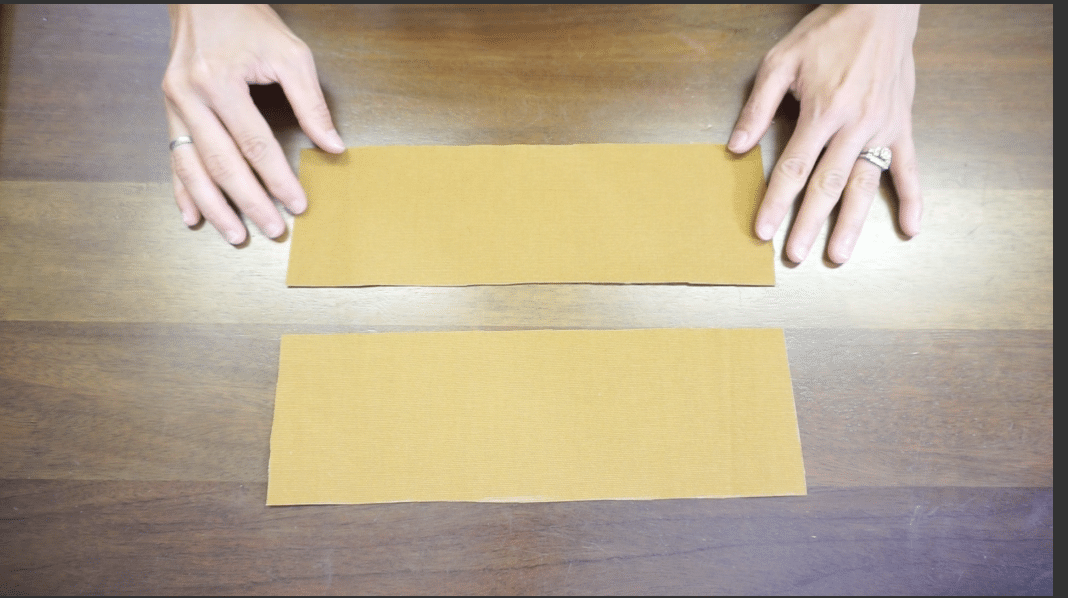
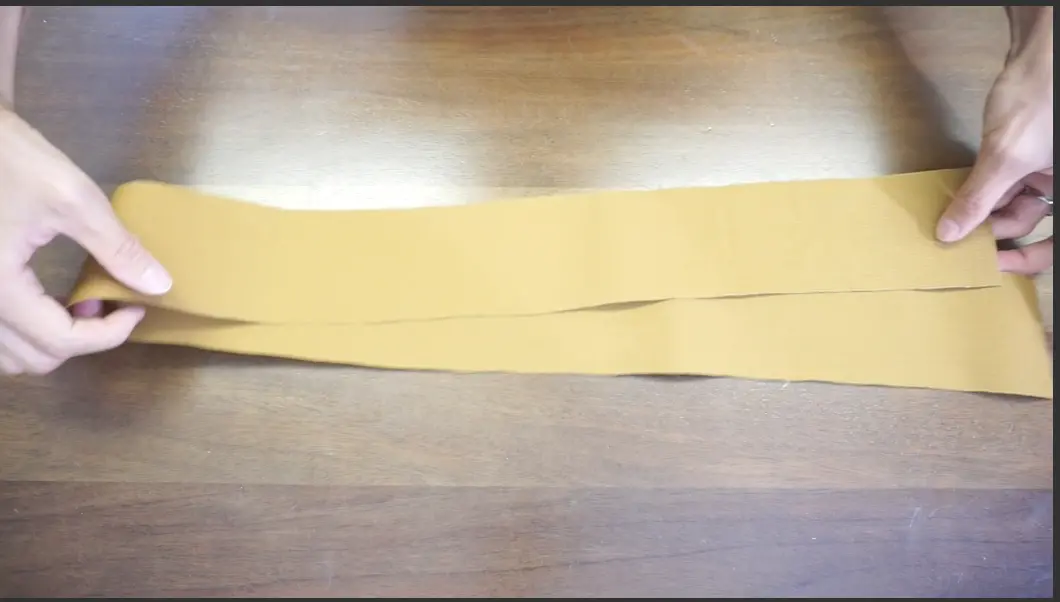
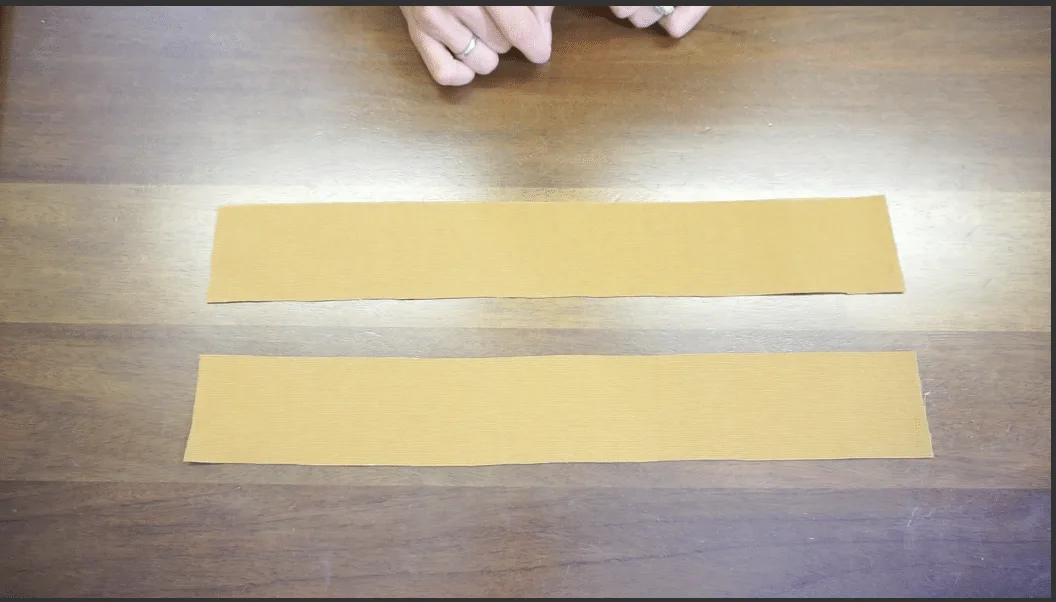
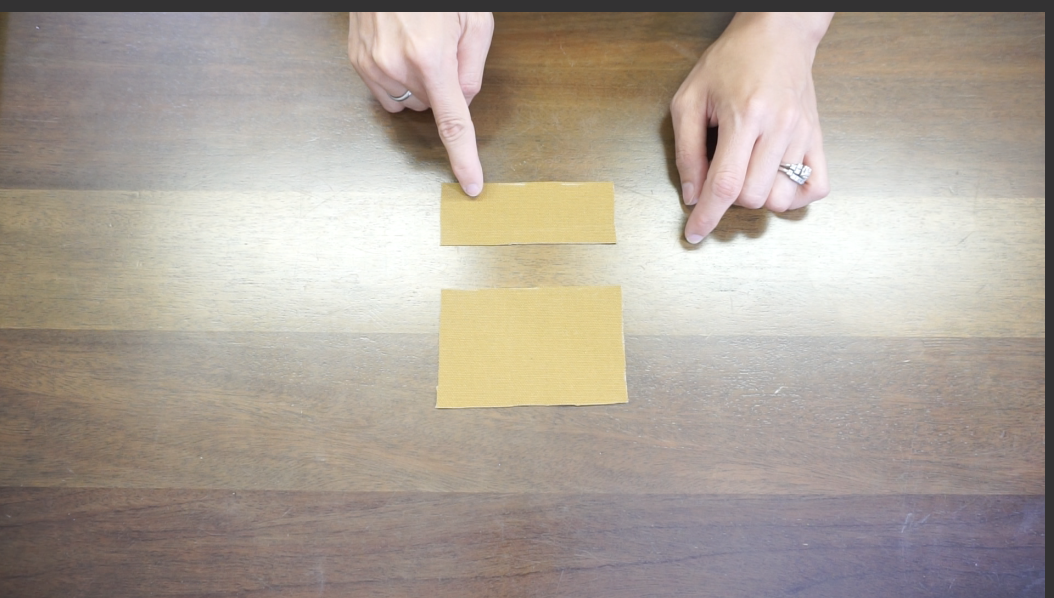
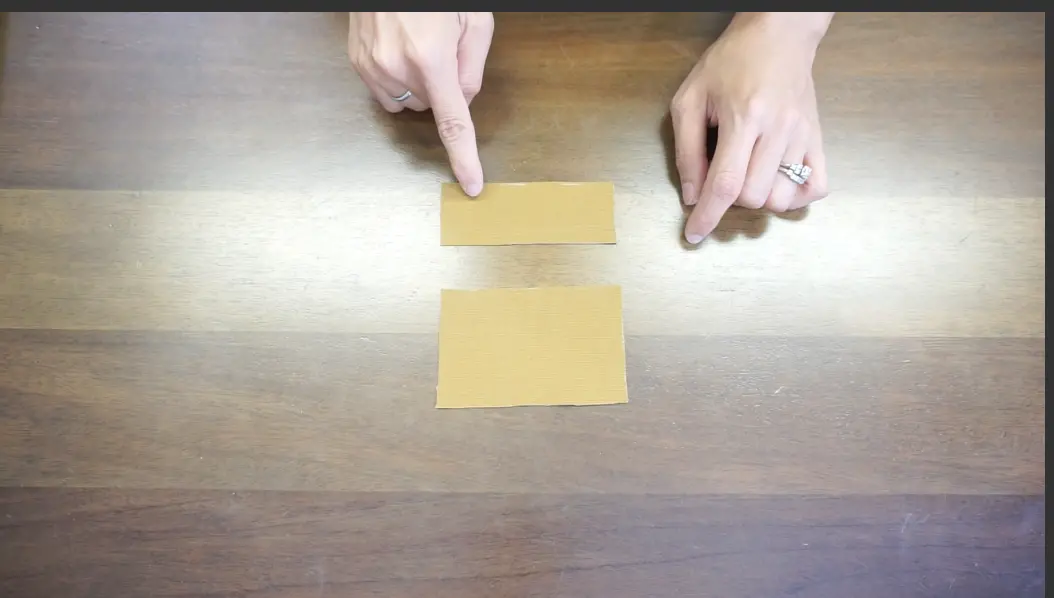
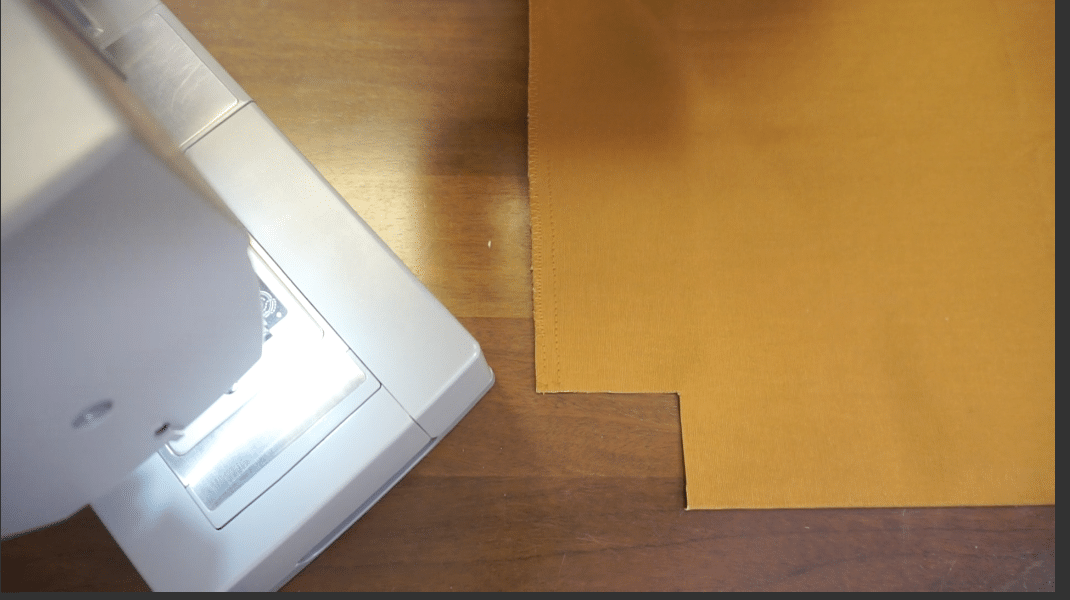
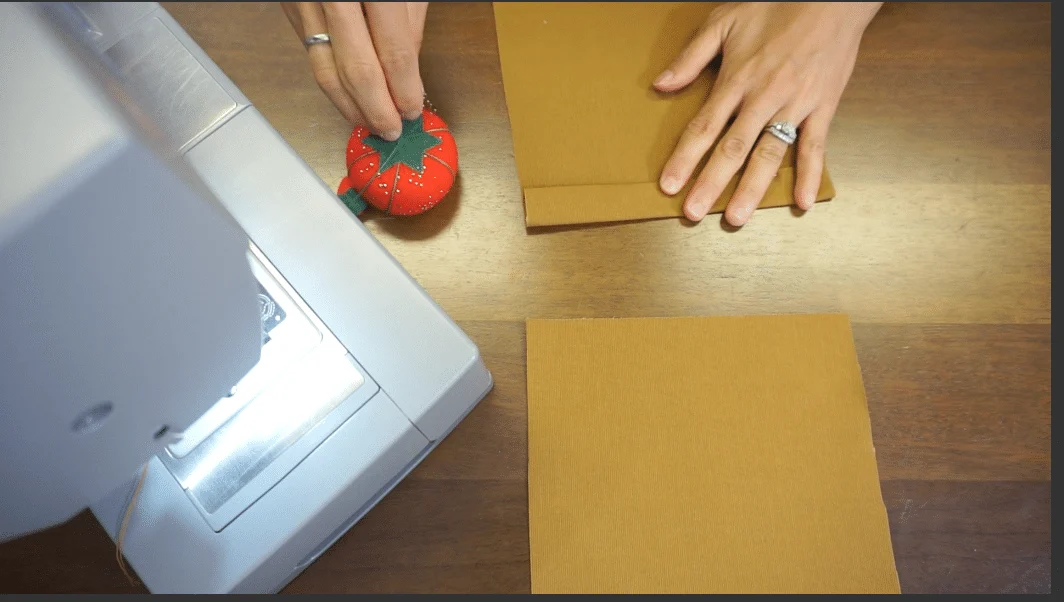
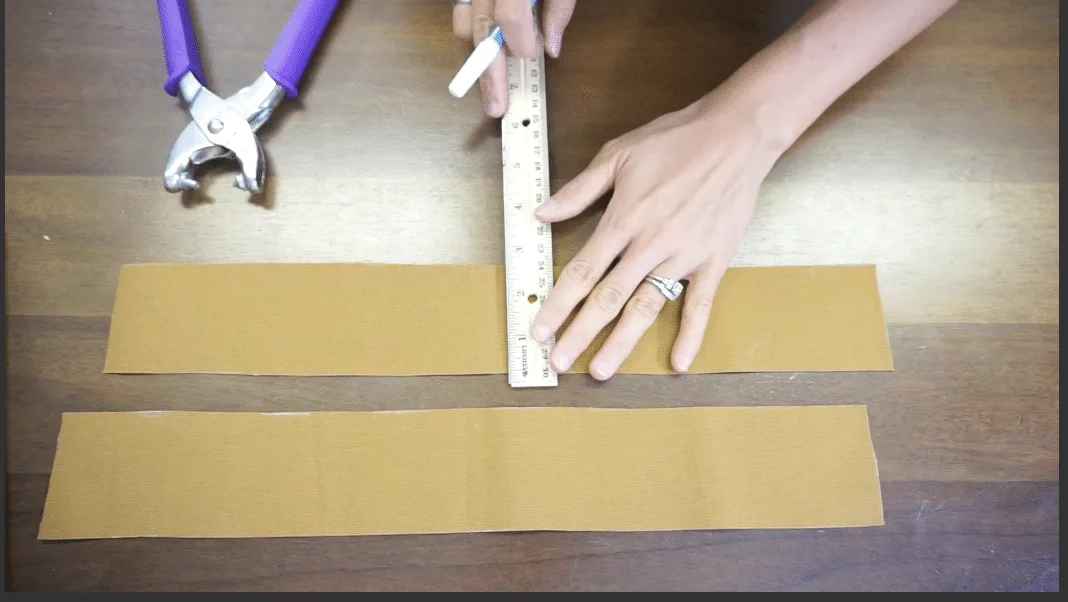
To make this free DIY tote bag pattern, start by cutting the specific fabric pieces:

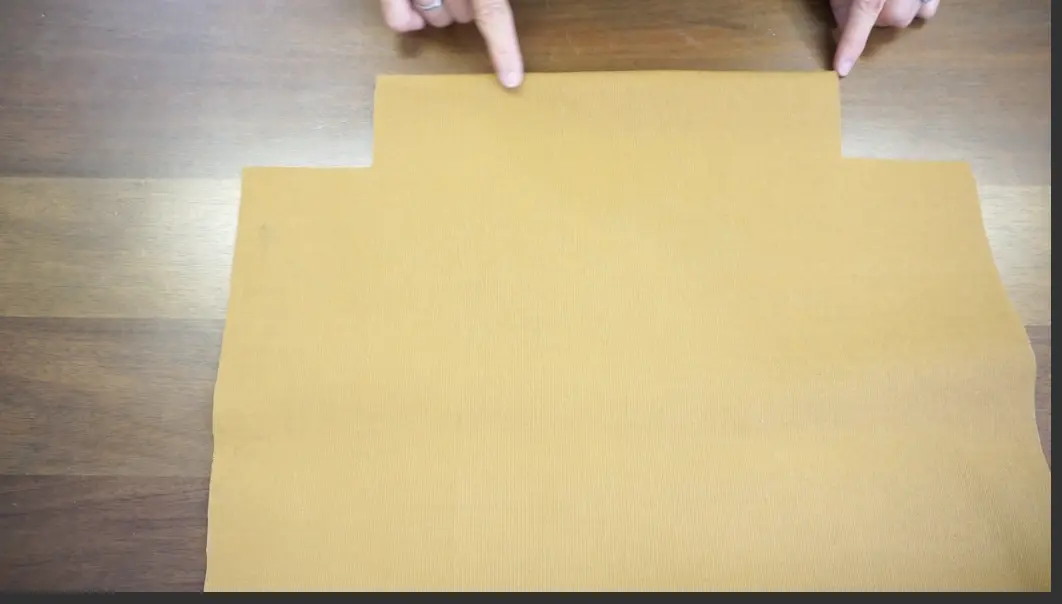


How To Sew Sides On A Bag
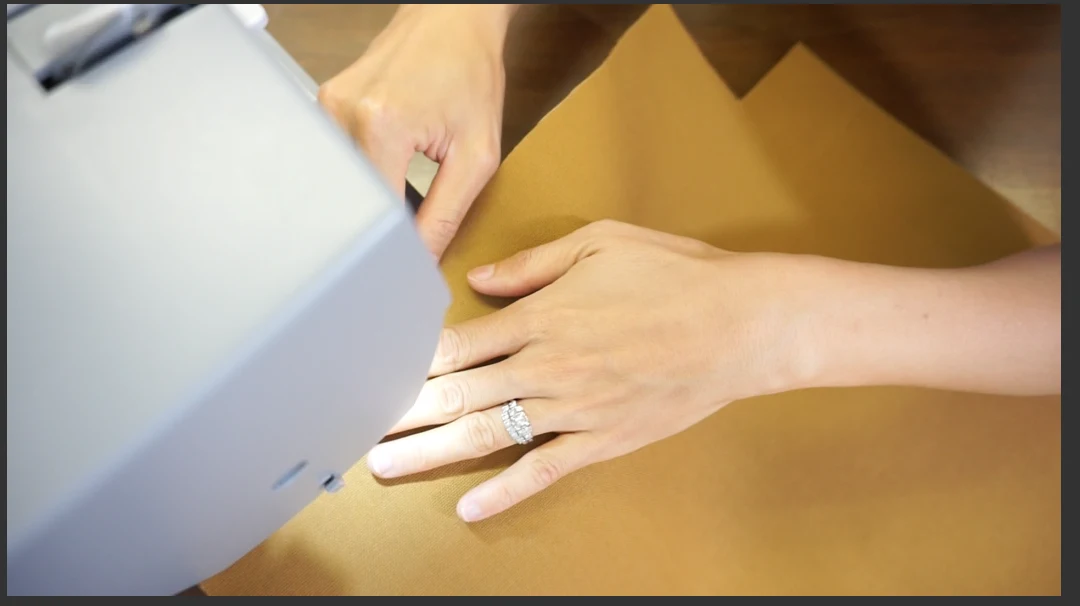
- Fold the bag body piece in half with the right sides facing each other.

- Next, sew ½” seam allowance on the side seams and then finish with zigzag stitching.

How To Sew A Tote Bag With Flat Bottom
- Open the flat bottom corner tabs, fold the matching seams together and pin to secure.

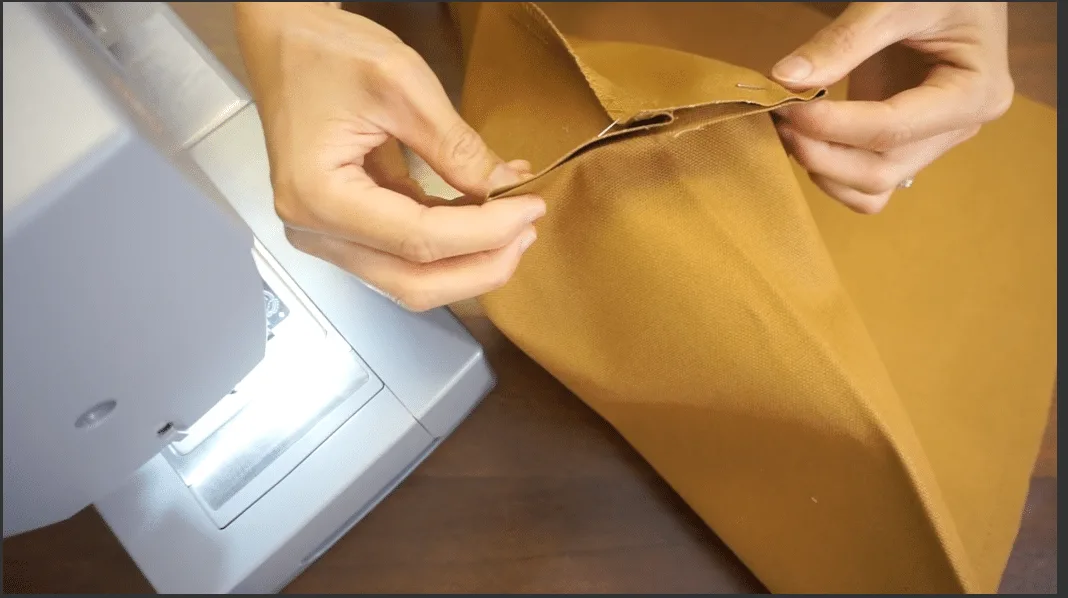
- Then, sew ½” seam allowance and then finish with zigzag stitching.

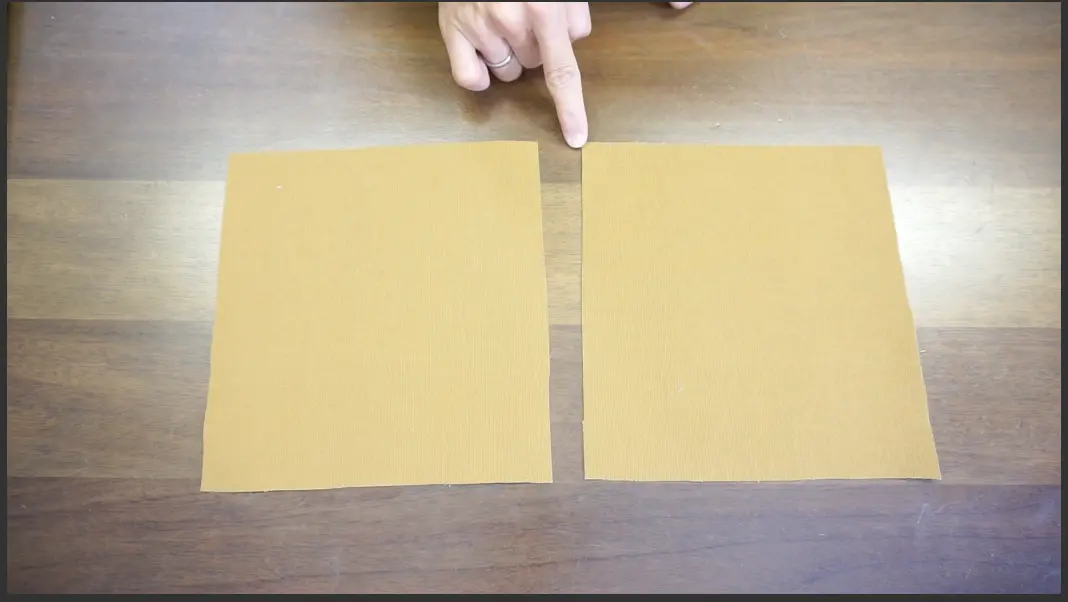
How To Make Tote Bags With Pockets
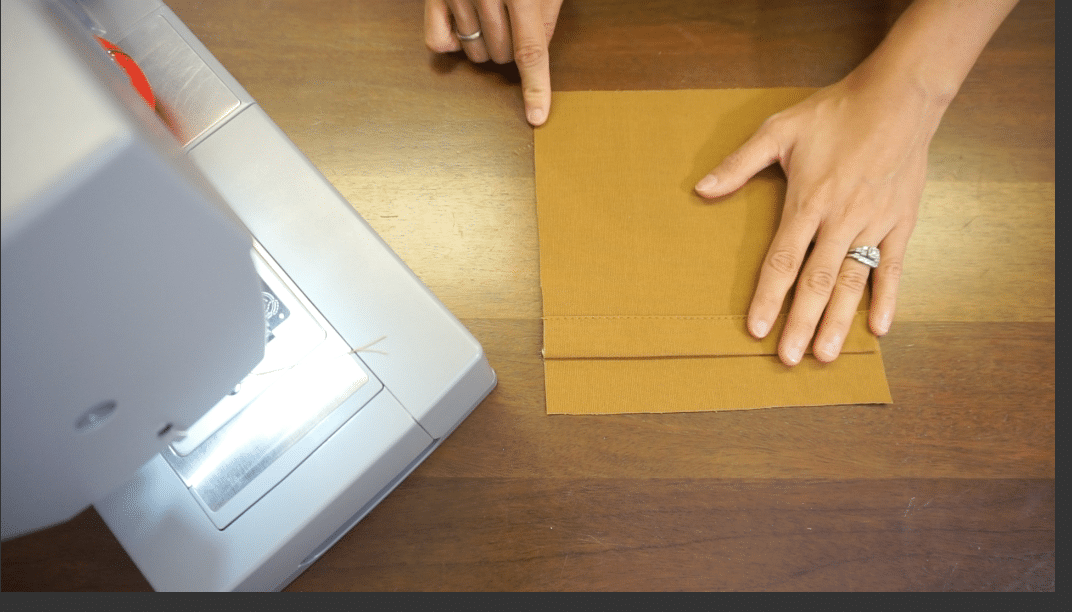
- For a tote bag with inside pocket: Double fold 1/4” and ½” on the topside of the inside pocket. Pin to secure.

- Finish with edge topstitch to close the folded line of the pocket.

- Lay both inside pocket pieces with the right sides facing each other.


- Sew ½” along both sides and the bottom. Finish with zigzag stitch. Afterwards, flip the finished pocket right side out.
Pro tip: So the completed corners will look sharp, make sure you clip the corners to remove the bulky excess fabric.
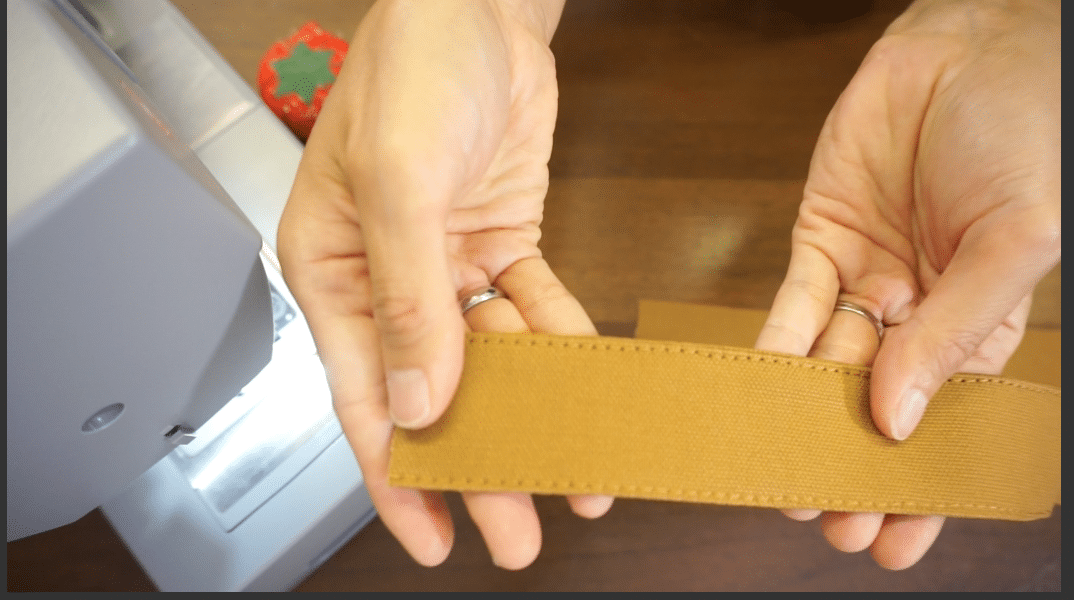
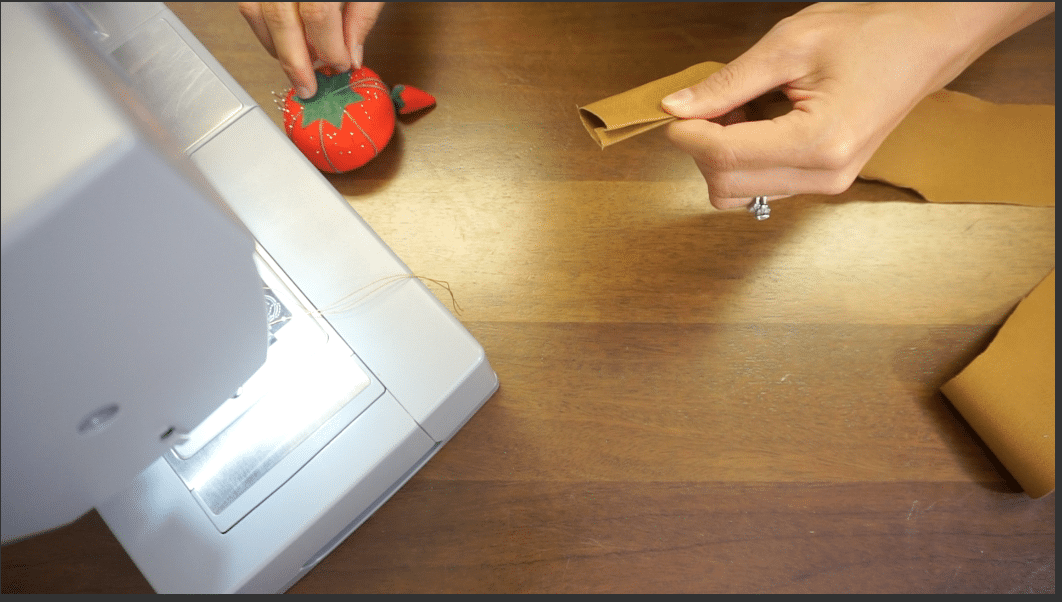
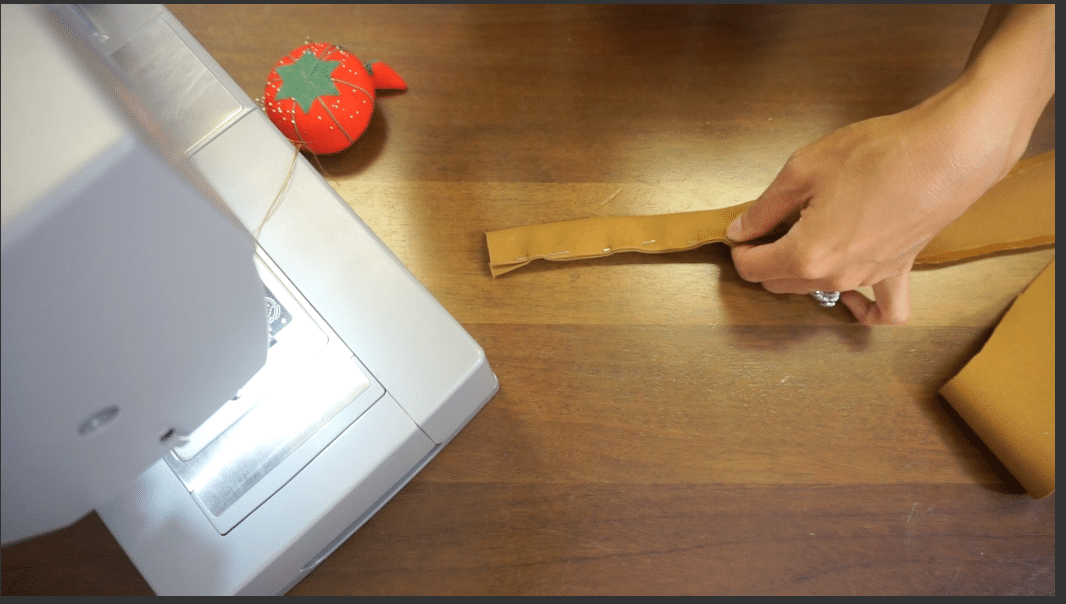
How To Make A Tote Bag With Handles
- For a tote bag with handle strap pieces, fold ¼” on the sides of both straps and then fold the width again in half.

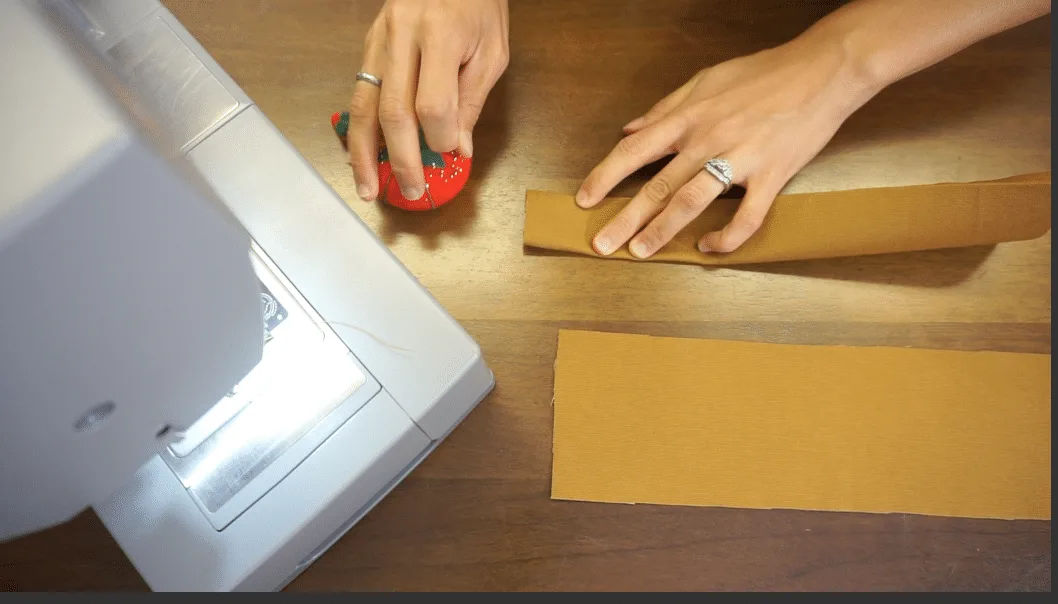
- Secure with pins along the folded line and edge topstitch about ⅛” on both sides.

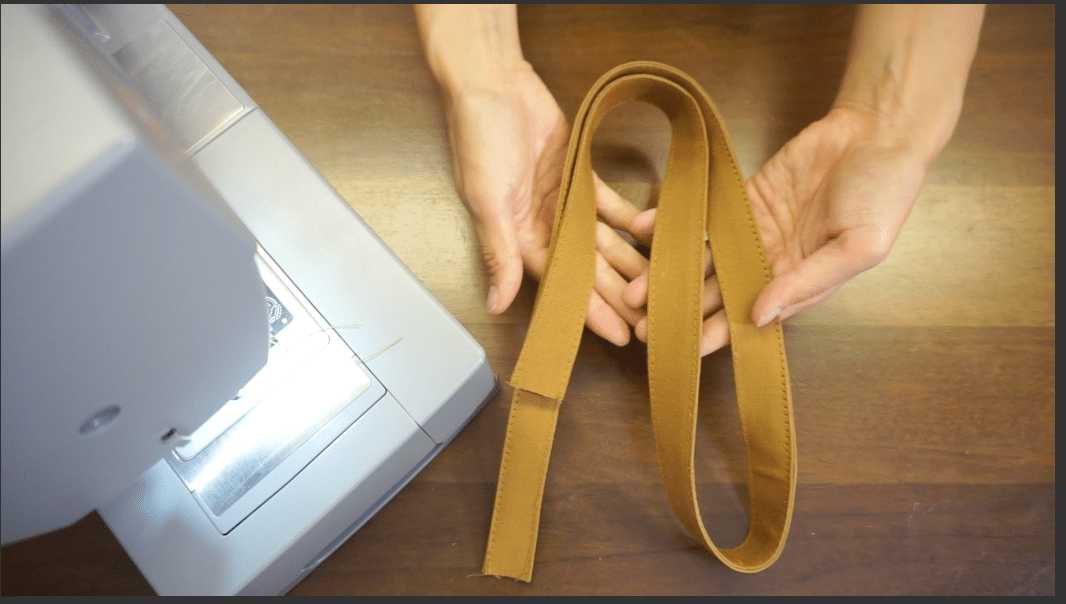
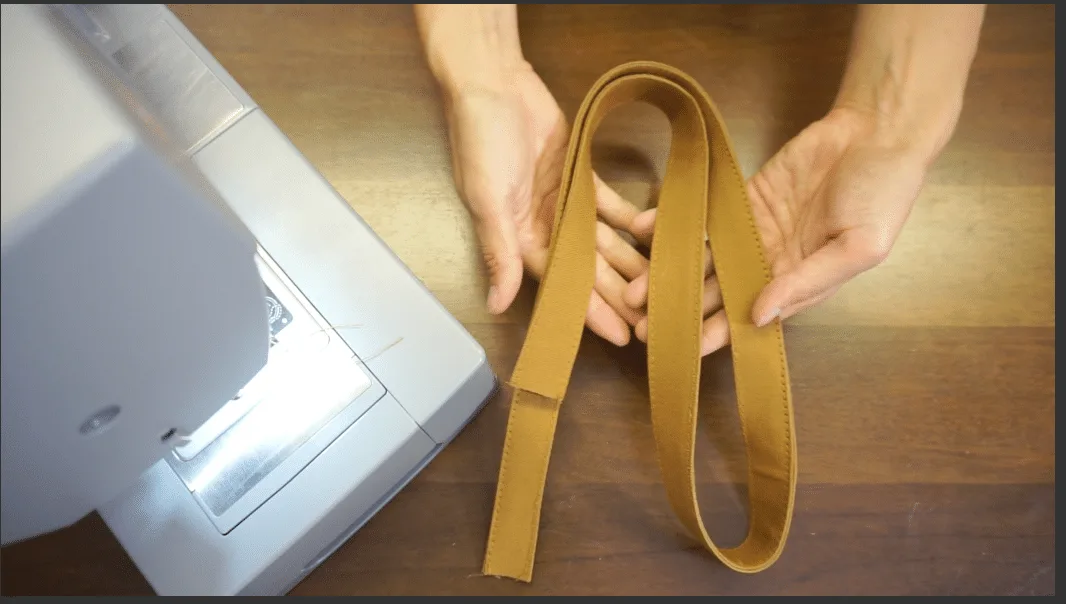
How To Make A Tote Bag With Shoulder Strap
- For a tote bag with shoulder strap, fold ¼” on both sides of the strap and then fold the width again in half. Pin to secure and sew edge topstitch along both sides of the folded line.

- To make the looped shoulder strap snap button closure, fold ¼” on both sides and then fold the width again in half. Secure with pins and edge topstitch along both sides.

- To make the short shoulder strap snap button closure, fold ¼” on both sides and then fold in half lengthwise. Pin to secure and this time edge topstitch all the way around this piece.
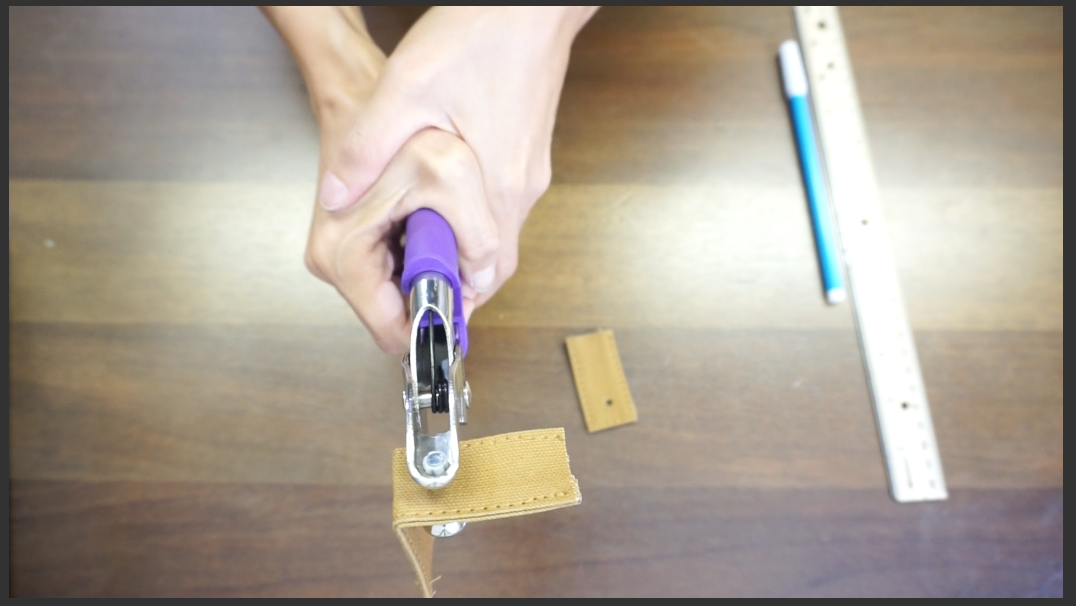
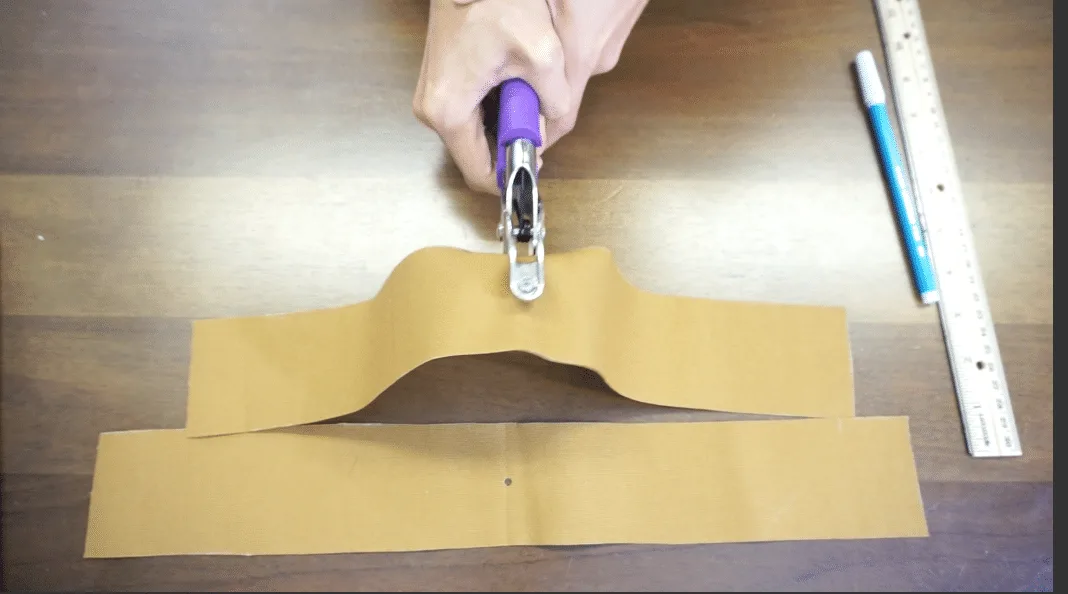
Pro tip: When making a tote bag with snap buttons, its best to punch all of the snap button holes first. Then do all of the caps and sockets. Lastly, finish with all of the posts and studs. It is much easier to do them in order rather than changing the heavy-duty snap button plier fittings for each task.
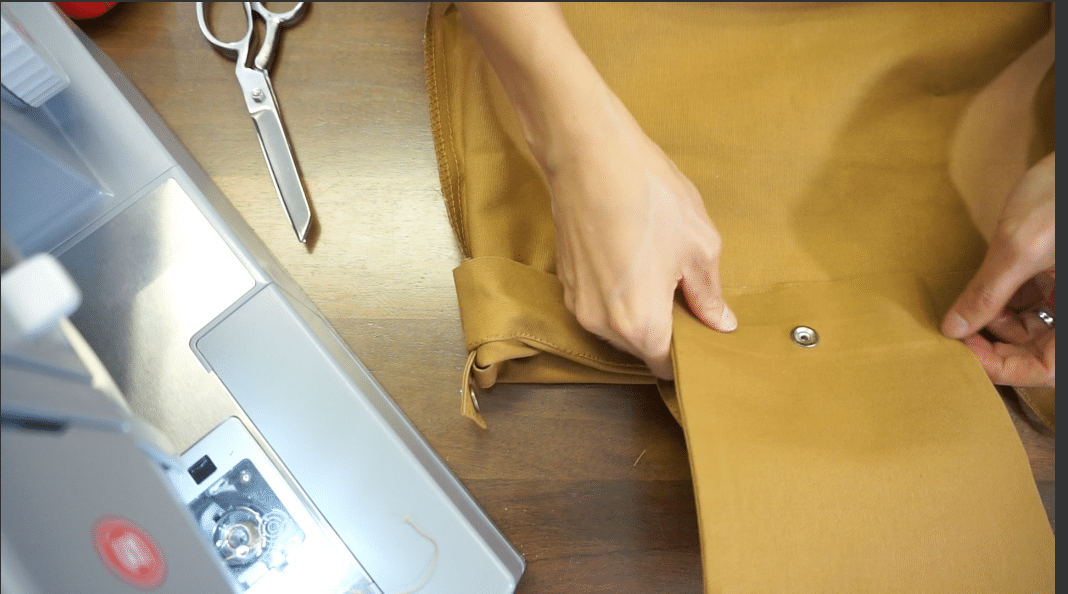
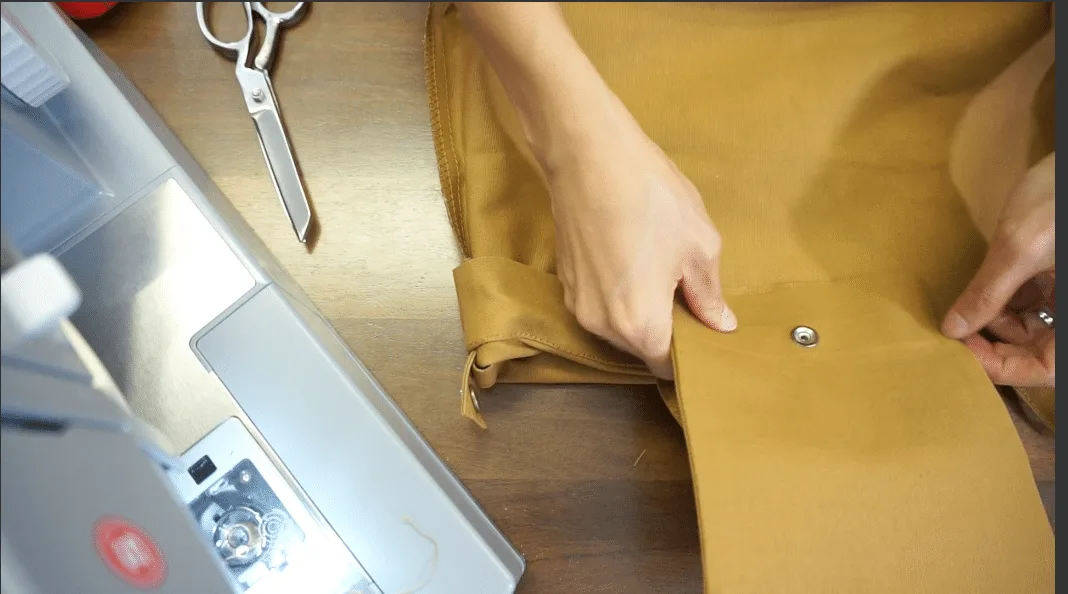
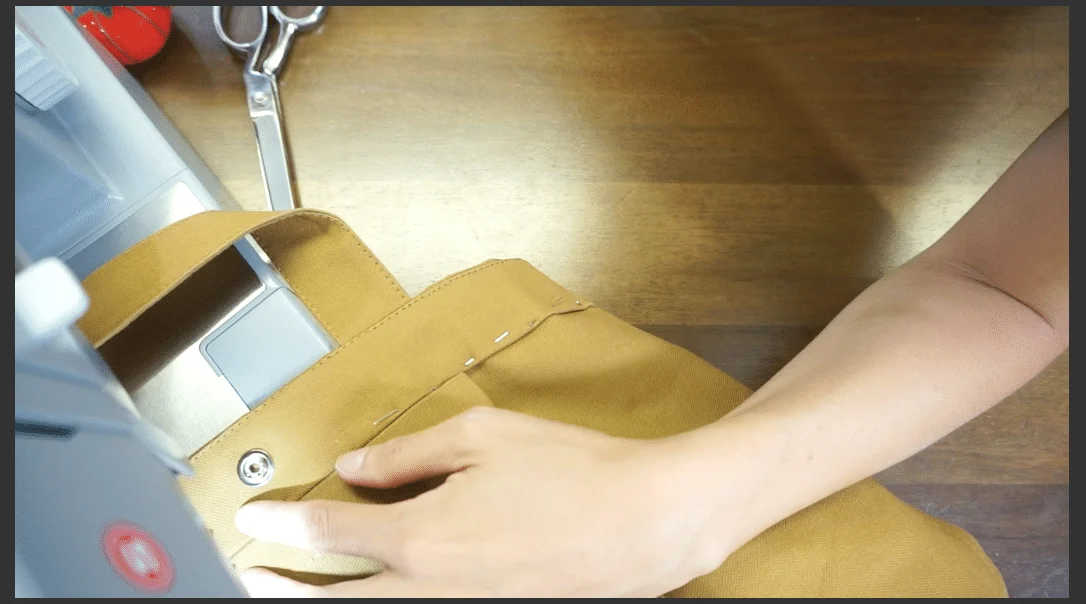
How To Make A Tote Bag With Snap Buttons
- To attach snap buttons to inner pocket, start by marking the middle of the pocket opening with a fabric pen. Use heavy-duty snap button pliers to make a hole.
- Then, mark through the hole onto the inside of the pocket and make another hole using heavy-duty snap button pliers.
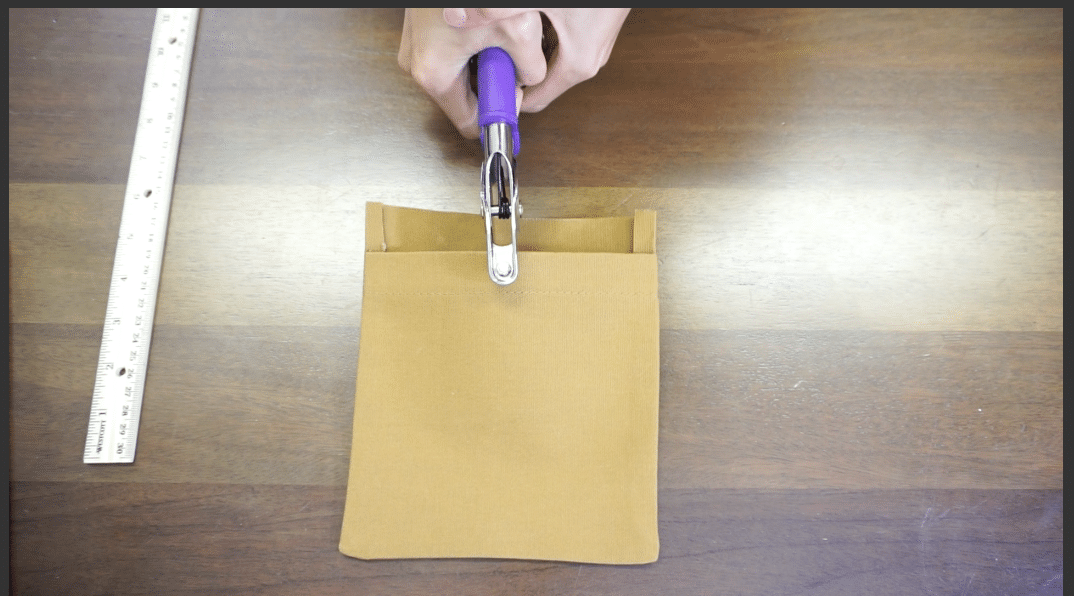
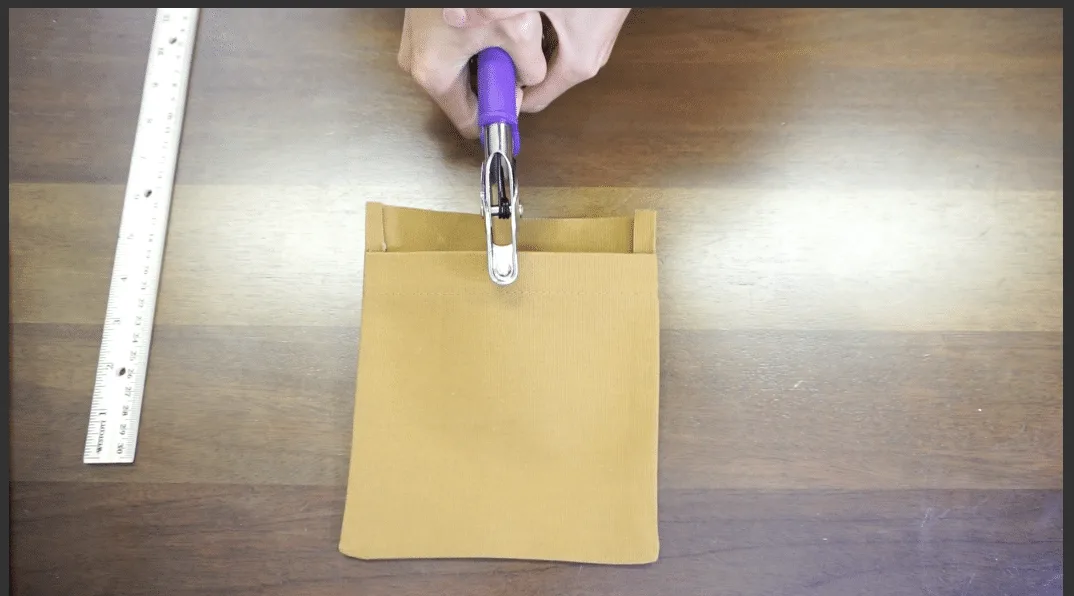
- Place cap and socket on the heavy-duty snap button pliers and punch it on the marked hole of the outside pocket.

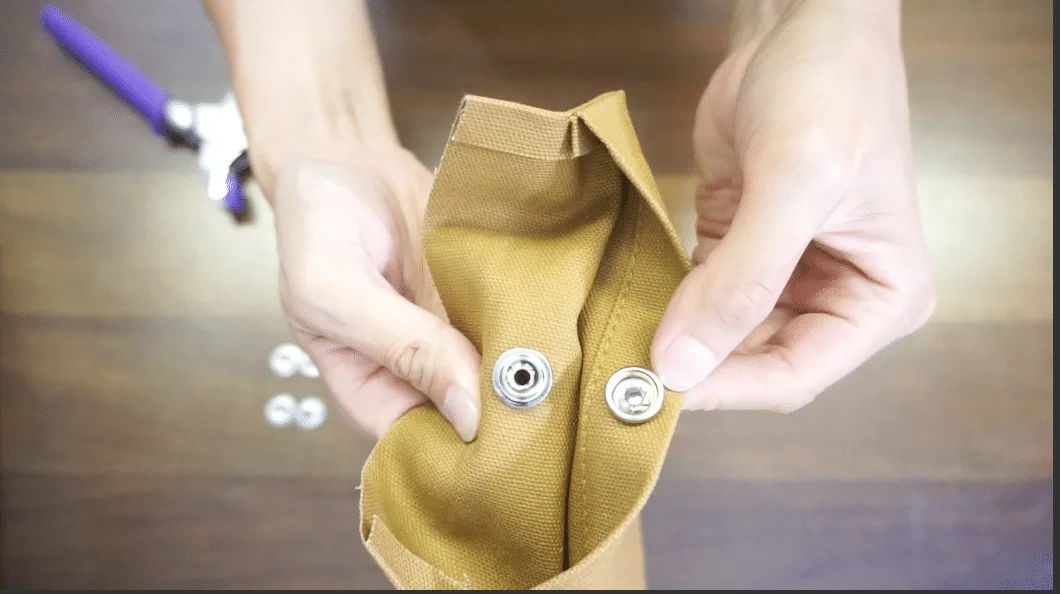
- Place post and stud on the heavy-duty snap button pliers and punch it on the marked hole of the inside pocket.

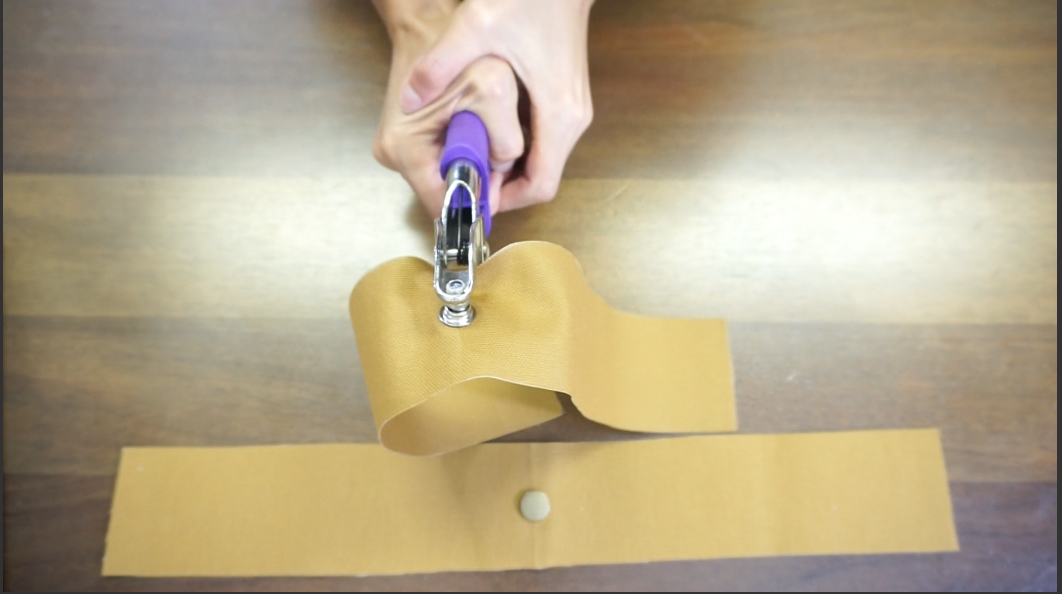
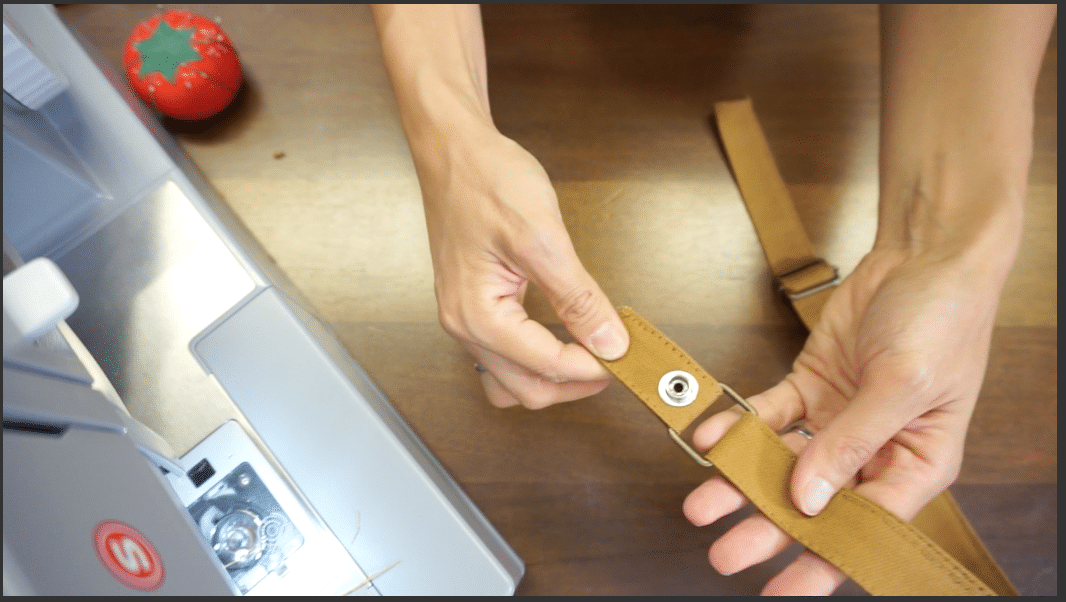
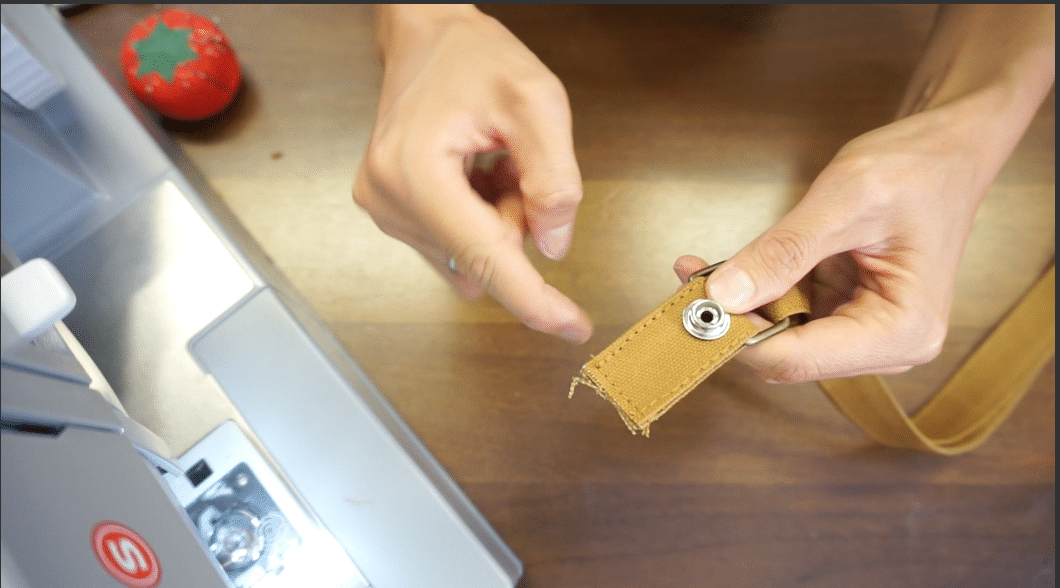
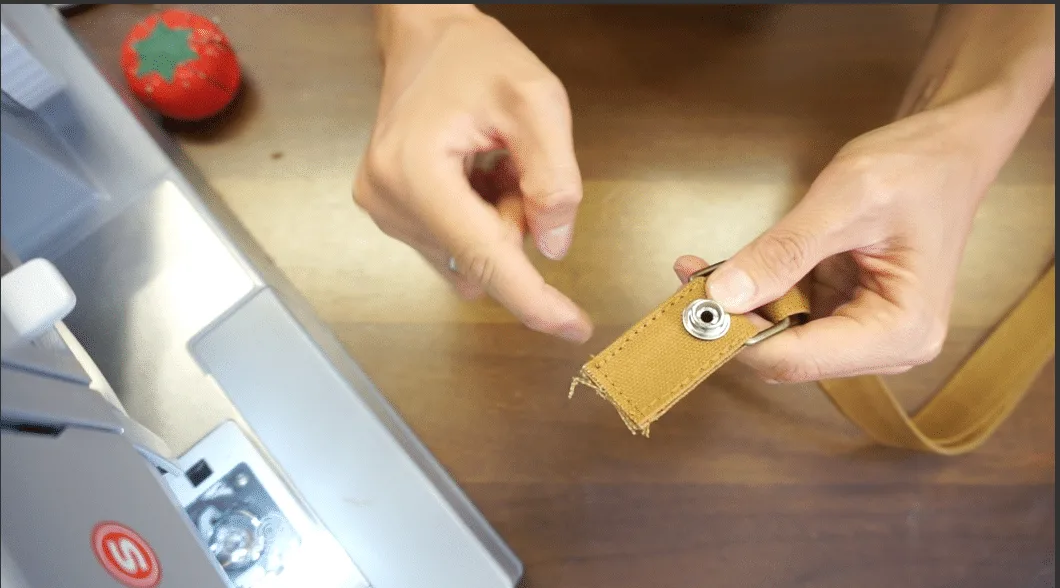
- To attach snap buttons to shoulder strap closure, make a hole using heavy-duty snap button pliers about ½” away from the top on the short shoulder strap snap button closure .
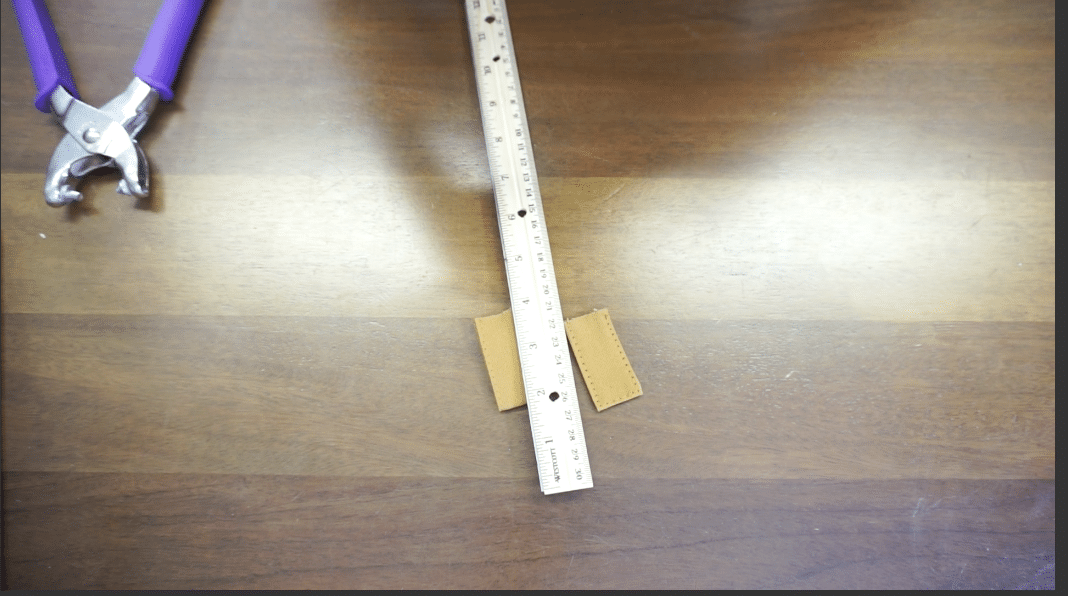

- Then fold the looped shoulder strap snap button closure in half and lay the strap on top the short shoulder strap snap button closure to mark through the hole. Punch a hole using heavy-duty snap button pliers.

- Place cap and socket on the heavy-duty snap button pliers and punch it on the marked hole of the short shoulder strap snap button closure.
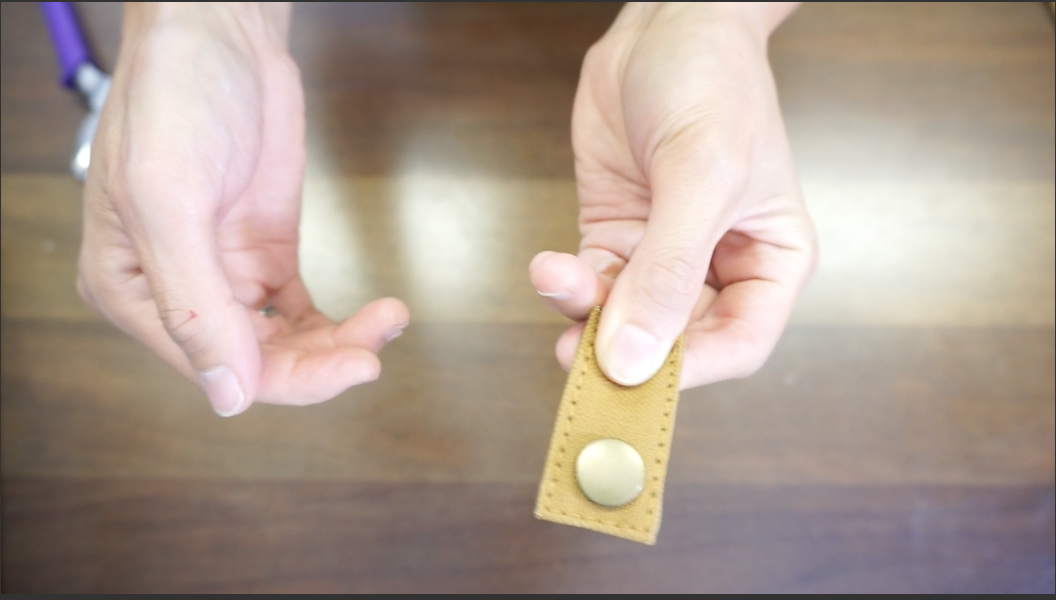

- Place post and stud on the heavy-duty snap button pliers and punch it on the marked hole of the looped shoulder strap snap button closure.

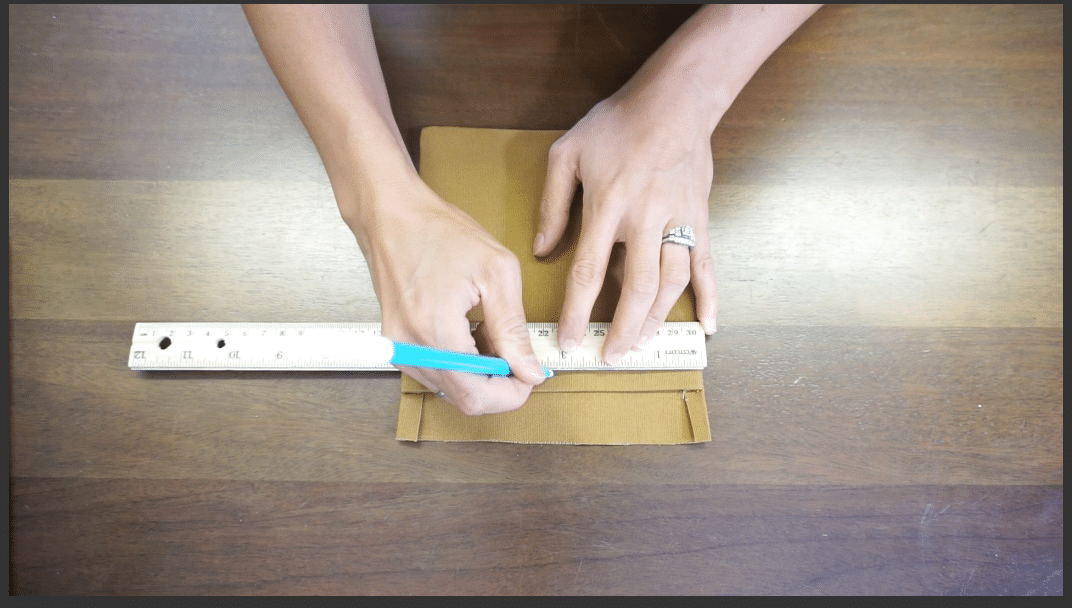
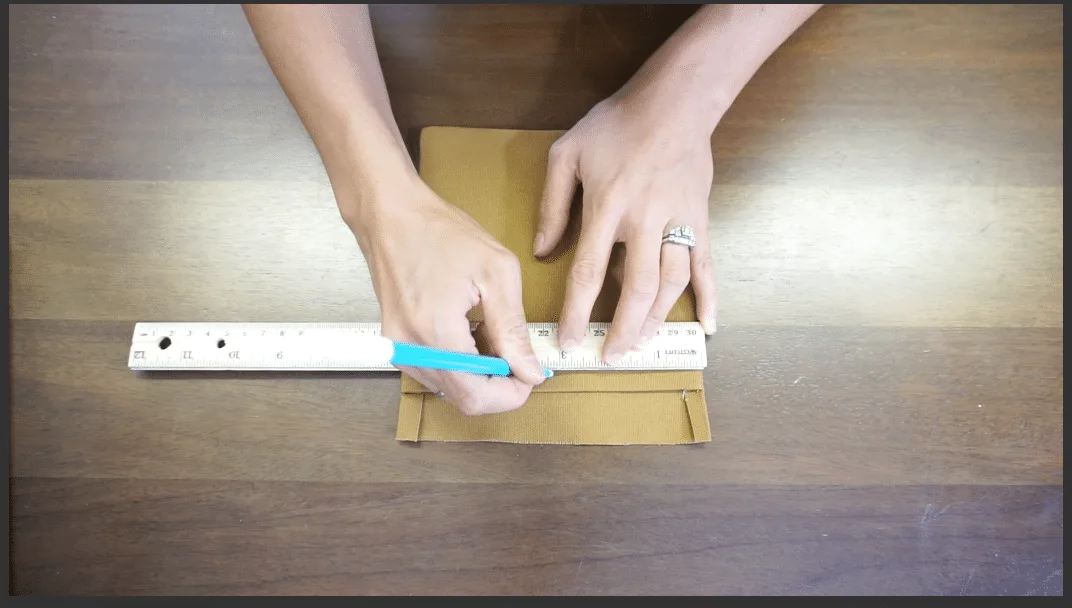
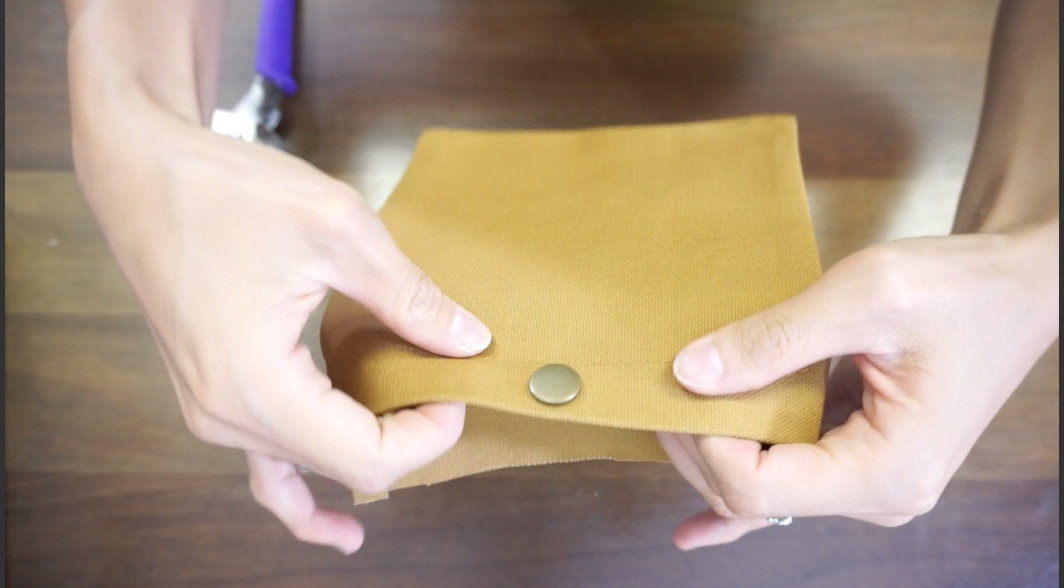
- To attach snap buttons to bag body closure, fold both facings in half and using a ruler find the center. Mark with fabric pen on both sides and use the heavy-duty snap button pliers to make a hole in both facings.

- Place cap and socket on the heavy-duty snap button pliers and punch it on the marked hole of the wrong side of one piece of facing.

- Place post and stud on the heavy-duty snap button pliers and punch it on the marked hole of the wrong side of the other piece of facing.

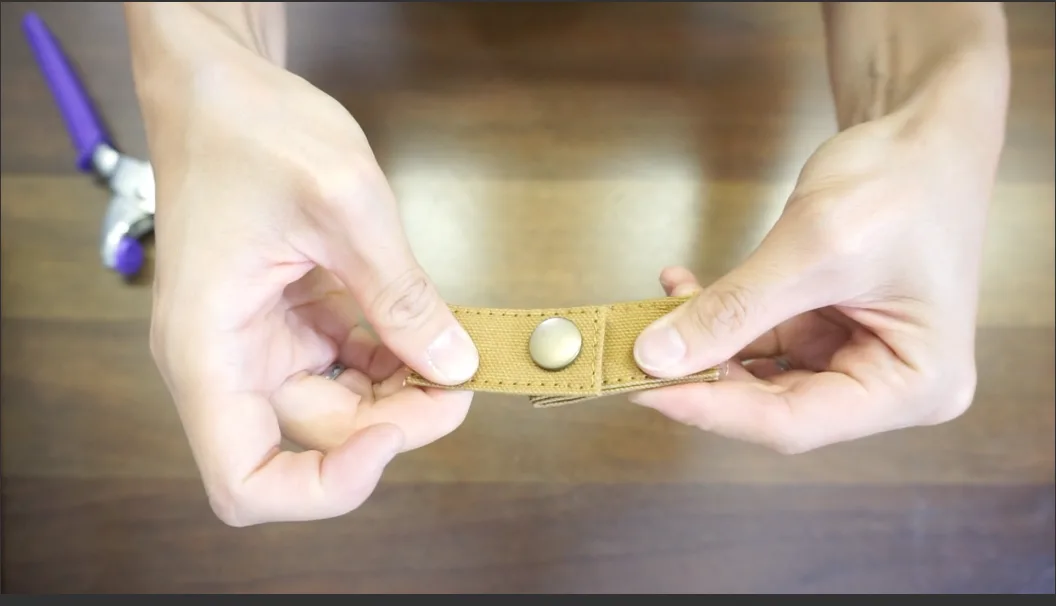
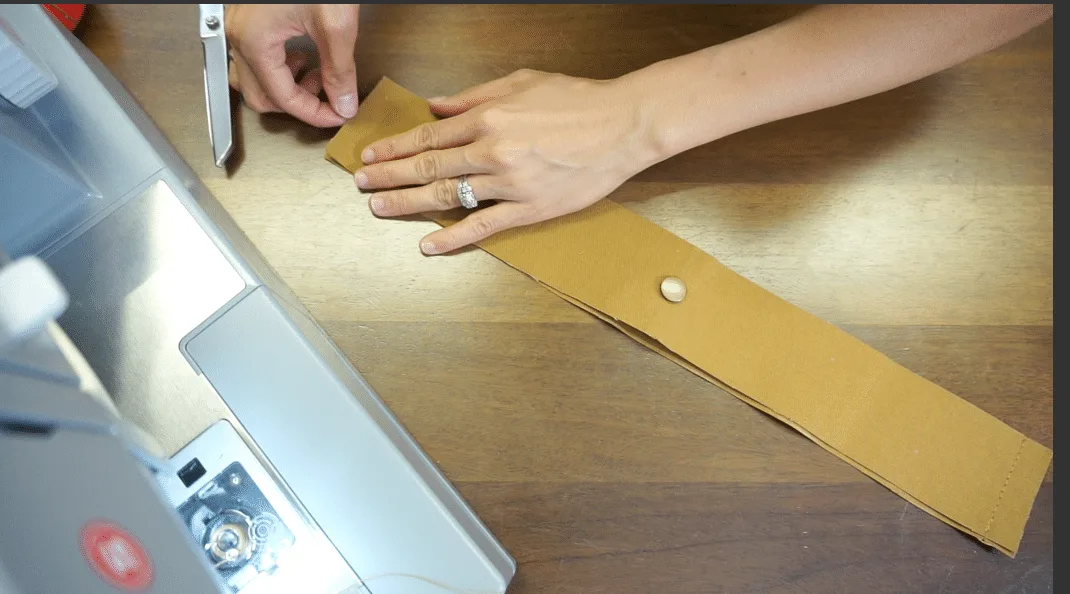
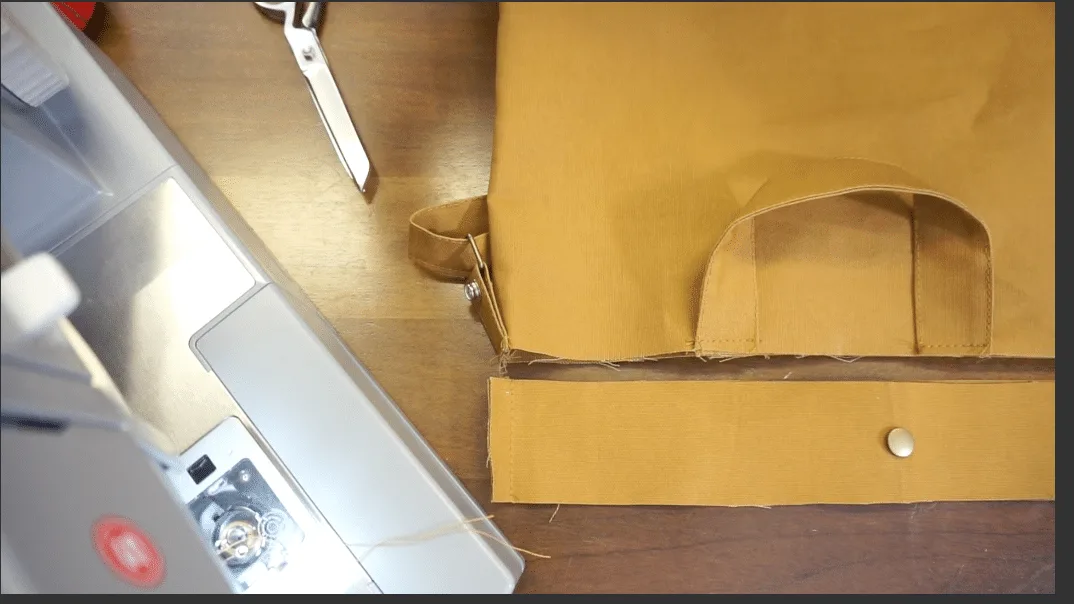
How To Make A Tote Bag With Adjustable Shoulder Strap
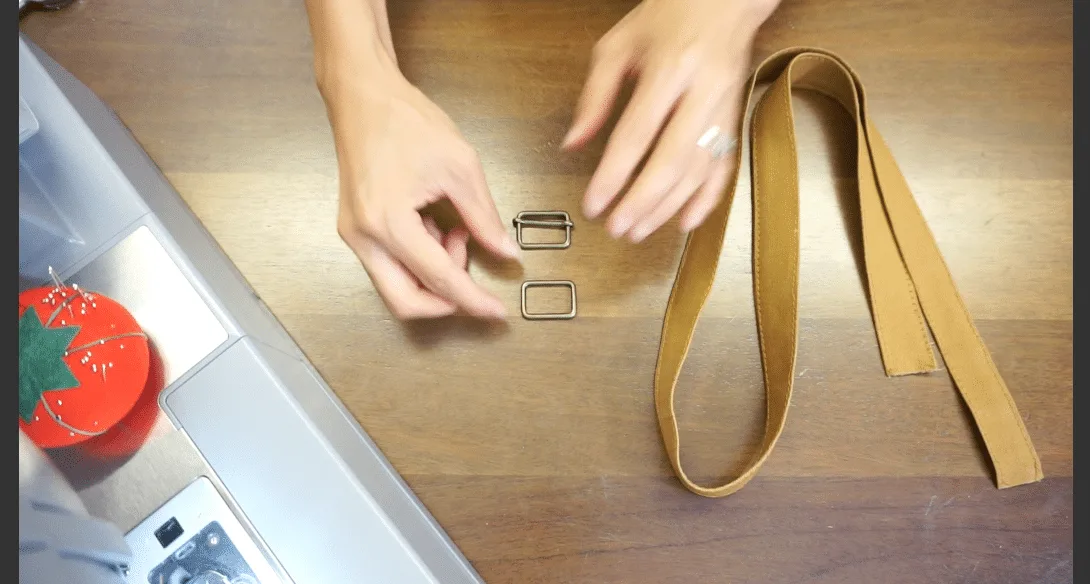
- Put a slide buckle and rectangle ring on the shoulder strap. Slide the adjustable shoulder strap through the rectangle ring and over the middle slide buckle.

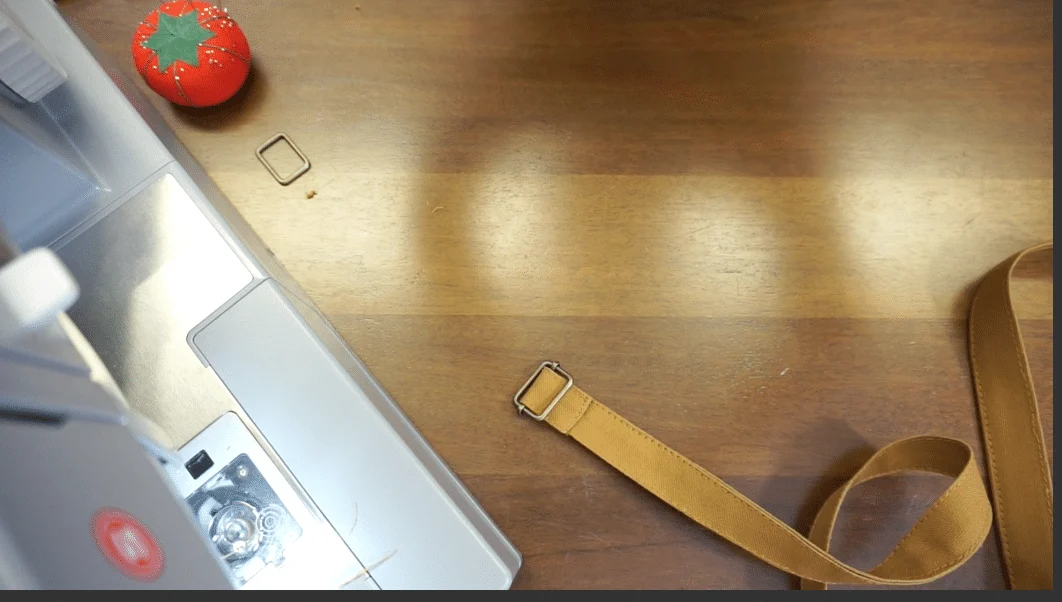
- Measure 1½” from one end of the shoulder strap and the middle adjustable buckle. Fold over the end of the shoulder strap about ¼” and pin to secure creating a loop back to the strap. Sew edge topstitch to lock in the adjustable slide buckle.

- Next, slide the looped shoulder strap snap button closure over the rectangle ring and edge topstitch to secure and lock in the rectangle ring.

- Lay the short shoulder strap snap button closure on top of the shoulder strap and edge topstitch to secure.
How To Sew A Simple Bag For Beginners
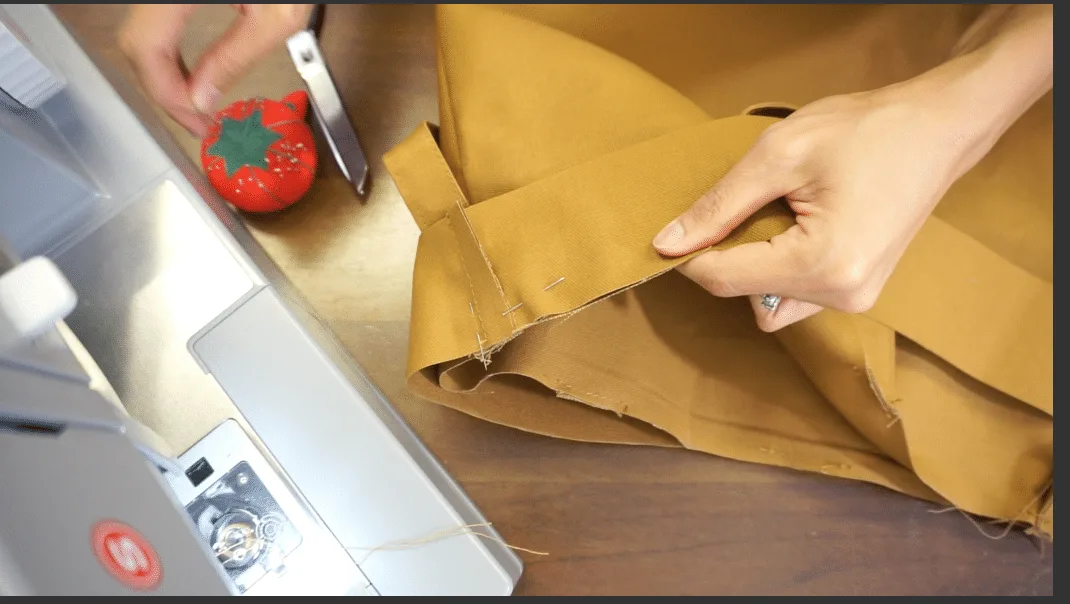
- Place the facings with the right sides together and sew ½” seam allowance on both sides. Turn the bag body inside out, fold it in half and then chalk mark the center.

- Use the center point to position the pocket, and use the pocket as the guide to place the handle. Pin both sides of the handles and edge topstitch.
- Place both ends of the shoulder strap matching to the side seam of the bag, pin to secure and edge topstitch. Slide the facing over the bag, pin around the bag opening and sew ¼” seam allowance.

- Open the facing and edge topstitch on the facing all the way around. Then, fold the facing ¼” to sandwich the pocket piece in and pin to secure. Use the ¼” folded line to pin all the way around the bag opening.

- Finish edge topstitch around the bottom of the facing. Flip the simple bag right side out and admire your finished project!

Notes
For this beginner sewing project, I grouped everything together so that sewing instructions for the simple bag were much easier to follow.
If you have any questions about this DIY tote bag pattern, feel free to reach out to me in the comments below! The questions and response really help others that may also have the same difficulties as well.
Recommended Products
As an Amazon Associate and member of other affiliate programs, I earn from qualifying purchases.
Give this is beginners sewing project a try!
Share your finished DIY tote bag with me!
#FashionWanderer
Elizabeth
Tuesday 22nd of December 2020
I am a little confused with the pocket placement. It is supposed to be on the outside of the tote or the inside?
Soonjoo
Wednesday 23rd of December 2020
Hi Elizabeth, For this tutorial, I placed the pocket inside of the tote bag. It's pretty handy and also gives nice clean look from outside.
Vanessa
Sunday 20th of December 2020
Hello. How are the side buttons on the strap used?
Soonjoo
Monday 21st of December 2020
Hello Vanessa, The snap buttons are used as bag closures. You can lock and secure the top opening with the side buttons. If you close the buttons on the facing and buttons on the strap, then the bag forms a square shape that looks super cute when holding the handles.
Vanessa
Wednesday 16th of December 2020
Hello. How are the side buttons in the strap used?
Soonjoo
Thursday 17th of December 2020
Hello Vanessa, The snap buttons are used as bag closures. You can lock and secure the top opening with the side buttons. If you close the buttons on the facing and buttons on the strap, then the bag forms a square shape that looks super cute when holding the handles.
Claudia
Monday 14th of December 2020
Dear Soonjoo. Thanx for the great idea! Cotton‘s waiting... but I really have problems with the measurement. Could you make a drawing of the bag-body? Because my calculation doesn‘t work: two times 3“ and 11“ doesn‘t make 15“... Sorry, dont get it- and I also have to change it in cm, I‘m in Switzerland... Greets and happy christmas- Claudia
Soonjoo
Tuesday 15th of December 2020
Hi Claudia! I’m super excited and look forward how the tote bag turn out! I included the measurement for the bag in inches and centimeters hope this help and solve the issue. Let me know how it turns out.Happy sewing!
Esther
Sunday 29th of November 2020
Nice one I love the explanations am going to try it out with a jean material. Thanks
Soonjoo
Sunday 29th of November 2020
Hello Esther. Thank you very much! Please share with me, I would love to see how it turns out!