
A coastal beaded tote bag charm is the perfect way to give a simple straw tote, canvas beach bag, or everyday handbag a playful summer makeover. Inspired by seashells, ocean colors, pearls, natural wood, and beach treasures, this easy DIY accessory adds instant personality to your favorite summer bag.
The best part? You do not need advanced jewelry-making skills to create one. With a handful of colorful beads, strong cord, a lobster clasp, and a few coastal charms, you can make a boutique-inspired beaded bag charm in less than an hour.
Need more beachy inspiration? Here are DIY summer beaded accessories that will add style to your outfit!
Materials
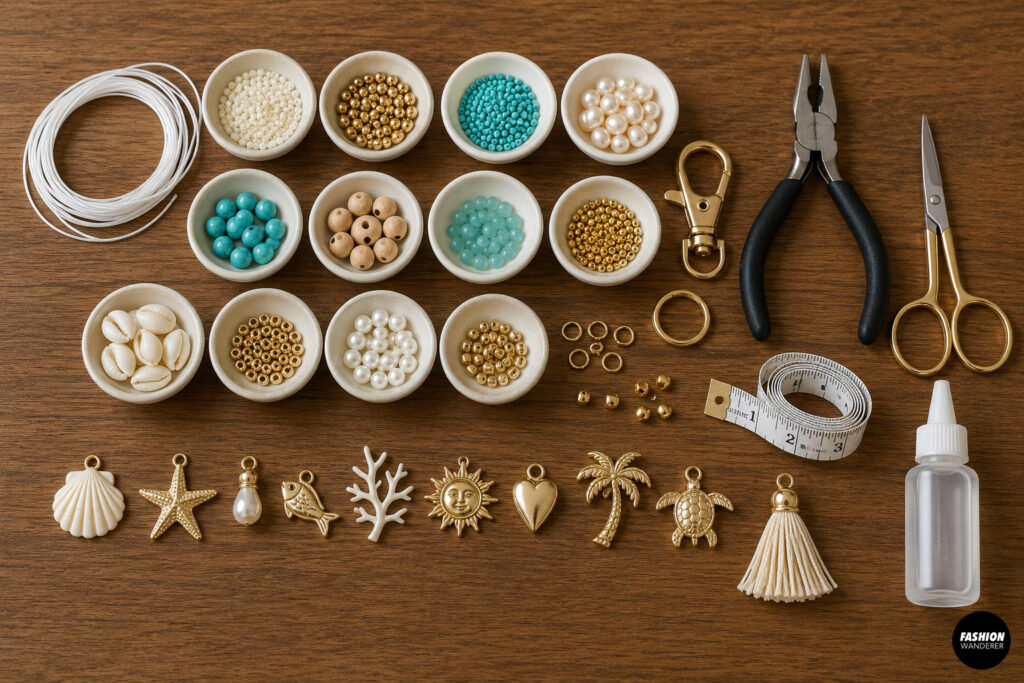
To make one coastal beaded tote bag charm, you will need:
- 12–16 inches of strong nylon beading cord or 0.8–1 mm elastic cord
- Colorful glass, resin, or acrylic beads
- Faux or freshwater-style pearls
- Turquoise-style beads
- Natural wood beads
- Small seed beads
- Gold or silver spacer beads
- Seashell beads
- One large lobster clasp or swivel clasp
- One large jump ring
- Small jump rings for charms
- Crimp beads or crimp covers, optional
- Jewelry pliers
- Sharp scissors
- Measuring tape
- Clear jewelry glue, optional
- Small coastal charms
- Small tassel, optional
For coastal-inspired charms, try seashells, starfish, pearls, fish, coral, suns, hearts, palm trees, sea turtles, or tiny gold charms.
Choosing a Coastal Color Palette
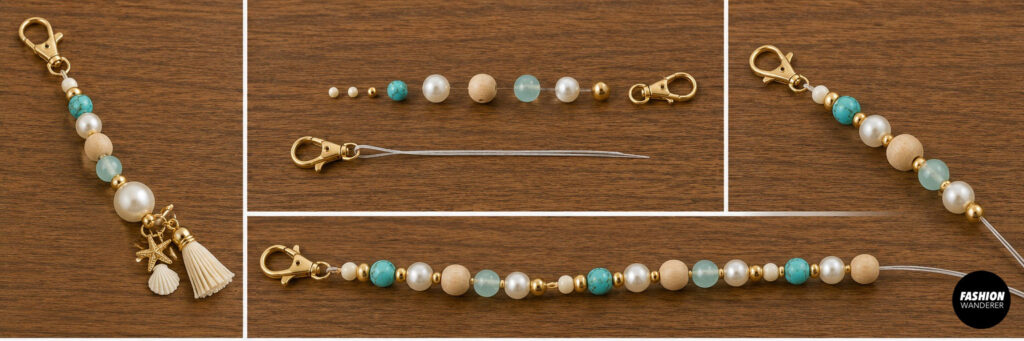
A beautiful beach-inspired bag charm combines natural textures with soft ocean colors. Choose three to five main colors so your finished accessory feels coordinated rather than overly busy.
Try these color combinations:
Coastal Blue: turquoise, aqua, white, ivory, and gold
Beach Neutral: cream, sand, natural wood, pearl, and antique gold
Sea Glass: pale blue, seafoam green, aqua, clear glass, and silver
Sunset Beach: coral, peach, pale pink, cream, and gold
Mediterranean Summer: cobalt blue, turquoise, white, and gold
For a trendy boutique-inspired look, combine chunky statement beads with smaller pearls and spacer beads.
Written Coastal Beaded Tote Bag Charm Pattern
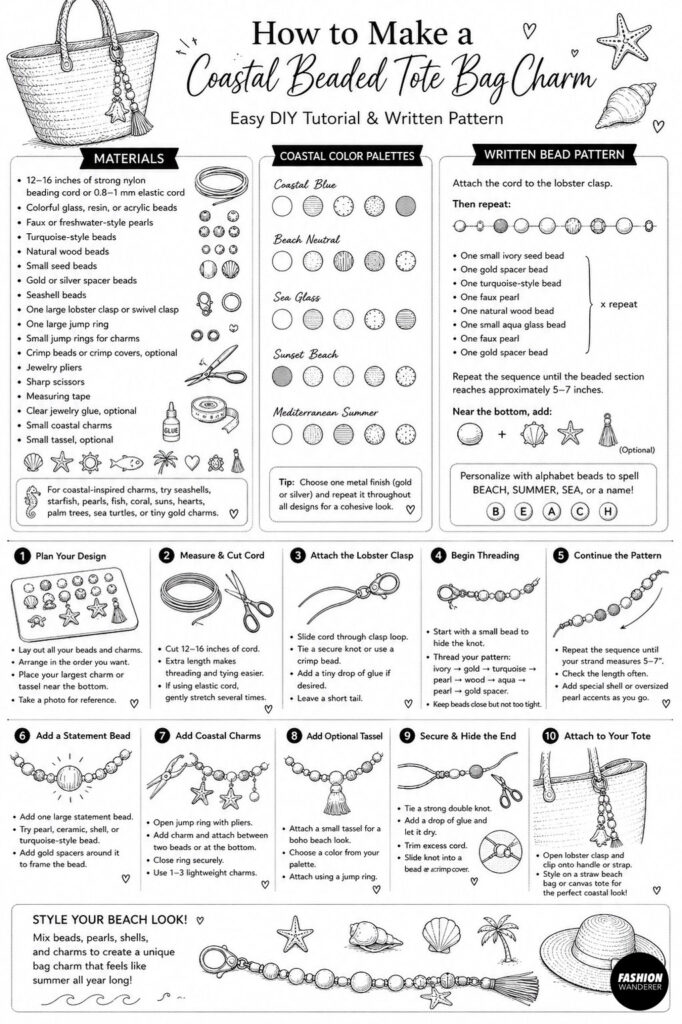
This pattern creates a beaded strand approximately 6–8 inches long, depending on your bead sizes.
Attach the cord to the lobster clasp.
Then repeat:
One small ivory seed bead
One gold spacer bead
One turquoise-style bead
One faux pearl
One natural wood bead
One small aqua glass bead
One faux pearl
One gold spacer bead
Repeat the sequence until the beaded section reaches approximately 5–7 inches.
Near the bottom, add:
One large statement bead
One seashell or starfish charm
One small tassel, optional
You can also replace the statement bead with a personalized section using alphabet beads to spell BEACH, SUMMER, SEA, or a name.
Step 1: Plan Your Bag Charm Design
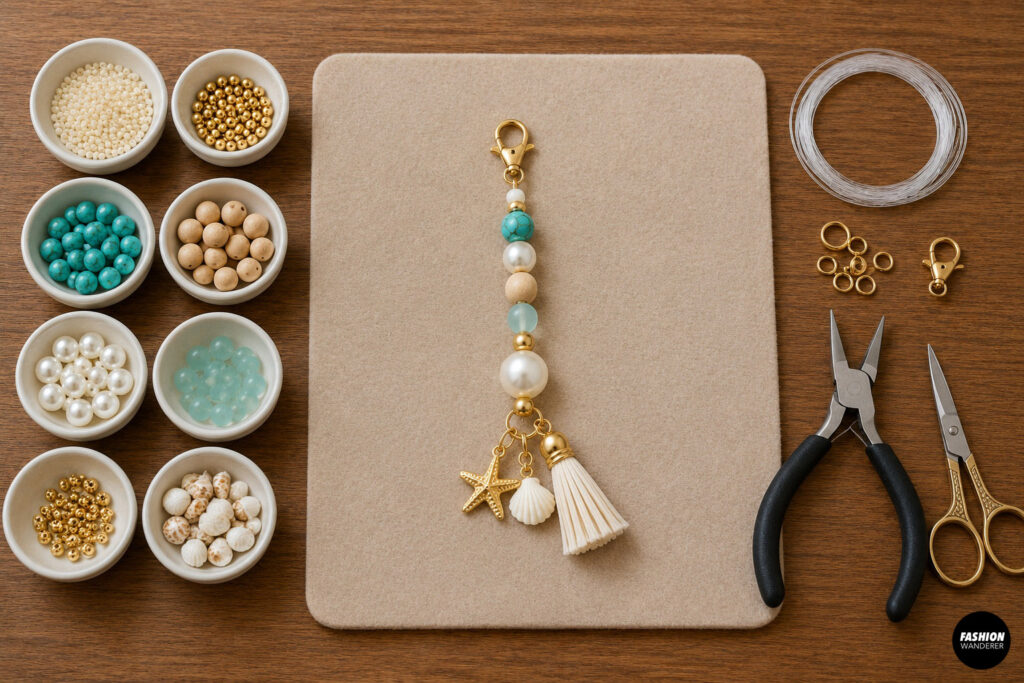
Start by laying all your beads and charms on a bead mat, small towel, or clean table.
Arrange the beads in the order you want them to appear. Mix different sizes and textures to create visual interest.
Try placing larger beads between groups of smaller beads. Pearls and gold spacers work especially well between colorful statement beads because they help separate the colors.
Place your largest charm or tassel near the bottom of the design.
Take a quick photo of your arrangement before threading. You can use the photo as a reference if your beads accidentally move.
Step 2: Measure and Cut the Cord
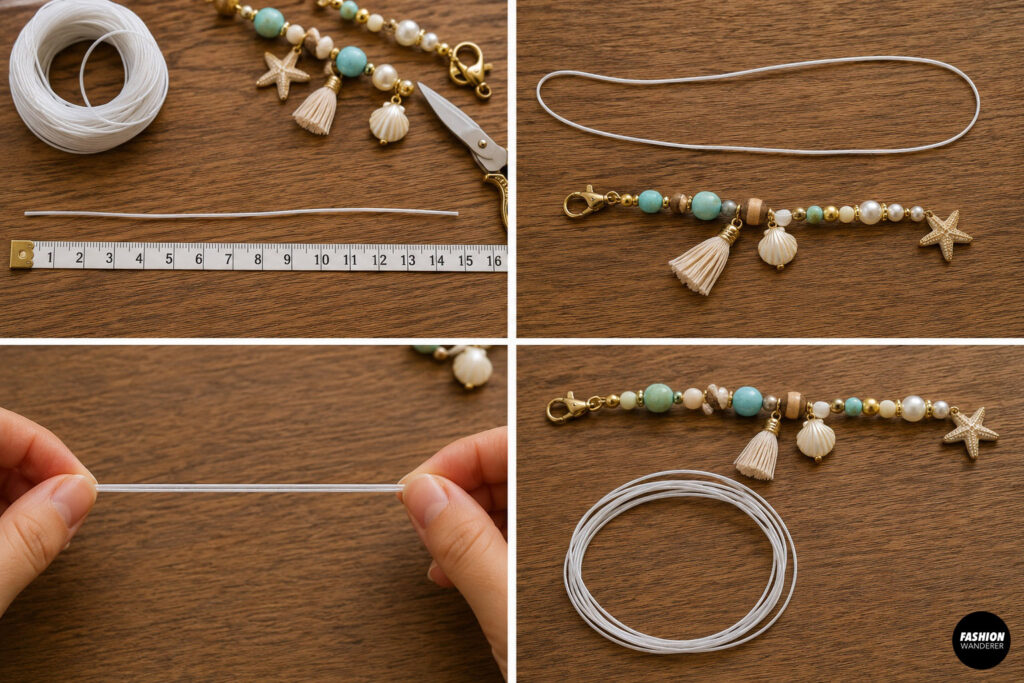
Cut approximately 12–16 inches of strong beading cord.
Although the finished charm may only measure 6–8 inches, the extra cord makes threading and tying much easier.
If using elastic cord, gently stretch it several times before beginning.
For a structured, jewelry-style bag charm, nylon beading cord or flexible beading wire is a better choice because it will support heavier beads without stretching.
Step 3: Attach the Lobster Clasp
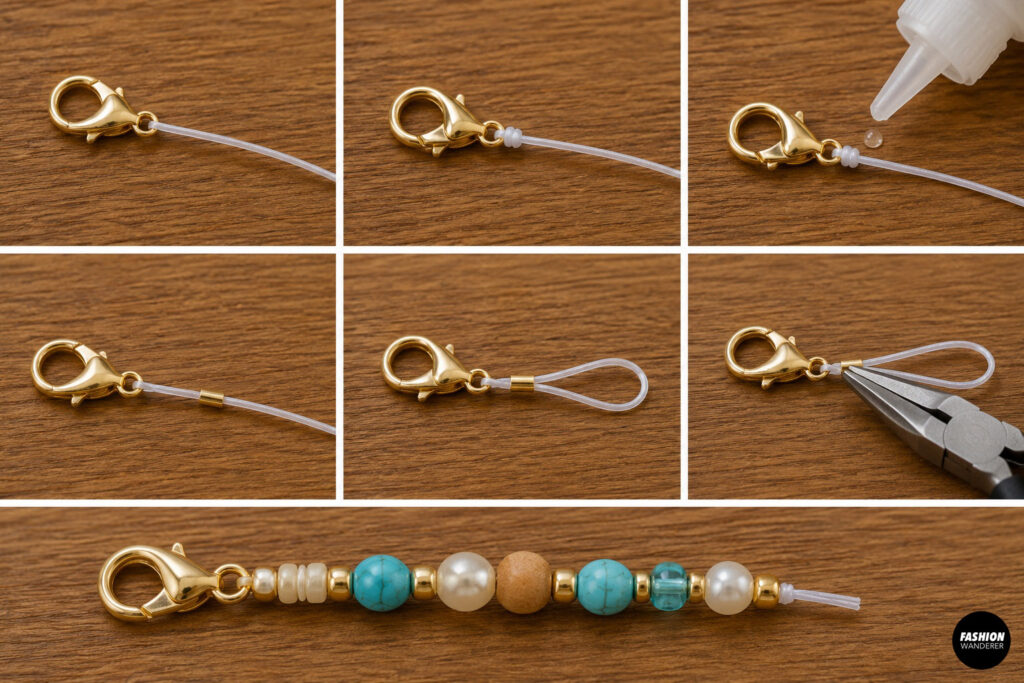
Slide one end of the cord through the loop on your large lobster or swivel clasp.
If using nylon cord, tie a secure surgeon’s knot or double knot around the clasp.
Add a tiny drop of clear jewelry glue if desired.
If using beading wire, slide a crimp bead onto the wire first. Pass the wire through the clasp and back through the crimp bead.
Use jewelry pliers to secure the crimp firmly.
Leave a short tail that can be hidden inside the first few beads.
Step 4: Begin Threading the Beads
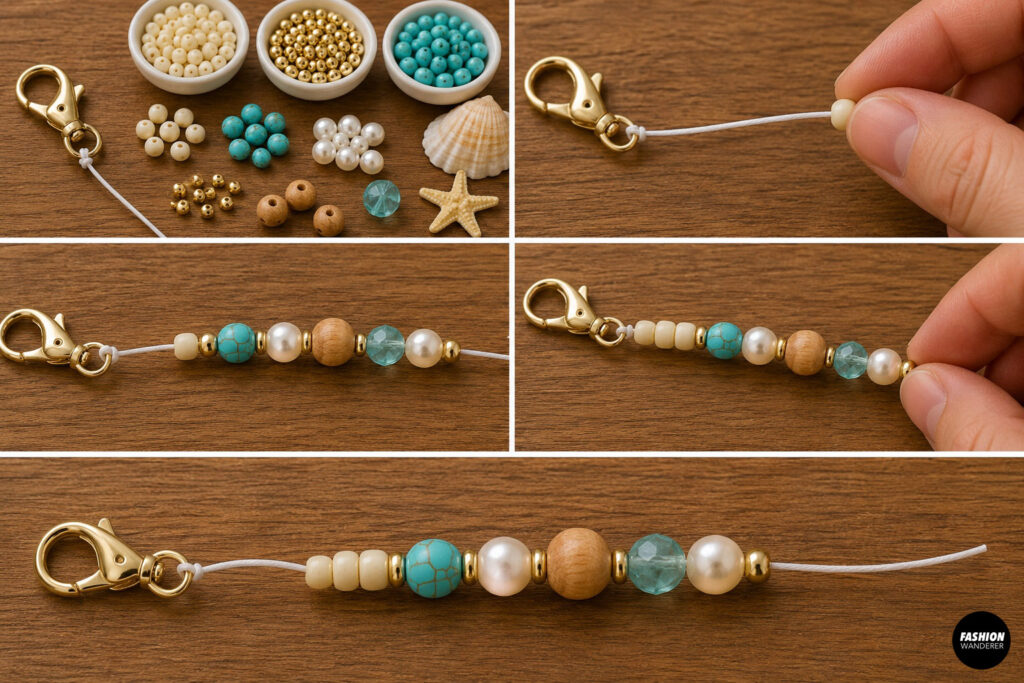
Start threading your written bead pattern onto the cord.
Begin with a smaller bead to help conceal the knot or crimp.
Continue with:
Ivory bead → gold spacer → turquoise bead → pearl → wood bead → aqua bead → pearl → gold spacer.
Slide each bead gently toward the clasp.
Keep the beads close together, but do not pull the cord so tightly that the strand becomes stiff. The finished charm should have enough flexibility to move naturally when hanging from your tote.
Step 5: Continue the Bead Pattern
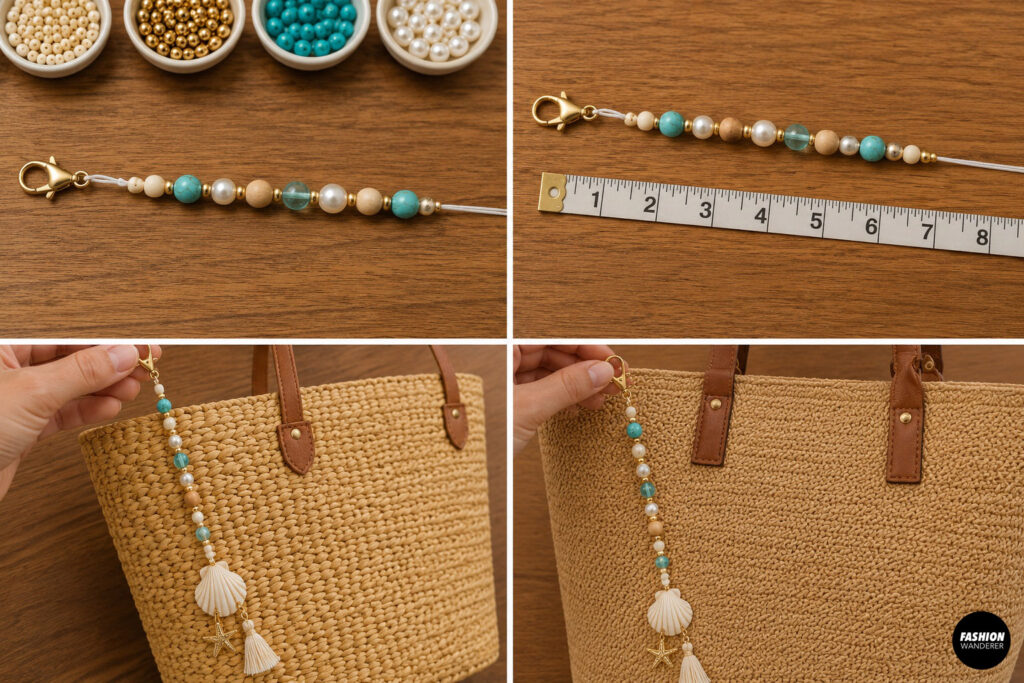
Repeat your chosen sequence until the beaded section measures approximately 5–7 inches.
Periodically hold the charm against your tote bag to check the proportions.
For a small handbag, a 5-inch charm may be enough. For an oversized straw beach tote, a longer 7–8-inch design can create more impact.
Feel free to break up the repeating pattern with a special shell bead or oversized pearl.
Step 6: Add a Statement Bead
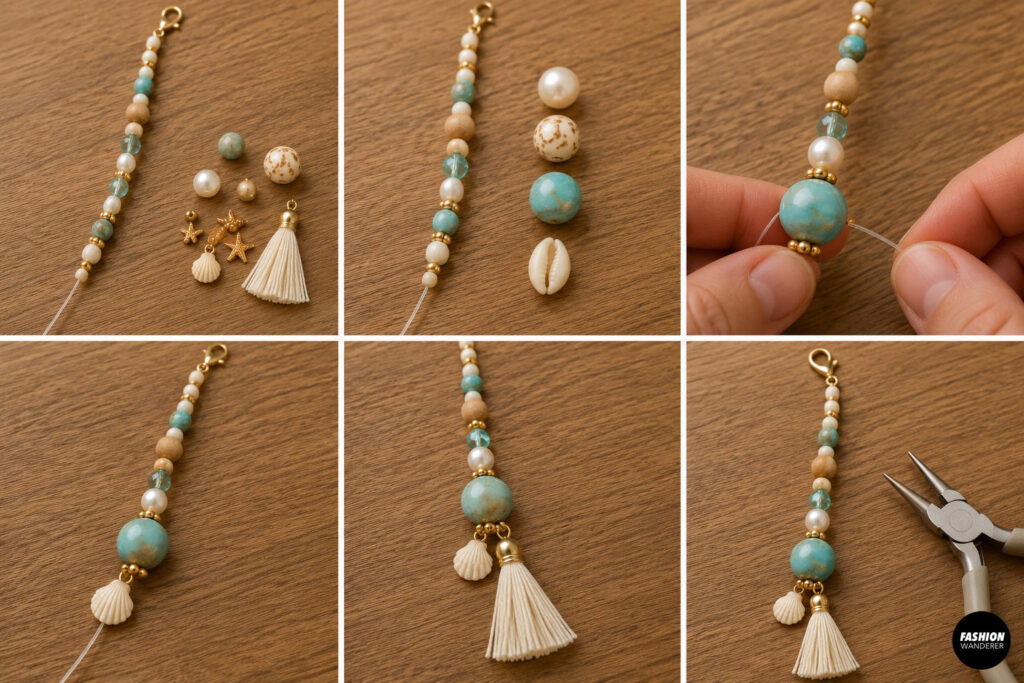
Near the bottom of the charm, add one larger statement bead.
This creates a focal point and gives the charm a professional, intentional finish.
Try a chunky pearl, ceramic bead, hand-painted bead, shell bead, or large turquoise-style bead.
Add one or two small gold spacer beads around the statement bead to frame it.
Step 7: Add the Coastal Charms
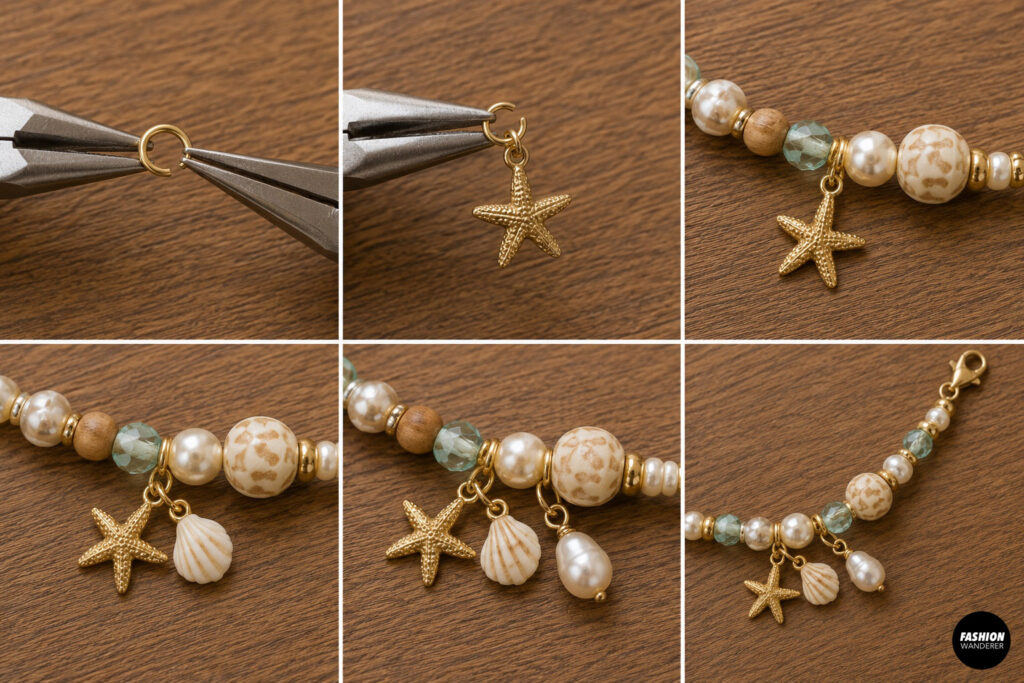
Open a small jump ring using jewelry pliers.
Slide your chosen coastal charm onto the jump ring.
Attach it between two beads or at the bottom of the beaded strand.
Close the jump ring securely.
You can combine two or three lightweight charms, such as a gold starfish, tiny seashell, and pearl drop.
Avoid adding too many heavy charms because they can pull on the cord.
Step 8: Add an Optional Tassel
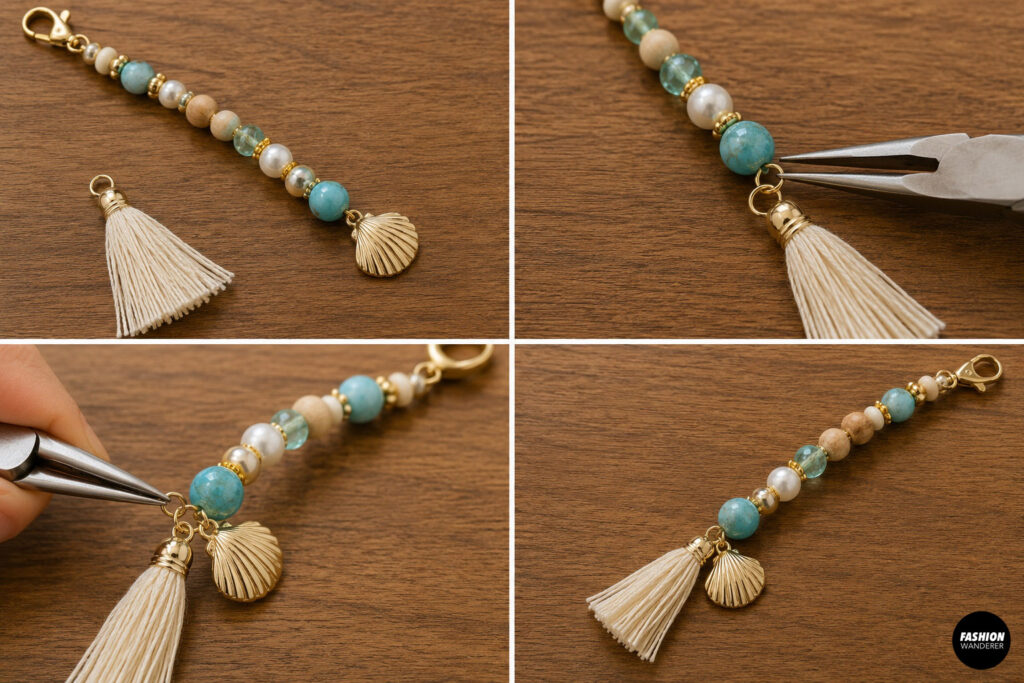
For an extra boho beach look, add a small cotton or thread tassel to the bottom.
Choose cream, turquoise, coral, or another color from your bead palette.
Attach the tassel using a jump ring.
You can also combine a tassel with a seashell charm for a playful layered finish.
Step 9: Secure and Hide the End
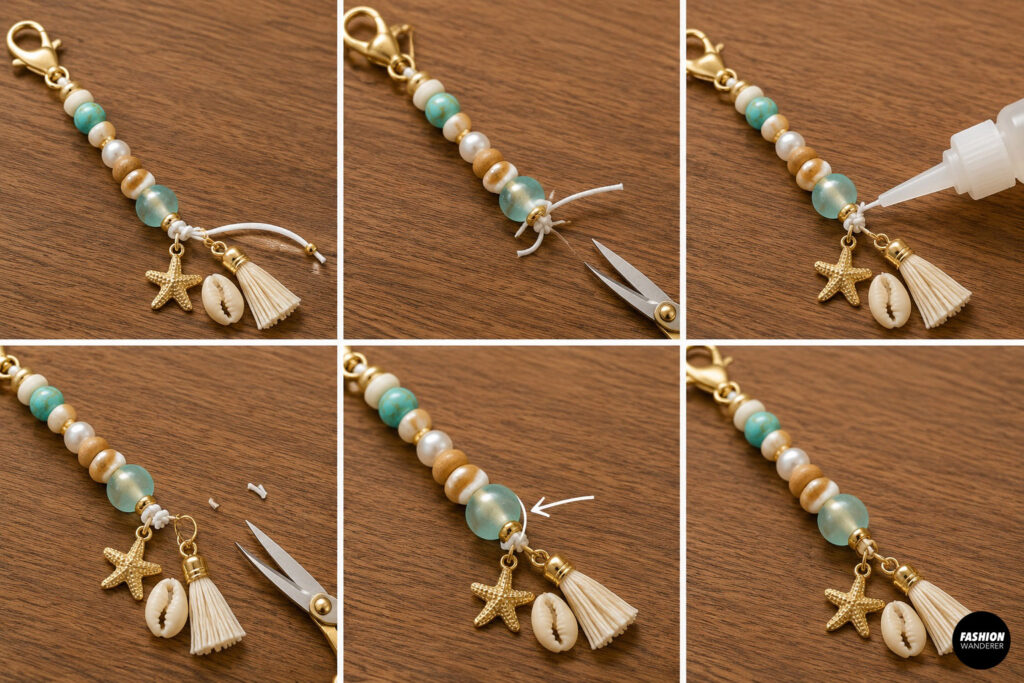
Once you are happy with the length, secure the end of the cord.
Tie a strong double or surgeon’s knot for nylon or elastic cord.
Add a tiny drop of jewelry glue and allow it to dry completely.
Trim the excess cord, leaving a small tail.
If possible, gently slide the knot inside a nearby bead with a larger opening. You can also conceal the knot with a crimp cover for a cleaner finish.
Step 10: Attach the Charm to Your Tote Bag
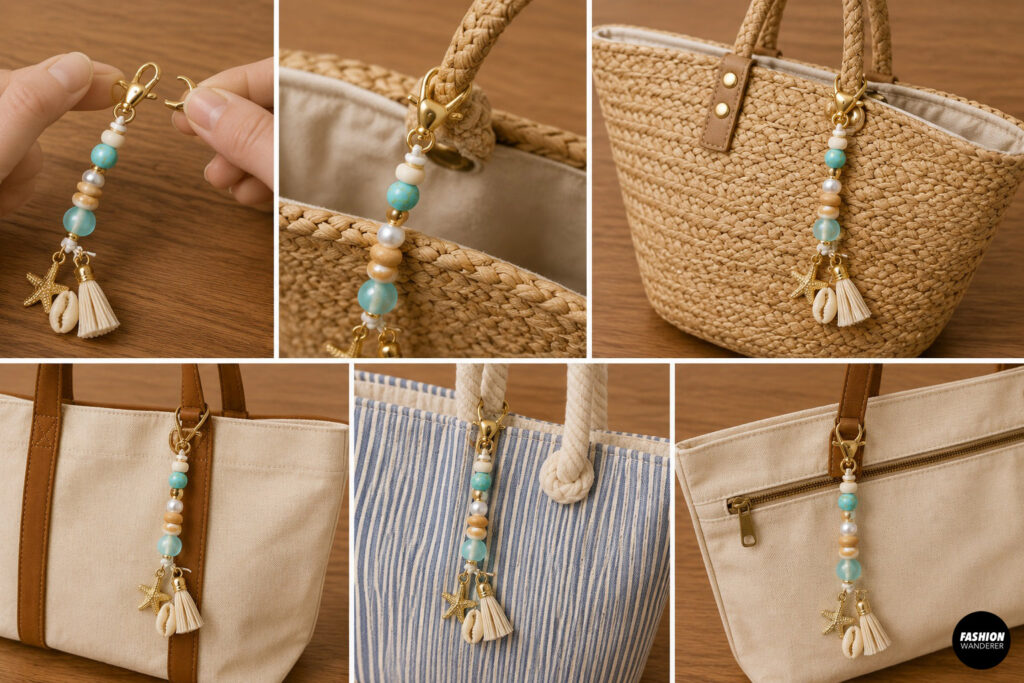
Open the lobster clasp and clip your finished charm onto the handle, strap, or hardware of your favorite tote.
Style it on a woven straw beach bag for a coastal vacation look, or attach it to a simple canvas tote for an instant summer upgrade.
You can even make several interchangeable charms in different color palettes.
For a fun personalized set, make one with turquoise and seashells, another with colorful fruit beads, and a third with pearls and letter beads.
Your handmade coastal beaded tote bag charm is now ready for beach days, summer vacations, farmers markets, and sunny weekend adventures. It’s also a quick and affordable DIY gift idea—especially when paired with a cute straw tote or handmade beach bag.
Final Thoughts
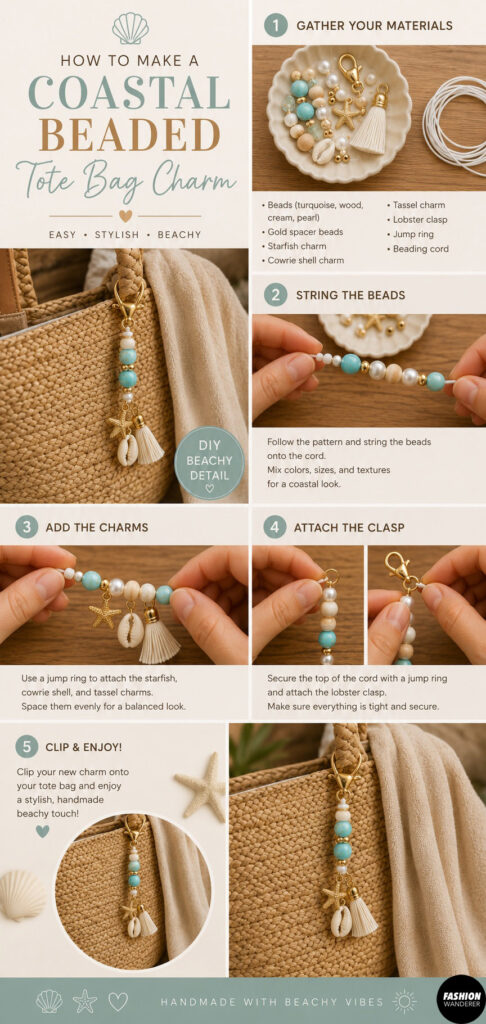
This beginner-friendly tutorial will show you how to make a coastal beaded tote bag charm with detailed step-by-step instructions and an easy written bead pattern. Customize your charm with seashells, starfish, pearls, letter beads, or tassels to create a one-of-a-kind accessory for beach vacations, pool days, summer outfits, or handmade gifts.