
A chunky beaded sunglasses chain is one of the easiest ways to turn an everyday pair of sunglasses into a fun summer accessory. Colorful beads, faux pearls, playful charms, and gold accents can instantly give basic sunglasses a boutique-inspired look while keeping them close at hand during beach days, vacations, festivals, and outdoor adventures.
This beginner-friendly DIY project requires no advanced jewelry-making skills and can usually be completed in less than one hour. You can customize the length, bead colors, and overall style to coordinate with your wardrobe or create personalized handmade gifts for friends.
We got you covered with plenty of inspiration! Here are DIY beaded summer accessories that add style to your beachy outfit ideas!
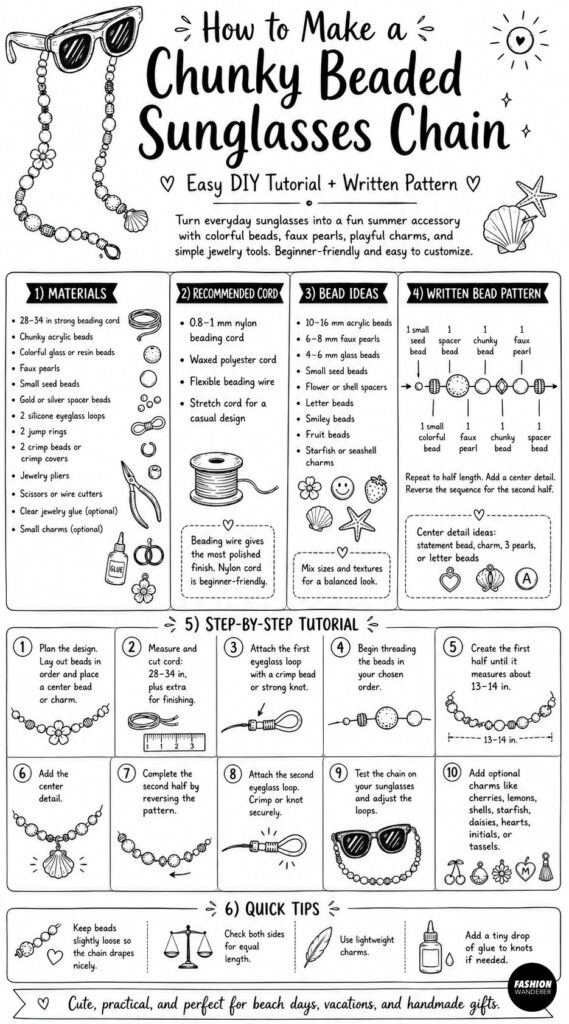
In this tutorial, you will learn how to make a chunky beaded sunglasses chain with detailed step-by-step instructions, a written bead pattern, finishing tips, and creative design ideas.
Skill Level
Beginner
This project is suitable for anyone who can thread beads, tie knots, and use small jewelry pliers.
Finished Size
Approximately 26–30 inches long, not including the eyeglass loops.
A shorter chain creates a necklace-like fit, while a longer chain allows the sunglasses to hang lower on the chest. Measure your preferred length before securing the final end.
Materials
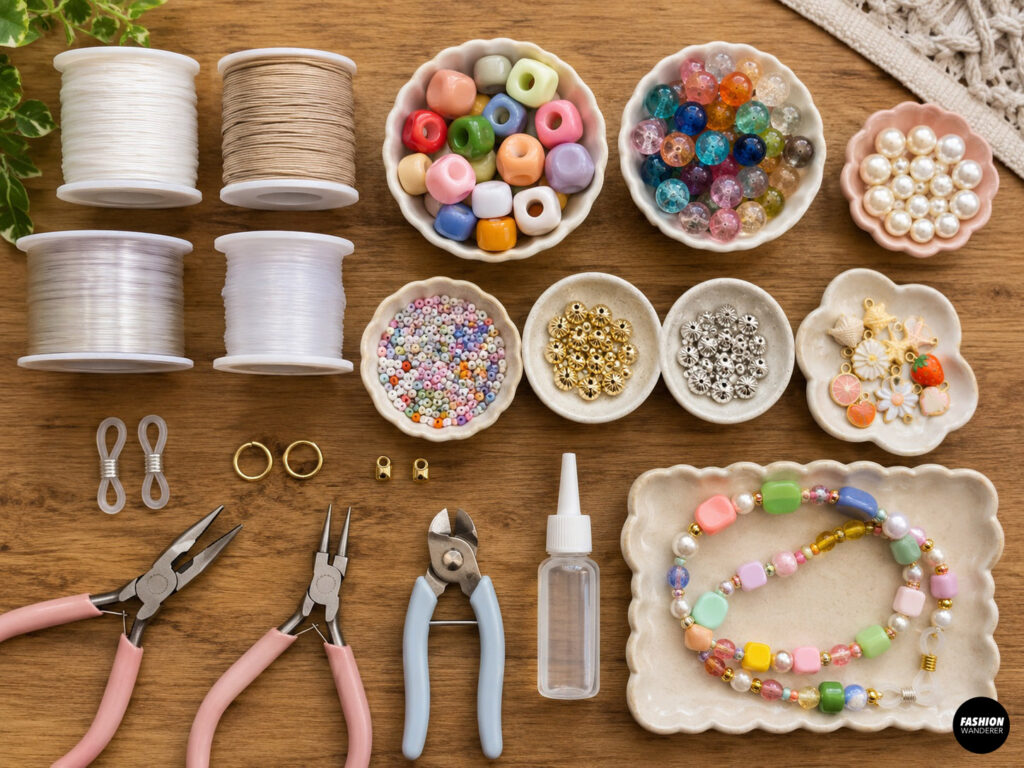
- 28–34 inches of strong beading cord
- Chunky acrylic beads
- Colorful glass or resin beads
- Faux pearls
- Small seed beads
- Gold or silver spacer beads
- Two silicone eyeglass loops
- Two jump rings
- Two crimp beads or crimp covers
- Jewelry pliers
- Scissors or wire cutters
- Clear jewelry glue, optional
- Small charms, optional
Recommended Cord
Choose a strong cord that can support chunky beads without stretching too much.
Good options include:
- 0.8–1 mm nylon beading cord
- Waxed polyester cord
- Flexible beading wire
- Stretch cord for a casual design
Beading wire with crimp beads creates the most polished and durable finish. Nylon cord is easier for complete beginners and can be secured with strong knots.
Choosing Your Beads
The best chunky sunglasses chains use a mixture of bead sizes and textures. Combining oversized acrylic beads with smaller pearls and spacer beads makes the design feel balanced rather than heavy.
Try using:
- 10–16 mm acrylic beads
- 6–8 mm faux pearls
- 4–6 mm glass beads
- Small seed beads
- Gold flower or shell spacers
- Letter beads
- Smiley-face beads
- Fruit beads
- Starfish or seashell charms
For summer, consider coral, turquoise, butter yellow, lime green, lavender, white, and gold.
Written Bead Pattern
This pattern creates a symmetrical chain approximately 28 inches long.
Repeat the following sequence:
- One small seed bead
- One gold spacer bead
- One chunky acrylic bead
- One faux pearl
- One small colorful bead
- One faux pearl
- One chunky acrylic bead
- One gold spacer bead
Repeat this sequence until the chain reaches half of your desired length.
At the center, add:
- One statement bead
- One charm
- Three pearls
- Or a personalized letter-bead section
Then reverse the sequence for the second half so both sides match.
You can also create an intentionally mismatched chain by alternating different colors while keeping the bead sizes balanced.
Step 1: Plan the Design
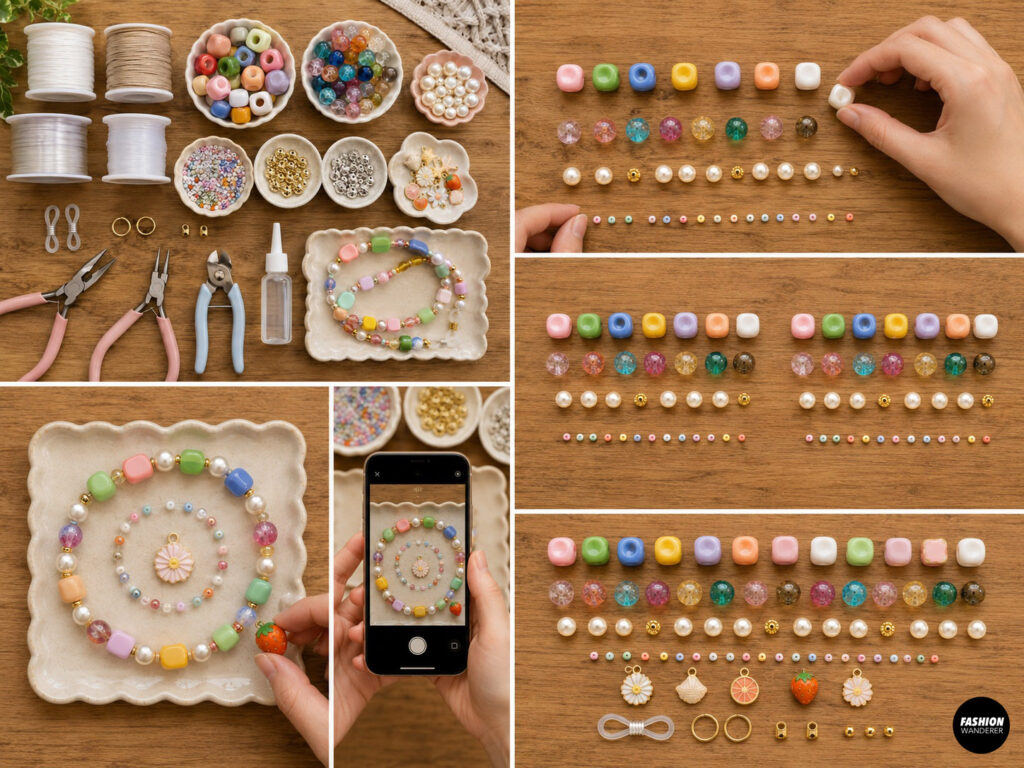
Lay all of your beads on a clean table or bead mat.
Arrange them in the order you want before threading. This step makes it easier to check the color balance and prevents you from repeatedly removing beads later.
Create two matching bead groups if you want a symmetrical design. Place your statement bead or charm in the center.
Take a quick photo of the arrangement so you can refer to it while threading.
Step 2: Measure and Cut the Cord
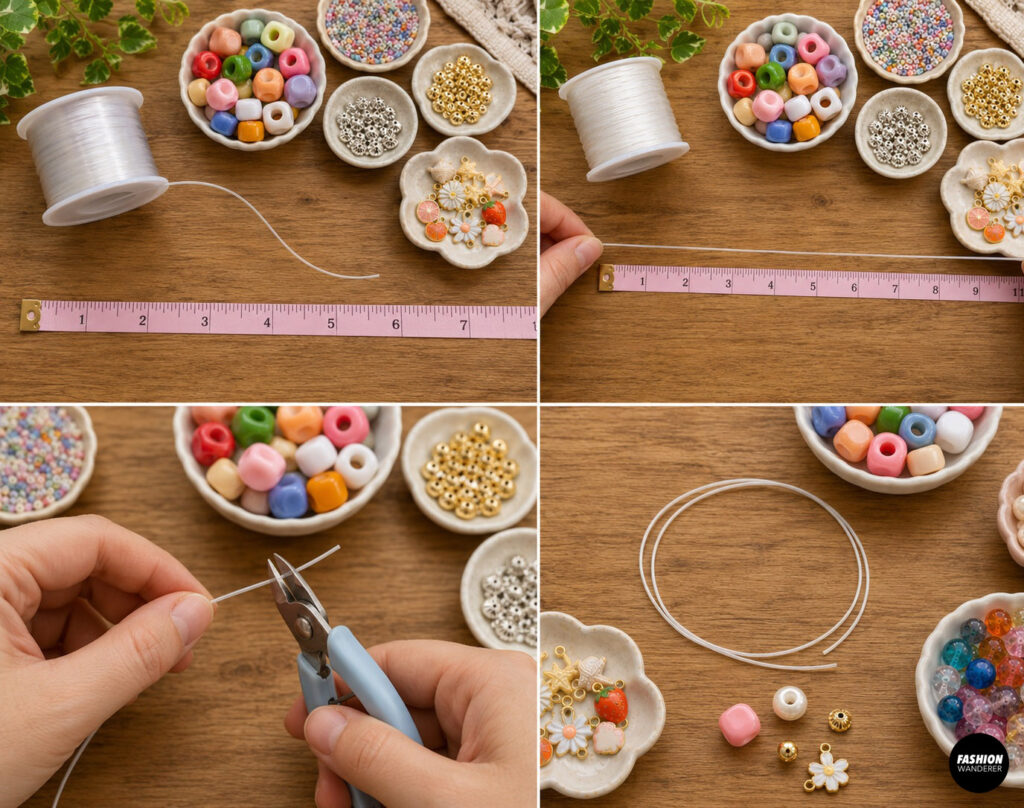
Measure approximately 28–34 inches of beading cord.
Add at least four extra inches to make knotting or crimping easier.
Cut the cord with sharp scissors or wire cutters. Avoid cutting it exactly to the finished measurement because the beads and finishing hardware will reduce the usable length.
Step 3: Attach the First Eyeglass Loop
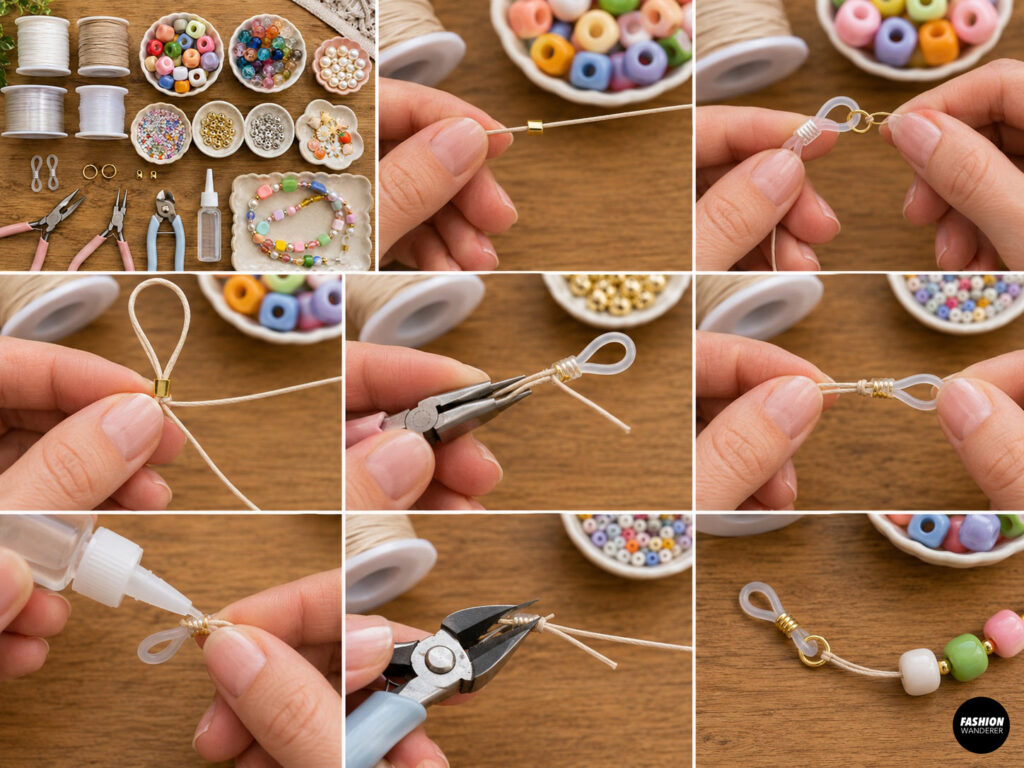
Slide one crimp bead onto the cord.
Thread the cord through a small jump ring or directly through the loop on the silicone eyeglass holder.
Bring the cord back through the crimp bead, creating a small loop.
Use jewelry pliers to flatten the crimp securely.
For nylon cord, tie a double or surgeon’s knot around the eyeglass loop. Add a tiny drop of clear jewelry glue and allow it to dry.
Trim the excess cord, leaving a short tail that can be hidden inside the first few beads.
Step 4: Begin Threading the Beads
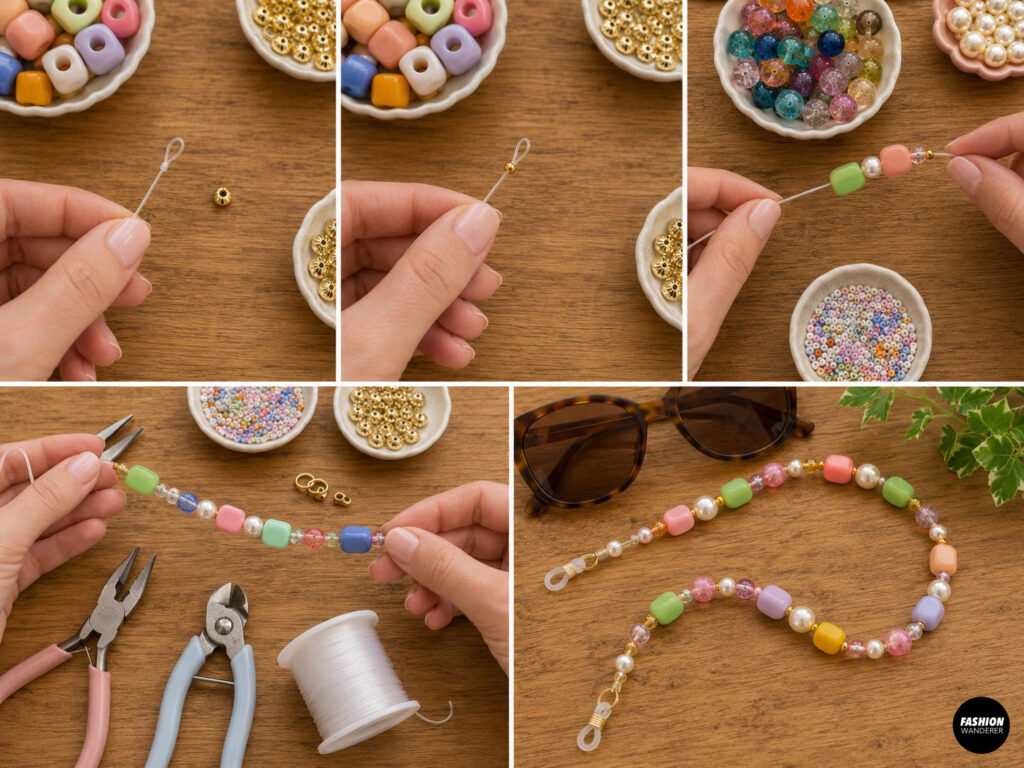
Thread the first bead sequence onto the cord.
Start with one small bead to conceal the crimp or knot. Continue adding the beads in your planned order.
Slide each bead down gently without forcing it. Keep the cord relaxed so the finished chain remains flexible.
Do not pull the beads too tightly together. A small amount of movement helps the chain drape naturally around the neck.
Step 5: Create the First Half
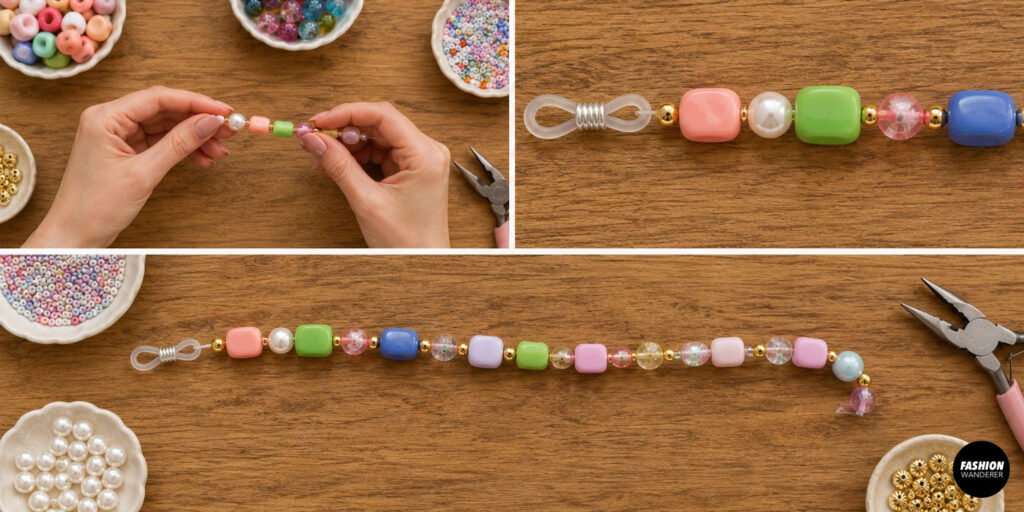
Continue repeating your bead pattern until the chain measures approximately 13–14 inches from the eyeglass loop.
Hold the chain against your neck or place it beside a measuring tape to check the length.
Adjust the sequence by adding or removing beads as needed. Try to finish the first half with the same bead used at the beginning of the second half for a smooth transition.
Step 6: Add the Center Detail
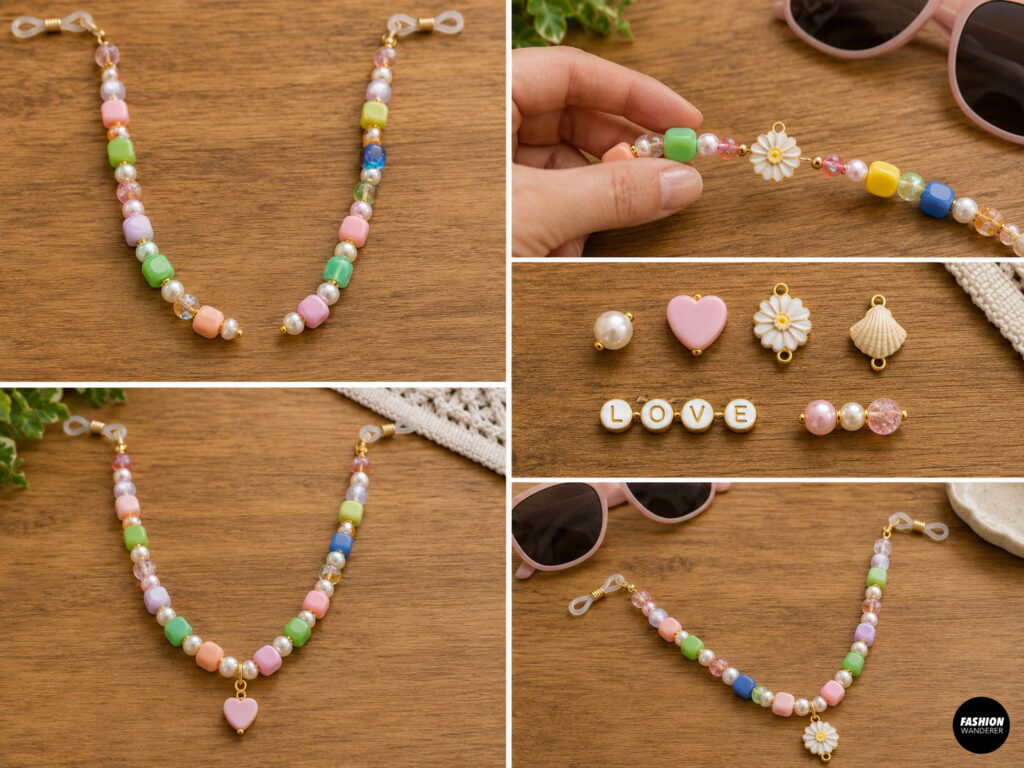
Thread one larger statement bead at the center of the chain.
Other center ideas include:
- A freshwater pearl
- A heart bead
- A daisy bead
- A shell charm
- A short name made with letter beads
- A group of three coordinating beads
The center detail will rest at the lowest point when the sunglasses chain is worn like a necklace.
Step 7: Complete the Second Half
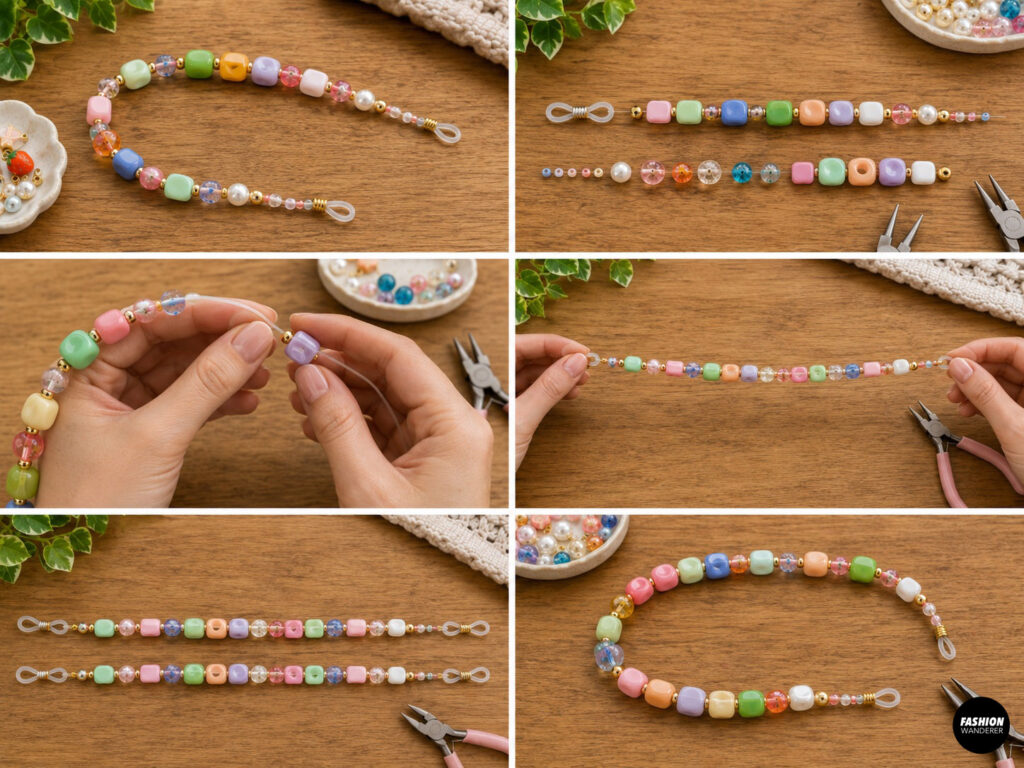
Reverse the original bead pattern to create a symmetrical design.
For example, if the first half ends with a pearl, spacer, and blue bead, begin the second half with a blue bead, spacer, and pearl.
Continue until both sides are equal in length.
Lay the chain flat and compare the two halves before attaching the second eyeglass loop.
Step 8: Attach the Second Eyeglass Loop
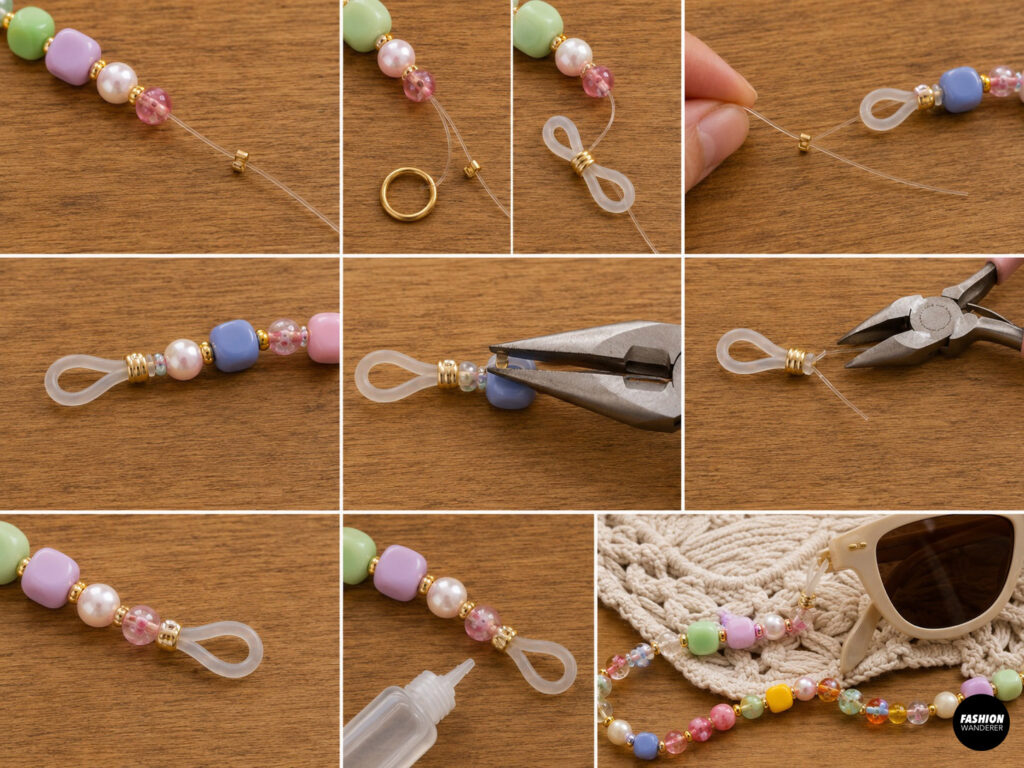
Slide a crimp bead onto the cord.
Thread the cord through the second jump ring or eyeglass loop, then pass it back through the crimp bead.
Pull gently until the beads sit comfortably together without gaps.
Flatten the crimp firmly with jewelry pliers.
Trim the excess cord and hide the short end inside the nearby beads.
For nylon cord, tie a strong double knot, add jewelry glue, and trim once dry.
Step 9: Test the Sunglasses Chain
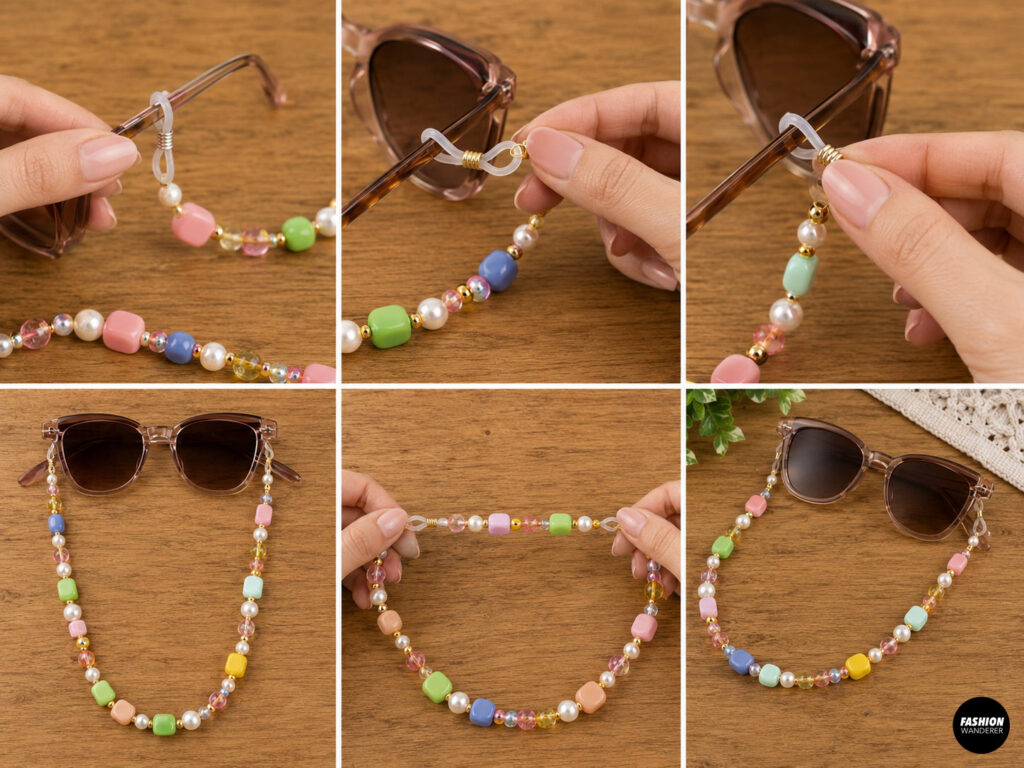
Slide the silicone loops onto the arms of your sunglasses.
Move the adjustable metal coils or rubber sliders so the loops grip the frames securely.
Put the sunglasses on, then allow them to hang around your neck. Check that the chain feels balanced and is not pulling on one side.
Test the strength by gently tugging each end.
Step 10: Add Optional Charms
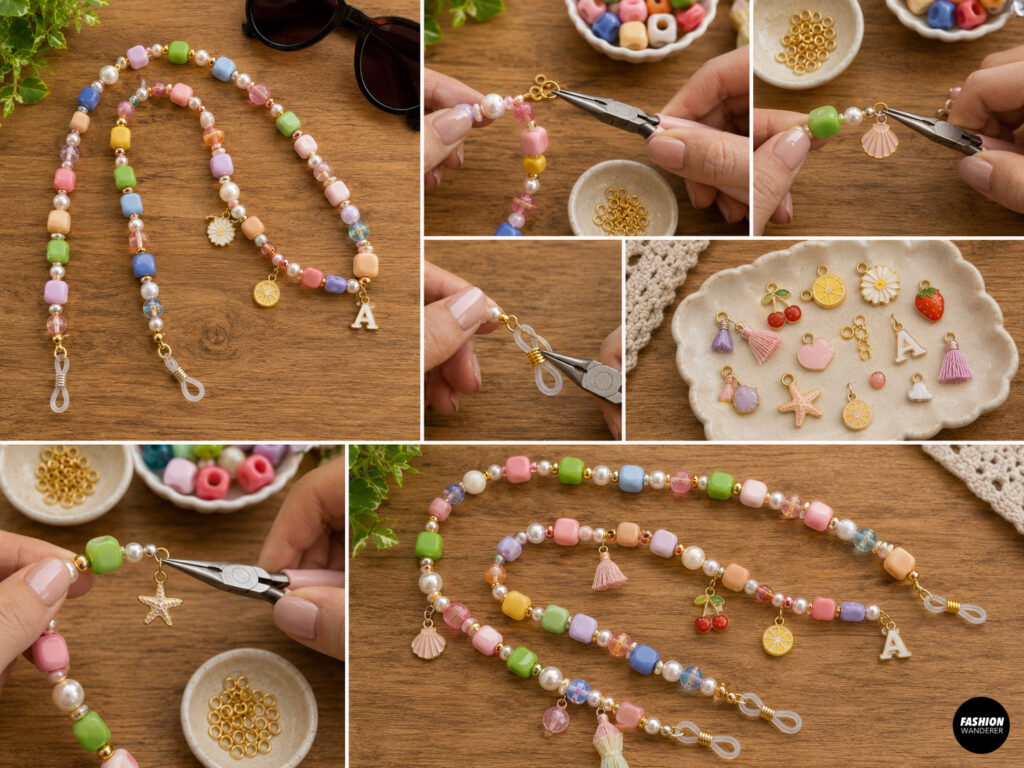
Use jump rings to attach small charms between beads or near the eyeglass loops.
Cute summer options include:
- Cherries
- Lemons
- Seashells
- Starfish
- Daisies
- Hearts
- Initials
- Tiny tassels
Keep charms lightweight so they do not make the chain uncomfortable.
Styling Ideas
Pair a colorful chunky beaded sunglasses chain with a linen dress, crochet top, denim shorts, or swimsuit cover-up. Pearl and gold combinations create an elegant coastal look, while bright acrylic beads feel playful and festival-ready.
The chain can also double as a necklace when the sunglasses are removed. Simply connect the silicone loops together behind the neck or replace them with a lobster clasp for a convertible design.
Final Thoughts
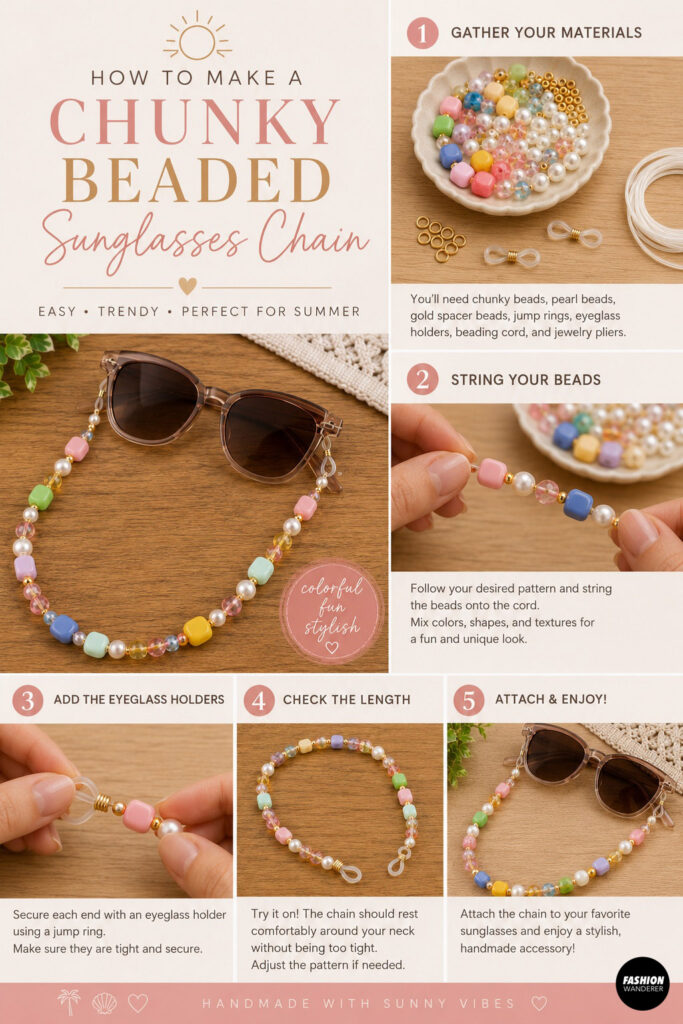
Making a DIY chunky beaded sunglasses chain is a quick and satisfying way to create a personalized summer accessory. The project is affordable, beginner-friendly, and easy to customize with different colors, charms, pearls, and statement beads.
Once you learn the basic construction, you can make coordinating phone wristlets, bracelets, anklets, and bag charms using the same bead collection. Whether you choose soft coastal neutrals or bold rainbow colors, your handmade sunglasses chain will add a stylish finishing touch to every sunny-day outfit.