
Bright, playful, and packed with personality, a Summer Fruit Beaded Charm Bracelet Stack is the perfect handmade accessory for sunny days. Inspired by strawberries, lemons, cherries, watermelons, oranges, and colorful tropical fruit, this cheerful bracelet set adds a fun pop of color to beach outfits, vacation looks, festival style, and everyday summer clothing.
The best part is that you do not need advanced jewelry-making skills to create your own bracelet stack. With colorful beads, elastic cord, fruit charms, and a few simple tools, you can make a coordinated set in about one hour. Each bracelet can have its own fruity theme, or you can mix several colors and charms together for a playful mismatched look.
Bring on the beachy vibes! These fun DIY summer beaded accessories are the perfect way to add a splash of color and personality to your sunny-day outfits.
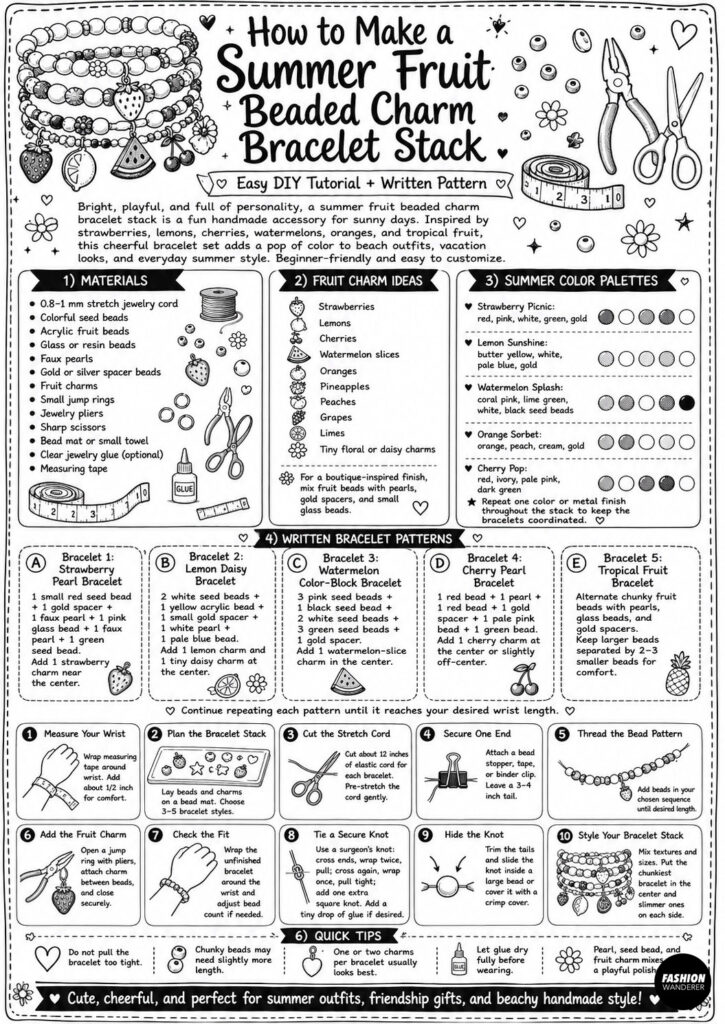
In this beginner-friendly tutorial, you will learn how to make a Summer Fruit Beaded Charm Bracelet Stack with detailed step-by-step instructions, sizing tips, finishing techniques, and easy written bead patterns.
Skill Level
Beginner
This project is ideal for anyone who can thread beads and tie a secure knot. Jewelry pliers are only needed when attaching charms with jump rings.
Finished Size
The finished bracelets fit an average adult wrist measuring approximately 6–7 inches.
To customize the size:
- Measure around your wrist.
- Add approximately ½ inch for a fitted bracelet.
- Add ¾–1 inch for a looser fit.
Children’s bracelets will require fewer beads and should always be used with adult supervision because small beads can be a choking hazard.
Materials
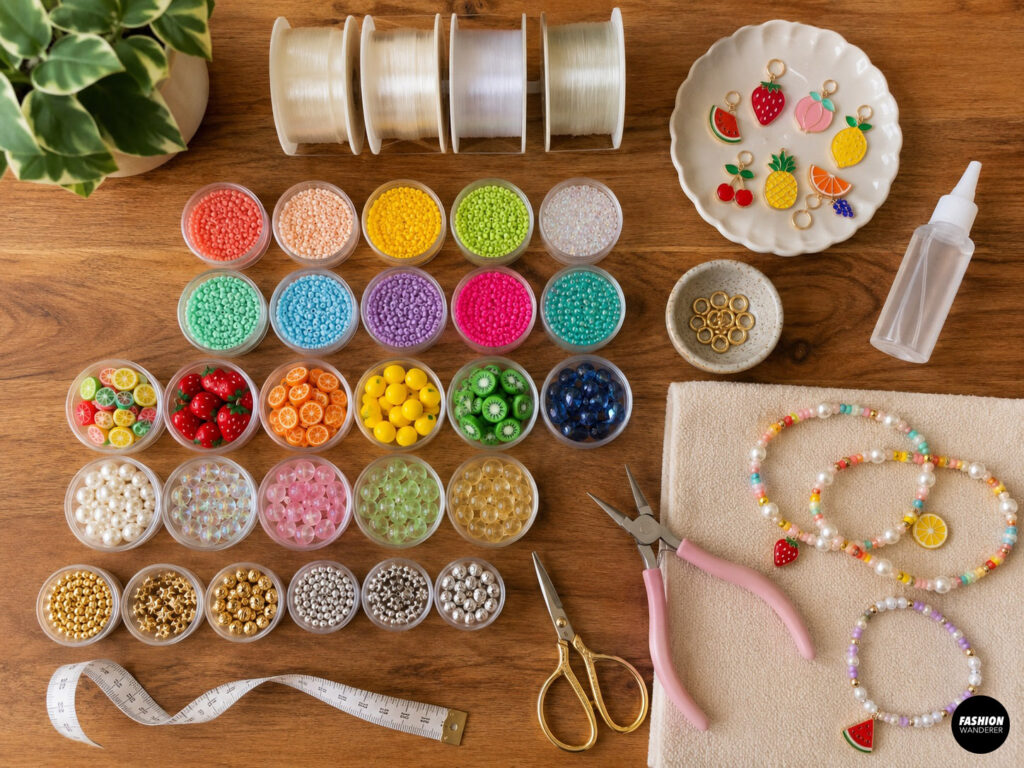
- 0.8–1 mm stretch jewelry cord
- Colorful seed beads
- Acrylic fruit beads
- Glass or resin beads
- Faux pearls
- Gold or silver spacer beads
- Fruit charms
- Small jump rings
- Jewelry pliers
- Sharp scissors
- Bead mat or small towel
- Clear jewelry glue, optional
- Measuring tape
Fruit Charm Ideas
Choose charms and beads that match your favorite summer fruit theme.
Popular options include:
- Strawberries
- Lemons
- Cherries
- Watermelon slices
- Oranges
- Pineapples
- Peaches
- Grapes
- Limes
- Tiny floral or daisy charms
For a boutique-inspired finish, combine playful fruit beads with pearls, gold spacers, and small glass beads.
Summer Color Palettes
Try one of these stylish combinations:
Strawberry Picnic: red, pink, white, green, and gold
Lemon Sunshine: butter yellow, white, pale blue, and gold
Watermelon Splash: coral pink, lime green, white, and black seed beads
Orange Sorbet: orange, peach, cream, and gold
Cherry Pop: red, ivory, pale pink, and dark green
You can make each bracelet a different fruit theme while repeating one color or metal finish throughout the stack to keep the collection coordinated.
Written Bracelet Patterns
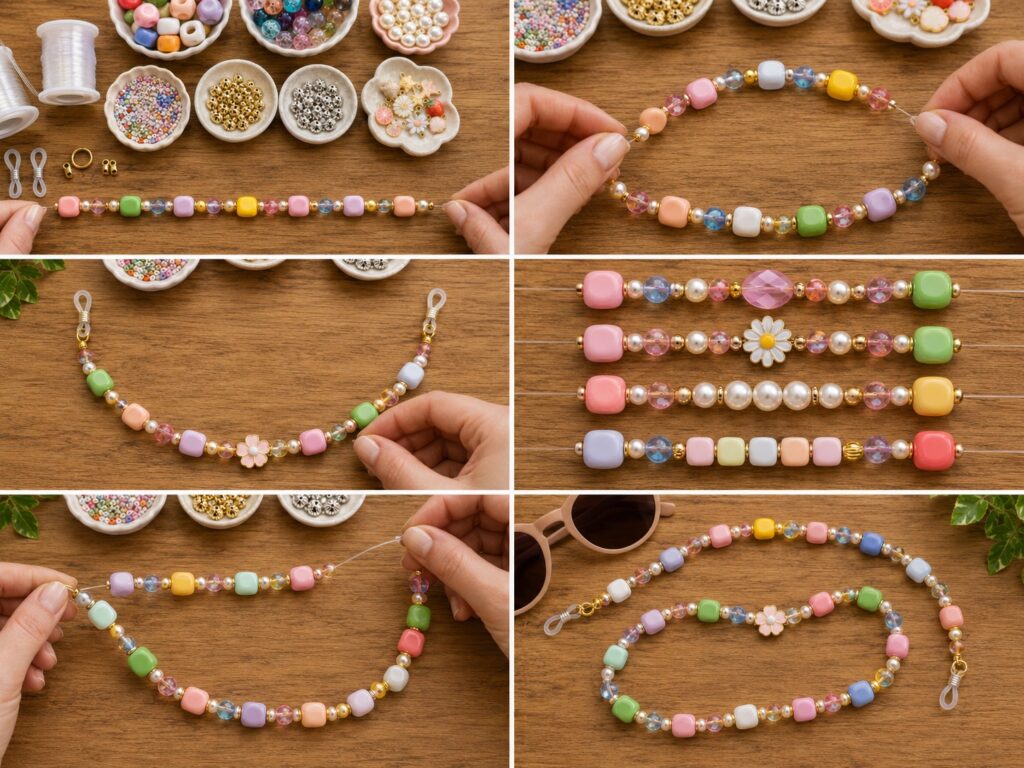
The number of beads needed depends on bead size and wrist measurement. Lay the pattern beside a measuring tape and continue repeating until it reaches your desired length.
Bracelet 1: Strawberry Pearl Bracelet
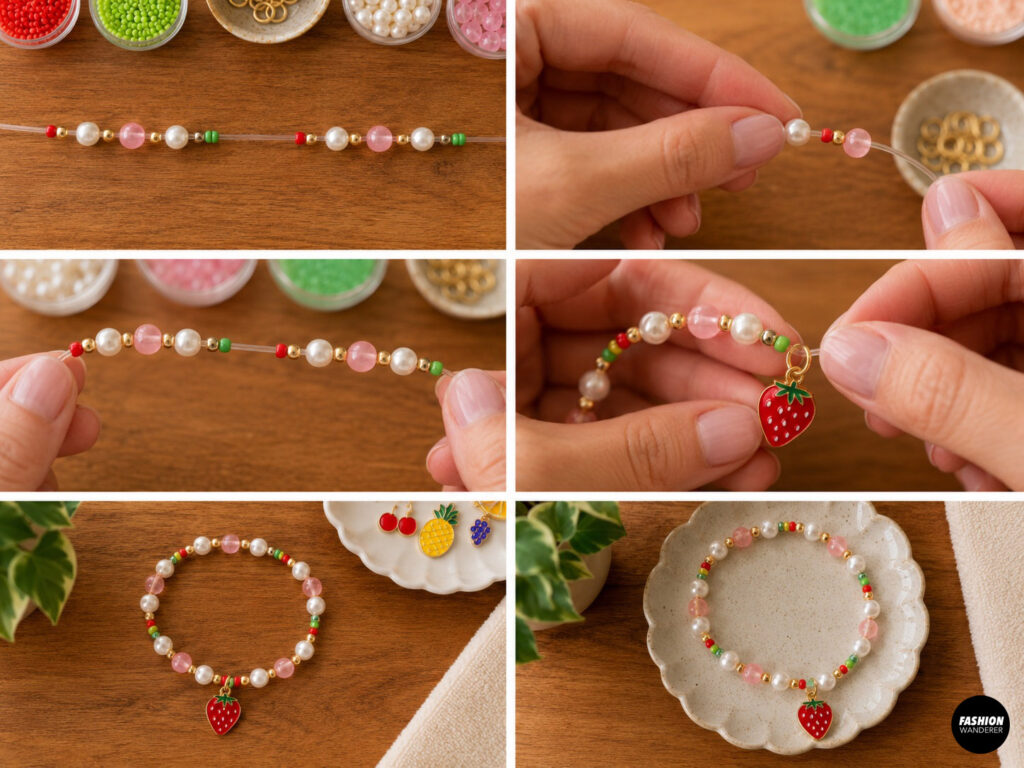
Repeat:
- One small red seed bead
- One gold spacer bead
- One faux pearl
- One pink glass bead
- One faux pearl
- One green seed bead
Add one strawberry charm near the center.
Bracelet 2: Lemon Daisy Bracelet
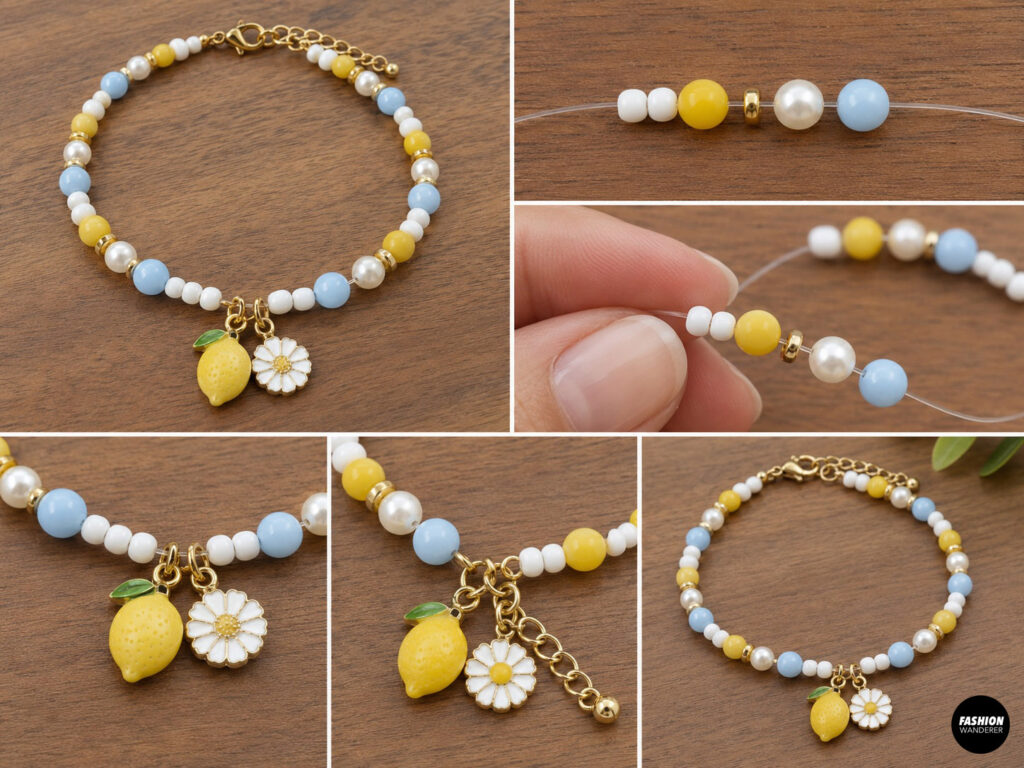
Repeat:
- Two white seed beads
- One yellow acrylic bead
- One small gold spacer
- One white pearl
- One pale blue bead
Add one lemon charm and one tiny daisy charm at the center.
Bracelet 3: Watermelon Color-Block Bracelet
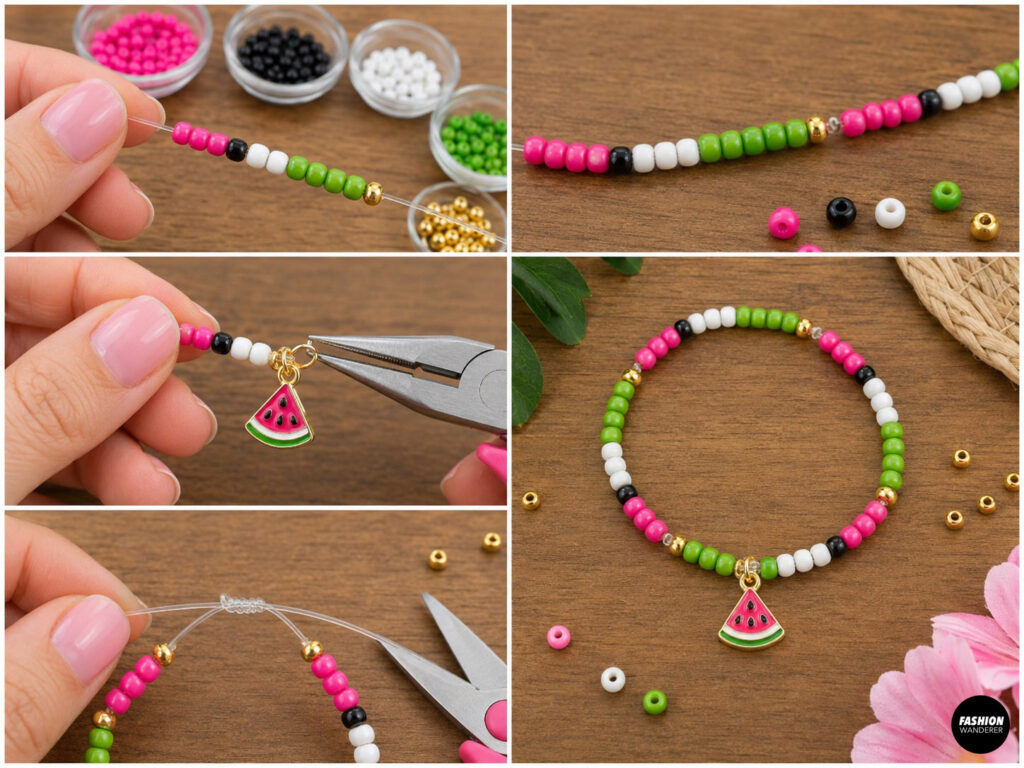
Repeat:
- Three pink seed beads
- One black seed bead
- Two white seed beads
- Three green seed beads
- One gold spacer
Add one watermelon-slice charm in the center.
Bracelet 4: Cherry Pearl Bracelet
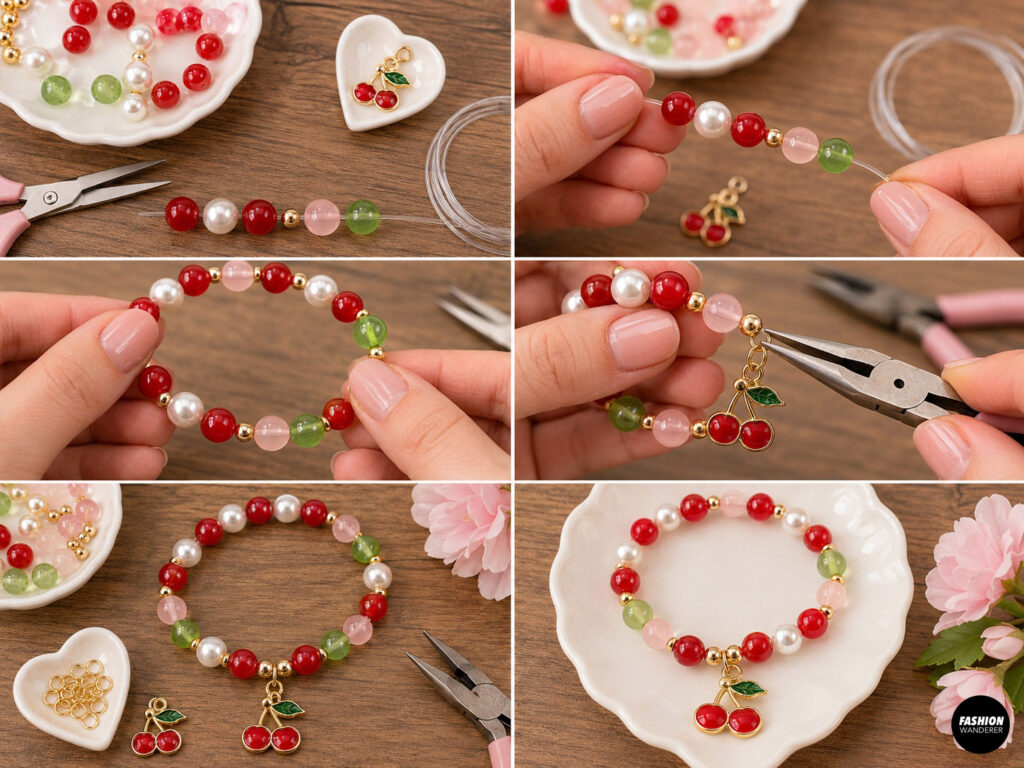
Repeat:
- One red bead
- One pearl
- One red bead
- One gold spacer
- One pale pink bead
- One green bead
Add one cherry charm to the center or slightly off-center.
Bracelet 5: Tropical Fruit Bracelet
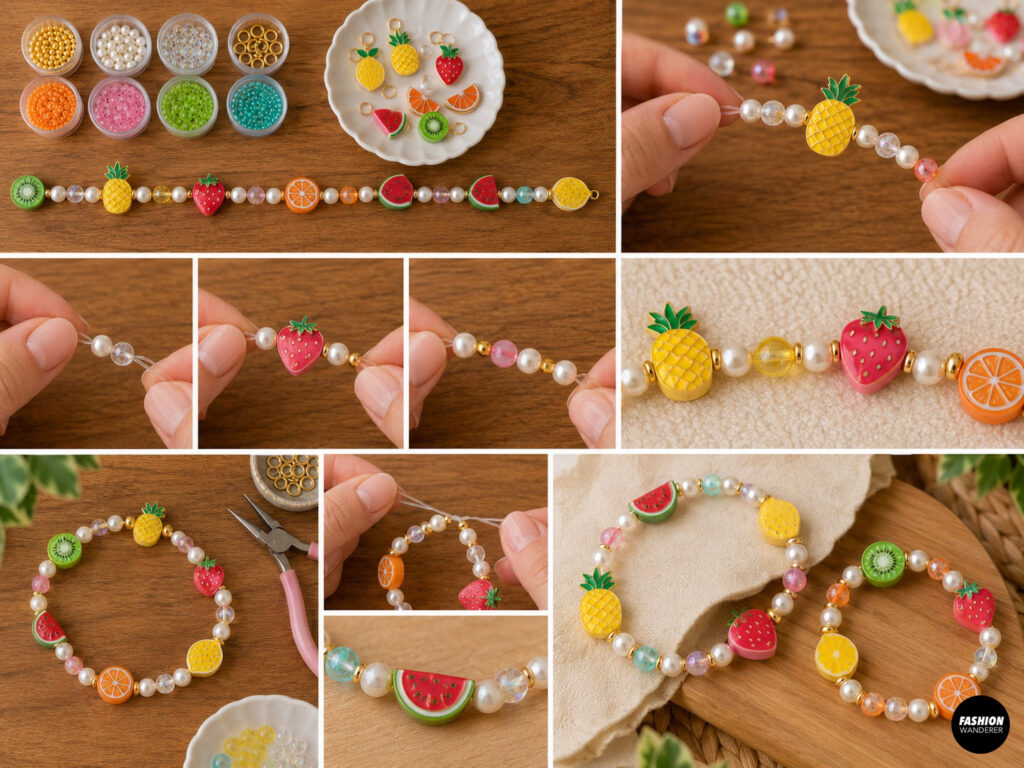
Alternate chunky fruit beads with pearls, glass beads, and gold spacers. Keep the larger beads separated by two or three smaller beads so the bracelet remains comfortable.
Step 1: Measure Your Wrist
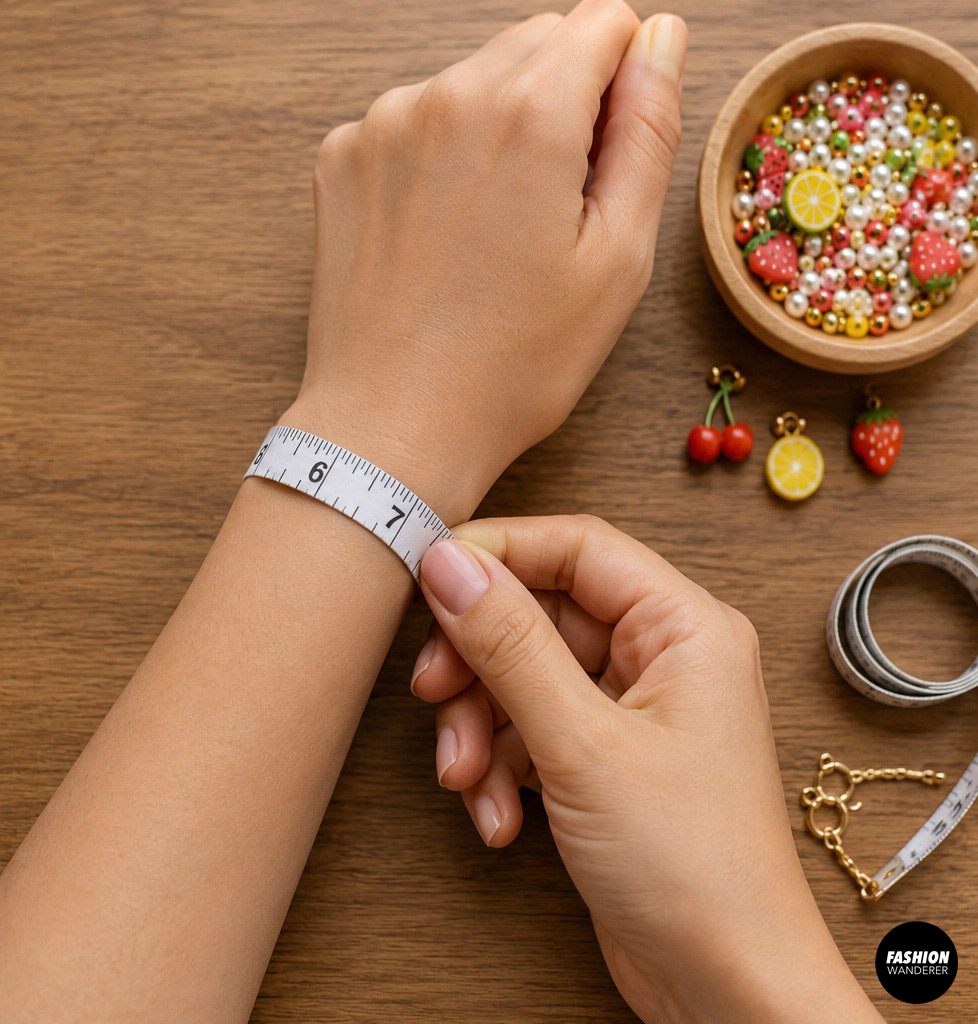
Wrap a flexible measuring tape around the widest part of your wrist.
Do not pull it too tightly. Add approximately ½ inch for comfort.
Write down the finished measurement for each bracelet. Bracelets in a stack can vary slightly in size so they sit naturally instead of forming one tight group.
Step 2: Plan the Bracelet Stack
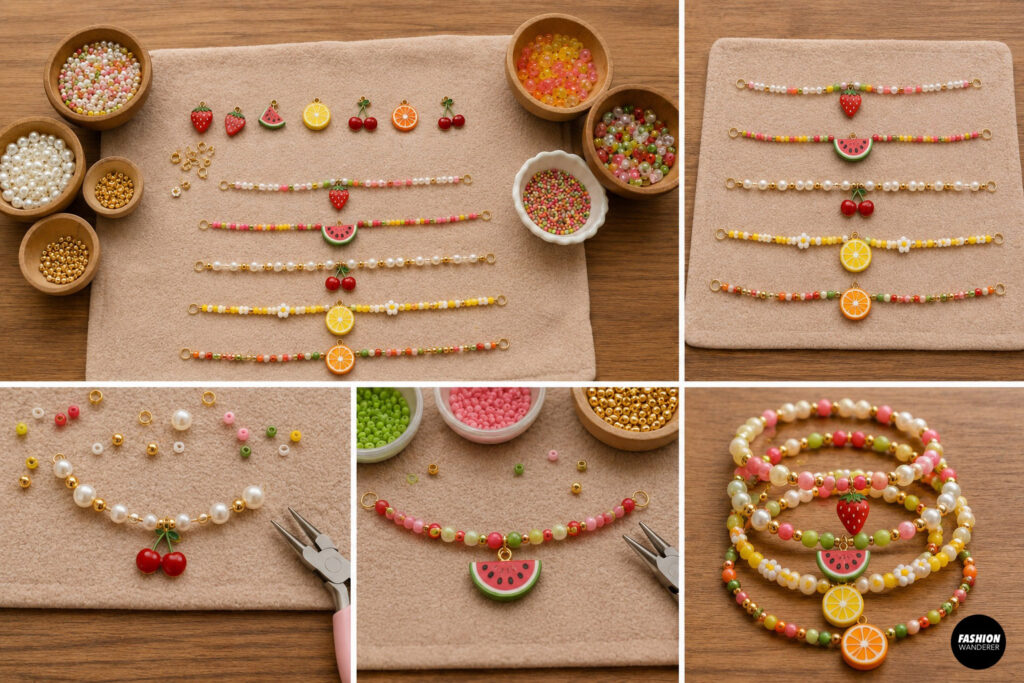
Lay your beads and charms on a bead mat or folded towel.
Choose three to five bracelet designs. A stylish stack usually includes:
- One pearl bracelet
- One colorful seed-bead bracelet
- One bracelet with chunky fruit beads
- One delicate charm bracelet
- One simple gold-accent bracelet
Arrange each bead pattern before cutting the cord. This lets you adjust the colors and spacing without repeatedly removing beads.
Step 3: Cut the Stretch Cord
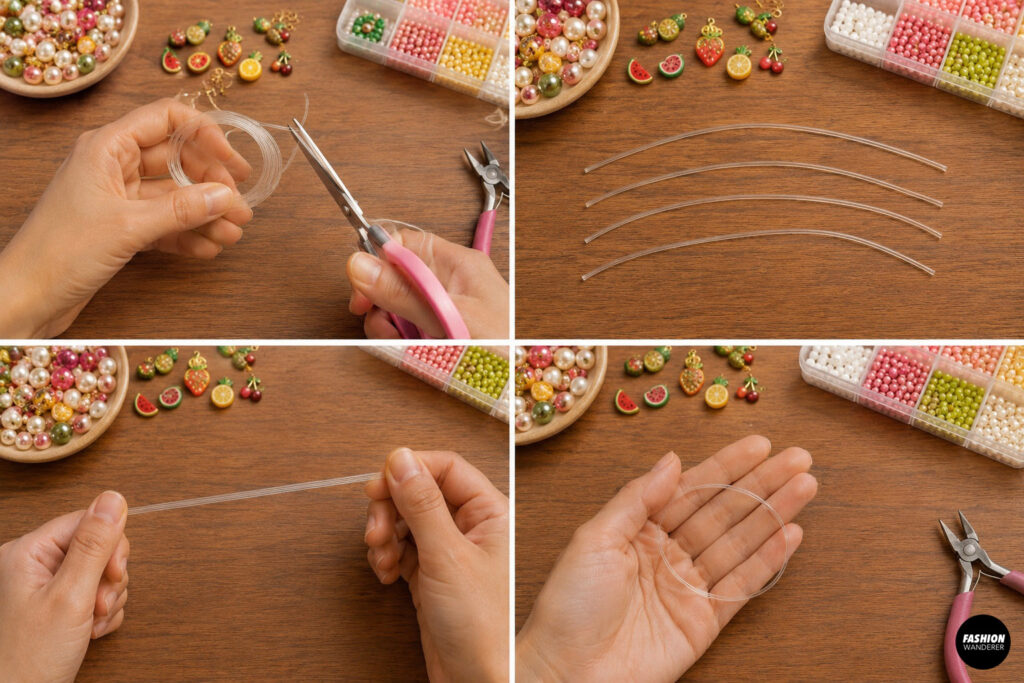
Cut a piece of elastic cord approximately 12 inches long for each bracelet.
The extra length makes threading and tying easier.
Before adding beads, gently stretch the cord several times. This pre-stretches the elastic and reduces the chance of the finished bracelet becoming loose after wear.
Step 4: Secure One End
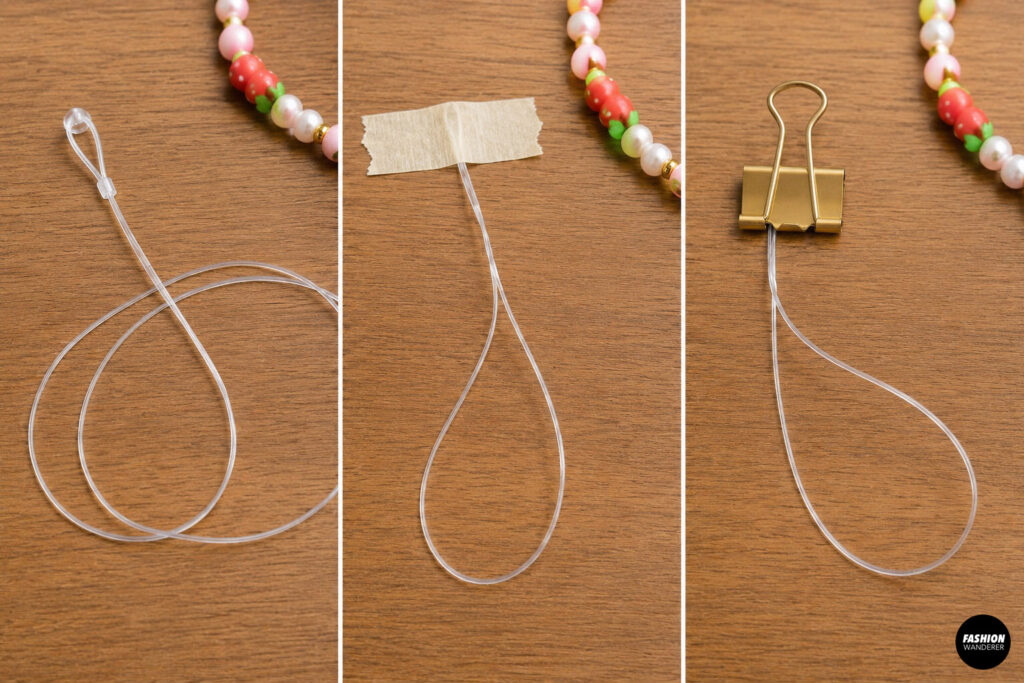
Attach a bead stopper to one end of the cord.
If you do not have a bead stopper, use a small piece of masking tape or a binder clip. Leave a 3–4 inch tail for tying the final knot.
Step 5: Thread the Bead Pattern
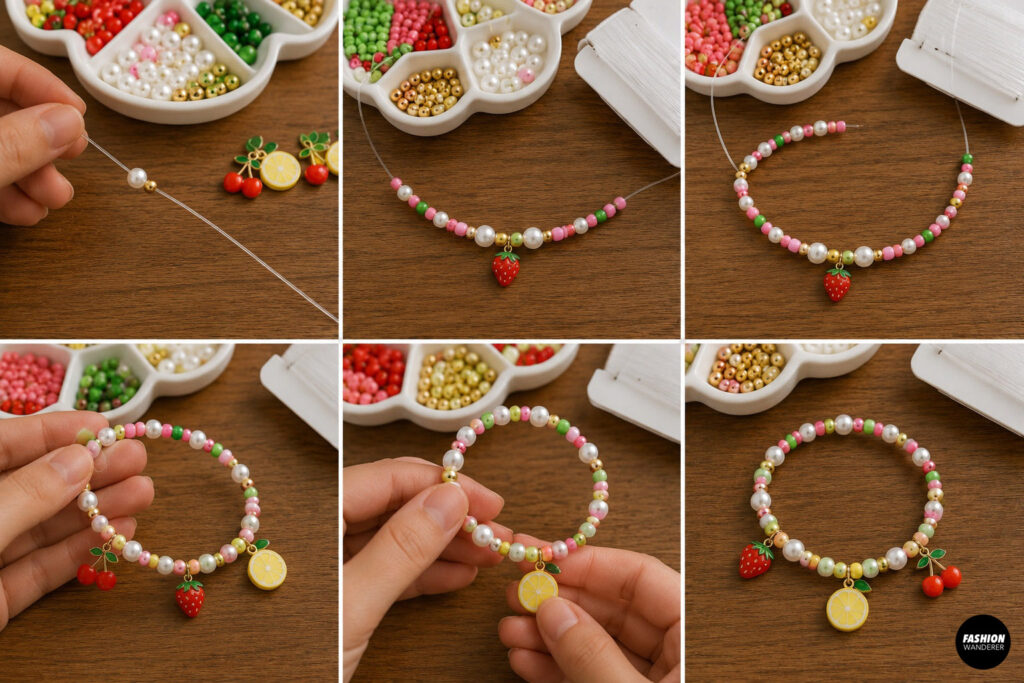
Begin threading the beads in your chosen sequence.
Slide each bead down the cord gently. Continue repeating the pattern until the bracelet reaches your measured length.
Check the arrangement every few inches. Make sure larger fruit beads are balanced and that charms will sit where you want them.
Avoid overloading the bracelet with heavy charms. One or two charms per bracelet usually looks polished and feels comfortable.
Step 6: Add the Fruit Charm
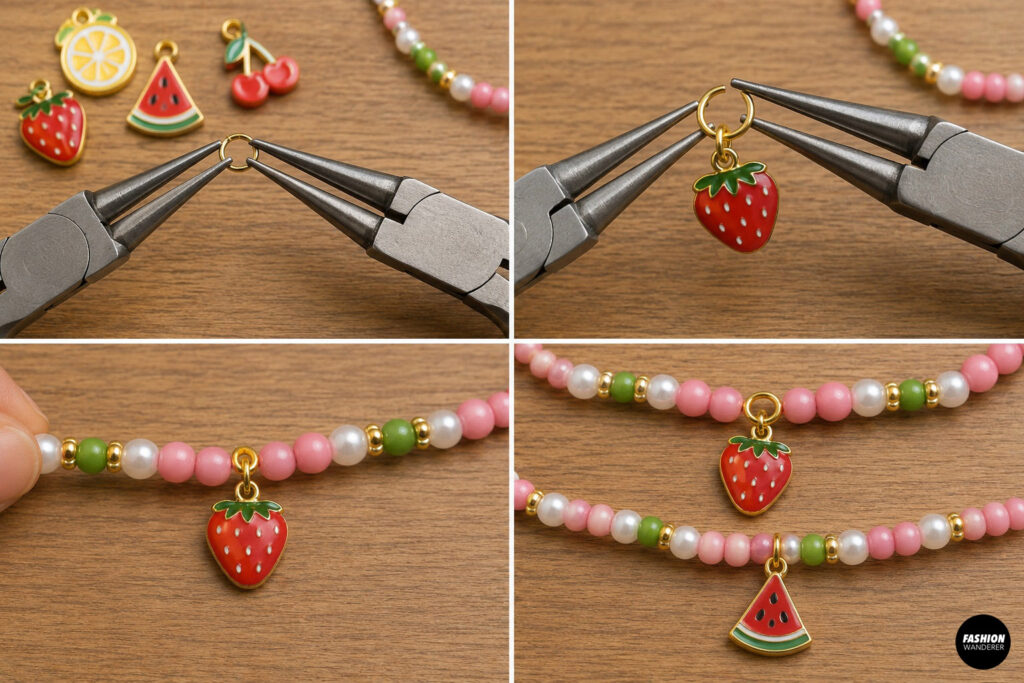
Open a small jump ring with two jewelry pliers by twisting the ends sideways.
Do not pull the ring apart because this can distort its shape.
Slide the fruit charm onto the ring, then attach it around the elastic cord between two beads. Twist the jump ring closed securely.
Another option is to thread a charm with a built-in loop directly onto the cord.
Step 7: Check the Fit
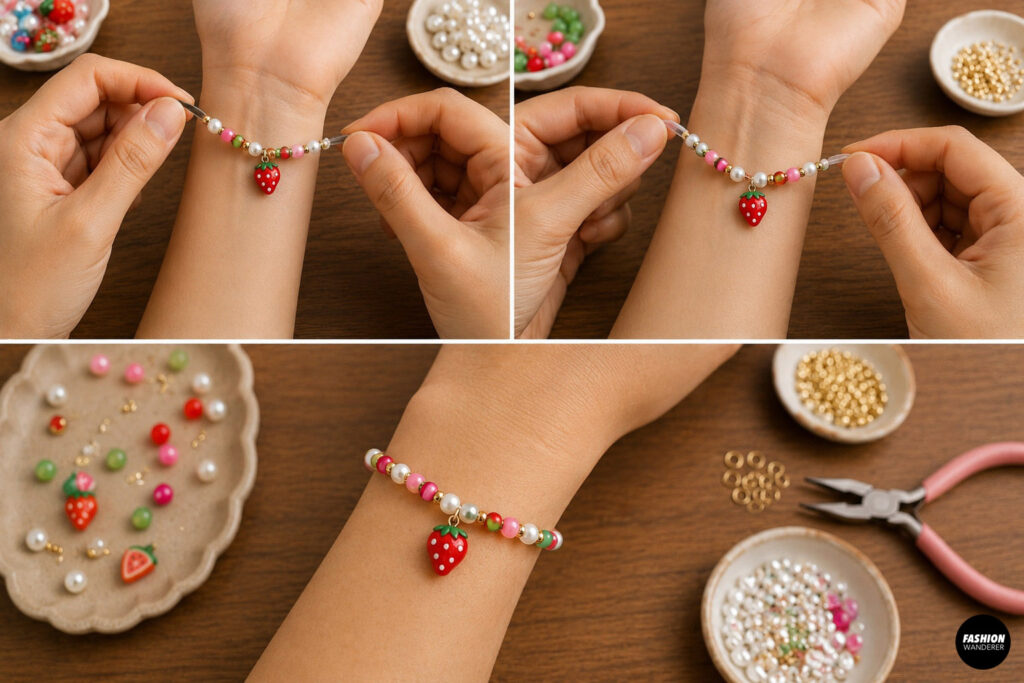
Carefully wrap the unfinished bracelet around your wrist while holding both cord ends.
The beads should meet without a large gap, but the bracelet should not feel tight.
Add or remove beads until the fit feels comfortable. Remember that chunky beads may require slightly more length than small seed beads.
Step 8: Tie a Secure Knot
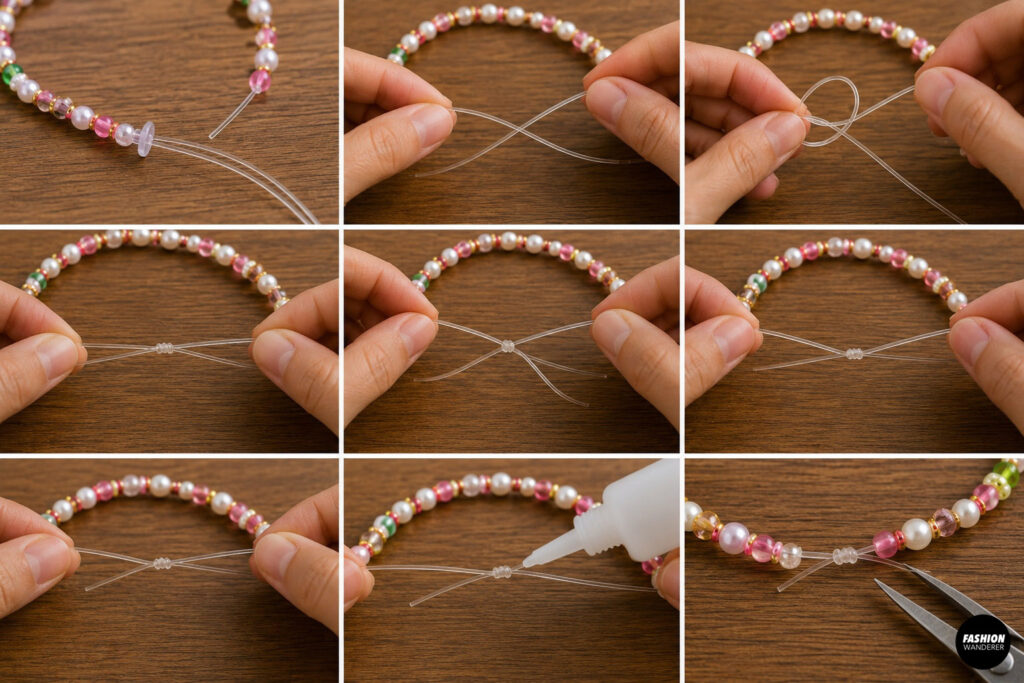
Remove the bead stopper.
Tie the two cord ends together using a surgeon’s knot:
- Cross the ends and wrap one end around twice.
- Pull gently.
- Cross the ends again.
- Wrap once and pull tightly.
Add one additional square knot for extra security.
Apply a tiny drop of clear jewelry glue to the knot if desired. Allow the glue to dry completely.
Do not use too much glue because it can make the elastic stiff.
Step 9: Hide the Knot
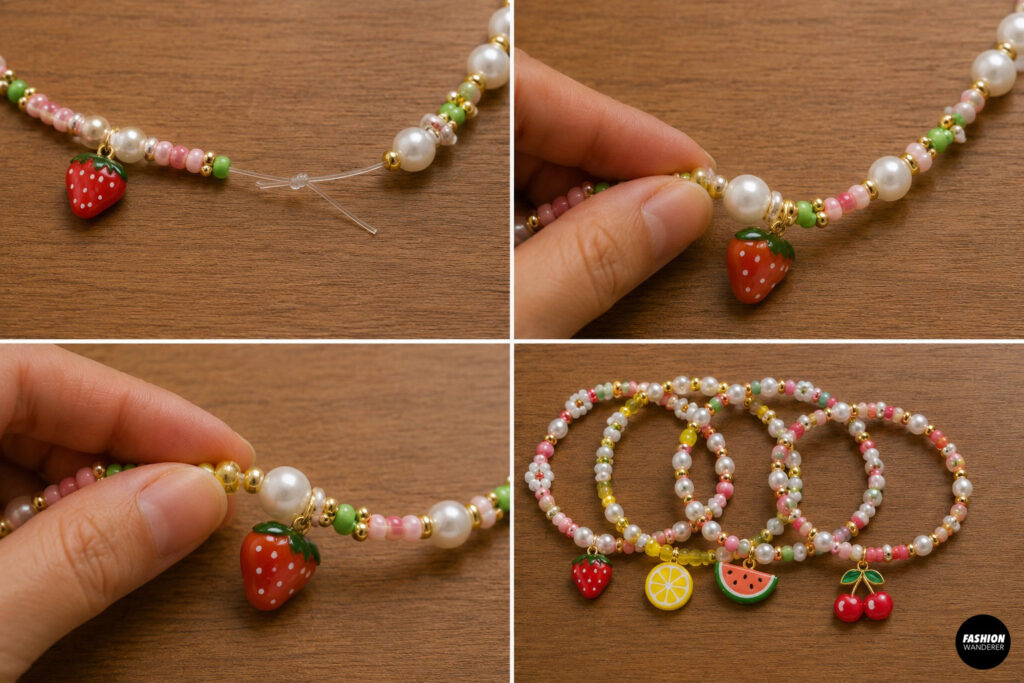
Trim the excess cord, leaving short tails.
Gently slide the knot inside a nearby large bead or cover it with a crimp cover. Make sure the bead hole is wide enough before forcing the knot inside.
Repeat the process for every bracelet in the stack.
Step 10: Style Your Bracelet Stack
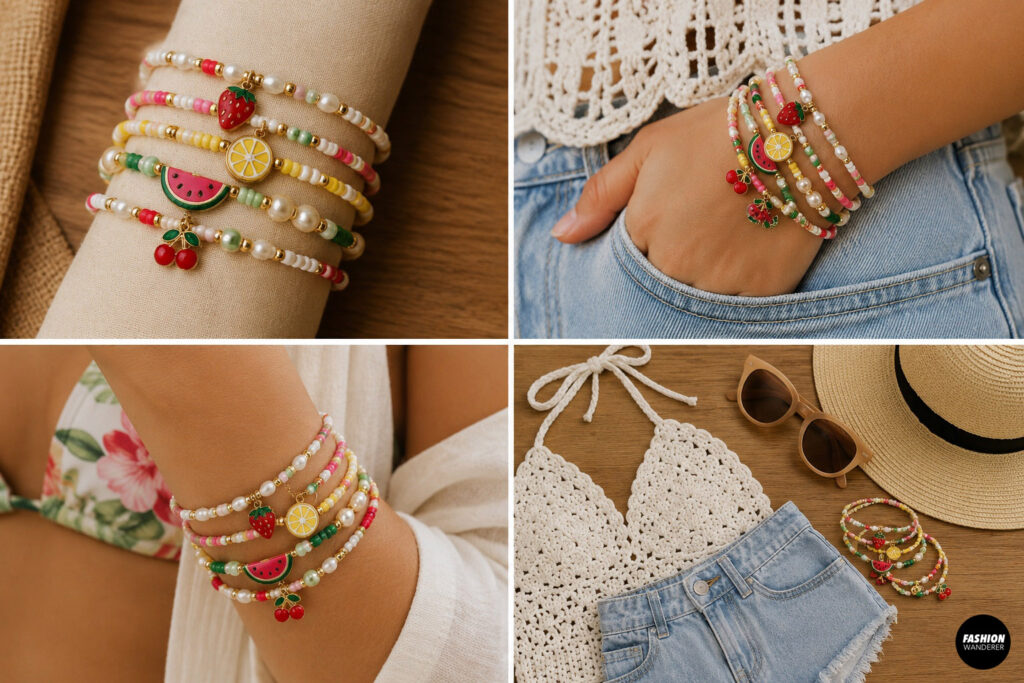
Arrange the bracelets so different colors and textures sit beside one another.
Place the chunkiest bracelet in the center and use slimmer seed-bead or pearl bracelets on each side. Mix fruit charms with gold accents for a playful but polished finish.
Pair your bracelet stack with linen dresses, crochet tops, denim shorts, swimsuits, or vacation outfits.
Final Thoughts
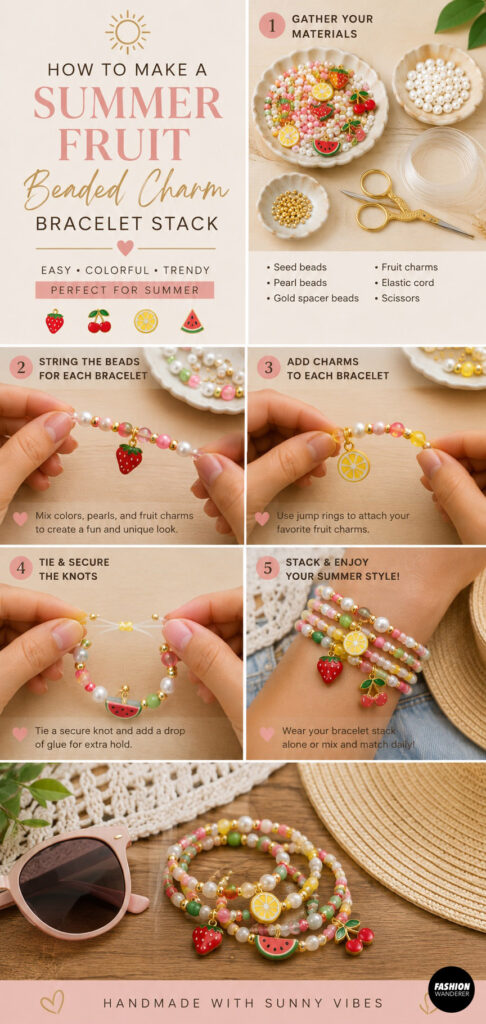
A Summer Fruit Beaded Charm Bracelet Stack is an easy and cheerful DIY project that lets you experiment with color, texture, and playful details. By combining seed beads, pearls, fruit charms, and gold spacers, you can create a coordinated bracelet collection that looks boutique-made but is simple enough for beginners.
Make one stack for yourself, create matching friendship bracelets, or package individual designs as handmade gifts. Once you master the basic pattern, you can use the same method to make anklets, necklaces, phone charms, and sunglasses chains for a complete summer accessory collection.