
A Coastal Charm Beaded Phone Wristlet is the perfect handmade accessory for summer vacations, beach days, festivals, farmers markets, and everyday errands. Designed with soft ocean-inspired colors, playful beads, and a secure wrist strap, this easy DIY project keeps your phone close while adding a stylish handmade touch to your outfit.
This beginner-friendly beaded phone wristlet tutorial requires only a few basic jewelry-making supplies and can be completed in about 30 to 45 minutes. You can customize the design with pearl beads, seashell charms, glass beads, letter beads, or colorful acrylic beads to create a phone strap that perfectly matches your personal style.
Add a little sunshine to your look with these colorful DIY summer beaded accessories—perfect for beach days, vacations, and everything in between!
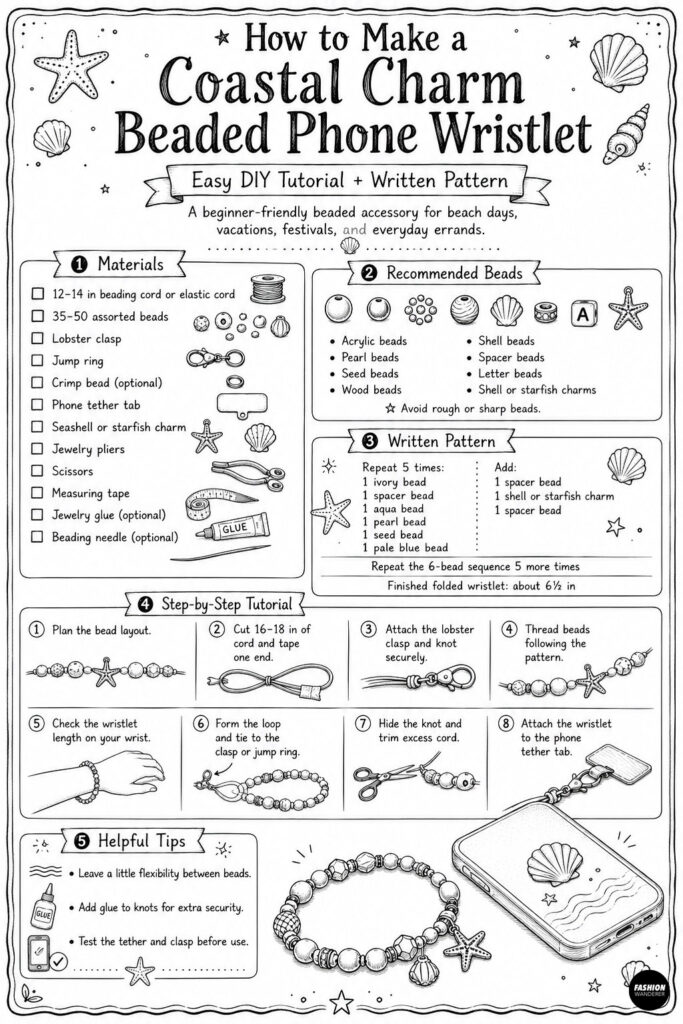
The finished wristlet attaches to most phone cases using a phone tether tab, making it easy to carry your phone hands-free without using a bulky crossbody bag.
Finished Size
The finished wristlet measures approximately:
- Total loop circumference: 12–14 inches
- Folded wristlet length: 6–7 inches
- Beaded section: Approximately 10–12 inches before forming the loop
You can easily adjust the length by adding or removing beads.
Materials and Supplies
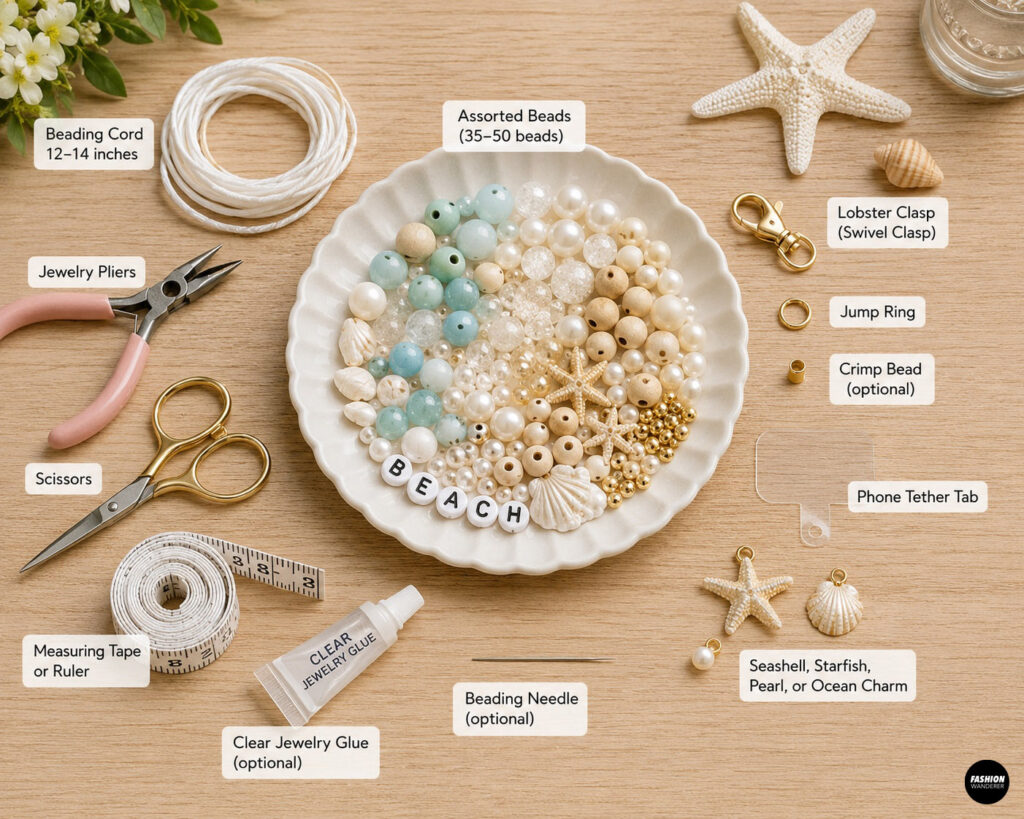
To make one Coastal Charm Beaded Phone Wristlet, you will need:
- 12–14 inches of strong beading cord, nylon cord, or 0.8–1 mm elastic cord
- Approximately 35–50 assorted beads
- 1 lobster clasp or swivel clasp
- 1 small jump ring
- 1 crimp bead or crimp tube, optional
- 1 phone tether tab
- 1 small seashell, starfish, pearl, or ocean-themed charm
- Jewelry pliers
- Scissors
- Measuring tape or ruler
- Clear jewelry glue, optional
- Beading needle, optional
For the best coastal-inspired look, choose a mixture of ivory, white, aqua, sea glass green, pale blue, soft pink, and natural wood beads.
Recommended Beads
A combination of different bead shapes and textures gives the wristlet a fun boutique-style finish. Try mixing:
- 6–10 mm acrylic beads
- Freshwater pearl-style beads
- Glass seed beads
- Natural wood beads
- Shell beads
- Gold spacer beads
- Letter beads
- Starfish or seashell charms
Avoid beads with rough or sharp edges, since they may scratch your phone or feel uncomfortable against your wrist.
Coastal Charm Beaded Phone Wristlet Written Pattern
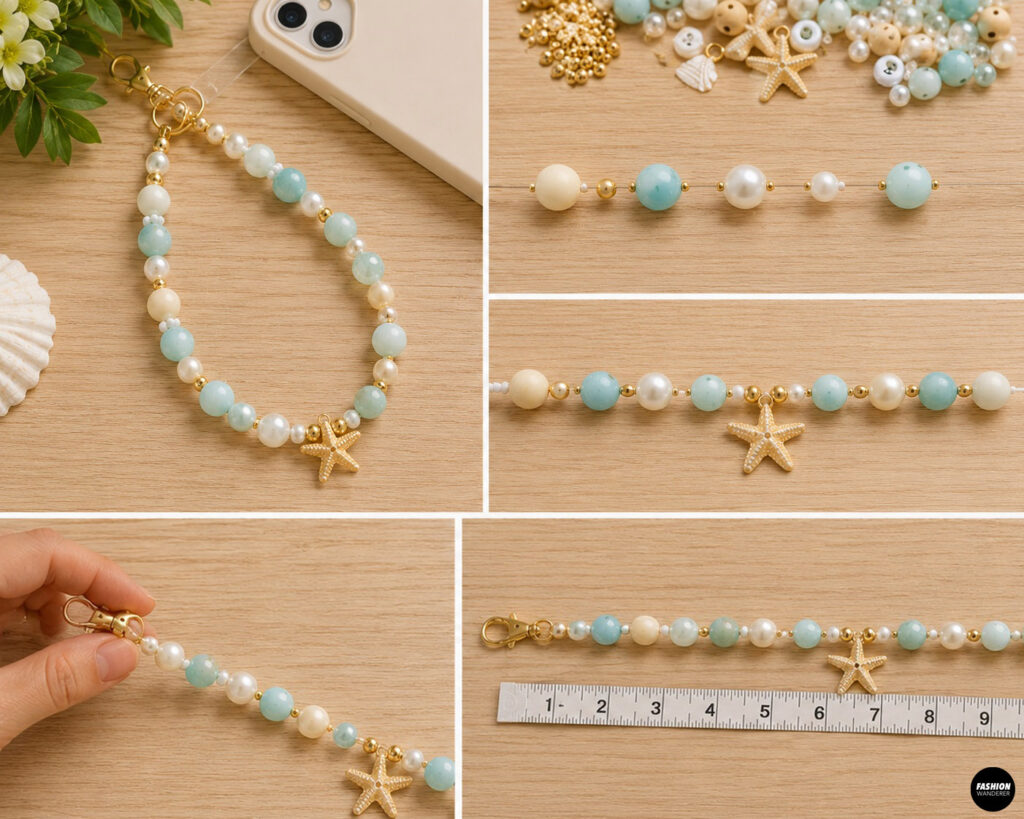
The following pattern creates a balanced wristlet measuring approximately 6½ inches when folded.
Bead Sequence
Repeat the following bead sequence five times:
- One 8 mm ivory bead
- One small gold spacer bead
- One 10 mm aqua bead
- One pearl bead
- One small white seed bead
- One pale blue bead
After completing five repeats, add:
- One gold spacer bead
- One shell or starfish charm
- One gold spacer bead
Continue with the same six-bead sequence another five times.
Your exact bead count may vary depending on the size of your beads. Measure the strand as you work and stop when the beaded section reaches approximately 11 to 12 inches.
Step 1: Plan the Bead Layout
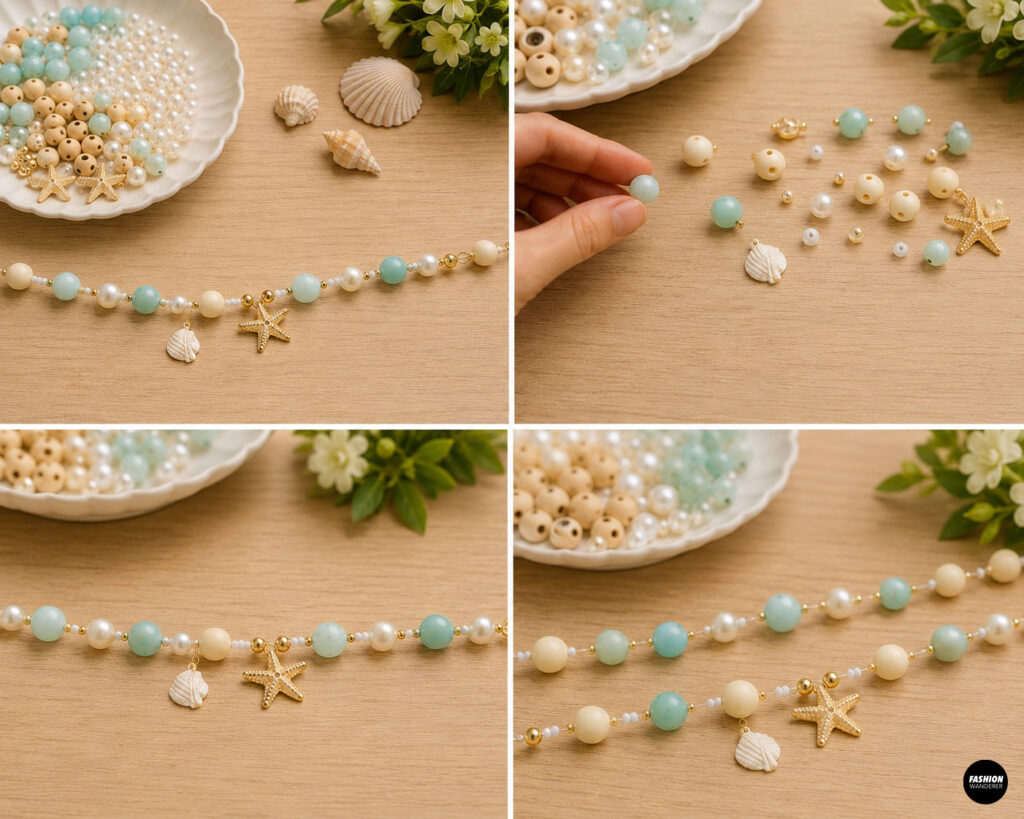
Arrange your beads on a flat surface before threading them onto the cord. Place the larger statement beads evenly throughout the design and fill the spaces between them with smaller beads or gold spacers.
Creating the full layout first helps prevent uneven color placement and makes it easier to achieve a polished, professional-looking pattern.
For a relaxed coastal design, alternate cool blue and aqua beads with creamy pearl and natural shell tones.
Step 2: Cut the Cord
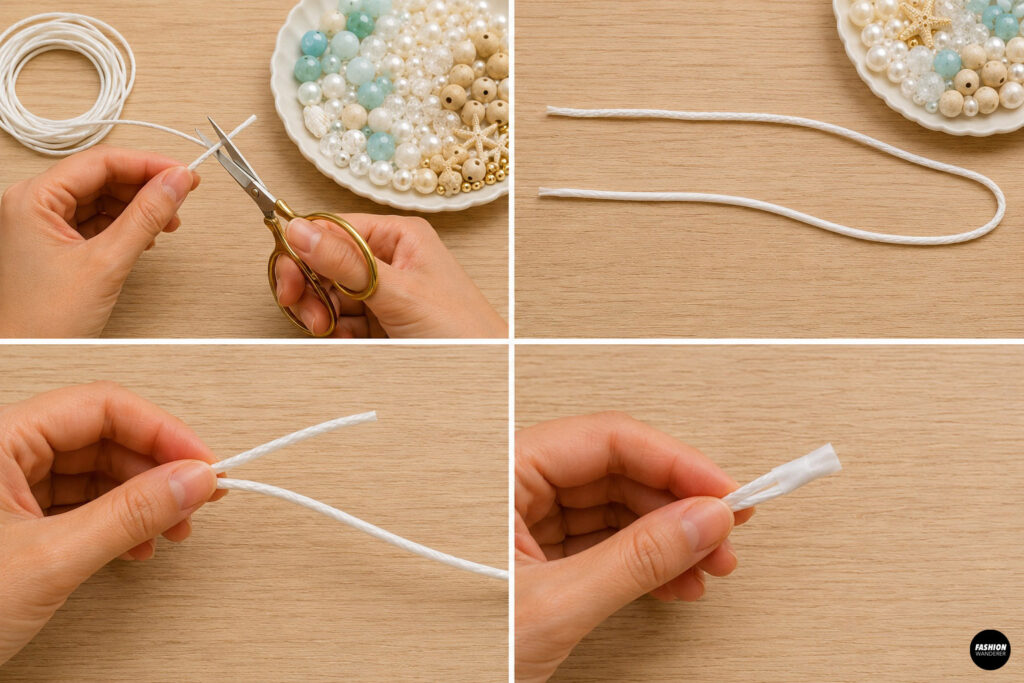
Cut a piece of beading cord approximately 16 to 18 inches long. This gives you enough extra length for tying knots and attaching the clasp.
When using non-stretch nylon cord, choose a strong cord that will not fray easily. Elastic cord may also be used, but it can stretch over time if the phone is heavy.
Place a small piece of tape on one end of the cord to prevent the beads from sliding off while you work.
Step 3: Add the First End of the Clasp
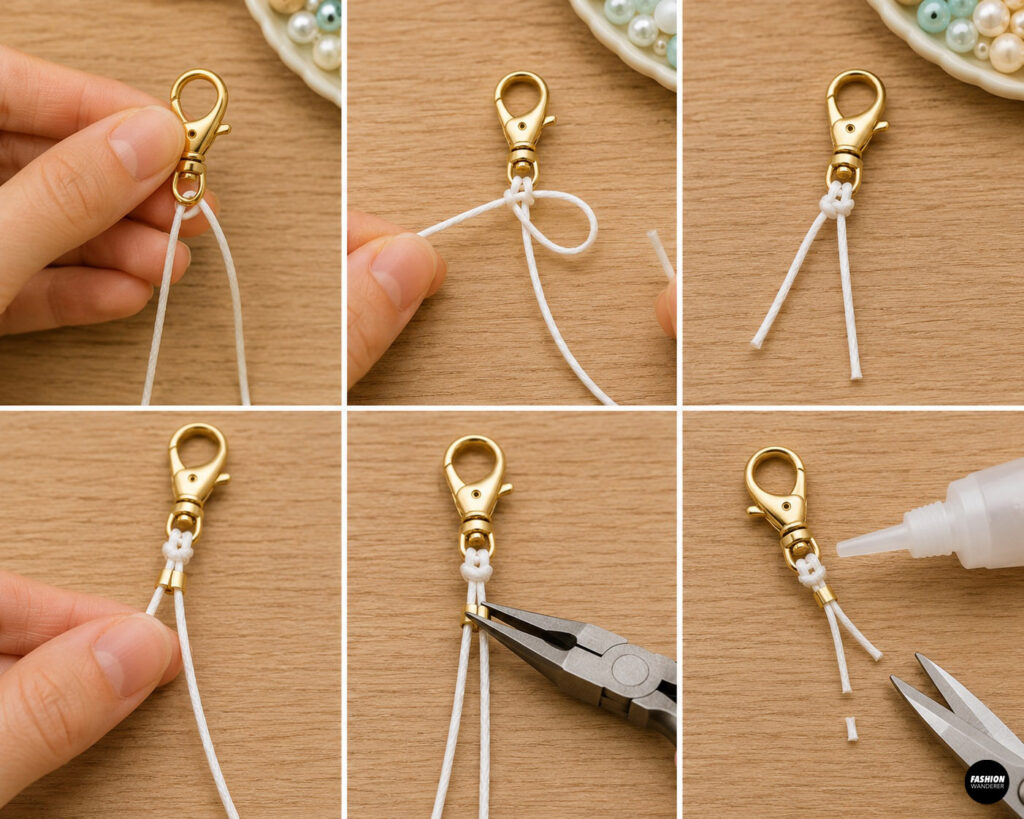
Thread one end of the cord through the loop of the lobster clasp. Leave a 3-inch tail.
Tie the cord securely around the clasp using a surgeon’s knot or double overhand knot. For additional security, slide a crimp bead over both cord ends and flatten it gently with jewelry pliers.
Add a small drop of clear jewelry glue to the knot, then allow it to dry before trimming the excess cord.
Step 4: Thread the Beads
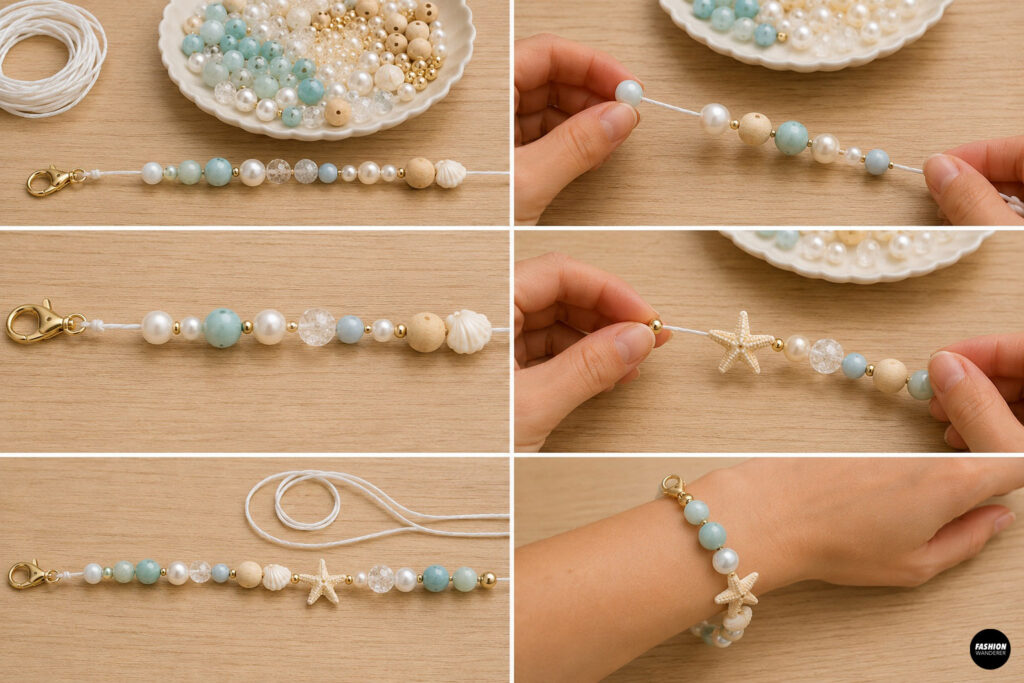
Begin threading the beads onto the long end of the cord following the written pattern.
Slide each bead down carefully until it rests beside the clasp. Continue adding beads while checking the strand regularly to make sure the pattern remains balanced.
If your cord is soft or difficult to push through smaller bead holes, use a flexible beading needle.
Do not pull the beads too tightly together. Leave a tiny amount of flexibility so the wristlet can bend comfortably around your wrist.
Step 5: Check the Length
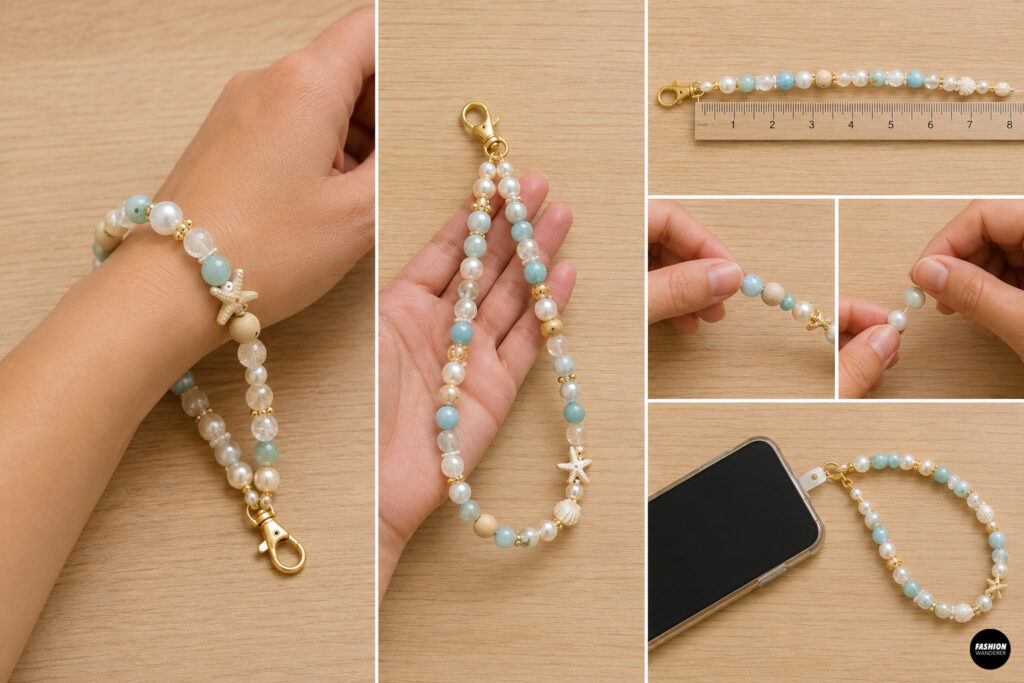
Wrap the beaded strand loosely around your wrist to check the fit. The wristlet should slide over your hand comfortably but should not be so large that your phone can easily slip away.
For most adults, the folded wristlet should measure approximately 6 to 7 inches from the clasp to the opposite end.
Add or remove beads as needed before closing the loop.
Step 6: Form the Wristlet Loop
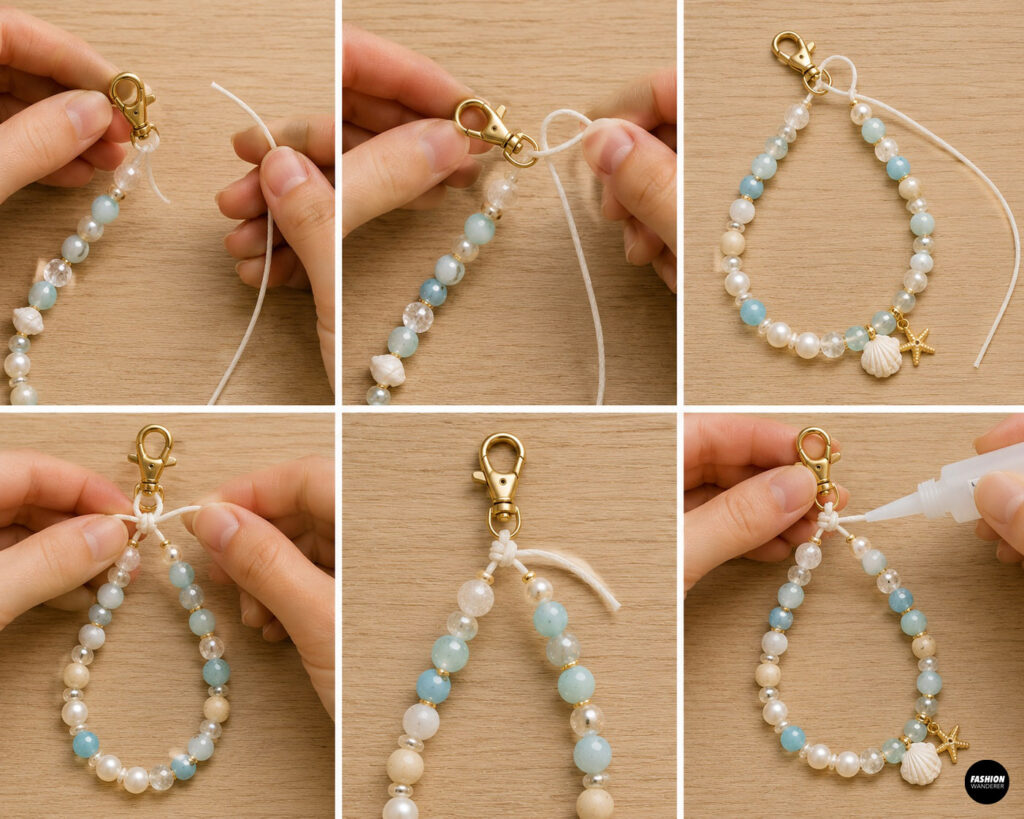
Bring the unfinished cord end back toward the clasp to form a loop.
Thread the loose cord end through the clasp loop or through a small jump ring attached to the clasp. Pull the cord until the beads sit neatly together without gaps.
Tie a secure surgeon’s knot by crossing the cord twice on the first pass, then finishing with a standard knot. Repeat the knot once more for extra strength.
Add a tiny drop of jewelry glue and allow it to dry completely.
Step 7: Hide the Knot
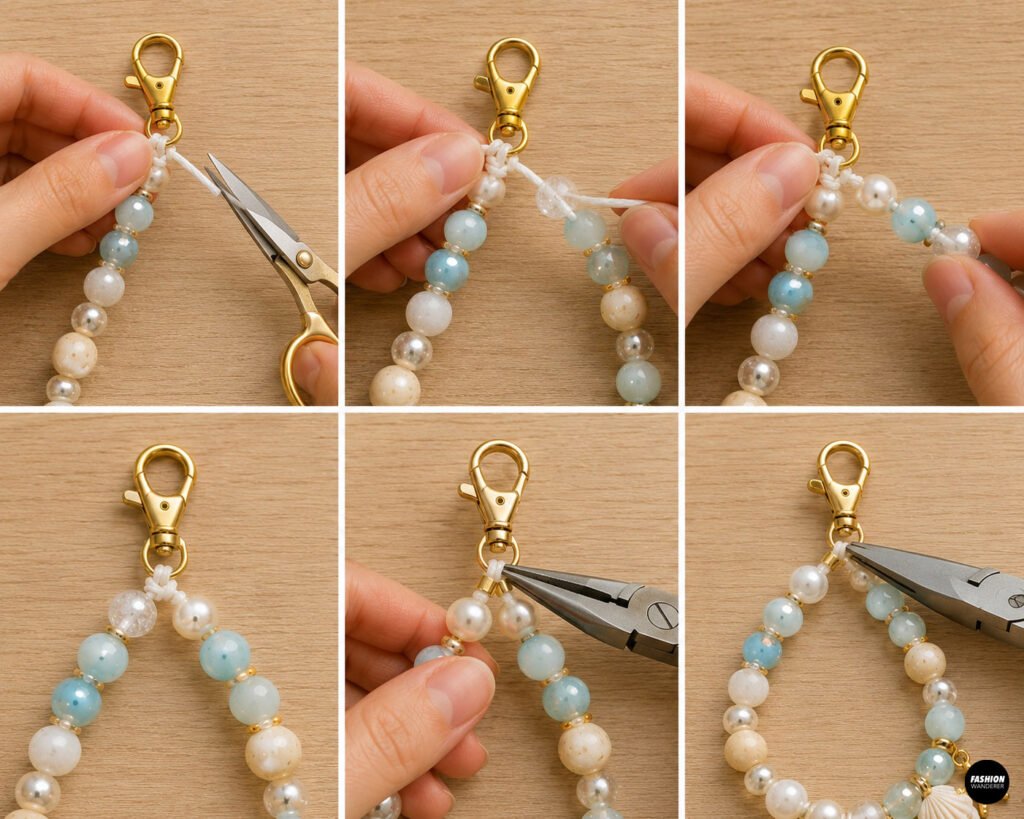
Trim the excess cord, leaving a short tail. Carefully thread the tail back through one or two nearby beads to hide the knot.
This step gives the wristlet a cleaner finish and helps protect the knot from rubbing or loosening.
When using a crimp bead, position it close to the clasp and gently flatten it with jewelry pliers.
Step 8: Attach the Phone Tether
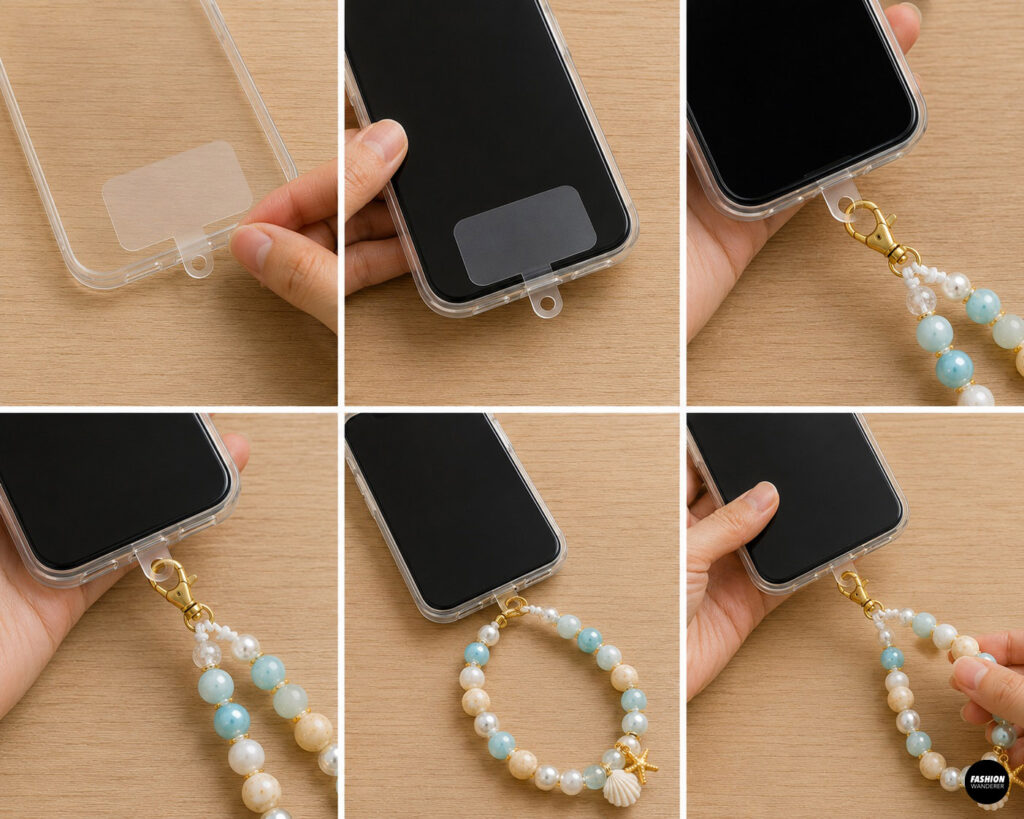
Slide the phone tether tab inside your phone case, positioning the small loop through the charging-port opening. Place your phone back into the case so the wide section of the tether remains securely trapped inside.
Attach the lobster clasp on the wristlet to the exposed tether loop.
Check that the case closes properly and gently pull on the wristlet to test the connection before carrying your phone.
Customization Ideas
Personalize your Coastal Charm Beaded Phone Wristlet by adding alphabet beads to spell a name, initials, “BEACH,” or “SUMMER.” You can also create a minimalist version using all pearl beads or make a colorful tropical wristlet with bright pink, coral, turquoise, and yellow beads.
For a matching accessory set, use the same beads to make a keychain, bag charm, bracelet, or sunglasses chain.
Final Tips
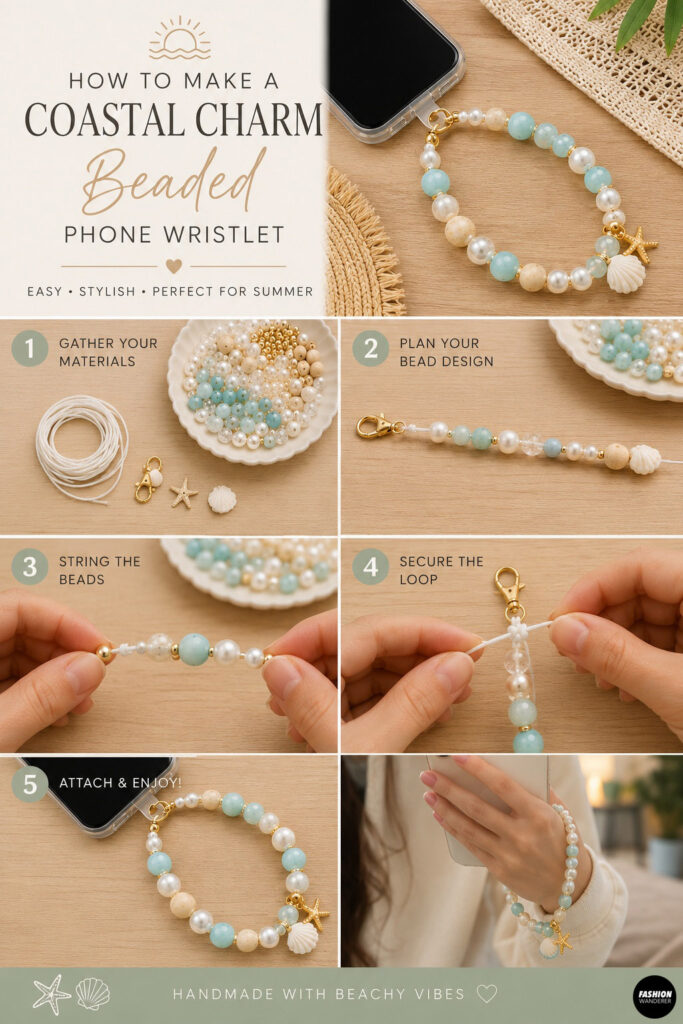
Always test the strength of the cord, clasp, and tether before using the wristlet with your phone. Avoid making the strap with fragile glass beads if you plan to use it frequently or while traveling.
The Coastal Charm Beaded Phone Wristlet is quick, stylish, and wonderfully customizable. It also makes a thoughtful handmade gift for birthdays, bridesmaids, teachers, teenagers, or anyone who loves beach-inspired accessories.