
Back-to-school season is the perfect excuse to pull out your sewing machine, dig through your fabric stash, and make a few practical handmade accessories for the new school year. Better yet, these beginner-friendly back-to-school sewing projects are useful, customizable, and easy to make with leftover fabric, fat quarters, canvas scraps, quilting cotton, and even old garments.
If you are looking for easy sewing projects for kids, teens, teachers, or college students, this roundup includes five practical ideas: a DIY Lunch Bag & Snack Pouch Set, DIY Pencil Pouch, Reusable Book Sleeve, Reading Pillow, and Cord Organizer.
Each project is simple enough for confident beginners and gives you a chance to practice useful sewing skills such as installing zippers, adding interfacing, sewing boxed corners, topstitching, and working with closures.
1. DIY Lunch Bag & Snack Pouch Set
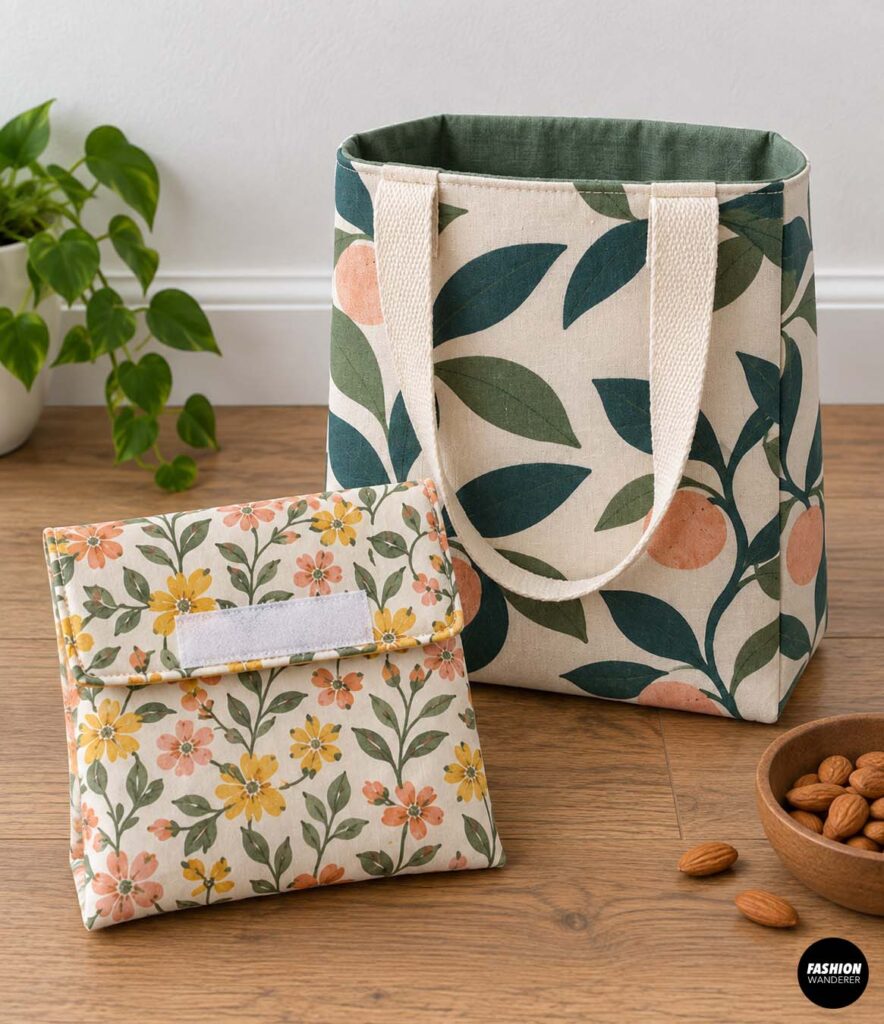
A handmade lunch bag and reusable snack pouch are practical back-to-school essentials and a great alternative to disposable plastic bags.
Materials
For the lunch bag, you will need:
- 1/2 yard canvas or quilting cotton
- 1/2 yard lining fabric
- Fusible interfacing
- Insulated batting, optional
- Velcro or snap closure
- Coordinating thread
- Sewing machine
- Scissors or rotary cutter
For the snack pouch, use leftover fabric and a food-safe washable lining if desired.
Step 1: Cut the Lunch Bag Pieces
Cut two outer fabric rectangles approximately 12″ x 14″ and two matching lining pieces.
Apply fusible interfacing to the wrong side of both outer pieces.
For an insulated lunch bag, sandwich a layer of insulated batting behind each outer piece.
Step 2: Sew the Side and Bottom Seams
Place the two outer pieces right sides together.
Sew along both sides and across the bottom using a 1/2″ seam allowance.
Repeat with the lining, but leave a 3″ opening along the bottom seam for turning.
Step 3: Create Boxed Corners
Flatten one bottom corner so the side seam lines up with the bottom seam.
Measure approximately 2″ from the corner and draw a line across.
Sew along the marked line and trim away the excess.
Repeat on all corners.
Step 4: Assemble the Bag
Turn the outer bag right side out.
Place it inside the lining so right sides are facing.
Sew around the top edge.
Turn everything right side out through the lining opening.
Topstitch the lining opening closed.
Step 5: Add the Closure
Topstitch around the bag opening and attach Velcro, snaps, or a magnetic closure.
For the matching snack pouch, sew two smaller fabric rectangles together using the same basic method and add Velcro across the opening.
You now have a cute reusable lunch set ready for school.
2. DIY Pencil Pouch
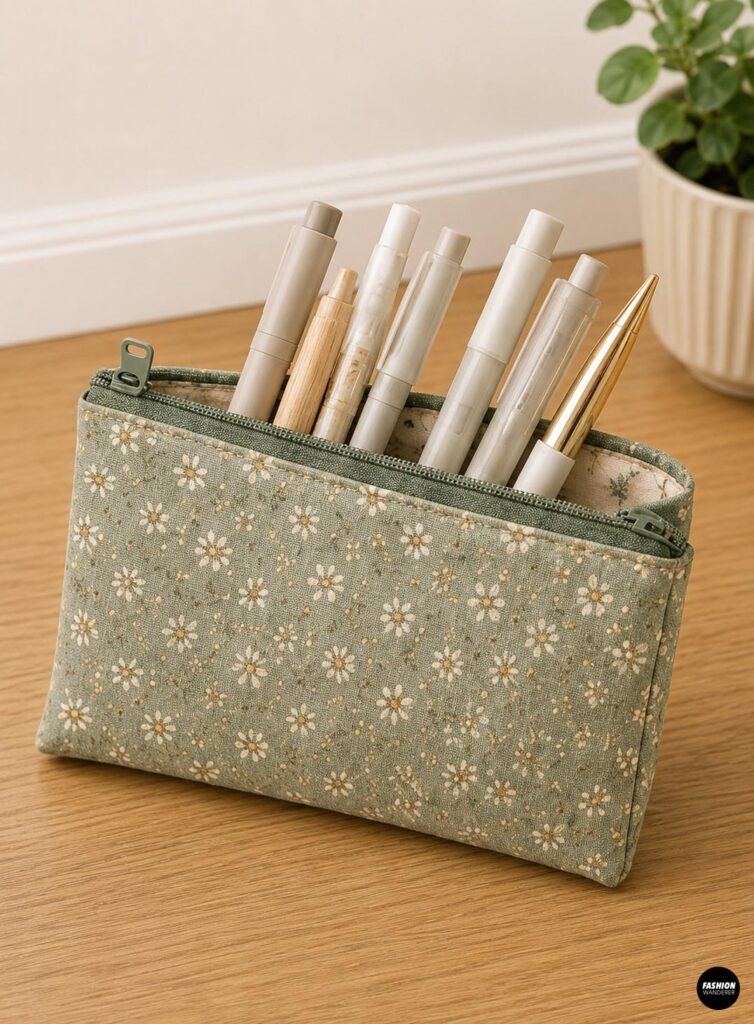
A DIY pencil pouch is one of the best beginner zipper projects because it requires only a few pieces of fabric.
Materials
- Two outer fabric rectangles, about 5″ x 10″
- Two lining rectangles, 5″ x 10″
- One 9″ zipper
- Fusible interfacing
- Thread
- Zipper foot
Step 1: Prepare the Fabric
Fuse interfacing to the wrong side of the outer fabric pieces.
Place the zipper right side down along the top edge of one outer piece.
Place one lining piece right side down over the zipper.
The zipper should be sandwiched between the fabrics.
Step 2: Sew the Zipper
Using a zipper foot, sew close to the zipper teeth.
Fold both fabrics away from the zipper and press.
Topstitch near the zipper edge.
Repeat with the remaining outer and lining pieces on the opposite side.
Step 3: Sew the Pouch
Open the zipper halfway.
Place the outer fabrics right sides together and the lining fabrics right sides together.
Sew around the entire pouch, leaving a 3″ opening in the lining.
Clip the corners, turn right side out, and stitch the lining opening closed.
Fill it with pencils, markers, rulers, or sewing tools.
3. Reusable Book Sleeve
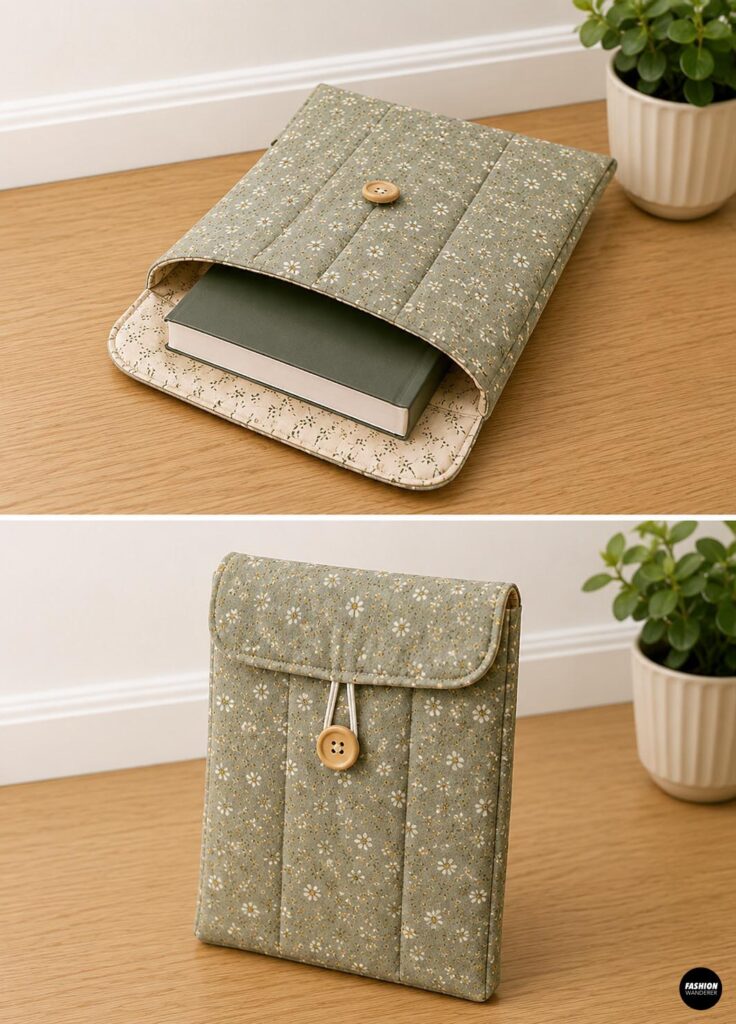
A padded reusable book sleeve protects textbooks, notebooks, tablets, and favorite novels inside a backpack.
Materials
- Two outer fabric rectangles
- Two lining rectangles
- Two batting rectangles
- Elastic
- Large button, optional
Measure your book first and add approximately 1 1/2″ to the width and height for seam allowance and ease.
Step 1: Layer the Fabric
Place one batting piece against the wrong side of each outer fabric piece.
Baste around the edges.
You can also quilt the layers together using straight stitching.
Step 2: Sew the Outer Sleeve
Place the outer pieces right sides together.
Sew along both sides and the bottom.
Leave the top open.
Step 3: Sew the Lining
Sew the lining pieces together the same way, leaving a small turning opening in the bottom.
Step 4: Add an Elastic Loop
Cut a 4″ piece of elastic.
Fold it in half and center it along the top back edge of the outer sleeve with the loop pointing downward.
Baste in place.
Step 5: Assemble
Place the outer sleeve inside the lining with right sides together.
Sew around the top opening.
Turn the sleeve right side out through the lining opening.
Topstitch the opening closed and press.
Add a button to the front so the elastic loop can secure the book inside.
4. Reading Pillow
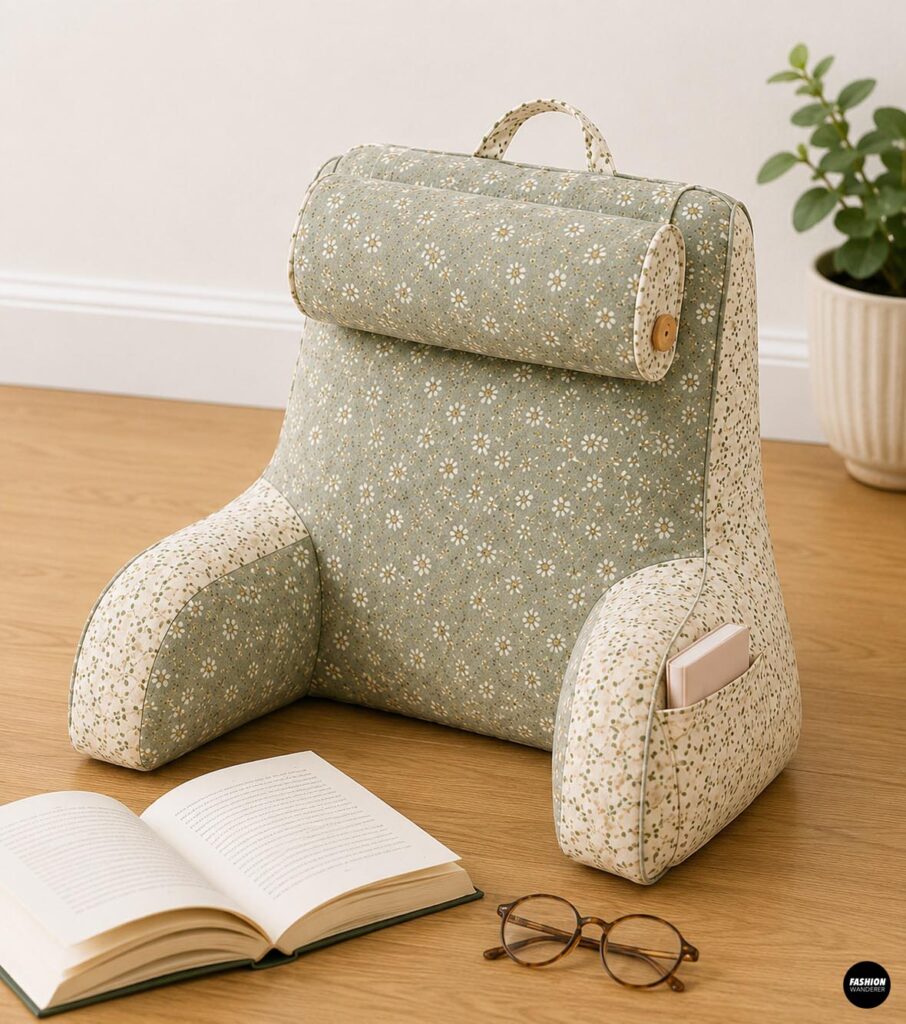
A reading pillow is a cozy back-to-school sewing project that gives kids a special place to store their favorite book.
The front pocket can hold books, notebooks, or even a small stuffed animal.
Materials
- Pillow front and back fabric
- Pocket fabric
- Fusible interfacing
- Pillow insert
- Thread
A 16″ x 16″ pillow insert is an easy beginner size.
Step 1: Cut the Pieces
Cut:
- Two 17″ x 17″ pillow pieces
- One 17″ x 12″ pocket piece
Apply lightweight interfacing to the pocket if your fabric is thin.
Step 2: Finish the Pocket
Fold the top edge of the pocket under 1/2″, then another 1/2″.
Press and topstitch.
Place the pocket along the bottom edge of the pillow front.
Baste around the sides and bottom.
Step 3: Assemble the Pillow
Place the pillow front and back right sides together.
Sew around the edges, leaving approximately 8″ open along the bottom.
Clip the corners.
Turn right side out and press.
Step 4: Insert the Pillow
Push the pillow form through the opening.
Fold the raw edges inward and hand stitch the opening closed.
Slip a favorite book inside the front pocket, and your reading pillow is ready.
5. DIY Cord Organizer
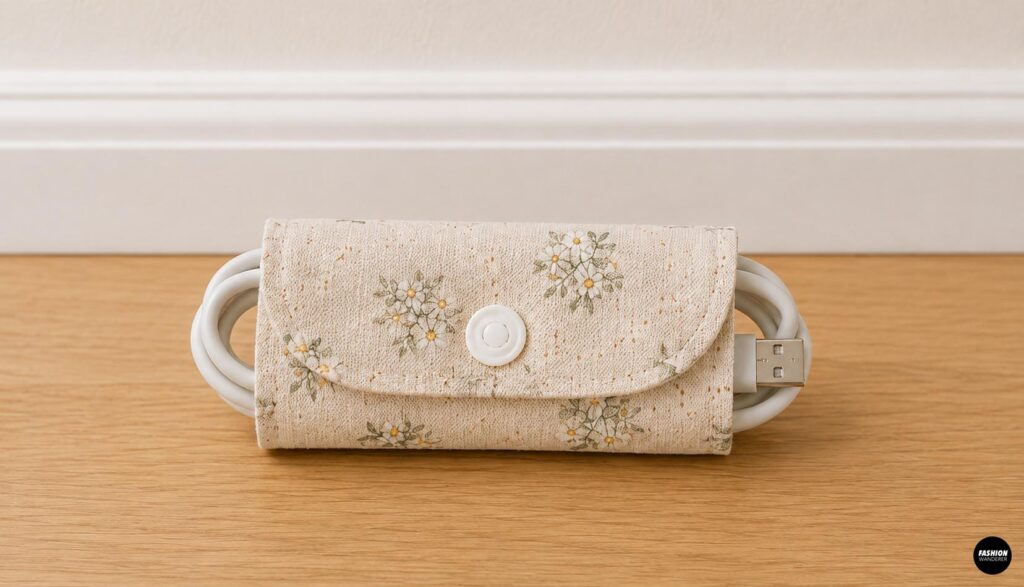
Chargers, earbuds, USB cables, and tablet cords can quickly become tangled inside backpacks. A simple fabric cord organizer keeps everything neatly wrapped.
Materials
- Two fabric pieces, approximately 3″ x 6″
- Fusible interfacing
- Snap or Velcro
- Thread
Step 1: Apply Interfacing
Fuse interfacing to the wrong side of one fabric rectangle.
Place both fabric pieces right sides together.
Step 2: Sew Around the Edges
Sew around the rectangle using a 1/4″ seam allowance, leaving a 2″ opening.
For softer corners, round the edges before sewing.
Step 3: Turn and Press
Turn the organizer right side out.
Push out the corners gently and press flat.
Fold the turning opening inward.
Step 4: Topstitch
Topstitch approximately 1/8″ from the edge around the entire organizer.
This closes the opening while creating a polished finish.
Step 5: Add the Closure
Install a snap or small piece of Velcro at each end.
Coil the charging cord, wrap the fabric organizer around it, and secure the closure.
Easy Back-to-School Sewing Projects to Make From Your Fabric Stash
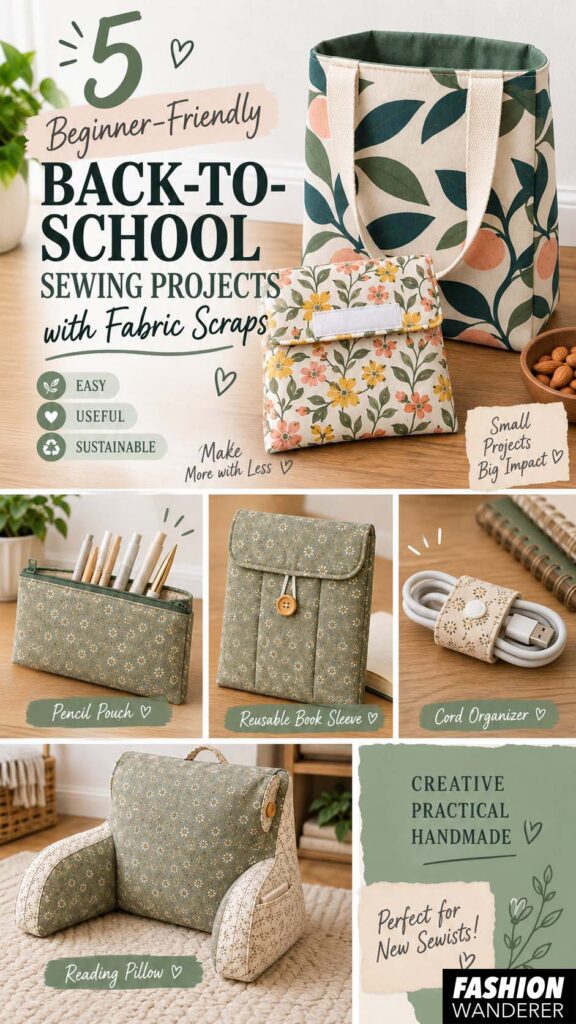
These five beginner-friendly back-to-school sewing projects are a fun way to turn fabric scraps into accessories you can actually use every day.
Start with the quick cord organizer or pencil pouch if you are new to sewing. Once you feel comfortable, move on to the lunch bag, padded book sleeve, or reading pillow.
You can even sew all five projects using coordinating fabrics to create a complete handmade back-to-school set. Choose colorful prints for younger kids, minimalist solids for teens, or neutral canvas for college students.
Best of all, each project helps you practice essential sewing techniques while making something practical, reusable, and completely customized for the new school year.