
Loose charging cables, earbuds, USB cords, and sewing machine cords have a talent for turning into a tangled mess at exactly the wrong moment. A DIY cord organizer is a small sewing project that keeps cords neatly wrapped, easy to identify, and simple to toss into a purse, drawer, backpack, or travel bag.
This beginner-friendly project uses only a small amount of fabric and can be finished quickly, making it a great scrap-busting sewing idea. You can make one cord keeper for your phone charger or sew a whole matching set for your electronics.
Beginner-friendly back-to-school sewing projects with fabric scraps are a great way to create useful school essentials without buying new fabric. Below, you’ll learn how to sew a fabric cord organizer step by step, including sizing, interfacing, closures, and helpful beginner tips.
Why Make a Fabric Cord Organizer?
A handmade cord organizer is useful for more than just phone chargers. Use it for:
- Charging cables
- Earbuds
- USB cords
- Laptop charging cords
- Sewing machine cords
- Small extension cords
- Camera cables
- Travel electronics
They also make cute stocking stuffers, teacher gifts, travel accessories, and handmade gifts.
Because the project requires very little fabric, it is perfect for leftover cotton scraps from previous sewing projects.
Materials You Will Need
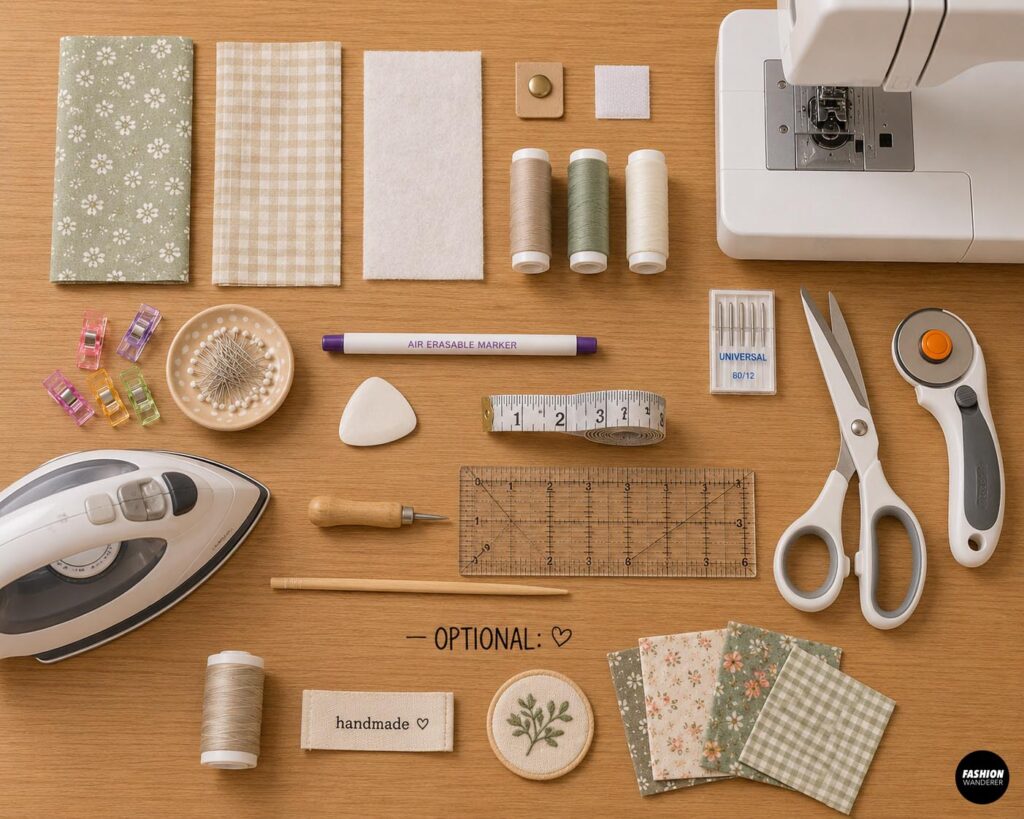
To make one DIY cord organizer, gather:
- 2 pieces cotton fabric, approximately 3″ x 6″
- 1 piece lightweight fusible interfacing, approximately 3″ x 6″
- 1 small snap button, Velcro square, or sew-on snap
- Coordinating polyester thread
- Sewing machine
- Universal sewing machine needle
- Fabric scissors or rotary cutter
- Pins or sewing clips
- Fabric marker or tailor’s chalk
- Measuring tape or ruler
- Iron and ironing board
- Point turner or blunt chopstick
Optional:
- Topstitching thread
- Decorative labels
- Embroidery
- Fabric scraps in contrasting prints
Finished Size
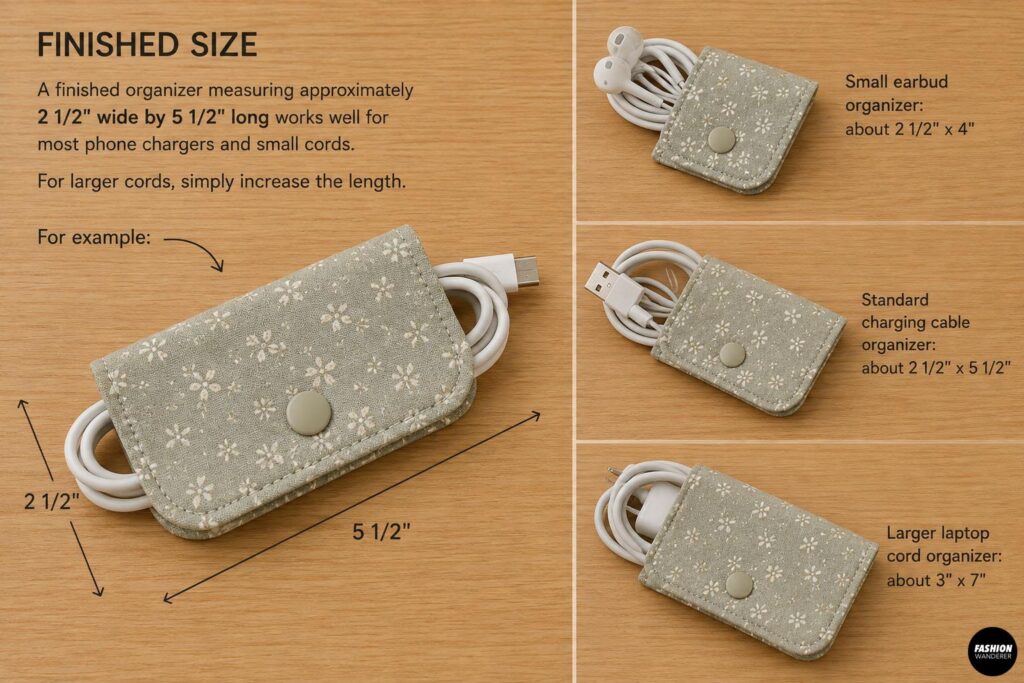
A finished organizer measuring approximately 2 1/2″ wide by 5 1/2″ long works well for most phone chargers and small cords.
For larger cords, simply increase the length.
For example:
Small earbud organizer: about 2 1/2″ x 4″
Standard charging cable organizer: about 2 1/2″ x 5 1/2″
Larger laptop cord organizer: about 3″ x 7″
The construction method stays exactly the same.
Cord Organizer Tutorial
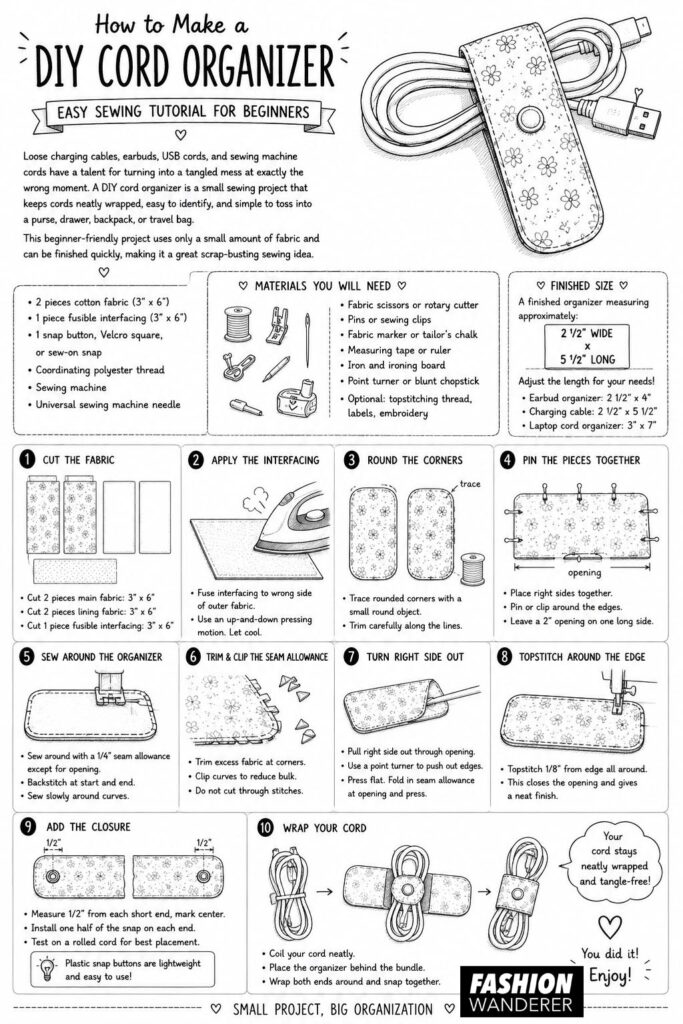
Step 1: Cut the Fabric
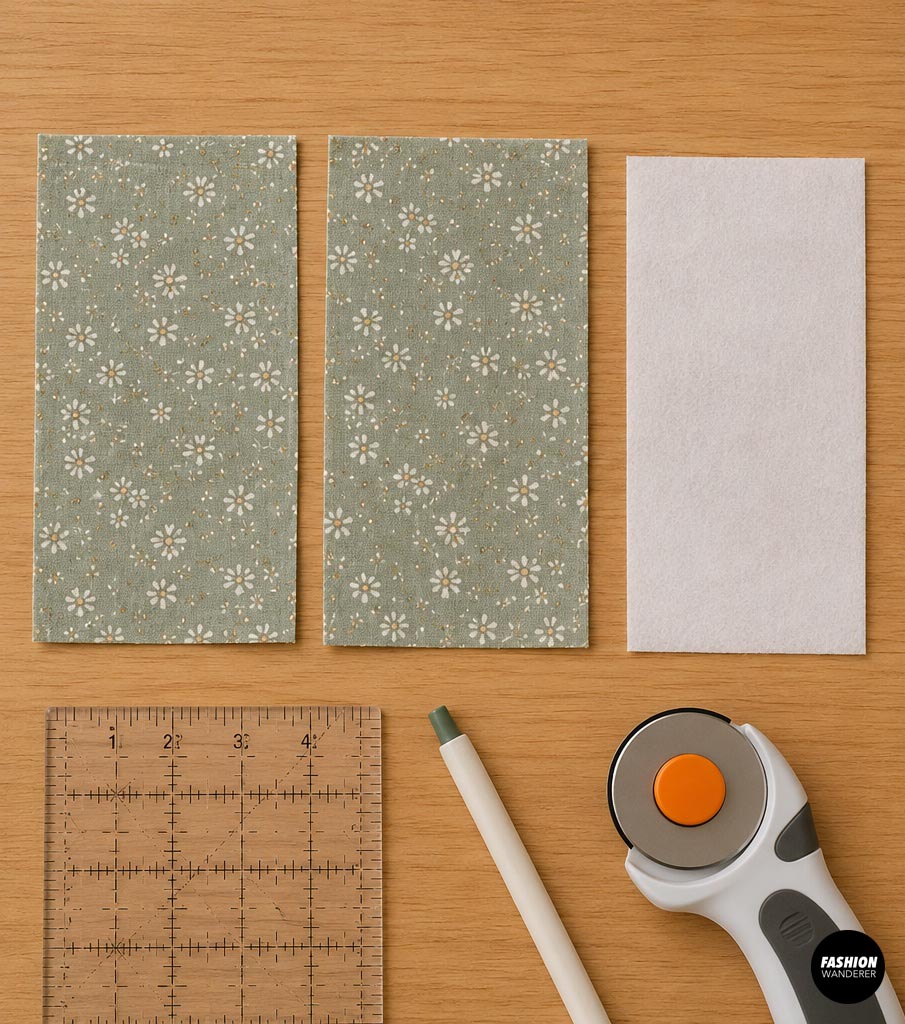
Cut two rectangles from your main fabric measuring approximately:
3″ wide x 6″ long
One piece will become the outside of the organizer, while the second will become the lining.
Cut one matching piece of lightweight fusible interfacing.
If you are using thicker canvas, denim, or upholstery fabric, you may be able to skip the interfacing.
For quilting cotton, however, interfacing gives the organizer a sturdier and more professional finish.
Step 2: Apply the Interfacing
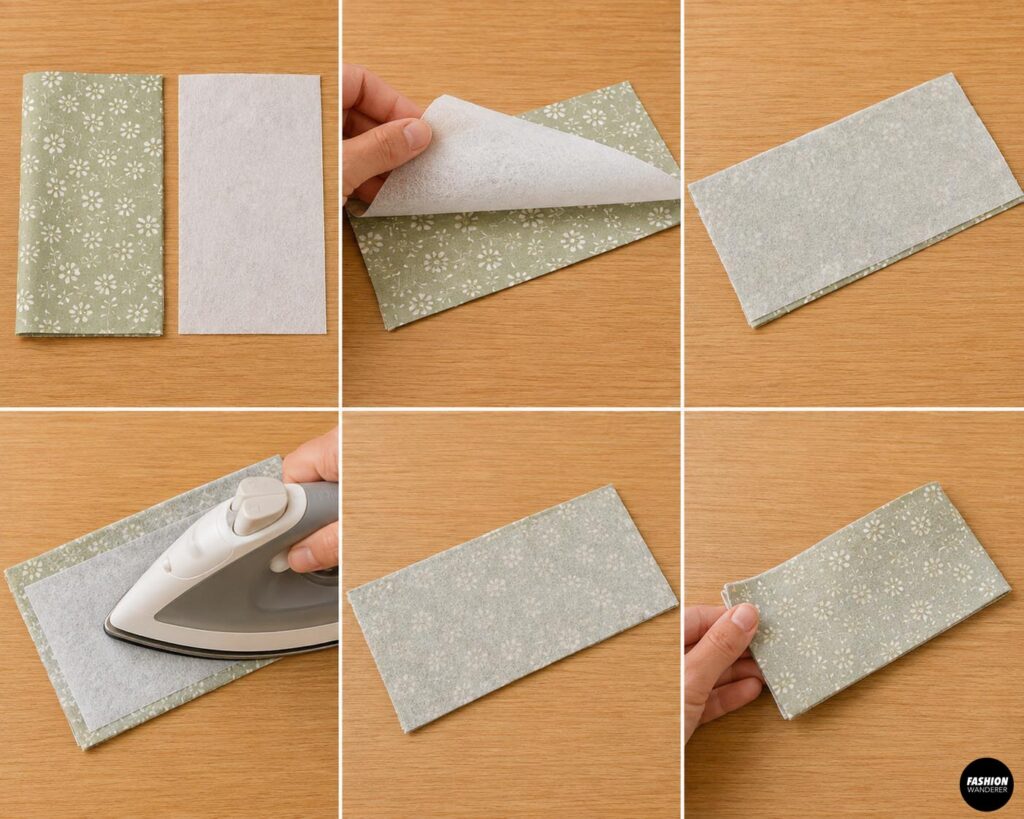
Place the fusible side of the interfacing against the wrong side of your outer fabric.
Follow the interfacing manufacturer’s instructions and press it in place with an iron.
Use an up-and-down pressing motion rather than sliding the iron back and forth.
Allow the fabric to cool before continuing.
The interfacing helps the cord organizer hold its shape and gives the snap closure extra support.
Step 3: Round the Corners
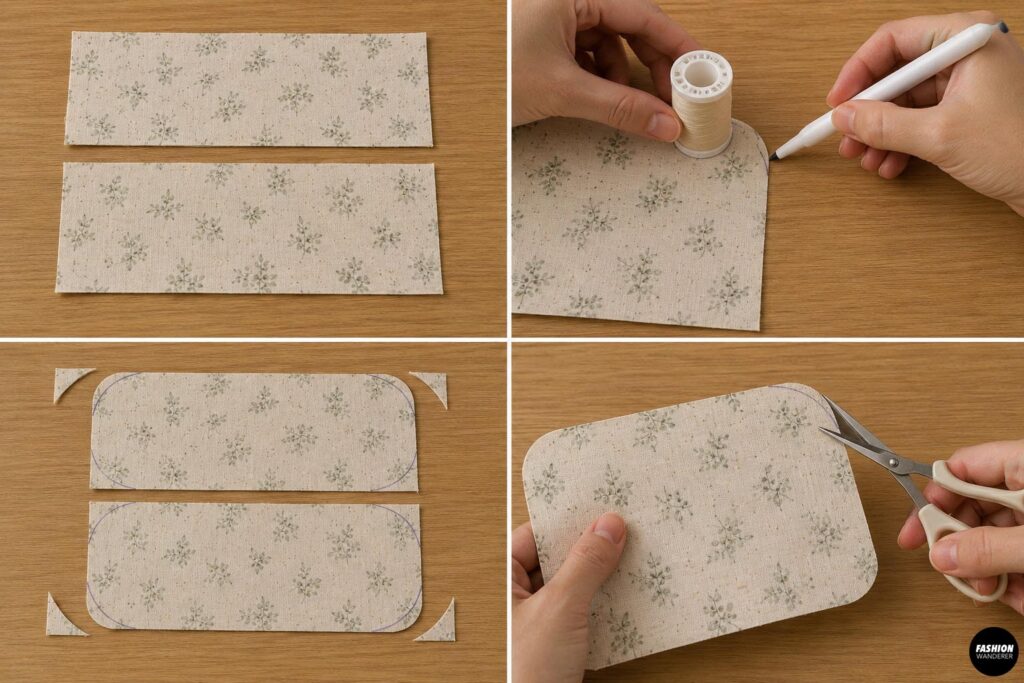
You can leave the organizer rectangular, but rounded corners create a softer, polished look.
Use a small round object such as a spool of thread or drinking glass to trace curved corners.
Round all four corners.
Carefully trim along your marked lines.
Try to make both fabric pieces identical so they align properly when sewn together.
Step 4: Pin the Fabric Pieces Together
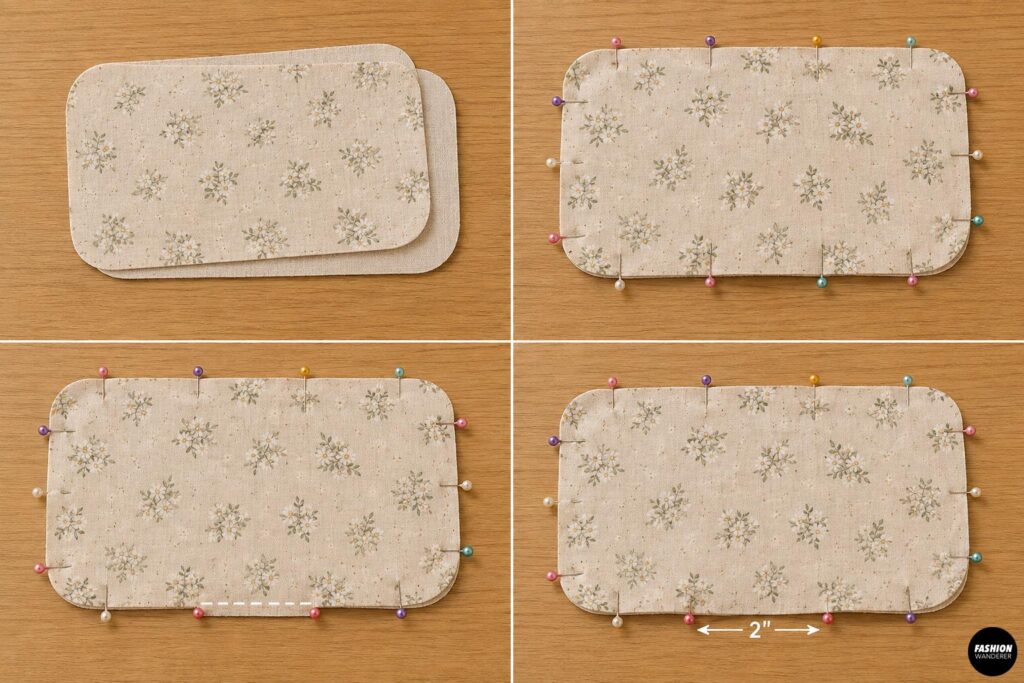
Place the outer fabric and lining right sides together.
Match all edges and rounded corners.
Pin or clip around the perimeter.
Leave an opening approximately 2″ wide along one long edge.
This opening will allow you to turn the cord organizer right side out later.
Mark the opening with two pins so you do not accidentally sew it closed.
Step 5: Sew Around the Organizer
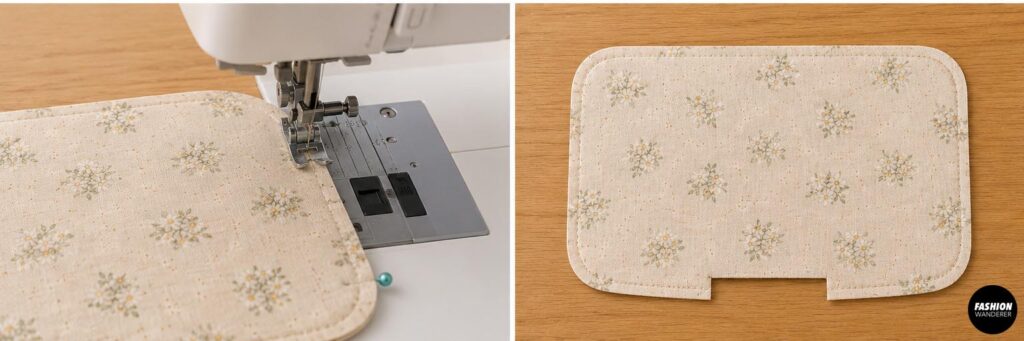
Using approximately a 1/4″ seam allowance, sew around the entire organizer except for the turning opening.
Backstitch when you begin and end.
Sew slowly around curved corners.
If necessary, stop with your needle down, lift the presser foot, slightly rotate the fabric, lower the presser foot, and continue sewing.
This gives you smoother curves.
Step 6: Trim and Clip the Seam Allowance
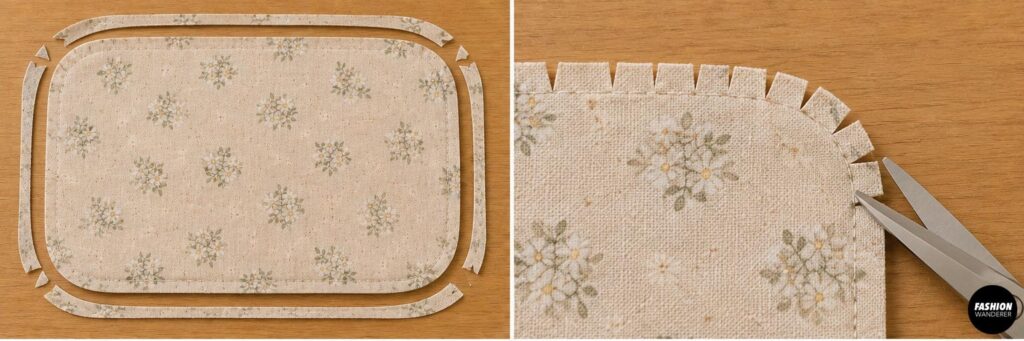
Before turning the organizer right side out, trim away excess fabric around the curved corners.
You can also make tiny clips into the seam allowance around each curve.
Be careful not to cut through the stitching.
Reducing the seam allowance helps the curved edges lie flat instead of looking bulky.
Step 7: Turn Right Side Out
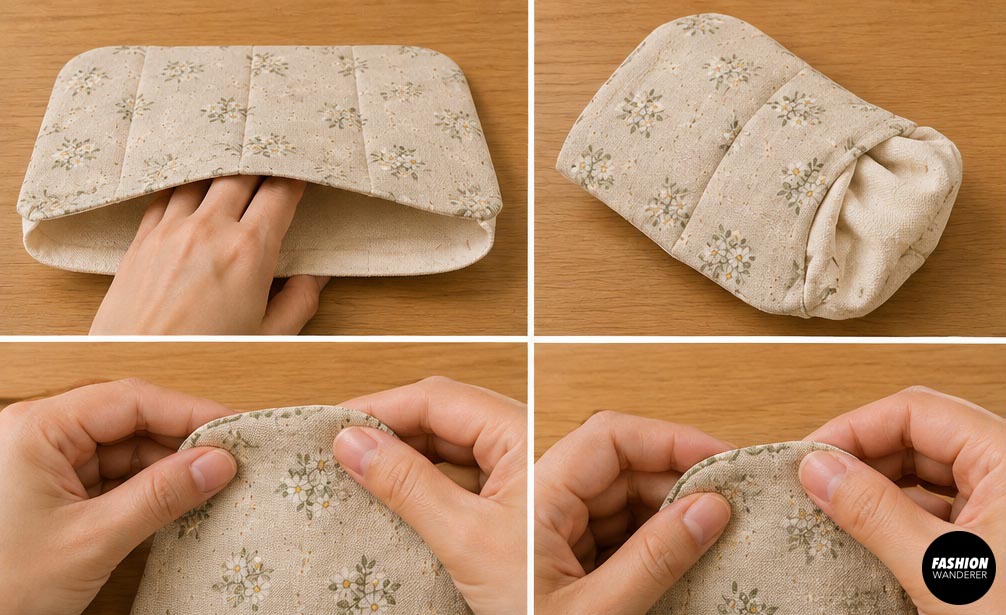
Reach through the opening and gently pull the fabric right side out.
Use a point turner, chopstick, or other blunt tool to carefully push out the edges.
Avoid using sharp scissors because they can poke through the fabric.
Roll the seams between your fingers until the edges sit neatly.
Then press the entire organizer flat with your iron.
At the turning opening, fold the raw edges inward approximately 1/4″ so they line up with the sewn seam.
Press them flat.
Step 8: Topstitch Around the Edge
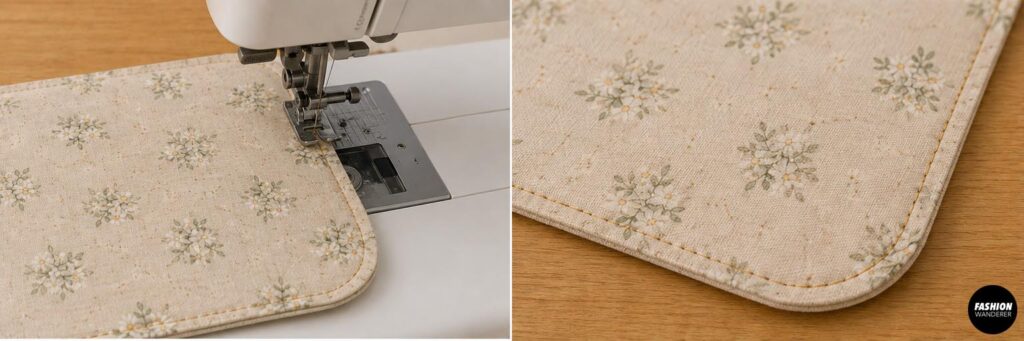
Topstitch approximately 1/8″ from the edge around the entire cord organizer.
This stitching closes the turning opening and gives the project a crisp finished appearance.
Go slowly around the curved corners.
For a decorative look, use contrasting thread.
If you prefer something subtle, use thread that matches your fabric.
Step 9: Add the Closure
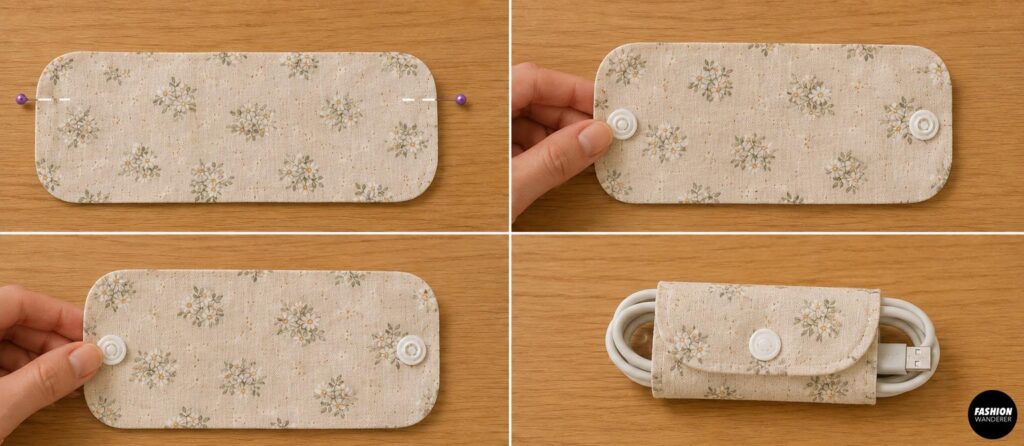
Now add your snap, Velcro, or sew-on fastener.
Measure approximately 1/2″ from each short end and mark the center.
Install one half of the snap on one end and the matching half on the opposite end.
Before permanently attaching the closure, fold the organizer around a rolled charging cable to make sure the placement works.
You want the organizer snug enough to hold the cord but not so tight that the fabric pulls.
Plastic snap buttons are especially convenient for this project because they are lightweight and easy to use.
Step 10: Wrap Your Cord
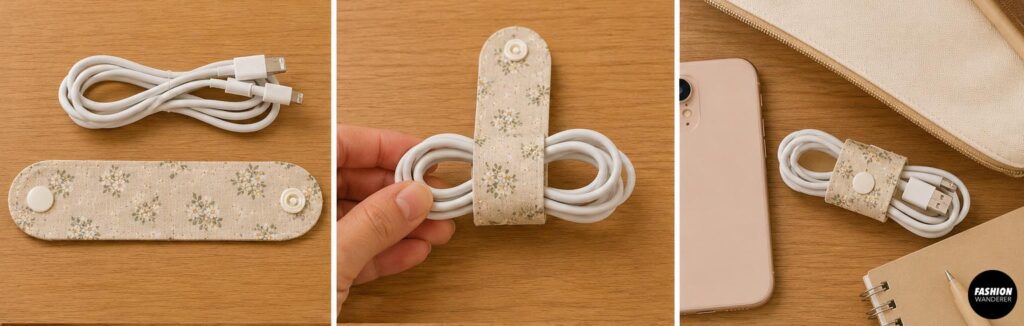
Coil your charging cable neatly into a small bundle.
Place the center of the cord organizer behind the bundle.
Bring both ends around the cord and snap them together.
Your cord should now stay neatly wrapped instead of unraveling in your bag.
That’s it—your handmade cord organizer is finished.
Beginner Sewing Tips
If this is your first small sewing project, quilting cotton is one of the easiest fabrics to work with.
Always press your fabric during construction. Pressing makes small projects look much cleaner and more professional.
When installing snaps, avoid placing them too close to the fabric edge. Leaving approximately 1/2″ gives the fabric enough support around the snap.
You can also make several organizers in different colors so each cord is easy to recognize. For example, use pink for a phone charger, blue for earbuds, green for a tablet cable, and yellow for a camera cord.
DIY Cord Organizer Variations
Once you understand the basic construction, this project is easy to customize.
Try making cord organizers from floral cotton, gingham, canvas, denim scraps, or leftover fabric from handmade bags.
You can also add:
- Machine embroidery
- Initials
- Fabric labels
- Quilted stitching
- Appliqué shapes
- Contrasting lining fabric
- A small keyring loop
For a gift set, sew three to five organizers in coordinating prints and package them together.
Final Thoughts
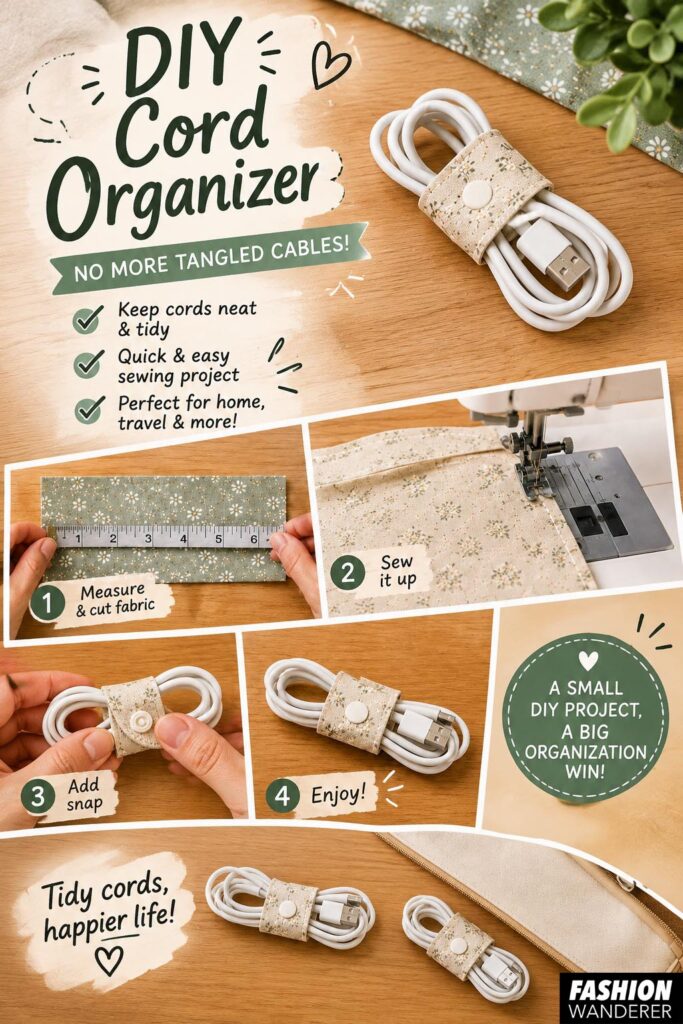
Learning how to make a cord organizer is an easy way to practice basic sewing skills while creating something genuinely useful. The project teaches several beginner techniques, including sewing curves, working with interfacing, turning fabric, topstitching, and installing snaps.
Best of all, each organizer uses only a tiny amount of fabric.
Keep one in your purse, travel bag, desk drawer, sewing room, or electronics pouch, and make extras whenever your scrap basket starts overflowing. Once you see how much easier neatly wrapped cords are to manage, you may find yourself making a cord organizer for every charger you own.