
Looking for a cute sewing project that uses fabric scraps and takes very little time to make? This DIY puffy fabric bow bag charm is an easy beginner sewing project that can instantly dress up a tote bag, purse, backpack, zipper pouch, or keychain.
Puffy bow bag charms are especially fun because you can customize them with gingham, floral cotton, denim, linen, velvet, or leftover quilting scraps. Make a small neutral bow for an everyday handbag or create oversized colorful bows for a playful statement accessory.
This tutorial will show you how to sew a fabric bow bag charm step by step, including how to stuff the bow, create the center wrap, and add a swivel clasp or key ring. It is also a great scrap-busting project to sew for gifts, craft fairs, or handmade shops.
Learn how to Make $1,000 a Month Sewing by creating simple, profitable projects you can sell online, at craft fairs, or through social media.
Finished Size
The finished puffy fabric bow will measure approximately:
6–7 inches wide x 4–5 inches tall
You can easily make the pattern larger or smaller depending on the look you want.
Materials You Will Need

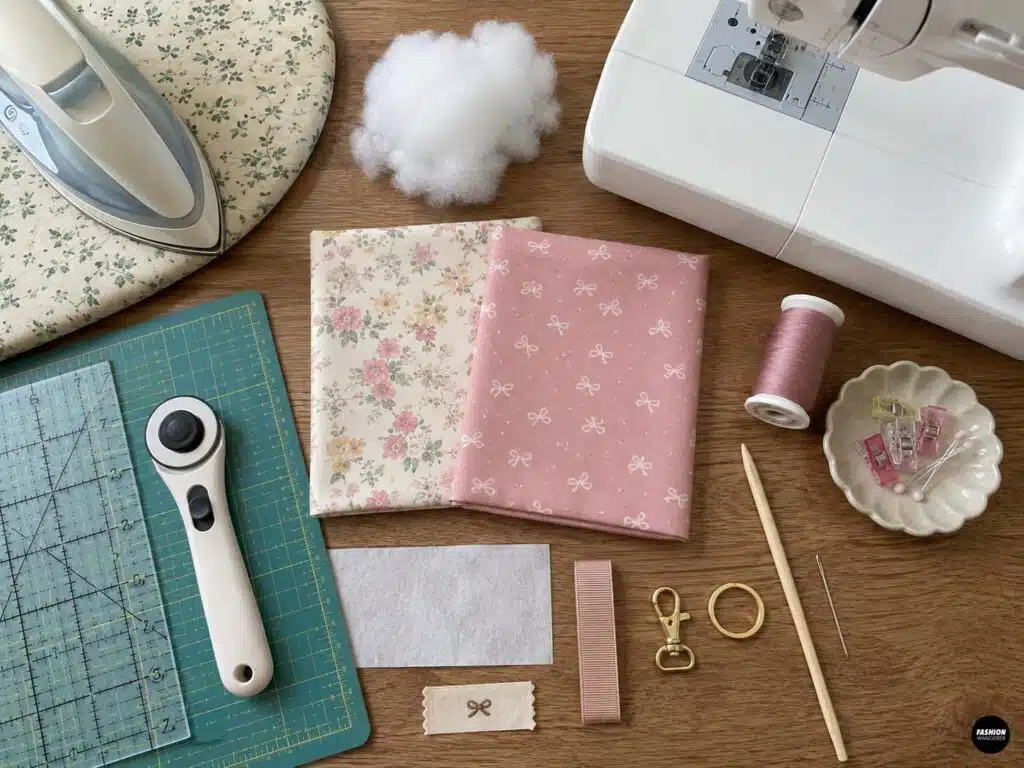
To make one DIY fabric bow bag charm, gather:
- 2 pieces cotton fabric approximately 8 x 6 inches
- Small amount of polyester fiberfill
- Fabric scissors or rotary cutter
- Cutting mat and ruler
- Sewing machine
- Coordinating polyester thread
- Pins or sewing clips
- Hand-sewing needle
- Iron and ironing board
- Point turner or chopstick
- 1 swivel lobster clasp, key ring, or carabiner
- 3-inch piece of ribbon or narrow fabric strap
- Optional fusible interfacing
- Optional decorative label
Lightweight or medium-weight woven fabrics work best. Quilting cotton is especially beginner friendly because it is easy to cut, press, and sew.
DIY Bow Bag Charm Step-by-Step

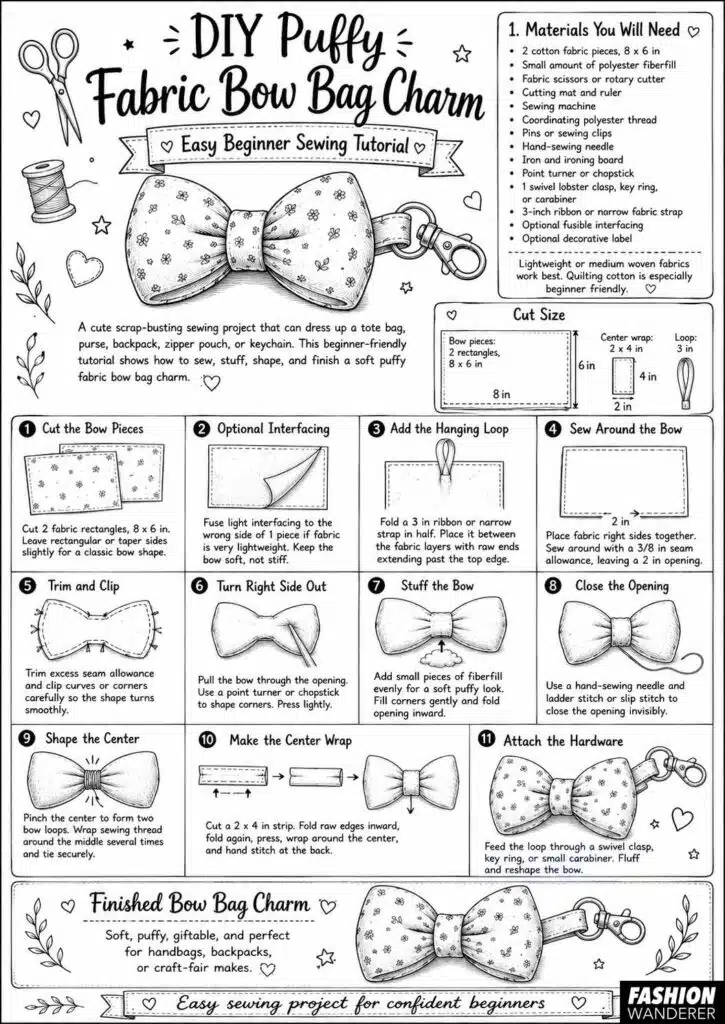
Step 1: Cut the Bow Pieces

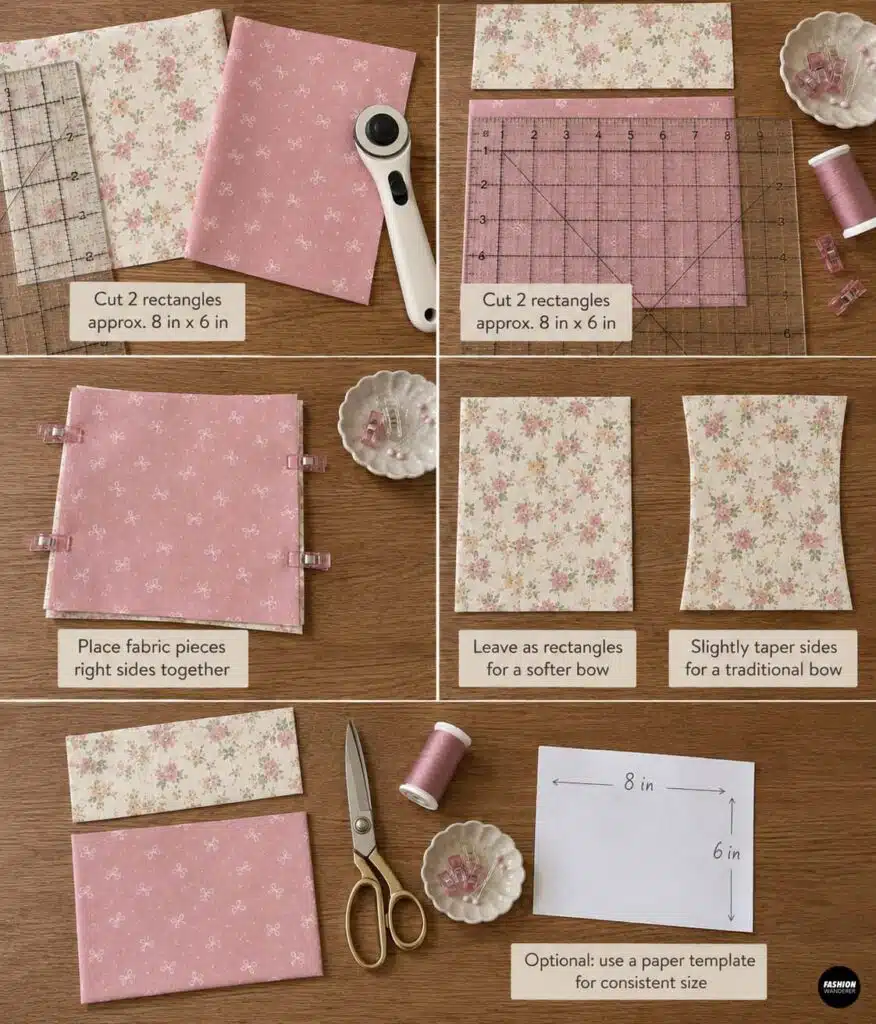
Start by cutting two rectangles approximately 8 inches wide by 6 inches tall.
Place the fabric pieces right sides together.
For a softer rectangular bow, you can leave the pieces as rectangles. For a more traditional bow shape, slightly curve or taper the sides toward the center.
You can also create a paper template first so every bow comes out the same size if you plan to make several.
Step 2: Optional – Add Interfacing

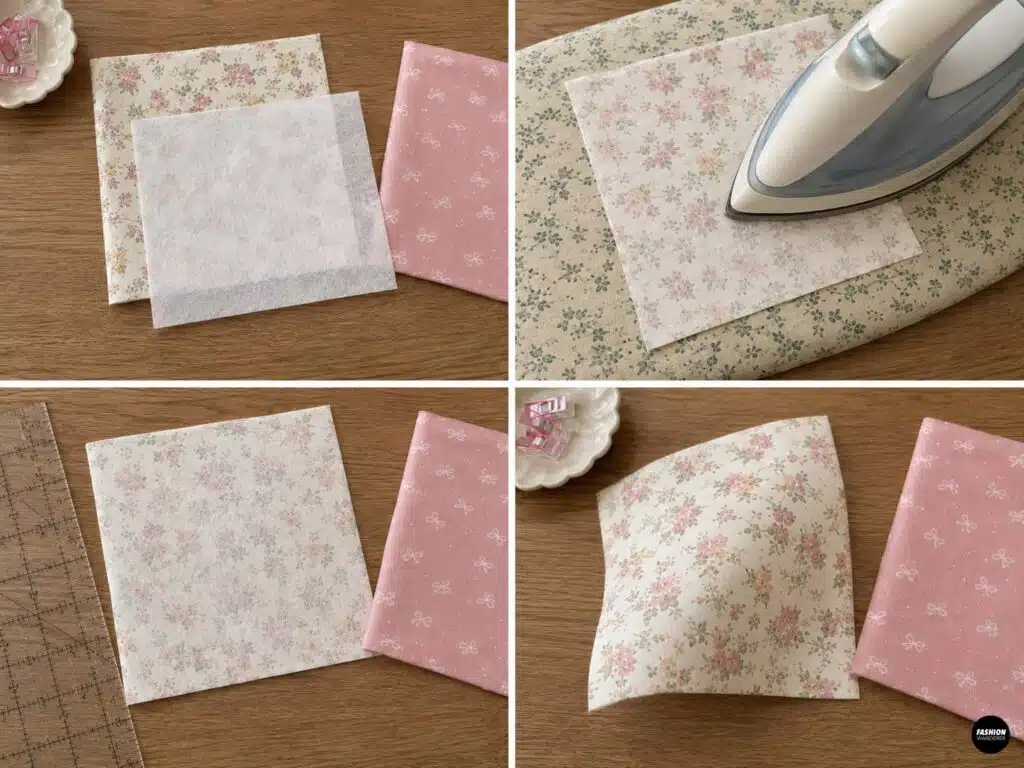
If your fabric is very lightweight, add a thin layer of fusible interfacing to the wrong side of one fabric piece.
Follow the manufacturer’s instructions for applying the interfacing.
Do not use heavy interfacing because the finished bow should remain soft and slightly puffy.
For quilting cotton or lightweight denim, you can usually skip this step.
Step 3: Add the Hanging Loop

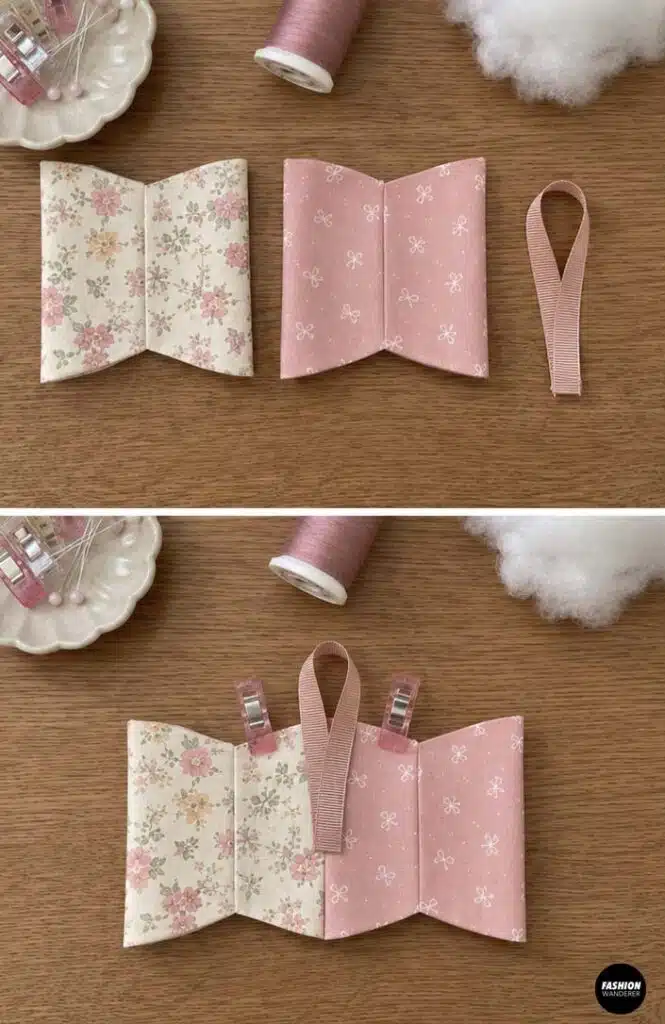
Cut a piece of ribbon or narrow fabric strap approximately 3 inches long.
Fold it in half to create a loop.
Place the loop between the two bow pieces with the raw ends extending slightly beyond the top edge of the fabric. The loop itself should point toward the center of the bow.
Pin or clip it securely.
This loop will eventually hold the swivel clasp or key ring.
Step 4: Sew Around the Bow

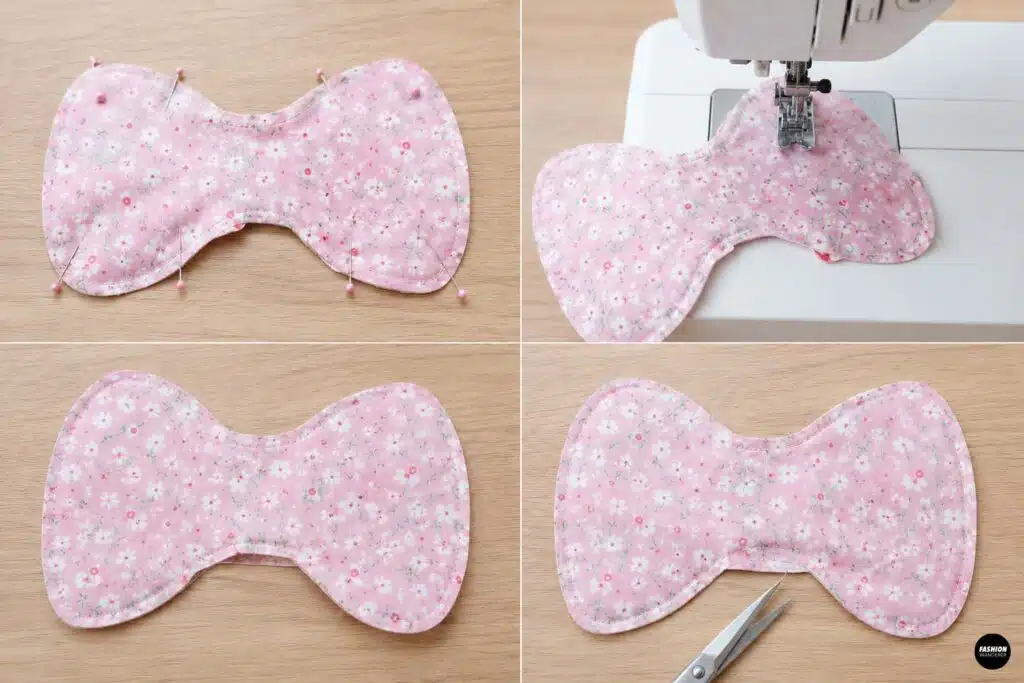
Pin the two fabric pieces together around the edges.
Using a ⅜-inch seam allowance, sew around the entire bow, leaving approximately a 2-inch opening along one edge.
Backstitch at the beginning and end of your stitching.
Slow down when sewing around curved areas so the finished bow shape stays smooth.
Step 5: Trim and Clip the Seams

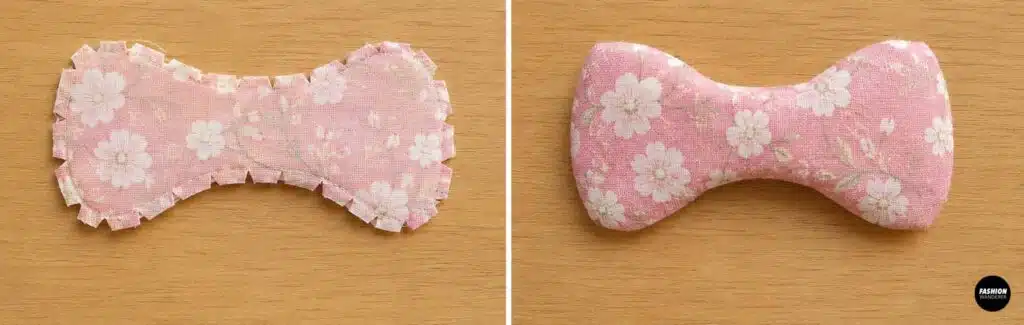
Trim away excess seam allowance, especially around the corners.
If your bow has curved edges, make small clips into the seam allowance without cutting through your stitching.
This helps the curves lie smoothly after the bow is turned right side out.
Step 6: Turn the Bow Right Side Out

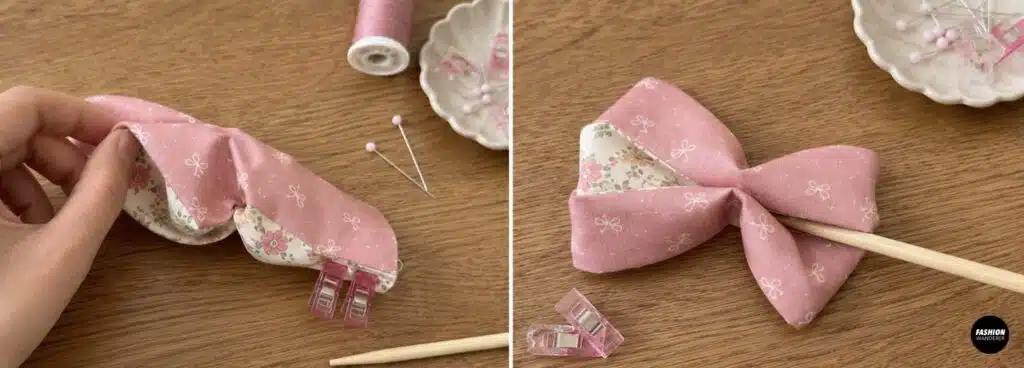
Carefully pull the bow through the 2-inch opening.
Use a point turner, chopstick, or blunt end of a pencil to gently push out the corners and curves.
Avoid pushing too hard because you can accidentally poke through the stitching.
Press the bow lightly with an iron before adding the stuffing.
Step 7: Stuff the Bow

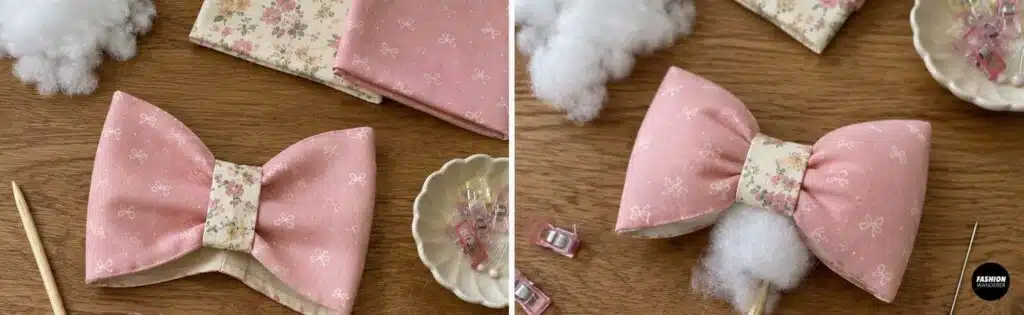
Tear small pieces of polyester fiberfill and begin inserting them through the opening.
Stuff both sides of the bow evenly.
The goal is to create a soft, puffy appearance, not a firm stuffed toy. Too much stuffing can make the bow bulky and difficult to shape.
Pay extra attention to the outer corners so they look full.
Once you are happy with the shape, fold the opening seam allowance toward the inside.
Step 8: Close the Opening

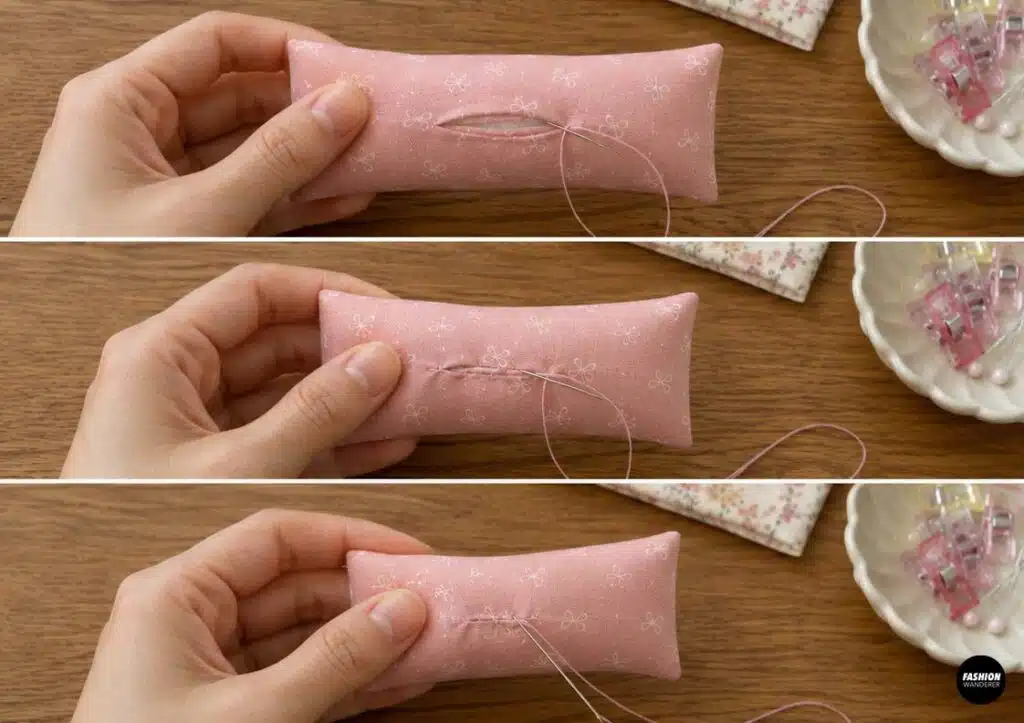
Thread a hand-sewing needle with coordinating thread.
Use a small ladder stitch or slip stitch to close the opening invisibly.
Knot the thread securely and hide the thread tail inside the bow.
You now have a simple stuffed rectangle that will become the bow.
Step 9: Shape the Center

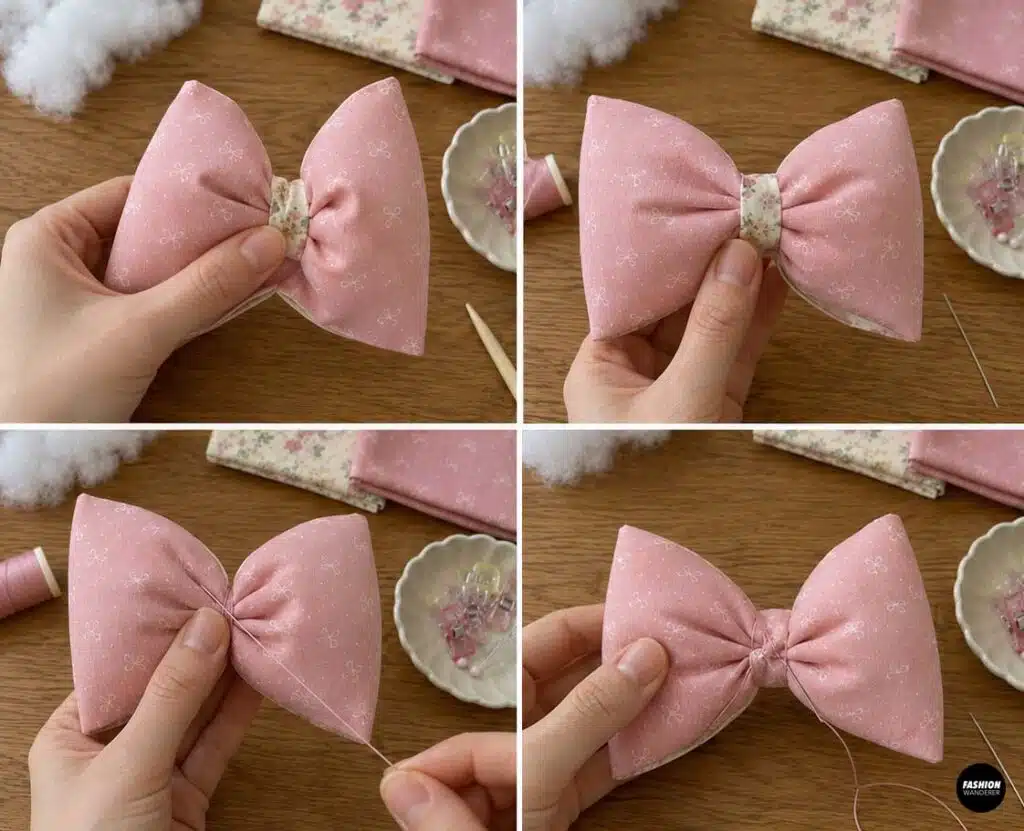
Pinch the center of the stuffed piece together with your fingers.
You may need to adjust the stuffing slightly to create two even bow loops.
Wrap sewing thread tightly around the center several times to hold the gathered shape.
Tie the thread securely at the back.
Don’t worry if the center looks messy because it will be covered with fabric in the next step.
Step 10: Make the Center Bow Wrap

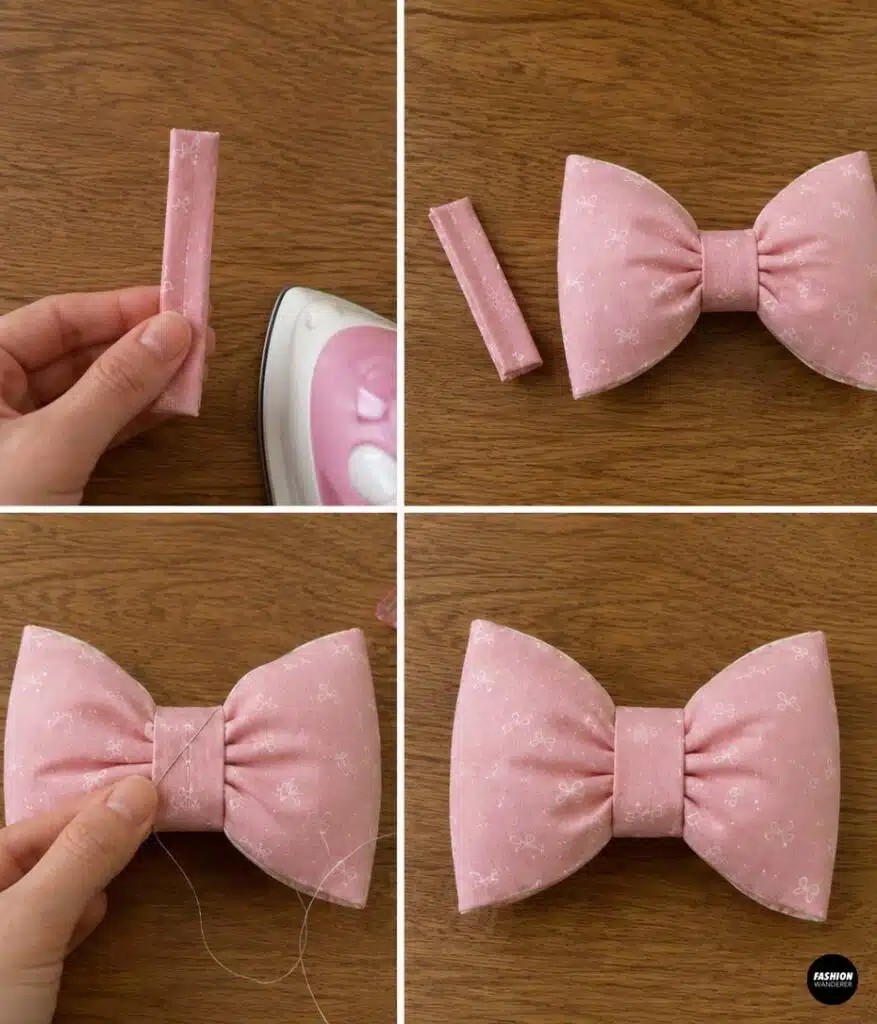
Cut a fabric rectangle approximately:
2 inches wide x 4 inches long
Fold both long raw edges toward the center and press.
Fold the strip in half lengthwise again so the raw edges are hidden.
Press well.
Wrap the fabric strip around the gathered center of the bow.
Overlap the ends at the back and hand stitch them together securely.
Adjust the center wrap until it sits neatly and evenly.
Step 11: Attach the Bag Charm Hardware

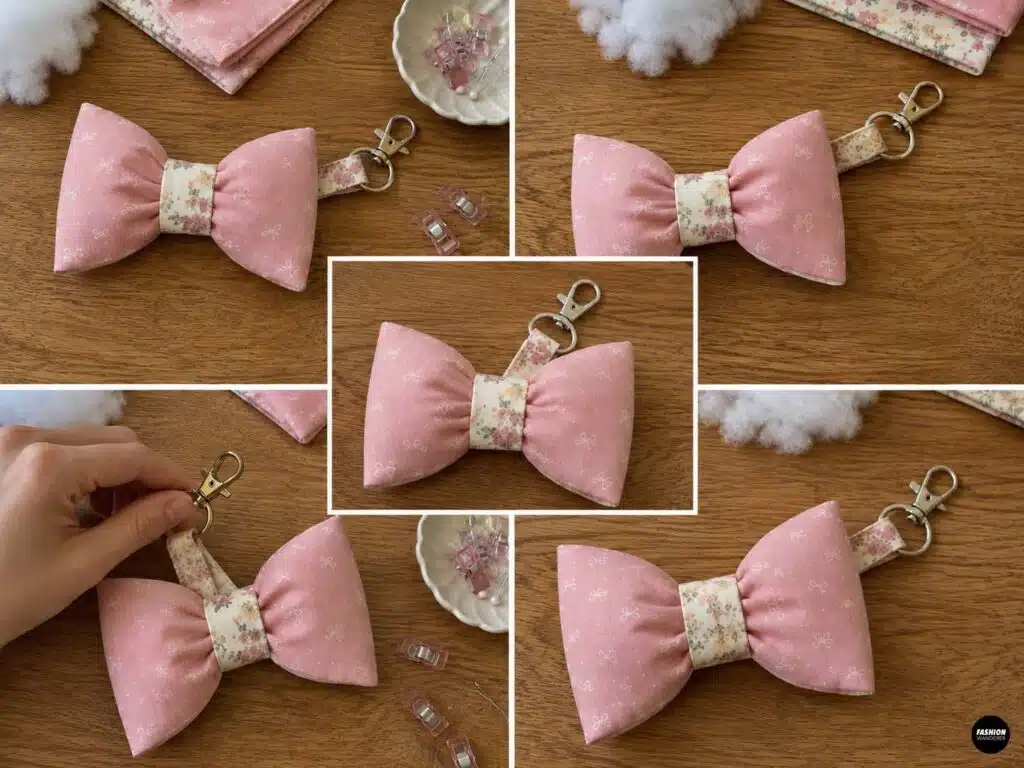
Feed the fabric loop through a swivel lobster clasp, key ring, or small carabiner.
If you installed the hardware before sewing the bow, simply check that everything is securely attached.
A swivel clasp is especially convenient because customers can easily move the bow between different handbags and backpacks.
Give the bow a final fluff and gently reshape the stuffing with your fingers.
Your DIY puffy fabric bow bag charm is finished!
Cute Fabric Ideas for Bow Bag Charms
One of the best parts about this beginner sewing project is how many different styles you can create.
Try:
- Pink gingham for a playful look
- Tiny floral cotton for a romantic style
- Black and white fabric for a minimalist bow
- Denim for a casual everyday accessory
- Red plaid for holiday gifts
- Pastel linen for spring
- Metallic fabric for party accessories
- Patchwork scraps for a one-of-a-kind bow
You can even make matching bow charms and zipper pouches from the same fabric.
Tips for Making Bow Charms to Sell
If you want to turn this easy sewing project into a handmade product, make several bows at the same time.
Cut all the fabric pieces first, sew them assembly-line style, and stuff several bows together. Batch sewing can dramatically reduce the time required to make each charm.
Consider offering small, medium, and oversized versions along with different hardware choices.
Personalization can also increase the perceived value. Add embroidered initials, small fabric labels, charms, or coordinating ribbons.
Final Thoughts

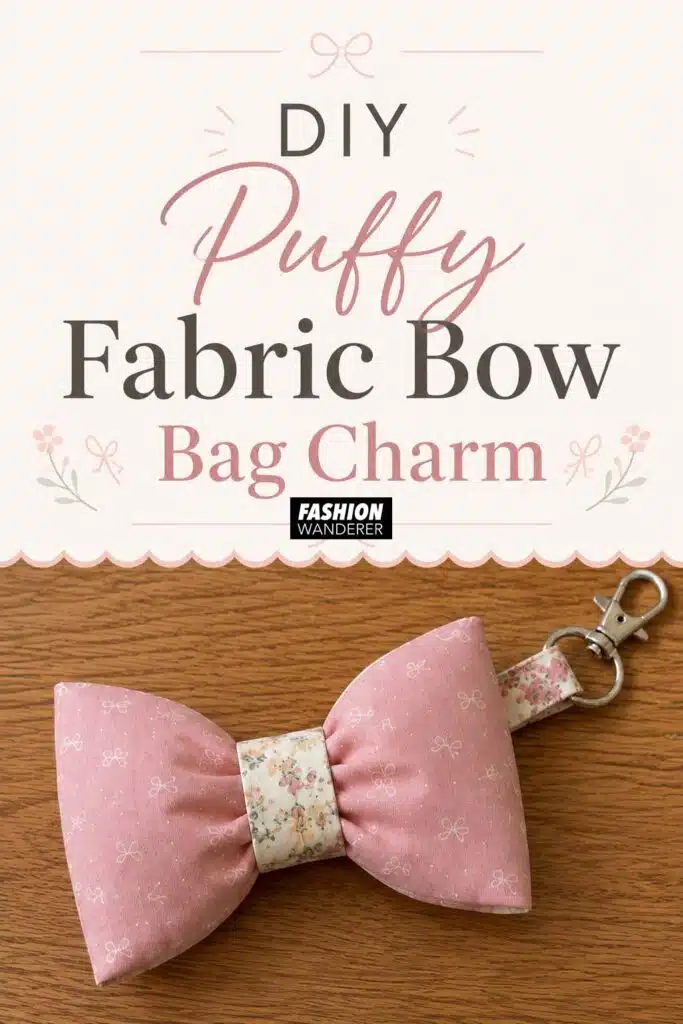
A DIY puffy fabric bow bag charm is the perfect combination of cute, useful, and beginner friendly. You only need a small amount of fabric, basic sewing supplies, and simple straight stitching to create an accessory that looks much more complicated than it really is.
It is also an excellent project for using leftover fabric from larger sewing projects instead of throwing scraps away.
Make one to decorate your favorite tote, sew several as handmade gifts, or create an entire collection in coordinating prints to sell. Once you master the basic technique, you can experiment with different sizes, fabrics, embellishments, and bow shapes to create your own signature style.