
If you love carrying books in your tote bag, backpack, or suitcase, a reusable book sleeve is one of the easiest sewing projects you can make. A padded fabric book sleeve helps protect your favorite novels, journals, planners, and e-readers from bent corners, scratches, dust, and everyday wear.
This beginner-friendly sewing tutorial shows you how to make a reusable book sleeve step by step using simple rectangles of fabric, lightweight batting, and an optional closure. It is also a fantastic scrap-busting project and makes a thoughtful handmade gift for book lovers, teachers, students, and readers of all ages.
Back-to-school fabric scrap sewing ideas are ideal for beginners who want small, manageable projects that can be finished quickly. Once you understand the basic construction, you can easily adjust the measurements to fit paperback books, hardcover books, planners, tablets, or Kindles.
Why Make a Reusable Book Sleeve?
A fabric book sleeve is practical, washable, and reusable. Unlike disposable wrapping or plastic covers, you can use the same padded sleeve again and again.
It is also a great project for sewing beginners because there are no complicated curves, zippers, or fitted seams. You mainly sew straight lines, making it perfect for practicing seam allowances, layering, turning, and topstitching.
For an extra personalized look, try quilting the outer fabric, adding embroidery, using patchwork scraps, or sewing a label to the front.
Materials You Will Need
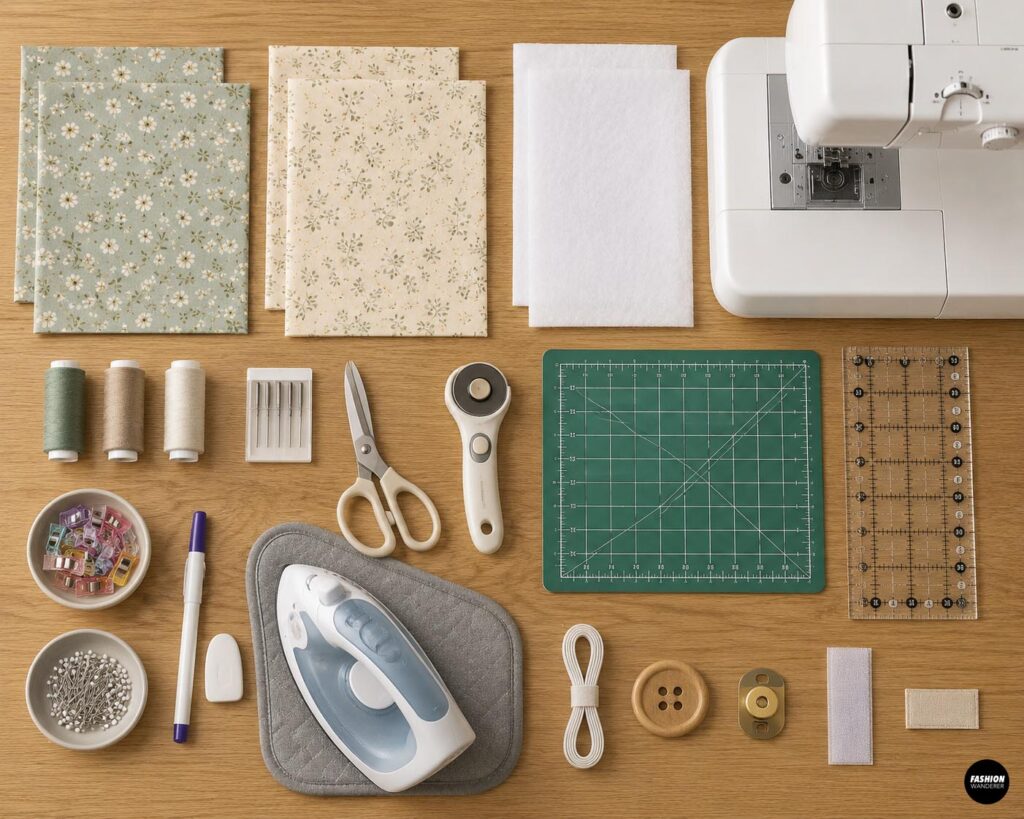
To make one medium reusable book sleeve, gather:
- 2 pieces outer fabric, approximately 9½” x 12″
- 2 pieces lining fabric, approximately 9½” x 12″
- 2 pieces lightweight batting or fusible fleece, approximately 9½” x 12″
- Coordinating polyester thread
- Sewing machine
- Universal sewing machine needle
- Fabric scissors or rotary cutter
- Cutting mat
- Ruler or measuring tape
- Fabric clips or pins
- Iron and ironing board
- Fabric marking pen or chalk
Optional:
- 4″–5″ piece of elastic
- 1 medium button
- Magnetic snap
- Velcro
- Fabric label
The finished sleeve from these measurements will fit many standard paperback and medium hardcover books. Always measure your specific book before cutting if you want a custom fit.
Easy DIY Book Sleeve
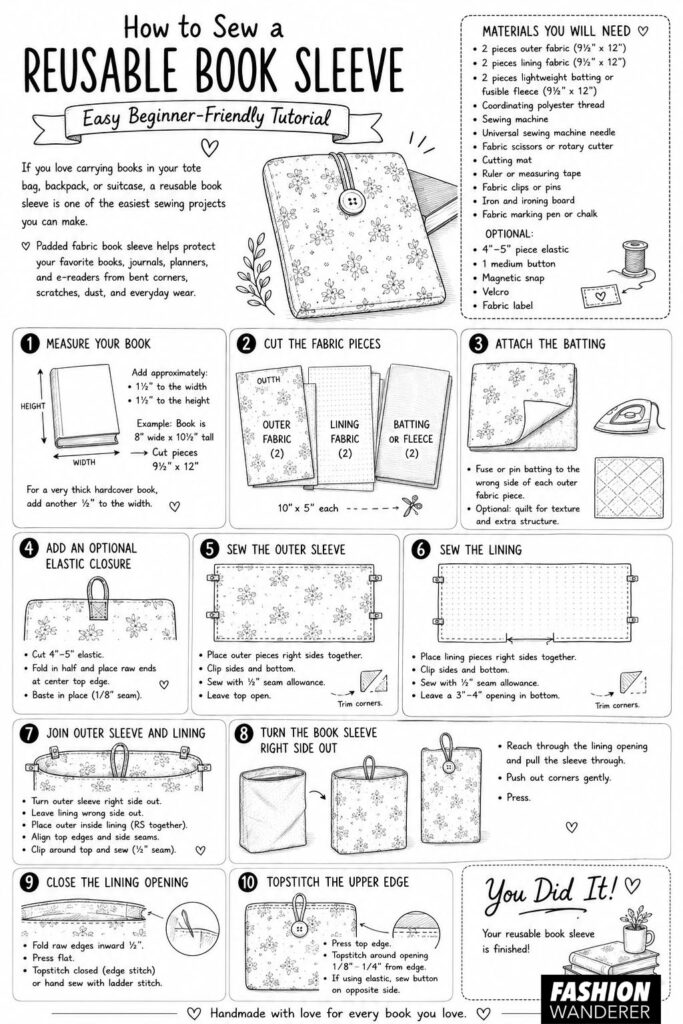
Step 1: Measure Your Book
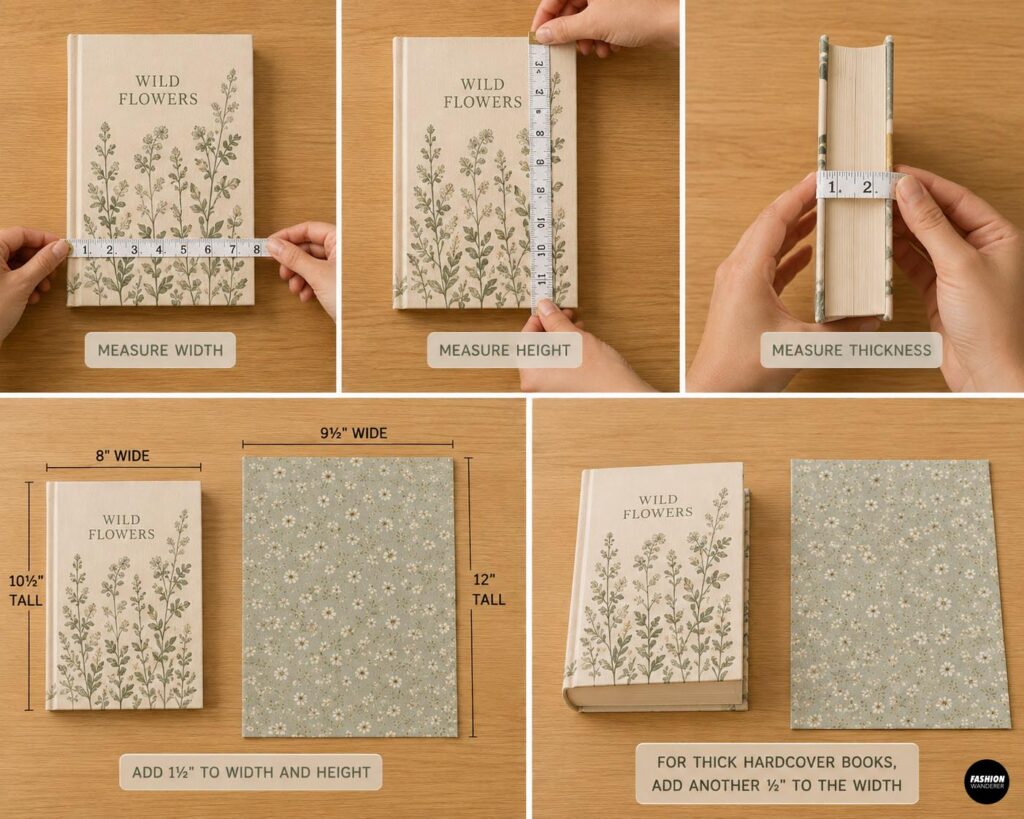
Lay the book flat and measure its width, height, and thickness.
Add approximately:
- 1½” to the width
- 1½” to the height
This extra room allows for seam allowances, batting, and the thickness of the book.
For example, if your book measures 8″ wide and 10½” tall, cutting your pieces around 9½” x 12″ gives comfortable room without making the sleeve overly loose.
For a very thick hardcover book, add another ½” to the width.
Step 2: Cut the Fabric Pieces
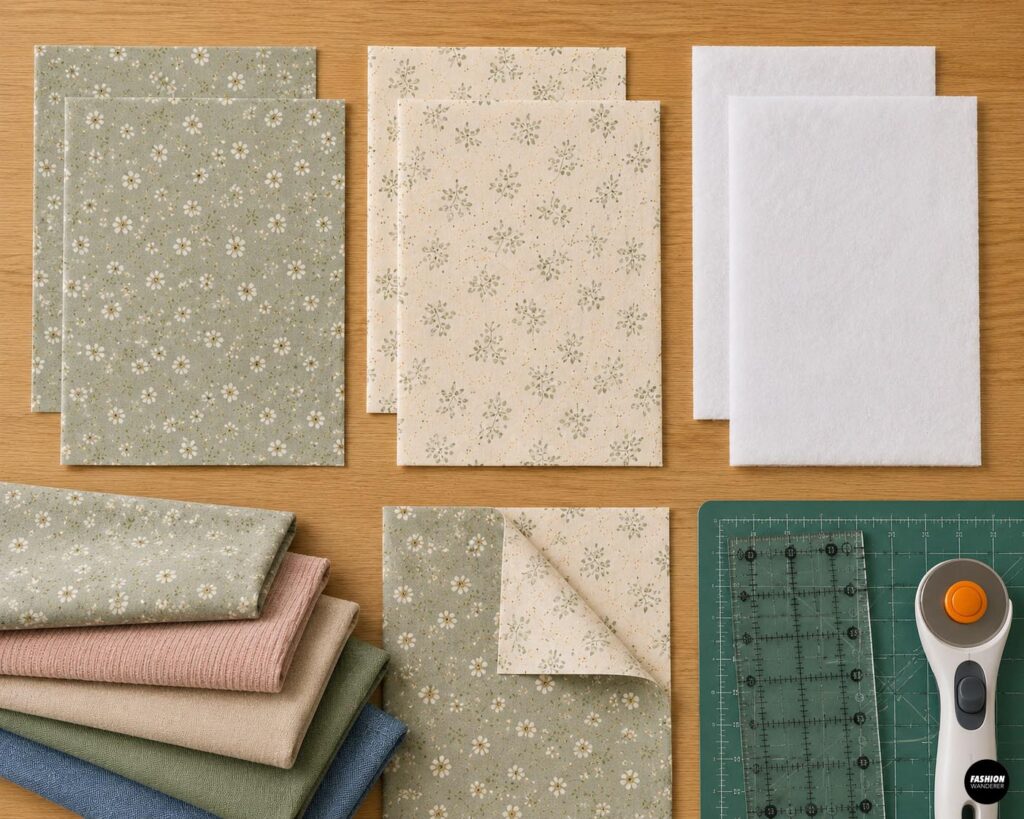
Cut two matching rectangles from your outer fabric.
Cut two matching rectangles from the lining fabric.
Cut two pieces of batting or fusible fleece using the same measurements.
Try quilting cotton, canvas, linen blend, corduroy, or lightweight denim for the outer fabric. Quilting cotton works especially well for beginners because it is easy to cut and sew.
For the lining, choose smooth cotton so the book slides easily into the finished sleeve.
Step 3: Attach the Batting
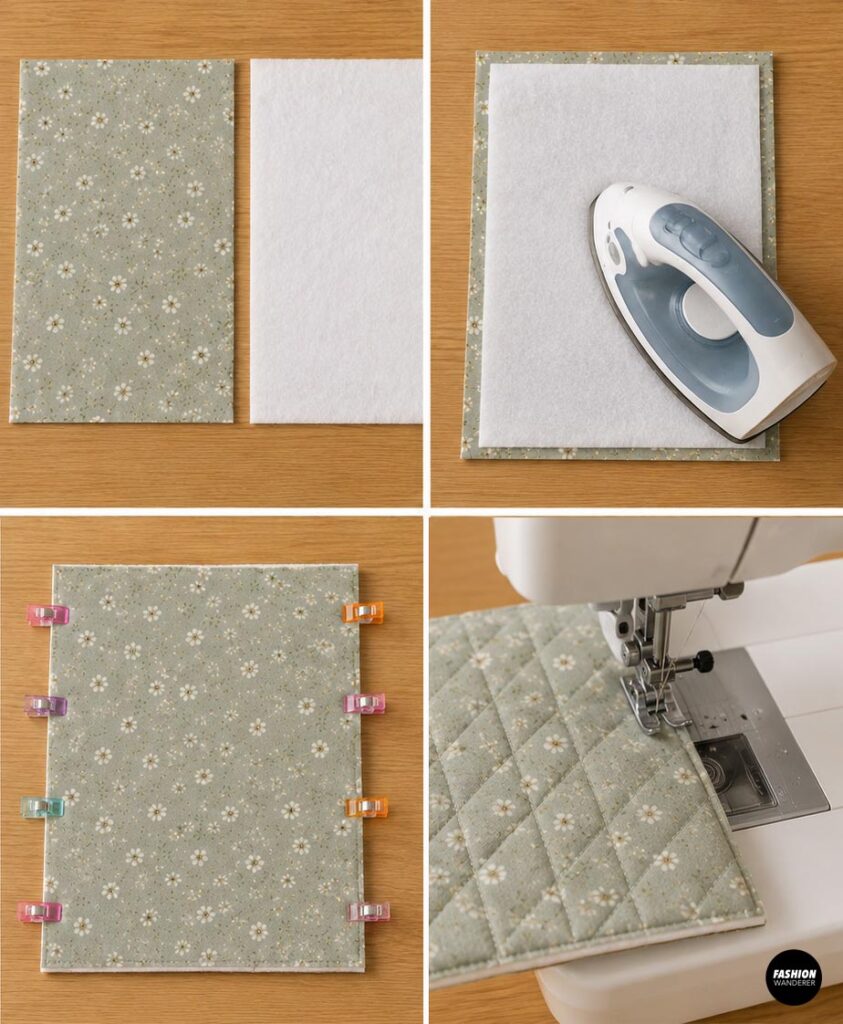
Place one batting piece against the wrong side of each outer fabric rectangle.
If you are using fusible fleece, follow the manufacturer’s directions and fuse it in place with your iron.
If you are using regular batting, secure the layers with fabric clips or a few pins.
For additional texture, quilt the batting to the outer fabric. Sew straight parallel lines, diagonal lines, or a simple grid across both pieces.
Quilting is optional, but it makes the book sleeve feel more structured and polished.
Step 4: Add an Optional Elastic Closure
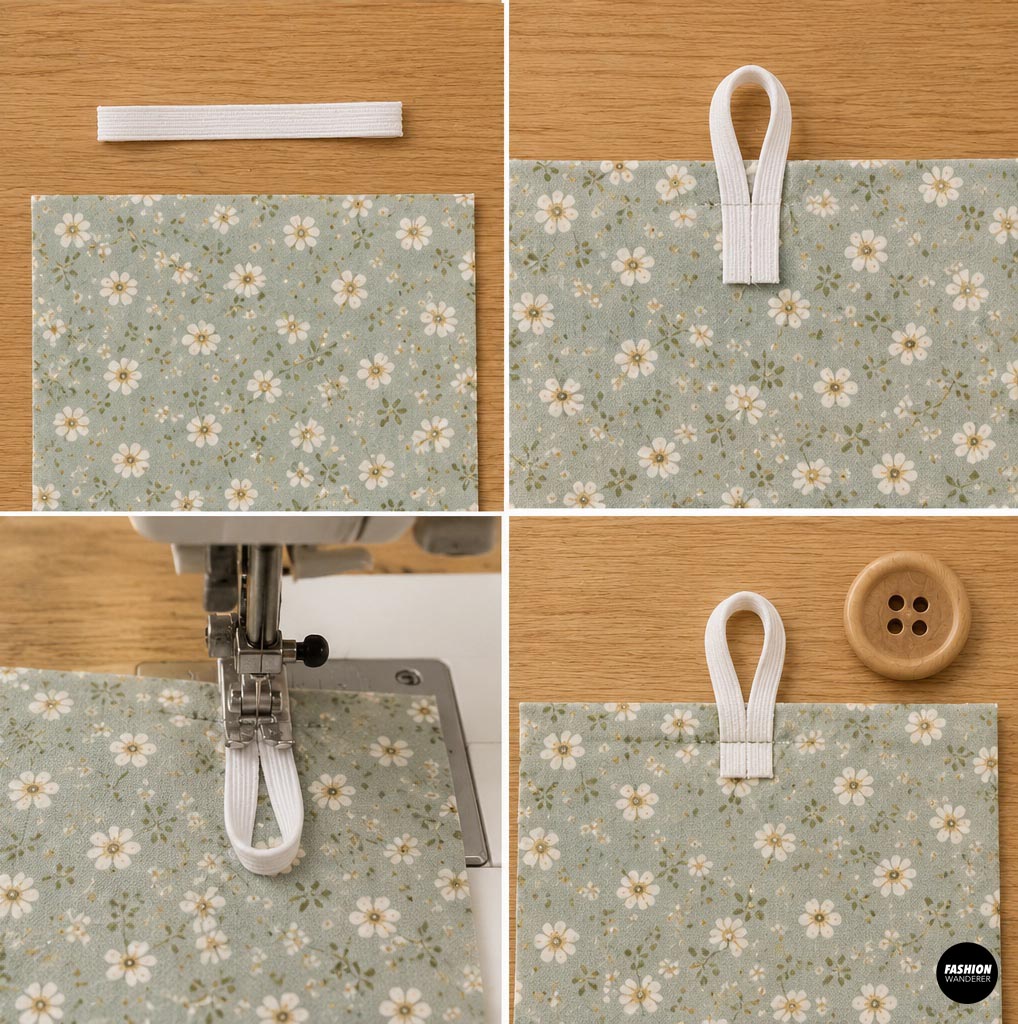
If you want your reusable book sleeve to stay securely closed, add an elastic loop.
Cut approximately 4″–5″ of elastic.
Fold the elastic in half so the raw ends meet.
Place the raw ends at the center of the top edge of one outer fabric piece, with the loop pointing downward toward the fabric.
Baste across the elastic ends using a ⅛” seam allowance.
Later, you will sew a button onto the opposite side so the elastic can stretch over it.
Step 5: Sew the Outer Sleeve
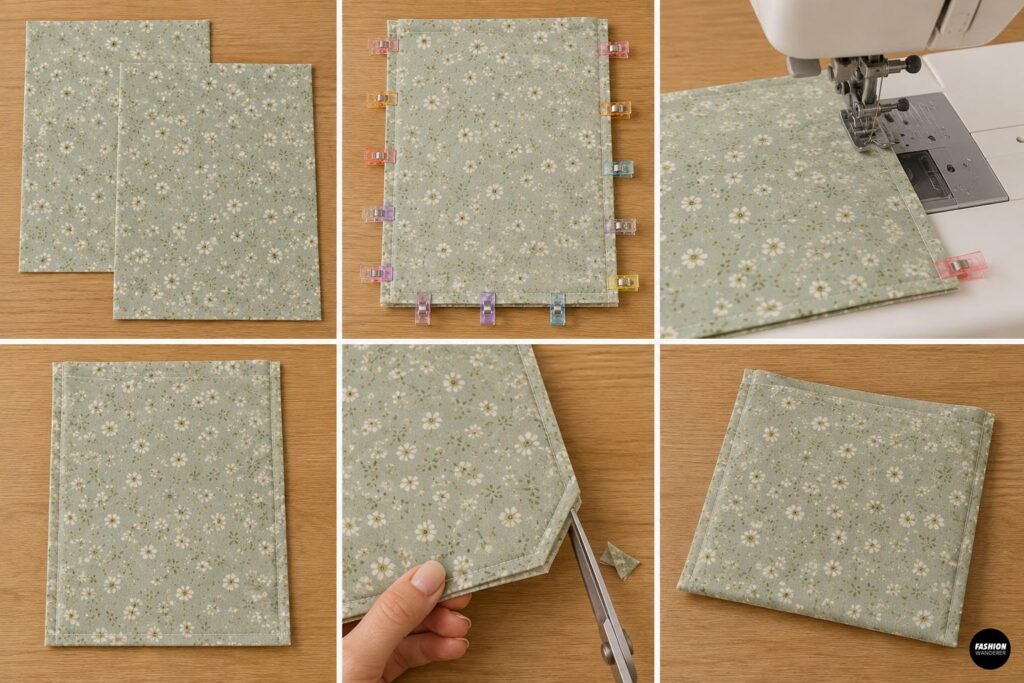
Place the two outer fabric pieces right sides together.
Match all edges carefully and clip around the sides and bottom.
Leave the top edge completely open.
Using a ½” seam allowance, sew down one side, across the bottom, and up the opposite side.
Backstitch at the beginning and end.
Trim a little bulk from the bottom corners without cutting through the stitching.
Do not turn the outer sleeve right side out yet.
Step 6: Sew the Lining
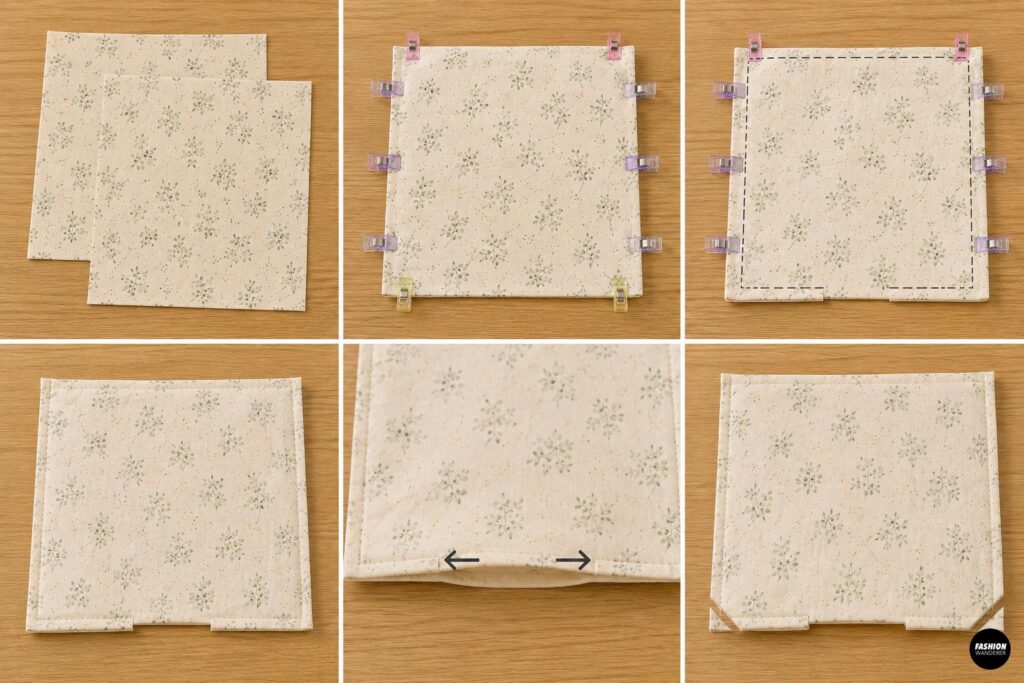
Place the two lining pieces right sides together.
Clip around both sides and the bottom.
This time, leave a 3″–4″ opening along the bottom edge. You will use this opening to turn the entire book sleeve later.
Sew around the sides and bottom with a ½” seam allowance, stopping on either side of the turning opening.
Backstitch at each end of the opening.
Trim the lower corners.
Step 7: Join the Outer Sleeve and Lining
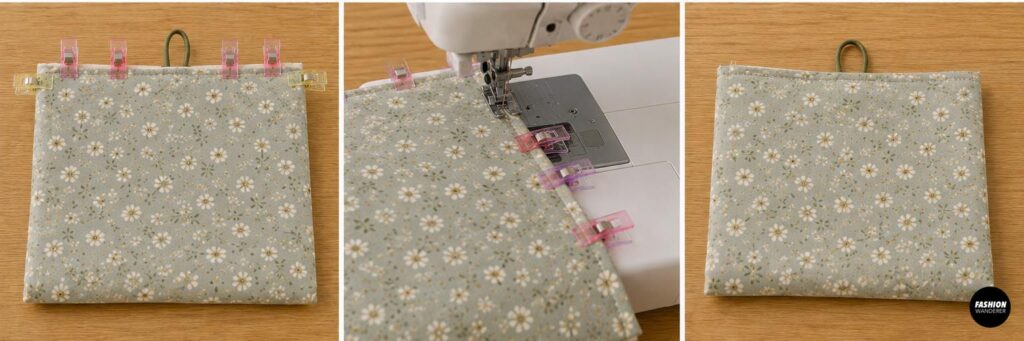
Turn the outer sleeve right side out.
Leave the lining wrong side out.
Slide the outer sleeve inside the lining so the right sides of the outer fabric and lining are facing each other.
The top raw edges should match.
Align the side seams and clip around the entire upper edge.
Make sure the elastic loop, if added, is tucked safely between the layers.
Sew completely around the top using a ½” seam allowance.
Step 8: Turn the Book Sleeve Right Side Out
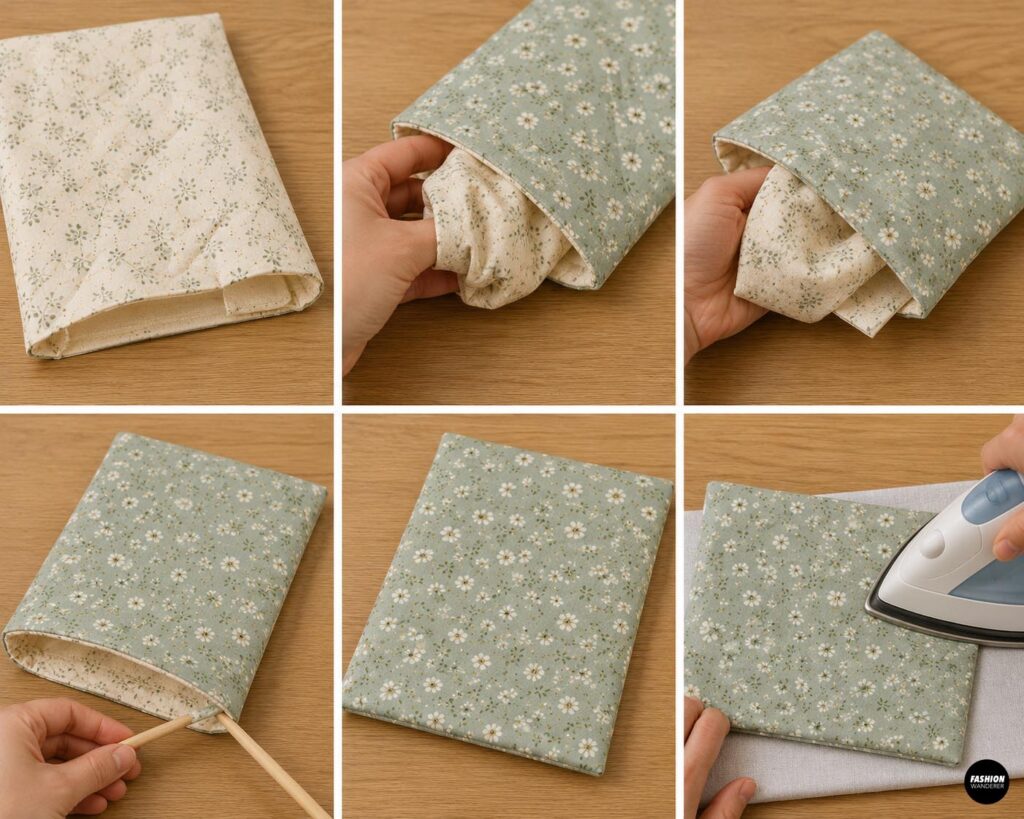
Reach through the opening you left in the bottom of the lining.
Gently pull the entire book sleeve through the opening.
Push out the corners carefully with your fingers or a blunt turning tool.
Avoid using anything sharp that could poke through the fabric.
Once everything is turned, press the outer fabric and lining smoothly.
Step 9: Close the Lining Opening
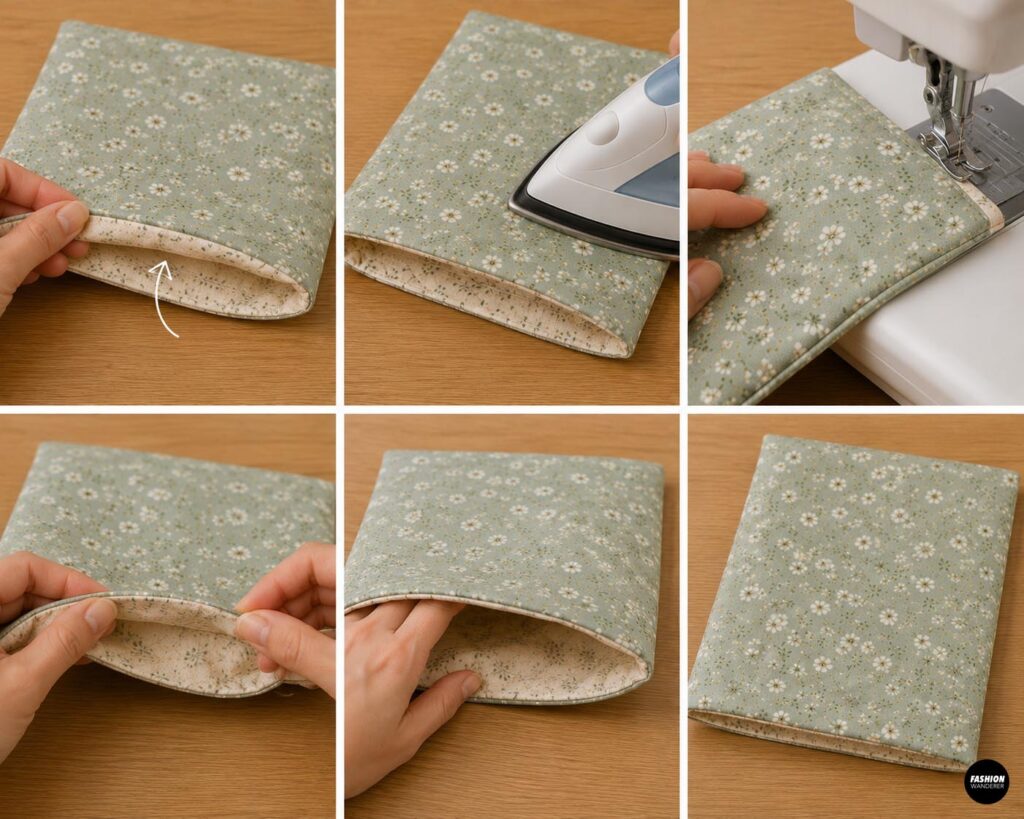
Fold the raw edges of the lining opening inward by approximately ½”.
Press the folded edges flat.
Topstitch the opening closed with an edge stitch, or hand sew it using a ladder stitch for a nearly invisible finish.
Push the lining down inside the outer sleeve.
Smooth the corners into place.
Step 10: Topstitch the Upper Edge
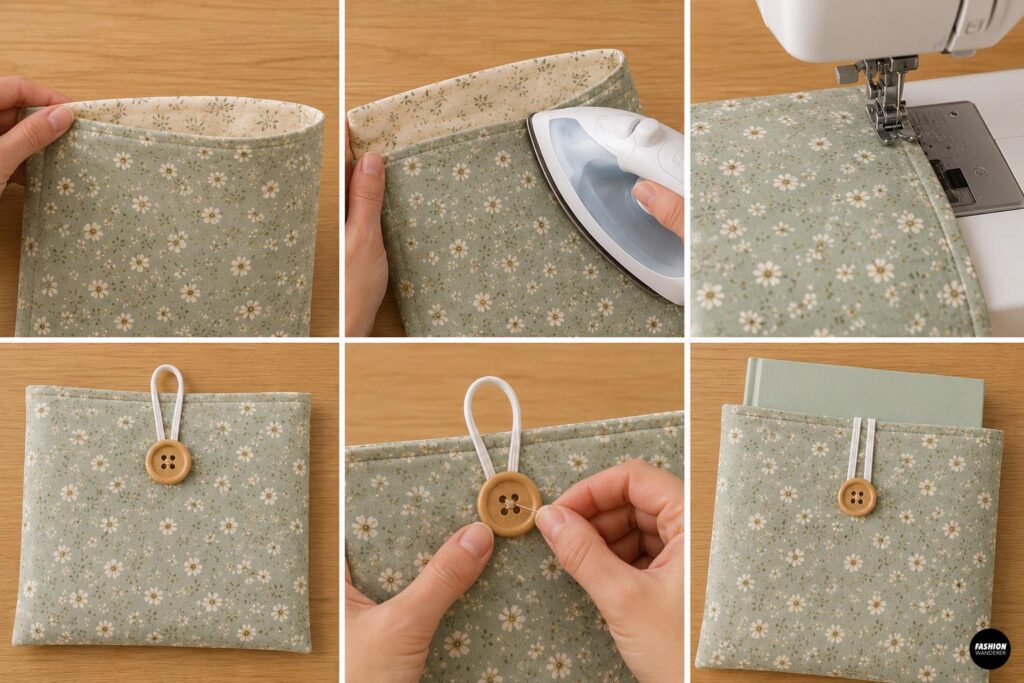
Press the top edge carefully so the lining sits slightly inside the sleeve and does not roll outward.
Topstitch around the entire opening approximately ⅛”–¼” from the edge.
This step gives the reusable book sleeve a clean professional finish and helps keep the lining securely in place.
If you added an elastic loop, sew the button onto the opposite side of the sleeve at the correct height.
Test the closure with a book inserted before stitching the button permanently.
Easy Ways to Customize Your Book Sleeve
Once you have made one, the possibilities are endless. Use patchwork scraps for a colorful version, quilt the exterior for extra padding, embroider a reader’s initials, or add a front pocket for bookmarks and pens.
You can also resize the same pattern to create sleeves for journals, Bibles, tablets, planners, and e-readers.
For gifts, pair the finished sleeve with a favorite novel, handmade bookmark, or bookstore gift card.
Final Thoughts
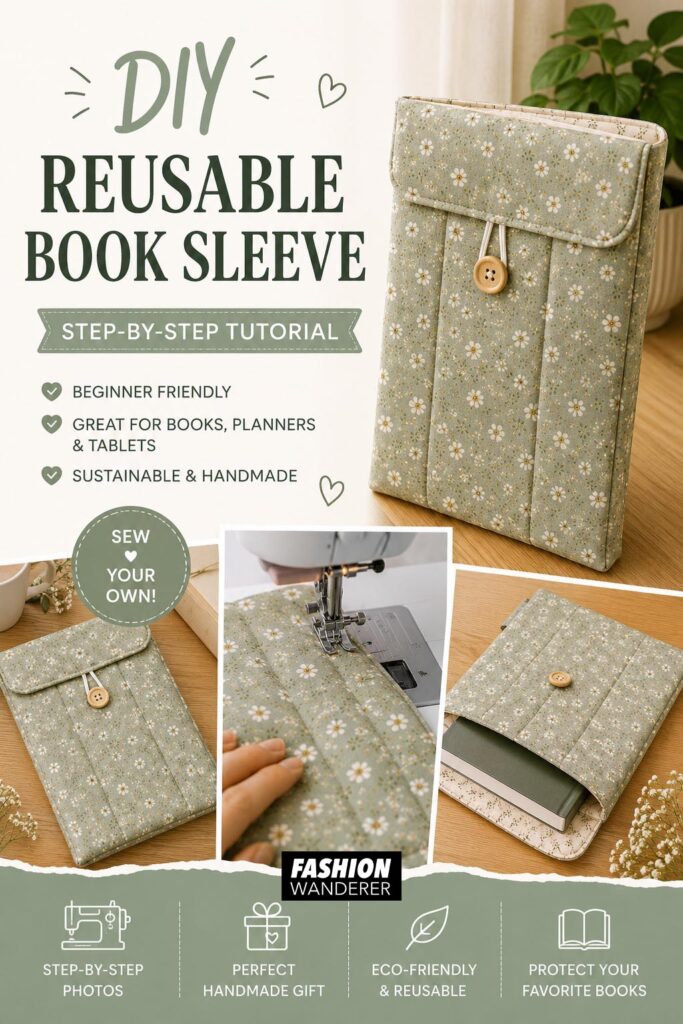
Learning how to sew a reusable book sleeve is a quick and satisfying project that combines practicality with creativity. With just a few rectangles of fabric and basic straight stitching, you can create a padded protective cover that looks polished and lasts for years.
It is an especially good beginner sewing project because you can practice lining, batting, turning, pressing, and topstitching without tackling complicated construction.
Make one for yourself, then use your leftover fabric to sew a few more. They are easy to customize, useful year-round, and perfect for anyone who hates seeing a beautiful book arrive at its destination with a bent corner.