
Need a quick Halloween costume that looks cute, photographs well, and does not require sewing an entire outfit from scratch? This 30-minute DIY skeleton costume from kids’ pajamas is one of the easiest last-minute Halloween projects you can make at home.
Instead of starting with a costume pattern, you use a plain black pajama set as the base and add white skeleton bones to the front. The result is comfortable enough for trick-or-treating, school parties, Halloween movie nights, or dress-up play after October is over.
This project is especially beginner friendly because you can make the bones with white felt, fleece, iron-on vinyl, or fabric paint. If you have a sewing machine, you can stitch felt pieces in place for a durable costume. If you want an even faster version, use heat-transfer vinyl or fabric-safe adhesive.
Turn everyday hoodies, sweatshirts, pajamas, and jeans into easy kids halloween costumes you can make from clothes you already own. Below, I’ll show you how to make a simple DIY kids skeleton costume step by step in about 30 minutes.
Materials You Will Need
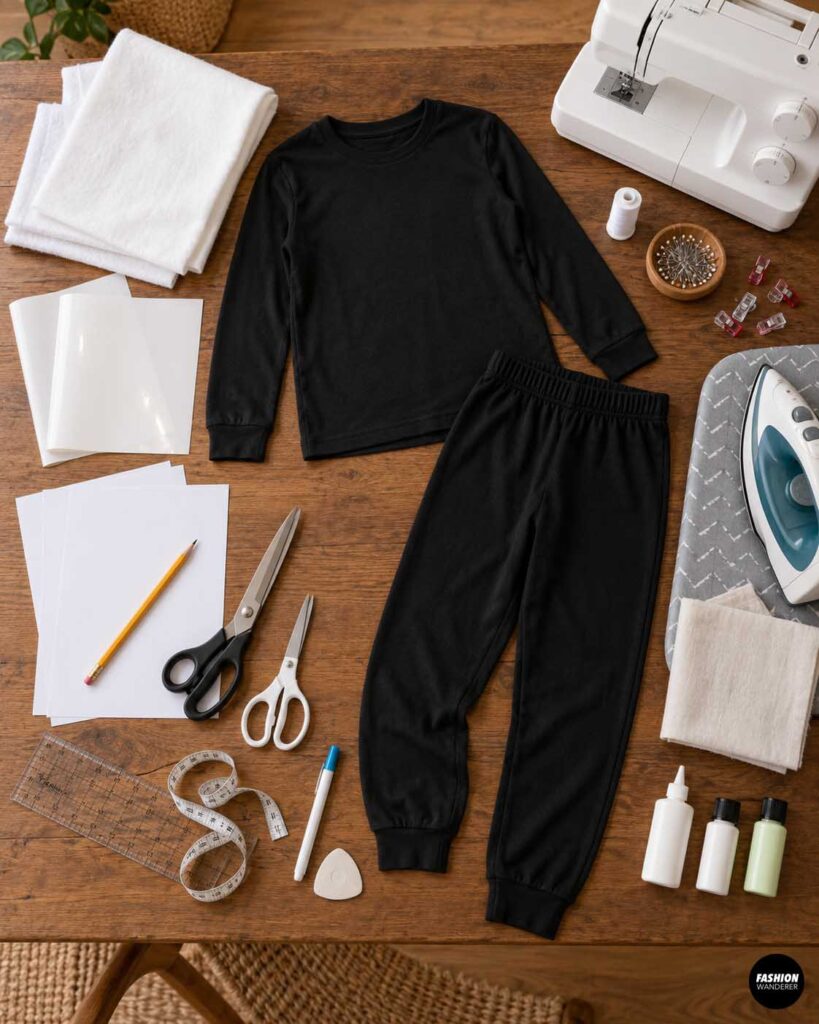
To make one kids’ skeleton pajama costume, gather:
- One plain black long-sleeve pajama top
- One pair of black pajama pants
- White felt, fleece, or heat-transfer vinyl
- Paper for making bone templates
- Pencil
- Fabric scissors
- Regular scissors for paper
- Measuring tape or ruler
- Fabric chalk or washable marker
- Straight pins or sewing clips
- Sewing machine, optional
- White polyester thread, optional
- Iron and ironing board
- Pressing cloth if using heat-transfer vinyl
- Optional fabric glue
- Optional white fabric paint
- Optional glow-in-the-dark fabric paint
Choose pajamas that fit comfortably and are not too tight. A slightly relaxed fit makes it easier to add the skeleton design and gives your child plenty of room to move.
DIY Skeleton Costume From PJs
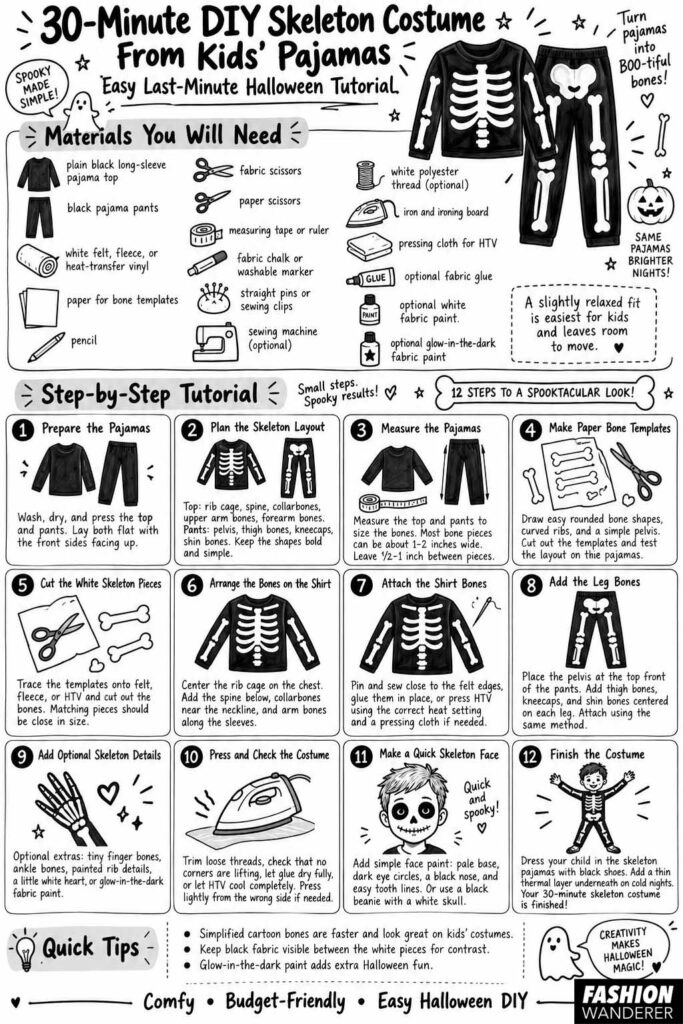
Step 1: Prepare the Pajamas
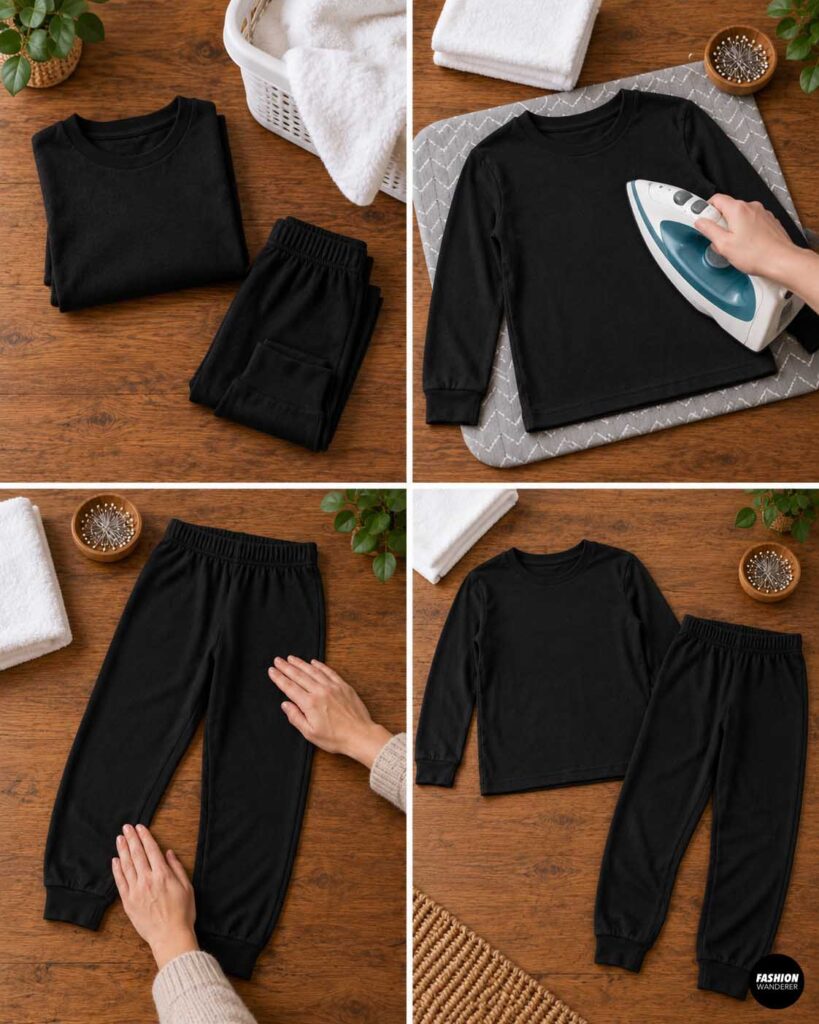
Wash and dry the pajamas before adding the skeleton design.
This is especially important if the pajamas are new because cotton blends can shrink slightly during the first wash.
Press the top and pants so the fabric lies smooth and flat.
Lay both pieces on your work surface with the front sides facing up.
Step 2: Plan the Skeleton Layout
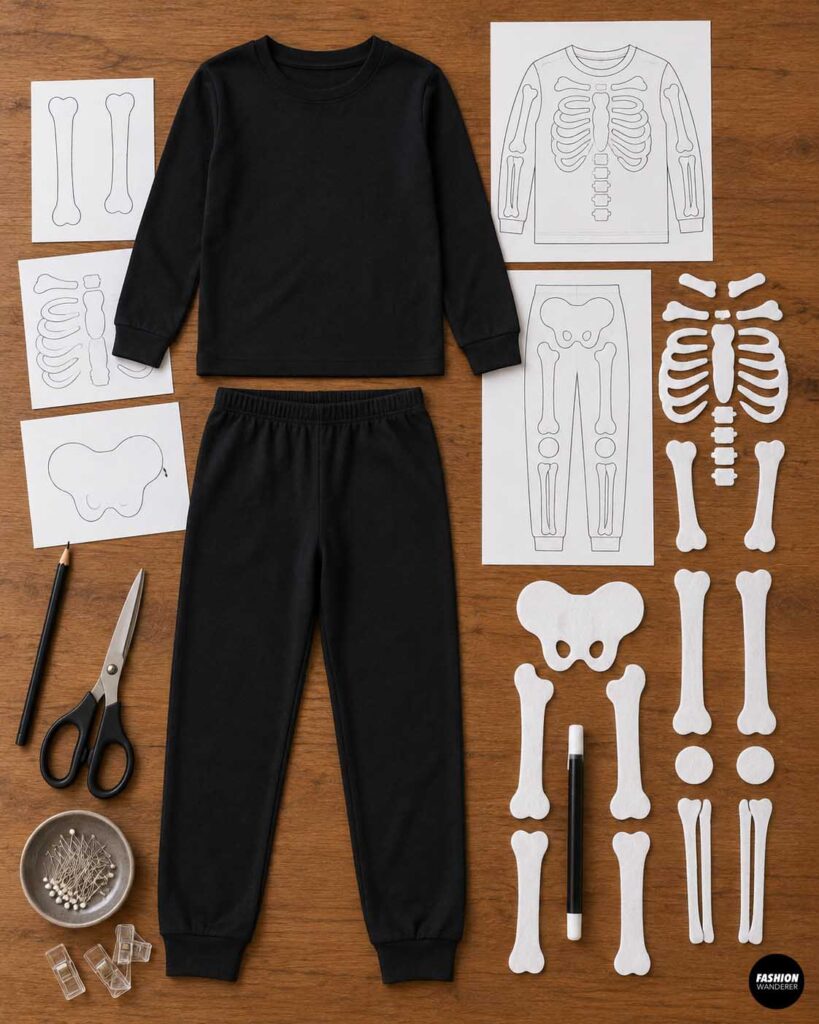
Before cutting anything, decide where you want the bones to go.
For the pajama top, you will usually need:
- Rib cage
- Spine
- Collarbone shapes
- Upper arm bones
- Forearm bones
For the pants, add:
- Pelvis shape
- Thigh bones
- Kneecaps
- Shin bones
You do not need the skeleton to be anatomically perfect. A simplified cartoon-style skeleton is faster to make and often looks better on kids’ pajamas.
Keep the shapes bold and easy to recognize.
Step 3: Measure the Pajamas
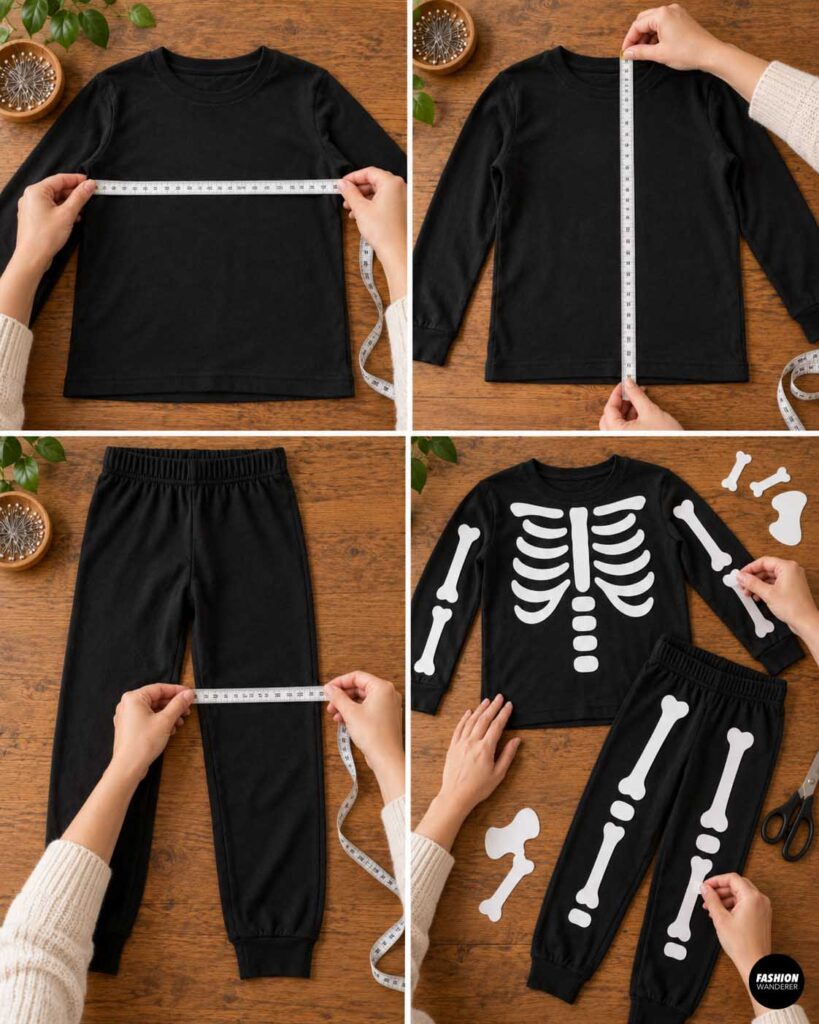
Measure the width and length of the pajama top and pants.
Use these measurements to estimate the size of each bone.
For younger children, most individual bone pieces can be approximately 1 to 2 inches wide.
The rib cage can be around 6 to 9 inches wide, depending on the child’s size.
Keep at least ½ to 1 inch between the bone pieces so the black fabric shows through clearly.
Step 4: Make Simple Paper Bone Templates
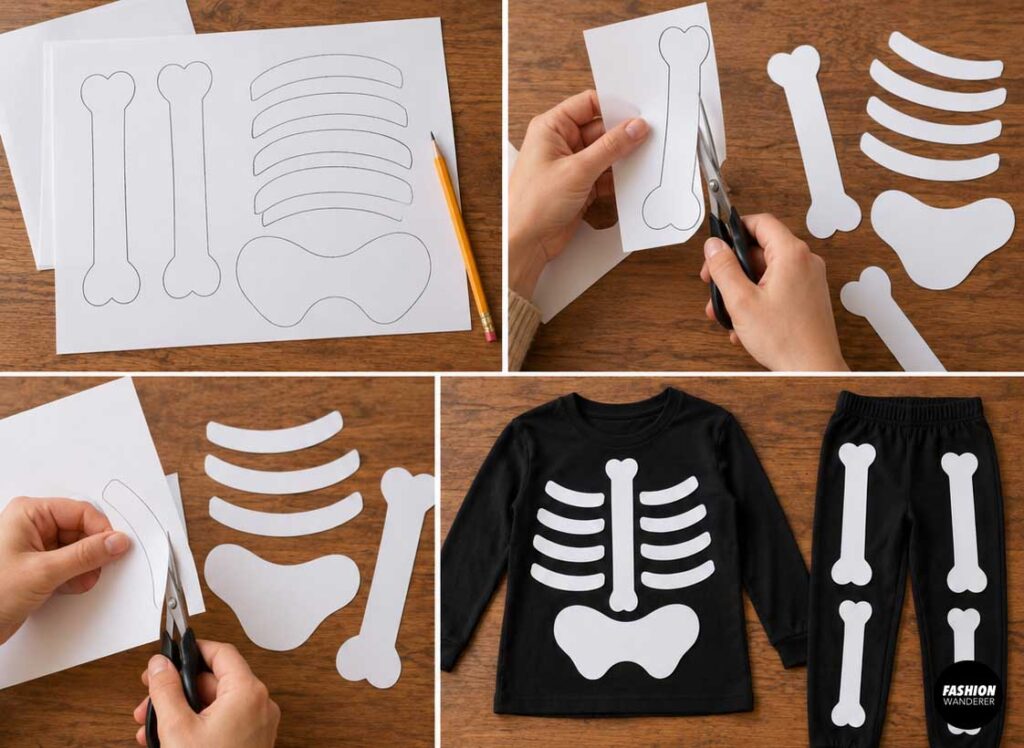
Draw the bones onto plain paper.
Start with a long oval or rounded rectangle for the arm and leg bones.
For the ends, widen the shape slightly to imitate joints.
Create several rib shapes using curved strips.
For the pelvis, draw a simple wide curved shape rather than trying to copy a realistic skeleton.
Cut out the paper templates and place them on the pajamas.
Adjust the shapes until the proportions look balanced.
Step 5: Cut the White Skeleton Pieces
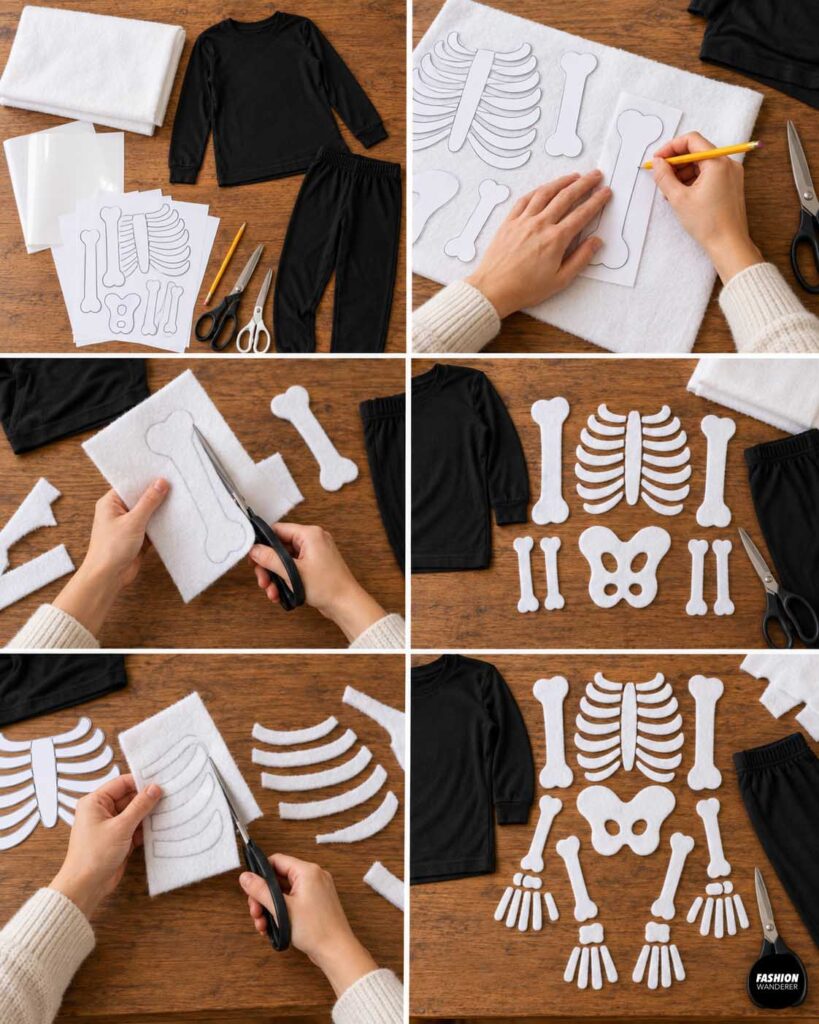
Place the paper templates on white felt or fleece.
Trace around each template and cut out the pieces.
If using heat-transfer vinyl, place the templates on the vinyl and trace the shapes onto the backing.
Try to keep matching bones similar in size.
For example, both thigh bones should look approximately the same length.
Do not worry about tiny imperfections. Slightly handmade-looking bones actually make the costume feel more playful.
Step 6: Arrange the Bones on the Shirt
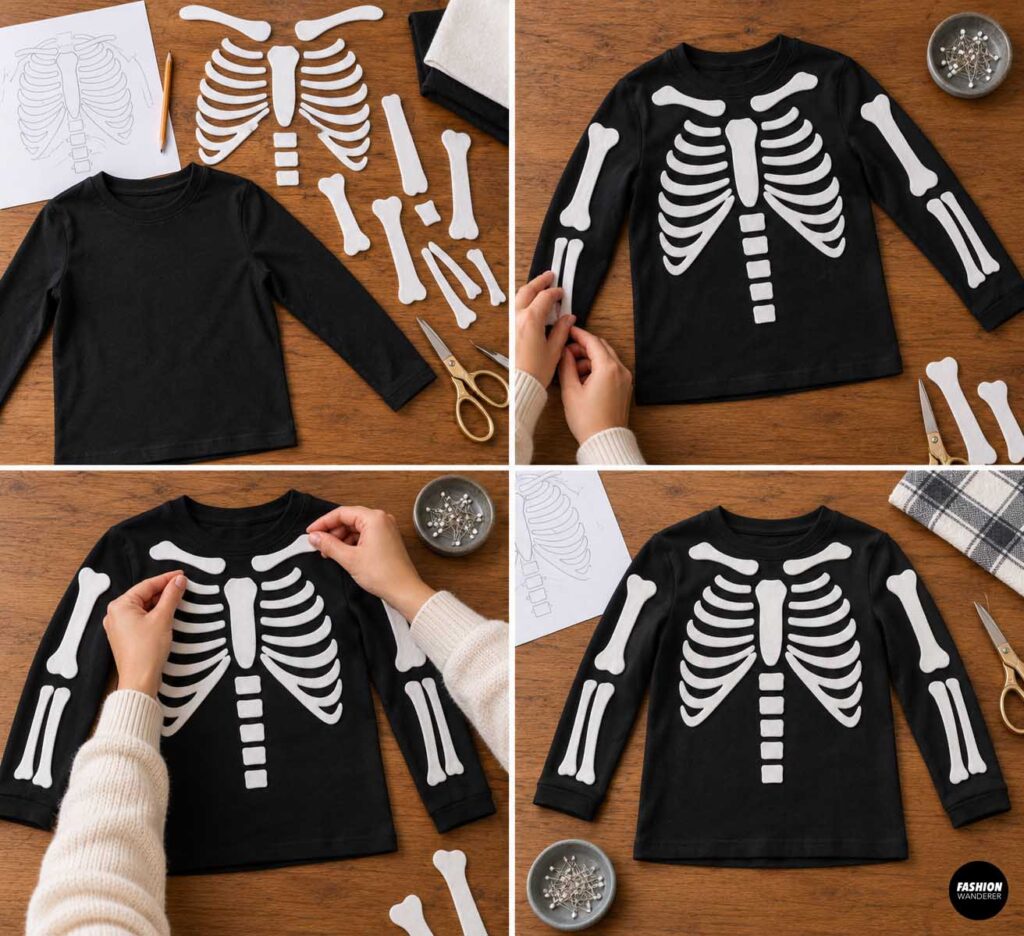
Start with the pajama top.
Place the rib cage in the center of the chest.
Add a narrow vertical spine below it.
Position the collarbone shapes near the neckline.
Then arrange the upper arm and forearm bones along the sleeves.
Step back and look at the pajama top from a distance.
Make adjustments before attaching anything.
Step 7: Attach the Shirt Bones
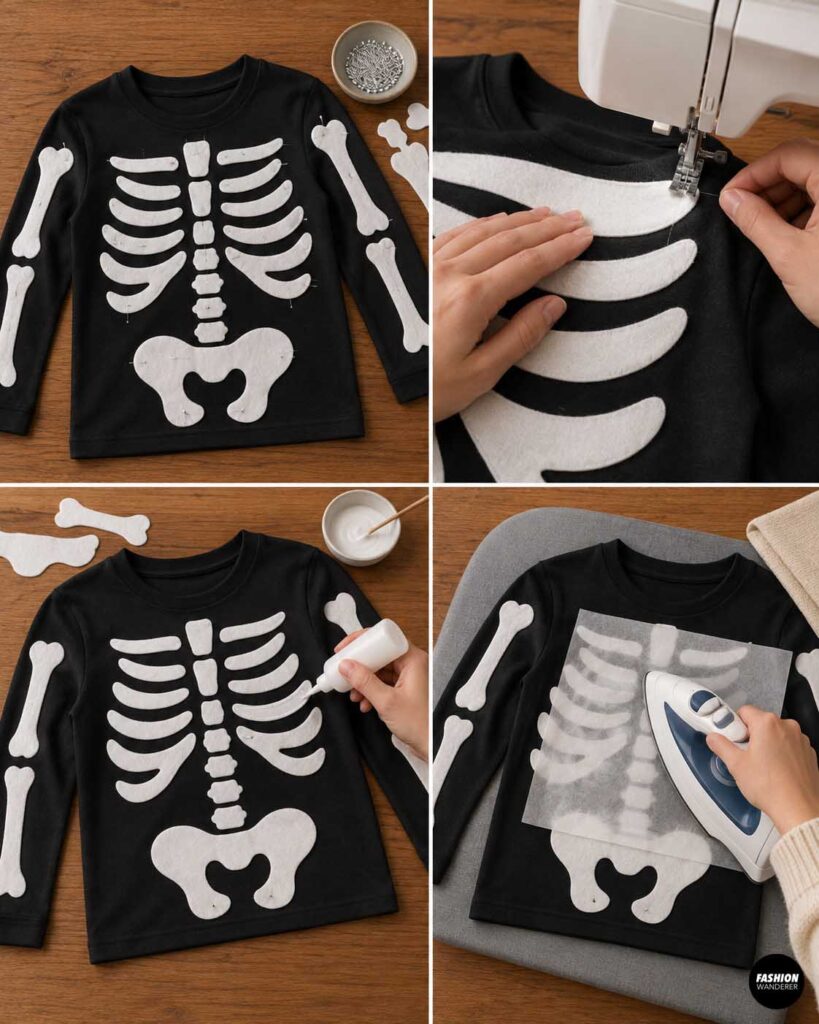
You have several options.
For the fastest sewn version, pin the felt bones to the pajamas and stitch close to the edges using a straight stitch.
Keep the stitching approximately ⅛ inch from the felt edge.
If you do not want to sew, use fabric glue according to the manufacturer’s instructions.
For heat-transfer vinyl, place the pieces adhesive-side down and press using the recommended temperature and time.
Always use a pressing cloth if required.
Step 8: Add the Leg Bones
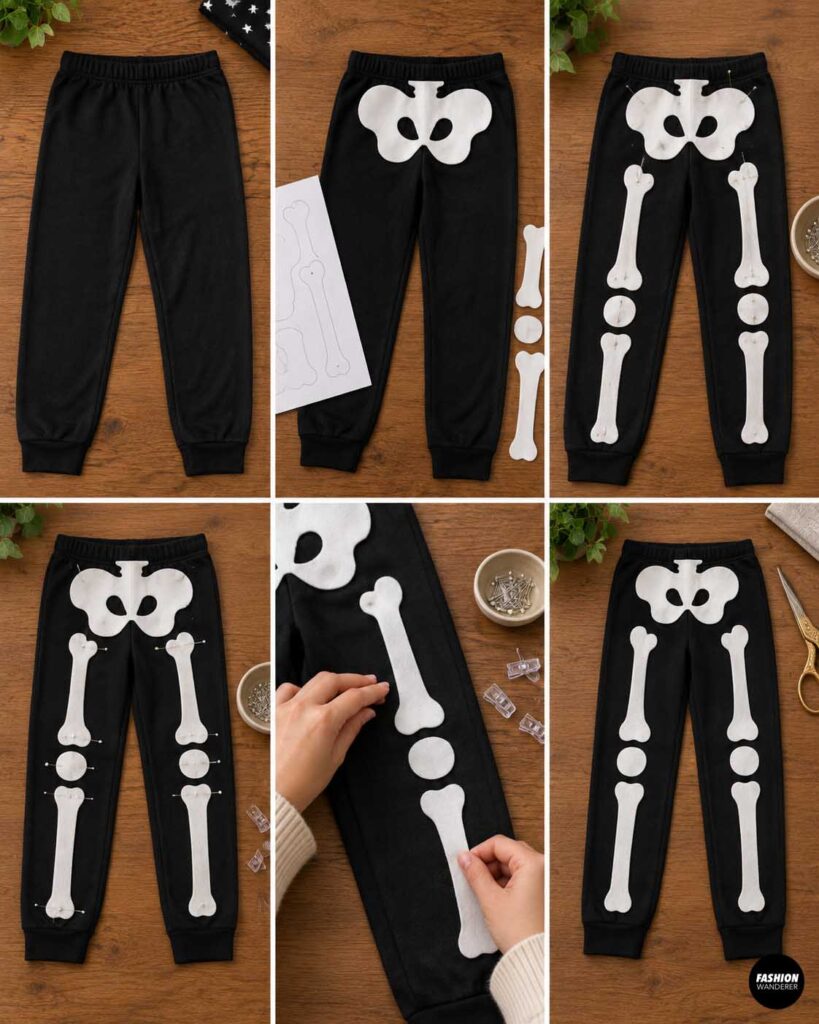
Lay the pajama pants flat.
Place the pelvis shape near the top front.
Position one thigh bone on each leg.
Add small kneecap shapes at the knees, followed by long shin bones below.
Make sure the bones are centered on the front of each pant leg.
Pin, glue, or press them in place using the same method you used on the pajama top.
Step 9: Add Optional Skeleton Details
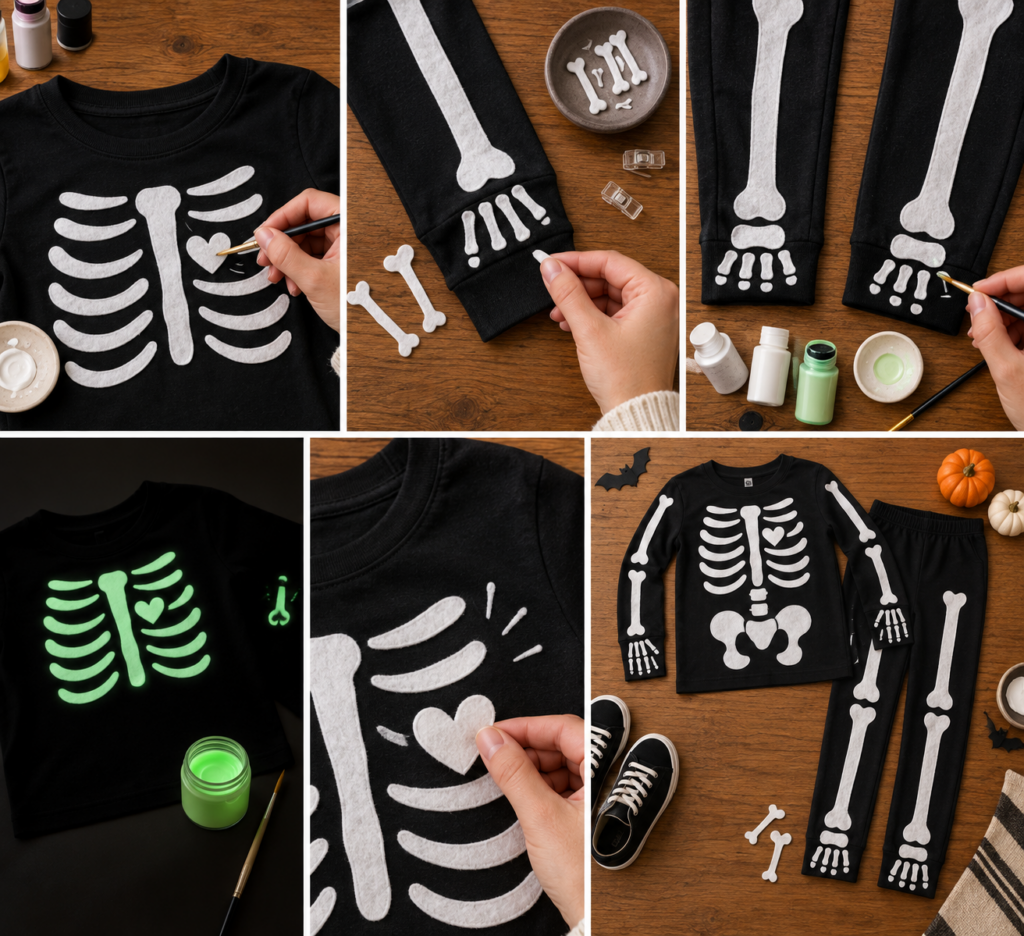
If you have a few extra minutes, add small details to make the costume stand out.
You can paint small white lines between the rib pieces, add tiny finger bones near the sleeve cuffs, or create ankle bones near the pant hems.
Glow-in-the-dark fabric paint is especially fun for nighttime trick-or-treating.
You can also add a small white heart inside the rib cage for a cute twist.
Step 10: Press and Check the Costume
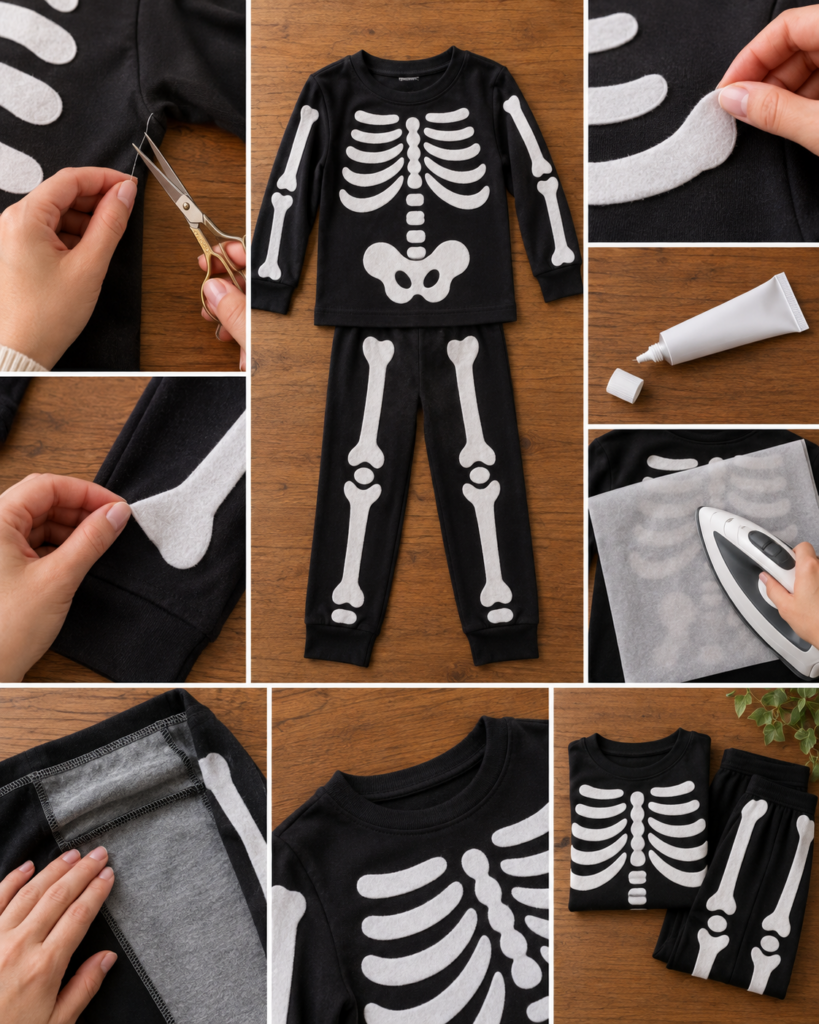
Once all the pieces are attached, give the costume a final check.
Trim loose threads.
Make sure no felt corners are lifting.
If you used fabric glue, allow it to dry fully before wearing.
If you used heat-transfer vinyl, let the design cool completely.
Lightly press the costume from the wrong side if needed.
Step 11: Make a Quick Skeleton Face
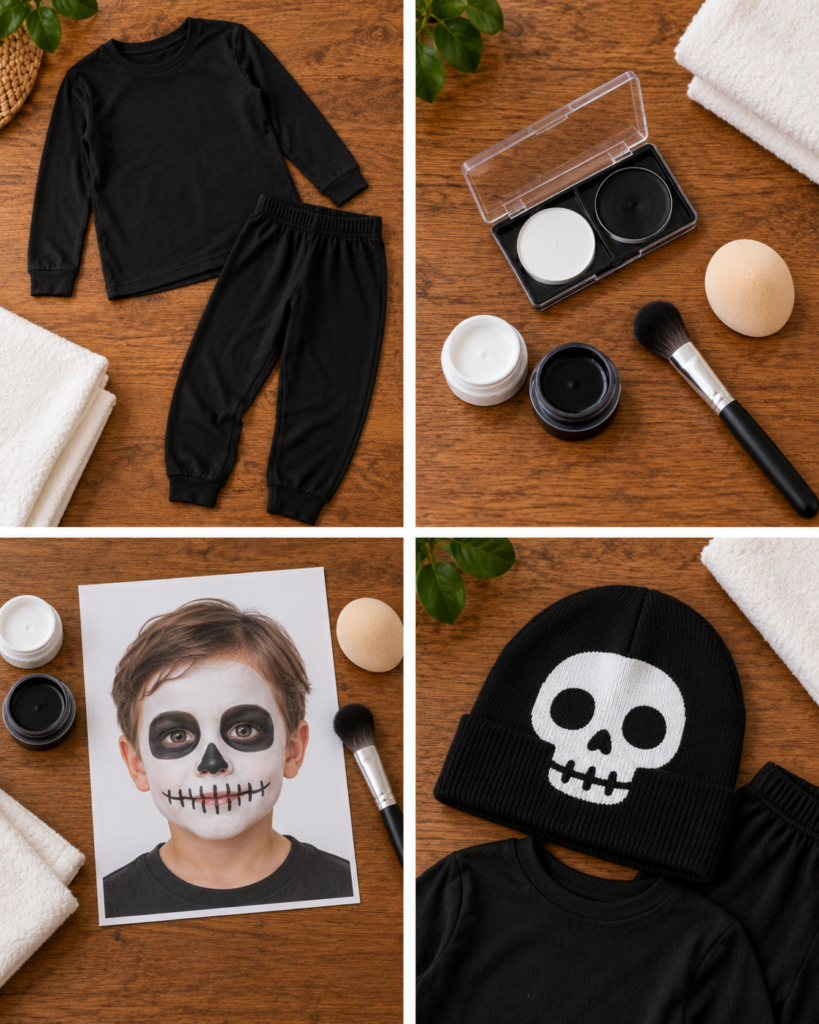
The pajamas can work perfectly on their own, but simple face paint makes the costume feel more complete.
Use white and black face paint to create:
- Pale face base
- Dark circles around the eyes
- Small black nose
- Simple teeth lines around the mouth
Keep the makeup soft and comfortable for younger children.
For kids who do not like face paint, use a black beanie with a simple white skull design instead.
Step 12: Finish the 30-Minute Skeleton Costume
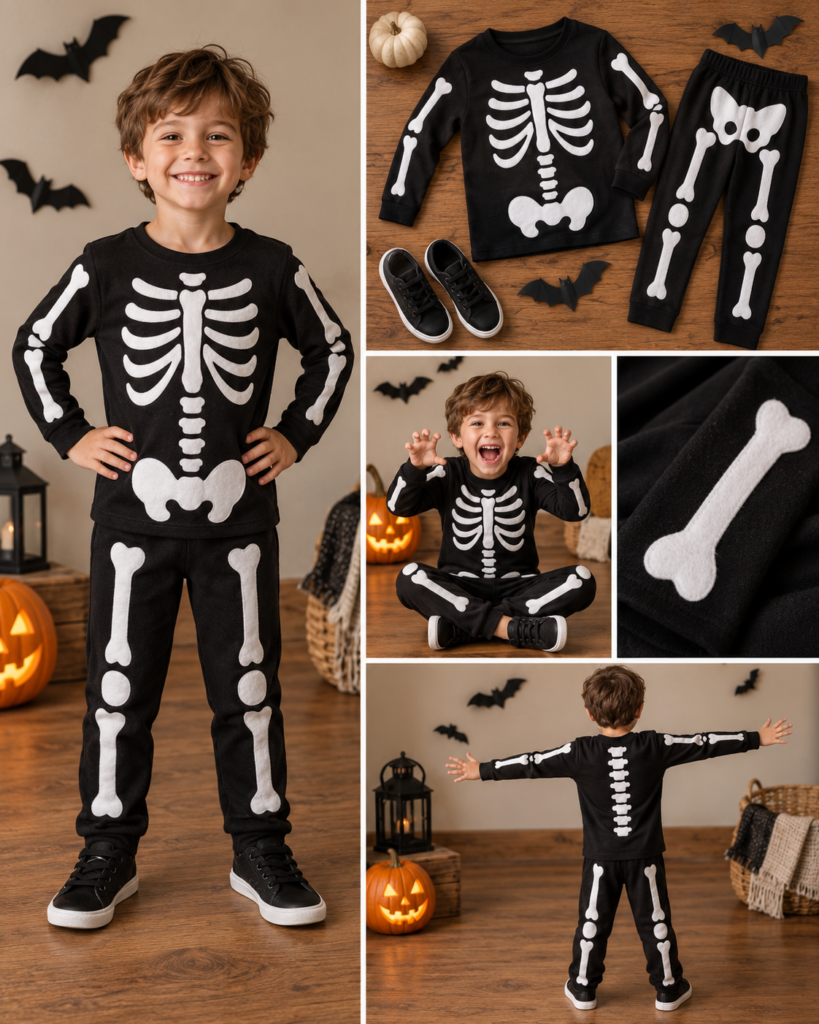
Dress your child in the finished black skeleton pajamas and add comfortable black shoes.
Because the costume starts with pajamas, it is much easier to move in than many bulky store-bought costumes.
For cold Halloween nights, you can even layer a thin thermal shirt underneath without changing the look.
Your 30-minute DIY skeleton costume from kids’ pajamas is finished!
Easy Skeleton Costume Variations
Once you make the basic costume, it is easy to customize.
Try pink bones for a playful skeleton, neon green for a glow-inspired look, or metallic silver for a robot skeleton.
You can also make matching sibling costumes by using the same bone templates in different sizes.
For an extra-cute family theme, make a skeleton costume for a child and a matching bone-print bandana for the family dog.
Final Tips for a Fast DIY Halloween Costume
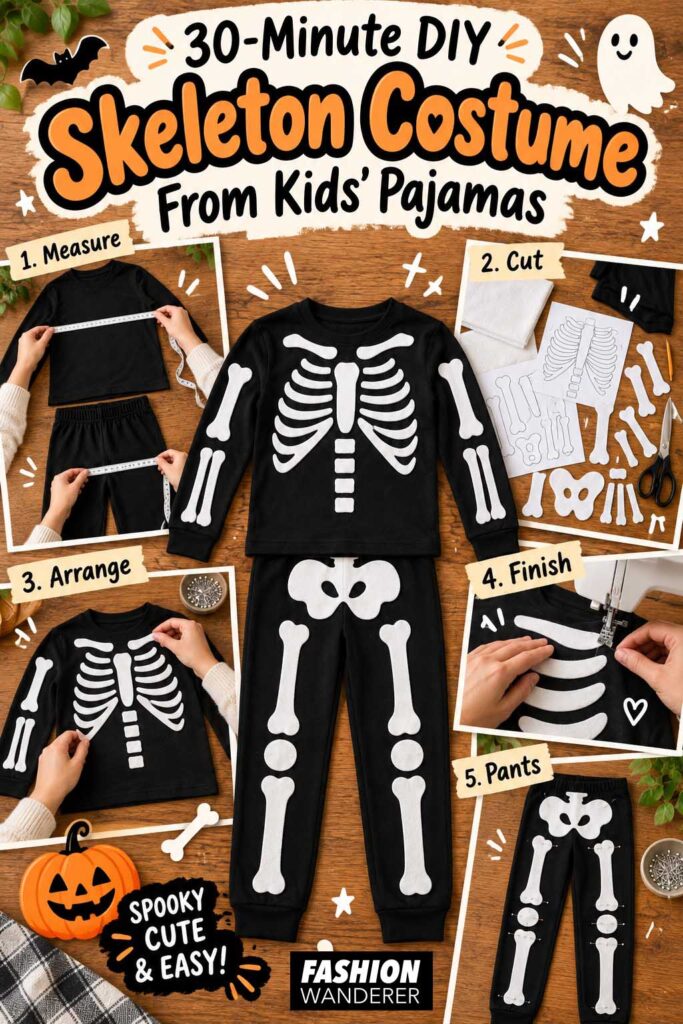
Keep the design simple if you truly want to finish in 30 minutes. Large bone shapes are faster to cut, easier to attach, and more visible in photos than tiny detailed pieces.
If you plan to reuse the pajamas after Halloween, use removable safety-pinned felt pieces or a temporary fabric adhesive.
For a permanent costume, stitched felt or heat-transfer vinyl will hold up better through repeated wear.
This DIY kids skeleton costume proves that a great Halloween outfit does not have to be complicated. With one black pajama set, a few white bone shapes, and about half an hour of crafting, you can create a comfortable, inexpensive, and memorable costume that looks far more impressive than the time it takes to make.