
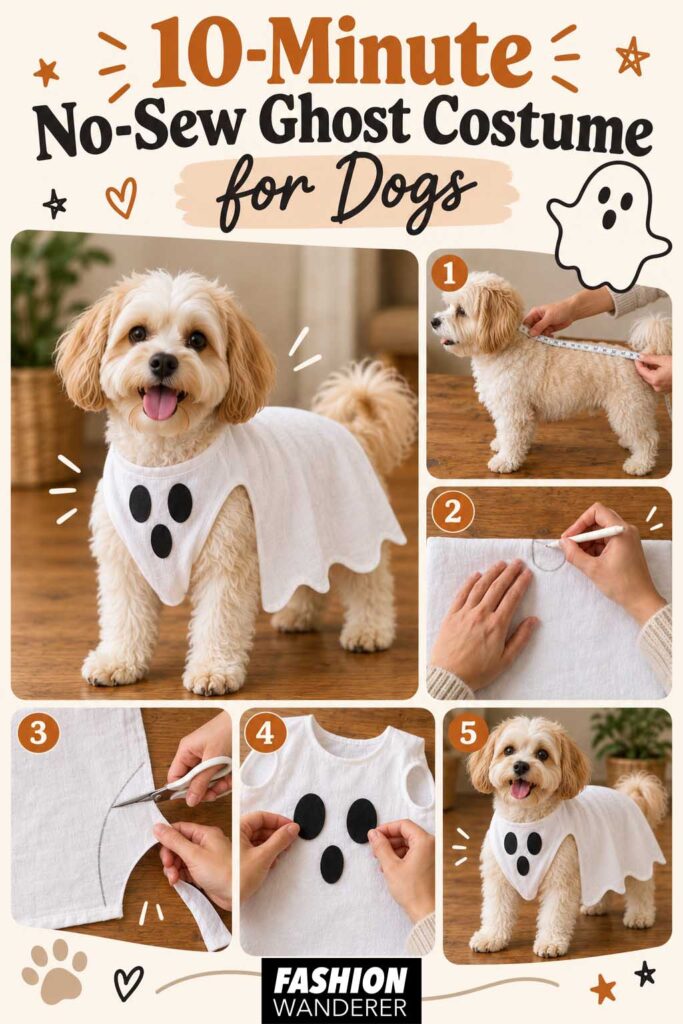
Looking for an adorable Halloween costume for your dog that doesn’t require a sewing machine, complicated patterns, or an afternoon of crafting? This 10-minute no-sew ghost costume for dogs is about as easy as DIY pet costumes get. With a lightweight piece of white fabric, scissors, and a few simple measurements, you can transform your dog into the cutest little ghost on the block.
This project works especially well for last-minute Halloween parties, neighborhood walks, pet costume photos, and family Halloween pictures. Better yet, the costume can be made from an old white sheet or inexpensive fabric you may already have at home.
The biggest difference between making a ghost costume for a person and making one for a dog is comfort. Instead of simply throwing a sheet over your pet and cutting holes, this tutorial creates a shorter, lightweight drape that stays away from the dog’s eyes, mouth, paws, and tail. Your dog should always be able to see, breathe, walk, sit, and move normally.
If you want an easy way to dress up your dog or cat without buying a costume, try these quick DIY Halloween pet costumes made from old clothes. Here’s how to make an easy DIY dog ghost costume in about 10 minutes.
Materials You Will Need
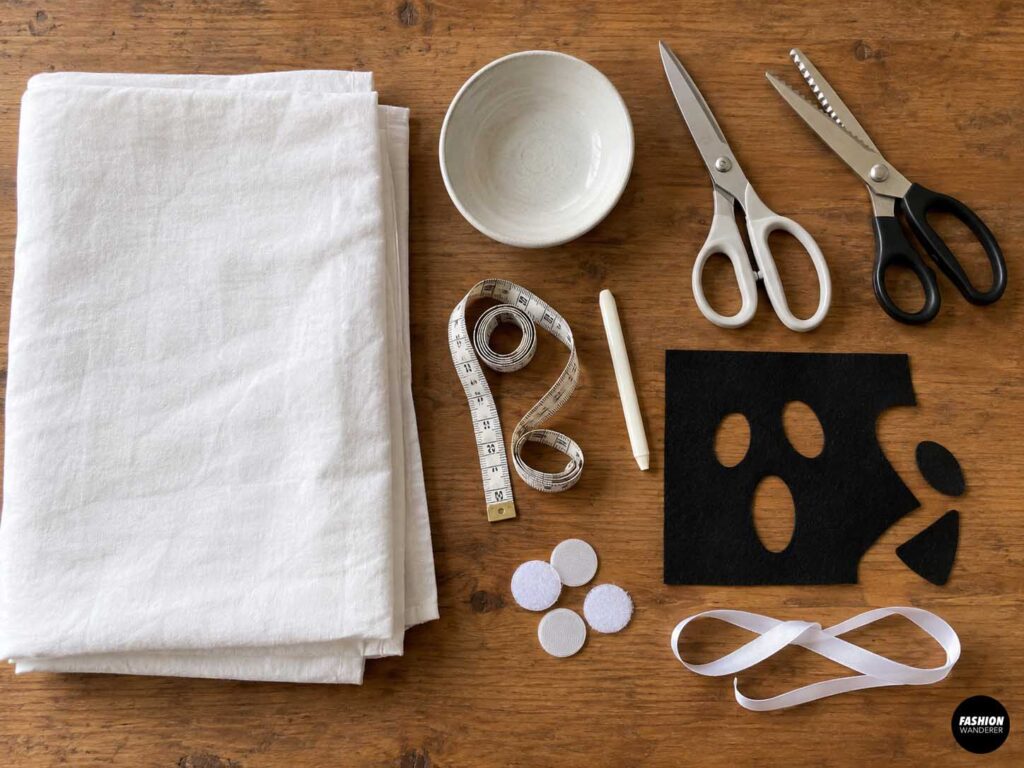
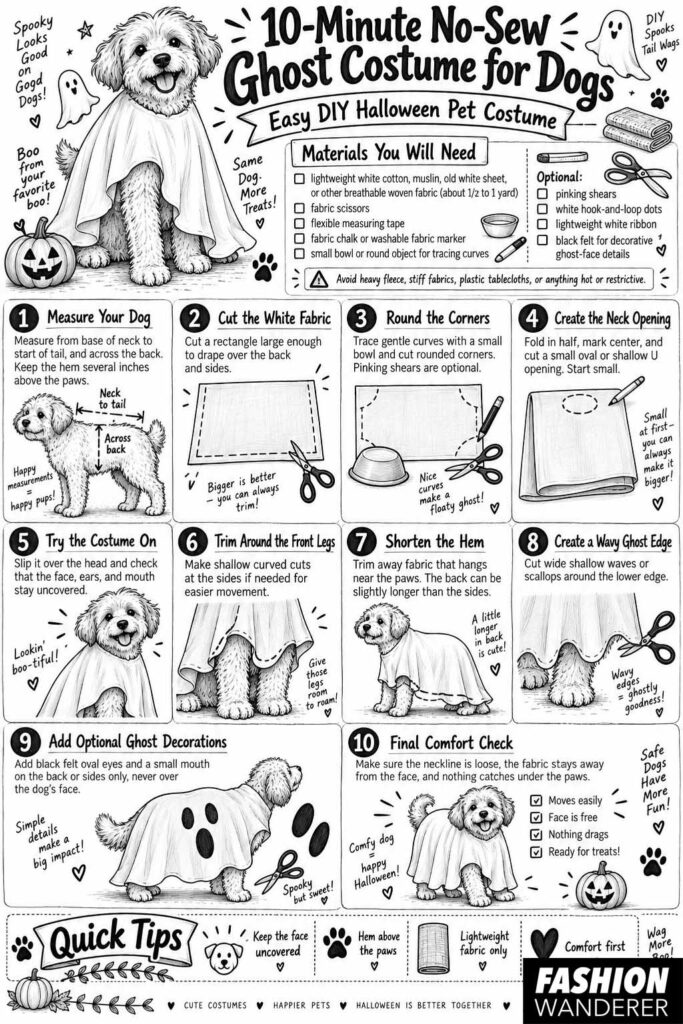
For this no-sew dog Halloween costume, you’ll need approximately 1/2 to 1 yard of lightweight white cotton, muslin, an old white sheet, or another breathable woven fabric. You’ll also need fabric scissors, a flexible measuring tape, fabric chalk or a washable fabric marker, and a small bowl or round object for tracing curves. Optional supplies include pinking shears to reduce fraying, white hook-and-loop dots, a lightweight white ribbon, and black felt if you want decorative ghost-face details that do not interfere with your dog’s vision.
Avoid heavy fleece, stiff fabrics, plastic tablecloths, or anything that could become hot or restrict movement.
How to Make a 10-Minute No-Sew Ghost Costume for Dogs
Step 1: Measure Your Dog
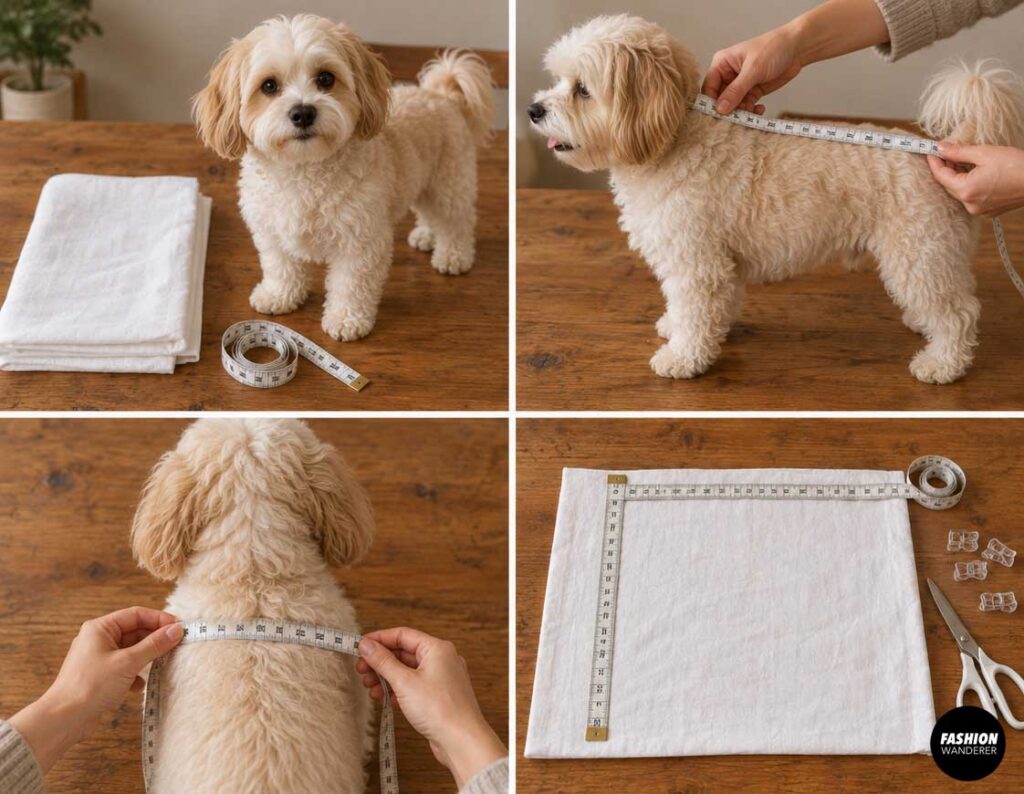
Have your dog stand naturally. Measure from the base of the neck to approximately the beginning of the tail. Next, measure across the back from one side of the body to the other. You want the finished ghost fabric to hang over the body without reaching the floor. For safety, the hem should end several inches above your dog’s paws.
Step 2: Cut the White Fabric
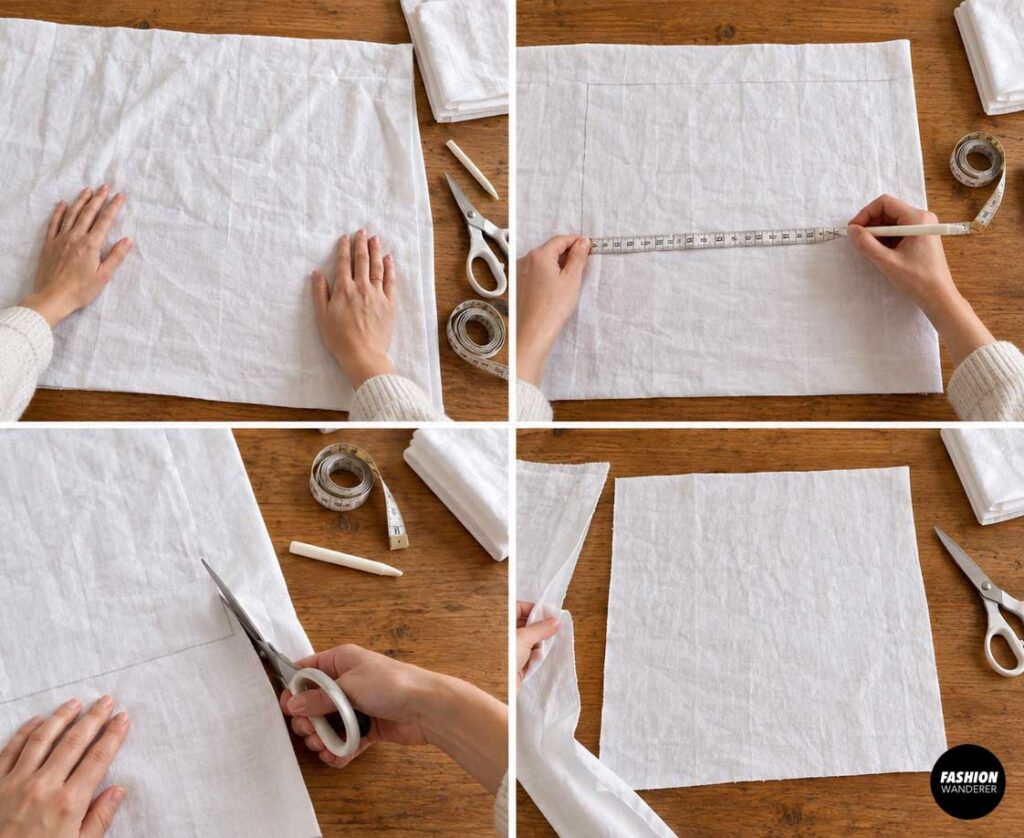
Lay the white fabric flat on a table or cutting surface. Cut a rectangle large enough to cover your dog’s back and sides based on the measurements you just took. Don’t worry about making everything perfectly symmetrical. A slightly uneven edge actually makes the costume look more ghost-like.
Step 3: Round the Corners
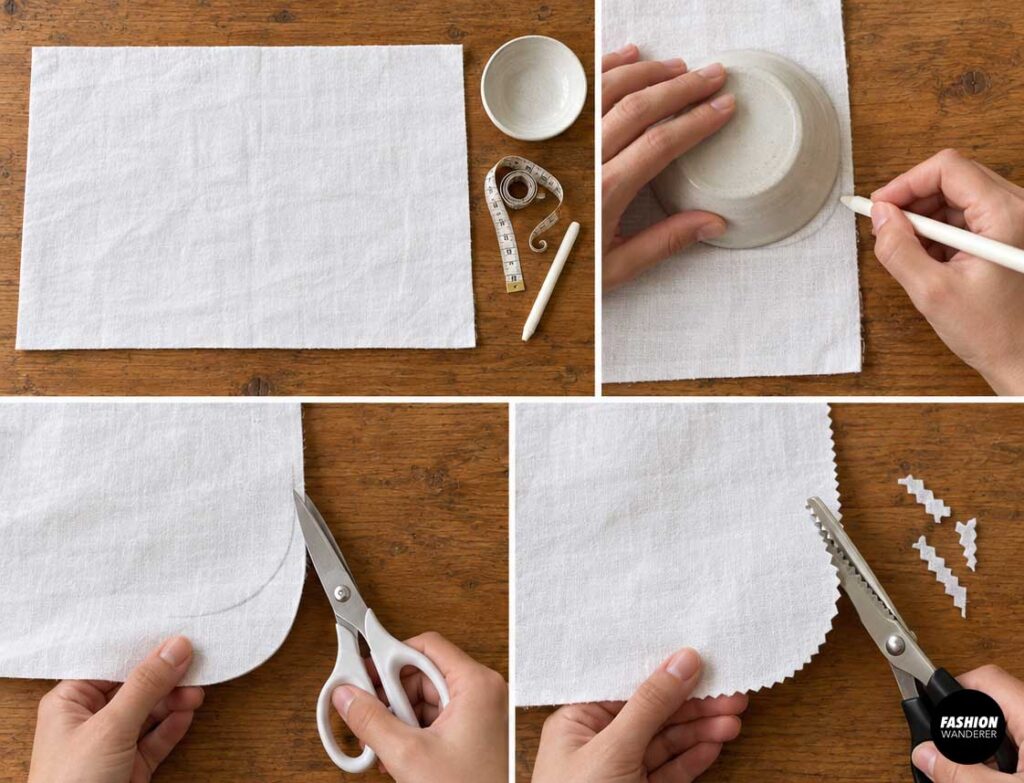
Place a small bowl at each corner and use fabric chalk to draw a gentle curve. Cut along the curves. Rounded edges look softer and are less likely to drag or catch than sharp rectangular corners. If you have pinking shears, you can use them around the entire outside edge to create a fun zigzag finish while helping reduce fraying.
Step 4: Create the Neck Opening
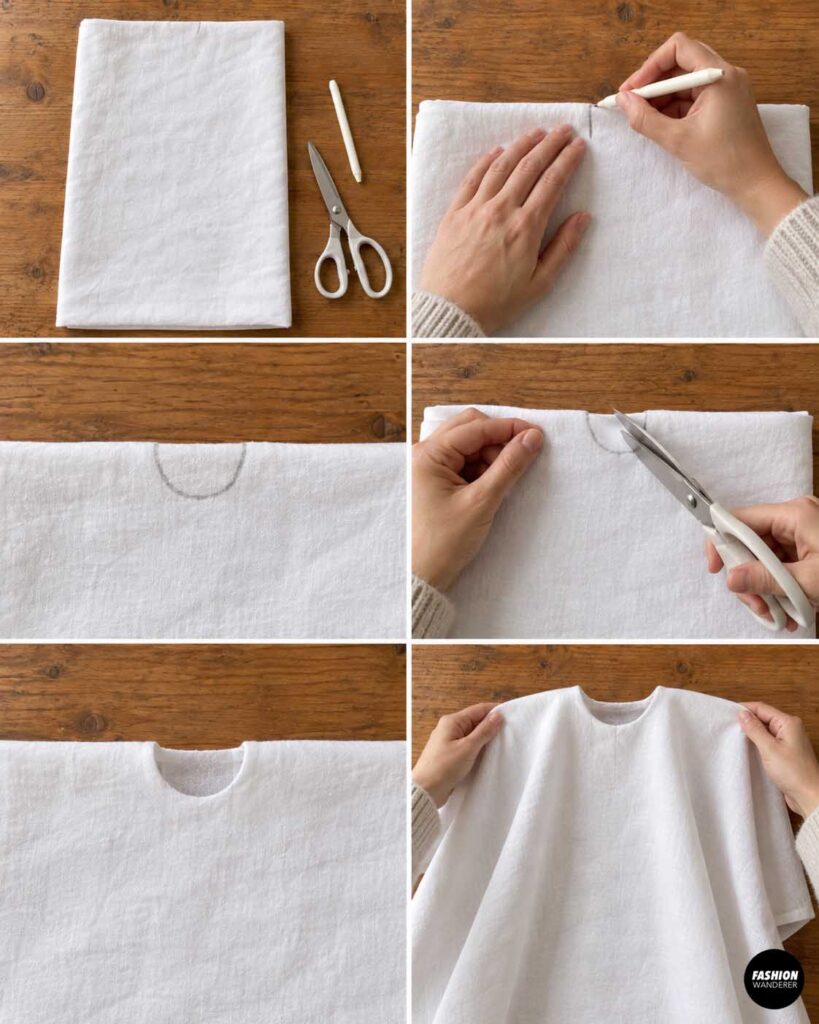
Fold the fabric in half lengthwise so you can locate the center. Mark where your dog’s neck will sit. Cut a small oval or shallow U-shaped opening. Start smaller than you think you need—you can always make the opening larger. The fabric should rest loosely around the shoulders without pressing against the throat.
Step 5: Try the Costume On
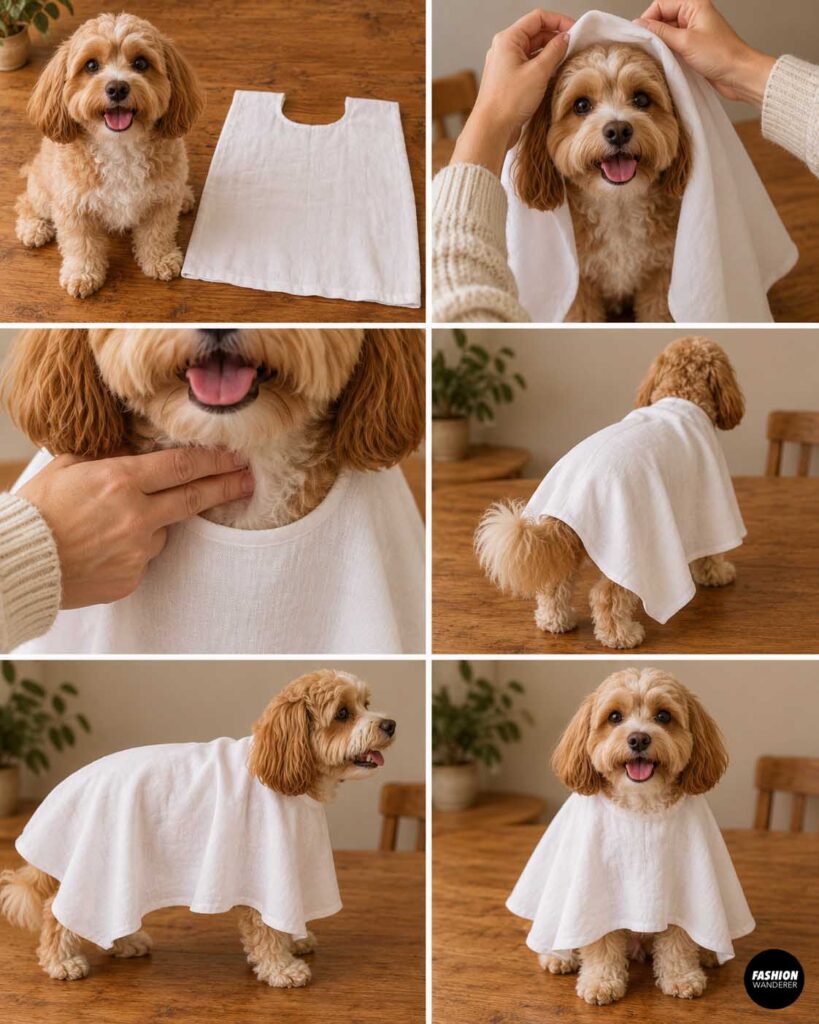
Gently slip the fabric over your dog’s head and allow it to fall across the back. Check the neck opening first. You should easily be able to slide a couple of fingers between the fabric and your dog. Make sure the material is not covering the face, ears, or mouth.
Step 6: Trim Around the Front Legs
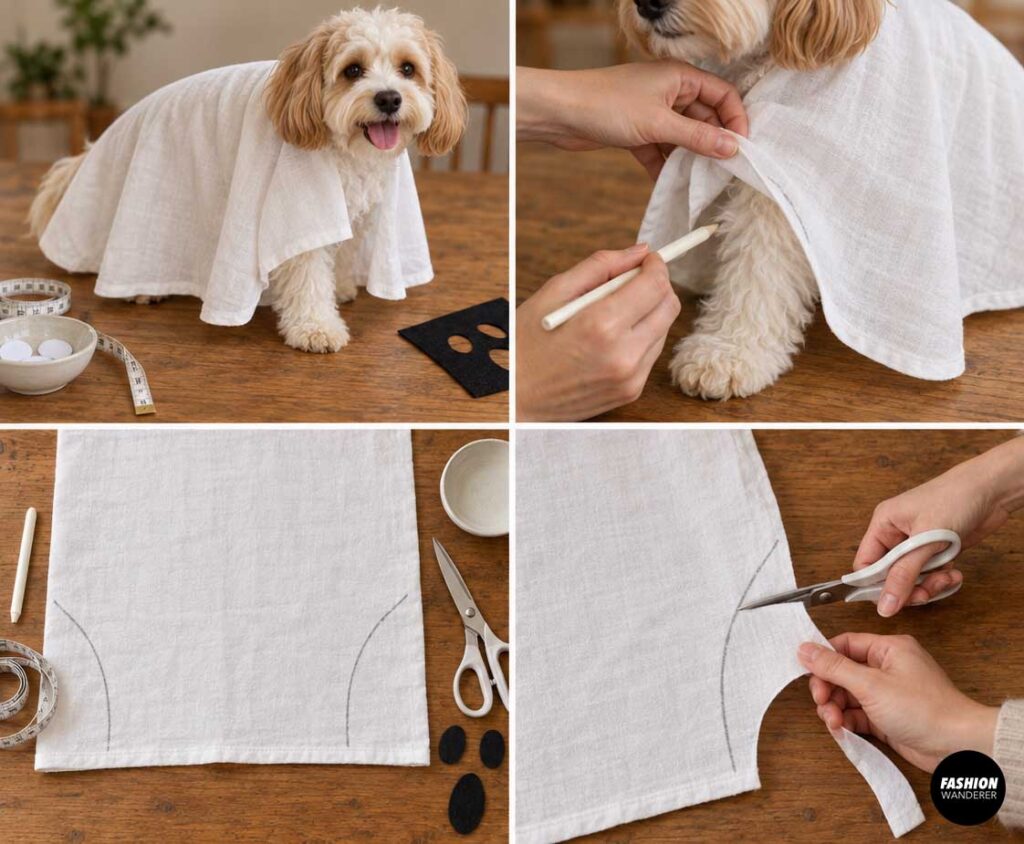
Look at where the fabric falls near your dog’s front legs. If necessary, make shallow curved cuts along each side so the front legs can move freely. You usually don’t need actual leg holes. Leaving the sides partially open makes the ghost costume quicker to make and much easier for a dog to wear.
Step 7: Shorten the Hem
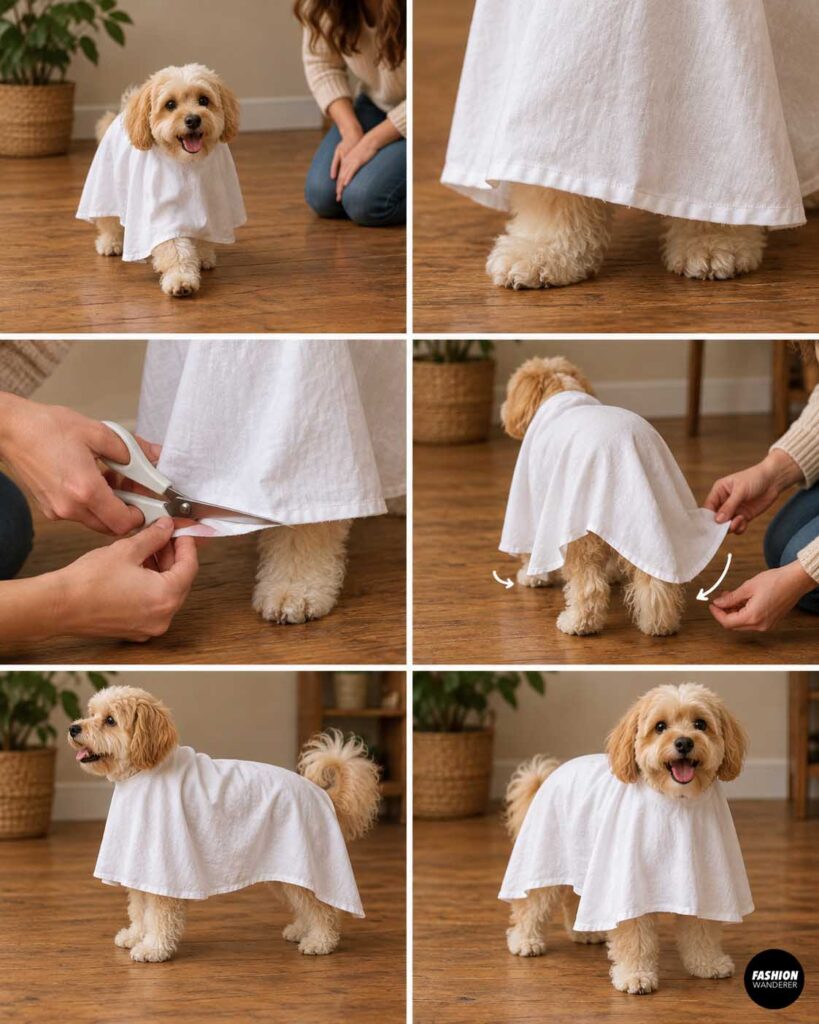
Have your dog walk a few steps while you carefully observe the costume. Trim any fabric that comes close to the paws. The back can be slightly longer than the sides to create that classic flowing ghost shape, but it should not drag on the floor.
Step 8: Create a Wavy Ghost Edge
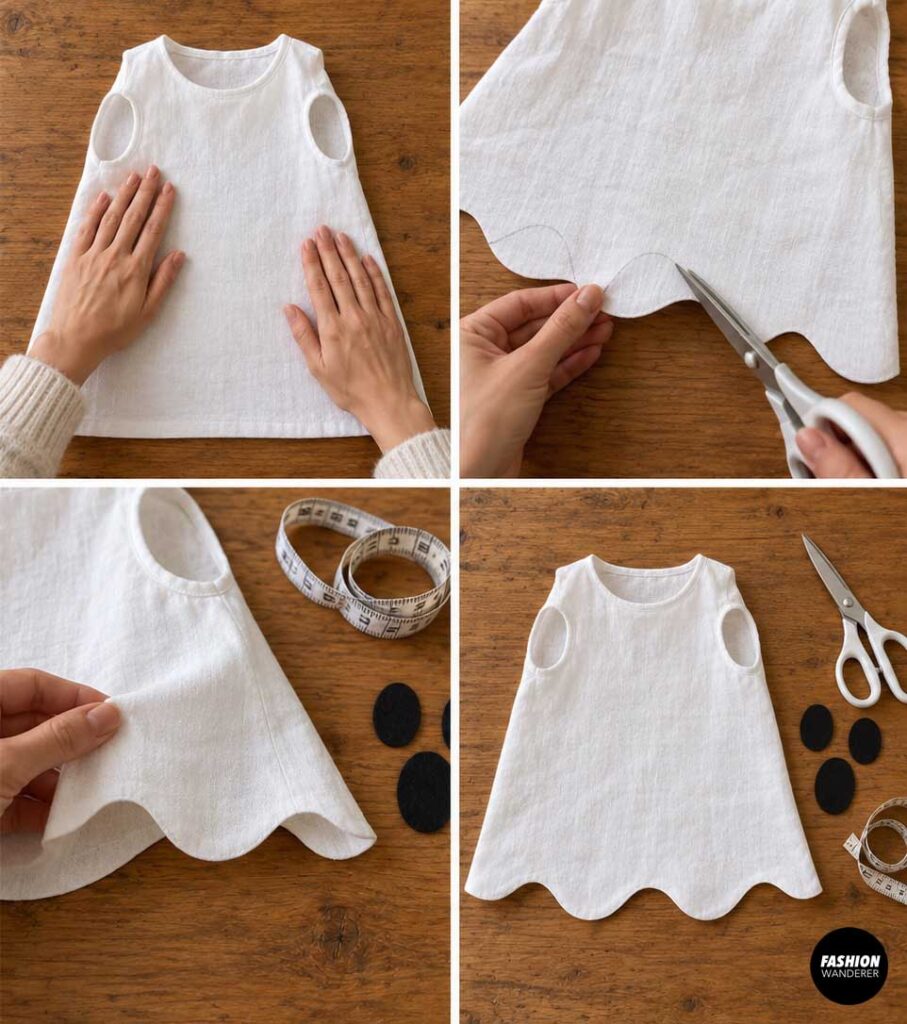
Remove the costume and lay it flat again. Cut wide, shallow waves around the lower edge. Another cute option is creating several rounded scallops. Avoid long narrow points because your dog could step on them.
Step 9: Add Optional Ghost Decorations
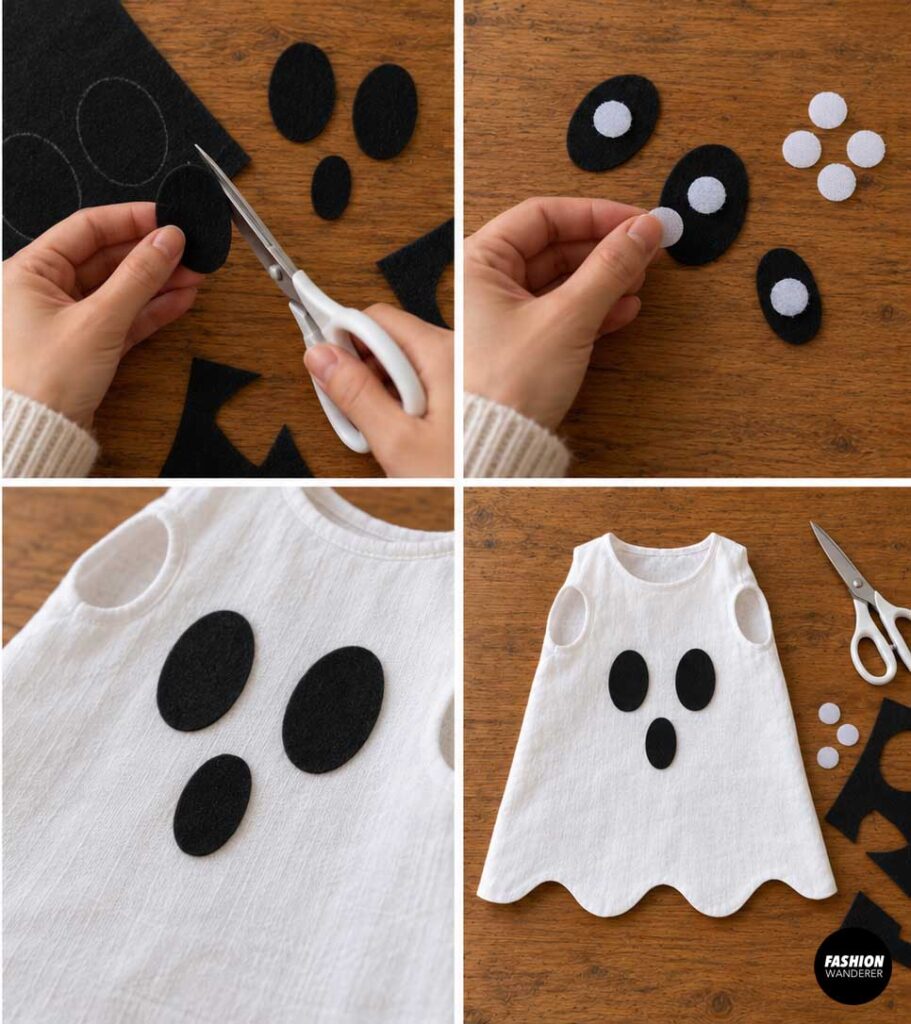
Instead of cutting eye holes and covering your dog’s head, keep your pet’s entire face uncovered. If you want the traditional ghost look, cut two large oval shapes from black felt and attach them to the fabric on the dog’s back or sides using removable hook-and-loop dots. You can also add a small black oval mouth. This gives you the ghost-face effect without obstructing your dog’s actual eyes.
Step 10: Do the Final Comfort Check
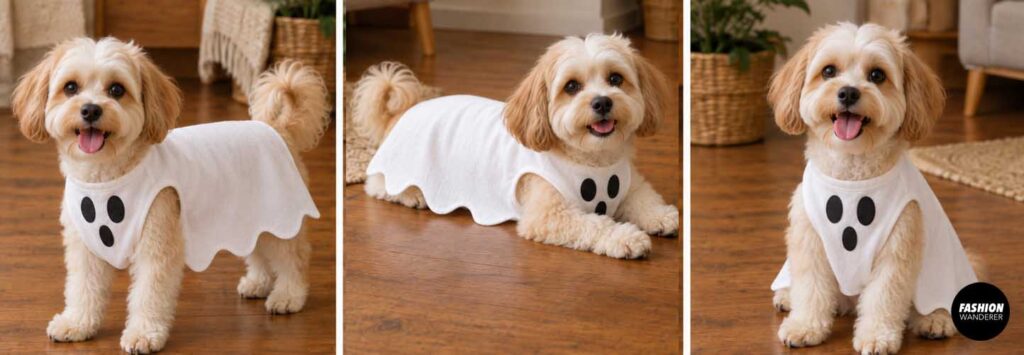
Put the costume on one final time. Have your dog walk, sit, turn around, and lie down. Check that the neckline remains loose, the fabric stays away from the face, and nothing catches beneath the paws. Once everything moves comfortably, your 10-minute no-sew dog ghost costume is ready for Halloween.
How to Keep a DIY Dog Costume Comfortable
The cutest costume is one your dog barely notices wearing. Lightweight cotton is usually a better choice than thick materials because Halloween weather can still be surprisingly warm.
Keep costume sessions short at first. Let your dog sniff the fabric before putting it on, then reward calm behavior with treats. If your dog freezes, repeatedly scratches at the costume, tries to bite it, pants unusually, or appears stressed, remove it.
Never tie ribbon tightly around your dog’s neck, and never use pins, safety pins, staples, wire, or small loose decorations where your pet could chew or swallow them.
For photos, you may only need the costume on for a few minutes.
Make It Even Cuter for Halloween Photos
A simple ghost costume looks fantastic against pumpkins, fall leaves, wooden porches, hay bales, or a plain neutral background. For a funny group costume, dress several dogs as little ghosts in slightly different white fabrics. You could even coordinate your dog’s ghost costume with a human ghost, witch, skeleton, or pumpkin costume.
The beauty of this project is that perfection isn’t necessary. Uneven hems, slightly floppy fabric, and a little movement actually make the ghost effect better.
An Easy Last-Minute Halloween Costume for Dogs
This 10-minute no-sew ghost costume for dogs proves that an adorable pet Halloween costume doesn’t have to require expensive supplies or advanced sewing skills. Starting with an old sheet and a pair of scissors, you can create a comfortable, reusable costume in just a few minutes.
Keep the design lightweight, leave your dog’s face completely visible, trim the fabric well above the paws, and prioritize comfortable movement over elaborate decorations.
Then grab a few treats, find some pumpkins, and get ready for one extremely cute little ghost to haunt your Halloween photos. 👻🐶