
If you love cozy handmade clothing and colorful fall crochet projects, this Granny-Square Cropped Cardigan Crochet Pattern is a beautiful project to add to your wardrobe. Made from classic crochet granny squares, this cardigan has a relaxed, slightly oversized shape with an open-front design that is easy to customize.
This free crochet cardigan pattern is sized from XS through 3XL, making it a versatile project for a wide range of body sizes. Instead of crocheting complicated garment shaping, you make individual granny squares, arrange them into panels, and join everything together.
It is a great project for confident beginners who already know basic crochet stitches and want to try making their first crochet garment.
For an autumn-inspired cardigan, combine shades such as burnt orange, pumpkin, mustard yellow, olive green, burgundy, cream, camel, and chocolate brown.
Skill Level
Confident beginner.
You should be comfortable with:
- Chain stitches
- Slip stitches
- Single crochet
- Half double crochet
- Double crochet
- Joining crochet motifs
- Weaving in yarn ends
Finished Fit
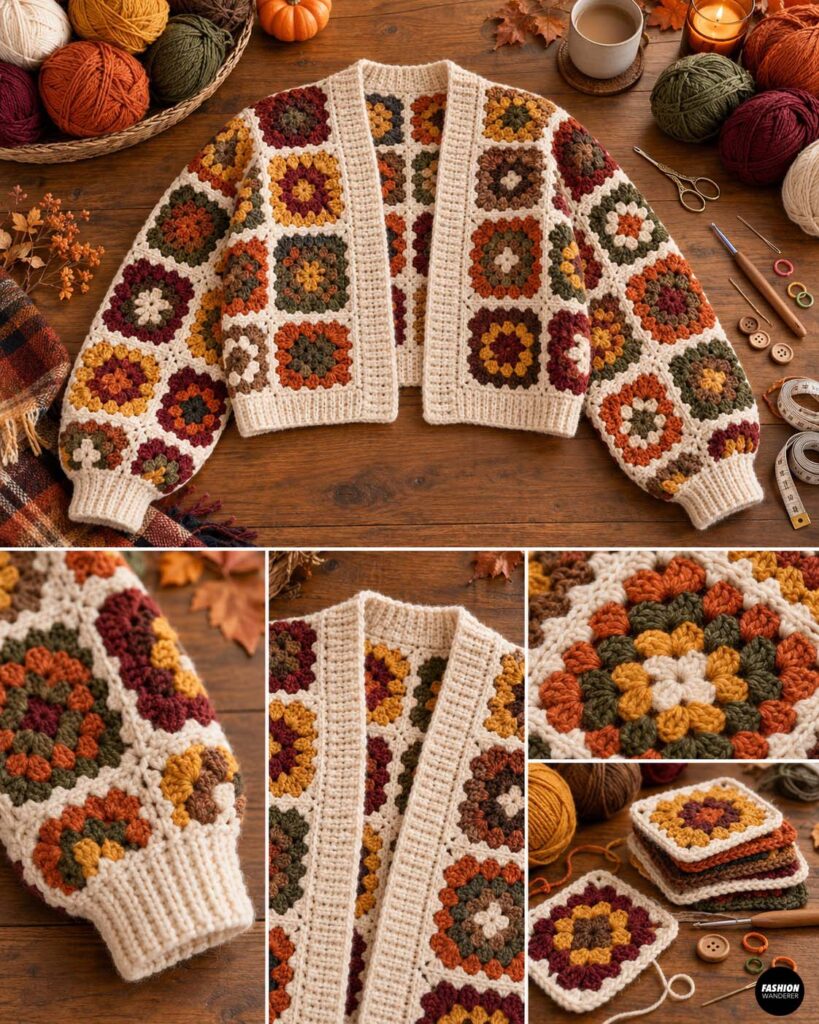
This cardigan has a relaxed, slightly oversized open-front cropped fit.
Size Chart
| Size | Body Bust | Approx. Finished Bust |
| XS | 30–32″ | 36″ |
| S | 34–36″ | 40″ |
| M | 38–40″ | 44″ |
| L | 42–44″ | 48″ |
| XL | 46–48″ | 52″ |
| 2XL | 50–52″ | 56″ |
| 3XL | 54–56″ | 60″ |
If you are between sizes and prefer a relaxed cardigan, choose the larger size.
Materials
- Category 4 worsted-weight yarn
- 5 mm crochet hook
- Yarn needle
- Scissors
- Stitch markers
- Measuring tape
- Blocking mats
- Rust-proof pins
- Optional 3–5 buttons
Approximate Yarn
- XS: 1,000–1,200 yards
- S: 1,150–1,350 yards
- M: 1,300–1,500 yards
- L: 1,450–1,700 yards
- XL: 1,650–1,900 yards
- 2XL: 1,850–2,100 yards
- 3XL: 2,000–2,300 yards
Purchase a little extra yarn if you want long cuffs, a wider button band, or additional length.
Gauge
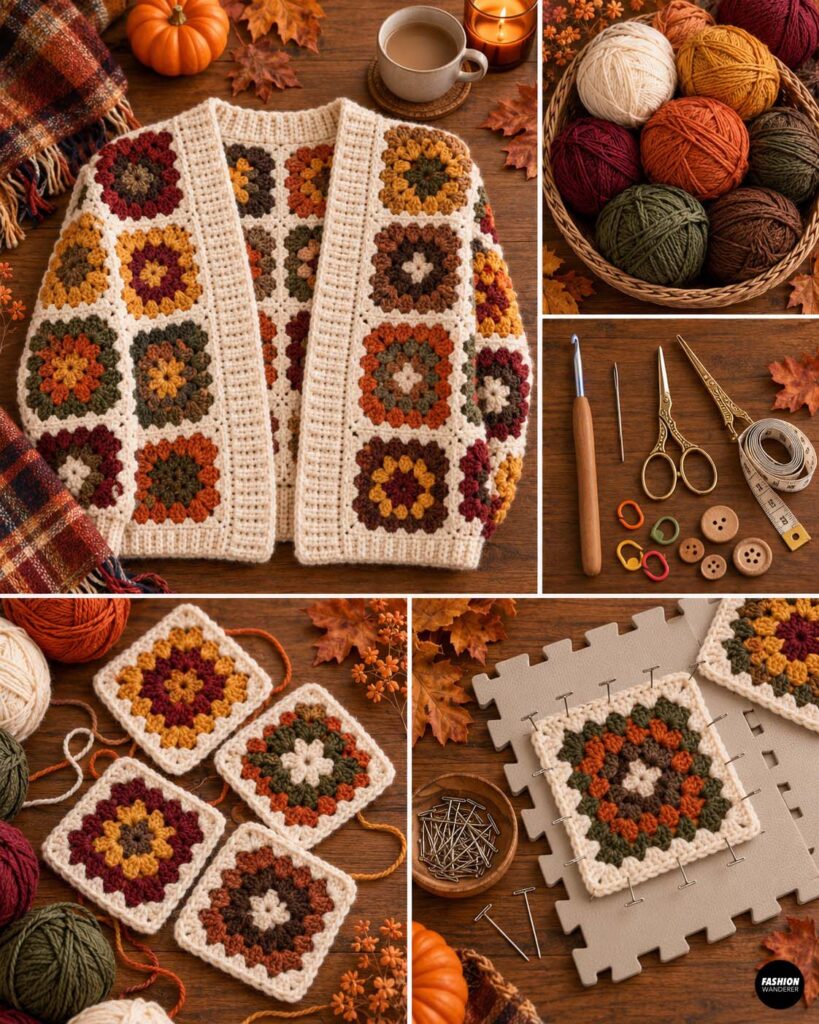
Each completed and blocked granny square should measure:
4 x 4 inches
The square measurement is important because the entire cardigan sizing is based on the finished motif size.
If your squares are too large, use a smaller crochet hook.
If they are too small, use a larger hook.
Granny Square Pattern
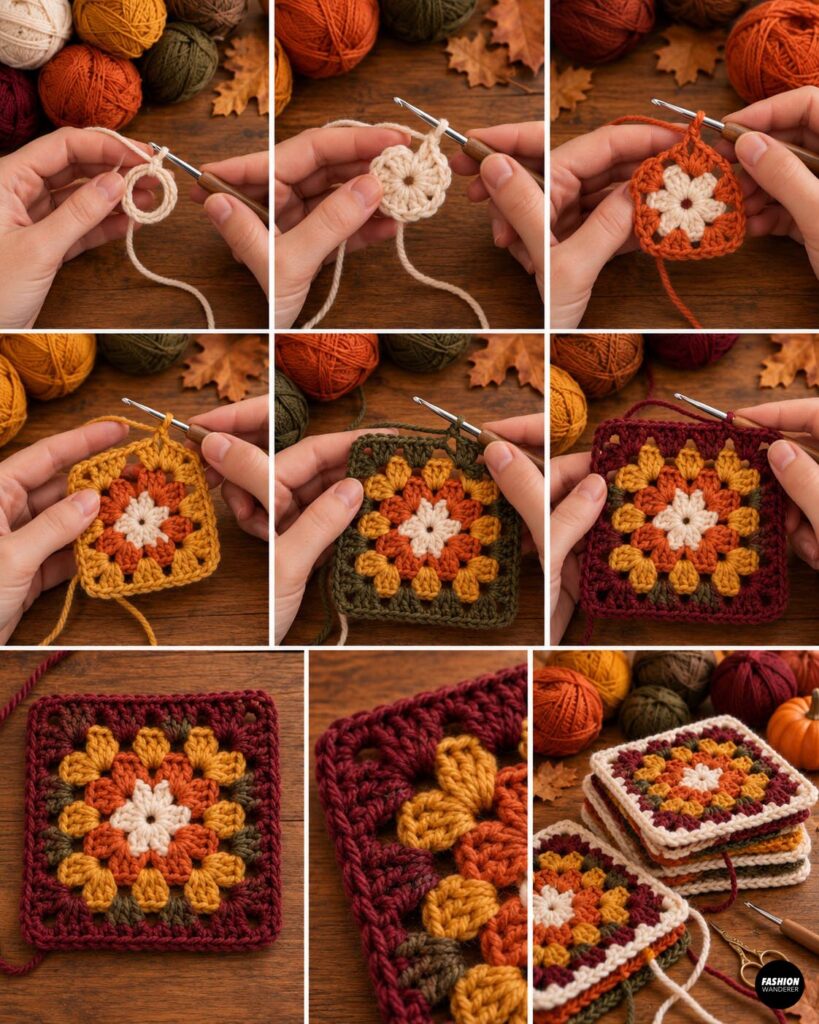
Round 1
Make a magic ring.
Chain 3.
Work 2 double crochet into the ring.
Chain 2.
Work:
3 dc, ch 2
three more times.
You should have four groups of 3 double crochet.
Slip stitch to the top of the beginning chain.
Fasten off.
Round 2
Join your next color in any corner.
Chain 3 and work 2 dc into the same space.
Chain 2.
Work 3 dc into the same corner.
Chain 1.
In the next corner work:
3 dc, ch 2, 3 dc
Chain 1.
Repeat around.
Join and fasten off.
Round 3
Join your next color in a corner.
Work:
3 dc, ch 2, 3 dc
in each corner.
Work:
3 dc
into every chain-1 side space.
Chain 1 between clusters.
Continue until your motif measures approximately 4 inches square.
Depending on yarn and tension, you may need 3–4 rounds.
Granny Square Count by Size
These counts create the cropped body plus two sleeves.
| Size | Approximate Total Squares |
| XS | 56 |
| S | 64 |
| M | 68 |
| L | 80 |
| XL | 92 |
| 2XL | 99 |
| 3XL | 107 |
Do not worry if you make a few extra squares. They are useful for pockets or replacing squares whose gauge differs.
Body Layout
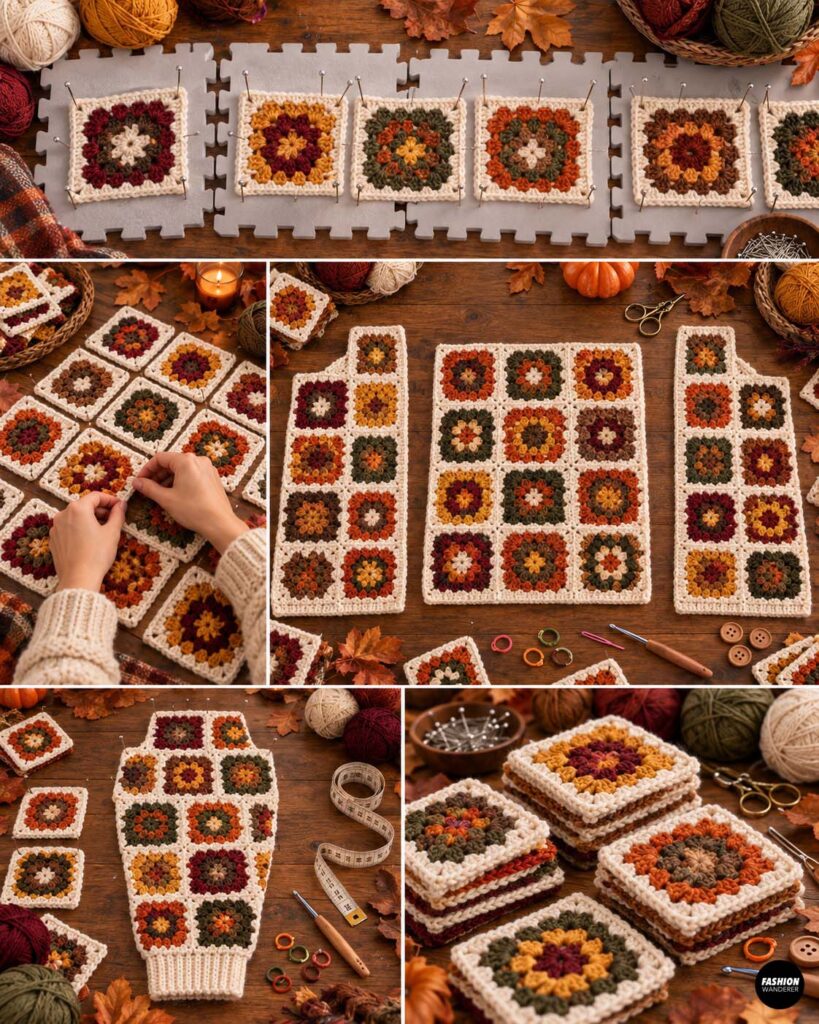
Lay all your blocked granny squares on a large table or floor before joining.
XS
Back:
4 squares wide × 4 squares tall
Each front:
2 squares wide × 4 squares tall
S
Back:
5 squares wide × 4 squares tall
Each front:
2 squares wide × 4 squares tall
M
Back:
5 squares wide × 4 squares tall
Each front:
3 squares wide × 4 squares tall
L
Back:
6 squares wide × 4 squares tall
Each front:
3 squares wide × 4 squares tall
XL
Back:
6 squares wide × 5 squares tall
Each front:
3 squares wide × 5 squares tall
2XL
Back:
7 squares wide × 5 squares tall
Each front:
3 squares wide × 5 squares tall
3XL
Back:
7 squares wide × 5 squares tall
Each front:
4 squares wide × 5 squares tall
Simple Cardigan Layout
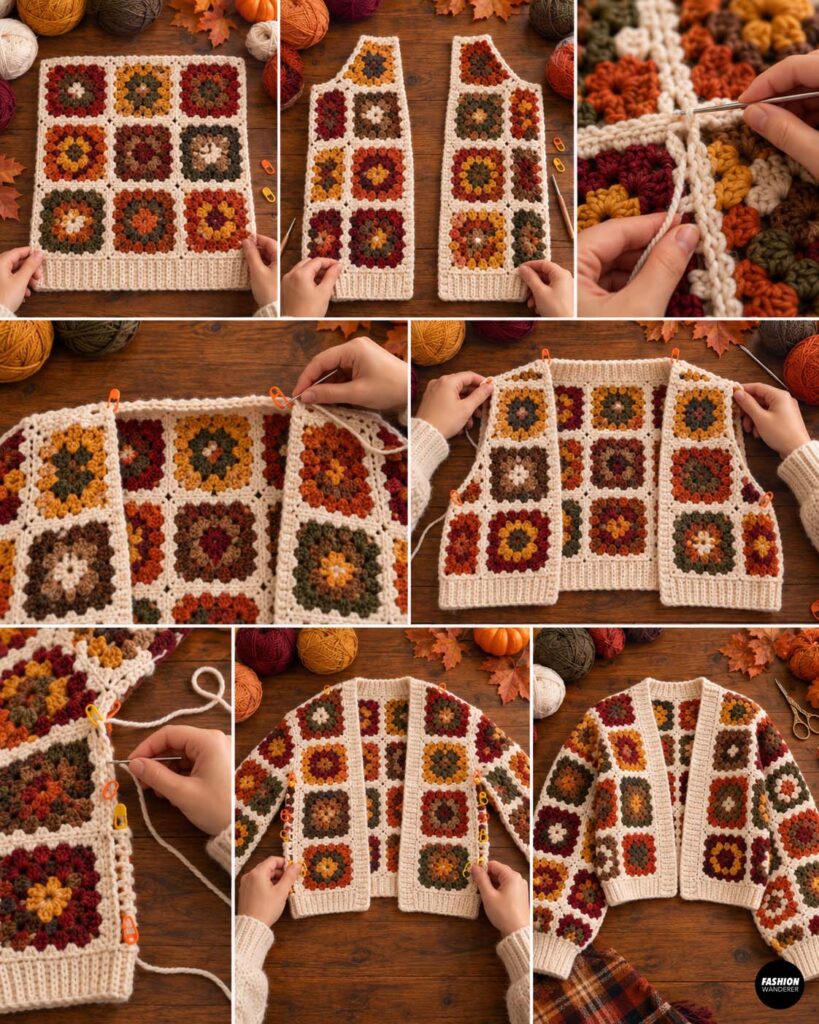
Think of the body as three rectangles:
LEFT FRONT BACK RIGHT FRONT
□ □ □ □ □ □ □ □
□ □ □ □ □ □ □ □
□ □ □ □ □ □ □ □
□ □ □ □ □ □ □ □
The illustration above represents the basic XS construction.
Larger sizes simply add columns or rows according to the size chart.
Step 1: Block Every Granny Square
Do not skip this step.
Lightly wet or steam-block your squares according to the yarn manufacturer’s care instructions.
Pin every square to exactly:
4 x 4 inches
Allow them to dry completely.
Uniform squares make the cardigan much easier to assemble.
Step 2: Arrange Your Colors
Spread the squares out before joining.
Avoid putting several identical squares beside one another unless you intentionally want a repeating design.
For a balanced fall color palette, try alternating:
- Pumpkin
- Cream
- Mustard
- Olive
- Burgundy
- Brown
Using the same color for the final round of every granny square can make a highly colorful cardigan look more cohesive.
Step 3: Join the Back Panel
Arrange the correct number of squares for your size.
Join the squares horizontally first.
Then join the rows vertically.
For beginners, a slip-stitch join is one of the easiest methods.
Place two squares right sides together.
Insert your hook through corresponding outer loops and slip stitch across.
Repeat until the entire back panel is assembled.
Step 4: Make the Front Panels
Create two separate rectangular panels using the measurements for your size.
Join the squares exactly as you did for the back.
Do not join the two front panels together.
The opening between them becomes the cardigan’s center front.
Step 5: Join the Shoulders
Lay the front panels over the back with right sides facing.
Align the outer edges.
Join the shoulder areas while leaving the center open for your neck.
As a starting point:
- XS–S: join approximately 4″ at each shoulder
- M–L: join approximately 6–8″
- XL–3XL: join approximately 8″
Try the cardigan against your shoulders before permanently completing the seams.
The neckline should sit comfortably without pulling toward the back.
Step 6: Create the Armholes
Begin joining the side seams from the bottom hem upward.
Stop before reaching the shoulder to create an armhole.
Leave approximately:
- XS: 7–8″
- S: 8″
- M: 8″
- L: 8–9″
- XL: 9–10″
- 2XL: 10–11″
- 3XL: 10–12″
Try the body on before finishing the seams.
You should comfortably be able to move your arms forward and upward.
Step 7: Crochet the Sleeves
The sleeves are also constructed from granny squares.
XS
3 squares around × 4 squares long
S
3 squares around × 4 squares long
M
3 squares around × 4 squares long
L
4 squares around × 4 squares long
XL
4 squares around × 4 squares long
2XL
4 squares around × 4 squares long
3XL
4 squares around × 4 squares long
For longer sleeves, add another row of squares.
For shorter sleeves, finish the length with a wider crochet cuff instead.
Step 8: Assemble Each Sleeve
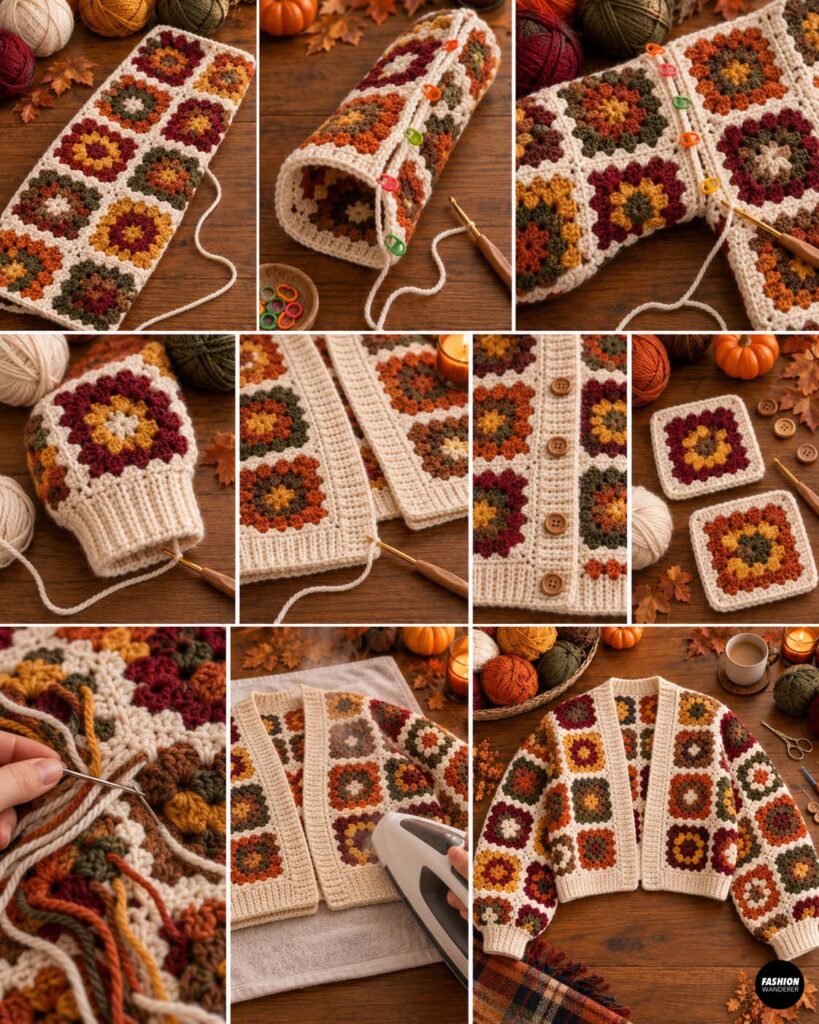
Arrange the sleeve squares into a rectangle.
Join all neighboring squares.
Bring the two long edges together to create a tube.
Slip stitch or whip stitch the sleeve seam closed.
Leave one end open for the armhole and one end open for the wrist.
Repeat for the second sleeve.
Step 9: Attach the Sleeves
Turn the cardigan body inside out.
Insert one sleeve into the armhole with right sides facing.
Match the sleeve seam to the cardigan side seam.
Place stitch markers at:
- Shoulder
- Underarm
- Front midpoint
- Back midpoint
Join the sleeve evenly around the armhole.
Repeat for the other side.
Step 10: Crochet the Sleeve Cuffs
Attach yarn around the wrist opening.
Round 1
Single crochet evenly around.
If the sleeve opening is wide, decrease by working several sc2tog stitches evenly around.
Rounds 2–5
Work single crochet or half double crochet.
Continue until the cuff measures approximately:
1½–2½ inches
For a fitted ribbed cuff, alternate front-post and back-post double crochet.
Repeat for the second sleeve.
Step 11: Add the Bottom Hem
Join yarn at one side seam.
Work one round of single crochet evenly around the bottom.
Continue for approximately:
3–5 rows
depending on your preferred cardigan length.
For a very cropped style, make only 2–3 rows.
For extra coverage, continue the band for several additional inches.
Step 12: Crochet the Front Opening and Neckline
Join yarn at one lower front corner.
Single crochet evenly:
Up the first front edge,
around the neckline,
and down the opposite front.
Turn.
Work another row of single crochet or half double crochet.
Repeat for approximately 3–6 rows.
This creates the cardigan’s finished front band.
For sizes that need a little additional chest coverage, simply add more rows to this band.
Step 13: Add Buttonholes—Optional
If you want your granny-square cardigan to close, add buttonholes along one front band.
When you reach the desired button position:
Chain 2.
Skip approximately 2 stitches.
Continue crocheting.
On the following row, crochet into the chain space.
Add three to five buttons to the opposite front band.
Wooden, tortoiseshell, or oversized vintage-style buttons look especially pretty with fall yarn colors.
Step 14: Optional Granny-Square Pockets
Have a couple of extra granny squares?
Turn them into pockets.
Place one granny square toward the lower portion of each front panel.
Pin carefully.
Whip stitch around:
- Left side
- Bottom
- Right side
Leave the top open.
Two patch pockets add extra charm while using leftover motifs.
Step 15: Weave In All Yarn Ends
Granny-square projects can produce a lot of yarn tails, especially when changing colors frequently.
Use a yarn needle to weave every tail through several stitches.
Change direction at least once before trimming the excess yarn.
Avoid simply cutting tails close to the knot because they can eventually work loose.
Step 16: Final Blocking
Lay the finished cardigan flat.
Lightly dampen or steam it according to your yarn’s care instructions.
Straighten:
- Front opening
- Bottom hem
- Sleeve seams
- Cuffs
- Neckline
- Shoulders
Allow the cardigan to dry completely before wearing.
Easy Fall Color Combination
For a warm vintage-inspired cardigan, try:
Square 1: Cream + rust + mustard + brown
Square 2: Burgundy + cream + olive + rust
Square 3: Mustard + brown + cream + olive
Square 4: Pumpkin + burgundy + cream + brown
Repeat the combinations randomly throughout the cardigan.
Using cream or chocolate brown for the final round of every square will help tie the entire design together.
How to Customize the Fit
One of the best things about a granny-square cardigan crochet pattern is how easily you can personalize it.
For a longer cardigan, add another horizontal row of granny squares before joining the body.
For an oversized cardigan, size up or add a wider front border.
For balloon sleeves, add an extra granny-square column around each sleeve and dramatically decrease at the cuff.
For a more fitted sleeve, use your regular square count and decrease several stitches during the first cuff round.
For a true cropped cardigan, position the finished hem at or slightly above the natural waist.
Final Thoughts
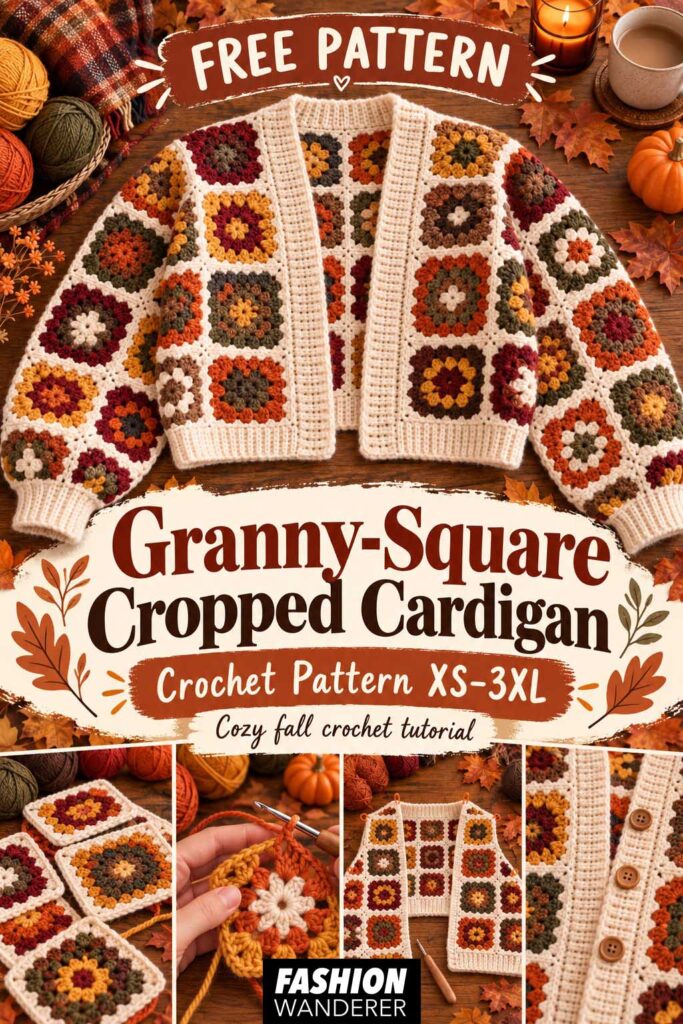
This granny-square cropped cardigan crochet pattern XS–3XL turns one of crochet’s simplest motifs into a cozy handmade fall wardrobe piece.
The project may look complicated at first, but the construction is surprisingly simple: crochet the squares, block them, arrange them, join them, add sleeves, and finish the edges.
Because every square is made separately, this is also a great project to work on a little at a time. Crochet a few squares while watching television, traveling, or relaxing in the evening, then assemble everything once your stack is complete.
One of the best things about this free granny-square cardigan pattern is how easy it is to personalize.
Try making a longer cardigan by adding another row of squares, create dramatic balloon sleeves, use a contrasting cream border, add oversized vintage buttons, or crochet every square in a different color combination.
You can even use leftover yarn from previous projects for a colorful scrap-yarn cardigan.
Once you understand the basic construction, the same granny-square technique can be adapted into vests, jackets, bags and other handmade garments.
This free Granny-Square Cropped Cardigan Crochet Pattern XS–3XL is a fun way to turn simple crochet motifs into an eye-catching handmade wardrobe piece. With cozy fall colors, an easy modular construction and plenty of opportunities for customization, it is the kind of project you can make completely your own.