
A chunky infinity scarf is one of the easiest fall knitting projects for beginners. It works up quickly, uses simple stitches, and creates a cozy handmade accessory that looks far more complicated than it actually is.
If you are new to knitting, this easy chunky infinity scarf pattern is a great place to start. You only need basic knitting skills, bulky yarn, and a pair of large knitting needles. Because chunky yarn creates large stitches, you can see your progress quickly and finish the scarf in just a few knitting sessions.
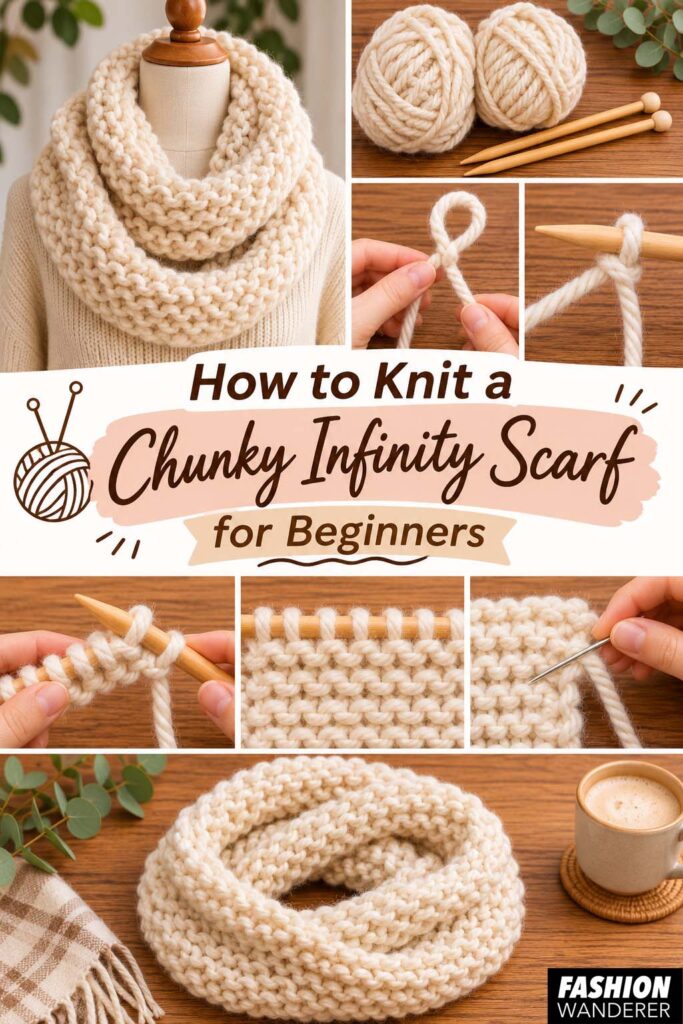
This beginner-friendly tutorial shows you how to knit a chunky infinity scarf step by step, including how to cast on, knit the scarf body, bind off, and join the ends together.
Finished Size
The finished chunky infinity scarf measures approximately:
- 8 to 10 inches wide
- 55 to 60 inches long before joining
- Approximately 27 to 30 inches long when folded into a loop
This length allows the scarf to wrap comfortably around your neck twice.
You can easily adjust the length if you prefer a shorter or longer infinity scarf.
Materials You Will Need
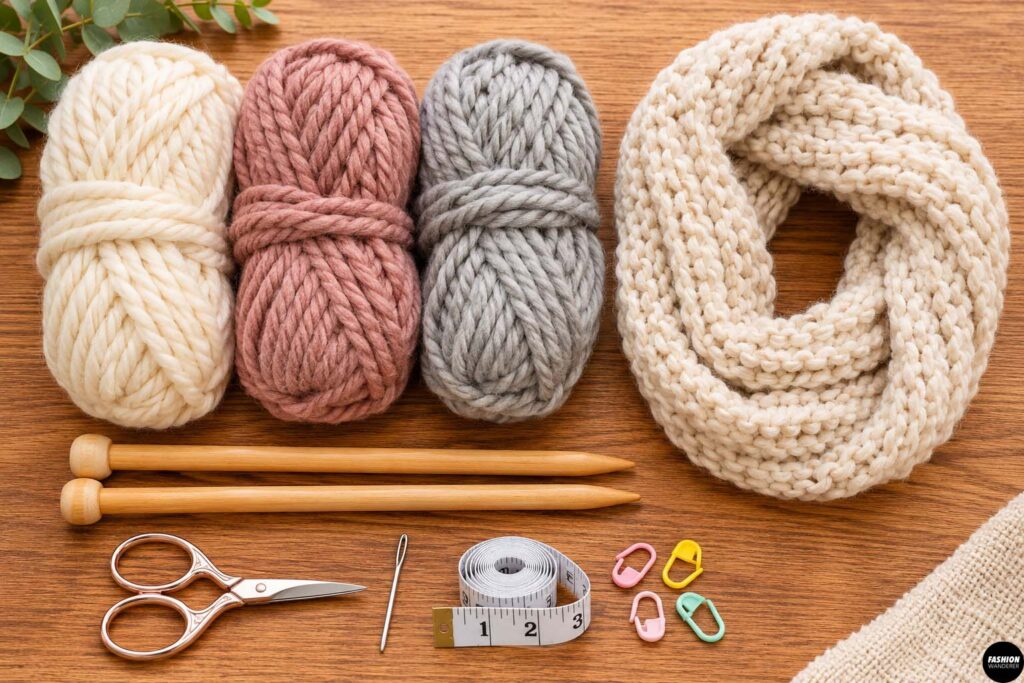
For one chunky infinity scarf, gather:
- 2 to 3 skeins chunky or super bulky yarn
- Approximately 180 to 250 yards total
- US size 13 to 17 knitting needles
- Yarn needle
- Scissors
- Measuring tape
- Stitch marker, optional
For beginners, choose a smooth chunky yarn rather than fuzzy or novelty yarn. Smooth yarn makes it easier to see your stitches and correct mistakes.
Wool blends, acrylic blends, or soft chunky polyester yarn all work well.
Best Yarn for a Chunky Infinity Scarf
Look for yarn labeled Category 5 Bulky or Category 6 Super Bulky.
Super bulky yarn will create a thicker scarf and knit up faster.
If you want a soft everyday scarf, choose neutral colors such as cream, oatmeal, beige, gray, camel, or dusty rose.
For a statement scarf, try rust, forest green, burgundy, mustard, or deep blue.
Knit a Chunky Infinity Scarf for Beginners
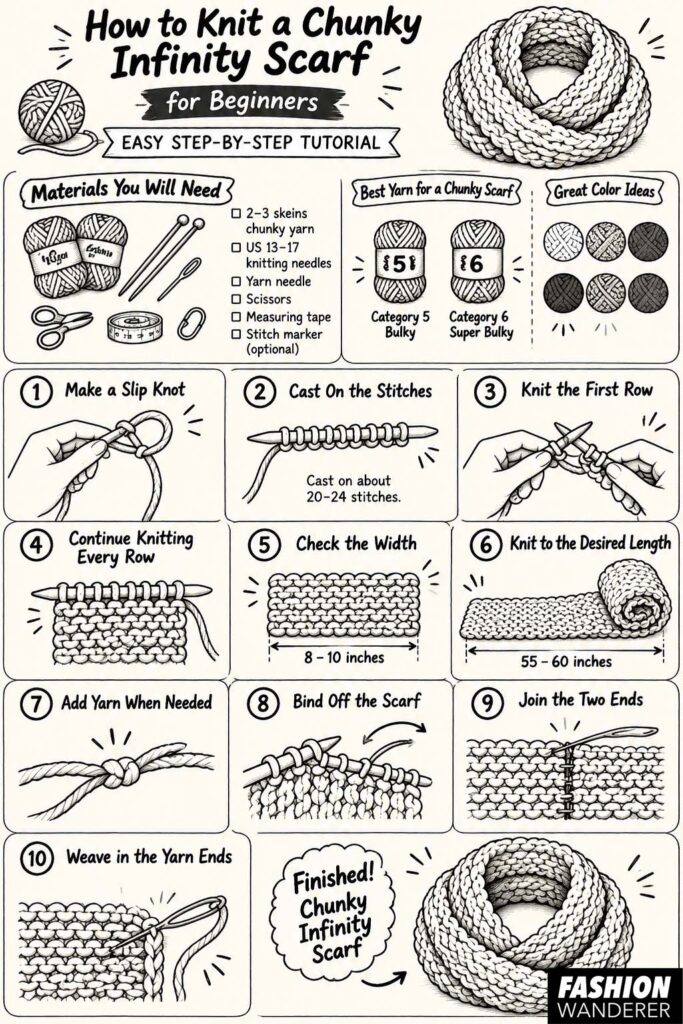
Step 1: Make a Slip Knot
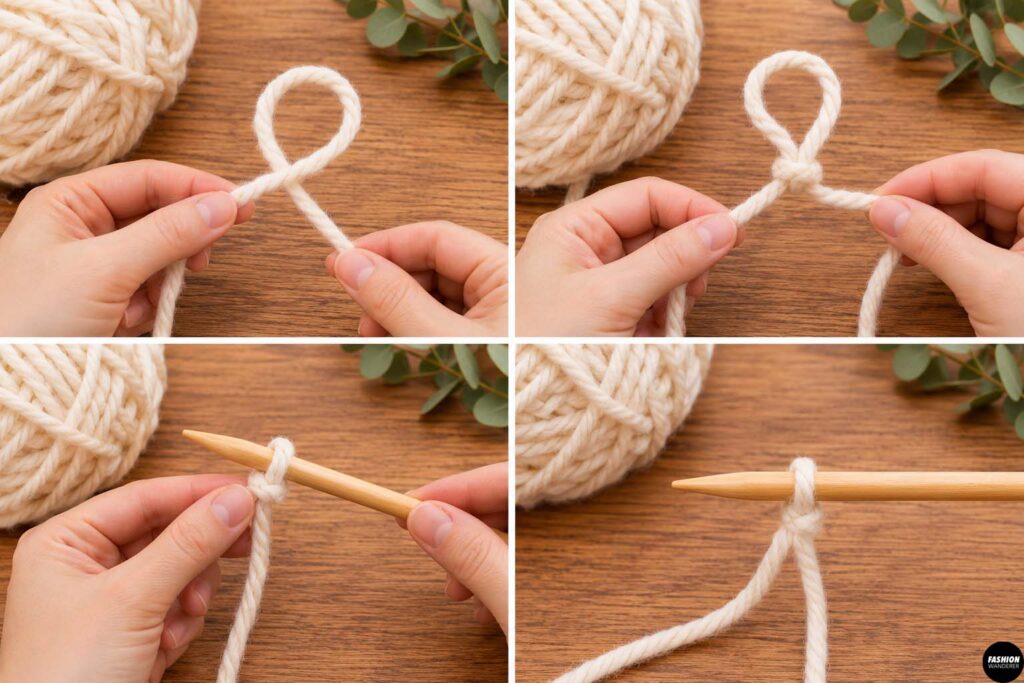
Begin by creating a slip knot.
Leave approximately a 6-inch yarn tail.
Place the slip knot onto your knitting needle and gently tighten it.
Do not pull the knot too tightly. The loop should slide comfortably along the knitting needle.
This first loop counts as your first cast-on stitch.
Step 2: Cast On the Stitches
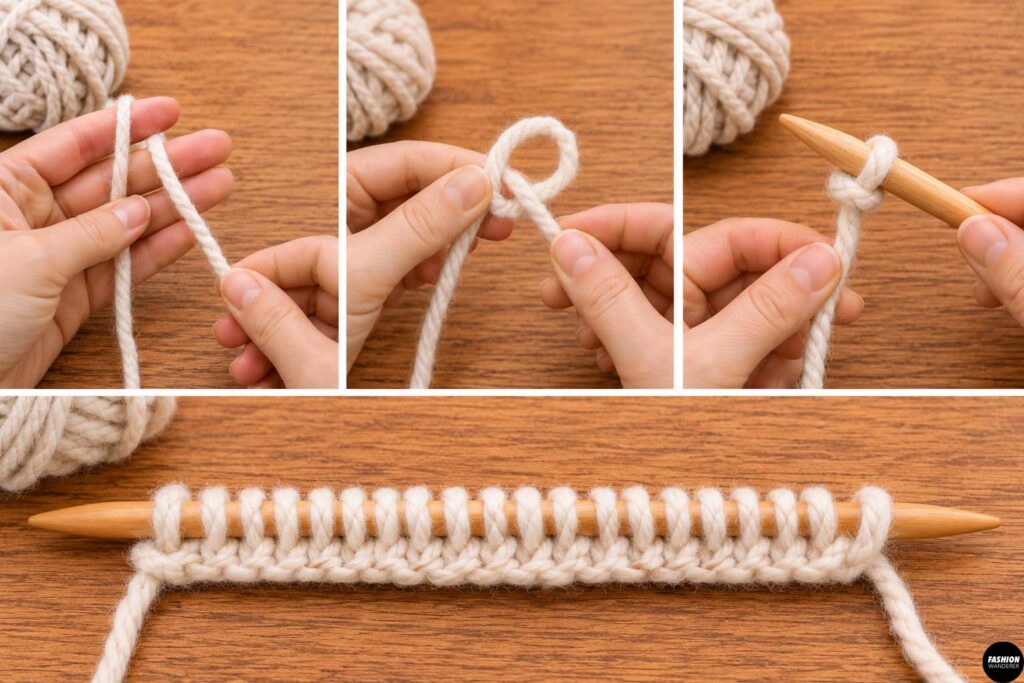
Cast on approximately 20 to 24 stitches.
The exact number depends on your yarn thickness and how wide you want your scarf.
For a scarf approximately 8 inches wide, start with about 20 stitches using super bulky yarn.
If you are using slightly thinner bulky yarn, you may need 24 to 28 stitches.
Use the long-tail cast-on or another beginner-friendly cast-on method.
Keep your cast-on edge relaxed.
If the cast-on stitches are too tight, the bottom edge of the scarf may feel stiff.
Step 3: Knit the First Row
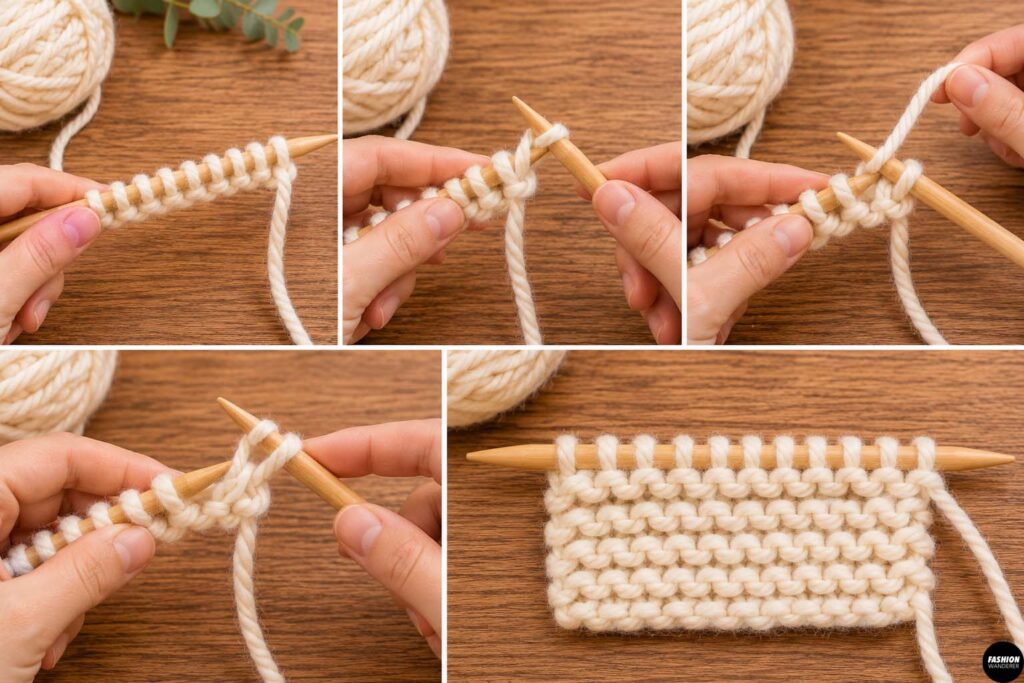
Turn your work so the needle holding the cast-on stitches is in your left hand.
Insert the empty needle into the first stitch from front to back.
Wrap the working yarn around the right needle.
Pull the yarn through the stitch and slide the old stitch off the left needle.
You have completed one knit stitch.
Continue knitting every stitch across the row.
This creates a simple garter stitch, which is made by knitting every row.
Garter stitch is especially good for beginners because it lies flat and has a soft, textured appearance.
Step 4: Continue Knitting Every Row
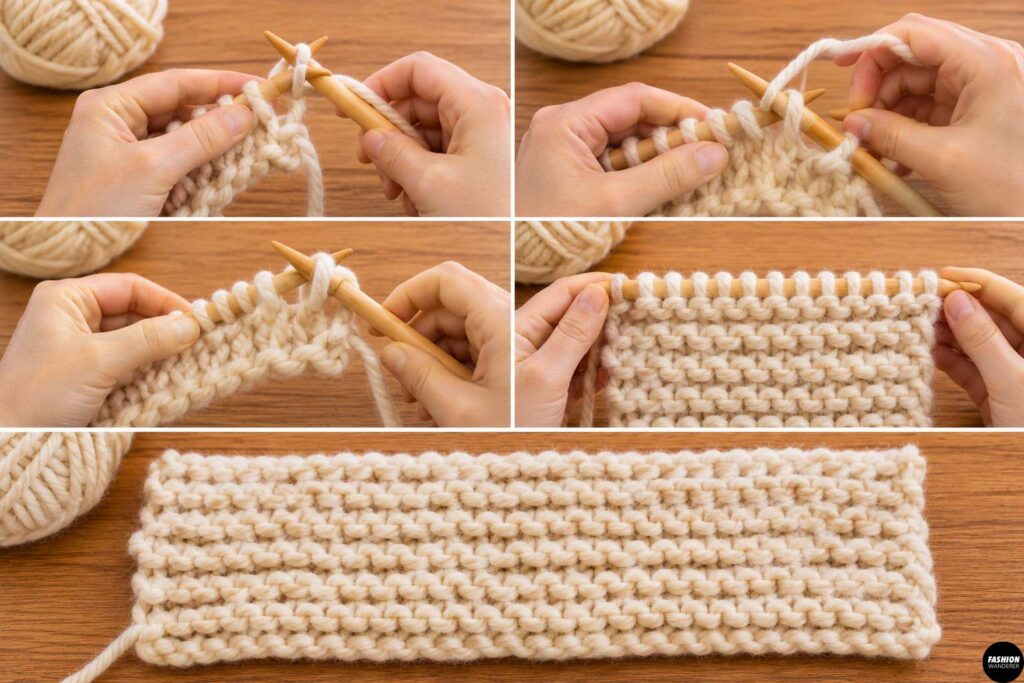
Turn the work and knit every stitch across the next row.
Continue repeating this process.
You will begin to see horizontal ridges forming across the scarf.
Try to keep your knitting tension relaxed and consistent.
Avoid pulling the yarn tightly after each stitch.
Chunky yarn looks best when the stitches remain soft and slightly loose.
Step 5: Check the Width
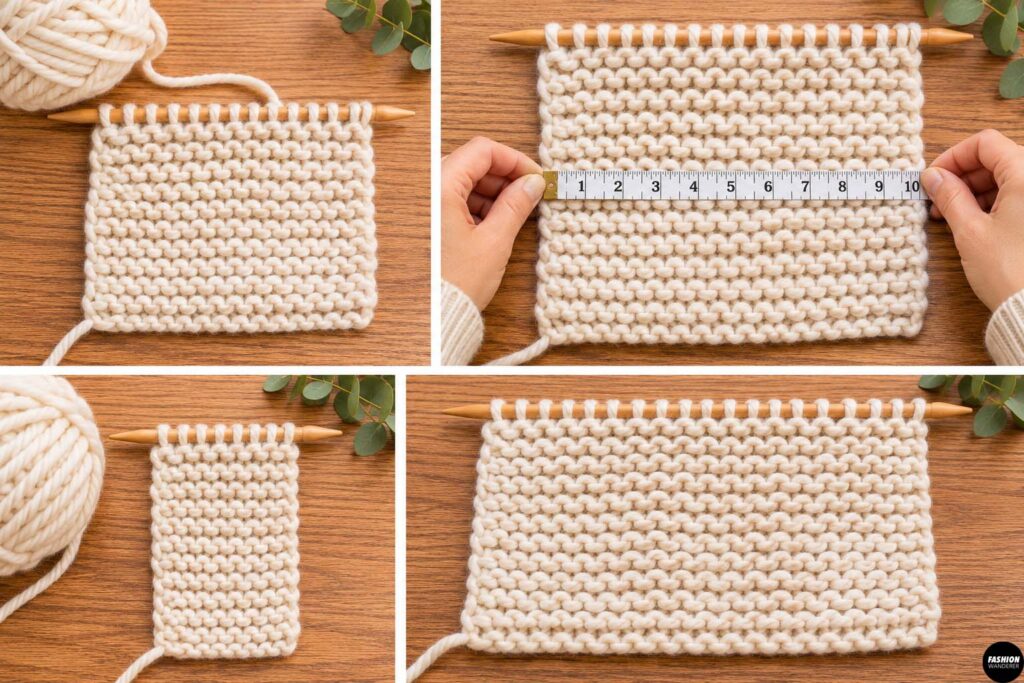
After knitting several rows, lay the scarf flat and measure the width.
A comfortable chunky infinity scarf is usually approximately 8 to 10 inches wide.
If your scarf is too narrow, you can start again with more cast-on stitches.
If it feels too wide, reduce the number of stitches.
It is easier to adjust the width early in the project rather than after knitting several feet.
Step 6: Continue Until the Scarf Reaches the Desired Length
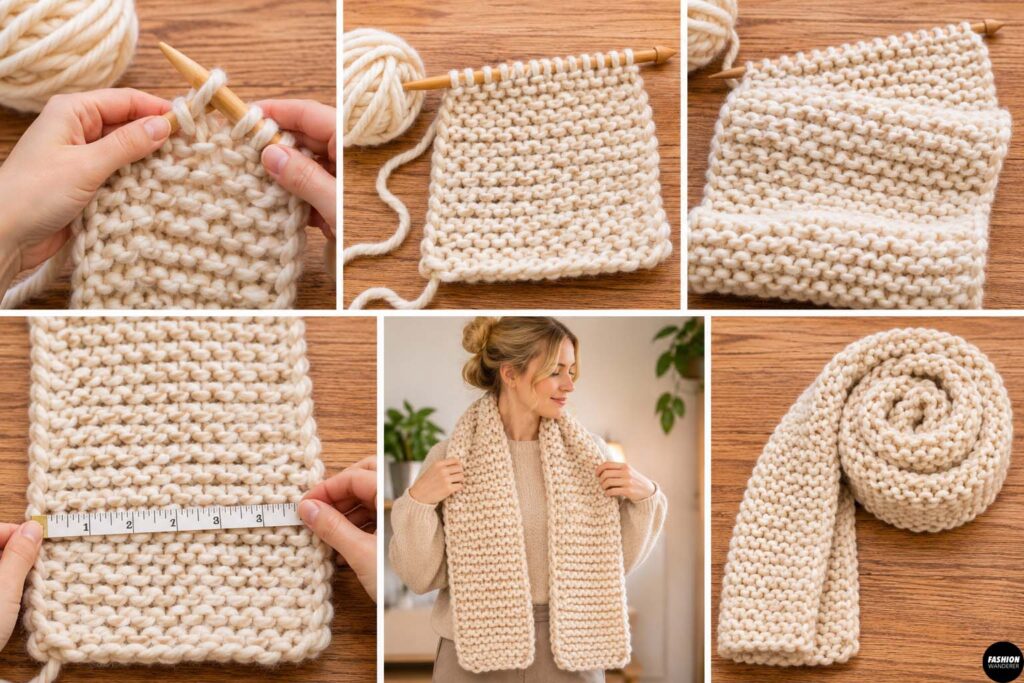
Continue knitting every row until the scarf measures approximately 55 to 60 inches long.
For a smaller infinity scarf, stop around 50 inches.
For a larger double-wrap scarf, continue to approximately 60 to 65 inches.
Occasionally wrap the unfinished scarf loosely around your neck to check the length.
Remember that chunky knitted fabric may stretch slightly during wear.
Step 7: Add Yarn When Needed
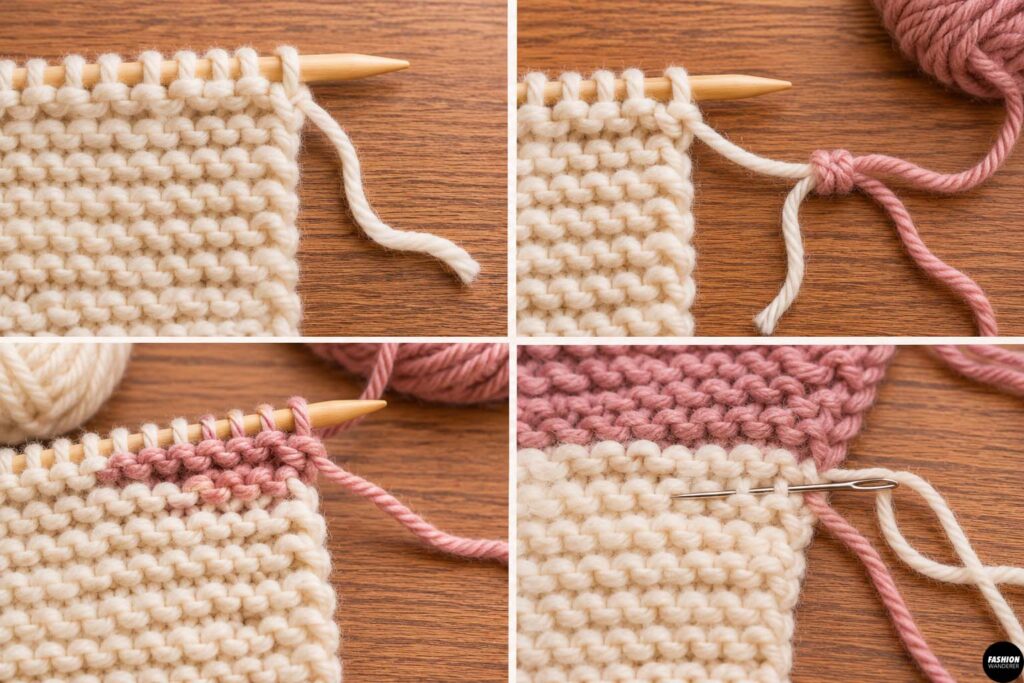
You will probably need more than one skein of yarn.
When you reach the end of a skein, stop with approximately 6 inches of yarn remaining.
Tie the new yarn loosely to the old yarn near the edge of your work.
Continue knitting using the new yarn.
Later, use a yarn needle to weave both yarn tails securely into the scarf.
Avoid joining new yarn in the middle of the scarf if possible.
Placing yarn joins near the edge makes them easier to hide.
Step 8: Bind Off the Scarf
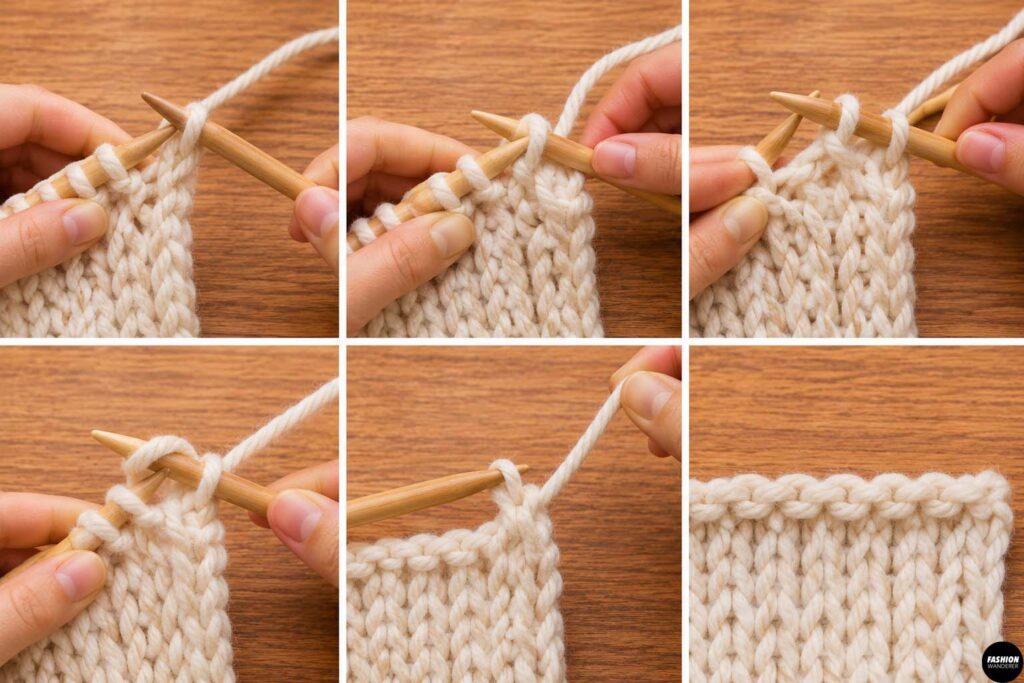
Once the scarf reaches your desired length, bind off the stitches.
Knit the first two stitches.
Use the left needle to lift the first knitted stitch over the second stitch and off the needle.
Knit another stitch.
Lift the previous stitch over the new stitch.
Continue until only one stitch remains.
Cut the yarn, leaving approximately a 10-inch tail.
Pull the yarn tail through the final loop and tighten gently.
Keep your bind-off edge relaxed so it matches the stretch of the cast-on edge.
Step 9: Join the Two Ends
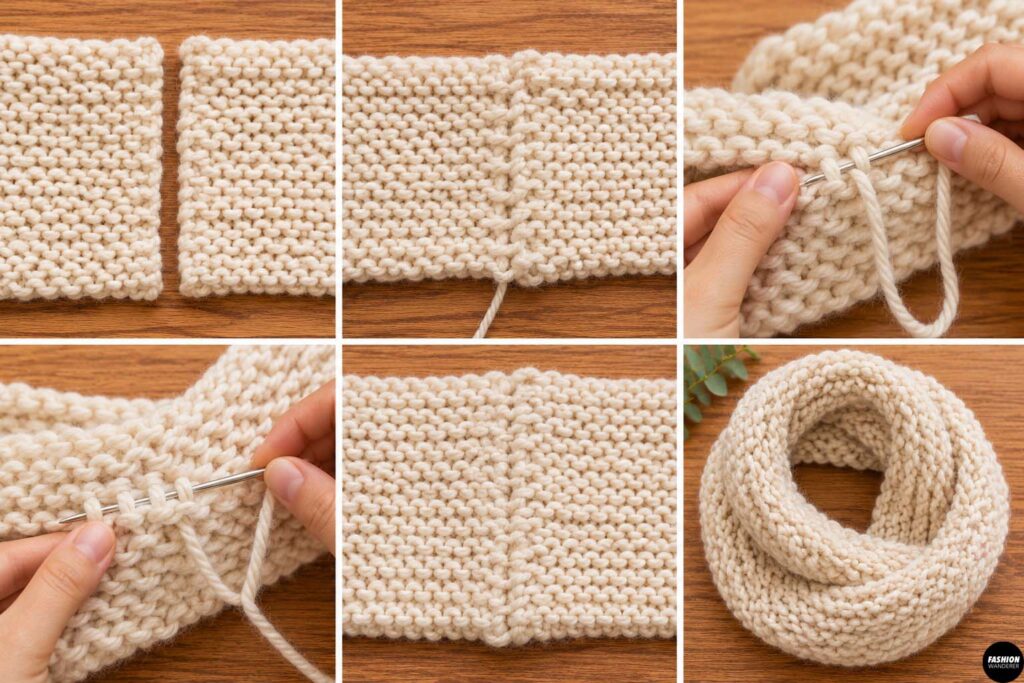
Lay the scarf flat with both short ends together.
Make sure the scarf is not twisted.
Thread the long yarn tail through a yarn needle.
Use a mattress stitch, whipstitch, or simple running stitch to sew the two ends together.
Work carefully across the entire width of the scarf.
Pull the stitches snugly, but do not tighten them so much that the seam becomes stiff.
Once finished, knot the yarn securely on the inside.
Step 10: Weave in the Yarn Ends
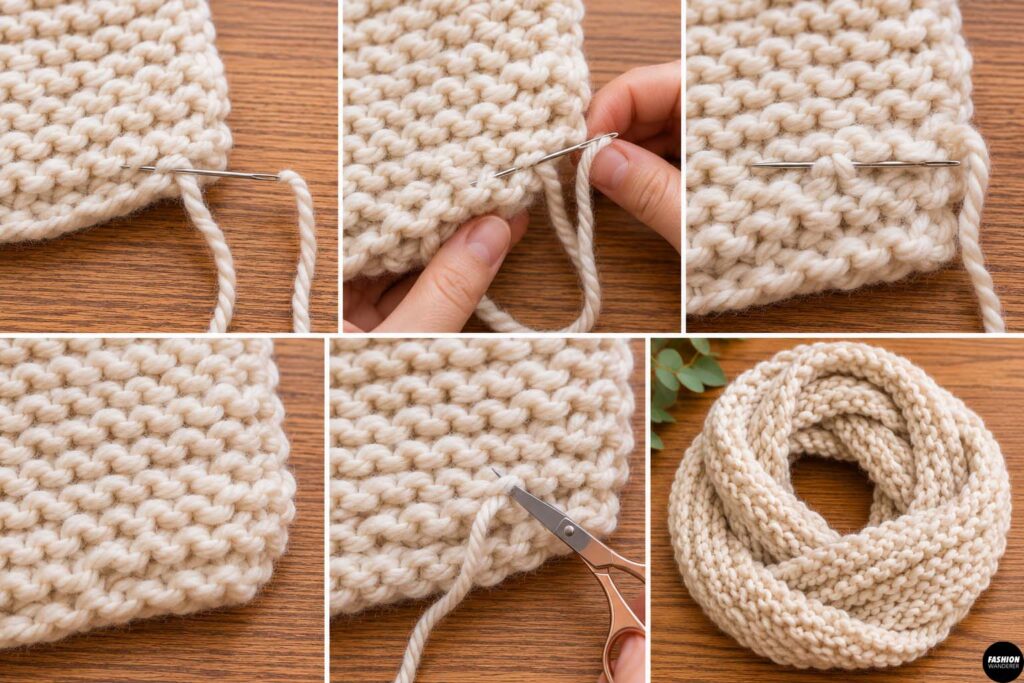
Use a yarn needle to weave all loose yarn tails through several nearby stitches.
Change direction once or twice while weaving.
This helps prevent the yarn ends from slipping out.
Trim the remaining yarn close to the knitted fabric.
Turn the seam toward the inside of the scarf.
Your chunky infinity scarf is finished.
How to Wear Your Chunky Infinity Scarf
Place the scarf around your neck as one large loop.
Twist the loop once and pull the second loop over your head.
Adjust both layers until the scarf sits comfortably around your neck.
You can wear it loosely for a relaxed oversized look or pull it closer around your neck for extra warmth.
Easy Ways to Customize Your Infinity Scarf
Once you feel comfortable with the basic pattern, try changing the design.
Use two colors and switch yarn halfway through for a color-block scarf.
Knit alternating rows of different colors for stripes.
You can also experiment with seed stitch, rib stitch, or simple knit-and-purl textures.
For an extra oversized winter scarf, use super bulky yarn and larger needles.
Final Tips for Beginner Knitters
Do not worry if your stitches are not perfectly even when you begin. Your tension will naturally improve as you continue knitting.
Count your stitches every few rows so you do not accidentally add or lose stitches.
If you notice a mistake only a few stitches back, carefully undo the stitches and re-knit them.
The beauty of a chunky infinity scarf is that the large stitches make the project forgiving and easy to see.
This easy chunky infinity scarf knitting pattern for beginners is a simple project you can finish quickly while practicing the most important basic knitting skills. Once you learn how to cast on, knit, bind off, and sew the ends together, you can use the same techniques to make scarves in different colors, sizes, and textures for yourself, gifts, or handmade items to sell.