
Have an old quilt tucked away in your closet? Instead of letting that beautiful vintage fabric collect dust, transform it into an adorable DIY patchwork kids’ cape! This beginner-friendly sewing project turns a forgotten quilt into a cozy, one-of-a-kind outerwear piece filled with nostalgic charm.
With its colorful patchwork patterns, soft quilted texture, and relaxed silhouette, handmade kids capes are perfect for chilly autumn walks, cottagecore-inspired outfits, and everyday layering.
The best part? You don’t need complicated sewing patterns or advanced techniques. With a few simple cuts and basic stitching, you can give an old quilt a fashionable second life.
Why You’ll Love This Vintage Quilt Upcycle
Turning an old quilt into a kids’ cape is a wonderful way to combine sustainable fashion with creative sewing.
- Budget-friendly: Repurpose a quilt you already own instead of buying expensive fabric.
- Beginner-friendly: Simple cutting, straight stitching, and minimal fitting.
- One-of-a-kind: Every vintage quilt creates a unique patchwork design.
- Cozy and comfortable: Quilted fabric provides warmth without needing additional lining.
- Perfect for fall: Layer over sweaters, leggings, jeans, or dresses.
Whether you’re using a colorful grandmother’s quilt or a thrift-store find, this easy sewing refashion creates something truly special.
Materials You’ll Need
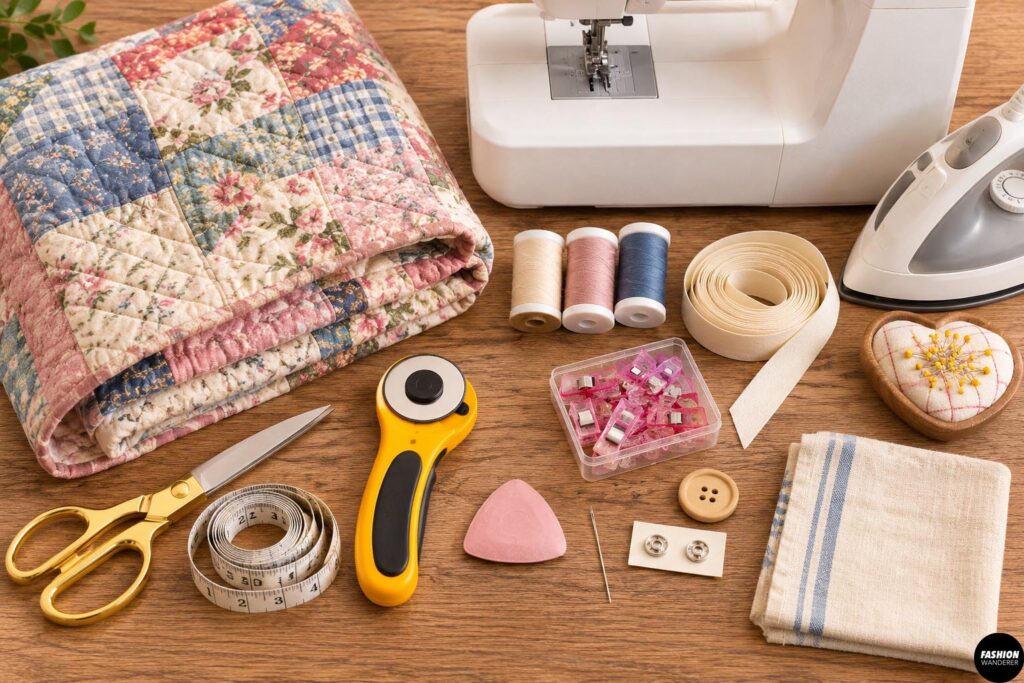
Before starting your DIY quilted cape, gather these supplies:
- Old lightweight or medium-weight quilt
- Fabric scissors or rotary cutter
- Measuring tape
- Fabric chalk or washable marker
- Sewing clips or pins
- Sewing machine
- Coordinating polyester thread
- Bias tape or quilt binding
- One large button and fabric loop, or a sew-on snap
- Hand-sewing needle
- Iron and pressing cloth
Beginner tip: Choose a quilt with secure stitching and minimal wear. Avoid heavy comforters, loose batting, or fragile antique quilts that could become damaged during cutting.
Step-by-Step Tutorial: How to Make a Patchwork Kids’ Cape
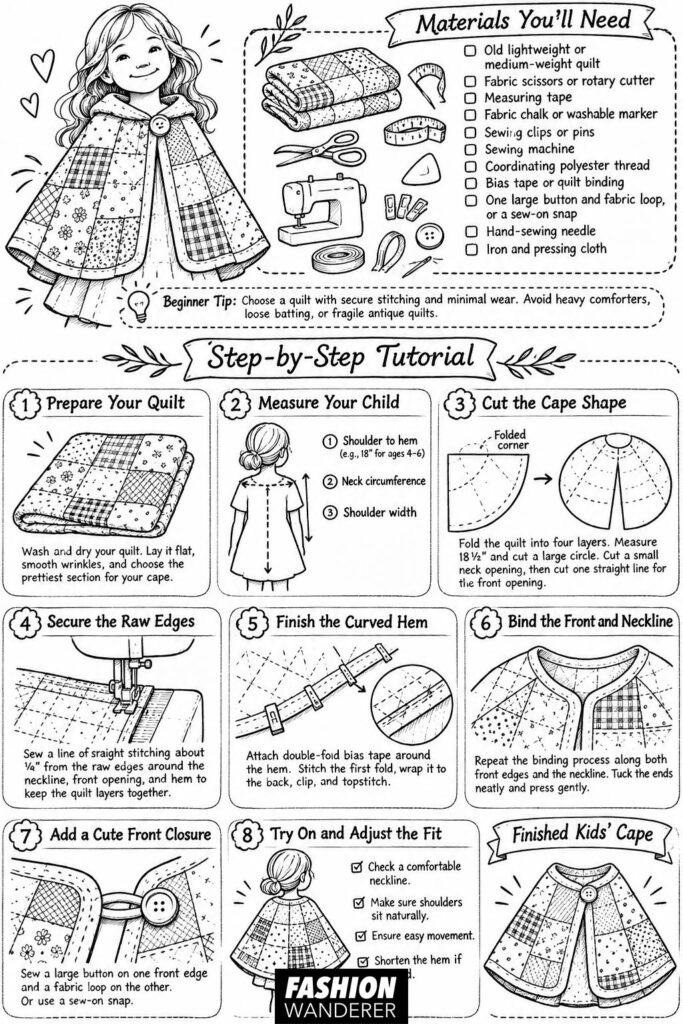
This tutorial creates a simple open-front cape with a gently curved hem and a comfortable neckline.
Step 1: Prepare Your Old Quilt
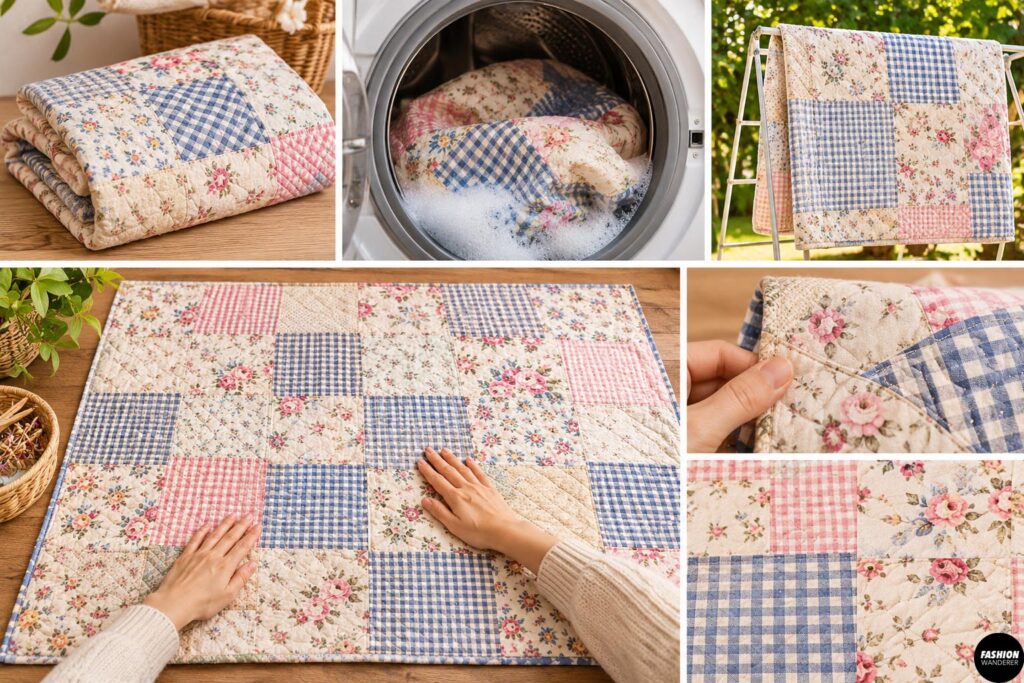
Start by washing your quilt according to its fabric care instructions. Allow it to dry completely.
Spread the quilt flat on a large table or clean floor. Smooth out wrinkles and inspect the fabric for worn patches, loose seams, or damaged quilting.
Choose the most attractive patchwork section for the cape’s front and back.
If your quilt features colorful squares, floral prints, or geometric designs, position those details where they’ll be most visible.
Step 2: Measure Your Child
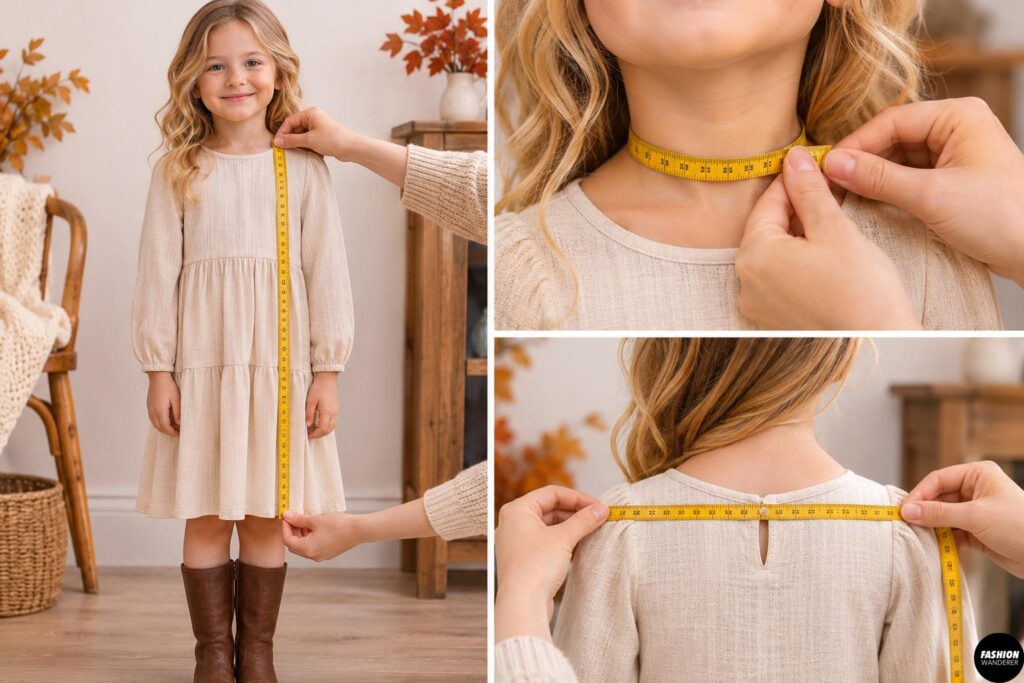
Take three basic measurements:
- Shoulder to hem: Measure from the base of the neck to your desired cape length.
- Neck circumference: Measure comfortably around the base of the neck.
- Shoulder width: Measure across the shoulders to help determine the cape’s proportions.
For a sample cape suitable for approximately ages 4–6, use a finished length of 18 inches.
Add ½ inch to the desired length for the lower edge finish.
Always adjust measurements according to your child’s size and preferred coverage.
Step 3: Cut the Cape Shape
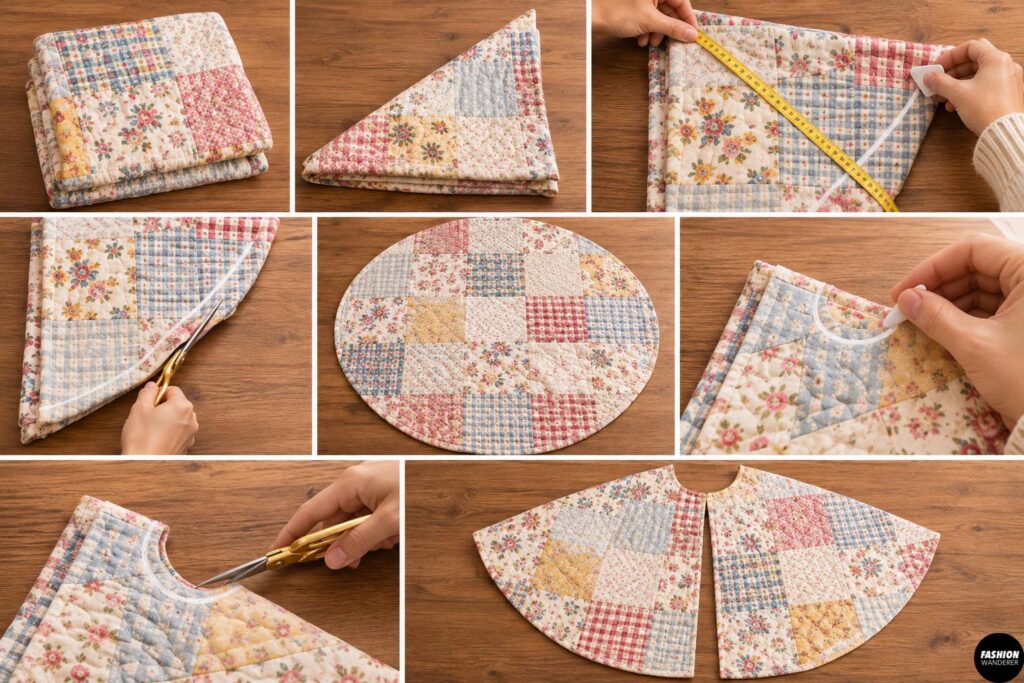
Fold your quilt in half, then fold it again to create four layers, with the intended center back at the folded corner.
Measure 18½ inches from that corner in several directions, marking a curved outer hem.
Cut along the markings to create a large circle.
Next, mark a small neckline opening around the folded corner. Begin conservatively with approximately a 2-inch radius, then cut and unfold to check the fit.
Important: The neckline must fit comfortably without pulling against the child’s throat.
Open the circle and cut one straight line from the outer hem to the center neckline, creating the front opening.
Step 4: Secure the Raw Quilt Edges
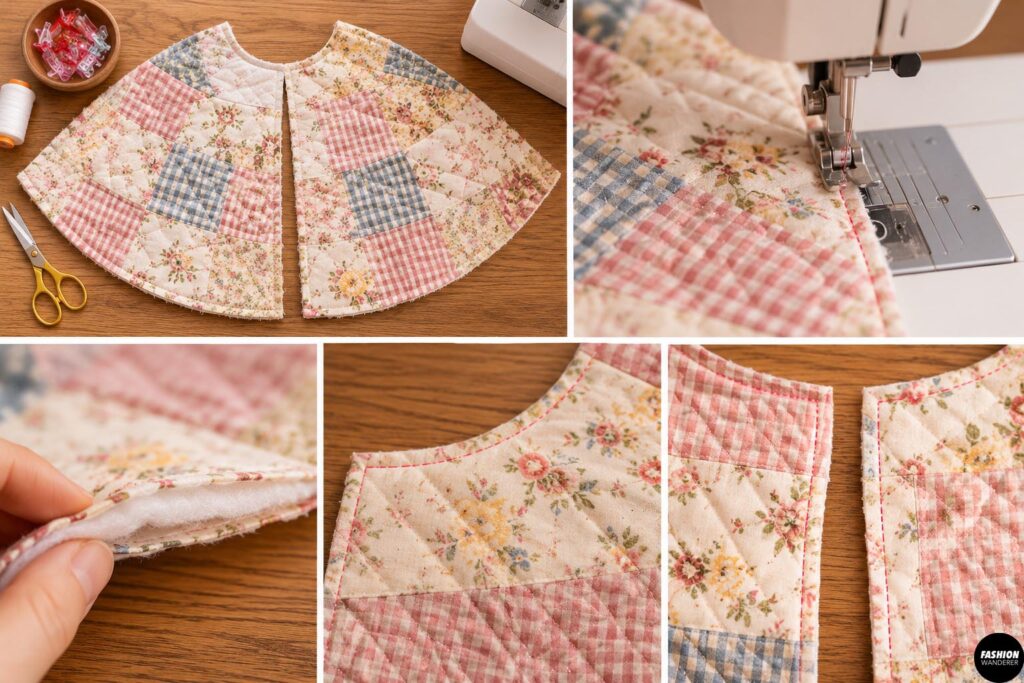
Cutting through an old quilt exposes the fabric layers and batting.
To prevent shifting, sew a line of straight stitching approximately ¼ inch from the raw edges around the neckline, front opening, and hem.
Use a 3.0 mm stitch length and sew slowly through bulky seams.
If your quilt is especially thick, use a size 90/14 or 100/16 sewing machine needle.
This simple step helps keep all quilt layers together before binding.
Step 5: Finish the Curved Hem
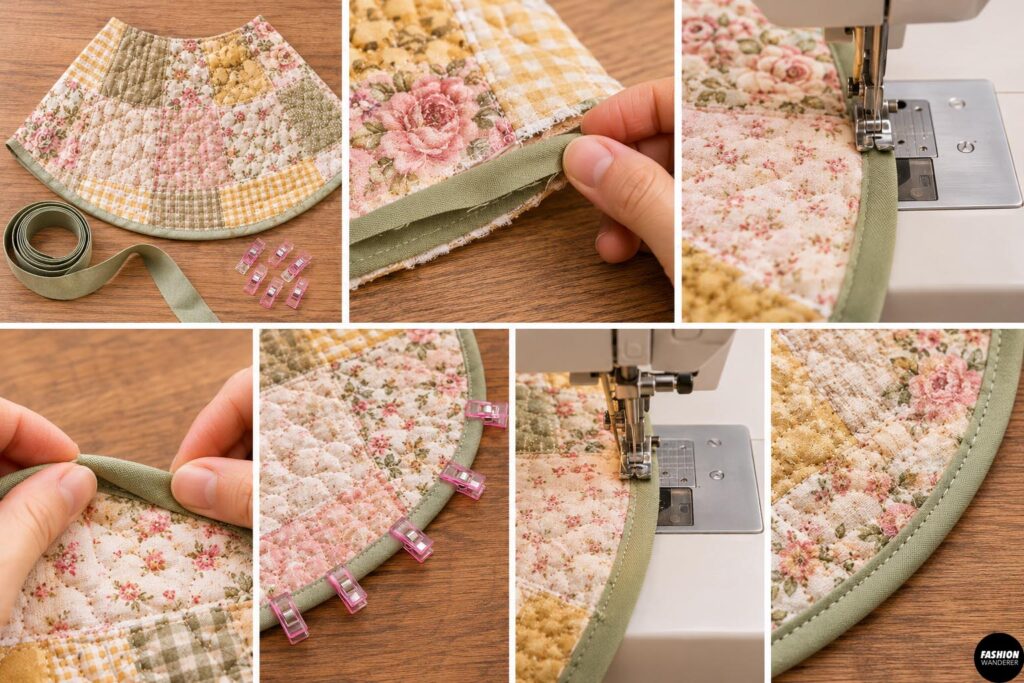
Now it’s time to create a polished, professional-looking edge.
Open your double-fold bias tape and position it around the raw hem.
Stitch the first fold of the binding to the quilt edge, using the binding’s fold line as your guide.
Fold the tape over the raw edge toward the opposite side.
Secure with sewing clips, then stitch close to the folded edge, making sure the stitching catches both sides of the binding.
Work slowly around the curve to avoid puckering.
Style tip: Choose cream, dusty pink, sage green, or mustard binding for a charming vintage cottagecore finish.
Step 6: Bind the Front Opening and Neckline
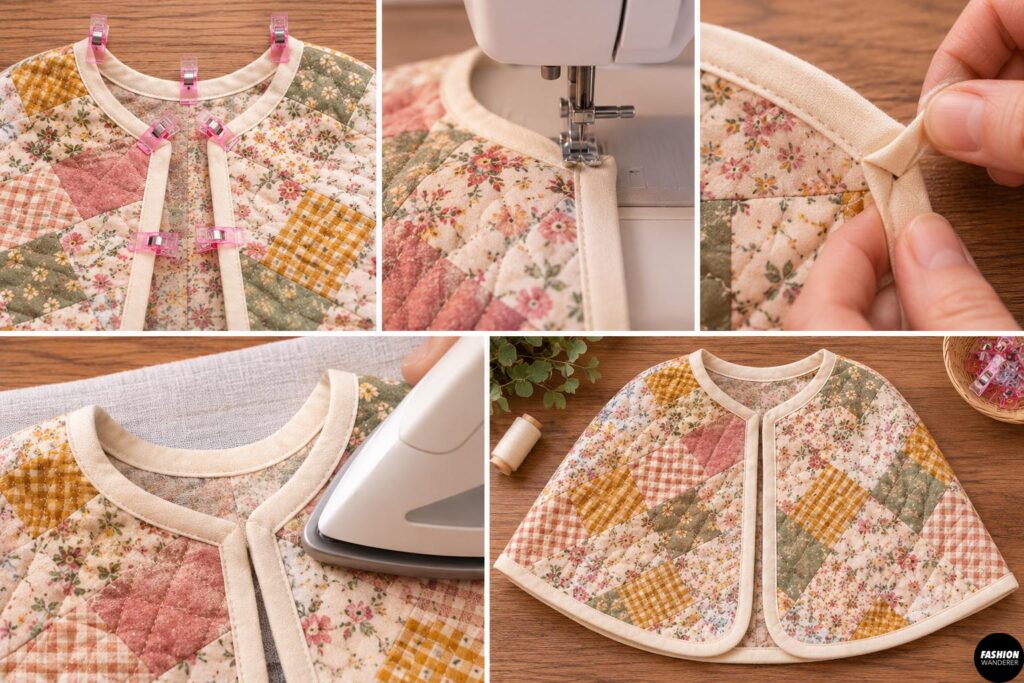
Repeat the binding process along both front edges and around the neckline.
At the upper corners, carefully fold and tuck the binding ends for a neat finish.
Avoid stretching the neckline while sewing, as this may distort the cape’s shape.
Press gently with a pressing cloth to flatten bulky seams without crushing the quilted texture.
Step 7: Add a Cute Front Closure
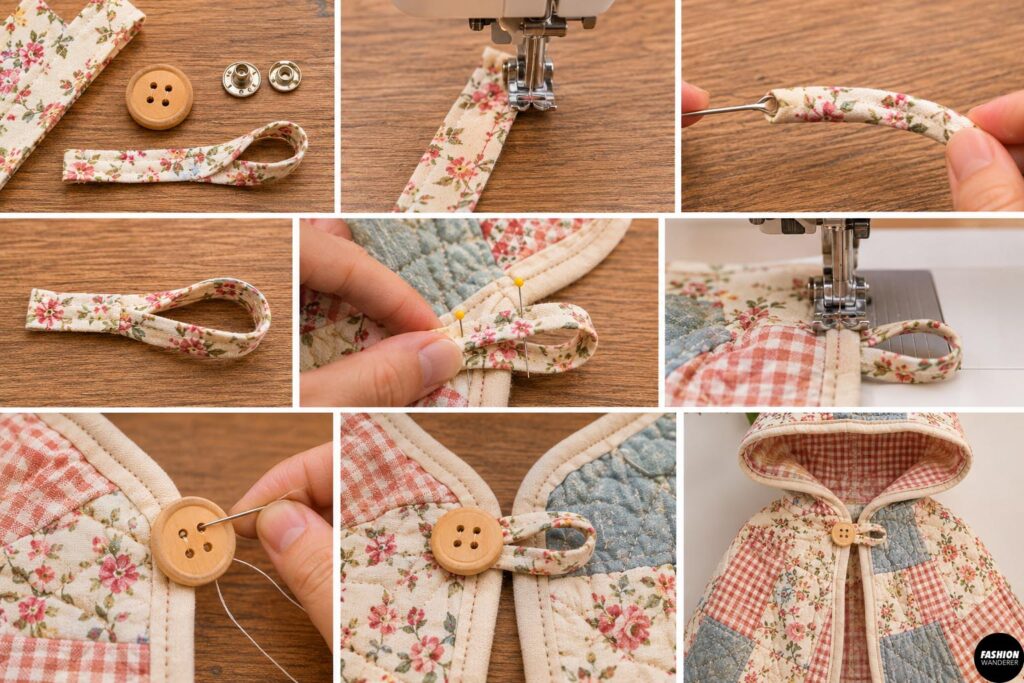
A simple closure keeps the cape comfortably positioned over your child’s shoulders.
For a vintage-inspired look, sew a large decorative button near one upper front edge.
Create a matching fabric loop using a narrow strip of cotton fabric or sturdy bias tape.
Fold the strip lengthwise, stitch along the edge, turn it right side out, and attach it securely opposite the button.
Alternatively, use a sew-on snap for a simpler finish.
Safety tip: Use a breakaway-style closure when possible, avoid ties around the neck, and check that buttons are firmly attached. Supervise young children while wearing the cape.
Step 8: Try On and Adjust the Fit
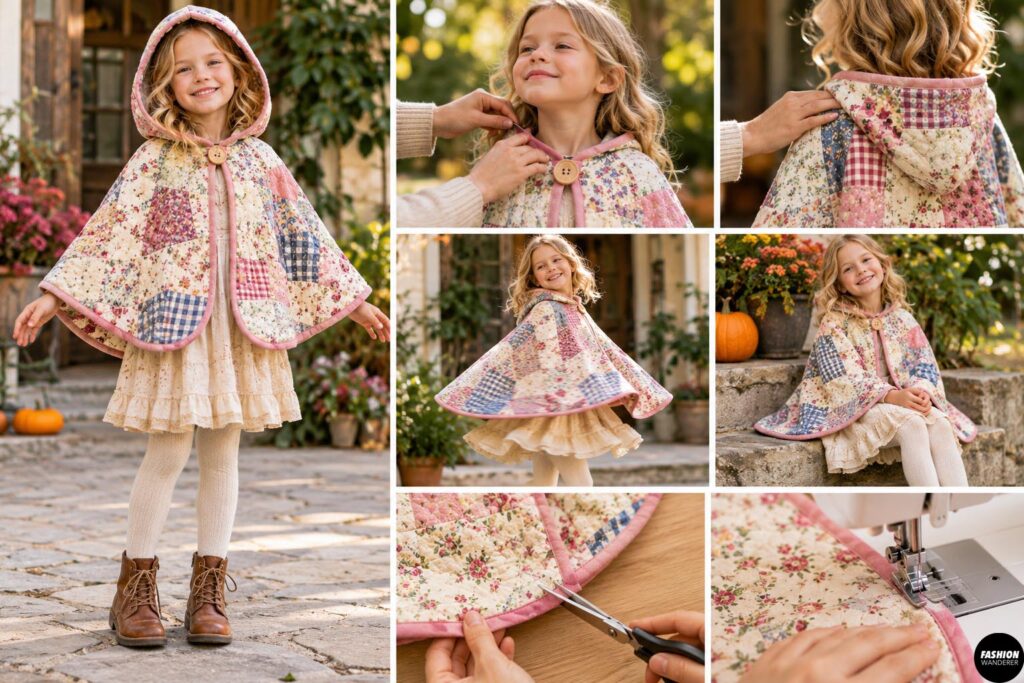
Have your child try on the finished cape.
Check that the neckline feels comfortable, the shoulders sit naturally, and the front opening allows easy movement.
Make sure the hem doesn’t interfere with walking, playing, or sitting.
If necessary, shorten the cape slightly and rebind the hem.
The finished result should feel cozy without being restrictive.
Creative Ways to Customize Your Patchwork Cape
Want to make your handmade kids’ cape even more adorable?
Try adding oversized patch pockets using leftover quilt pieces. You can also attach a small embroidered flower, decorative fabric label, or contrasting binding.
For an extra playful look, choose quilts featuring pastel florals, colorful checkerboards, or traditional vintage patchwork blocks.
Pair the finished cape with corduroy pants, a knitted beanie, and ankle boots for an effortlessly cute autumn outfit.
Frequently Asked Questions
Can I make a kids’ cape without a sewing pattern?
Yes! This simple circular cape uses basic measurements and curved cutting, making it ideal for beginners.
What type of quilt works best?
Lightweight cotton quilts with secure stitching are easiest to cut, bind, and sew.
Can I use a damaged vintage quilt?
Absolutely! Choose sturdy, undamaged sections and save smaller scraps for matching accessories.
Final Thoughts
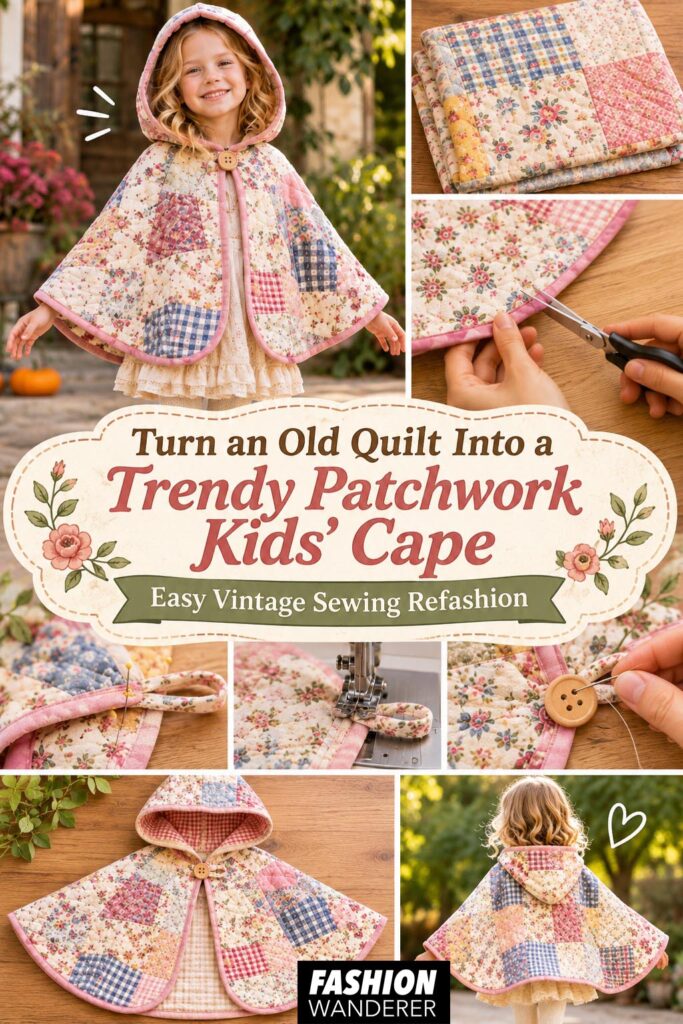
Transforming an old quilt into a trendy patchwork kids’ cape is a creative way to refresh forgotten textiles while making something practical and adorable.
With basic sewing skills, a few simple measurements, and beautiful vintage fabric, you can create a cozy handmade layer that’s perfect for cooler weather.
Instead of throwing away that old quilt, give it a second life as a charming piece of children’s fashion!