
Have an old sweater sitting in your closet that you never wear anymore? Don’t throw it away! With a few simple cuts and basic sewing techniques, you can transform an old sweater into an adorable kids’ knit cape in under an hour. This easy DIY sweater upcycle is perfect for keeping little ones cozy during chilly fall mornings, winter outings, or holiday adventures.
The best part? You don’t need a sewing pattern to make a diy kids cape! By reusing the sweater’s existing neckline, knit fabric, and finished hem, you can create a stylish, comfortable cape without complicated measurements or advanced sewing skills.
Whether you’re looking for a beginner-friendly sewing project, a sustainable kids’ clothing idea, or a cute handmade gift, this DIY kids’ sweater cape tutorial is a wonderful way to give old clothing a second life.
Why You’ll Love This Easy Sweater Upcycle
Turning an oversized sweater into a cozy kids’ cape is one of the simplest ways to experiment with upcycled children’s clothing.
- Beginner-friendly: Only basic cutting and straight stitching are needed.
- No sewing pattern required: The sweater provides the neckline and shape.
- Budget-friendly: Repurpose clothing you already own.
- Quick project: Complete it in approximately 45–60 minutes.
- Customizable: Add decorative buttons, pockets, or a cute bow.
This project works especially well with soft, medium-weight knit sweaters that have a little stretch.
Materials You’ll Need
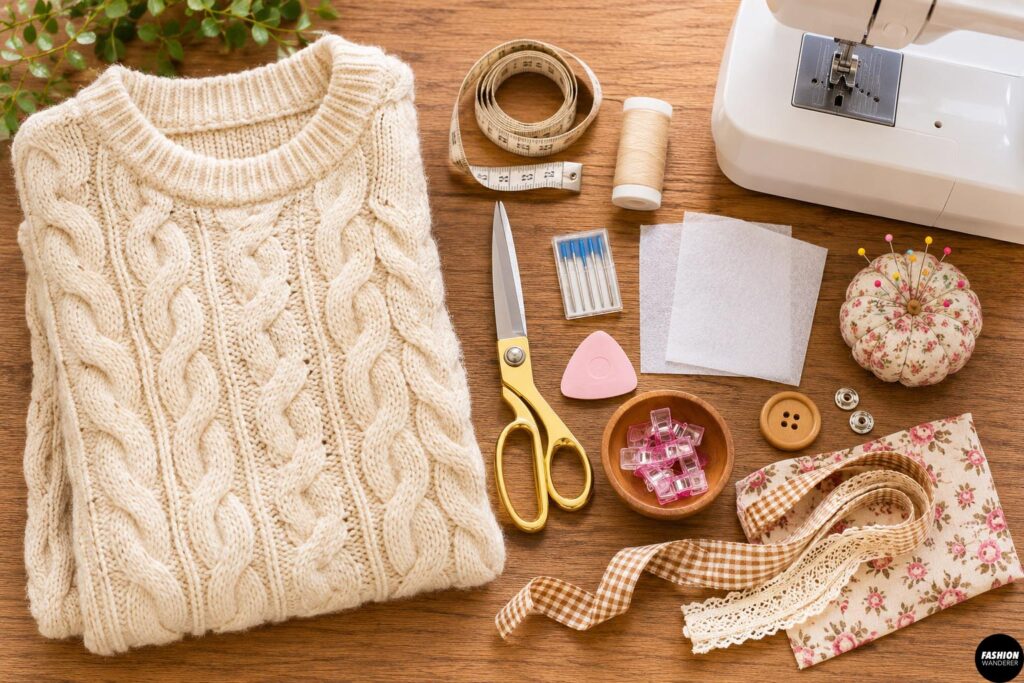
Before starting your DIY knit cape, gather these supplies:
- One oversized adult sweater (medium to XL, depending on the child’s size)
- Fabric scissors or rotary cutter
- Measuring tape
- Fabric chalk or washable marker
- Sewing clips or pins
- Sewing machine
- Matching polyester thread
- Ballpoint or stretch sewing machine needle
- Two small pieces of fusible knit interfacing
- One large button or sew-on snap (optional)
- Ribbon or fabric scraps for decoration (optional)
Skill Level: Beginner
Estimated Time: 45–60 minutes
Seam Allowance: ⅜” (1 cm), unless otherwise noted
Recommended Ages: Approximately 2–8 years, depending on sweater dimensions.
Step-by-Step Tutorial: How to Turn an Old Sweater Into a Kids’ Knit Cape
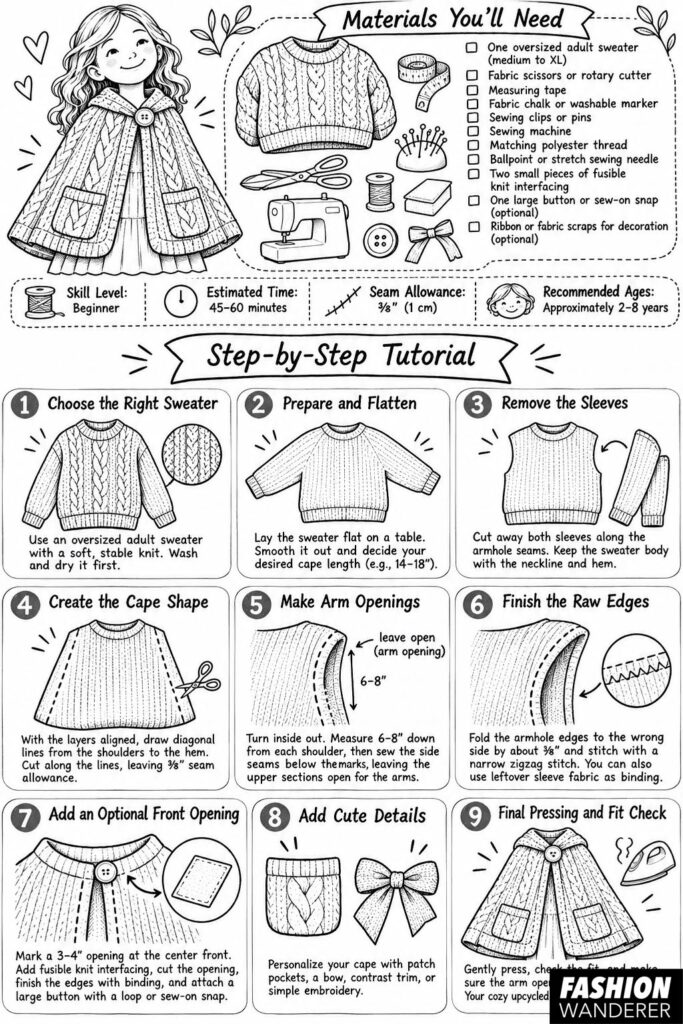
Step 1: Choose the Right Sweater
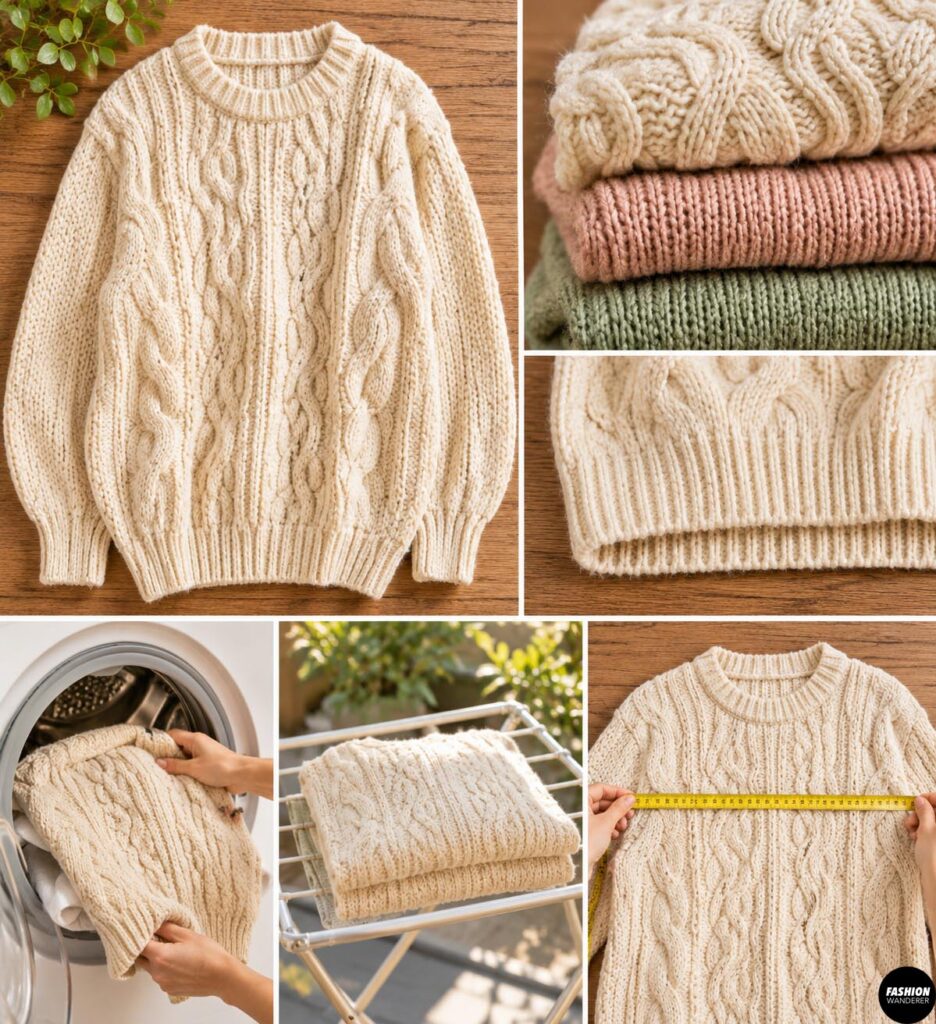
Start by selecting an oversized adult sweater with a soft texture and comfortable neckline.
Look for sweaters made from cotton knit, acrylic blends, or stable sweater fabrics. Avoid extremely loose, chunky knits because they can unravel when cut.
A sweater with a finished ribbed bottom hem is ideal because you can reuse that edge as the cape’s hemline.
Wash and dry the sweater according to its care label before beginning.
Beginner Tip: Choose a sweater at least several inches wider than the child’s shoulder measurement to create a relaxed, flowing cape.
Step 2: Prepare and Flatten the Sweater
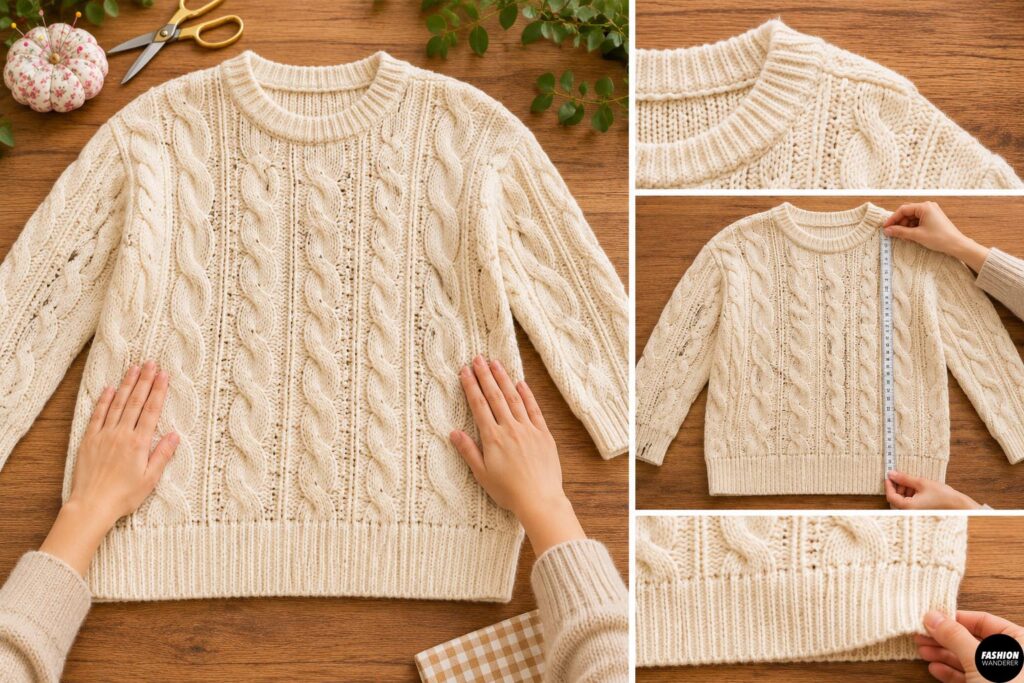
Lay the sweater flat on a large cutting surface with the front facing upward.
Smooth out wrinkles and align the shoulder seams, side seams, and bottom hem.
Make sure the sweater is not stretched while measuring.
Decide how long you want the finished cape to be. For younger children, a length of approximately 14–18 inches from the shoulder is a useful starting point.
The finished cape should allow the child to move their arms freely without dragging or restricting movement.
Step 3: Remove the Sleeves
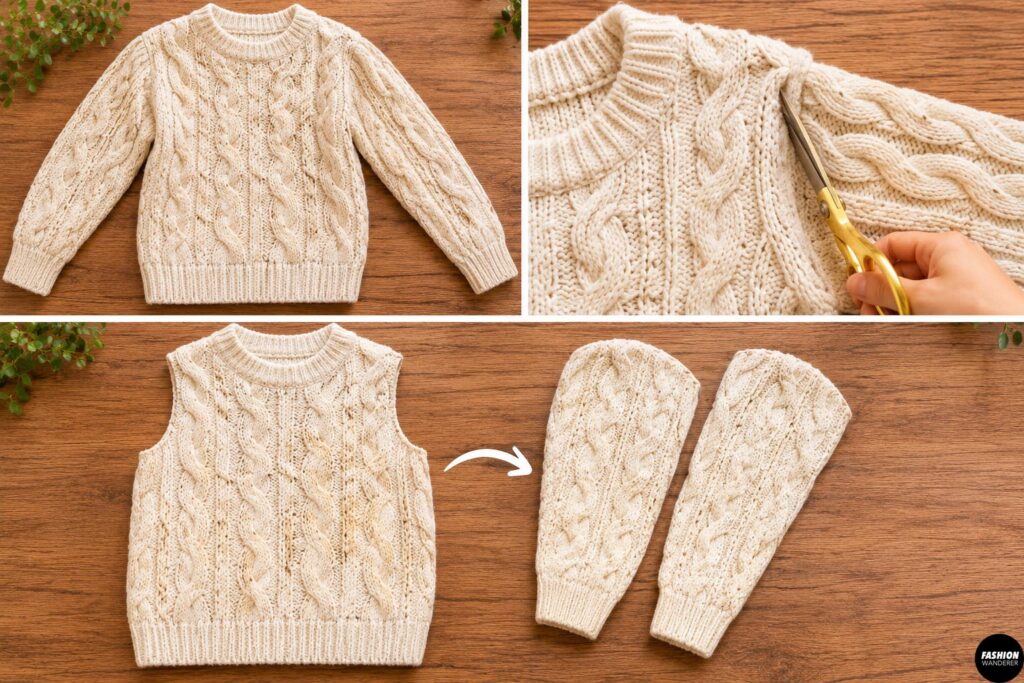
Using fabric scissors, carefully cut away both sleeves along the armhole seams.
Keep the sweater body intact, including the neckline, shoulder seams, and bottom ribbed hem.
Set the sleeves aside because you can reuse them later to create matching accessories or decorative pockets.
Don’t worry if the armhole edges look unfinished. You’ll reshape them in the next step.
Step 4: Create the Cape Shape Without a Pattern
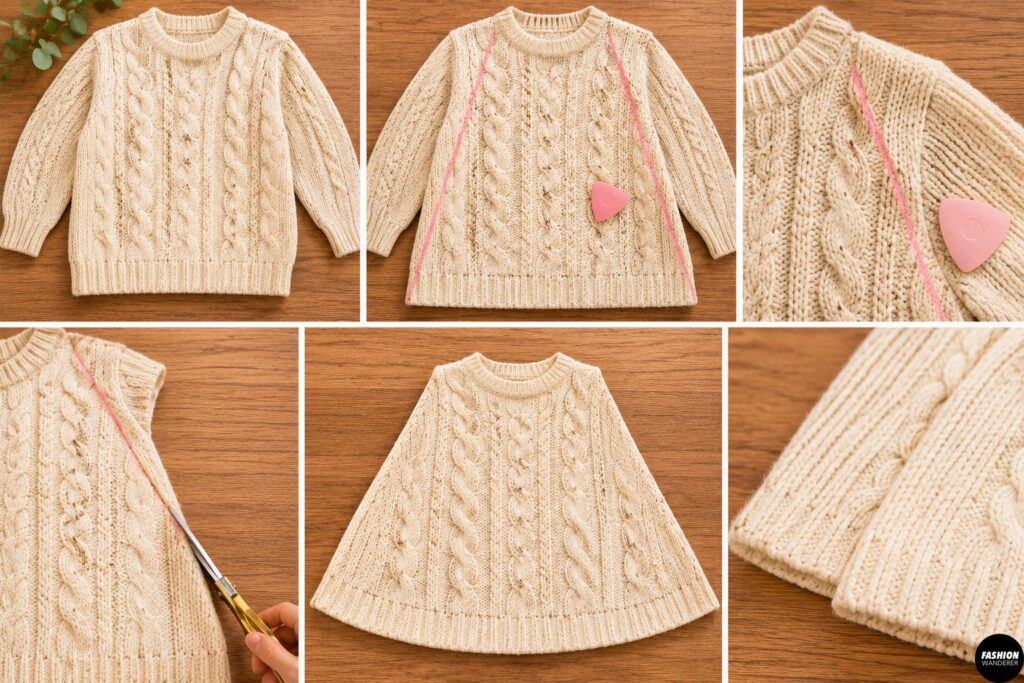
Keep the sweater lying flat with the front and back layers aligned.
Using fabric chalk, draw a gentle diagonal line on each side, starting near the outer shoulder and extending toward the bottom hem.
Keep the original neckline and shoulder seams intact.
For a wider, poncho-inspired cape, make the diagonal lines less steep to preserve more fabric around the sides.
Cut along your marked lines through both layers, leaving approximately ⅜” seam allowance.
Important: This creates a closed-side cape silhouette. The side seams will be sewn together, leaving openings for the child’s arms.
Step 5: Make Comfortable Arm Openings
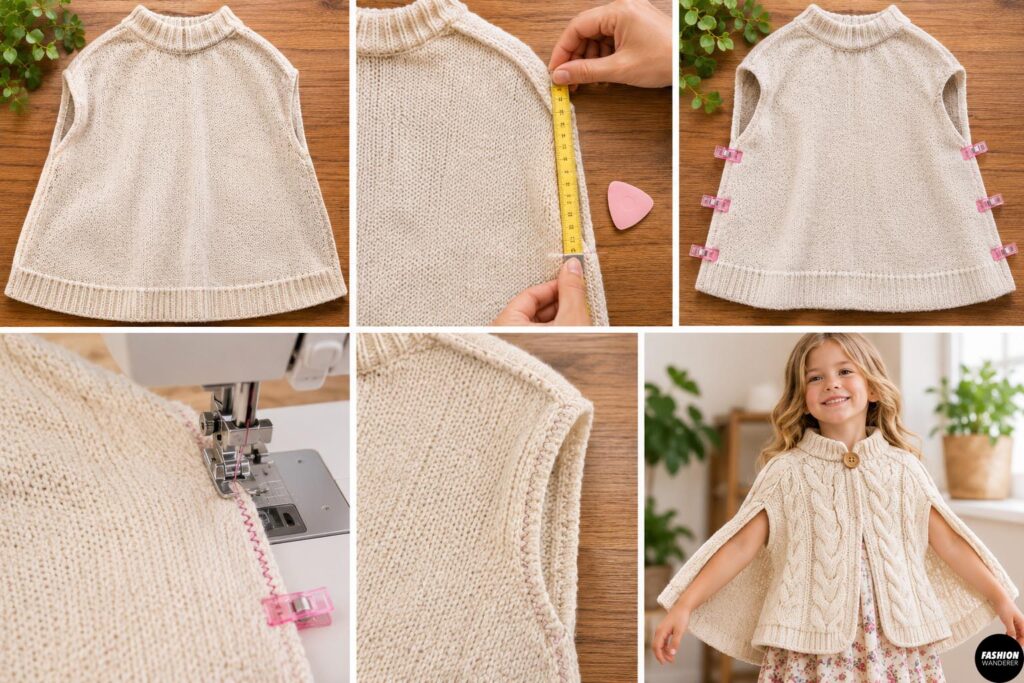
Turn the sweater inside out.
Measure approximately 6–8 inches downward from each shoulder along the side edges, adjusting for the child’s size.
Mark the bottom of each arm opening.
Starting below these marks, pin or clip the front and back side edges together.
Sew each side seam using a narrow zigzag stitch or stretch stitch, leaving the upper sections open for the arms.
Use a ⅜” seam allowance and avoid pulling the knit fabric while sewing.
Try the cape on the child to ensure the arm openings are comfortable and allow unrestricted movement.
Step 6: Finish the Raw Knit Edges
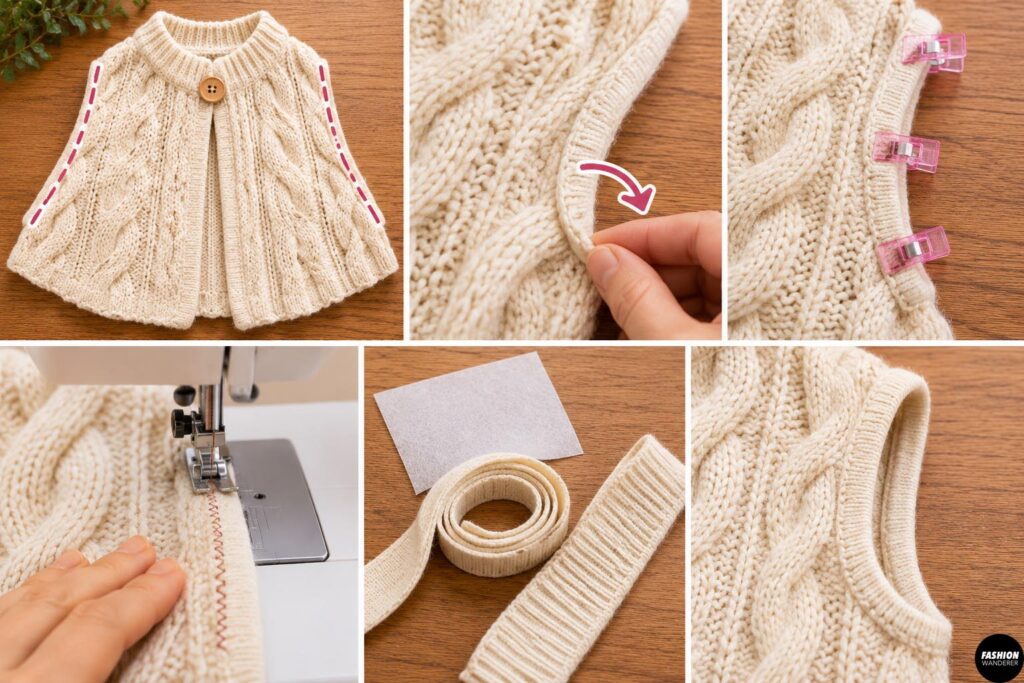
To prevent fraying or unraveling, finish the exposed armhole edges.
Fold each raw edge toward the wrong side by approximately ⅜” and secure it with sewing clips.
Sew using a narrow zigzag stitch, allowing the fabric to stretch naturally.
For thicker sweaters, use a knit binding made from leftover sleeve fabric instead of folding bulky edges.
If the sweater has a loose knit structure, stabilize the edges with lightweight knit interfacing before sewing.
Sewing Tip: Always test your stitch on a leftover sweater scrap before sewing the actual cape.
Step 7: Add an Optional Front Opening
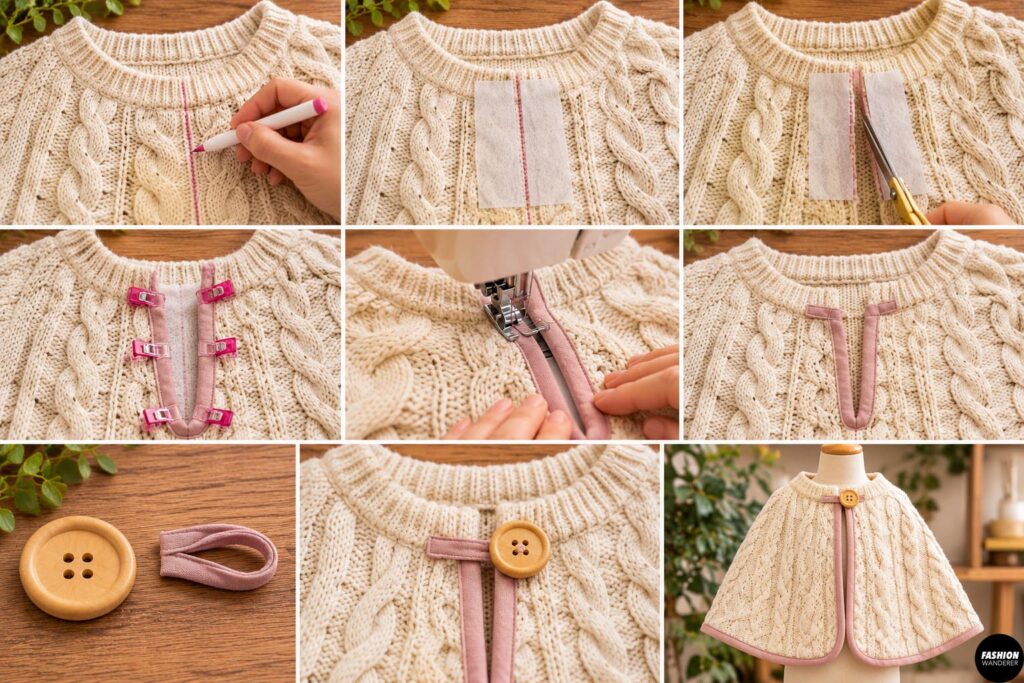
For easier dressing, you can create a short front opening.
Find the center front of the neckline and mark a vertical line approximately 3–4 inches long.
Apply narrow strips of fusible knit interfacing to the wrong side around the marked opening.
Carefully cut along the center line, then finish both edges with narrow knit binding.
Add a large decorative button with a reinforced loop or a sew-on snap near the neckline.
Make sure the closure is secure and comfortable.
For toddlers, avoid loose buttons, dangling cords, or small embellishments that could become choking hazards. A short opening should not be forced over the child’s head if the neckline is too tight.
Step 8: Add Cute Decorative Details
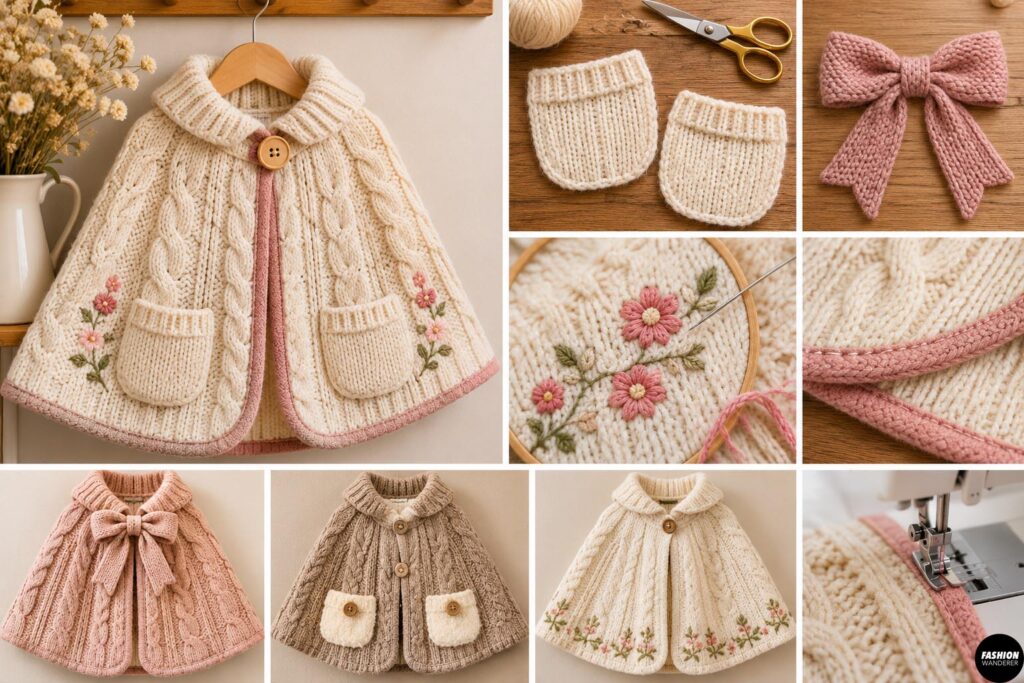
Now comes the fun part—personalizing your handmade kids’ cape!
Use leftover sweater fabric to create two small patch pockets or a decorative bow.
You can also add a contrasting fabric trim along the arm openings or a simple embroidered design near the bottom hem.
For a classic cottagecore-inspired look, choose neutral sweater colors such as cream, oatmeal, dusty pink, or warm brown.
Keep decorations lightweight and securely attached.
Step 9: Final Pressing and Fit Check
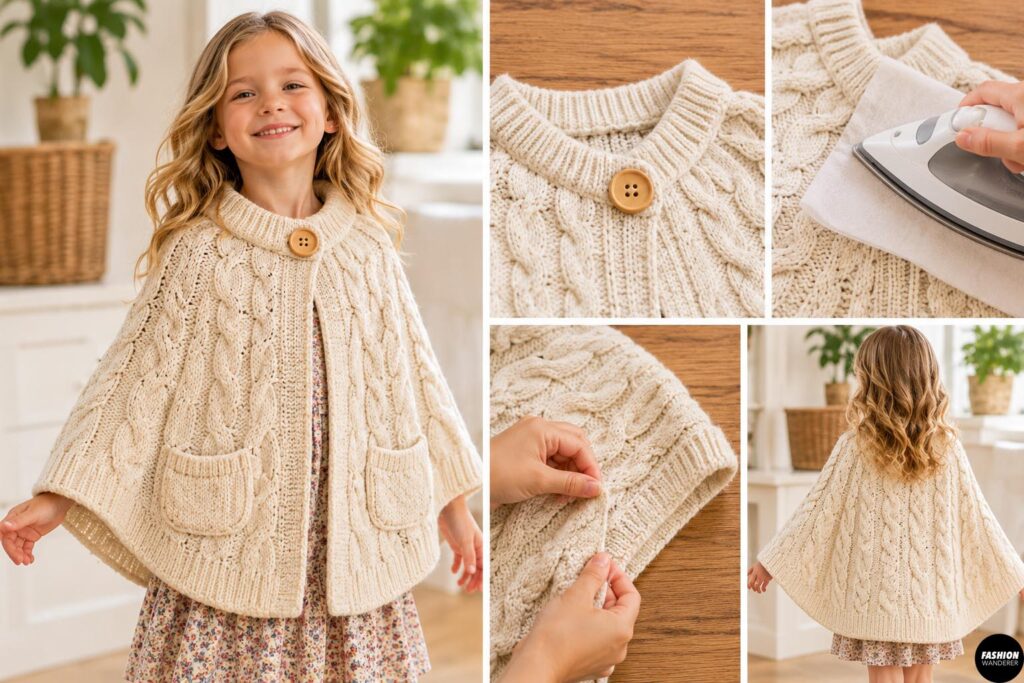
Turn the finished cape right side out.
Gently press the seams using a low-temperature iron and pressing cloth, following the sweater’s care instructions.
Check that the neckline sits comfortably, the arm openings are symmetrical, and all seams are secure.
Have the child try on the cape and move their arms naturally.
If necessary, adjust the side seams or shorten the hem for a better fit.
Your DIY upcycled kids’ knit cape is now ready to wear!
Helpful Tips for Sewing Sweater Fabric
Sewing stretchy sweater material can feel intimidating, but these simple tricks make the process easier.
- Use a ballpoint needle to avoid damaging knit fibers.
- Choose a narrow zigzag stitch instead of a regular straight stitch for stretchable seams.
- Avoid stretching the sweater while sewing.
- Use sewing clips to hold thick knit layers together.
- Stabilize loose knit edges before cutting to reduce unraveling.
For extra warmth, layer the finished cape over a long-sleeve shirt or lightweight sweater.
Frequently Asked Questions
Can I make a kids’ cape without a sewing machine?
Yes! You can hand-sew the side seams using a small backstitch, although finishing the stretchy edges may take longer.
What type of sweater works best?
Medium-weight, tightly knitted sweaters are easiest to cut and sew. Avoid delicate open-knit fabrics that unravel easily.
Can I make this cape for a toddler?
Absolutely. Use a smaller sweater, shorten the length, and ensure the neckline and arm openings fit comfortably. Always supervise young children while wearing capes.
Final Thoughts
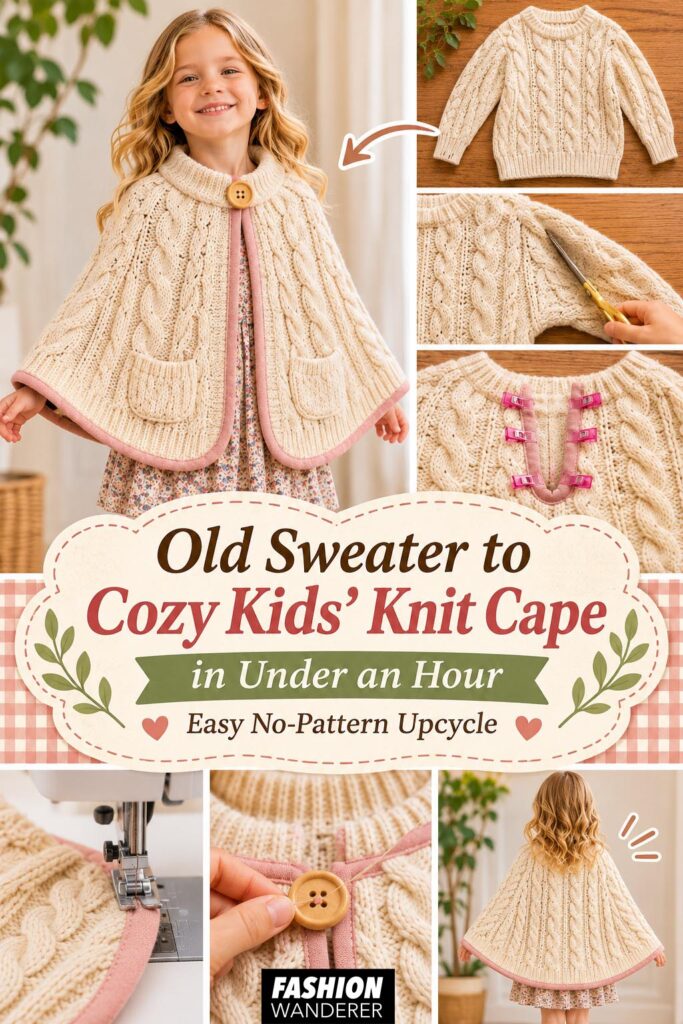
Transforming an old sweater into a cozy kids’ knit cape is a creative way to reduce textile waste while making something adorable and practical.
With no sewing pattern, minimal materials, and less than an hour of sewing, you can create a one-of-a-kind layering piece perfect for fall adventures, holiday outfits, or everyday play.
So grab that forgotten sweater, dust off your sewing machine, and turn something old into a cozy new favorite!