
When the weather turns crisp and cozy, there’s one piece of clothing I can’t get enough of: the cat ear hoodie. Equal parts comfy, playful, and effortlessly stylish, this DIY hoodie project is beginner-friendly and adds a dose of personality to your fall wardrobe.
Whether you’re lounging at home, heading back to school, or looking for a cute casual Halloween outfit, cat ear hoodies are the ultimate staple from now until November.
The best part? You don’t need to spend a fortune on store-bought versions. With just a few supplies and basic sewing techniques, you can make your very own cat ear hoodie at home. This step-by-step tutorial will walk you through everything you need, from materials to styling tips.
Why Make Your Own Cat Ear Hoodie?
- Budget-friendly: No need to drop $50+ on trendy store-bought versions.
- Beginner-friendly sewing: If you can sew a straight line, you can make this hoodie.
- Customizable: Choose your fabric, hoodie color, and ear style—whether sharp kitten ears, rounded bear ears, or oversized cosplay-style ears.
- Year-round wear: Perfect for Halloween, cozy loungewear, or casual outfits with jeans and sneakers.
Why Cat Ear Hoodies Are Perfect Until November
Fall weather practically demands comfort. As the air gets chillier, slipping into a hoodie feels like wrapping yourself in a warm hug. Add playful cat ears, and suddenly your outfit is no longer just practical—it’s fun and mood-lifting.
Whether you’re curled up with pumpkin spice lattes, walking through crunchy leaves, or picking out Halloween candy, your cat ear hoodie will be the piece you reach for again and again. It’s a versatile DIY that transitions easily from September through November, keeping you cozy and stylish the entire season.
Materials You’ll Need

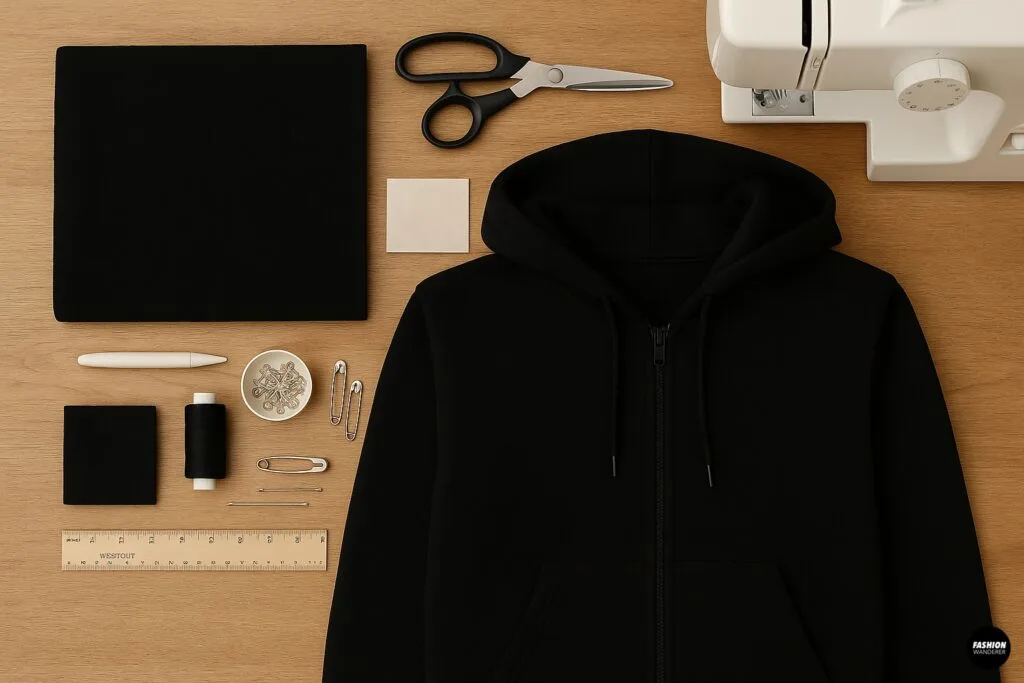
- 1 plain hoodie (zip-up or pullover, preferably fleece or cotton)
- ¼ yard of matching or contrasting fabric (fleece works best)
- Fabric scissors
- Sewing machine or hand needle and thread
- Pins or sewing clips
- Tailor’s chalk or washable fabric marker
- Ruler or measuring tape
Optional:
- Fusible interfacing (to make ears stand upright)
- Safety pins (for temporary placement if you don’t want to sew permanently)
Step-by-Step Tutorial: How to Make a DIY Cat Ear Hoodie


Step 1: Choose Your Hoodie

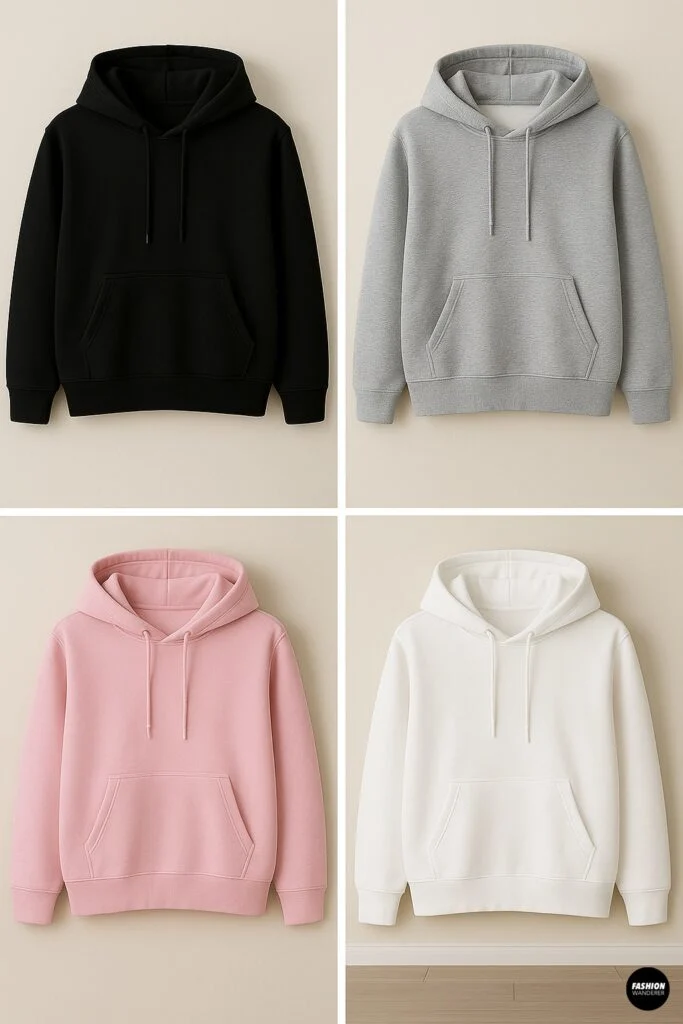
Start with a simple hoodie in your favorite color. Black and grey are classic choices for a subtle, everyday look, while pastel pinks, purples, or whites add a kawaii vibe. Make sure the hoodie has a sturdy hood—this is where your ears will sit.
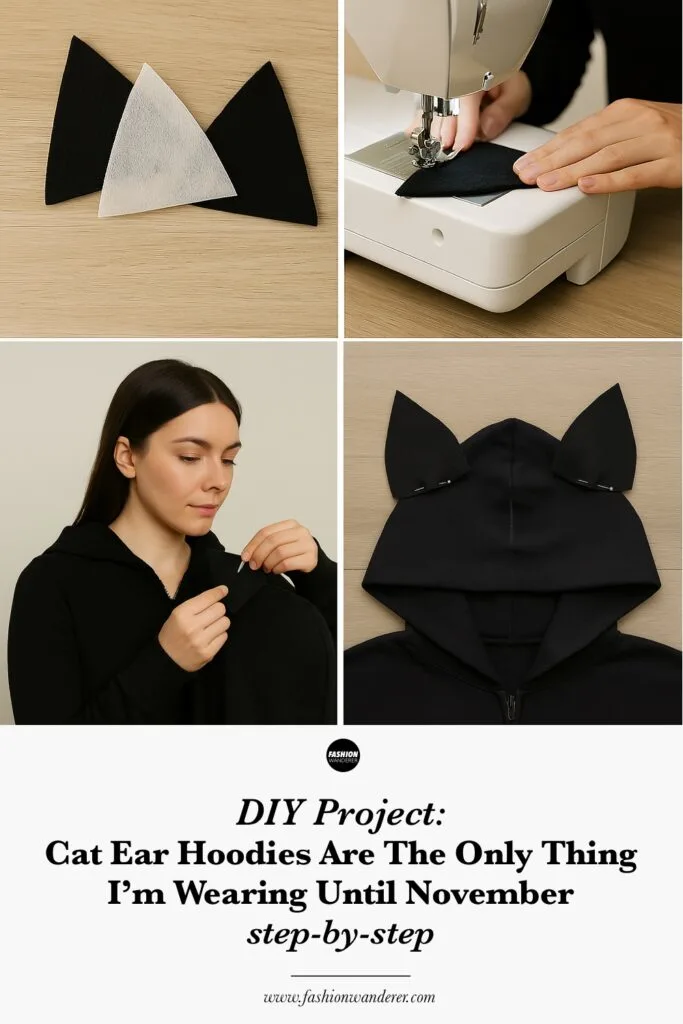
Step 2: Draft the Cat Ears

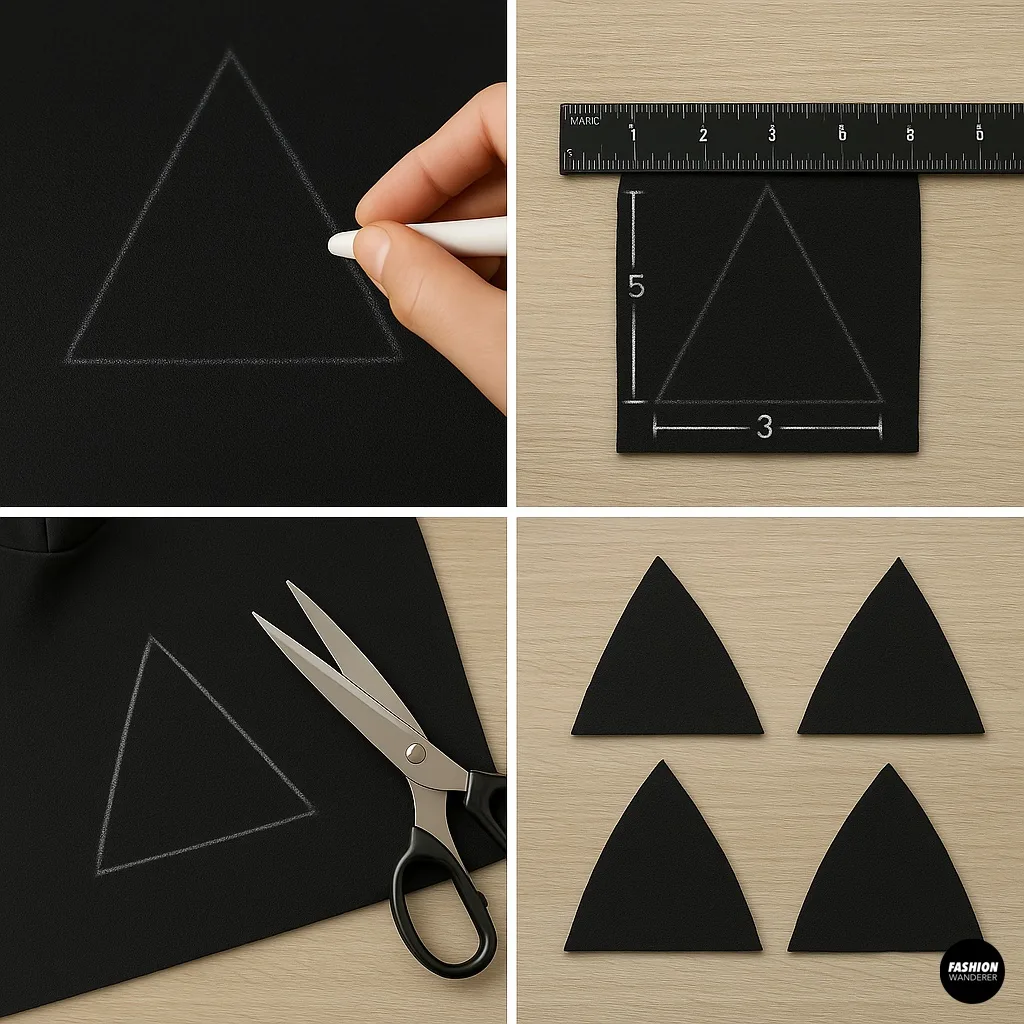
Using tailor’s chalk, draw two identical triangles on your fabric. For standard ears, aim for 4–5 inches tall and 3 inches wide at the base. If you want dramatic cosplay ears, go larger. Cut out four pieces (two per ear).
Pro Tip: Add ½ inch seam allowance on all sides for sewing.
Step 3: Sew the Ears Together

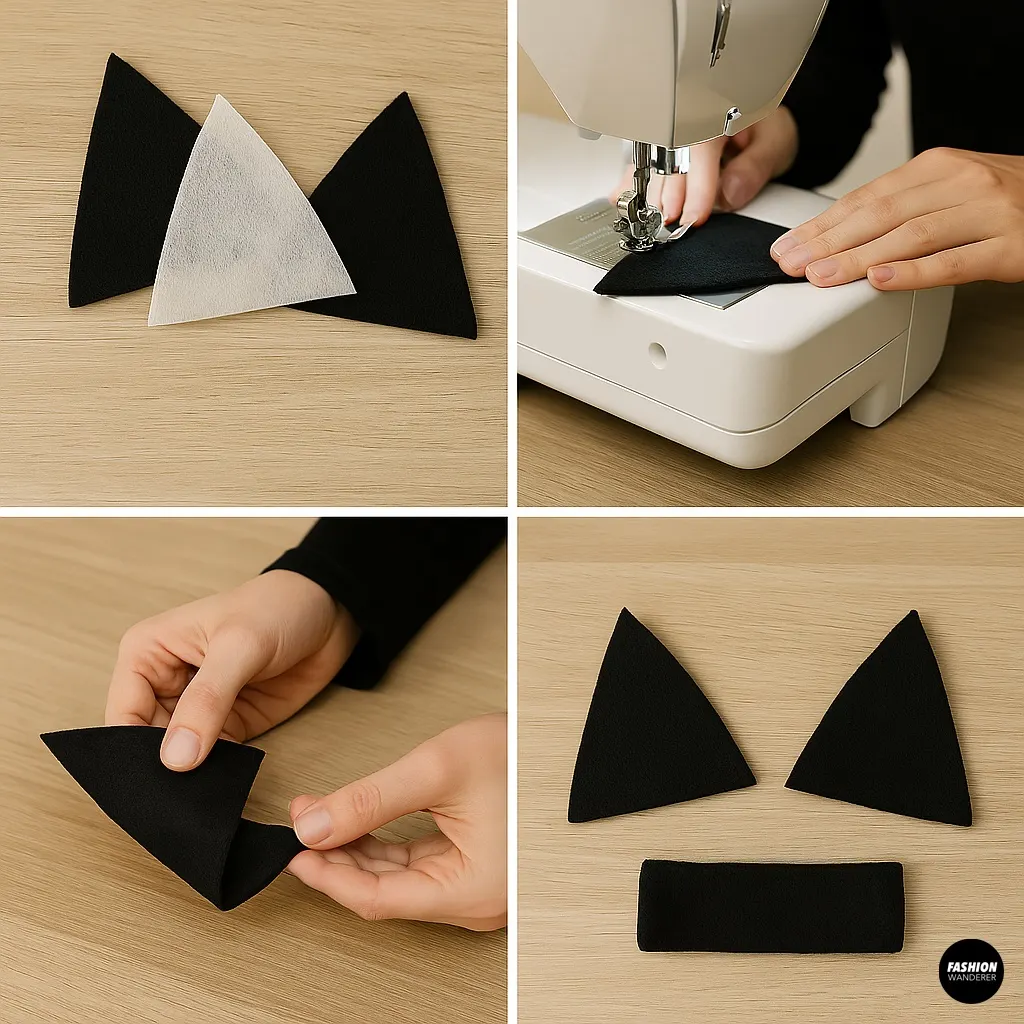
Place two triangles right sides together and sew along the two sides, leaving the bottom open. Turn the ear right side out. Repeat for the second ear.
For extra firmness, slip a piece of fusible interfacing inside before sewing. This will help the ears stand tall rather than flop.
Step 4: Position the Ears on the Hoodie


Put the hoodie on and mark where you’d like the ears to sit using pins or chalk. Most people place them toward the top center of the hood, angled slightly outward for a playful look.
Lay the hoodie flat and align the ears at your markings.
Step 5: Attach the Ears

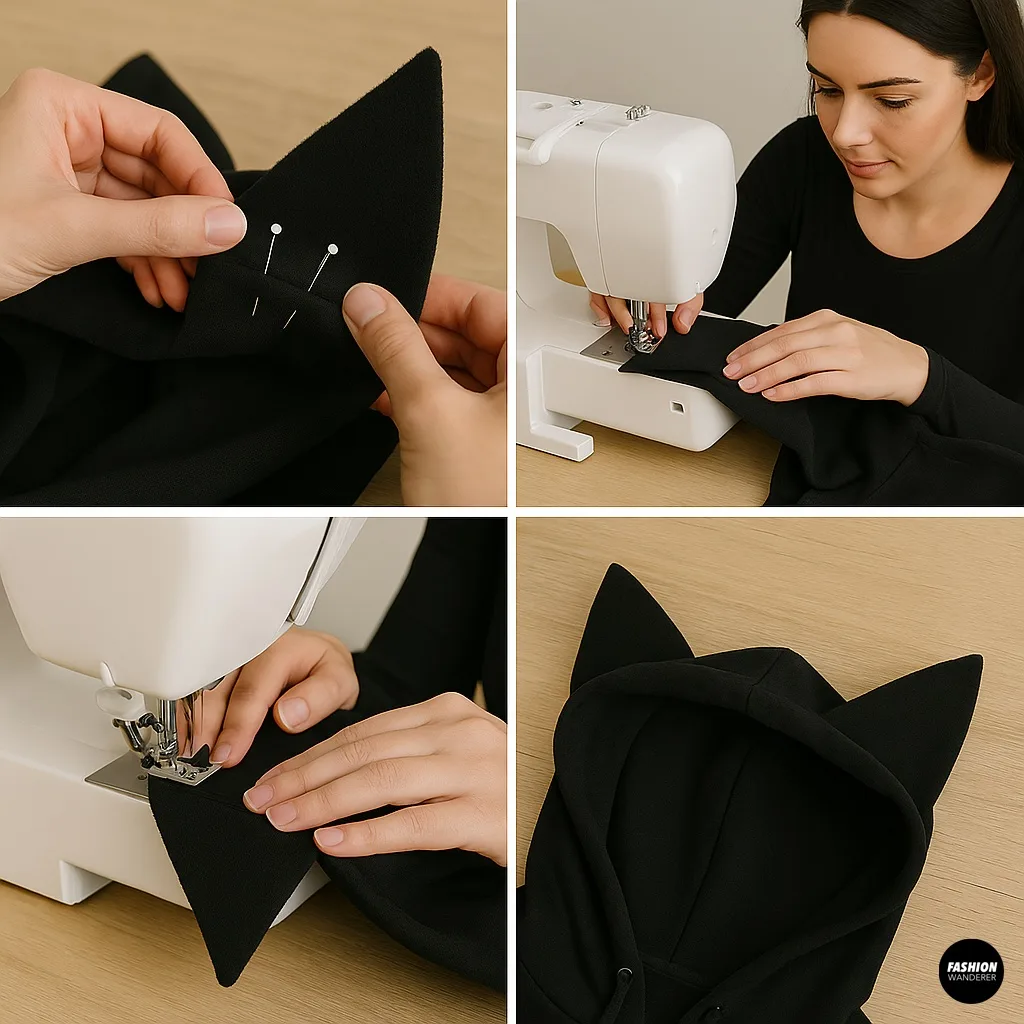
Pin the open base of each ear to the hoodie hood. Using your sewing machine (or needle and thread), sew along the base securely, reinforcing the stitches so the ears won’t wobble.
Pro Tip: For a seamless finish, tuck the ear bases slightly inside the hood seam and stitch.
Step 6: Test and Adjust

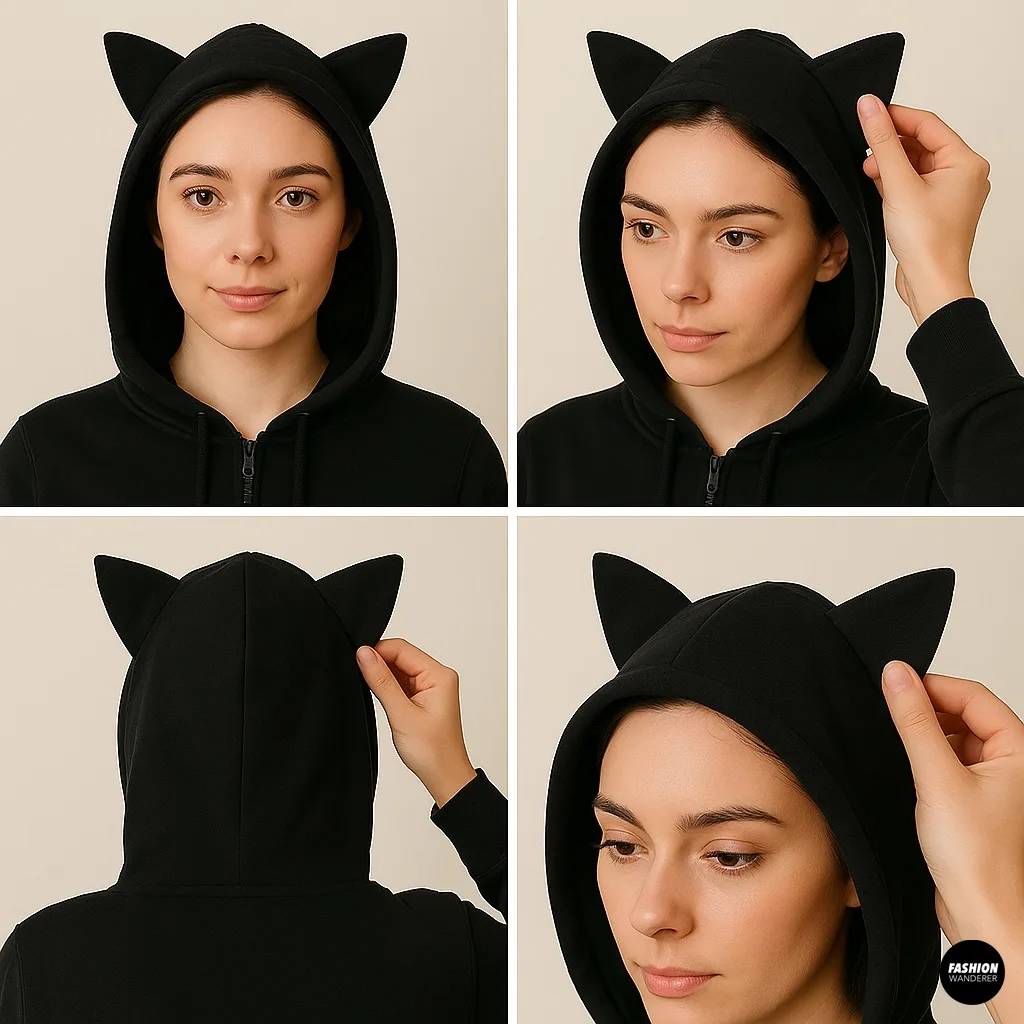
Try on your hoodie. Do the ears sit straight? Do they feel secure? If needed, adjust by tightening the stitches or repositioning the angle.
And that’s it—you now have your very own cat ear hoodie!
Variations to Try

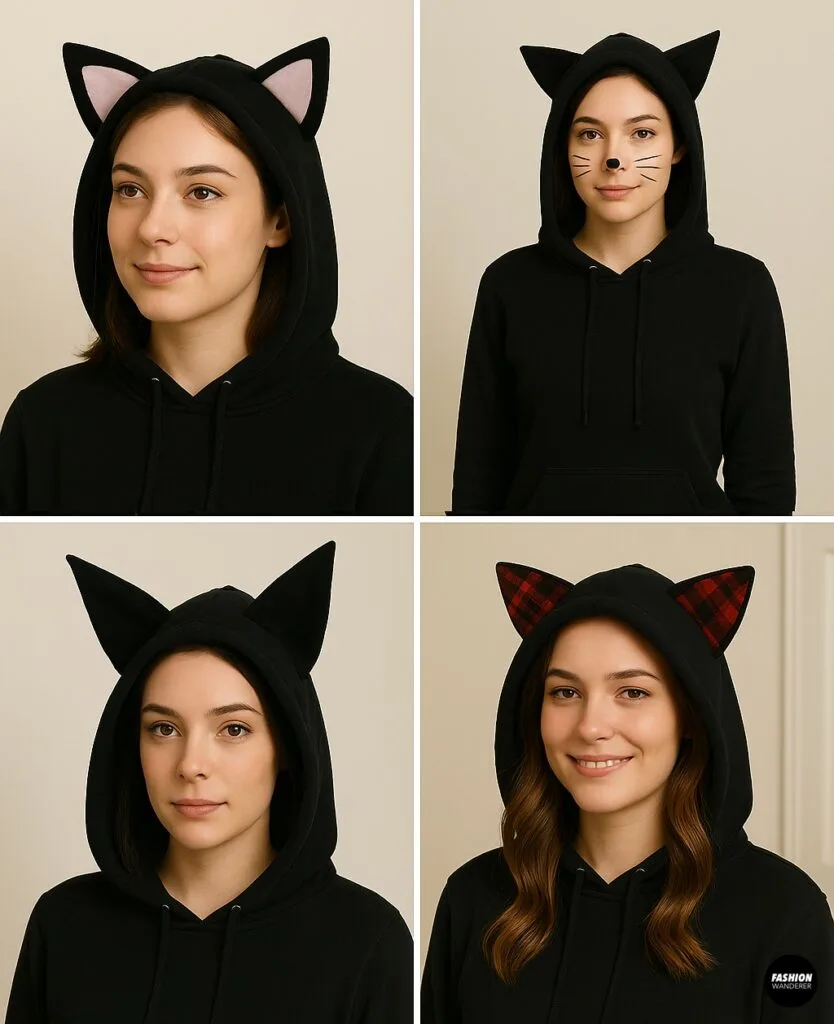
- Kawaii Kitty: Add felt inner ear pieces in pink or pastel for a soft, cute look.
- Halloween Cat: Pair with black leggings and whisker makeup for a no-effort costume.
- Cosplay-Inspired: Go bigger and add wire inside the ears to create dramatic anime-style points.
- Seasonal Twist: Use holiday-themed fabric for the inner ears—orange for Halloween, red plaid for Christmas.
How to Style Your Cat Ear Hoodie

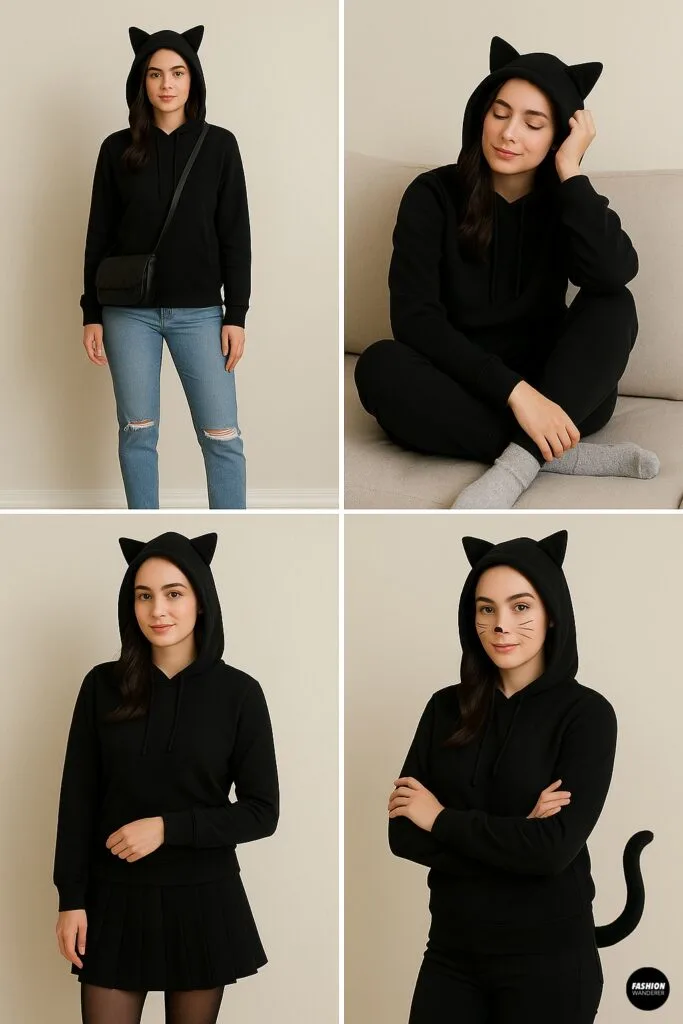
- Everyday Casual: Pair with ripped jeans, chunky sneakers, and a crossbody bag.
- Loungewear Ready: Throw it on with joggers or leggings and fuzzy socks for a cozy Netflix marathon.
- Back-to-School Cute: Layer over a pleated skirt and tights for a playful preppy-meets-kawaii vibe.
- Halloween Outfit: Combine with black pants, a tail accessory, and cat-eye makeup for an instant DIY costume.
Tips for Success
- Fabric choice matters: Fleece holds shape better than jersey, making your ears perkier.
- Test before sewing: Pin the ears first and check in the mirror before stitching permanently.
- Reinforce seams: Especially if you’ll wear and wash your hoodie often. Double-stitching ensures durability.
- Experiment: Try bunny ears, bear ears, or even devil horns for different looks.
Final Thoughts

DIY cat ear hoodies are more than just a cute trend—they’re a statement of creativity and individuality. With minimal supplies and simple steps, you can transform an ordinary hoodie into your go-to fall essential.
So this season, skip the overpriced store versions and make your own. Trust me—you’ll love how easy it is, and once you put it on, you won’t want to take it off until November.
Trendy, Affordable Sewing Patterns for All Sizes


Tie Shoulder Jumpsuit Pattern


Palazzo Pants Sewing Pattern


Pocket Overall Romper Pattern


Wrap Maxi Skirt Sewing Pattern


Tie Back Top Sewing Pattern