
Dog walks are much easier when everything you need is right at your fingertips—or, in this case, right on your dog’s backpack! Instead of carrying treats, empty poop bags, keys, and other small walking essentials yourself, you can sew a lightweight DIY dog walking backpack with a poop bag holder that attaches to your dog’s existing harness.
This beginner-friendly sewing project features two small side pouches to help distribute lightweight items evenly. One pouch includes a convenient poop bag dispenser opening, while the other can hold a few treats or other very light walking supplies.
There are a variety of styles, and these DIY dog backpacks have your bases covered! Best of all, this backpack can be made removable, so you can attach it for longer walks and take it off when your dog only needs a regular harness.
What You’ll Need
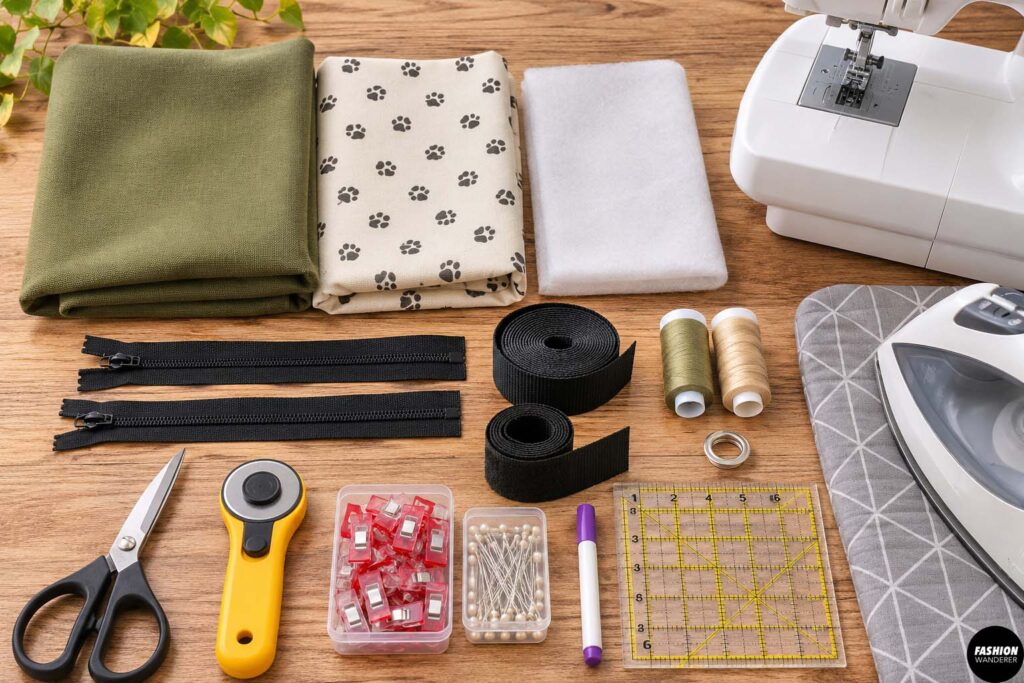
For this DIY dog backpack sewing project, gather:
- 1/2 yard lightweight canvas, cotton twill, ripstop nylon, or similar durable fabric
- 1/2 yard lightweight lining fabric
- Lightweight fusible interfacing, optional
- Two 7–9 inch zippers
- 1-inch nylon webbing
- 1-inch hook-and-loop tape
- Small grommet for the poop bag dispenser
- Coordinating polyester thread
- Fabric scissors or rotary cutter
- Ruler and fabric marker
- Pins or sewing clips
- Sewing machine
- Iron and ironing board
Choose lightweight but sturdy fabrics. Avoid unnecessarily heavy materials because the finished backpack should remain comfortable for your dog.
DIY Dog Walking Backpack with Poop Bag Holder

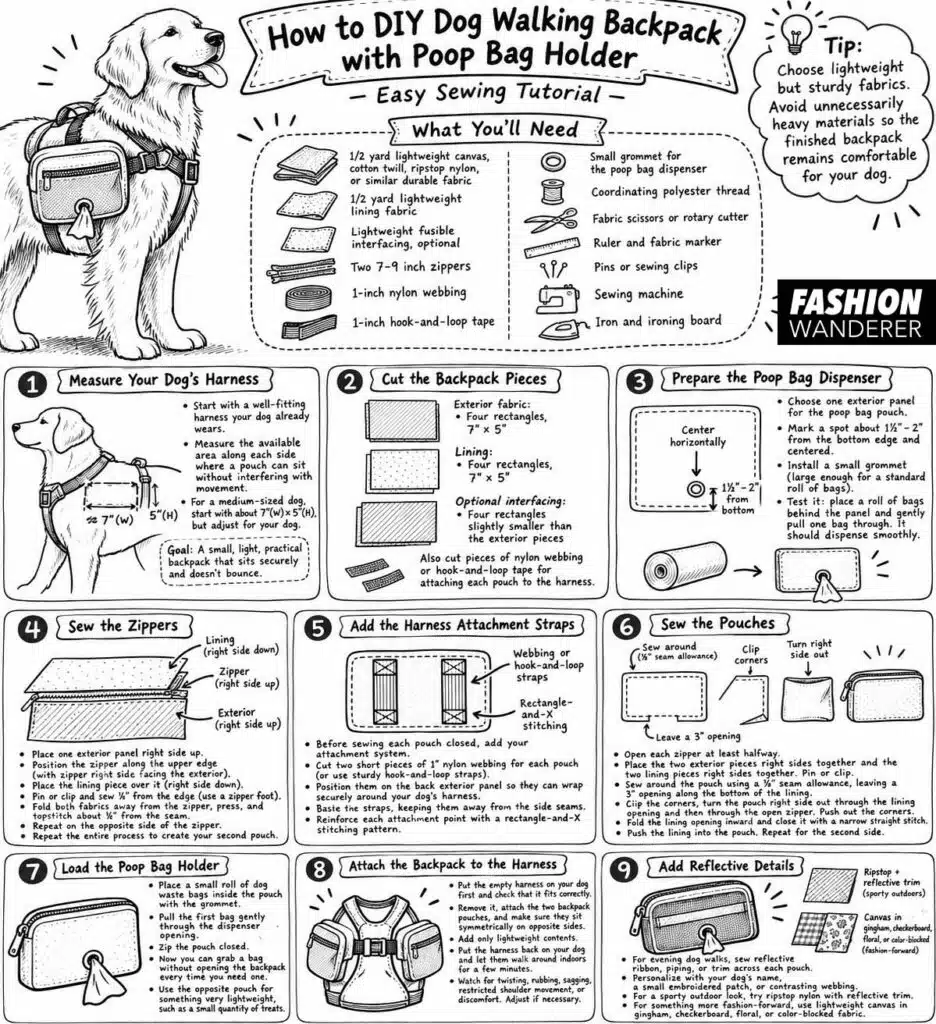
Step 1: Measure Your Dog’s Harness
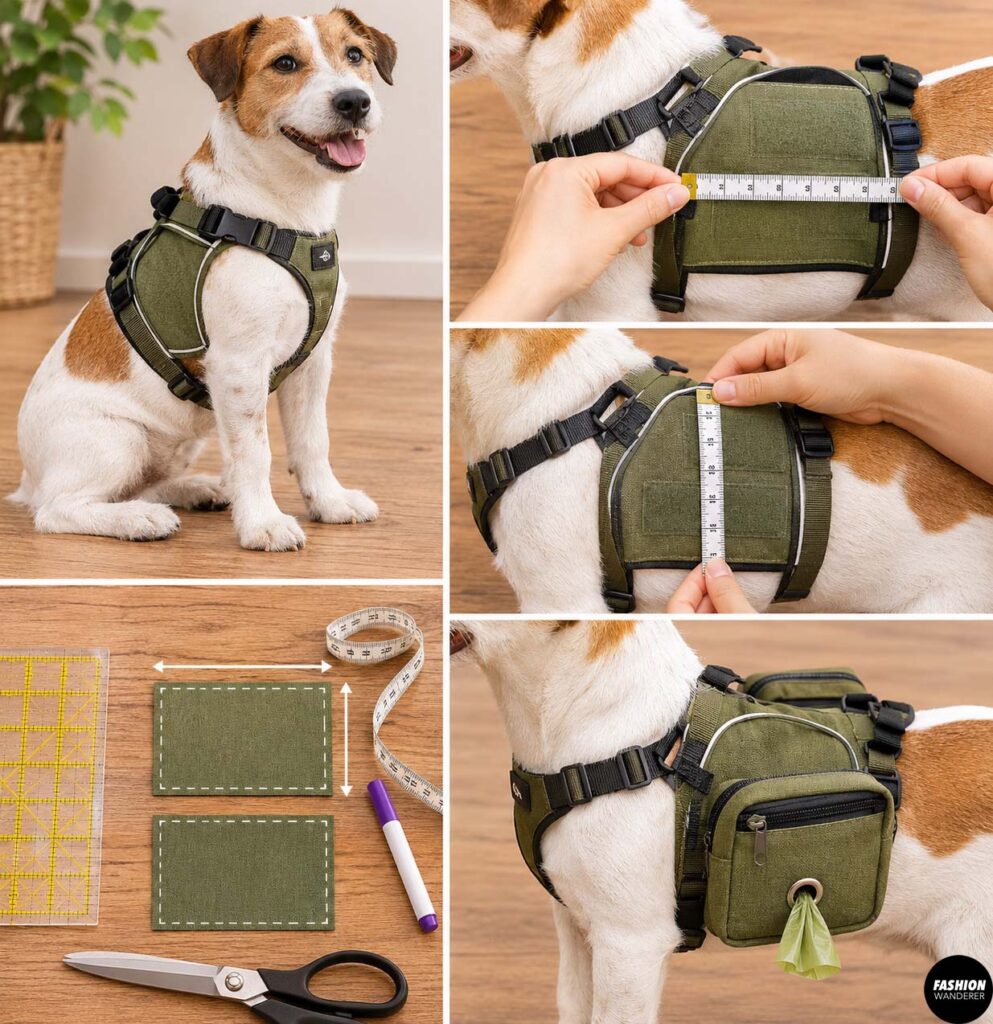
Start with a well-fitting walking harness your dog already wears comfortably.
Measure the available area along each side of the harness where a small pouch could sit without interfering with your dog’s shoulders, front legs, or movement.
The backpack should sit securely and should not bounce around while your dog walks.
For a medium-sized dog, you might start with pouch rectangles approximately 7 inches wide by 5 inches tall, but always adjust these measurements to your individual dog and harness.
The goal isn’t to make the biggest backpack possible. Keep it small, light, and practical.
Step 2: Cut the Backpack Pieces
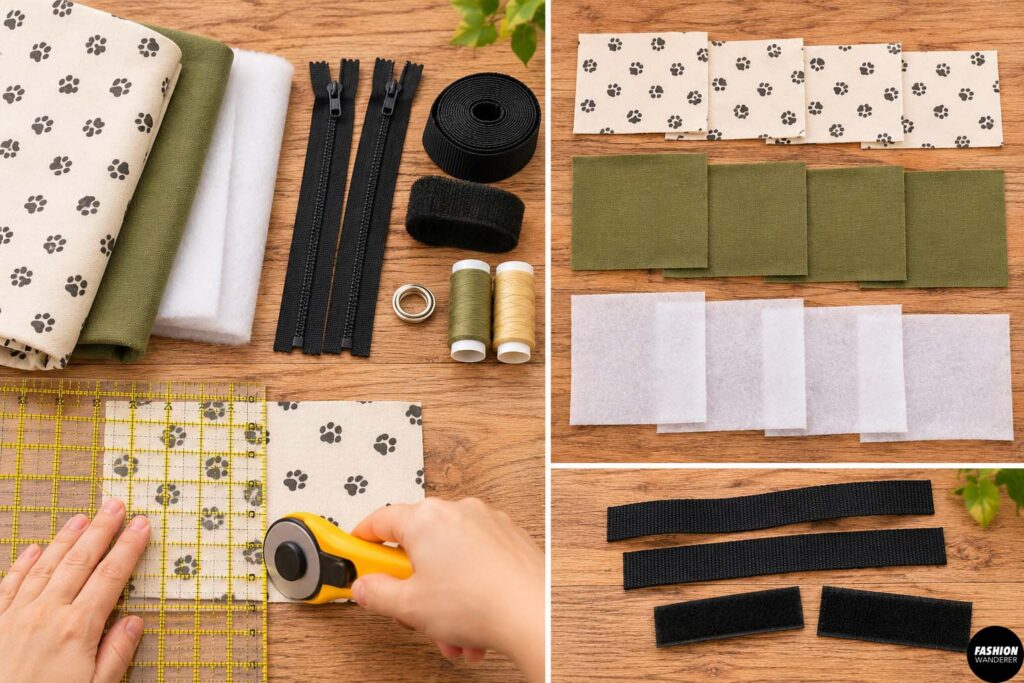
For two simple zippered pouches, cut:
Exterior fabric:
- Four rectangles, 7 × 5 inches
Lining:
- Four rectangles, 7 × 5 inches
Optional interfacing:
- Four rectangles slightly smaller than the exterior pieces
You will also need pieces of nylon webbing or hook-and-loop tape for attaching each pouch securely to the harness.
If you’re using thin quilting cotton, lightweight interfacing can give the bags more structure. Canvas or ripstop nylon may not need it.
Step 3: Prepare the Poop Bag Dispenser
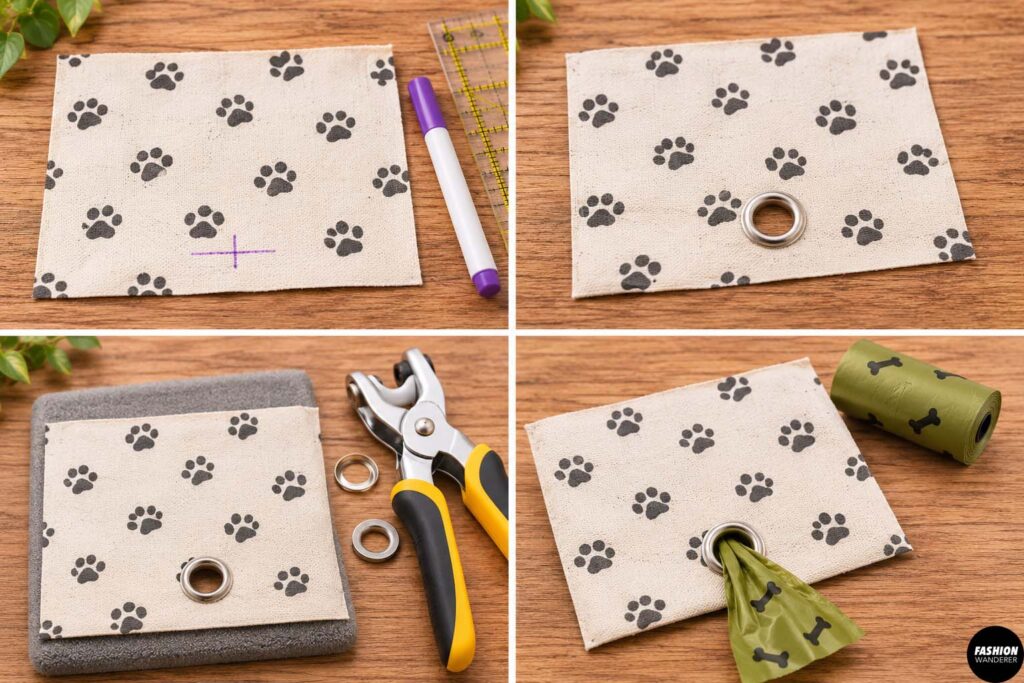
Choose one exterior panel to become the poop bag pouch.
Mark a spot approximately 1 1/2 to 2 inches from the bottom edge and centered horizontally.
Install a small grommet according to the manufacturer’s instructions. The opening only needs to be large enough for the end of a standard roll of dog waste bags to pull through easily.
Before continuing, test it.
Place a roll of bags behind the panel and gently pull one bag through the opening. It should dispense smoothly without requiring excessive force.
This tiny detail transforms an ordinary dog pouch into a practical DIY dog poop bag holder.
Step 4: Sew the Zippers
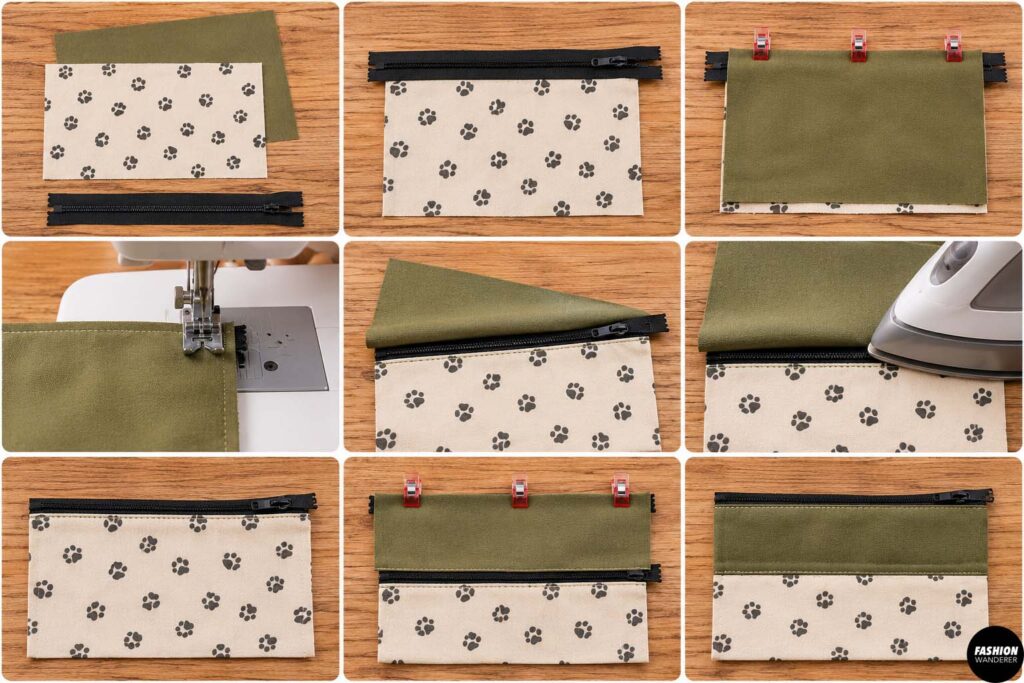
Place one exterior panel right side up.
Position the zipper along the upper edge with the zipper right side facing the exterior fabric. Place the corresponding lining piece over it, right side facing down.
The zipper should now be sandwiched between the exterior and lining.
Pin or clip everything together.
Using a zipper foot, sew along the zipper tape approximately 1/4 inch from the edge.
Fold both fabrics away from the zipper and press carefully. Topstitch approximately 1/8 inch from the seam.
Repeat on the opposite side of the zipper with the remaining exterior and lining panels.
Repeat the entire process to create your second pouch.
Step 5: Add the Harness Attachment Straps
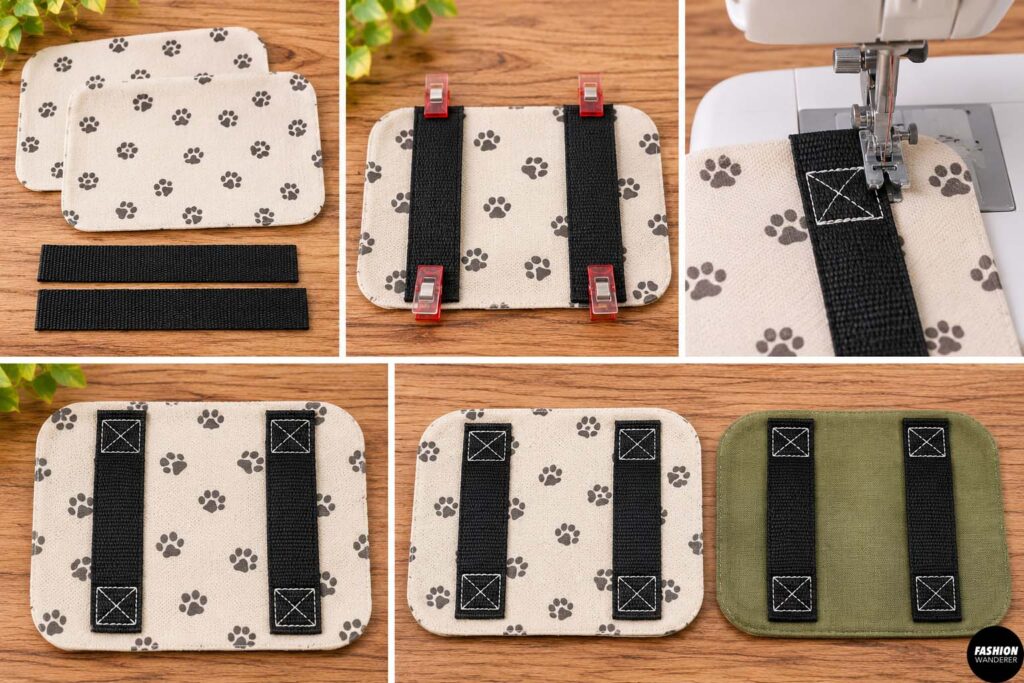
Before sewing each pouch closed, add your attachment system.
Cut two short pieces of 1-inch nylon webbing for each pouch. Position them on the back exterior panel where they can wrap securely around your dog’s existing harness.
Another beginner-friendly option is using sturdy hook-and-loop straps.
Baste the straps securely to the exterior fabric, keeping them away from the pouch’s side seam allowances.
Reinforce each attachment point with a rectangle-and-X stitching pattern.
These areas experience the most pulling during use, so don’t rely on a single line of stitching.
Step 6: Sew the Pouches
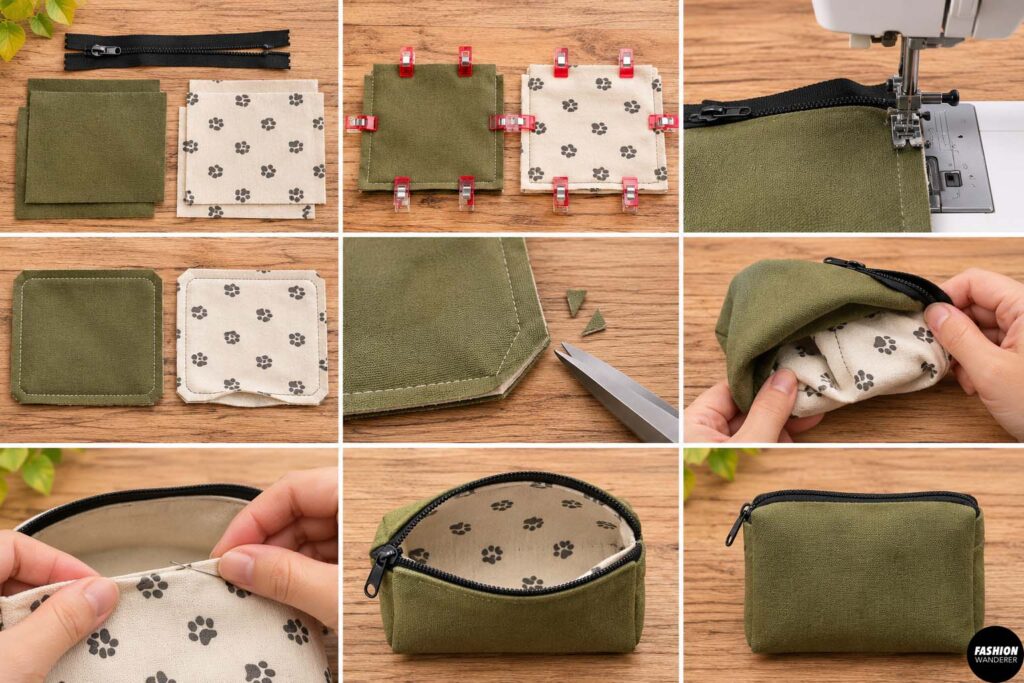
Open each zipper at least halfway before sewing the pouch together. This is important—you’ll need that opening to turn the bag right side out.
Separate the exterior and lining layers.
Place the two exterior pieces right sides together and the two lining pieces right sides together.
Pin or clip around the perimeter.
Sew around the pouch using approximately a 3/8-inch seam allowance, but leave a 3-inch opening along the bottom of the lining.
Clip the corners carefully without cutting through your stitching.
Turn the pouch right side out through the lining opening and then through the open zipper.
Push out the corners gently.
Fold the lining opening inward and close it with a narrow straight stitch.
Push the lining into the pouch.
Your first mini backpack pocket is finished!
Repeat for the second side.
Step 7: Load the Poop Bag Holder
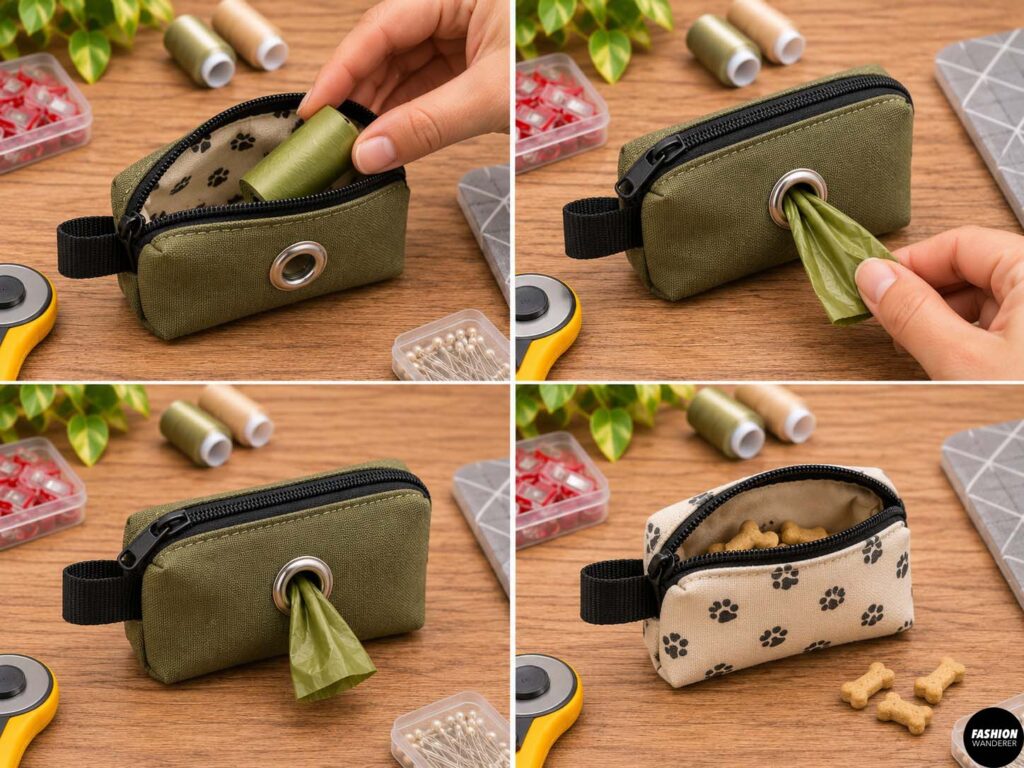
Place a small roll of dog waste bags inside the pouch with the grommet.
Pull the first bag gently through the dispenser opening.
Zip the pouch closed.
Now you can grab a bag without opening the backpack every time your dog needs one.
Use the opposite pouch for something very lightweight, such as a small quantity of treats.
Step 8: Attach the Backpack to the Harness
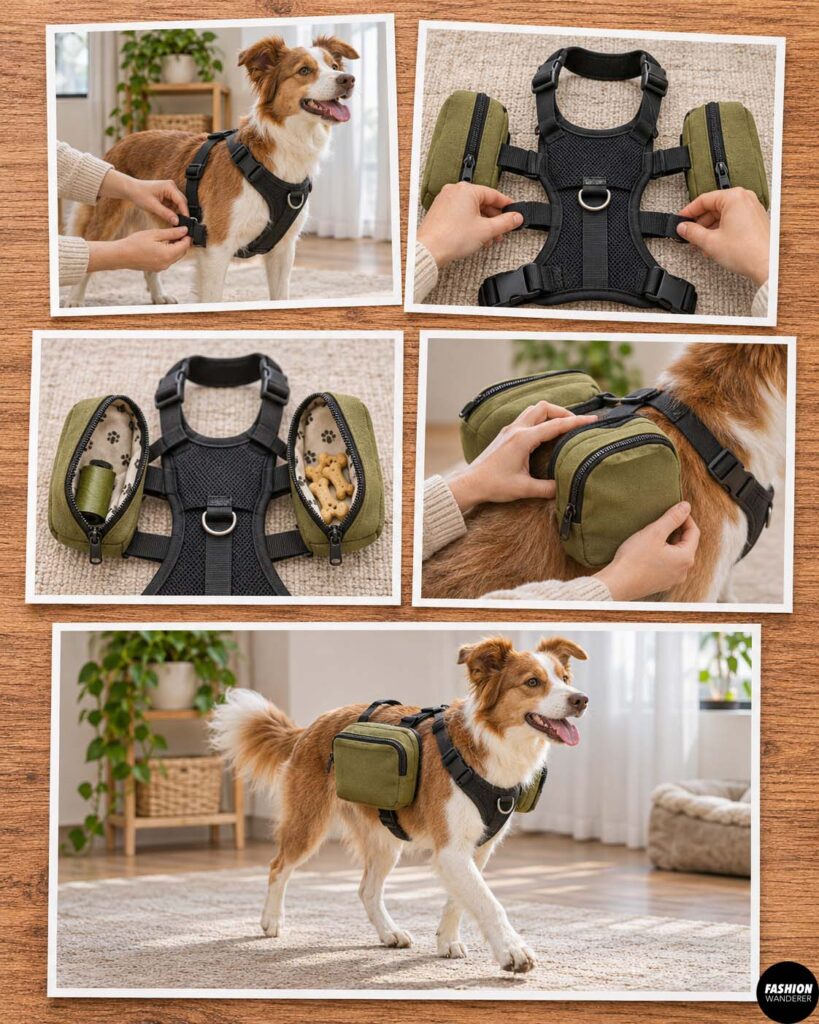
Put the empty harness on your dog first and check that it fits correctly.
Remove it, attach the two backpack pouches, and make sure they sit symmetrically on opposite sides.
Add only lightweight contents.
Put the harness back on your dog and allow them to walk around indoors for a few minutes.
Watch carefully for twisting, rubbing, sagging, restricted shoulder movement, or signs that your dog is uncomfortable.
Adjust the pouch placement if necessary.
Step 9: Add Reflective Details
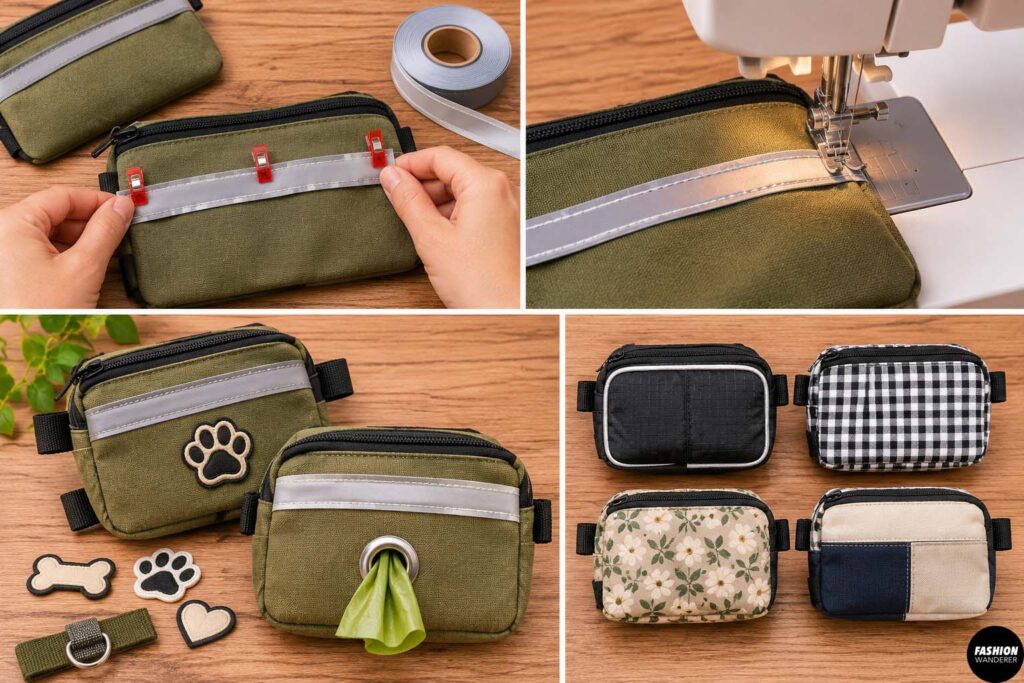
For evening dog walks, consider sewing reflective ribbon, piping, or trim across the outside of each pouch.
You can also personalize the backpack with your dog’s name, a small embroidered patch, or contrasting webbing.
For a sporty outdoor look, try ripstop nylon with reflective trim. For something more fashion-forward, use lightweight canvas in gingham, checkerboard, floral, or color-blocked fabric.
Safety Tips for a DIY Dog Backpack
A homemade dog backpack should primarily be a lightweight walking accessory, not a way to make your dog carry a heavy load.
Keep both sides balanced and avoid packing water bottles, phones, large keys, or other dense objects unless your veterinarian has specifically advised that carrying weight is appropriate for your dog.
Check the backpack frequently for loose stitching, damaged webbing, broken hardware, or rubbing.
Never allow a pouch or strap to restrict the dog’s shoulders or legs, and remove the backpack immediately if your dog appears uncomfortable.
Final Thoughts
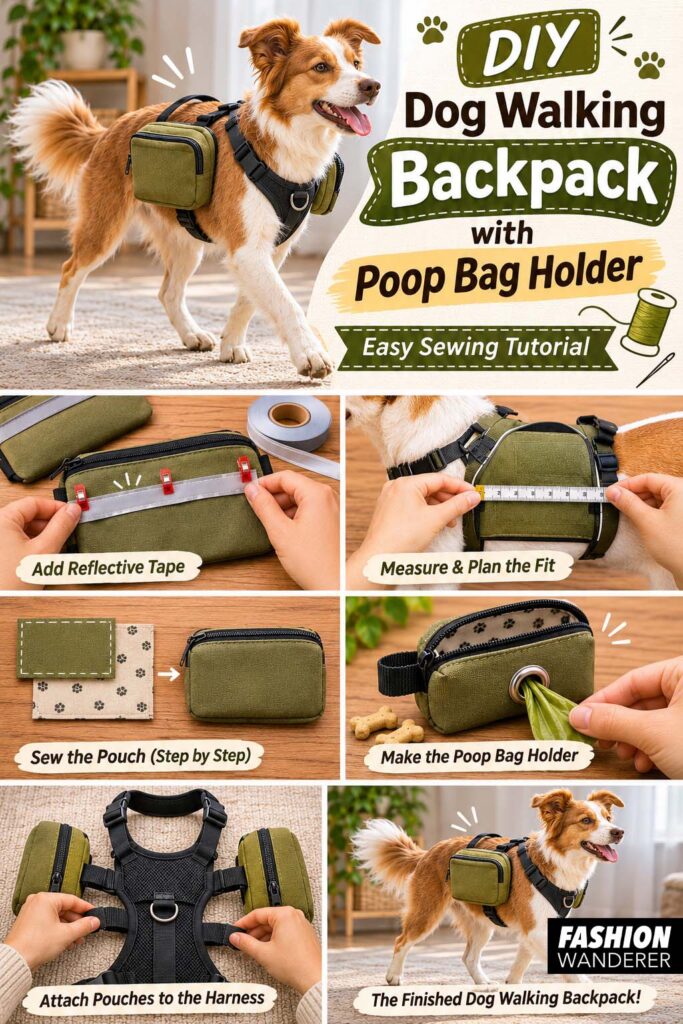
This DIY dog walking backpack with poop bag holder turns a few pieces of fabric, webbing, and two zippers into an adorable and genuinely useful sewing project.
The built-in poop bag dispenser keeps waste bags accessible, while the second mini pouch provides room for a few lightweight walking essentials. Making the pouches detachable also means you don’t have to replace your dog’s favorite harness.
Once you’ve mastered the basic version, customize it with reflective trim, waterproof fabric, colorful webbing, embroidery, or fun prints.
It’s an easy sewing project that combines two things we love: DIY fashion and practical accessories for our pets.