
Transform your old jeans into on-trend fringe shorts with this easy, budget-friendly project. Whether you’re refreshing last season’s denim or upcycling a thrifted pair, you’ll be rocking a unique, festival-ready look in no time!
Why Fringe Shorts Are a Must-Have
Fringe shorts blend edgy boho vibes with casual comfort, making them perfect for summer concerts, beach days, or weekend strolls. DIYing your own pair lets you control the length, fit, and fringe style—plus, it’s a sustainable way to breathe new life into worn-out jeans.
Step by Step Tutorial to Make Jeans into Fringe Shorts
Materials You’ll Need
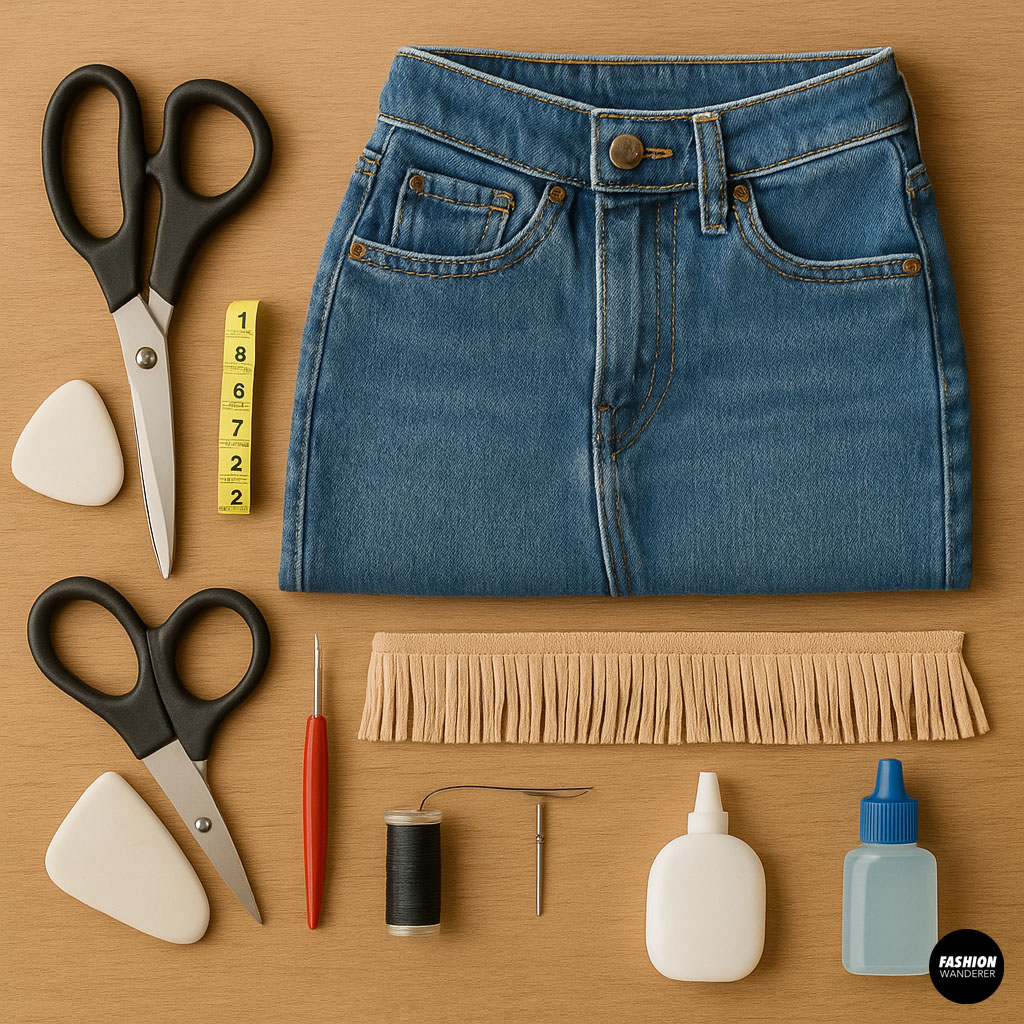

- Old pair of jeans (any wash or fit)
- Fabric scissors (sharp, for clean cuts)
- Ruler or measuring tape
- Chalk or fabric marker
- Seam ripper (optional, removes side seams easily)
- Fringe trim (cotton or faux-suede, 1–2″ wide)
- Fabric glue or sewing kit (needle + matching thread)
- Fray check or clear nail polish (to seal raw edges)
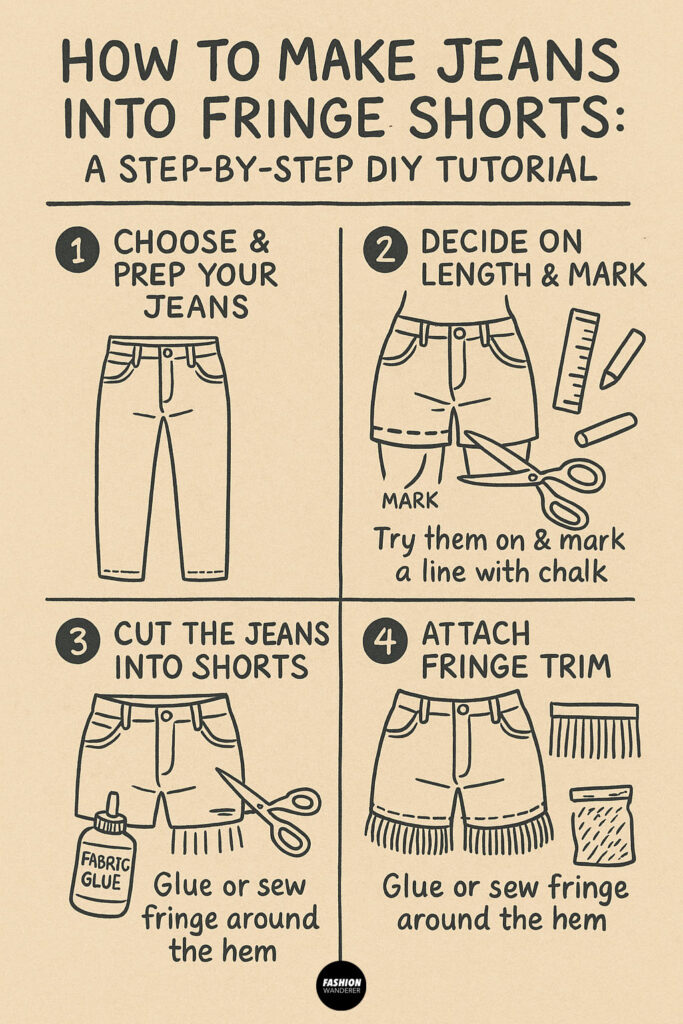
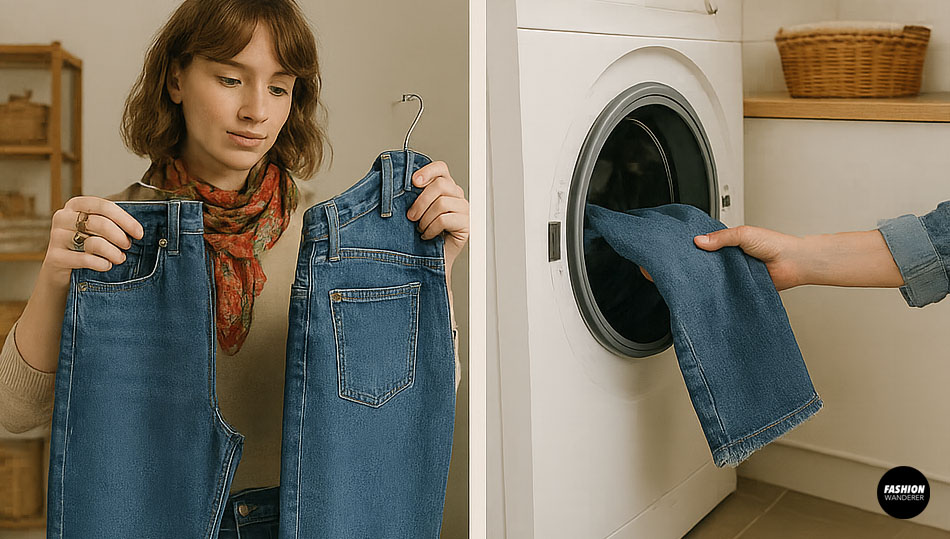
Step 1: Choose & Prep Your Jeans

- Select the right jeans.
- Pick a pair with minimal stretch for easier cutting. Boyfriend or straight-leg styles work best for a relaxed fit.
- Wash and dry.
- Starting with clean denim ensures no shrinking or color transfer later.
- Lay flat.
- Place jeans on a flat surface, smoothing out wrinkles. This helps you measure and cut accurately.
Step 2: Decide on Your Length & Mark
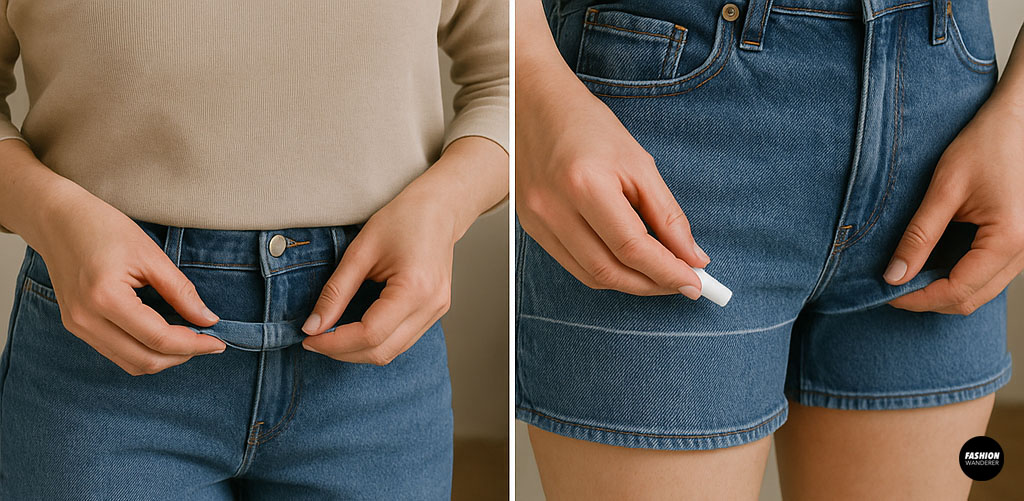

- Try them on.
- Put jeans on and fold up the hem to test your desired short length. Most fringe shorts hit between mid-thigh and upper-thigh.
- Mark with chalk.
- Once you’ve found the perfect fold, use chalk or a fabric marker to draw a straight cutting line all the way around each leg.
- Remove jeans and re-lay flat.
- Double-check that your chalk lines are even from front to back before cutting.
Step 3: Cut the Jeans into Shorts

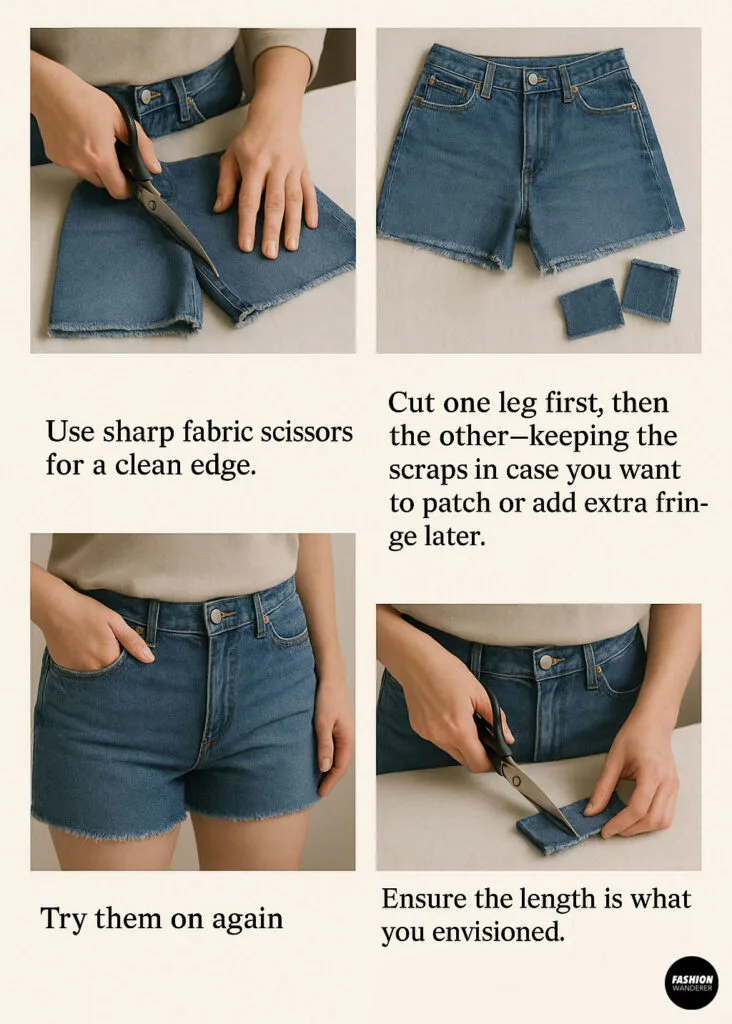
- Cut along the chalk line.
- Use sharp fabric scissors for a clean edge. Cut one leg first, then the other—keeping the scraps in case you want to patch or add extra fringe later.
- Try them on again.
- Ensure the length is what you envisioned. Trim a bit more if needed, but err on the side of longer—you can always go shorter!
Step 4: Distress the Edges (Optional)


- Rough up the hem.
- Use your scissors or a pumice stone to fray the raw edge of each leg. Gently run the scissors along the cut edge to pull out small threads and create a lived-in look.
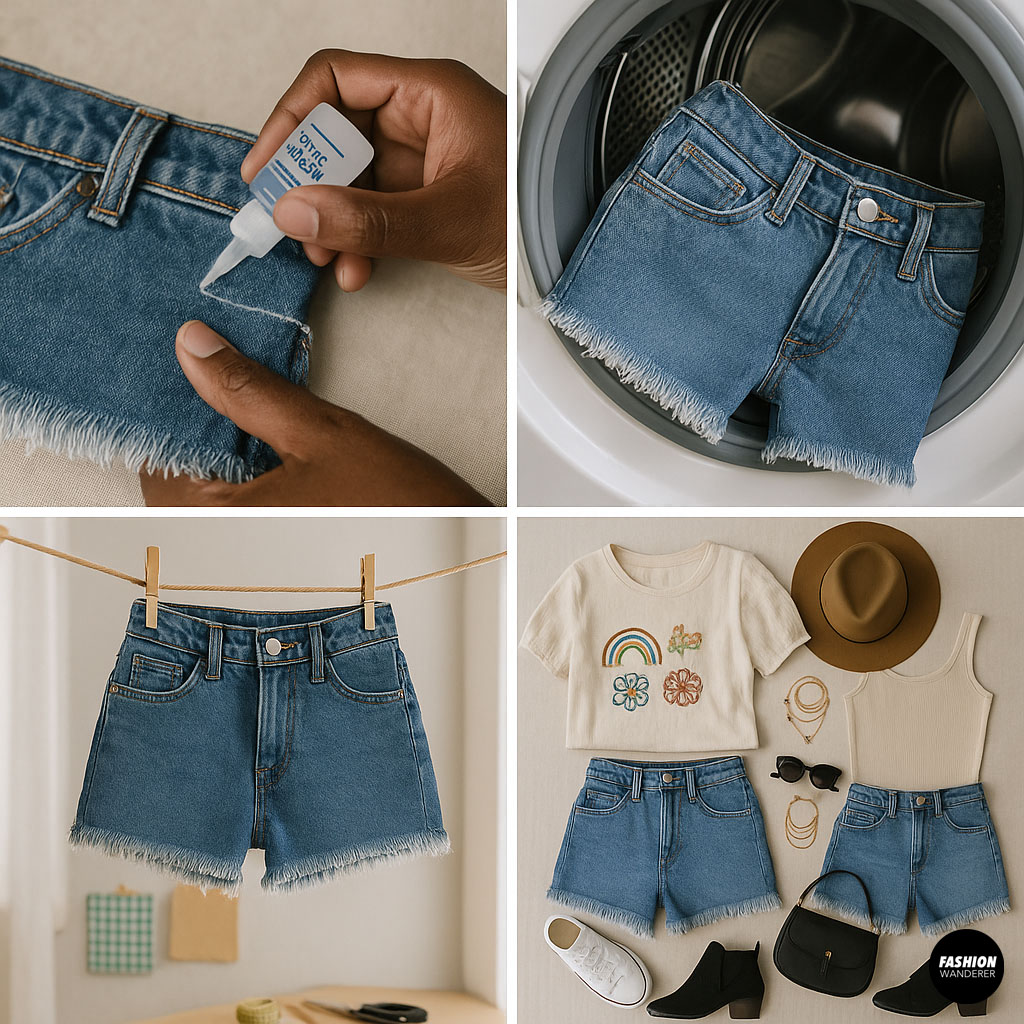
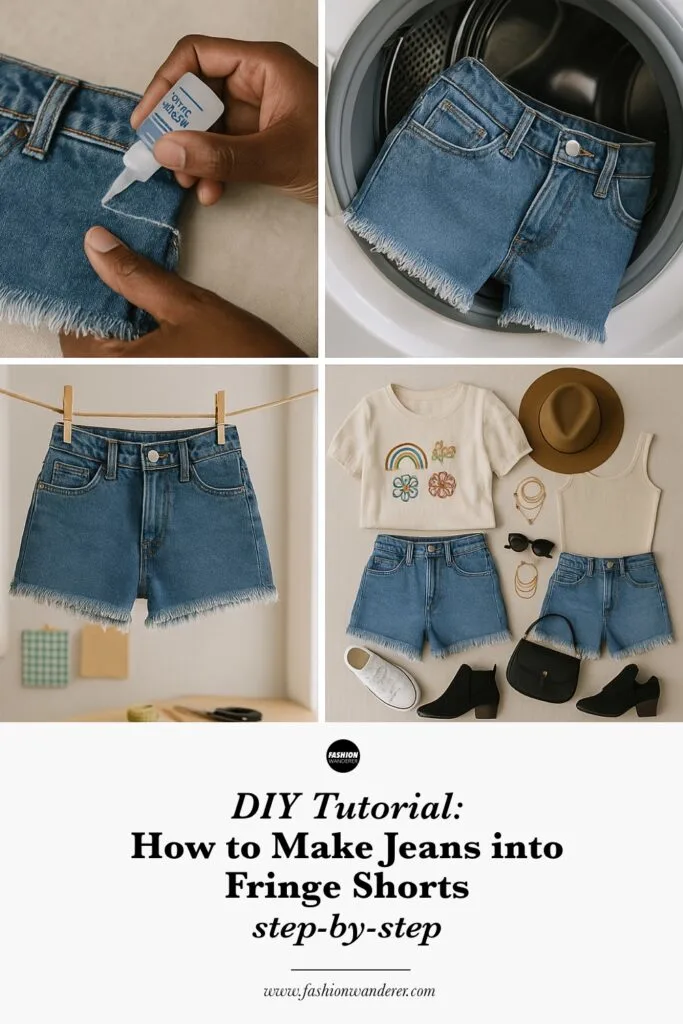
- Apply fray check.
- If you prefer the fringe trim style without too much additional fraying, apply a thin line of fray check or clear nail polish about ¼” from the edge to stop excess unraveling.
Step 5: Attach Fringe Trim
You have two main methods for securing fringe: sewing for durability, or gluing for a no-sew approach.
Sewing Method

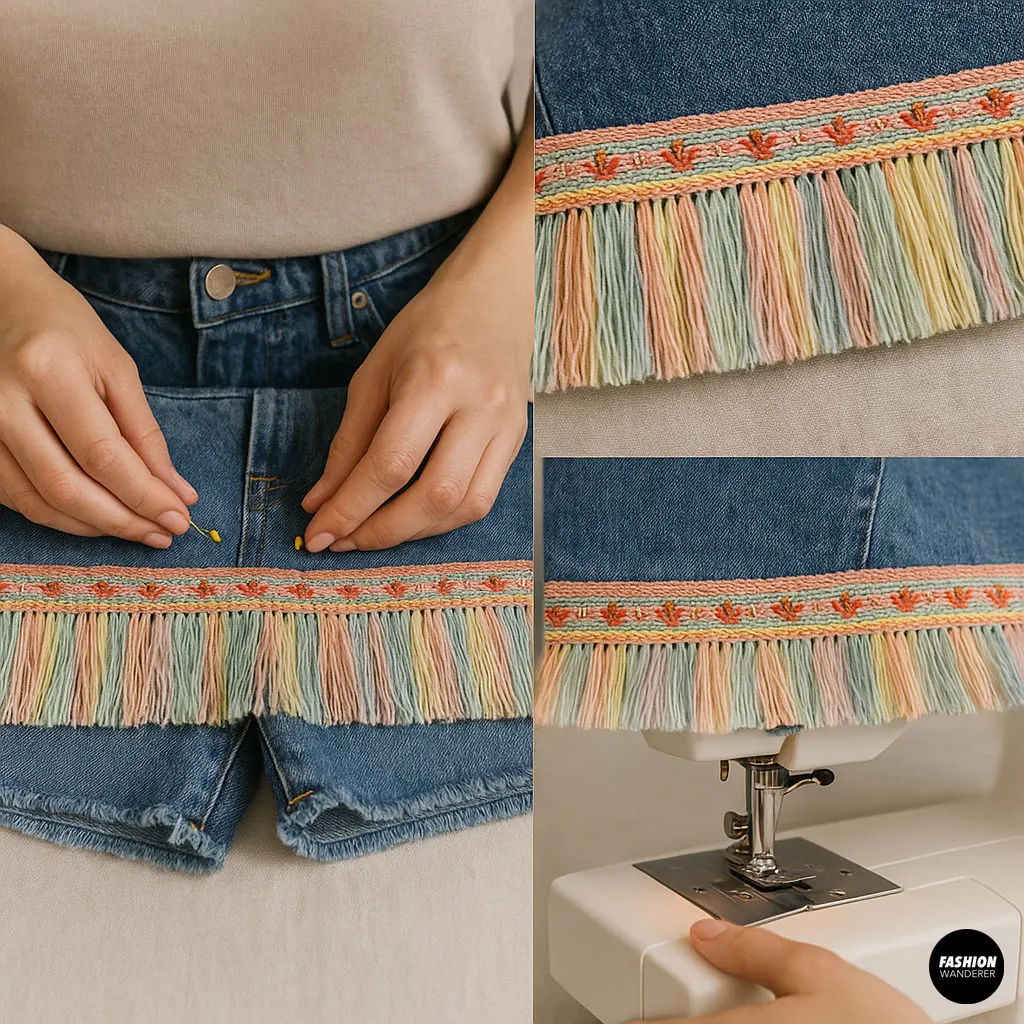
- Measure and pin trim.
- Lay your fringe trim around the top of the cut edge, aligning it so the fringe hangs below the shorts’ hem. Pin in place at intervals of about 2–3″.
- Sew in place.
- Using a matching thread, stitch along the top edge of the trim. A straight stitch or small zigzag works well. Backstitch at the start and end for security.
No-Sew Glue Method
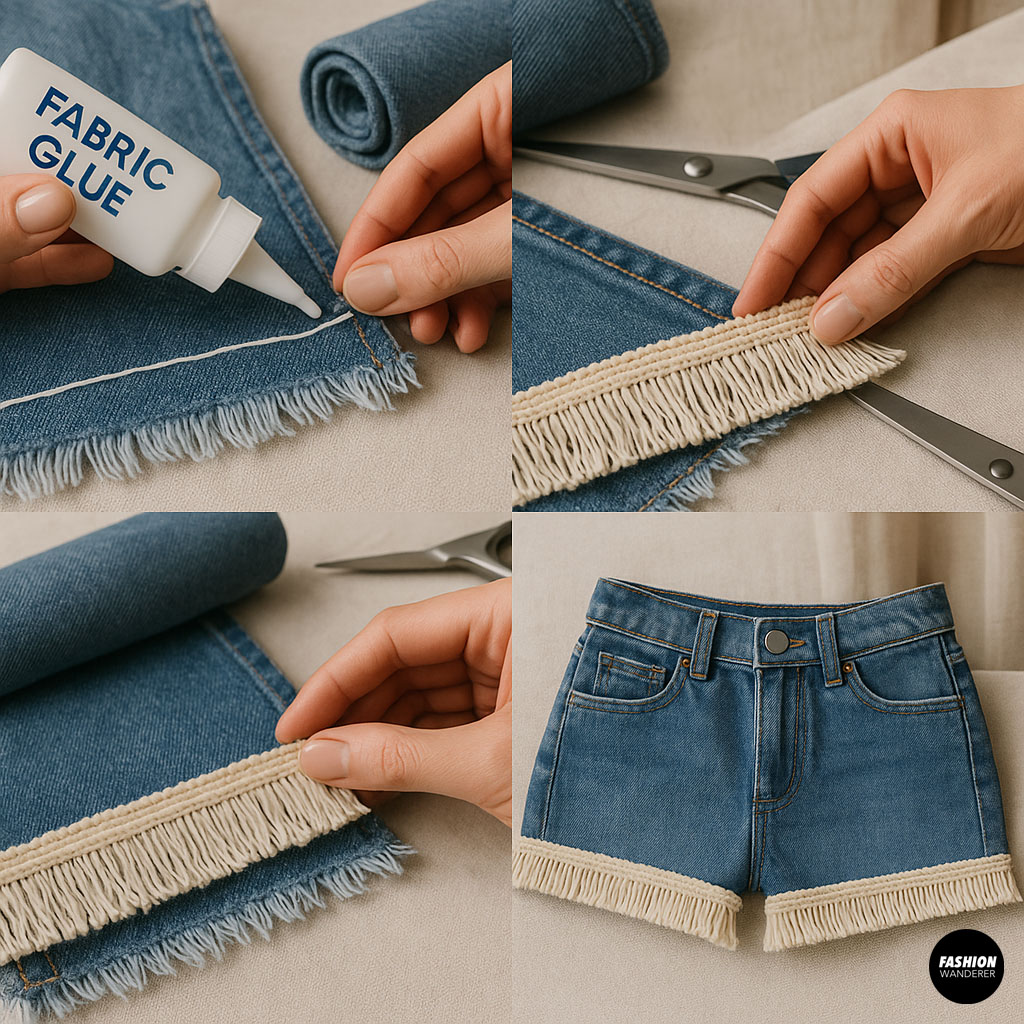

- Apply fabric glue.
- Spread a thin, even line of fabric glue around the hem’s raw edge.
- Press fringe into place.
- Firmly press the trim onto the glue, ensuring it’s straight and fully adhered. Allow 4–6 hours to dry before handling.
Step 6: Final Touches and Styling

- Seal any loose edges.
- Apply fray check to the fringe’s top seam or the glued edge to prevent shedding.
- Wash and wear.
- Turn shorts inside out and wash on a gentle cycle, then air-dry. This helps the trim settle naturally.
- Style your look.
- Pair your new fringe shorts with a graphic tee for a casual vibe, a flowy blouse for boho flair, or a fitted tank and ankle boots for a concert-ready outfit.
Troubleshooting & Tips
- Uneven Fringe: If your trim dips in spots, unpick a few stitches, reposition, and resew.
- Too Much Fray: Apply more fray check along the hemline to rein in loose threads.
- Fringe Too Long: Trim the fringe with scissors to your preferred length before attaching.
Why This DIY Works
- Customizable: You choose the fringe color, width, and length—create a subtle accent or bold statement.
- Eco-Friendly: Upcycling old jeans reduces waste and gives unloved denim a second life.
- Cost-Effective: Fringe trim and fabric glue are inexpensive, and you likely already own the basics.
Ready, Set, Fringe!

With this tutorial, turning your worn-out jeans into fabulous fringe shorts is a breeze. Not only will you master a trendy look, but you’ll also gain confidence in your DIY skills. So dig out those old jeans, grab your trim, and let your creativity shine—your perfect summer staple awaits!
Happy crafting—and enjoy your one-of-a-kind fringe shorts! 🎉🩳✨
Trendy, Affordable Sewing Patterns for All Sizes


Tie Shoulder Jumpsuit Pattern


Palazzo Pants Sewing Pattern


Pocket Overall Romper Pattern


Wrap Maxi Skirt Sewing Pattern


Tie Back Top Sewing Pattern