
Love anime but don’t want to spend hundreds of dollars on a cosplay costume? Good news! You don’t need expensive fabrics, complicated sewing patterns, or professional costume-making skills to recreate your favorite anime characters.
With a little creativity, a few thrift store finds, and some beginner-friendly sewing tricks, you can transform everyday clothing into incredible DIY anime cosplay costumes on a budget.
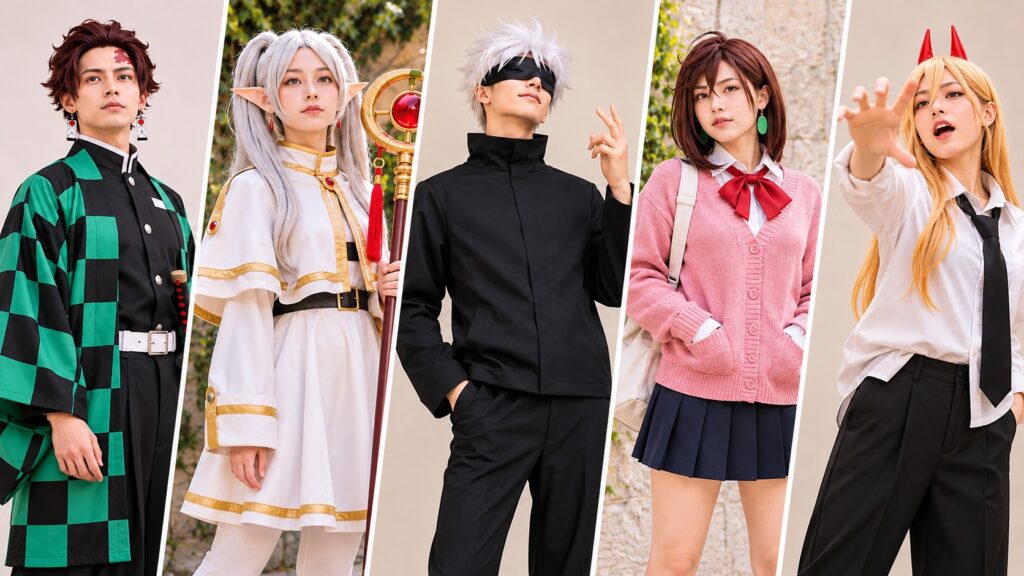
From Gojo Satoru’s iconic black outfit to Power’s recognizable white shirt and tie, these five anime-inspired upcycles are perfect for cosplay conventions, Halloween parties, anime-themed events, and TikTok transformations.
The best part? Most of these thrifted anime cosplay ideas use clothing you might already have in your closet!
Why Thrifted Anime Cosplay Is Worth Trying
Making anime costumes from secondhand clothing is one of the easiest ways to experiment with cosplay without spending a fortune.
Instead of constructing an entire costume from scratch, you can modify existing garments using simple techniques like hemming, fabric painting, appliqué, and basic hand sewing.
These projects are especially great for:
- Beginner cosplayers learning basic sewing techniques
- Budget-friendly Halloween and anime convention outfits
- DIY cosplay transformations for TikTok and Instagram
- Sustainable fashion lovers who enjoy clothing upcycles
- Last-minute costumes made from thrift store finds
Ready to turn ordinary clothes into anime-inspired outfits? Let’s get started!
1. Thrifted Black Jacket to Gojo Satoru Costume – Easy Anime Cosplay DIY
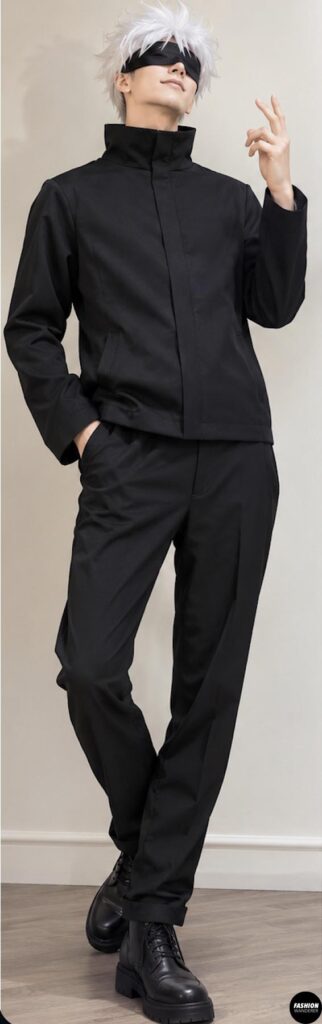
If you’re a fan of Jujutsu Kaisen, you already know that Gojo Satoru’s signature outfit is instantly recognizable.
His sleek black high-collar uniform, white hair, and dark blindfold make this one of the easiest anime looks to recreate using thrifted clothing.
This DIY Gojo Satoru cosplay requires only a few simple alterations.
Materials You’ll Need
- 1 thrifted black zip-up jacket or fitted black coat
- Black pants
- Black fabric scraps for the collar
- Lightweight fusible interfacing
- Matching black thread
- Sewing machine or hand-sewing needle
- Fabric scissors and pins
- Black fabric for a blindfold
- Optional white wig
Step-by-Step Tutorial
Step 1: Find the Perfect Black Jacket
Look for a black jacket with a simple silhouette and minimal decoration.
A fitted zip-up jacket, lightweight coat, or athletic jacket works particularly well.
Choose something with a front zipper and enough room around the neckline to add a taller collar.
Step 2: Create Gojo’s Signature High Collar
Measure around the jacket neckline.
Cut a rectangular piece of black fabric approximately 4–5 inches tall and long enough to fit around the neckline, including seam allowances.
Cut matching interfacing and fuse it to the wrong side of the fabric.
Fold the collar lengthwise with right sides together, sew the short ends, turn right side out, and press.
Step 3: Attach the Collar
Pin the new collar around the neckline, keeping the front edges aligned with the jacket opening.
Sew the outer collar layer to the neckline using a ⅜-inch seam allowance.
Fold the inner collar edge inward and hand-stitch it over the seam.
The finished collar should stand upright around your neck.
Step 4: Create the Black Blindfold
Cut a strip of soft, breathable black fabric approximately 3–4 inches wide.
Finish the edges with a narrow hem or zigzag stitch.
Fit it comfortably around your head, ensuring you can see safely. For walking around conventions, use a sheer vision panel or wear it raised above your eyes.
Step 5: Complete the Outfit
Pair your jacket with slim black pants, black shoes, and a spiky white wig.
For photos, pose with one hand raised near your face to capture Gojo’s playful personality.
Cosplay tip: A structured collar makes this thrifted costume look dramatically more polished, even when the rest of the outfit is completely secondhand.
2. Old Plaid Shirt to Tanjiro Costume – Easy Demon Slayer Cosplay Upcycle
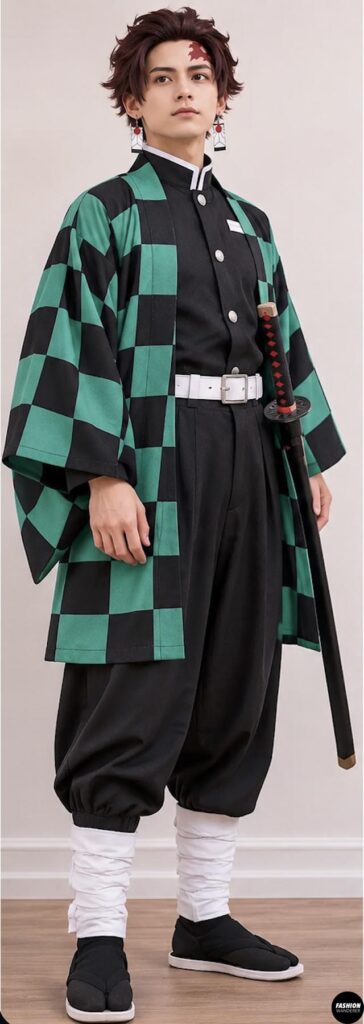
Tanjiro Kamado from Demon Slayer: Kimetsu no Yaiba is famous for his green-and-black checkered haori.
Instead of buying expensive cosplay fabric, you can transform an oversized plaid shirt into a lightweight anime-inspired jacket.
Materials You’ll Need
- 1 oversized green-and-black plaid shirt
- Black fabric paint, if needed
- Black pants
- Dark shirt or jacket for the uniform
- Matching thread
- Fabric scissors
- Seam ripper
- Sewing machine
- Optional white belt and rectangular earrings
Step-by-Step Tutorial
Step 1: Choose Your Thrifted Shirt
Search for an oversized green-and-black buffalo plaid shirt.
Tanjiro’s haori features large checkerboard squares rather than traditional tartan plaid, so choose a bold pattern with minimal extra lines.
If you cannot find the perfect print, use black fabric paint to darken alternating squares on a green shirt.
Step 2: Remove the Collar
Use a seam ripper to carefully detach the shirt collar and collar stand.
Avoid cutting into the neckline.
Fold the raw neckline edge inward by ¼ inch, then fold again and stitch.
This creates a simple collarless opening.
Step 3: Transform the Front Opening
Remove the buttons and carefully stitch the buttonholes closed if desired.
Fold each front edge inward by approximately ½ inch and sew a straight hem.
The shirt should now hang open like a traditional haori.
Step 4: Adjust the Sleeves
Tanjiro’s haori has loose, wide sleeves.
If your thrifted shirt has narrow cuffs, remove them with a seam ripper.
Trim the sleeves to your preferred length, fold the raw edges inward twice by ¼ inch, and stitch.
For extra volume, insert matching fabric panels along the underside of each sleeve.
Step 5: Adjust the Length
Try on the shirt over your black outfit.
Ideally, the finished haori should fall around mid-thigh.
Trim excess length if necessary, leaving a ½-inch hem allowance.
Fold and stitch the bottom edge.
Step 6: Style Your Tanjiro Costume
Layer your upcycled haori over a dark uniform-inspired outfit.
Add a white belt, leg wraps, and rectangular earrings.
For a recognizable finishing touch, use temporary makeup to recreate Tanjiro’s forehead marking.
Budget cosplay tip: If your plaid shirt isn’t perfectly checkered, focus on matching the green-and-black color palette and loose silhouette.
3. Old White Dress to Frieren Mage Costume – Budget Anime Cosplay Upcycle
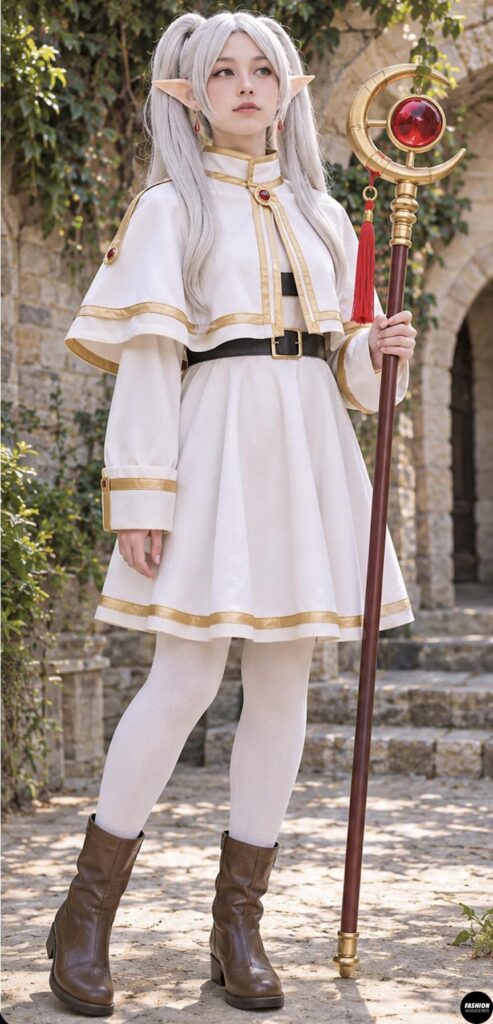
Looking for a soft, elegant anime costume with a fantasy-inspired aesthetic?
Frieren from Frieren: Beyond Journey’s End is an excellent choice for cosplayers who love flowing dresses, delicate details, and magical accessories.
You can recreate her recognizable white-and-gold outfit using a thrifted white dress and simple embellishments.
Materials You’ll Need
- 1 thrifted white long-sleeve dress
- White fabric scraps
- Gold ribbon or trim
- White thread
- Fabric scissors
- Sewing machine
- Measuring tape
- Optional gold embellishments
- Optional pointed elf ears and pale lavender wig
Step-by-Step Tutorial
Step 1: Find a Simple White Dress
Choose a white dress with long sleeves and a relaxed silhouette.
A vintage nightgown, white maxi dress, or oversized tunic works well.
Look for lightweight fabric that drapes softly.
Step 2: Adjust the Dress Length
Try on the dress and mark your desired hemline.
For Frieren’s recognizable outfit, aim for a short, tunic-like silhouette with enough coverage for comfortable movement.
Cut away excess fabric, leaving ½ inch for hemming.
Fold the bottom edge twice by ¼ inch and straight stitch.
Step 3: Create Decorative Gold Trim
Measure around the neckline and sleeve cuffs.
Cut gold ribbon to fit each area.
Pin the ribbon neatly along the edges, folding under the ends.
Sew both sides of the ribbon using a narrow straight stitch.
Step 4: Add the Capelet Detail
Cut a wide semicircle from leftover white fabric, using your shoulder measurement to determine the size.
Cut a smaller curved opening for the neckline.
Finish the outer edge with a narrow hem.
Attach gold trim along the border for an elegant fantasy look.
Step 5: Attach the Capelet
Position the capelet over the dress shoulders.
Secure it at the neckline with a few hand stitches or small removable snaps.
Keeping it detachable makes washing and adjusting the costume easier.
Step 6: Complete the Mage Look
Style the costume with a pale lavender wig, pointed elf ears, white tights, and brown boots.
A lightweight foam staff adds a magical finishing touch without making the outfit uncomfortable to wear.
Beginner sewing tip: Use lightweight gold ribbon rather than heavy decorative trim to keep the dress soft and comfortable.
4. Thrifted School Clothes to Momo Ayase Costume – Easy Dandadan Cosplay DIY
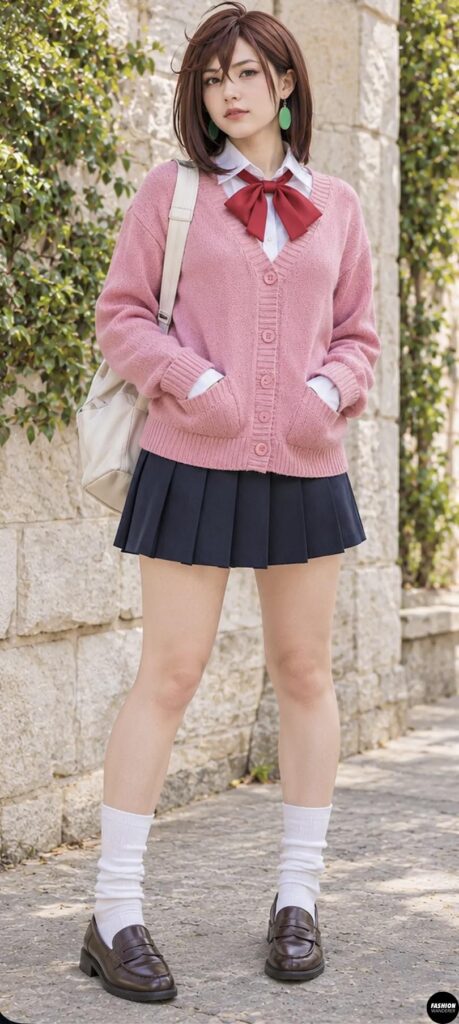
Momo Ayase from Dandadan has a stylish school-uniform-inspired look that’s surprisingly easy to recreate with secondhand clothing.
This DIY Momo Ayase cosplay is perfect for beginners because it requires very little sewing.
Materials You’ll Need
- 1 thrifted white button-up shirt
- 1 dark pleated mini skirt
- Red ribbon or necktie
- Navy or dark cardigan
- White socks
- Loafers or school-style shoes
- Fabric scissors
- Sewing machine or hand needle
- Optional wig or temporary hair styling products
Step-by-Step Tutorial
Step 1: Find Your School Uniform Pieces
Start with a white button-up shirt and a dark pleated skirt.
Choose a shirt that fits comfortably through the shoulders.
A slightly oversized shirt works well if you prefer a relaxed anime-inspired silhouette.
Step 2: Adjust the Shirt Fit
Try on the shirt and decide whether it needs shortening.
If the shirt is too long, mark the desired length.
Cut away the excess fabric, leaving a ½-inch hem allowance.
Fold the raw edge inward twice by ¼ inch and sew.
Step 3: Customize the Skirt
Try on your thrifted pleated skirt.
If it’s too long, carefully mark a new hemline while wearing it.
Remove the skirt, measure an even hem allowance, and trim.
Press the pleats back into place before stitching the hem.
Step 4: Create the Red Neck Accessory
Cut a length of red ribbon approximately 30–36 inches long.
Finish the ends by folding them inward and stitching.
Tie the ribbon loosely around the shirt collar.
Alternatively, use a thrifted red necktie for a more structured appearance.
Step 5: Style the Cardigan
Layer a dark cardigan over your white shirt.
If the cardigan is oversized, fold the cuffs inward and secure them with a few temporary hand stitches.
Avoid permanently altering the cardigan if you want to wear it afterward.
Step 6: Finish the Momo Ayase Look
Pair the outfit with white socks and loafers.
Style your hair into Momo’s recognizable updo with loose face-framing sections.
Add earrings and subtle makeup to complete the cosplay.
Thrift flip tip: School-uniform cosplay pieces are especially versatile because you can reuse them as everyday outfits after the event.
5. Old White Button-Up to Power Costume – Easy Chainsaw Man Cosplay Upcycle
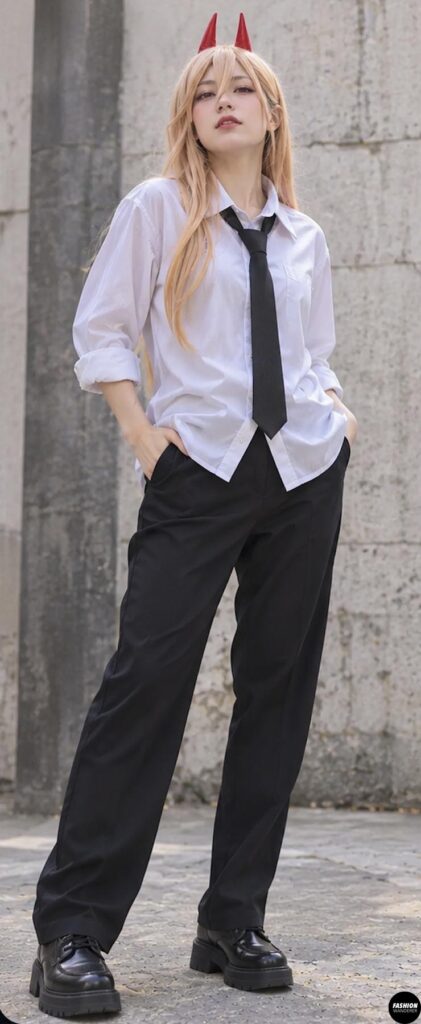
Power from Chainsaw Man is one of the most recognizable anime characters thanks to her messy blonde hair, red horns, white shirt, and black tie.
Fortunately, this Power costume is incredibly beginner-friendly.
Most of the outfit can be assembled using thrifted office clothing and a few handmade accessories.
Materials You’ll Need
- 1 oversized white button-up shirt
- 1 black necktie
- Black pants or shorts
- Red felt or craft foam
- Lightweight headband
- Fabric glue or hot glue
- Sewing machine or hand needle
- Fabric scissors
- Optional blonde wig
- Optional red contact lenses fitted by an eye-care professional
Step-by-Step Tutorial
Step 1: Choose an Oversized White Shirt
Find a white button-up shirt at your local thrift store.
A men’s shirt works particularly well because Power’s outfit has a relaxed, slightly messy appearance.
Choose a shirt that falls loosely over your shoulders.
Step 2: Adjust the Shirt Length
Try on the shirt with your chosen pants.
If the shirt is excessively long, mark a new hemline.
Cut away extra fabric, leaving a ½-inch allowance.
Fold the raw edge twice by ¼ inch and sew a straight hem.
Step 3: Roll and Secure the Sleeves
Roll the sleeves to your preferred length.
For a permanent adjustment, secure the folds with small stitches along the inner sleeve seams.
For a temporary costume, simply roll the sleeves without sewing.
Step 4: Make Power’s Red Horns
Draw two slightly curved horn shapes onto red craft foam.
Cut four matching pieces, then glue the pairs together for extra thickness.
Alternatively, sew two red felt horns, turn them right side out, and fill them lightly with polyester stuffing.
Step 5: Attach the Horns to a Headband
Position the horns several inches apart on a lightweight headband.
Secure them with glue or hand stitches, depending on the materials.
Allow everything to dry completely before wearing.
Step 6: Assemble the Costume
Pair the white shirt with black pants and a loosely tied black necktie.
Add a long blonde wig and your handmade red horns.
For photos, use exaggerated expressions and playful poses to capture Power’s chaotic personality.
Easy cosplay tip: Slightly wrinkled fabric and a loose tie actually help make this costume more character-accurate!
Quick Comparison: Which DIY Anime Cosplay Should You Make?
| Anime character | Sewing difficulty | Estimated budget | Time |
| Gojo Satoru | Easy | $15–$30 | 1–2 hours |
| Tanjiro Kamado | Easy | $15–$35 | 2–3 hours |
| Frieren | Easy–Intermediate | $20–$40 | 2–4 hours |
| Momo Ayase | Beginner | $10–$25 | 30–60 minutes |
| Power | Beginner | $10–$25 | 1–2 hours |
Estimated DIY costs in USD, assuming thrifted clothing and basic supplies; wigs, specialty shoes, and props may cost extra.
Tips for Making Thrifted Anime Cosplay Look Expensive
You don’t need a huge budget to make your handmade anime costume look convention-ready.
Focus on the details that make each character instantly recognizable.
Choose the right silhouette. A well-fitting jacket, flowing dress, or oversized shirt often matters more than expensive fabric.
Use accessories strategically. Gojo’s blindfold, Tanjiro’s haori, Frieren’s elf ears, Momo’s hairstyle, and Power’s horns help identify each character.
Press your seams. Ironing hems and collars gives even simple thrift flips a professional finish.
Use removable alterations. Snaps, temporary stitching, and detachable accessories allow you to reuse clothing after cosplay events.
Prioritize comfort. Choose breathable fabrics, comfortable footwear, and lightweight props, especially for long convention days.
Final Thoughts: Turn Thrift Store Finds Into Your Favorite Anime Characters
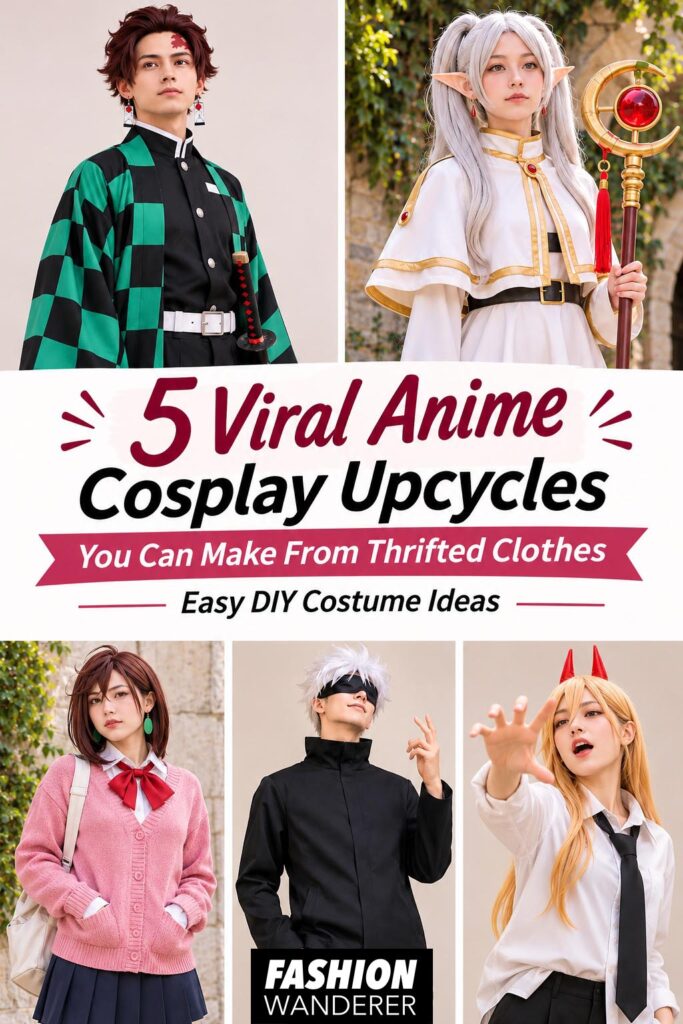
Creating DIY anime cosplay from thrifted clothes is an affordable, creative way to bring your favorite characters to life.
Whether you’re transforming a black jacket into Gojo’s uniform, turning a plaid shirt into Tanjiro’s haori, or making Power’s signature horns, these beginner-friendly projects prove that amazing costumes don’t require expensive materials.
Start with clothing you already own, visit your favorite thrift store for missing pieces, and experiment with simple sewing techniques.
Your next anime cosplay might be hiding in your closet!
Which anime character would you recreate first? Save these five easy anime cosplay upcycle ideas for your next convention, Halloween costume, or DIY fashion project.