
Every new parent can agree on one thing—you can never have too many burp cloths! Babies spit up, drool, and have little feeding accidents throughout the day, making burp cloths one of the most-used baby essentials. Instead of buying plain store-bought versions, why not sew your own soft, absorbent, and stylish burp cloths?
This DIY Soft Baby Burp Cloth tutorial is beginner-friendly, budget-friendly, and perfect for using fabric scraps. These handmade burp cloths make thoughtful baby shower gifts, practical newborn essentials, and wonderful items to sell at craft fairs or online. In this step-by-step guide, you’ll learn how to sew soft baby burp cloths with professional-looking results in under an hour.
If you’re new to sewing, baby projects are a fun way to practice your skills while making something genuinely useful. These easy DIY baby gifts use simple techniques and beginner-friendly construction, so you can create adorable handmade presents with confidence.
Why You’ll Love This Project
- Perfect beginner sewing project
- Uses small fabric pieces
- Quick to sew in 20–30 minutes each
- Highly absorbent and durable
- Machine washable
- Makes beautiful baby shower gifts
- Easy to personalize
Materials You’ll Need
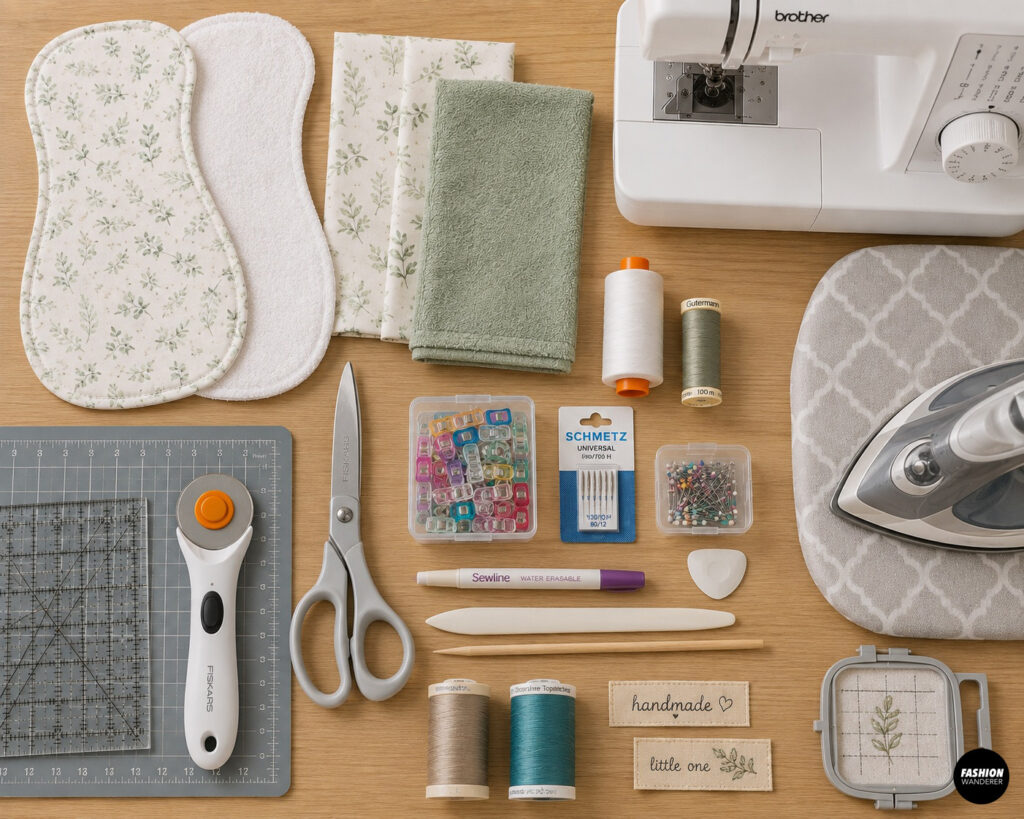
- Burp cloth sewing pattern or existing burp cloth
- Cotton quilting fabric (front)
- Terry cloth, chenille, bamboo terry, or cotton towel fabric (back)
- Fabric scissors or rotary cutter
- Cutting mat and acrylic ruler
- Sewing machine
- Universal needle (80/12)
- Polyester thread
- Sewing clips or pins
- Fabric marker or tailor’s chalk
- Iron and ironing board
- Point turner or chopstick
- Optional: Decorative topstitching thread
- Optional: Embroidery machine or personalized label
Finished Size
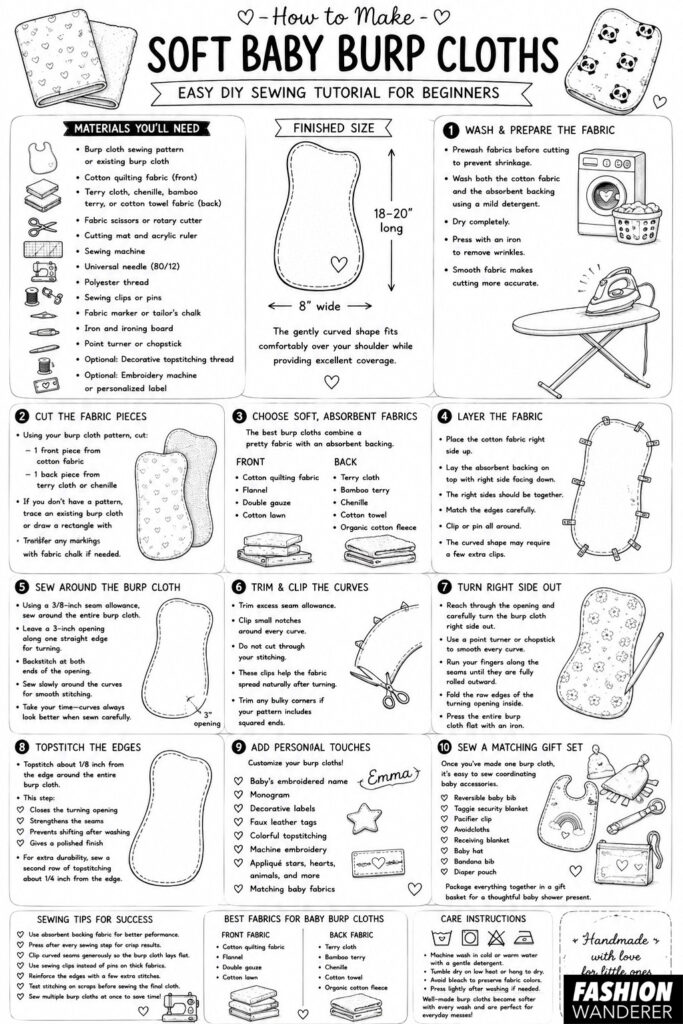
Most burp cloths measure approximately:
- 8 inches wide
- 18–20 inches long
The gently curved shape fits comfortably over your shoulder while providing excellent coverage.
DIY Soft Baby Burp Cloths
Step 1: Wash and Prepare the Fabric
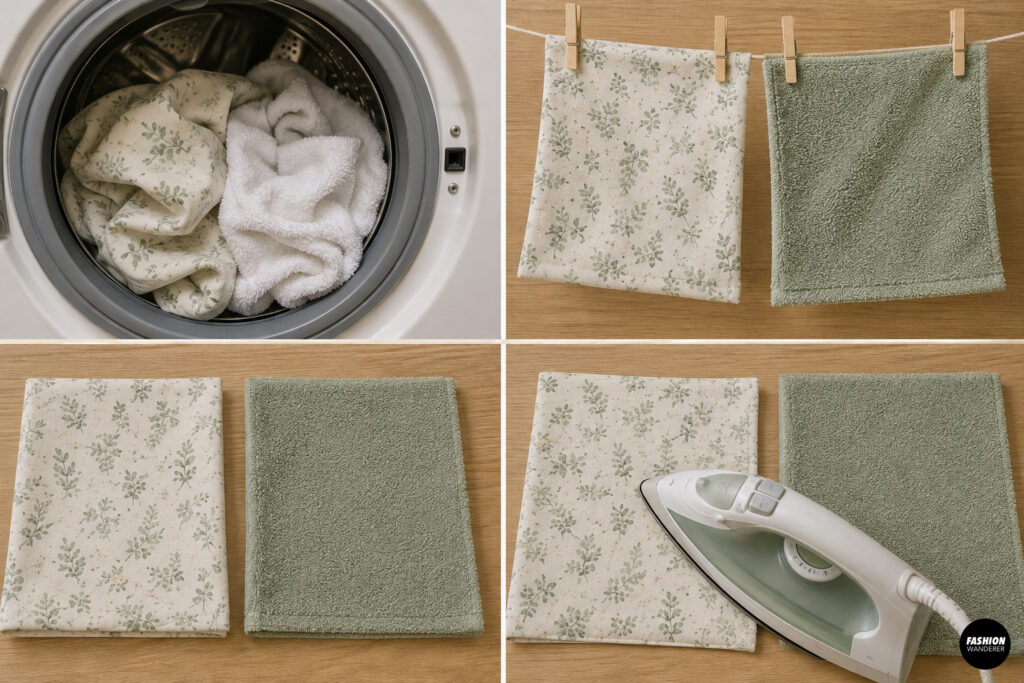
Always prewash your fabrics before cutting to prevent shrinkage after sewing.
Wash both the cotton fabric and the absorbent backing using a mild detergent.
Dry completely and press with an iron to remove wrinkles.
Smooth fabric makes cutting much more accurate.
Step 2: Cut the Fabric Pieces
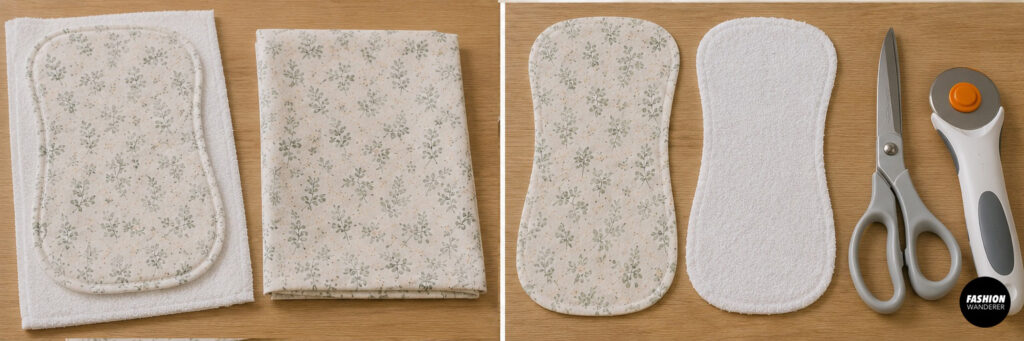
Using your burp cloth pattern, cut:
- 1 front piece from cotton fabric
- 1 back piece from terry cloth or chenille
If you don’t have a pattern, trace an existing burp cloth or draw a rectangle with gently curved sides.
Transfer any markings with fabric chalk if needed.
Step 3: Choose Soft, Absorbent Fabrics
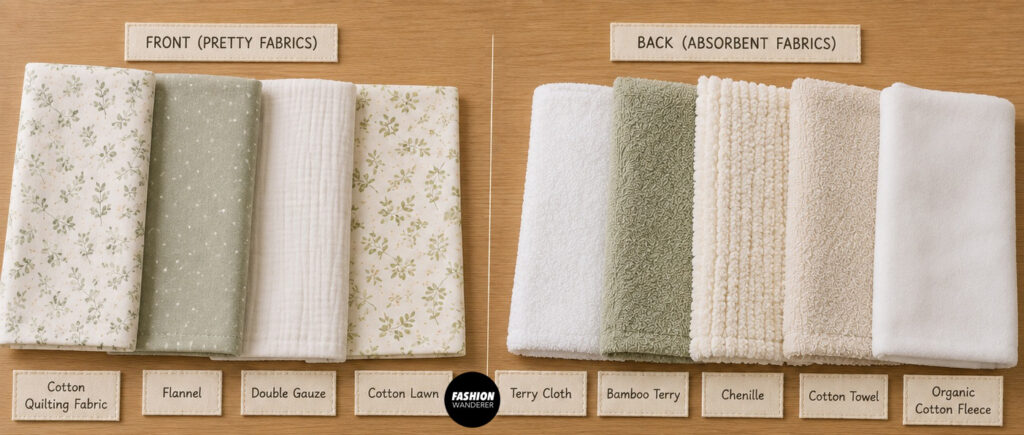
The best burp cloths combine a pretty fabric with an absorbent backing.
Great combinations include:
Front
- Cotton quilting fabric
- Flannel
- Double gauze
- Cotton lawn
Back
- Terry cloth
- Bamboo terry
- Chenille
- Cotton towel
- Organic cotton fleece
Mixing textures creates a burp cloth that is both stylish and functional.
Step 4: Layer the Fabric
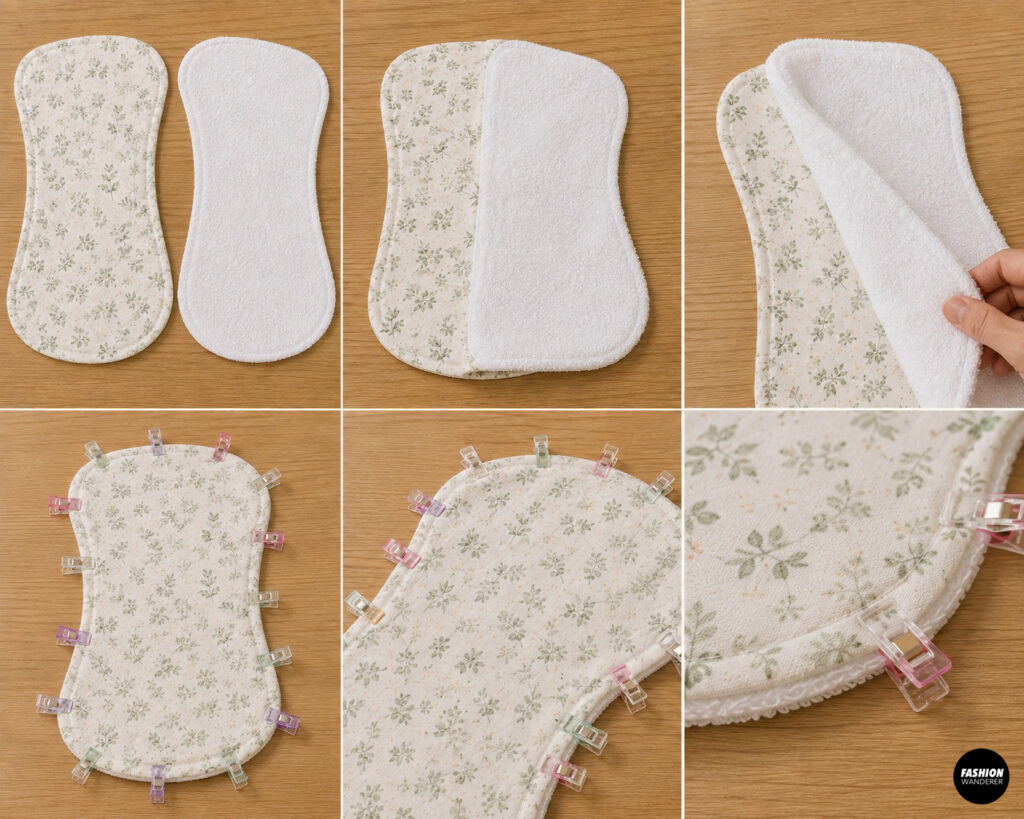
Place the cotton fabric right side up.
Lay the absorbent backing on top with the right side facing down.
The right sides should be together.
Match the edges carefully.
Clip or pin all around the burp cloth.
The curved shape may require a few extra clips to keep everything aligned.
Step 5: Sew Around the Burp Cloth
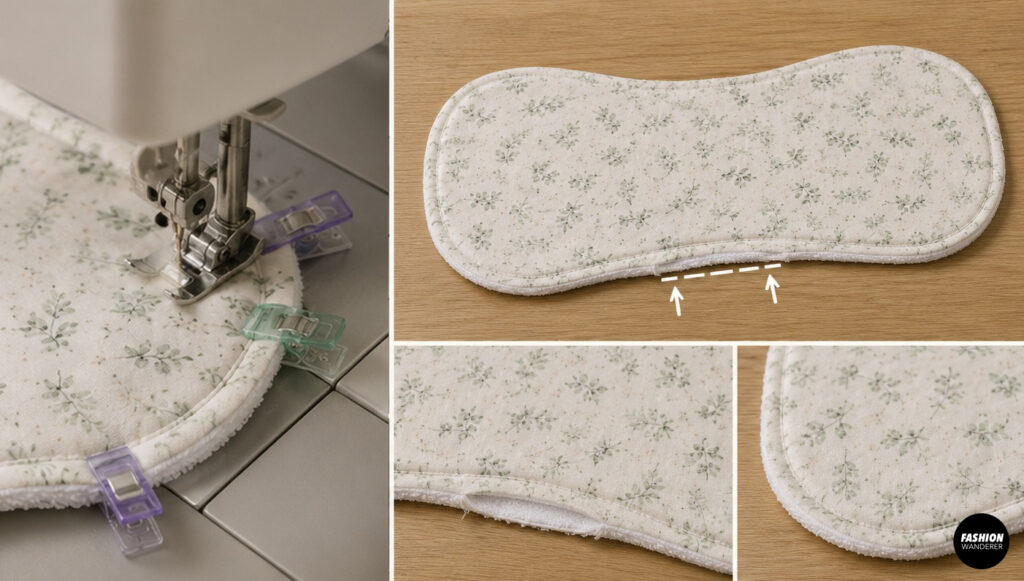
Using a ⅜-inch seam allowance, sew around the entire burp cloth.
Leave a 3-inch opening along one straight edge for turning.
Backstitch at both ends of the opening.
Sew slowly around the curves to create smooth stitching.
Take your time—curves always look better when sewn carefully.
Step 6: Trim and Clip the Curves
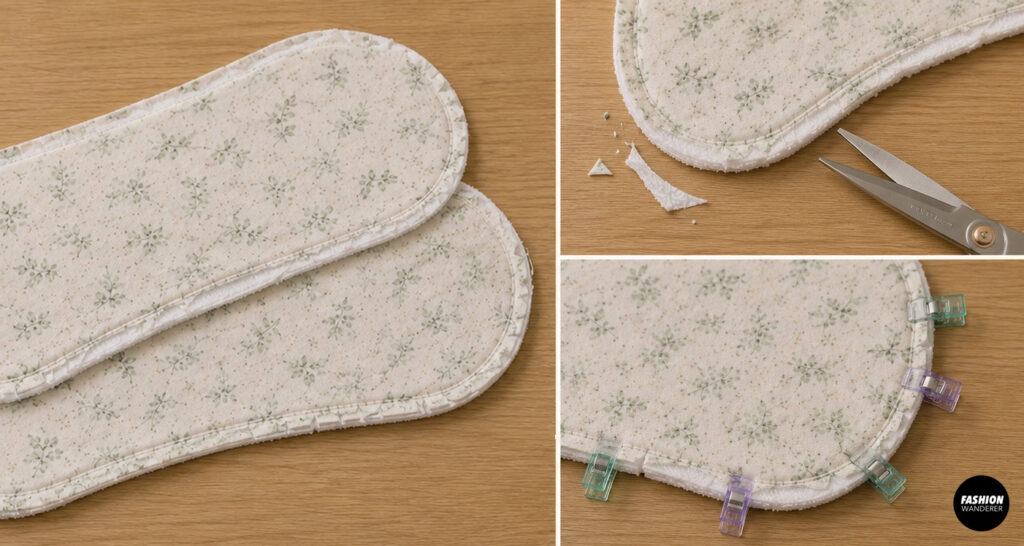
Before turning the burp cloth right side out:
Trim excess seam allowance.
Clip small notches around every curve.
Do not cut through your stitching.
These clips allow the fabric to spread naturally after turning, preventing puckers and bulky edges.
Trim any bulky corners if your pattern includes squared ends.
Step 7: Turn Right Side Out
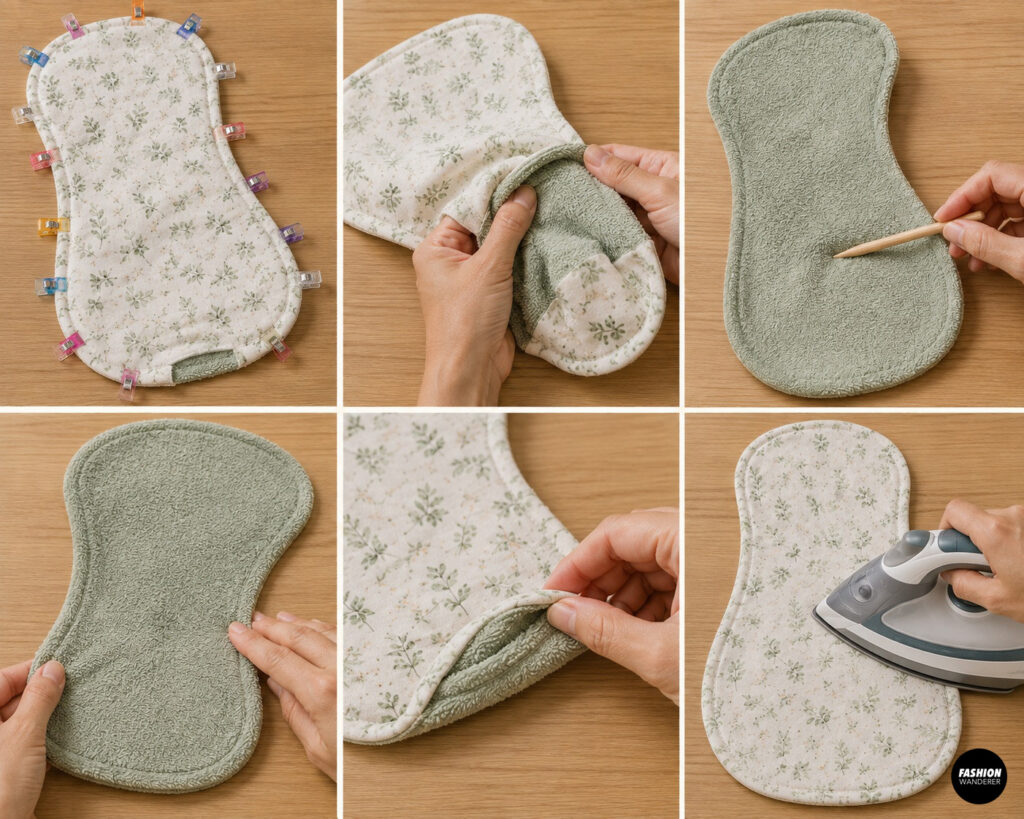
Reach through the opening and carefully pull the burp cloth right side out.
Use a point turner or chopstick to gently smooth every curve.
Run your fingers along the seams until they are fully rolled outward.
Fold the raw edges of the turning opening inside.
Press the entire burp cloth flat with an iron.
A good press gives the project a crisp, professional appearance.
Step 8: Topstitch the Edges
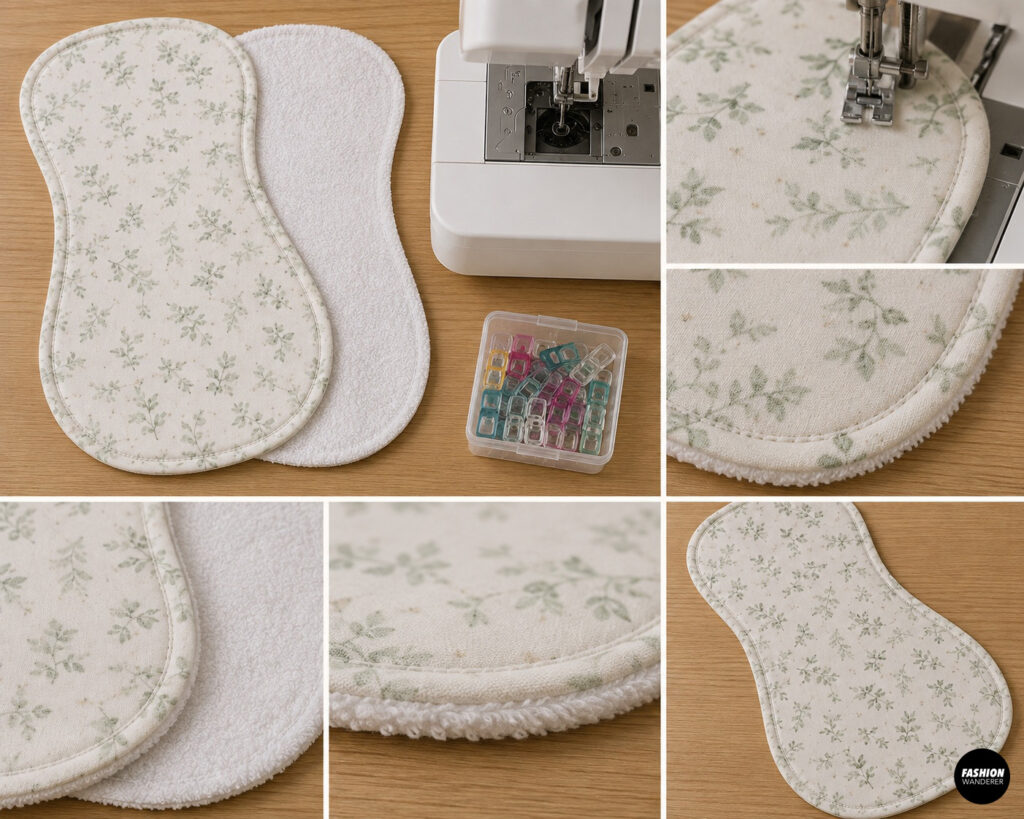
Topstitch approximately ⅛ inch from the edge around the entire burp cloth.
This step:
- Closes the turning opening
- Strengthens the seams
- Prevents shifting after washing
- Gives the burp cloth a polished finish
For extra durability, sew a second row of decorative topstitching about ¼ inch from the edge.
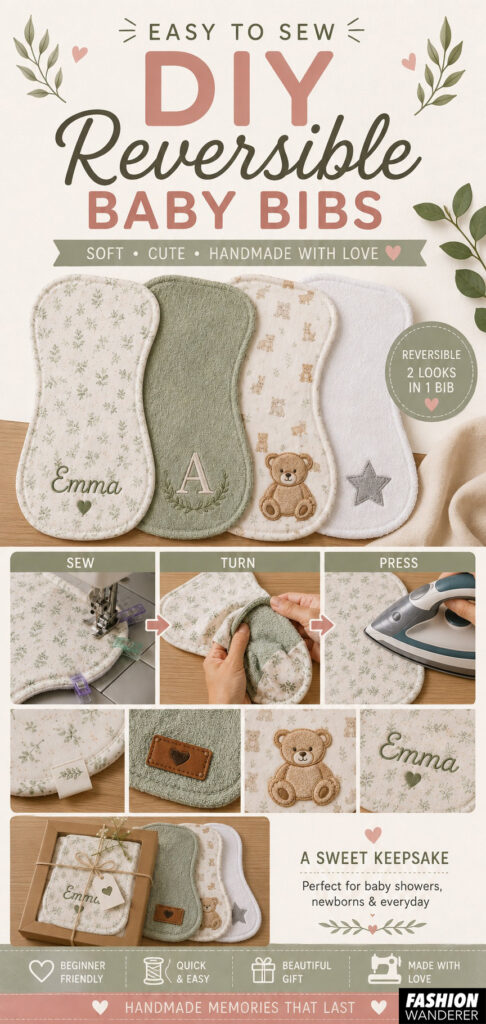
Step 9: Add Personal Touches
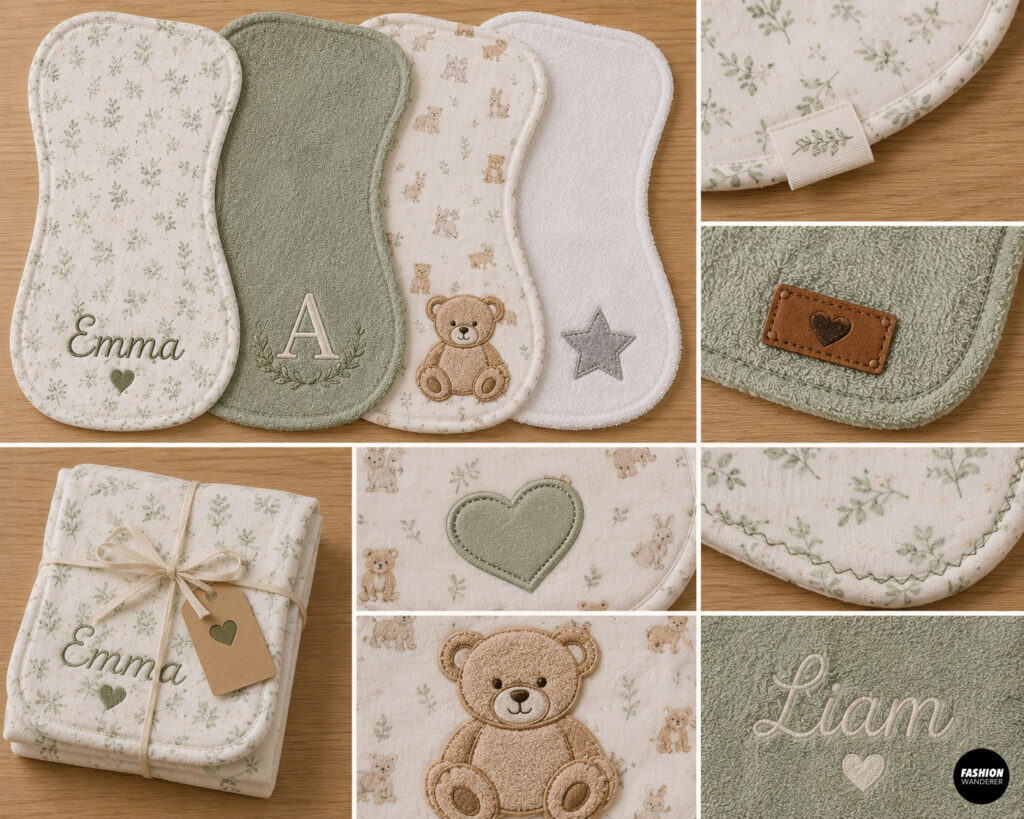
Customize your burp cloths to make them extra special.
Ideas include:
- Baby’s embroidered name
- Monogram
- Decorative labels
- Faux leather tags
- Colorful topstitching
- Machine embroidery
- Appliqué stars
- Hearts
- Animal motifs
- Matching baby fabric collections
Personalized burp cloths make unforgettable keepsake gifts.
Step 10: Sew a Matching Gift Set
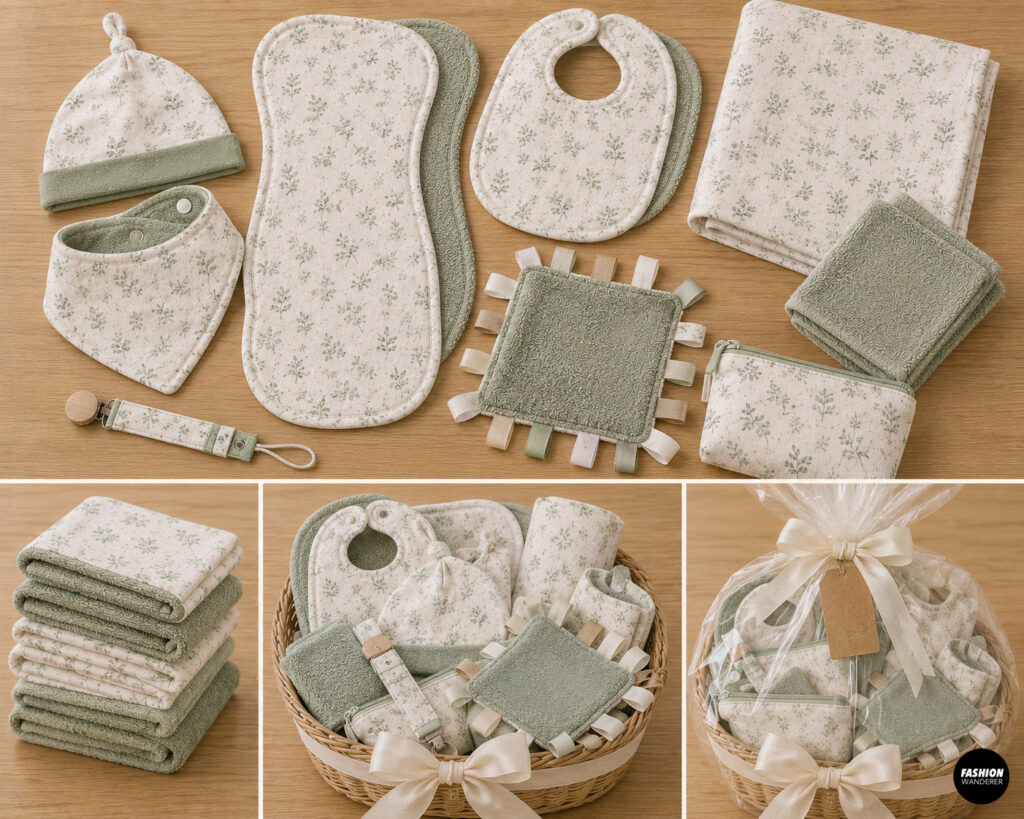
Once you’ve made one burp cloth, it’s easy to sew coordinating baby accessories.
Create a complete handmade gift set by adding:
- Reversible baby bib
- Taggie security blanket
- Pacifier clip
- Washcloths
- Receiving blanket
- Baby hat
- Bandana bib
- Diaper pouch
Package everything together in a gift basket for a thoughtful baby shower present.
Tips for Success
- Wash fabric before cutting.
- Use absorbent backing for maximum protection.
- Press after every sewing step.
- Clip curves generously.
- Sew slowly around rounded edges.
- Use matching thread for a clean finish.
- Make several burp cloths assembly-line style to save time.
Best Fabric Combinations
For maximum softness, try these combinations:
- Cotton + Terry Cloth
- Cotton + Bamboo Terry
- Double Gauze + Chenille
- Flannel + Cotton Towel
- Cotton + Organic Cotton Fleece
Each combination creates a soft, comfortable burp cloth that holds up well to frequent washing.
Caring for Handmade Burp Cloths
Machine wash in warm or cold water using baby-safe detergent.
Tumble dry on low heat or air dry.
Avoid bleach to preserve fabric colors and softness.
Press lightly if needed.
These burp cloths become softer with every wash while maintaining their absorbency.
Frequently Asked Questions
How many burp cloths should I make?
Most parents appreciate having 6–12 burp cloths available since they are used multiple times throughout the day.
Are burp cloths good beginner projects?
Absolutely! They only require basic sewing skills, making them one of the easiest projects for new sewists.
Can I sell handmade burp cloths?
Yes! Handmade burp cloths are popular items at baby boutiques, craft fairs, and Etsy shops. Offering coordinating sets with bibs, blankets, or personalized embroidery can make your products even more attractive.
Final Thoughts
Learning how to make soft baby burp cloths is a rewarding sewing project that combines practicality with creativity. With just two layers of soft fabric and a few simple sewing techniques, you can create beautiful, reusable burp cloths that new parents will use every day.
Whether you’re sewing for your own baby, making thoughtful baby shower gifts, or adding handmade products to your shop, these soft burp cloths are quick to sew, easy to customize, and built to withstand countless washes while keeping babies—and parents—comfortable.