
Fast fashion often treats clothes as disposable, but DIY makers know better—every rip, hole, and worn-out patch is an opportunity to transform an old garment into something beautiful and unique.
Visible mending has grown into a global trend, celebrating imperfections while giving clothes a second life. Instead of hiding flaws, visible mending highlights them with embroidery, colorful thread, or creative patchwork, turning damage into a design feature.
In this guide, we’ll cover step-by-step tutorials for visible mending techniques you can try at home. Whether you’re repairing jeans, sweaters, or jackets, these methods will help you preserve your clothes while making them personal style statements.
Why Visible Mending?
- Sustainable Fashion: Repairing garments reduces waste and keeps clothing out of landfills.
- Cost-Friendly: Extends the life of your wardrobe without buying new pieces.
- Creative Expression: Every stitch becomes an artistic detail.
- Durability: Reinforced mends strengthen weak areas, making clothes wearable for years.
Tools & Materials You’ll Need
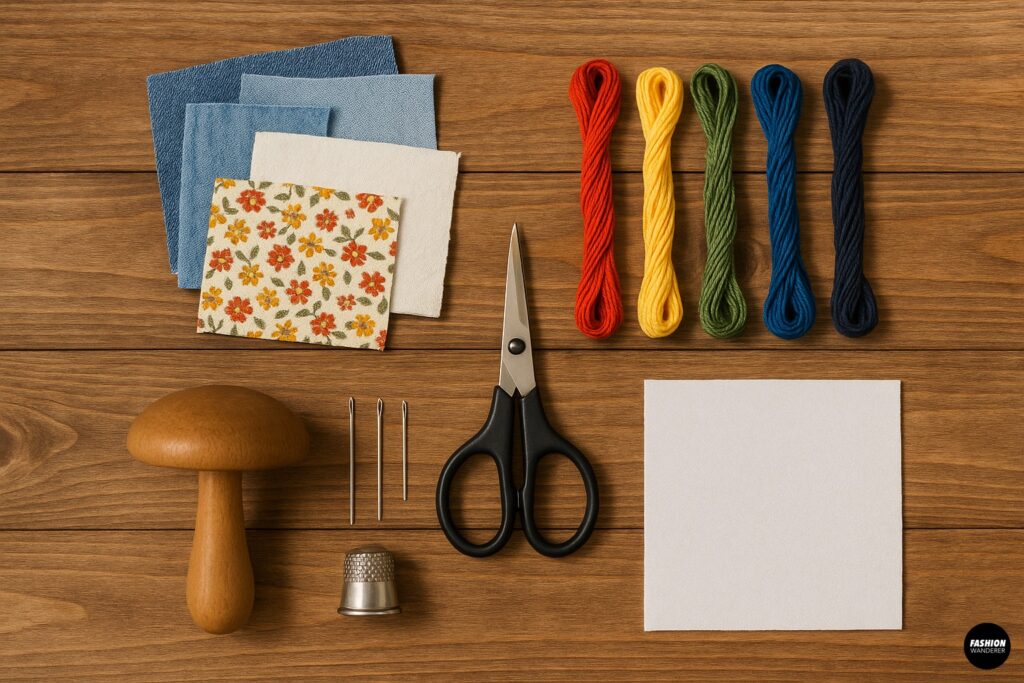
Before diving into tutorials, gather your supplies:
- Fabric patches (denim, cotton, or decorative fabric scraps)
- Embroidery floss or heavy thread in assorted colors
- Hand sewing needles and embroidery needles
- Scissors or fabric snips
- Darning mushroom (or small bowl) for knit repairs
- Thimble (optional but helpful for thick fabrics)
- Iron-on stabilizer or fusible webbing (optional for reinforcement)
DIY Sewing Mending Techniques
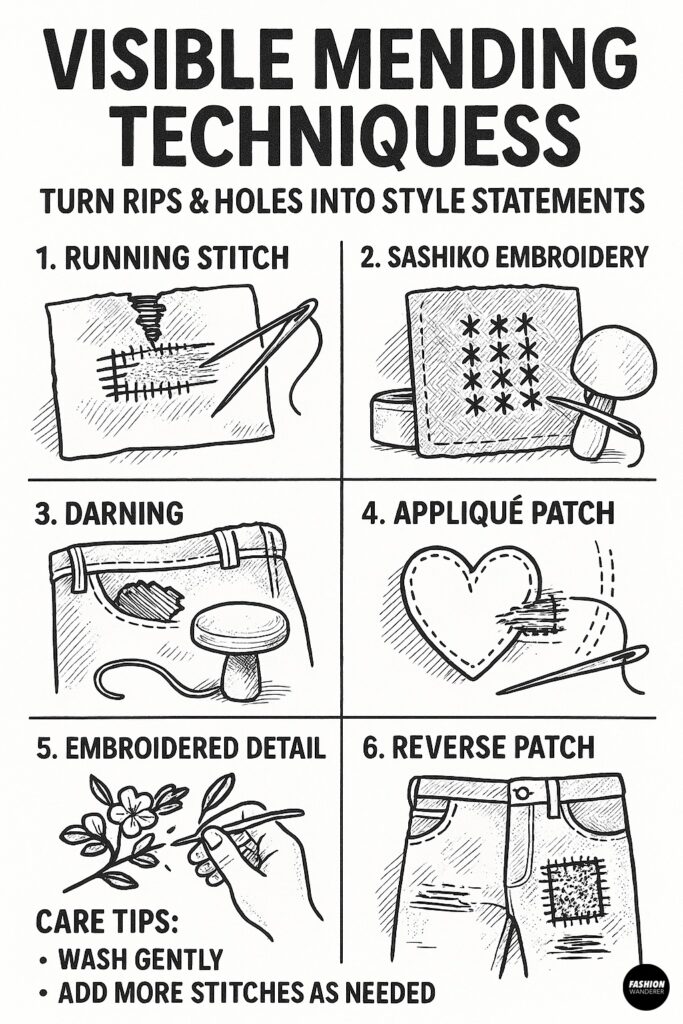
1. Running Stitch Repair (Best for Jeans & Canvas)
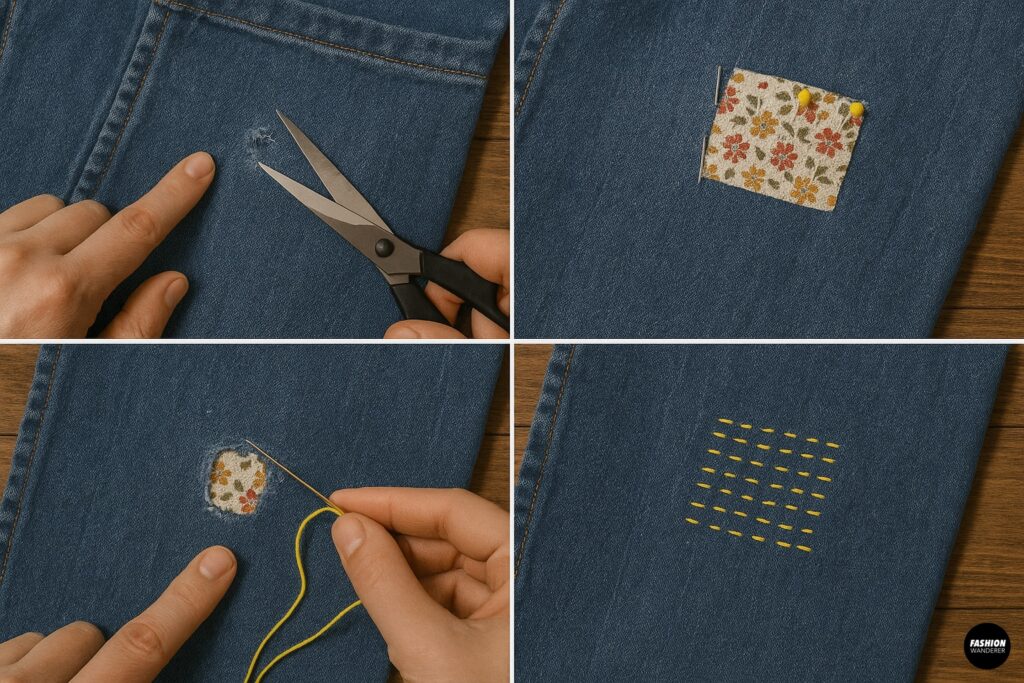
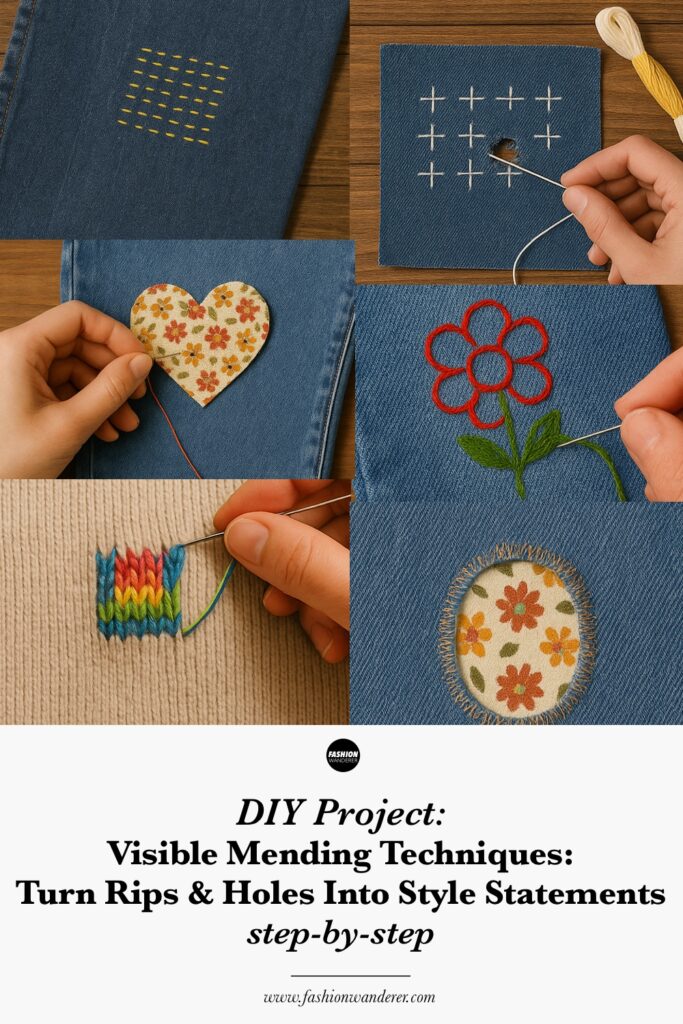
The running stitch is a simple sewing stitch to reinforce holes while adding decorative flair.
Steps:
- Prepare the Garment: Lay your fabric flat. Trim any loose threads around the hole.
- Add Patch (Optional): Place a fabric patch behind the hole for extra durability. Pin in place.
- Thread Needle: Choose embroidery floss or colorful thread to contrast with your garment.
- Begin Stitching: Start slightly outside the hole. Sew small, even running stitches back and forth across the damaged area.
- Create a Grid: Rotate the fabric and stitch in the opposite direction to form a crosshatch design.
Style Tip: Use neon thread on dark denim for a bold streetwear-inspired look.
2. Sashiko Embroidery (Japanese Decorative Repair)
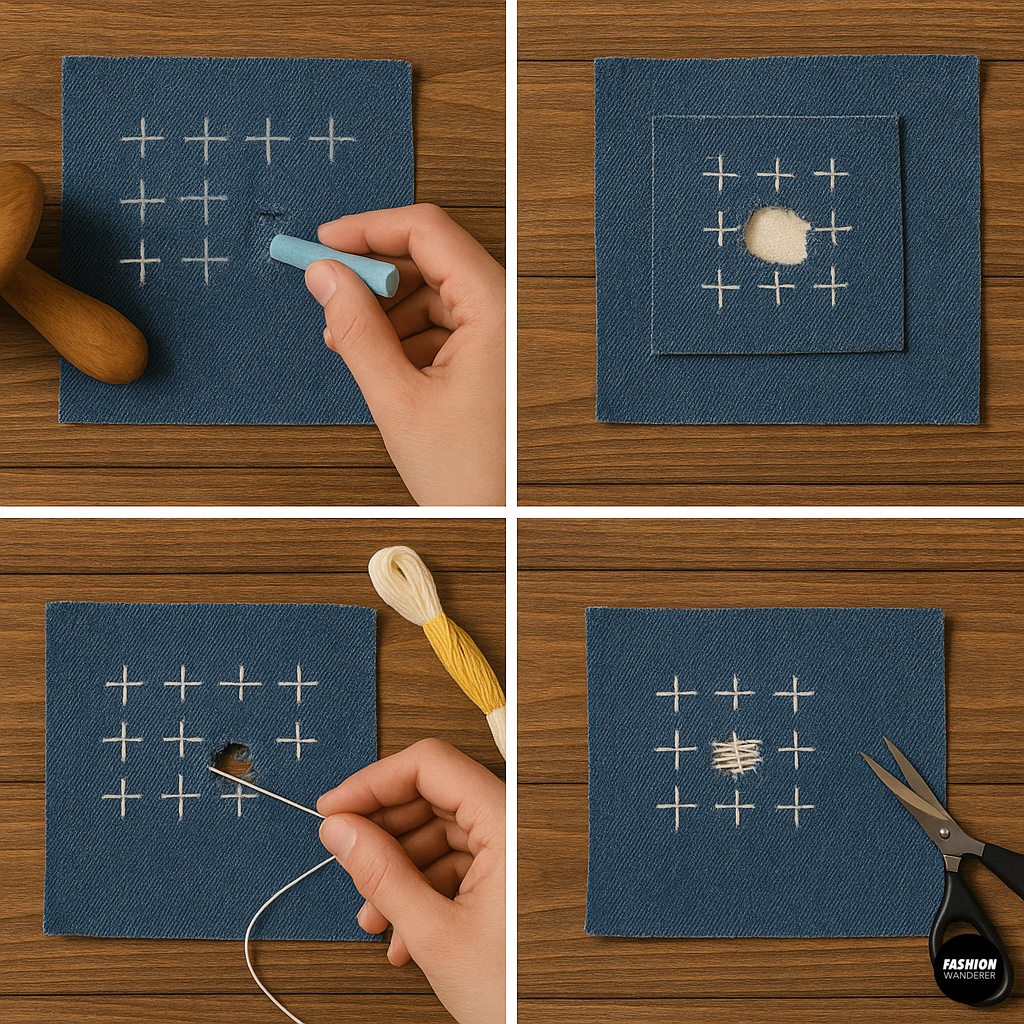
Sashiko is a traditional Japanese technique that uses geometric stitches to reinforce fabric.
Steps:
- Mark the Design: Use fabric chalk to draw a repeating pattern (like crosses, waves, or diamonds).
- Patch Placement: Place fabric behind the hole for stability.
- Begin Stitching: Work your sashiko needle across the pattern, keeping stitches even.
- Finish & Secure: Knot on the back side and trim thread.
Style Tip: White sashiko thread on indigo denim is a classic, minimalist look. Try mixing pastel threads for a modern twist.
3. Darning for Sweaters & Knits
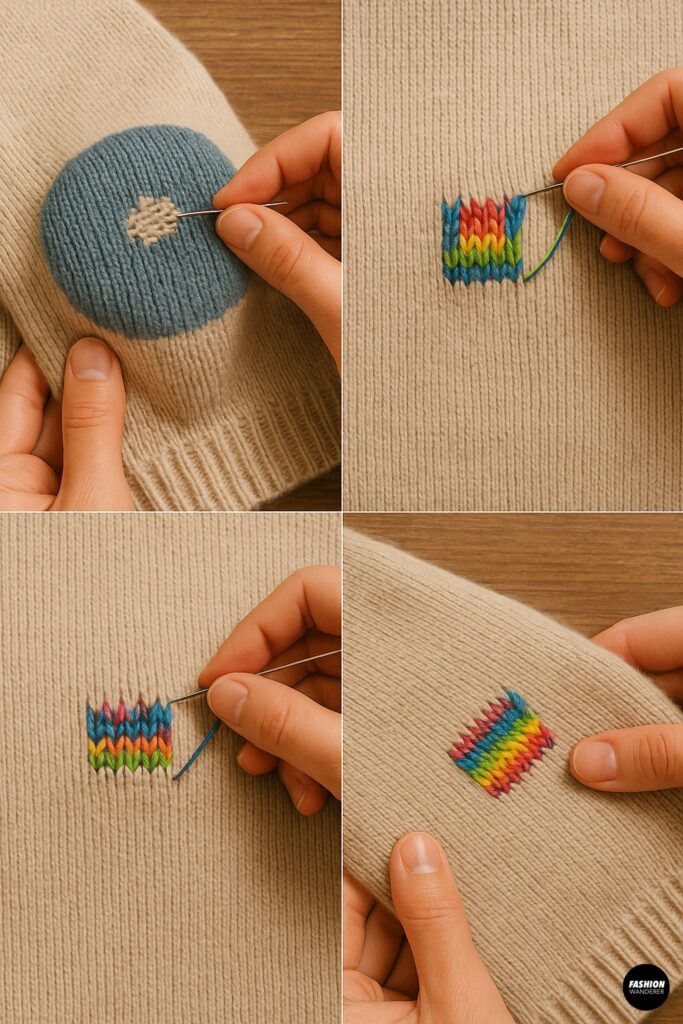
Darning is perfect for repairing holes in knitwear like sweaters, socks, or scarves.
Steps:
- Stretch Fabric Over Darning Tool: Place your darning mushroom or small bowl under the hole.
- Warp Threads: Thread yarn in a matching or contrasting color. Stitch vertical lines across the hole, slightly beyond the damaged area.
- Weave Weft: Weave horizontal stitches over and under the warp threads, creating a woven patch.
- Finish: Gently stretch the fabric to even out tension.
Style Tip: Use rainbow yarns for playful sweater repairs.
4. Appliqué Patch Mending
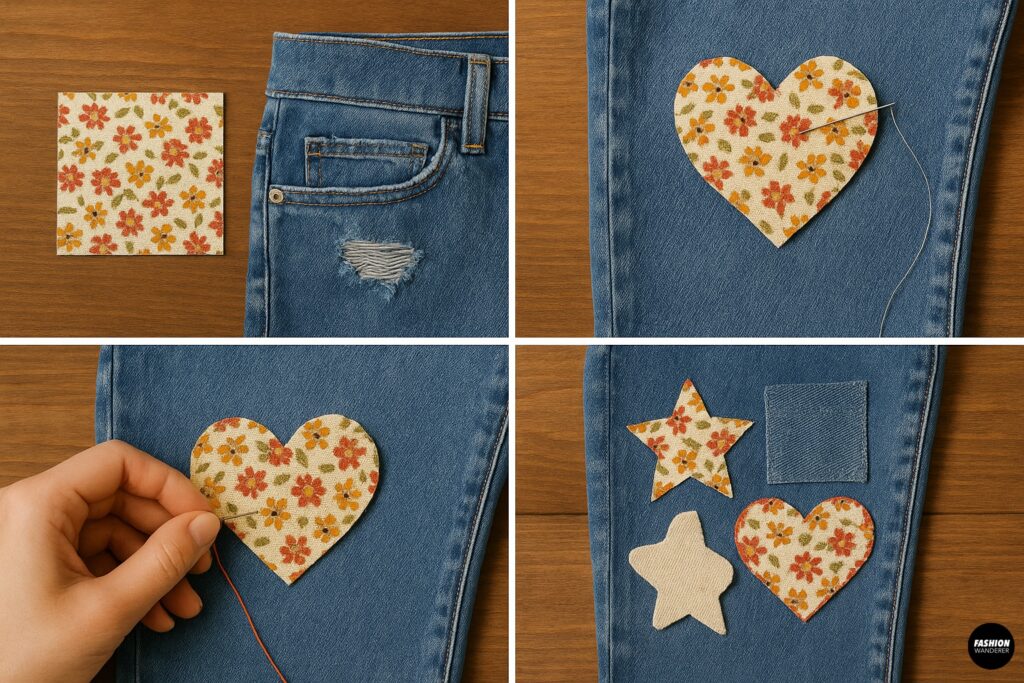
Appliqué patches are both functional and stylish, allowing you to cover large rips while adding unique flair.
Steps:
- Select Patch Fabric: Choose a bold print or textured fabric scrap.
- Cut Shape: Trim into a fun shape—hearts, stars, or geometric designs.
- Attach Patch: Place patch over the damaged area. Pin securely.
- Sew Around Edges: Use a whip stitch, blanket stitch, or zigzag stitch to attach.
Style Tip: Layer multiple patches for a collage effect on denim jackets or backpacks.
5. Embroidered Detail Repair
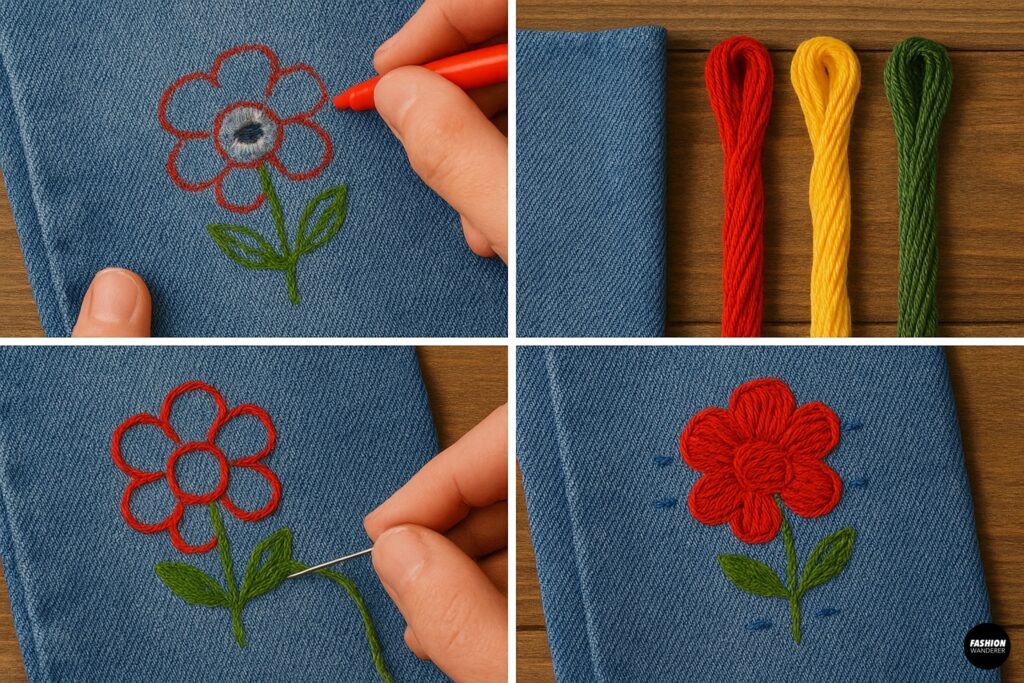
Why just cover a hole when you can embellish it? Hand embroidery stitches transform small tears into works of art.
Steps:
- Outline the Hole: Draw a simple shape around the rip, like a flower, leaf, or butterfly.
- Choose Thread Colors: Select embroidery floss that pops against your fabric.
- Fill Design: Use satin stitch, chain stitch, or French knots to embroider over and around the tear.
- Reinforce: Secure loose edges underneath with small stitches.
Style Tip: Embroider vines climbing up jeans seams for a botanical statement piece.
6. Reverse Patch Technique
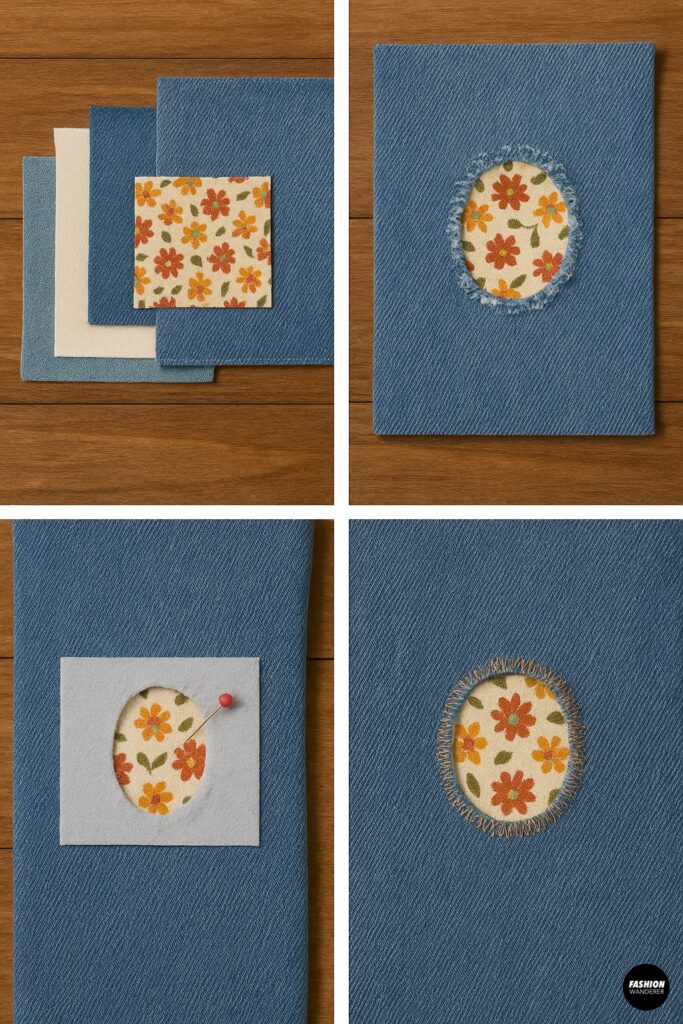
Instead of patching on top, reverse patching highlights the repair from underneath.
Steps:
- Cut Fabric Patch: Choose a colorful or patterned fabric slightly larger than the hole.
- Position Behind Hole: Place the patch underneath so the pattern shows through.
- Secure Patch: Pin or fuse with iron-on stabilizer.
- Topstitch Edges: Sew around the hole with decorative stitches, letting the patch peek through.
Style Tip: Try floral fabric peeking through ripped knees in jeans for a playful contrast.
Care Tips for Visible Mending
- Wash Gently: Hand wash or use a delicate cycle to protect embroidery and patches.
- Air Dry: Heat from dryers can weaken repairs.
- Add More Over Time: Layer new stitches or patches to evolve your garment into a long-term art piece.
Final Thoughts
Visible mending is more than just a sewing skill—it’s a philosophy that embraces imperfections and transforms them into style. Each stitch tells a story, celebrating the history of your clothes while keeping them functional and fashionable.
Whether you prefer bold embroidery, minimalist sashiko, or quirky appliqué patches, visible mending offers endless opportunities for creativity. So next time your jeans rip or your sweater frays, don’t toss it—turn it into your next DIY fashion statement.