
Looking for a thoughtful handmade baby gift that’s both practical and adorable? A reversible baby bib set is one of the easiest sewing projects for beginners and a must-have for every new parent. With two coordinating fabrics, you can create stylish bibs that can be worn on either side, doubling their use while helping keep little outfits clean during feeding, teething, and drooling.
In this beginner-friendly tutorial, you’ll learn how to sew a reversible baby bib set with easy step-by-step instructions. This quick project is perfect for using fabric scraps, making baby shower gifts, or creating beautiful handmade items to sell at craft fairs or online.
Few gifts feel as meaningful as something you’ve sewn especially for a new baby. From everyday essentials to adorable keepsakes, these beginner-friendly DIY baby gifts make it easy to create something parents will actually use.
Why You’ll Love This Project
- Beginner-friendly sewing project
- Great for baby showers and newborn gifts
- Fully reversible for two looks in one
- Quick one-hour project
- Uses fabric scraps
- Washable and durable
- Easy to personalize
Materials You’ll Need
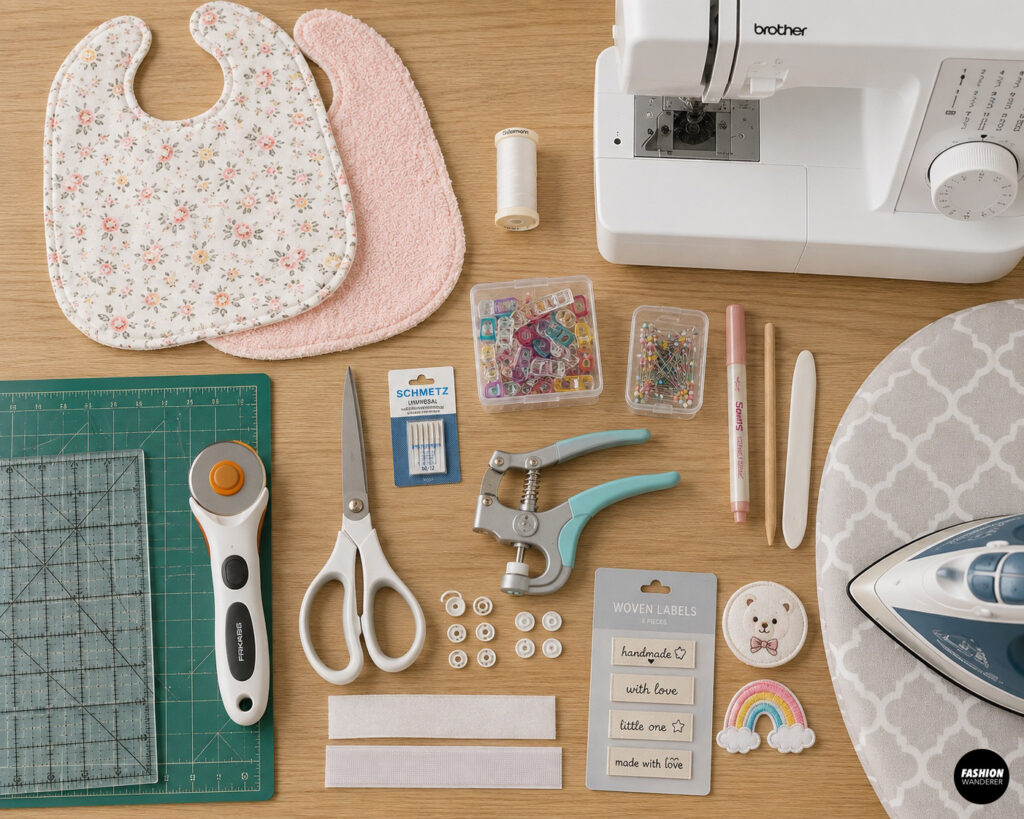
- Bib sewing pattern or existing baby bib
- Cotton quilting fabric (front)
- Terry cloth, bamboo terry, cotton flannel, or absorbent fleece (back)
- Fabric scissors or rotary cutter
- Cutting mat and acrylic ruler
- Sewing machine
- Universal needle (80/12)
- Polyester thread
- Sewing clips or pins
- Iron and ironing board
- Fabric marker or tailor’s chalk
- Point turner or chopstick
- Plastic snaps and snap setter
- Optional: Hook-and-loop tape instead of snaps
- Optional: Embroidery or iron-on labels
Finished Size
Typical baby bib measures approximately:
- Width: 8–9 inches
- Length: 11–13 inches
Suitable for babies from newborn through approximately 18 months.
DIY Reversible Baby Bib
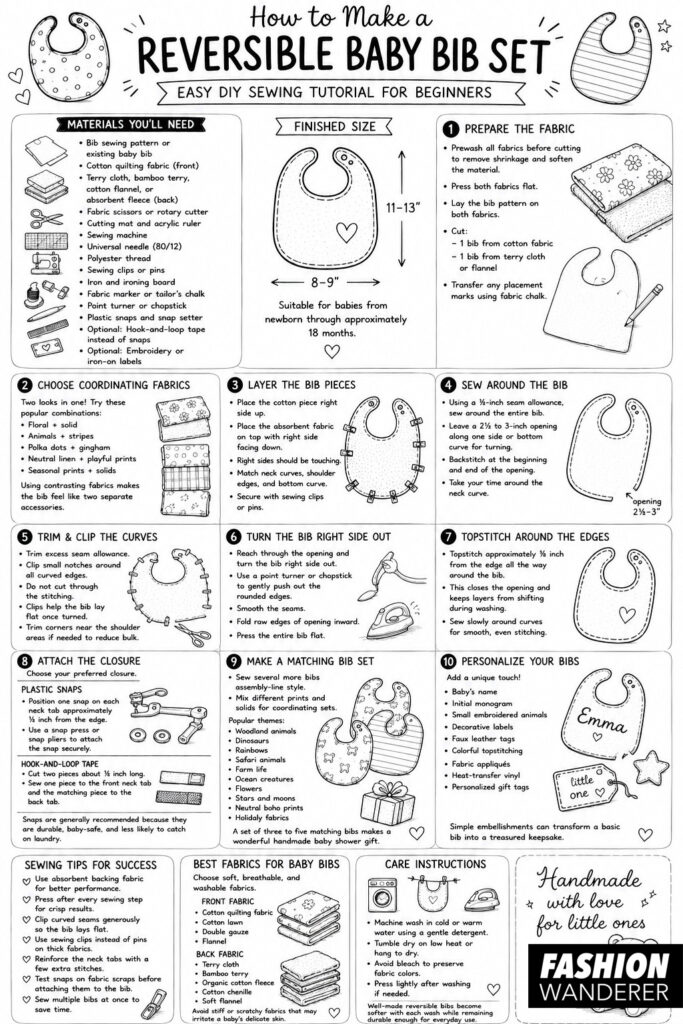
Step 1: Prepare the Fabric
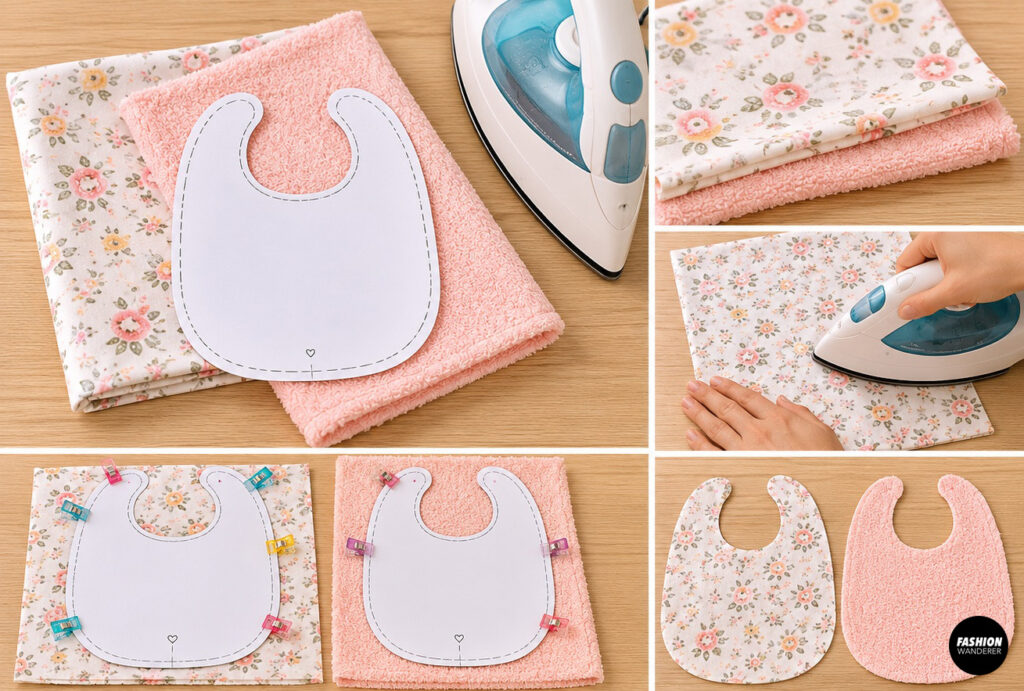
Prewash all fabrics before cutting to remove shrinkage and soften the material.
Press both fabrics flat using an iron.
Lay the bib pattern on both fabrics.
Cut:
- 1 bib from cotton fabric
- 1 bib from terry cloth or flannel
Transfer any placement marks using fabric chalk.
Step 2: Choose Coordinating Fabrics
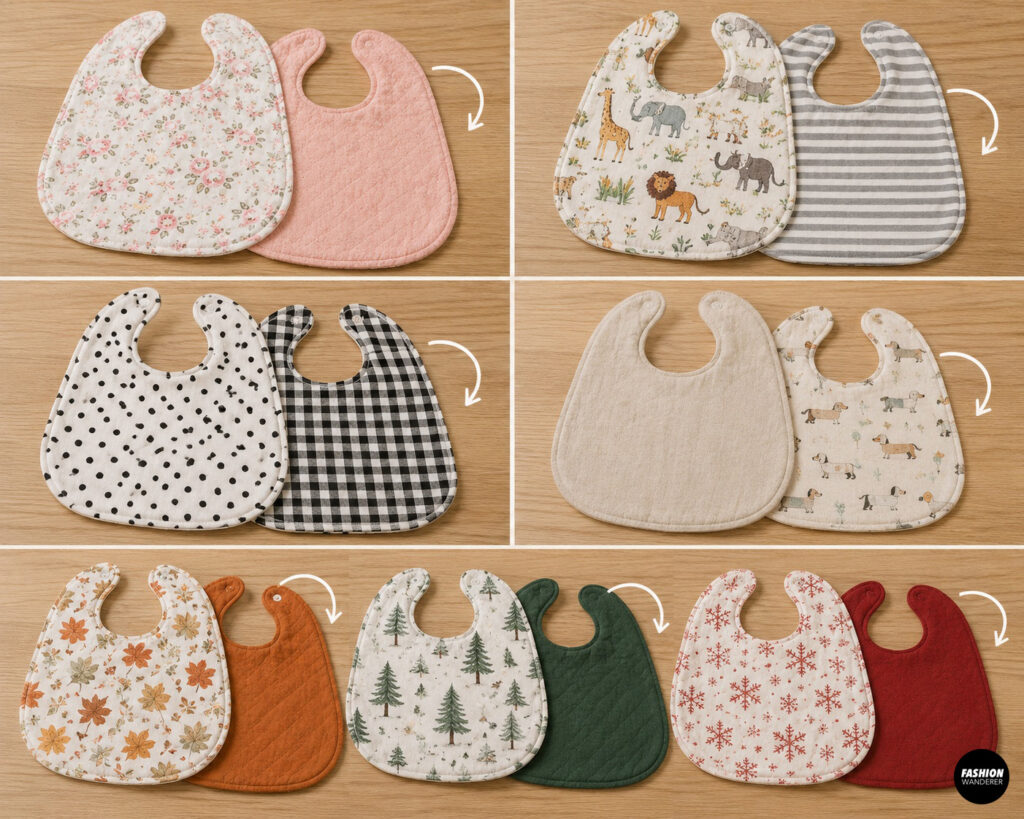
One of the best features of a reversible bib is having two completely different looks.
Some popular combinations include:
- Floral + solid
- Animals + stripes
- Polka dots + gingham
- Neutral linen + playful prints
- Seasonal prints + coordinating solids
Using contrasting fabrics makes the bib feel like two separate accessories.
Step 3: Layer the Bib Pieces
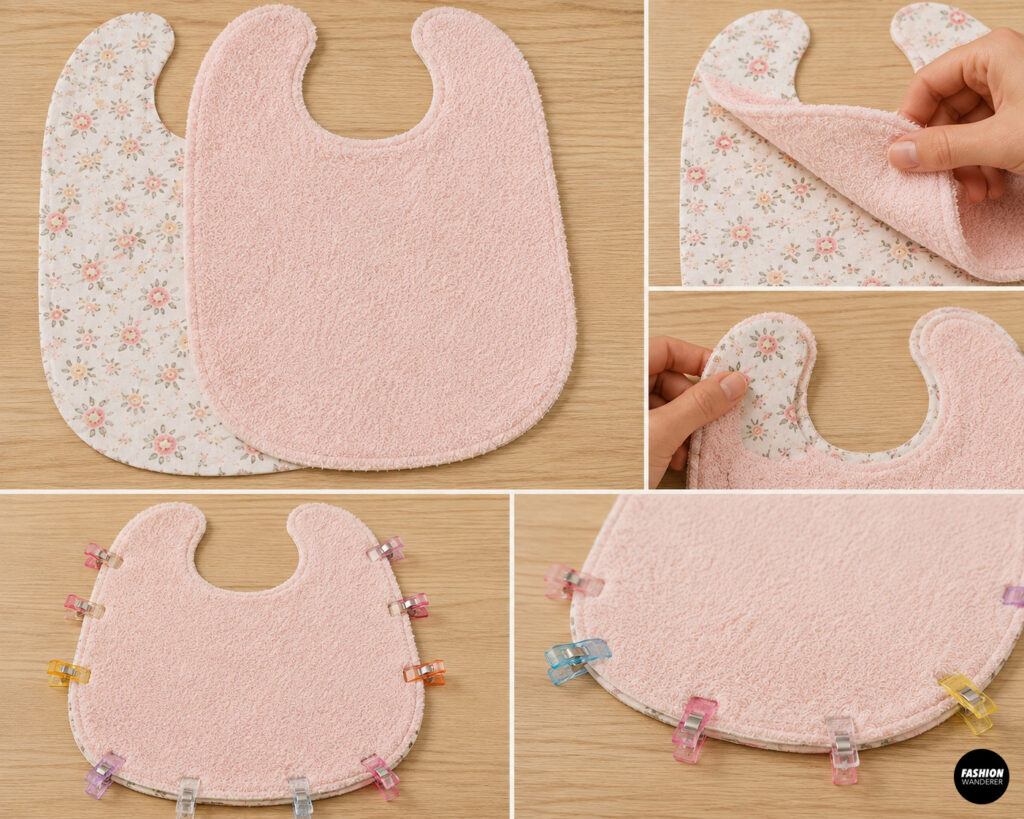
Place the cotton bib piece right side up.
Place the absorbent fabric on top with the right side facing down.
The right sides should be touching.
Match:
- Neck curves
- Shoulder edges
- Bottom curve
Secure with sewing clips or pins.
Step 4: Sew Around the Bib
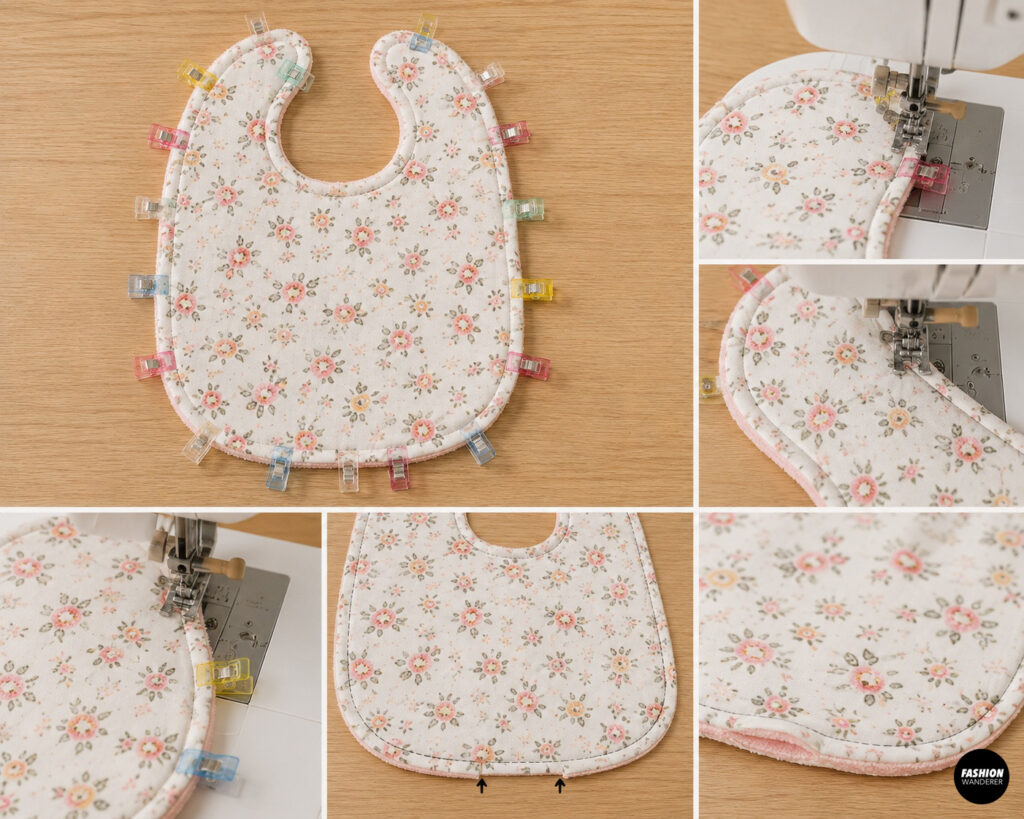
Using a ⅜-inch seam allowance, sew around the entire bib.
Leave a 2½ to 3-inch opening along one side or the bottom curve for turning.
Backstitch at the beginning and end of the opening.
Take your time around the neck curve to keep the stitching smooth.
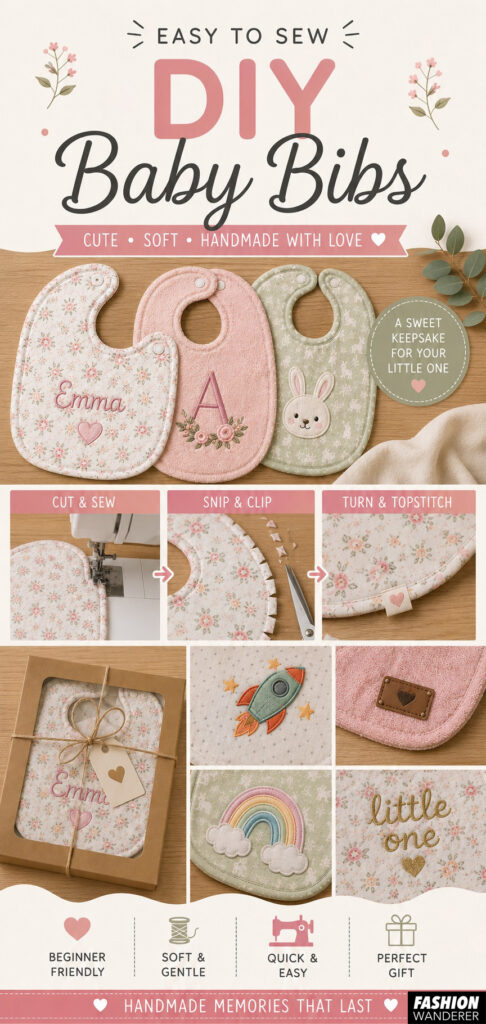
Step 5: Trim and Clip the Curves
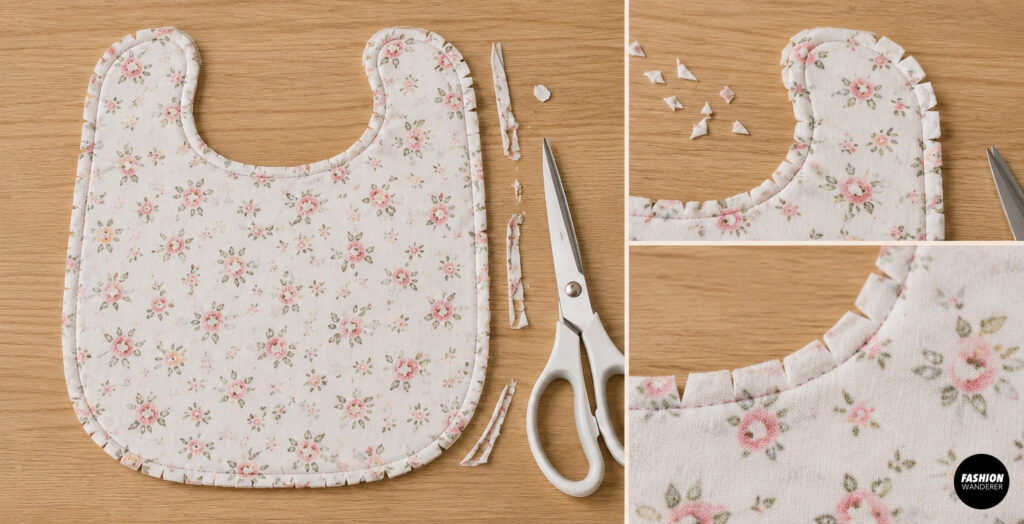
Before turning the bib right side out:
Trim excess seam allowance.
Clip small notches around all curved edges.
Be careful not to cut through the stitching.
These clips allow the bib to lay flat once turned.
Trim the corners near the shoulder areas if necessary to reduce bulk.
Step 6: Turn the Bib Right Side Out
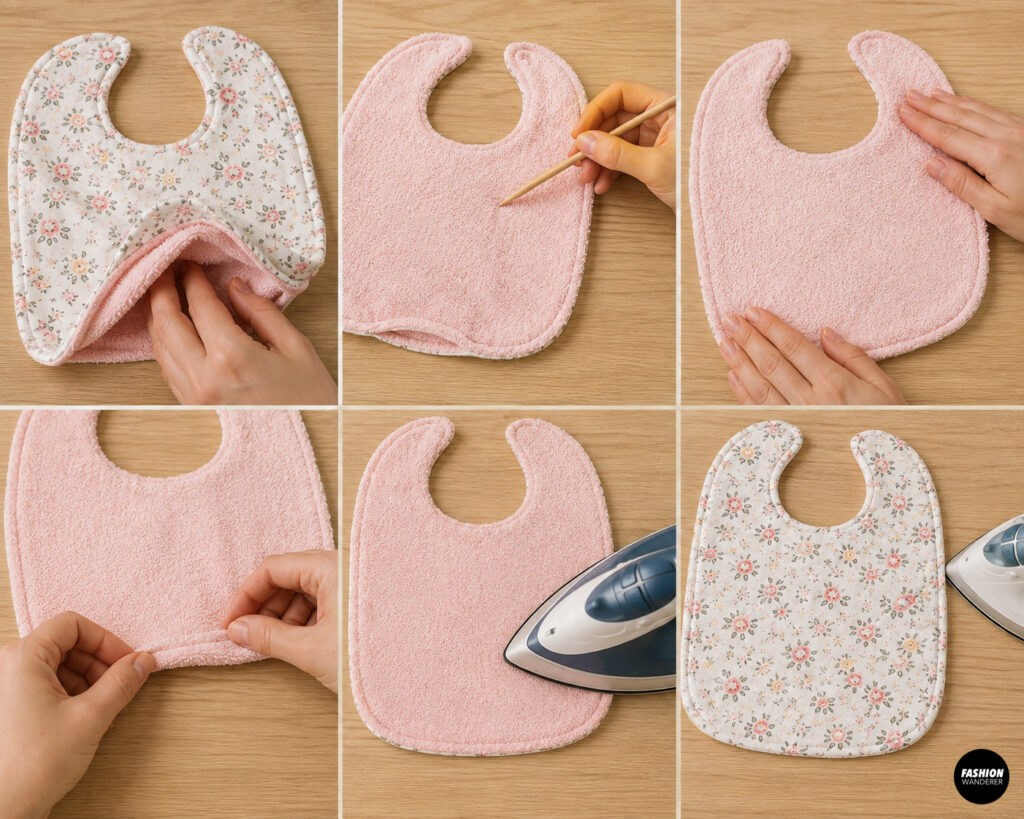
Reach through the opening and carefully turn the bib right side out.
Use a point turner or chopstick to gently push out the rounded edges.
Run your fingers around the seams to smooth them.
Fold the raw edges of the opening inward.
Press the entire bib flat with an iron.
A well-pressed bib will look much more professional and be easier to topstitch.
Step 7: Topstitch Around the Edges
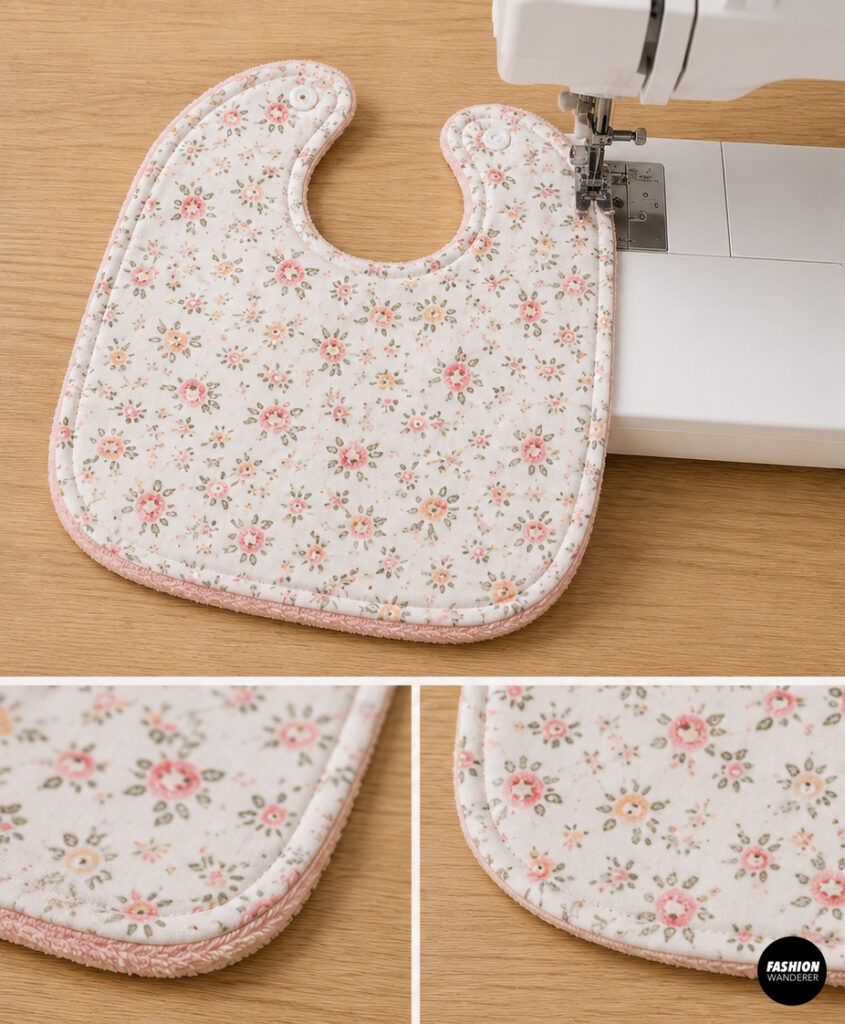
Topstitch approximately ⅛ inch from the edge all the way around the bib.
This step serves two purposes:
- Closes the turning opening
- Keeps both fabric layers from shifting during washing
Sew slowly around the neck curve and bottom edge for smooth, even stitching.
You can use matching thread or contrasting thread for a decorative finish.
Step 8: Attach the Closure
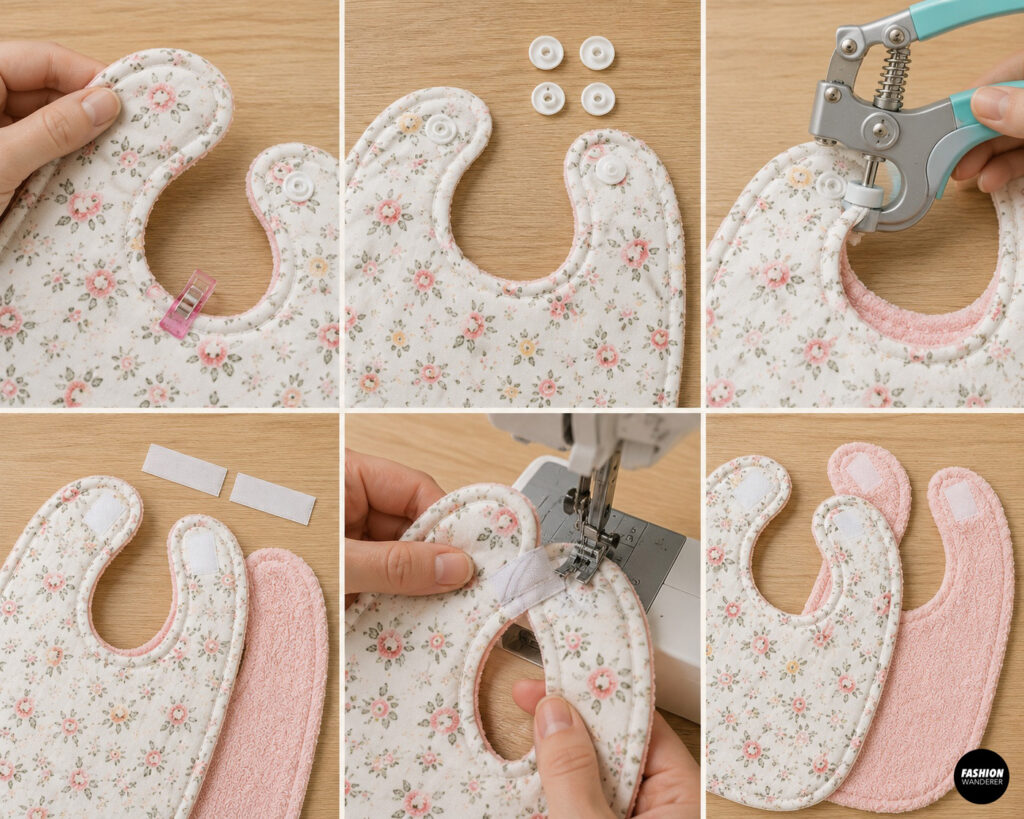
Choose your preferred closure.
Plastic Snaps
Position one snap on each neck tab approximately ½ inch from the edge.
Use a snap press or snap pliers to attach the snap securely.
Hook-and-Loop Tape
Cut two small pieces about ¾ inch long.
Sew one piece to the front neck tab and the matching piece to the back tab.
Snaps are generally recommended because they are durable, baby-safe, and less likely to catch on laundry.
Step 9: Make a Matching Bib Set
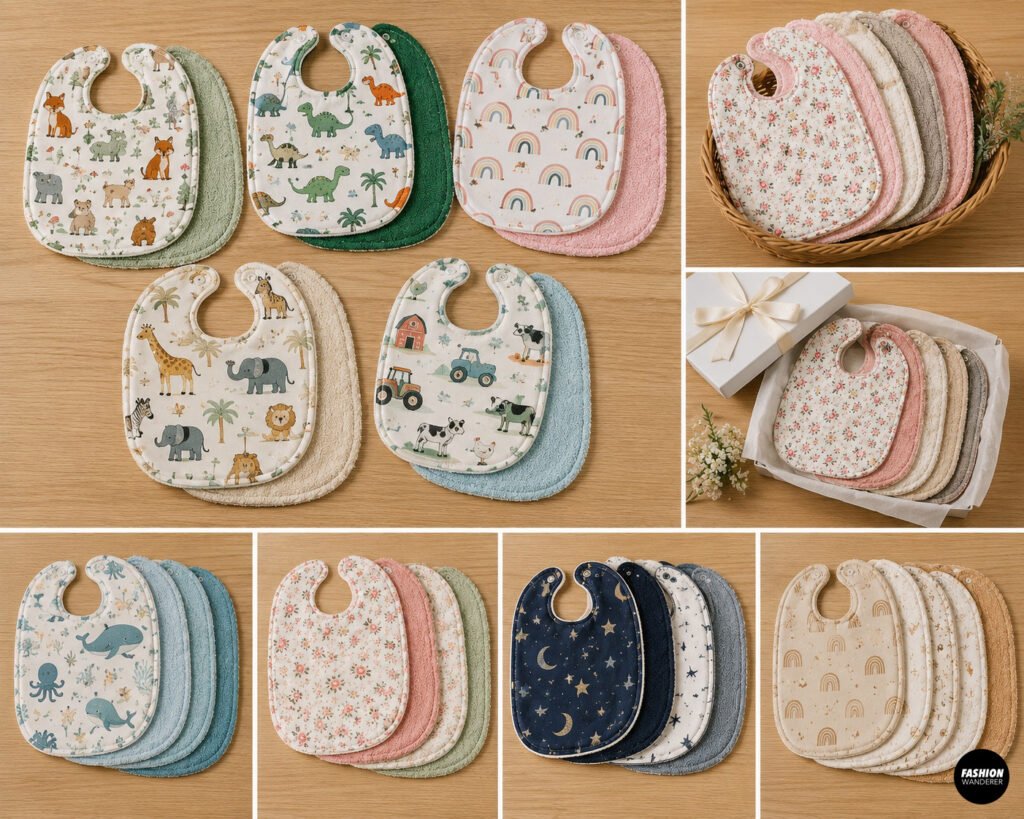
Once you’ve sewn one bib, it’s easy to make several more assembly-line style.
Mix different prints and solids to create coordinating sets.
Popular themes include:
- Woodland animals
- Dinosaurs
- Rainbows
- Safari animals
- Farm life
- Ocean creatures
- Flowers
- Stars and moons
- Neutral boho prints
- Holiday fabrics
A set of three to five matching bibs makes a wonderful handmade baby shower gift.
Step 10: Personalize Your Bibs
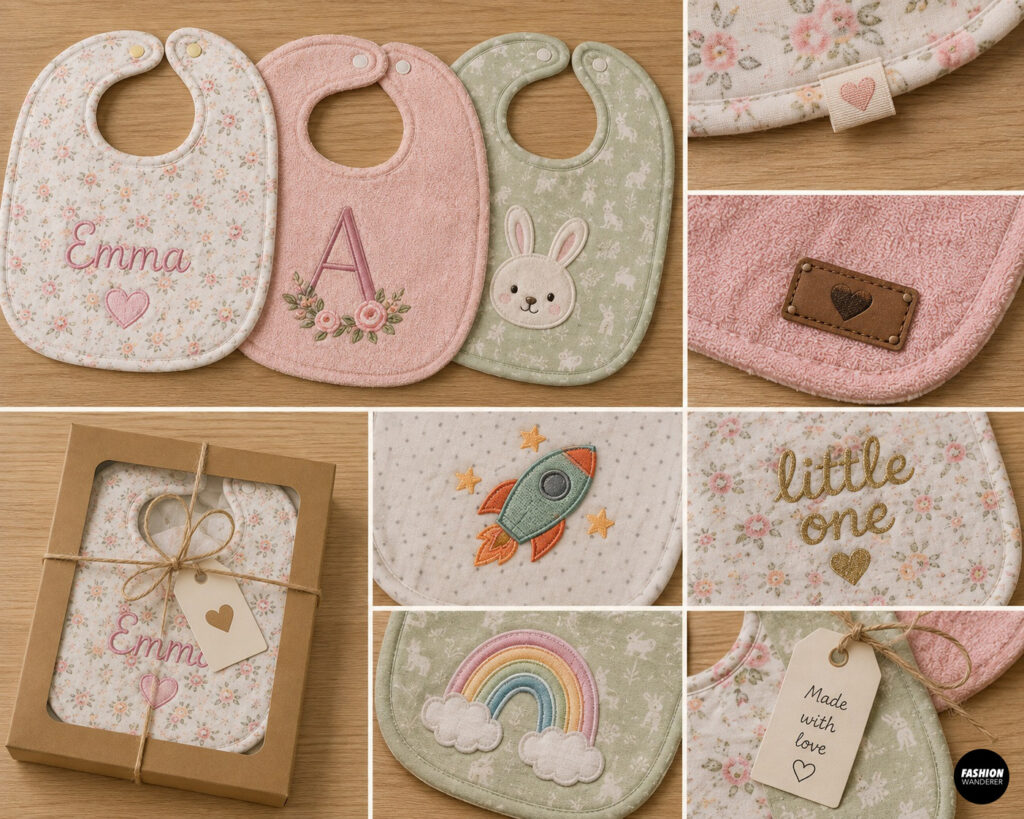
Add a unique touch by decorating your finished bibs.
Ideas include:
- Baby’s name
- Initial monogram
- Small embroidered animals
- Decorative labels
- Faux leather tags
- Colorful topstitching
- Fabric appliqués
- Heat-transfer vinyl
- Personalized gift tags
Simple embellishments can transform a basic bib into a treasured keepsake.
Sewing Tips for Success
- Use absorbent backing fabric for better performance.
- Press after every sewing step for crisp results.
- Clip curved seams generously so the bib lays flat.
- Use sewing clips instead of pins on thick fabrics.
- Reinforce the neck tabs with a few extra stitches.
- Test snaps on fabric scraps before attaching them to the bib.
- Sew multiple bibs at once to save time.
Best Fabrics for Baby Bibs
Choose soft, breathable, and washable fabrics.
Great options include:
Front Fabric
- Cotton quilting fabric
- Cotton lawn
- Double gauze
- Flannel
Back Fabric
- Terry cloth
- Bamboo terry
- Organic cotton fleece
- Cotton chenille
- Soft flannel
Avoid stiff or scratchy fabrics that may irritate a baby’s delicate skin.
Care Instructions
Machine wash in cold or warm water using a gentle detergent.
Tumble dry on low heat or hang to dry.
Avoid bleach to preserve fabric colors.
Press lightly after washing if needed.
Well-made reversible bibs become softer with each wash while remaining durable enough for everyday use.
Frequently Asked Questions
How many bibs should I make?
A set of 3 to 5 bibs is ideal for everyday use, while 6 to 8 bibs make an excellent baby shower gift.
Can beginners sew this project?
Yes! This is one of the best sewing projects for beginners because it uses basic cutting, straight stitching, clipping curves, turning, and topstitching.
Can I sell handmade reversible baby bibs?
Absolutely. Reversible baby bibs are popular at craft fairs, Etsy shops, and handmade markets. Offering coordinating fabric collections or personalized embroidery can make your bib sets even more appealing.
Final Thoughts
Learning how to make a reversible baby bib set is a fun, rewarding project that combines style with everyday practicality. With just a few basic sewing supplies and your favorite fabrics, you can create soft, absorbent bibs that are comfortable for babies and convenient for parents.
Whether you’re sewing a thoughtful baby shower gift, building your handmade inventory, or creating something special for your own little one, these reversible bibs are quick to make, easy to customize, and sure to become a daily favorite.