
Want to make something cute and practical for your dog’s daily adventures? This DIY quilted dog backpack harness combines a comfortable padded harness with two small fabric pockets for carrying lightweight essentials during walks.
The quilted design gives the harness a cozy handmade look while adding a little structure. Even better, you can customize the fabric to match your dog’s personality. Try gingham, florals, colorful cotton, denim, or a fun dog-themed print.
This sewing tutorial is designed to be approachable for beginners to make their own DIY dog backpack. We’ll make a simple quilted harness body, add adjustable straps, and finish it with two small side pockets.
Materials You’ll Need
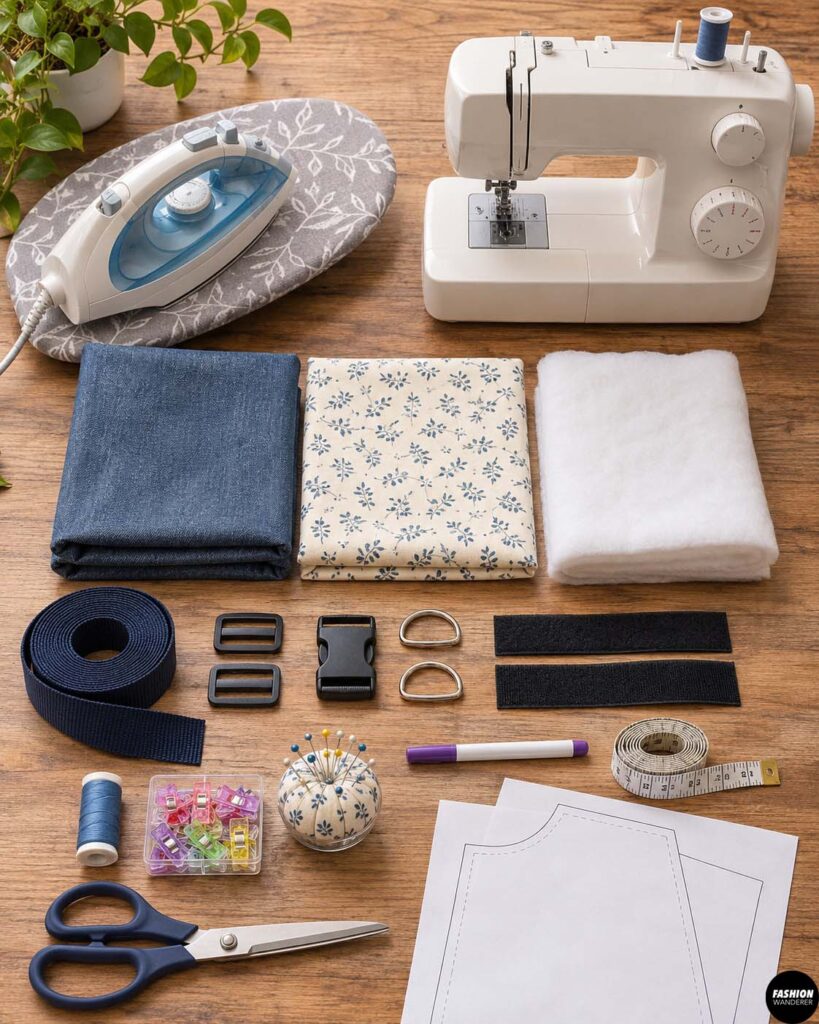
Gather these supplies before you begin:
- 1/2 yard cotton canvas, quilting cotton, or lightweight denim
- 1/2 yard cotton or breathable lining fabric
- 1/2 yard lightweight batting
- 1-inch nylon or polypropylene webbing
- Adjustable strap sliders
- Side-release buckle
- Two D-rings
- Hook-and-loop tape for removable pockets
- Coordinating polyester thread
- Sewing machine
- Fabric scissors or rotary cutter
- Pins or sewing clips
- Fabric marker
- Measuring tape
- Iron and ironing board
- Paper for making your pattern
Choose durable but lightweight materials. Your dog should be able to move comfortably without the backpack feeling stiff or bulky.
DIY Quilted Dog Backpack Harness
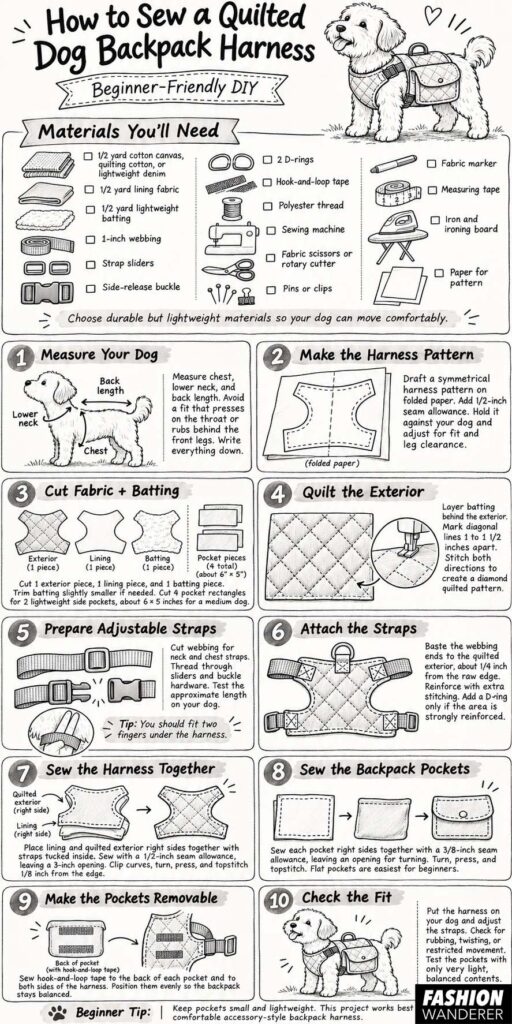
Step 1: Measure Your Dog
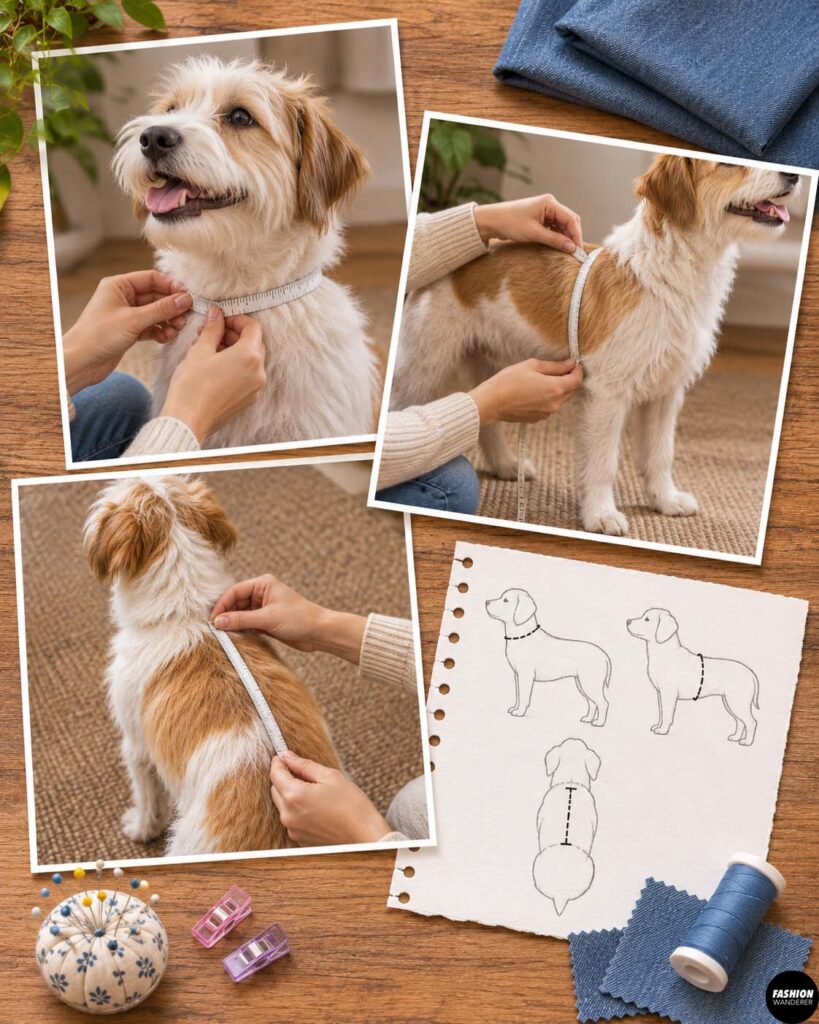
Before making your pattern, take three basic measurements.
Measure around the widest part of the chest, just behind the front legs. Next, measure around the lower neck where a harness would naturally sit. Finally, measure along the back from approximately the shoulder-blade area toward the middle of the back.
You don’t want the finished harness pressing against your dog’s throat or rubbing directly behind the front legs.
Write down all the measurements before drafting your pattern.
Step 2: Make the Harness Pattern
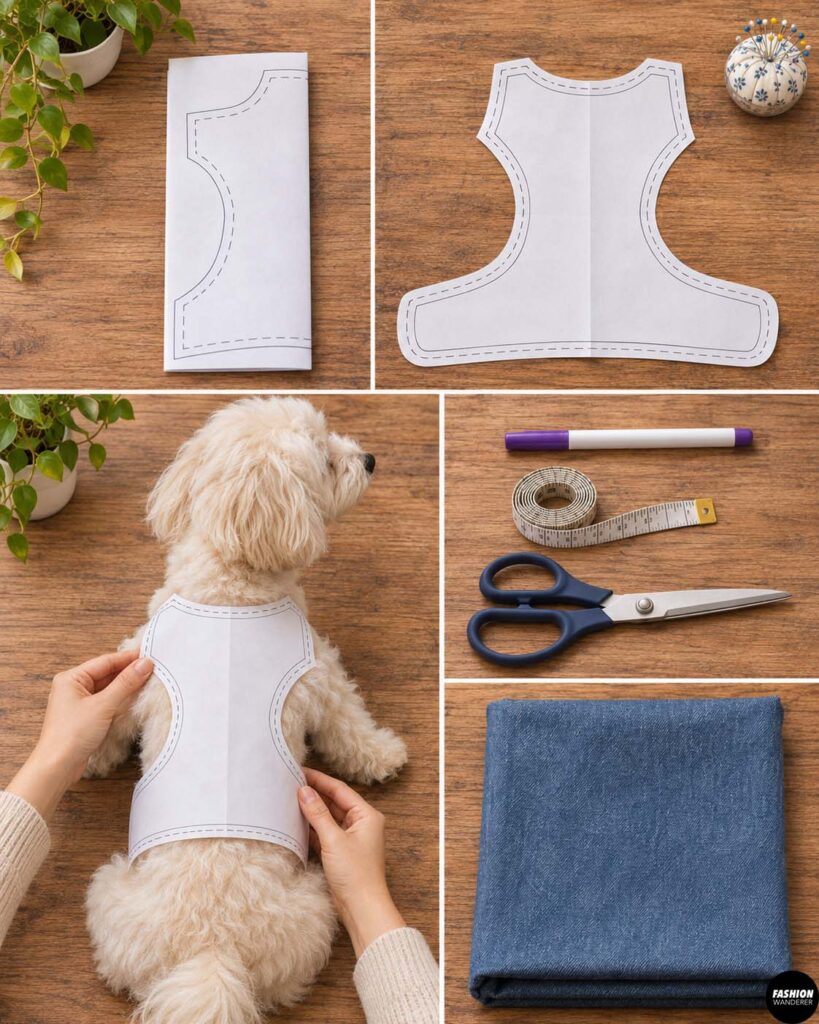
Create a simple harness body shaped somewhat like a wide hourglass or elongated vest.
The narrower center section sits across your dog’s back while the wider portions help distribute pressure around the chest.
Draft half of the pattern on folded paper so both sides remain symmetrical.
Add approximately 1/2-inch seam allowance around the pattern.
Hold the paper pattern gently against your dog before cutting your fabric. Check the length and make sure the harness won’t interfere with the front legs.
Adjust the paper pattern until you’re satisfied with the fit.
Step 3: Cut the Fabric and Batting
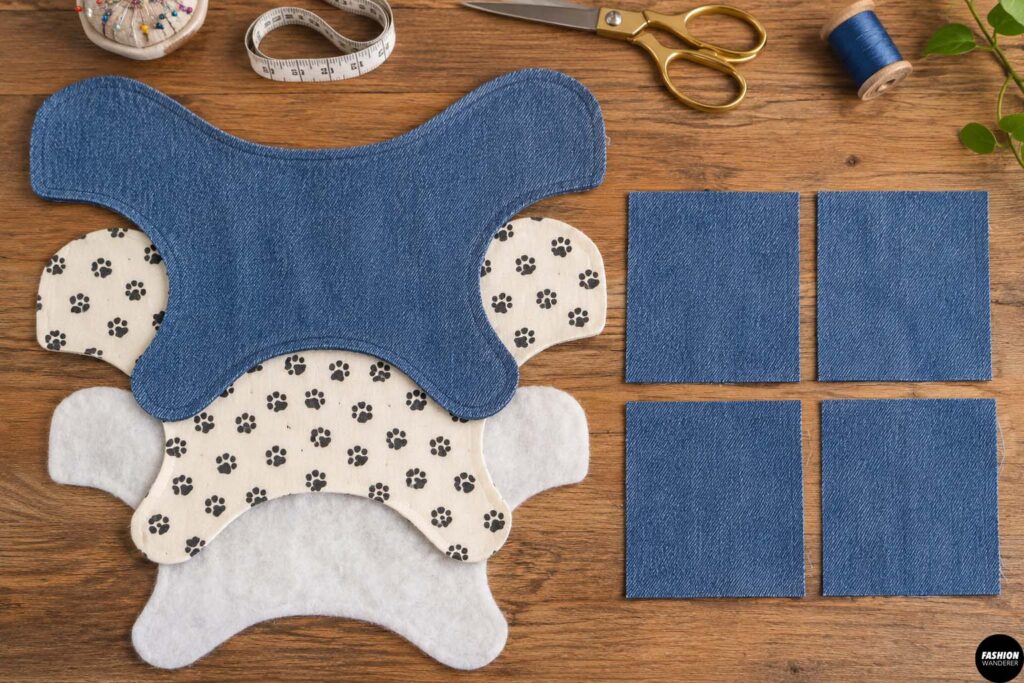
Using your finished pattern, cut:
- 1 exterior harness piece
- 1 lining harness piece
- 1 batting piece
Trim the batting slightly smaller around the outer edges if you want to reduce bulk in the seams.
For the backpack, cut four rectangles from your exterior fabric for two small pockets. A good starting size for a medium dog is approximately 6 x 5 inches, although you should scale the pockets according to your dog’s size.
Keep the pockets small and lightweight.
Step 4: Quilt the Harness Exterior
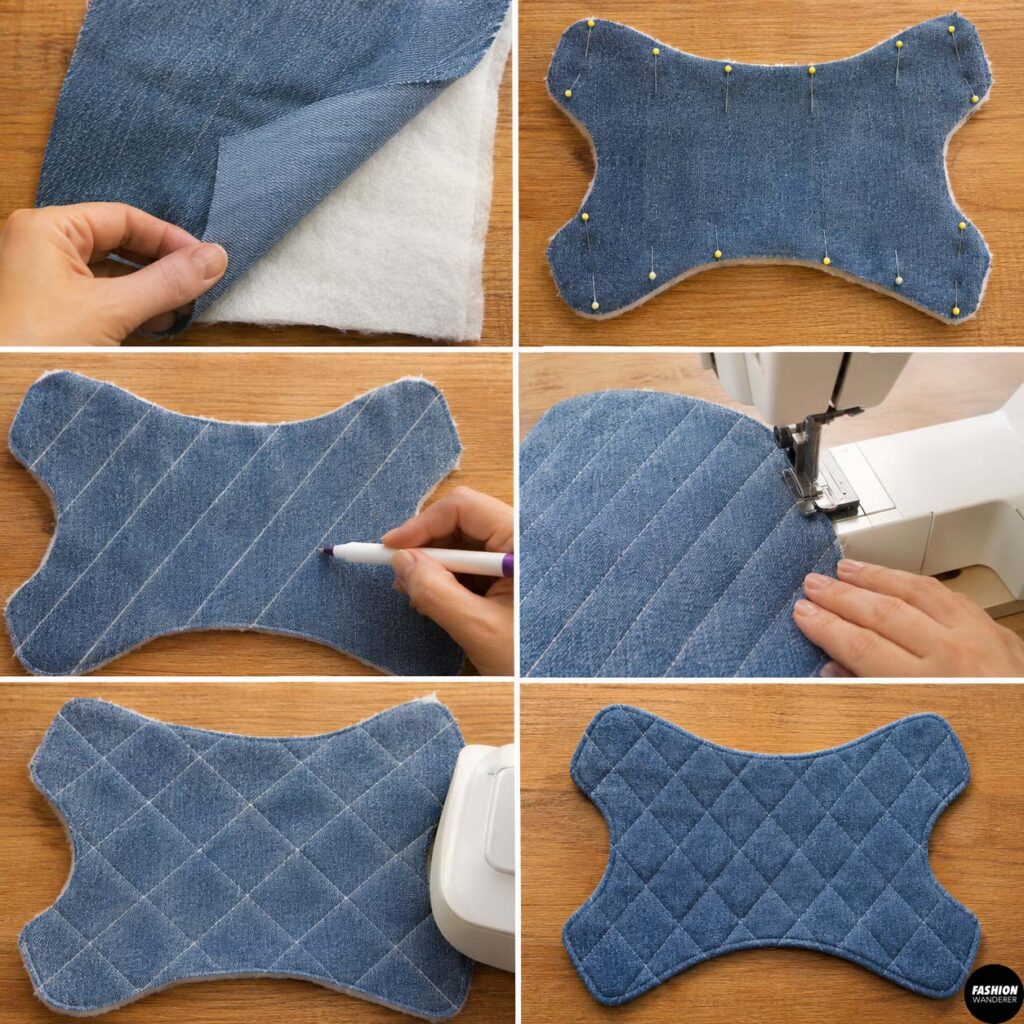
Place the batting against the wrong side of your exterior fabric.
Pin or baste the layers together.
Using a removable fabric marker, draw diagonal quilting lines approximately 1 to 1 1/2 inches apart.
Straight stitch along each marked line.
Turn the piece and sew another set of diagonal lines in the opposite direction to create a classic diamond quilting pattern.
The quilting prevents the batting from shifting and gives your DIY dog harness a polished handmade appearance.
Step 5: Prepare the Adjustable Straps
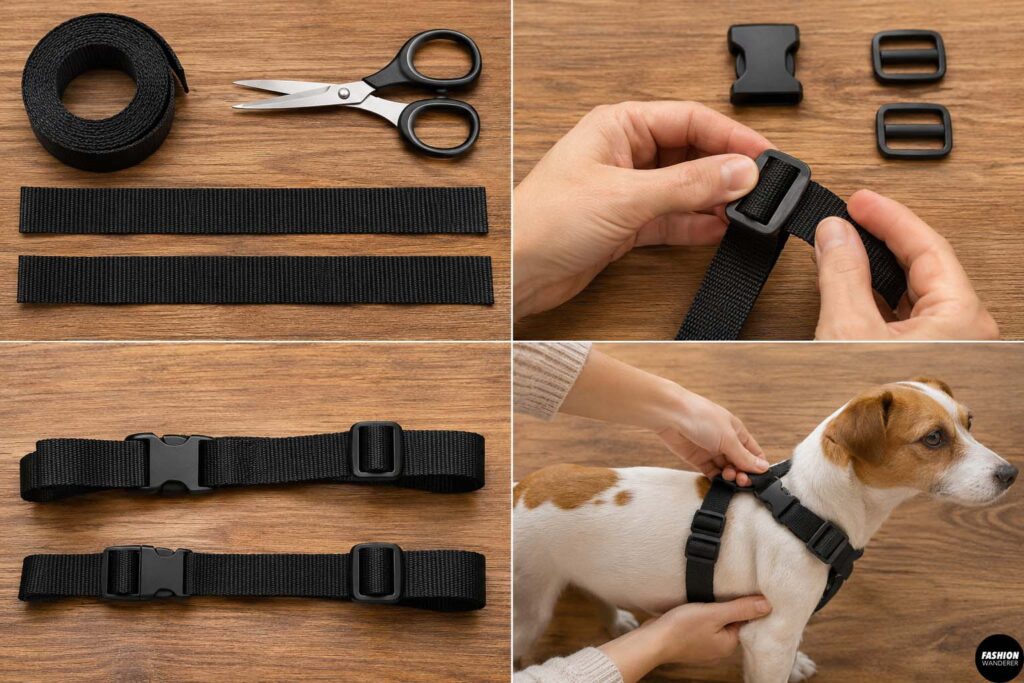
Cut your webbing for the neck and chest straps. Leave extra length so the harness can be adjusted later.
Thread the webbing through your strap sliders and buckle components according to the manufacturer’s directions.
Before permanently attaching anything, position the straps around your dog and check the approximate length.
You should generally be able to slide about two fingers comfortably underneath the harness when it is secured.
Step 6: Attach the Straps
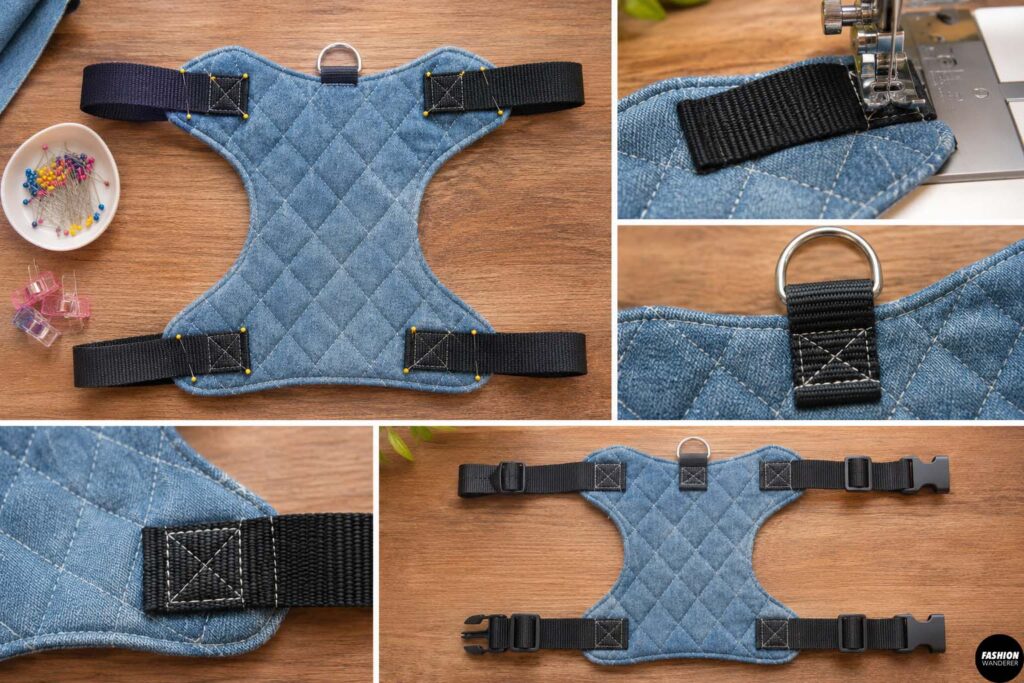
Place the webbing ends along the appropriate edges of your quilted exterior piece.
The straps should extend inward across the fabric while you sew the harness together.
Baste each strap approximately 1/4 inch from the raw edge.
For additional strength, reinforce the webbing attachment points with several rows of stitching.
You can also add a D-ring at the upper back for attaching a leash, but this area needs substantial reinforcement. If you aren’t confident that your materials and construction can safely handle leash forces, use your dog’s regular walking harness underneath and treat the quilted backpack as an accessory.
Step 7: Sew the Harness Together
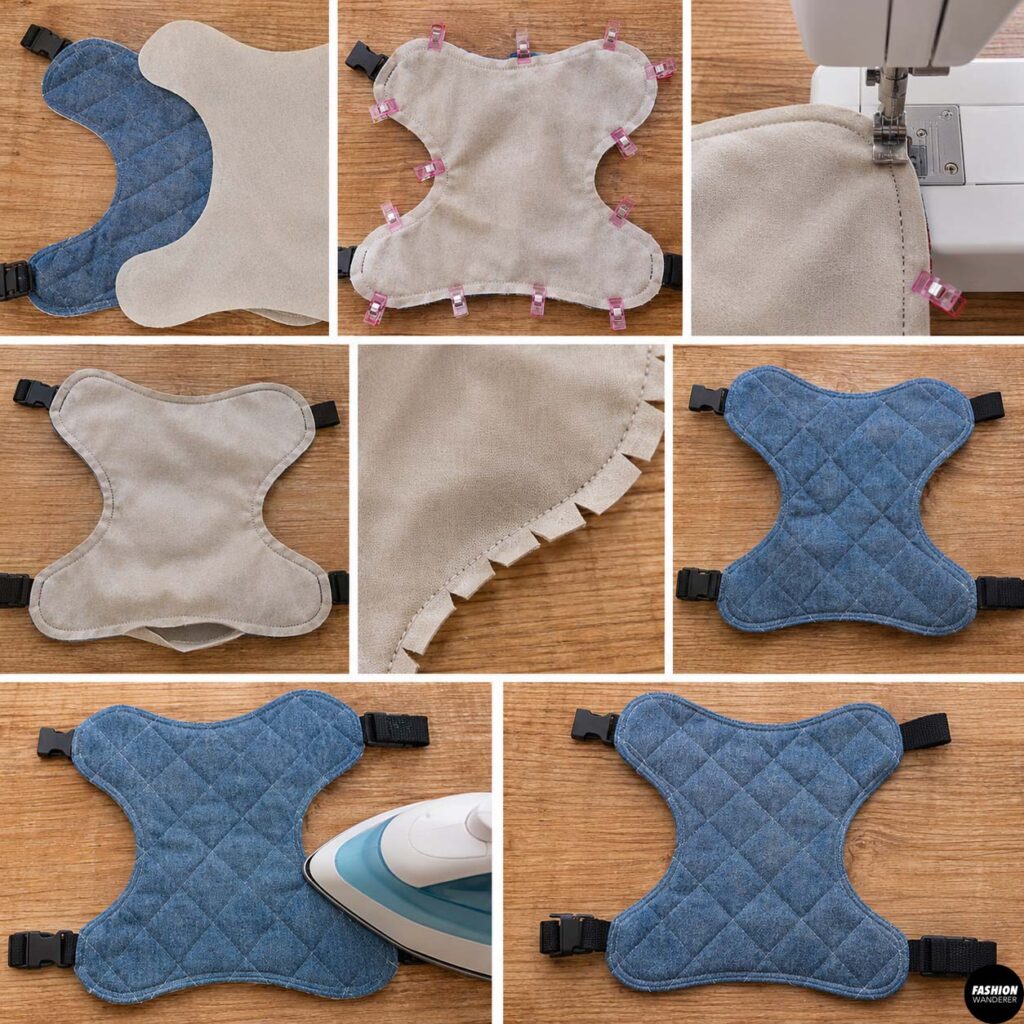
Place the lining over the quilted exterior with right sides together.
Make sure the straps are tucked safely inside and away from your stitching line.
Pin or clip around the entire edge.
Sew around the harness using a 1/2-inch seam allowance, leaving approximately a 3-inch opening for turning.
Clip the curved seam allowances without cutting through your stitching.
Turn the harness right side out through the opening.
Gently push out the edges and press carefully.
Fold the opening inward and topstitch approximately 1/8 inch from the edge around the entire harness. This closes the opening while giving your project a neat finish.
Step 8: Sew the Backpack Pockets
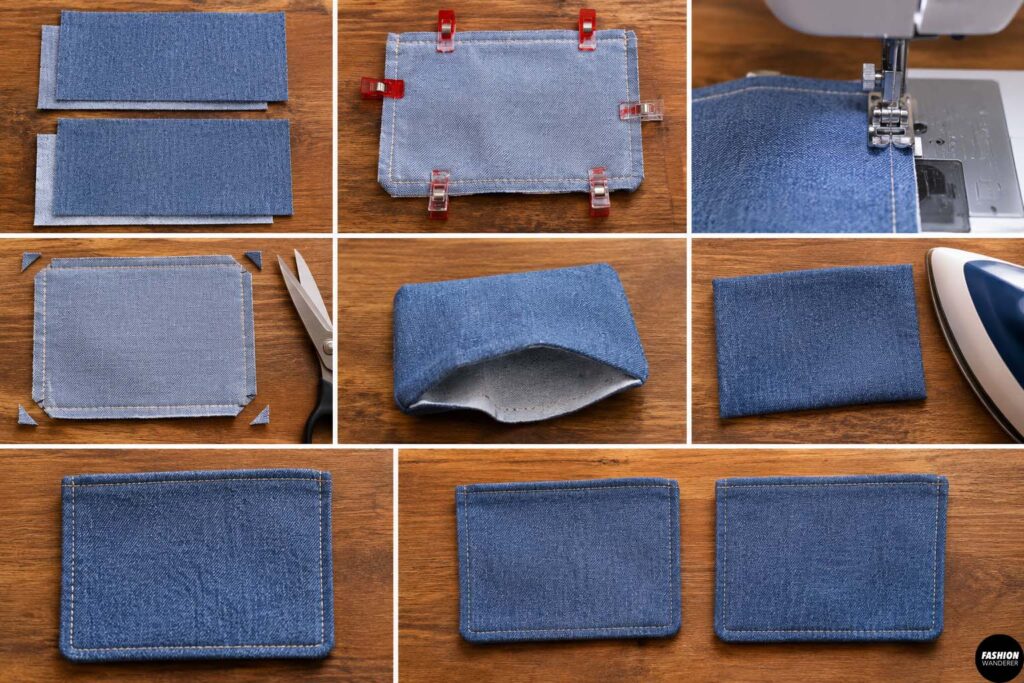
Place two pocket rectangles right sides together.
Sew around the edges using a 3/8-inch seam allowance, leaving approximately 2 inches open for turning.
Clip the corners and turn right side out.
Press flat and topstitch around the edges.
Repeat for the second pocket.
For more storage, you can make each pocket slightly dimensional by adding a narrow gusset, but simple flat pockets are much easier for a first project.
Step 9: Make the Pockets Removable
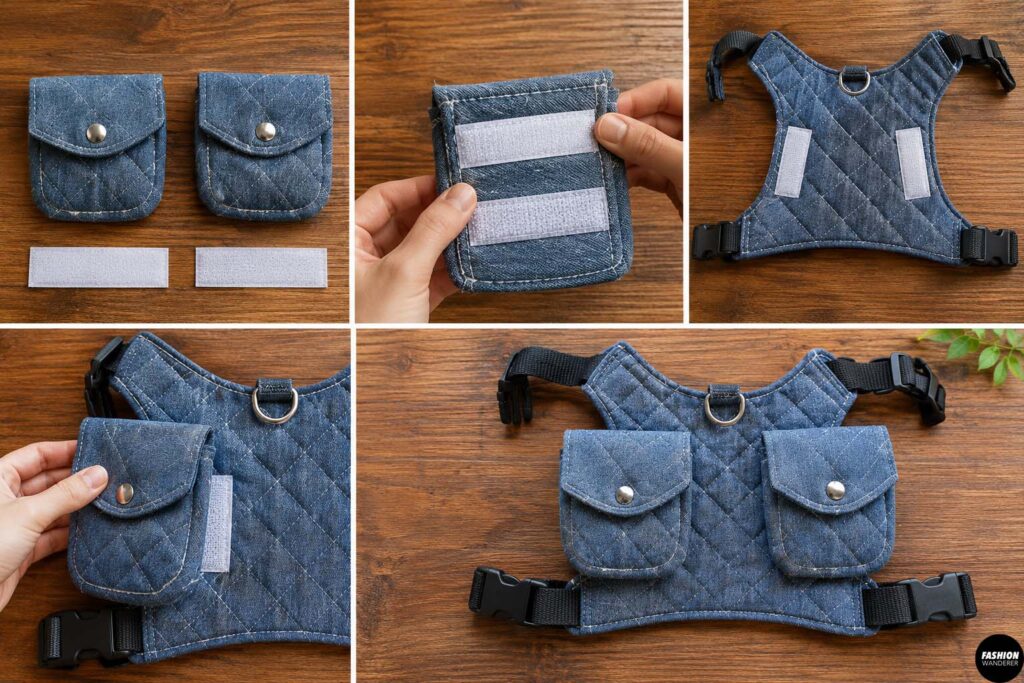
Instead of permanently sewing the backpack pockets onto the harness, make them removable.
Sew strips of strong hook-and-loop tape to the back of each pocket.
Attach the matching pieces securely to each side of the quilted harness.
Position both pockets at approximately the same height so the backpack remains visually and physically balanced.
Removable pockets also make washing your quilted dog backpack harness much easier.
Step 10: Check the Fit
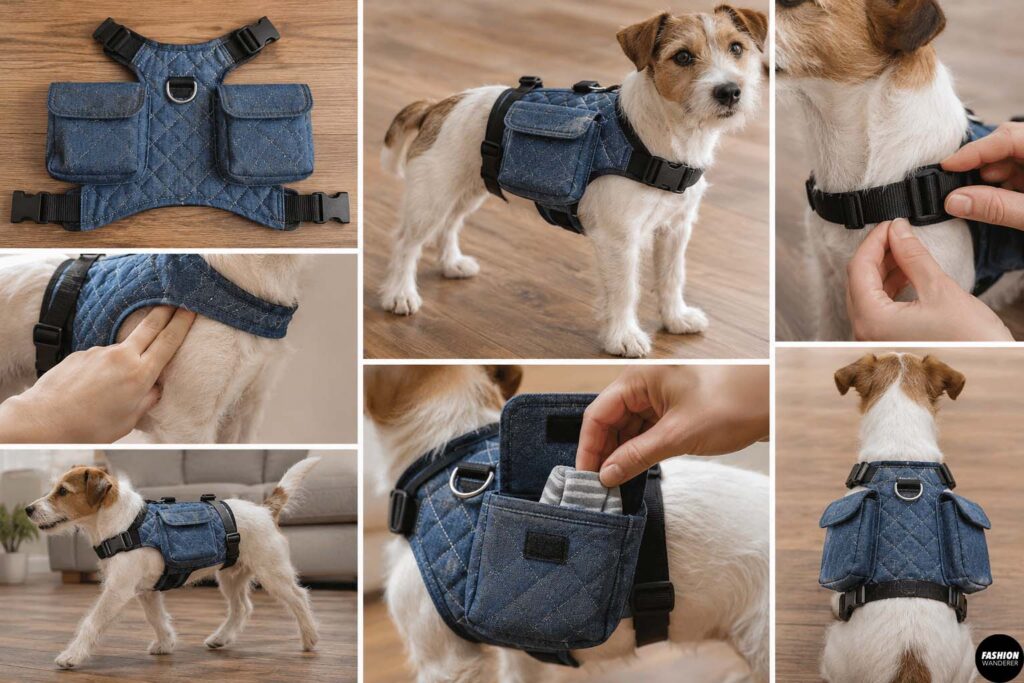
Put the completed harness on your dog without putting anything inside the pockets.
Adjust the straps until the harness sits securely without squeezing.
Watch your dog walk around the house. Check underneath the front legs, around the neck, and along the sides for rubbing, pulling, twisting, or restricted movement.
Then test the pockets with something extremely light.
The left and right pockets should be balanced rather than having noticeably more weight on one side.
Safety Tips for a DIY Dog Backpack
A handmade backpack should be treated primarily as a convenient way to carry very lightweight items, not as a way to make your dog carry a heavy load.
Never guess how much weight is appropriate for an individual dog. Age, size, conditioning, body structure, health and activity all matter.
Keep the pockets compact, balance their contents evenly, and regularly check for chafing.
For puppies, senior dogs, dogs with mobility problems, or dogs with health concerns, ask your veterinarian before introducing wearable packs or added weight.
Customize Your Quilted Dog Backpack
Once you’ve mastered the basic design, the fun really starts.
Try a floral quilted harness for a cottage-inspired look, gingham for something classic, or contrasting binding for a more professional finish.
You could also add reflective trim for visibility, embroider your dog’s name onto the pockets, or make several interchangeable pocket sets.
You can even sew a matching dog bandana or treat pouch from the leftover fabric.
Final Thoughts
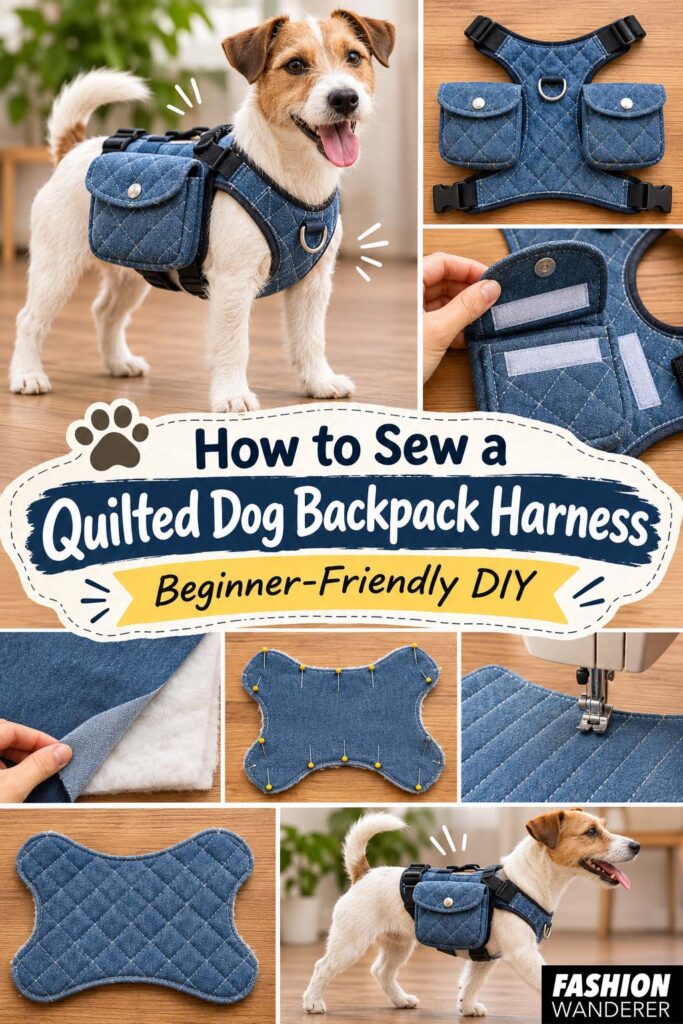
Learning how to sew a quilted dog backpack harness is a fun way to combine practical sewing with personalized pet fashion.
Start with accurate measurements, quilt the padded body, add adjustable webbing, sew two lightweight pockets, and finish everything with removable attachments. The result is a completely customized accessory that’s especially cute for neighborhood walks, outdoor photos and light adventures.
And because you’re making it yourself, those fabric scraps sitting in your sewing room might just become your dog’s newest favorite outfit.