
If you love hiking, camping, or taking long walks with your dog, a DIY dog hiking backpack is a fun and practical sewing project to try. Instead of buying an expensive dog pack, you can sew lightweight removable pockets that attach to your dog’s existing well-fitting harness.
This easy waterproof dog backpack sewing tutorial uses two small zippered saddlebags—one on each side of the dog—to create balanced storage for lightweight essentials. The removable design also means you can take the pockets off whenever your dog doesn’t need them.
Best of all, this DIY dog backpack project is customizable. Make the pockets smaller for a little dog, larger for a bigger dog, or choose a bright waterproof fabric that makes your pup easier to spot on outdoor adventures.
Materials You’ll Need

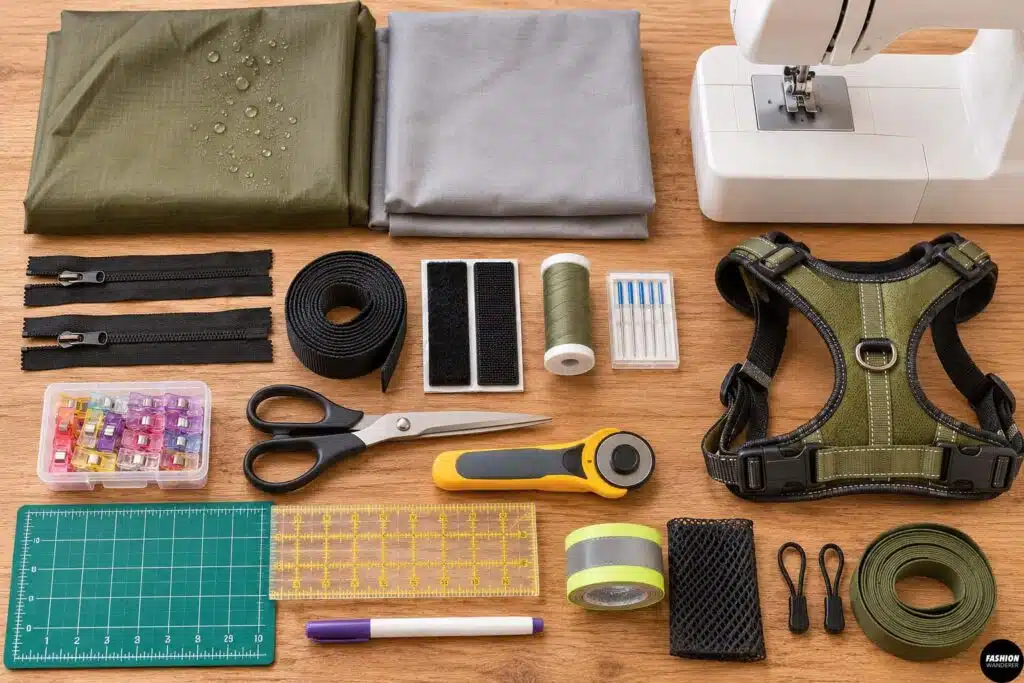
For this DIY dog hiking backpack, gather:
- 1/2 yard lightweight waterproof or water-resistant fabric, such as ripstop nylon
- 1/2 yard lightweight lining fabric
- Two nylon coil zippers, approximately 7–9 inches long
- 1-inch nylon webbing
- Sew-on hook-and-loop tape
- Polyester all-purpose thread
- Sewing machine
- Universal or Microtex sewing-machine needle appropriate for your fabric
- Fabric clips
- Fabric scissors or rotary cutter
- Ruler and cutting mat
- Fabric marker
- Existing properly fitted dog harness
Optional additions include reflective tape, lightweight mesh, zipper pulls and binding tape.
Tip: Avoid unnecessarily heavy hardware. The goal is a light backpack rather than adding significant weight to your dog.
DIY Dog Hiking Backpack

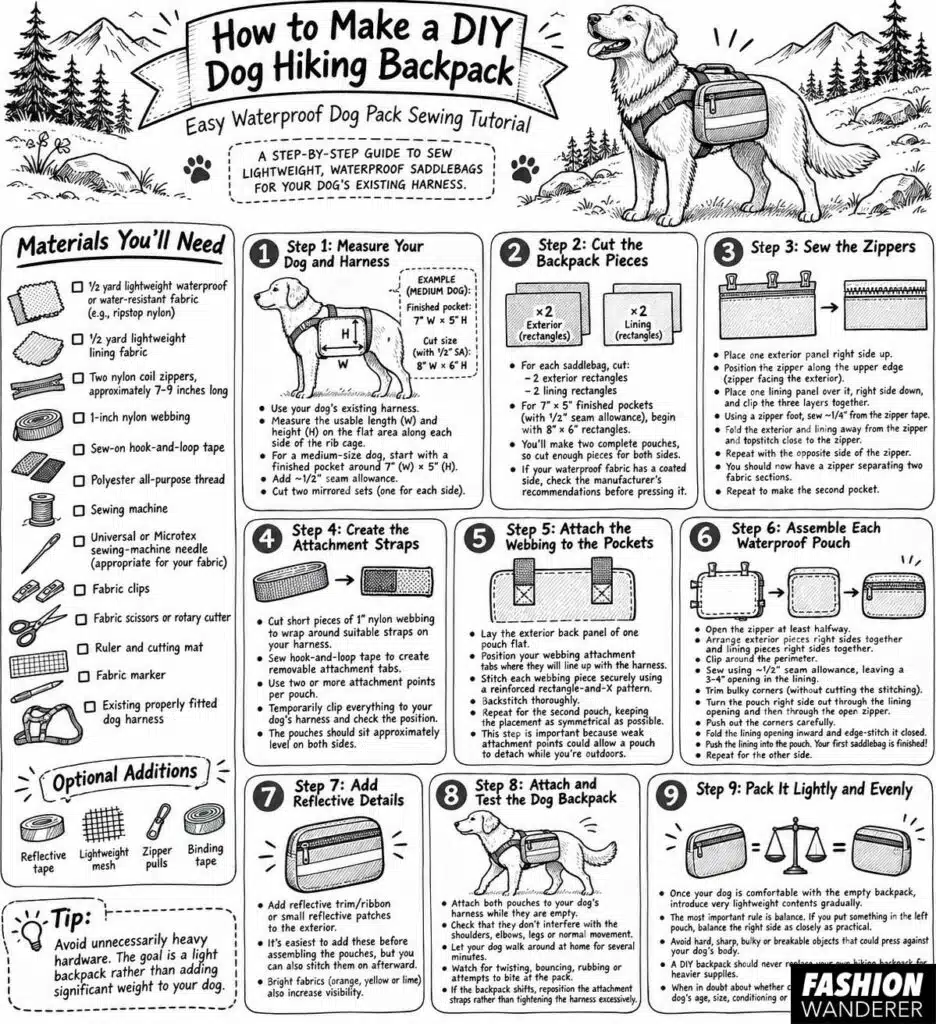
Step 1: Measure Your Dog and Harness

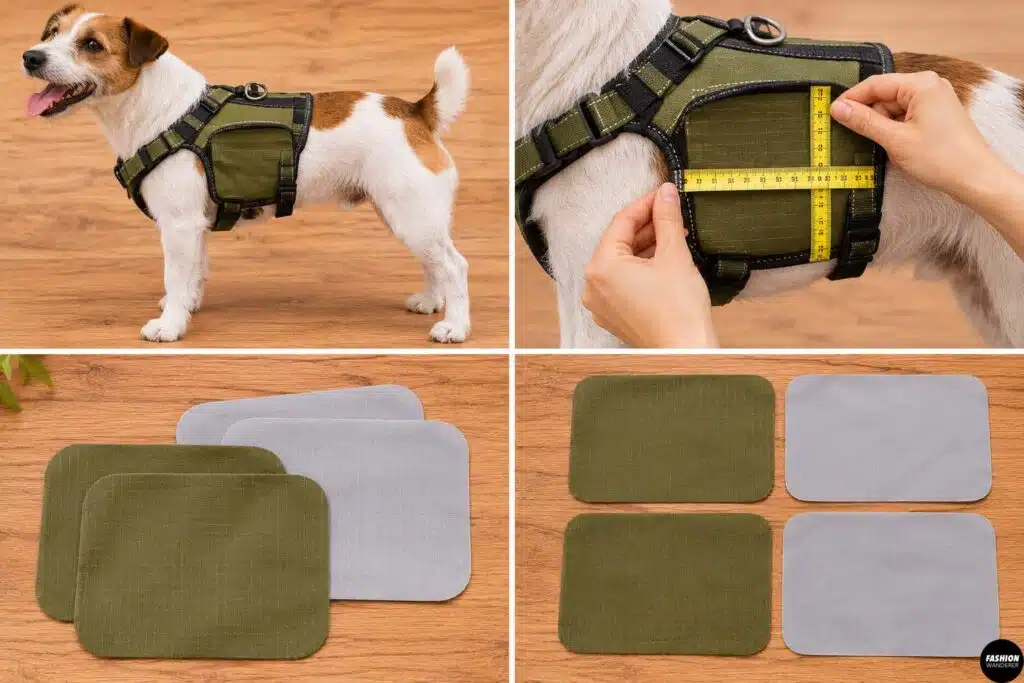
Start with the harness your dog already wears comfortably.
Put the harness on your dog and look at the flat area along each side of the rib cage. The backpack pockets should sit securely on the sides rather than hanging underneath the belly or interfering with the front or back legs.
Measure the usable length and height.
For a medium-size dog, you might start with a finished pocket around 7 inches wide × 5 inches tall, but treat this only as a starting point. Scale the dimensions to your individual dog.
Add approximately 1/2 inch seam allowance around your finished dimensions.
Cut two mirrored sets so you can make one pocket for each side.
Step 2: Cut the Backpack Pieces

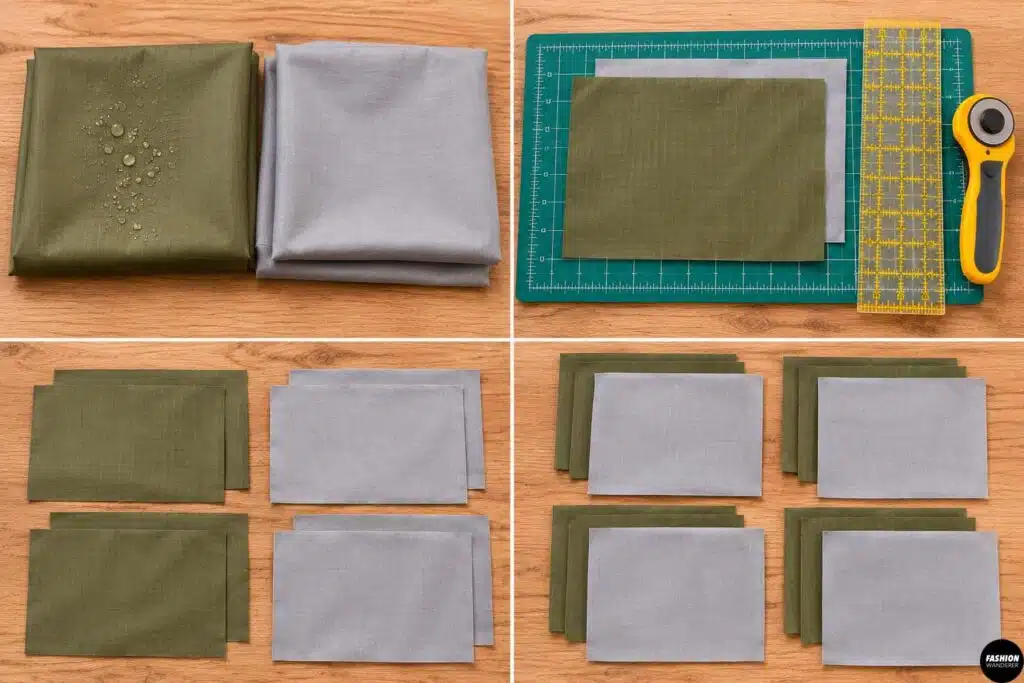
For each saddlebag, cut:
- 2 exterior rectangles
- 2 lining rectangles
If you’re making 7 × 5-inch finished pockets with a 1/2-inch seam allowance, you can begin with approximately 8 × 6-inch rectangles.
You’ll make two complete pouches, so cut enough pieces for both sides.
If your waterproof fabric has a coated side, check the manufacturer’s recommendations before pressing it. Some coated fabrics can be damaged by an iron.
Step 3: Sew the Zippers

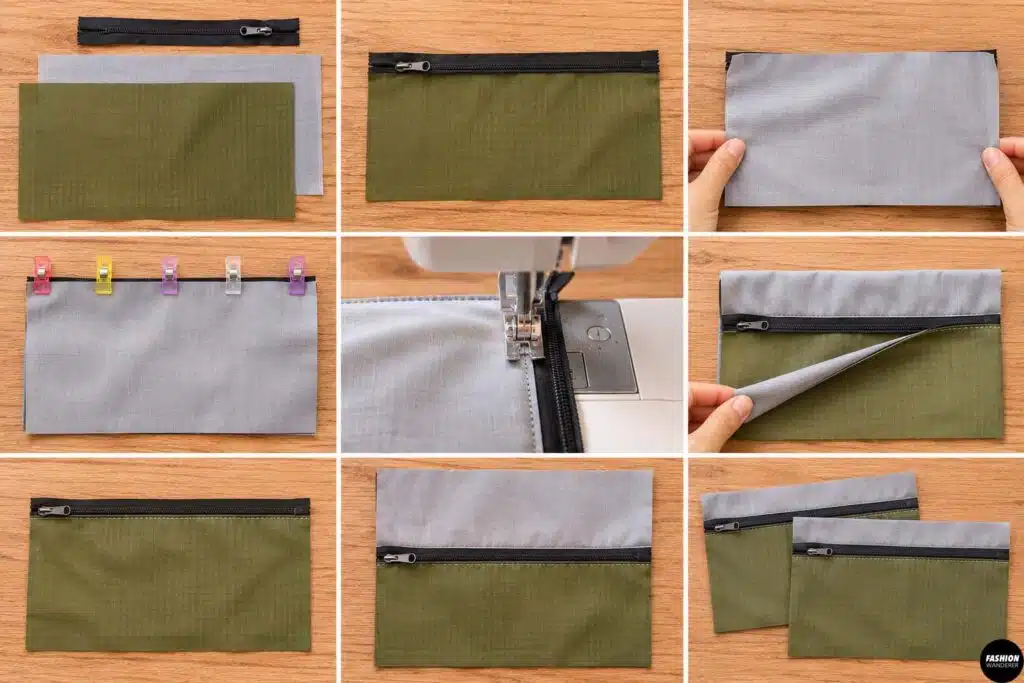
Place one exterior panel right side up.
Position the zipper along the upper edge with the zipper facing the exterior fabric. Place one lining panel over it, right side facing down.
Clip the three layers together.
Using a zipper foot, sew approximately 1/4 inch from the zipper tape, adjusting as necessary for your particular zipper.
Fold the exterior and lining away from the zipper and finger-press them flat. Topstitch close to the zipper.
Repeat with the opposite side of the zipper.
You should now have a zipper separating two fabric sections.
Repeat these steps to make the second dog backpack pocket.
Step 4: Create the Attachment Straps

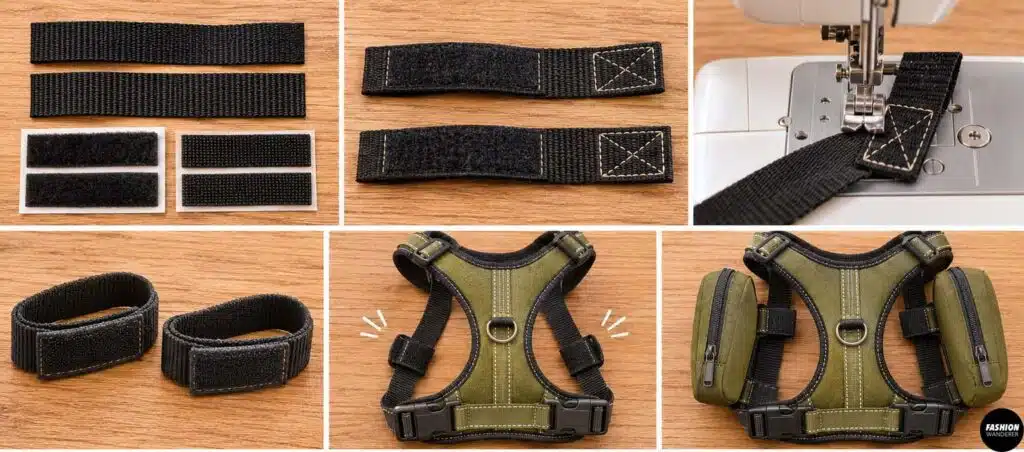
The safest beginner design is to attach your homemade pockets to a properly fitted existing harness rather than attempting to make the backpack itself function as the dog’s primary harness.
Cut short pieces of 1-inch nylon webbing that can wrap around suitable straps or attachment areas on the harness.
Sew hook-and-loop tape to the webbing to create removable attachment tabs.
Depending on your harness and pocket size, use two or more attachment points per pouch to reduce swinging.
Before sewing permanently, temporarily clip everything together and check the position on your dog.
The pouches should sit approximately level on opposite sides.
Step 5: Attach the Webbing to the Pockets

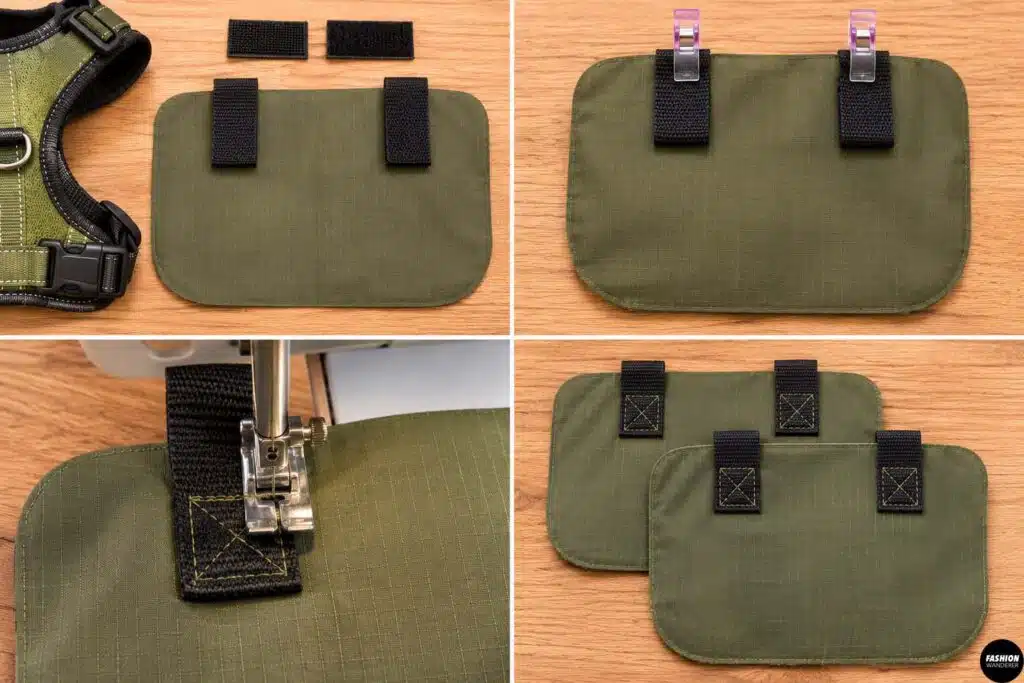
Lay the exterior back panel of one pouch flat.
Position your webbing attachment tabs where they will line up with the dog’s harness.
Stitch each webbing piece securely to the exterior panel using a reinforced rectangle-and-X stitching pattern.
Backstitch thoroughly.
Repeat for the second pouch, making the placement as symmetrical as possible.
This is an important step because weak attachment points could allow a pouch to detach while you’re outdoors.
Step 6: Assemble Each Waterproof Pouch

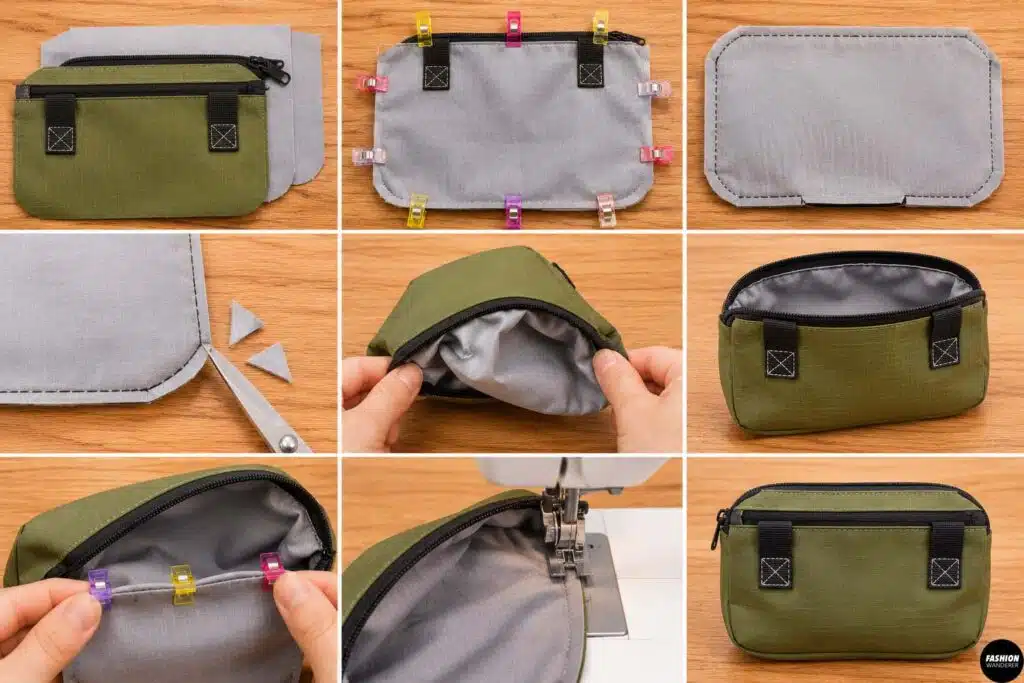
Open the zipper at least halfway before sewing the pouch closed. This gives you an opening for turning everything right side out.
Arrange the exterior pieces right sides together and the lining pieces right sides together.
Clip around the perimeter.
Sew around the pouch using approximately a 1/2-inch seam allowance, leaving a 3–4-inch opening in the lining.
Trim bulky corners without cutting through the stitching.
Turn the entire pouch right side out through the lining opening and then through the open zipper.
Push out the corners carefully.
Fold the lining opening inward and edge-stitch it closed.
Push the lining into the pouch.
Your first saddlebag is finished!
Repeat for the other side.
Step 7: Add Reflective Details

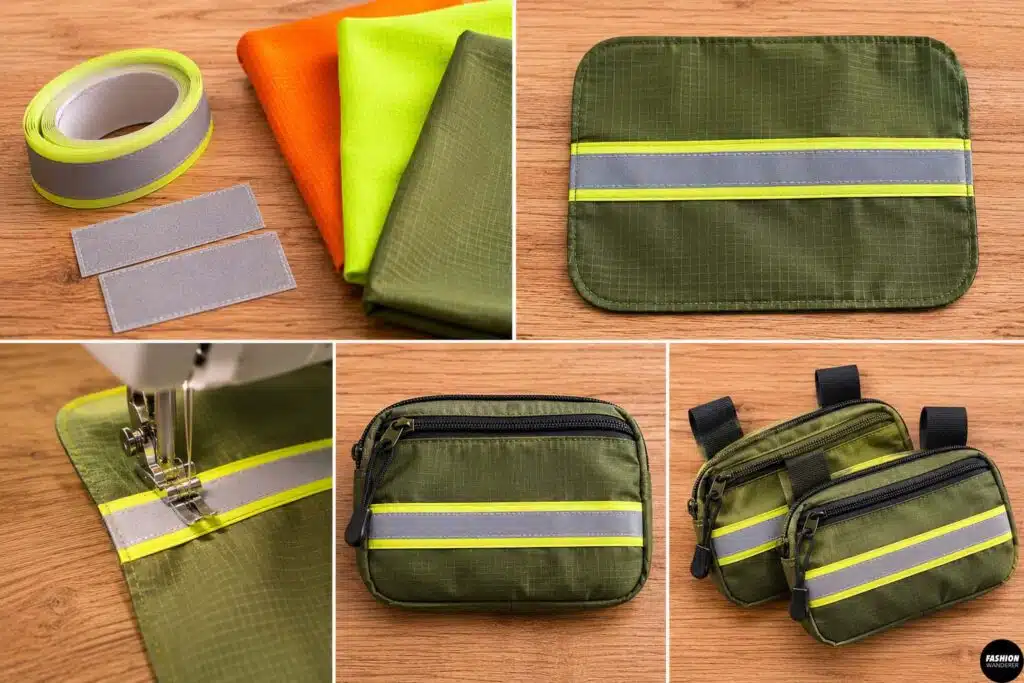
For extra visibility during early-morning or evening walks, consider adding reflective trim to the exterior.
You can sew reflective ribbon across each pouch or add small reflective patches.
It’s easiest to add these details before assembling the pouches, but they can also be securely stitched onto the finished exterior if construction allows.
Bright fabrics such as orange, yellow or lime can also make the backpack easier to see outdoors.
Step 8: Attach and Test the Dog Backpack

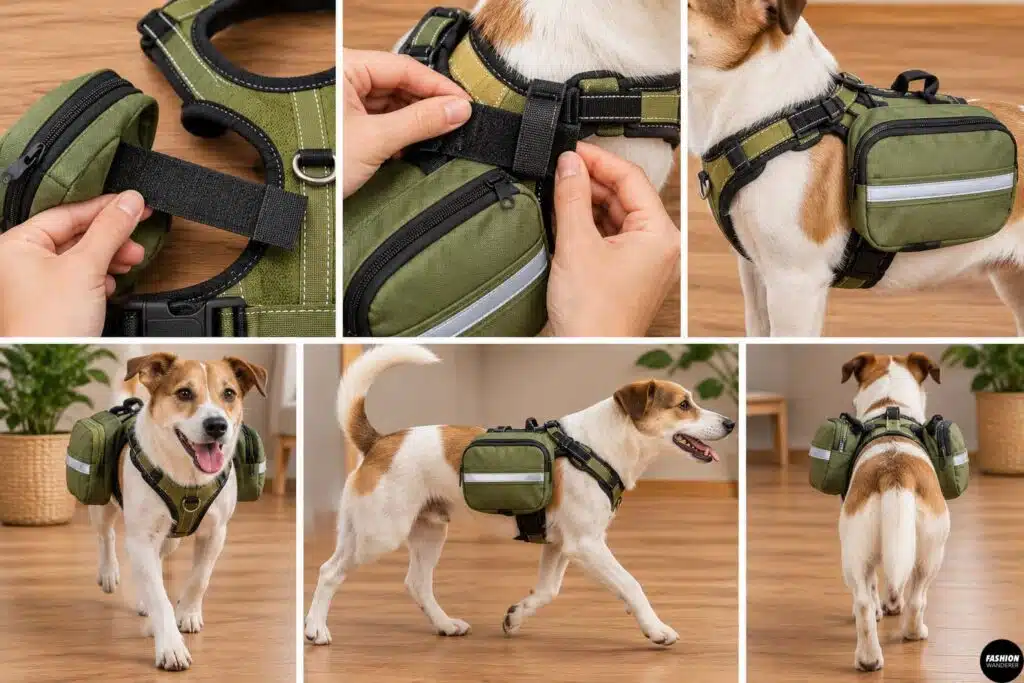
Attach both pouches to your dog’s harness while they are empty.
Check that they don’t interfere with the dog’s shoulders, elbows, legs or normal movement.
Let your dog walk around at home for several minutes.
Watch for twisting, bouncing, rubbing or attempts to bite at the pack.
If the backpack shifts, reposition the attachment straps rather than simply tightening the dog’s harness excessively.
Step 9: Pack It Lightly and Evenly

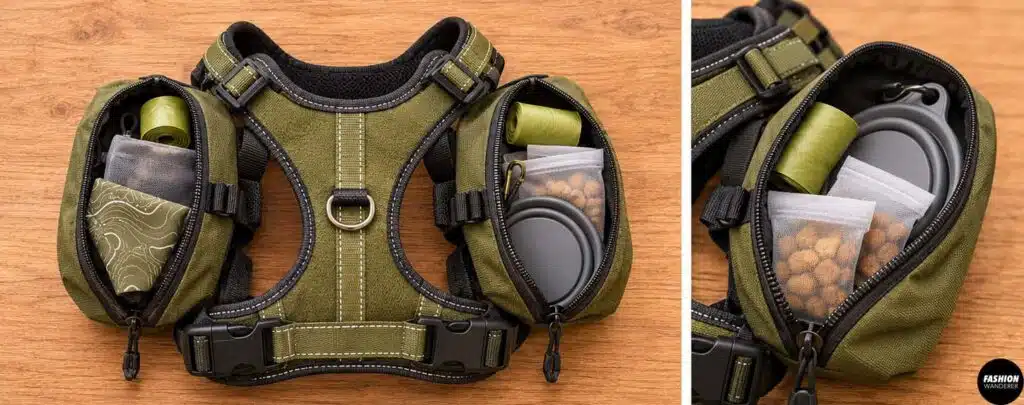
Once your dog is comfortable with the empty backpack, you can introduce very lightweight contents gradually.
The most important rule is balance.
If you put something in the left pouch, balance the right side as closely as practical. Avoid hard, sharp, bulky or breakable objects that could press against the dog’s body.
A DIY backpack should never replace your own hiking backpack for heavier supplies. When in doubt about whether carrying weight is appropriate for your dog’s age, size, conditioning or health, ask your veterinarian.
Make the Backpack More Functional
Once you’ve mastered the basic design, it’s easy to customize your DIY waterproof dog backpack.
Try adding a small exterior mesh pocket, reflective piping, contrasting zipper pulls or embroidered identification information. You could even make several detachable saddlebag sets for different adventures.
Another useful idea is to sew a small dispenser opening into one pocket for waste bags.
Final Thoughts

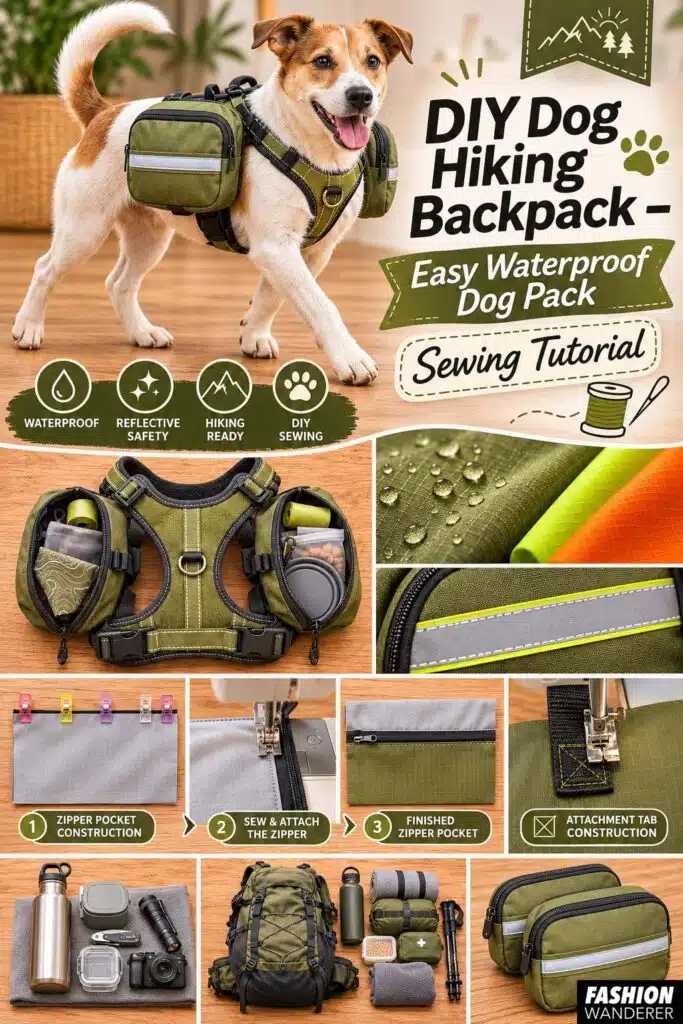
Making a DIY dog hiking backpack is a clever way to combine sewing with your love of outdoor adventures.
By starting with an existing properly fitted harness and adding two lightweight removable waterproof pouches, you can create a customized dog pack without constructing a complicated harness from scratch.
The key is keeping the finished design lightweight, balanced and comfortable. Start with an empty pack, check your dog’s movement carefully, and introduce only light contents gradually.
Choose your favorite waterproof fabric, add a couple of zippers and webbing straps, and you have an easy sewing project that’s practical, customizable and ready for your next dog-friendly adventure.