
Looking for a fun, budget-friendly way to transform old clothes into something adorable for your little one? These DIY kids’ capes made from old clothes are the perfect combination of cozy, cute, and creative!
Instead of throwing away an old fleece jacket, plaid blanket, vintage quilt, sweater, or sweatshirt, why not turn it into a charming handmade cape? From cottagecore-inspired hooded capes to playful woodland animal designs, these easy upcycle sewing projects for kids are perfect for fall adventures, chilly winter mornings, imaginative dress-up, and everyday layering.
The best part? You don’t need expensive fabrics or advanced sewing skills. Most of these beginner-friendly projects require only basic sewing supplies, simple measurements, and a little creativity.
Ready to give those forgotten clothes a second life? Here are five adorable DIY kids’ cape ideas you can sew at home!
1. Turn an Old Plaid Blanket Into an Adorable Kids’ Hooded Cape – Easy Cottagecore Upcycle
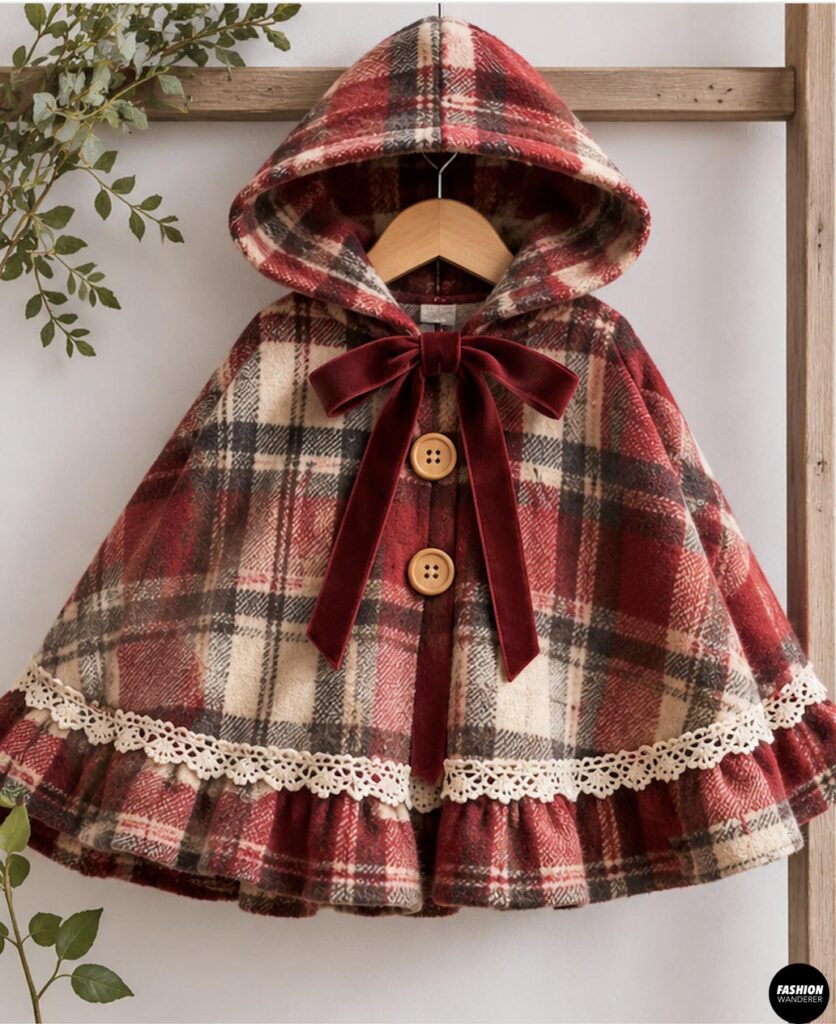
An old plaid blanket can become the sweetest cottagecore-inspired kids’ hooded cape! With its cozy texture, classic checkered pattern, and relaxed silhouette, this handmade cape looks like something straight out of a woodland storybook.
It’s perfect for fall outings, family photos, and layering over sweaters.
Materials You’ll Need
- Old plaid blanket (fleece, flannel, or lightweight wool)
- Coordinating thread
- Fabric scissors
- Measuring tape
- Sewing machine
- Pins or sewing clips
- Large decorative button and fabric loop (optional)
Step-by-Step Tutorial
Step 1: Measure Your Child
Measure from the base of your child’s neck to the desired cape length. For toddlers, approximately 14–18 inches works well, while older children may prefer 20–24 inches.
Add 1 inch for hemming.
Step 2: Cut the Cape
Fold your blanket into quarters, keeping the fabric layers flat.
From the double-folded corner, mark a small quarter-circle neckline based on your child’s neck measurement.
Measure outward from this corner to your desired cape length, drawing a larger curved hemline.
Cut along both curves, then unfold to reveal a circular cape.
Cut a straight opening down the center front.
Step 3: Create the Hood
Cut two hood-shaped pieces from the remaining blanket, using a well-fitting hoodie as your guide.
Add ½-inch seam allowances around the edges.
Place the hood pieces right sides together and sew along the curved back seam.
Step 4: Attach the Hood
With right sides together, pin the hood’s lower edge around the cape neckline, matching the center back.
Sew using a ½-inch seam allowance. Finish the seam with a zigzag stitch.
Step 5: Finish the Edges
Fold the front and bottom edges inward by ½ inch, then stitch.
Add a large decorative button with a fabric loop near the neckline for a charming finishing touch.
Style Tip: Pair your plaid cape with corduroy pants, ankle boots, and a knitted bonnet for an adorable cottagecore outfit.
2. Old Fleece Jacket to Cute Teddy Bear Hooded Cape – Beginner-Friendly Kids’ Sewing Upcycle
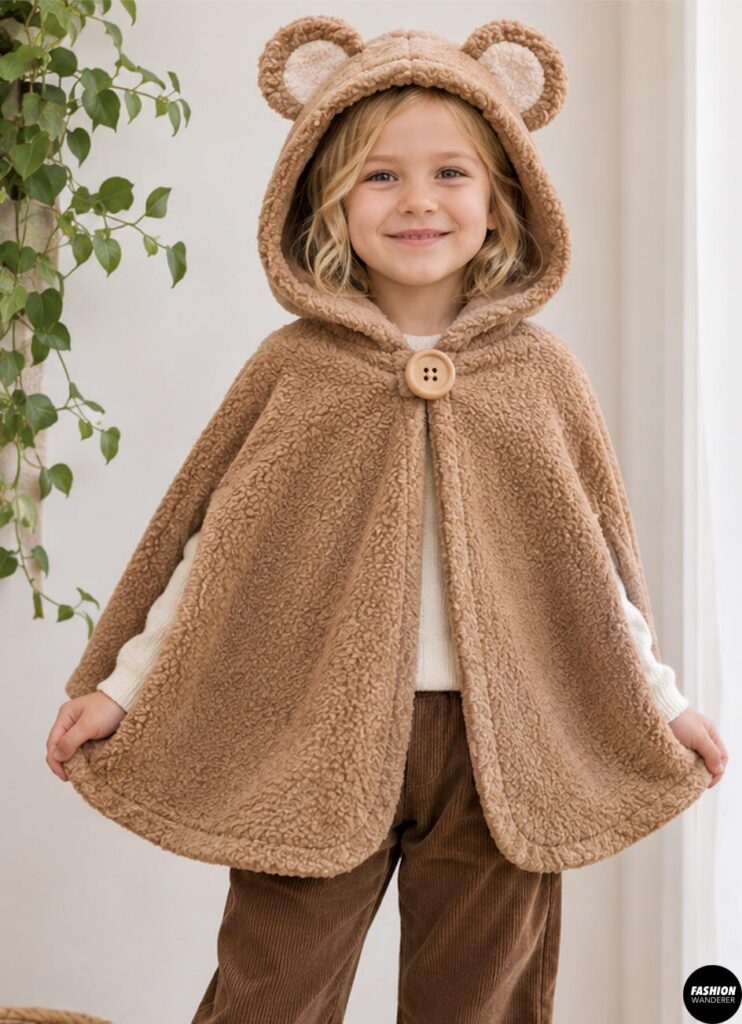
Have an old fleece jacket hiding in your closet? Transform it into an irresistibly cute DIY teddy bear hooded cape!
Soft fleece is ideal for beginner sewing projects because it doesn’t fray easily, feels comfortable against the skin, and creates a cozy outer layer.
Materials You’ll Need
- Old oversized fleece jacket
- Matching thread
- Fabric scissors
- Sewing machine
- Measuring tape
- Pins or clips
- Small fabric scraps for bear ears
- Sew-on snaps (optional)
Step-by-Step Tutorial
Step 1: Prepare the Jacket
Wash and dry the fleece jacket.
Remove the sleeves, zipper, pockets, and any bulky seams that interfere with your design.
Open the jacket along its side seams to create flat fabric panels.
Step 2: Cut Your Cape Pieces
Measure your child’s desired cape length.
Use the largest available fleece sections to cut two front panels and one back panel, adding ½-inch seam allowances.
Shape the shoulders gently and create a comfortable neckline.
If your jacket is small, piece together matching fleece sections before cutting.
Step 3: Sew the Shoulder Seams
Place the front panels against the back panel, right sides together.
Pin the shoulder edges and sew using a ½-inch seam allowance.
Step 4: Make the Teddy Bear Hood
Cut two rounded hood pieces from the leftover fleece.
Sew the curved back edges together, leaving the face and neckline openings unsewn.
Step 5: Create Adorable Bear Ears
Cut four semicircular fleece pieces.
Sew each pair right sides together around the curved edge, leaving the bottom open.
Turn right side out and lightly shape the ears.
Baste them to the hood’s outer layer near the top before completing the hood seam.
Step 6: Attach and Finish
Pin the hood to the cape neckline and sew.
Finish the front opening with a narrow folded hem or fleece binding.
Add sew-on snaps near the upper chest for an easy closure.
Beginner Tip: Use a ballpoint needle if your fleece has a knitted backing, and avoid stretching the fabric while sewing.
3. Turn an Old Quilt Into a Trendy Patchwork Kids’ Cape – Easy Vintage Sewing Refashion
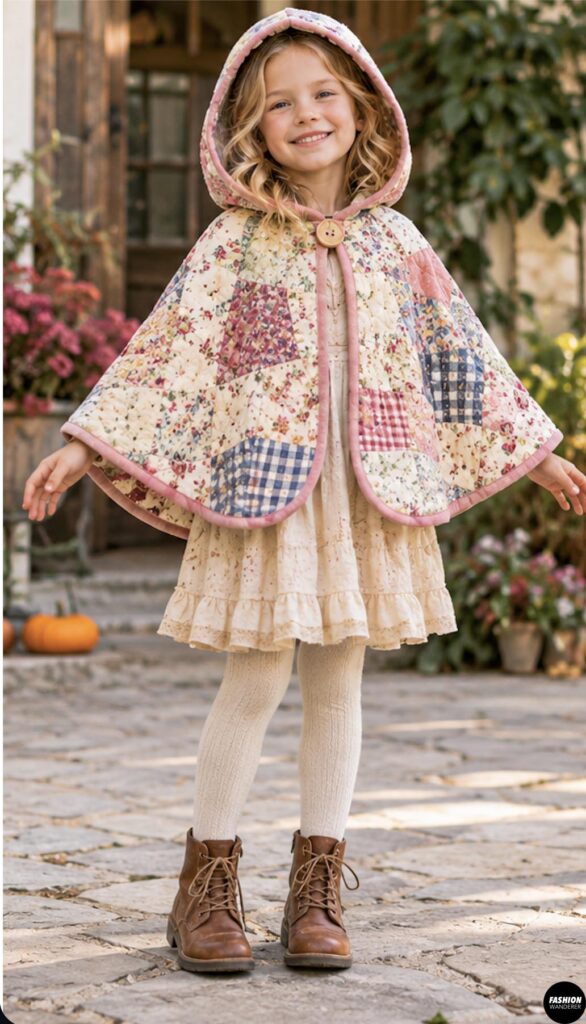
Vintage quilts are full of beautiful colors, patterns, and personality. Instead of leaving an old quilt tucked away in storage, turn it into a trendy patchwork kids’ cape!
This project creates a one-of-a-kind outerwear piece with a nostalgic, handmade feel.
Materials You’ll Need
- Old lightweight quilt
- Fabric scissors or rotary cutter
- Measuring tape
- Sewing machine
- Coordinating thread
- Bias binding
- Sewing clips
- Large buttons or sew-on snaps
Step-by-Step Tutorial
Step 1: Choose Your Quilt
Select a lightweight quilt with soft batting.
Avoid overly thick quilts, which can make the cape heavy and difficult to sew.
Step 2: Plan Your Cape Shape
Measure your child’s shoulder width and desired cape length.
Draw a simple cape pattern on paper using a gently curved neckline, sloping shoulders, and a flared bottom.
Create one back piece and two front pieces.
Step 3: Cut the Quilt
Lay your quilt flat and position the pattern pieces to showcase your favorite patchwork sections.
Cut carefully through all quilt layers, adding ½-inch seam allowances.
Step 4: Sew the Shoulders
Place the front and back pieces right sides together.
Pin the shoulder seams and sew slowly using a slightly longer stitch length, approximately 3 mm.
Trim bulky seam allowances if necessary.
Step 5: Bind the Raw Edges
Sandwich the neckline, front openings, and hem inside double-fold bias binding.
Stitch close to the binding’s inner folded edge, ensuring both sides are secured.
Step 6: Add a Closure
Sew two large buttons with corresponding buttonholes, or use sturdy sew-on snaps along the upper front opening.
Style Tip: Vintage floral quilts, pastel patchwork, and muted earth tones create especially charming handmade kids’ capes.
4. Old Sweater to Cozy Kids’ Knit Cape in Under an Hour – Easy No-Pattern Upcycle
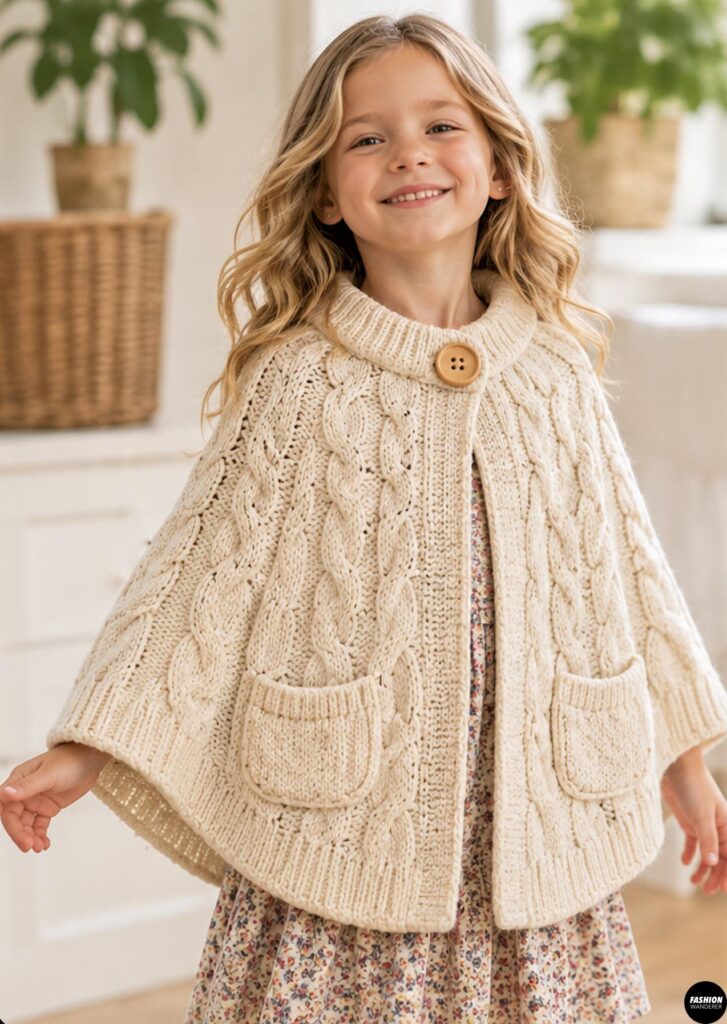
Need a quick sewing project? An oversized sweater can become a cozy kids’ knit cape in under an hour, especially when you reuse its original neckline and finished hem.
This simple no-pattern upcycle is ideal for beginners who want an adorable result without complicated cutting.
Materials You’ll Need
- Old oversized knit sweater\
- Fabric scissors
- Measuring tape
- Sewing clips
- Sewing machine
- Ballpoint needle
- Matching thread
- Knit binding or ribbon for finishing
Step-by-Step Tutorial
Step 1: Choose Your Sweater
Select a soft, oversized sweater with enough width to drape comfortably around your child’s shoulders.
Avoid itchy or loosely knitted sweaters that unravel easily.
Step 2: Remove the Sleeves
Lay the sweater flat.
Cut away both sleeves just outside the armhole seams.
Keep the sweater’s original neckline intact.
Step 3: Shape the Cape
Cut a straight opening down the center front, from the neckline to the hem.
Trim the side edges into a gentle outward flare, keeping the original bottom hem wherever possible.
Step 4: Finish the Armhole Openings
Fold the cut armhole edges inward approximately ¼ inch and sew using a narrow zigzag stitch.
For loose knits, apply knit binding instead to prevent unraveling.
Step 5: Finish the Front Edges
Bind the center-front openings with stretchy knit fabric or soft binding.
Avoid pulling the edges while sewing.
Step 6: Add a Simple Closure
Attach a sew-on snap near the neckline, ensuring the cape opens easily.
Try the cape on your child and adjust the length if needed.
Time-Saving Tip: Choose a sweater with a finished ribbed neckline and hem to minimize sewing.
5. Turn an Old Sweatshirt Into an Adorable Woodland Deer Cape – Cute Kids’ Fall Sewing DIY
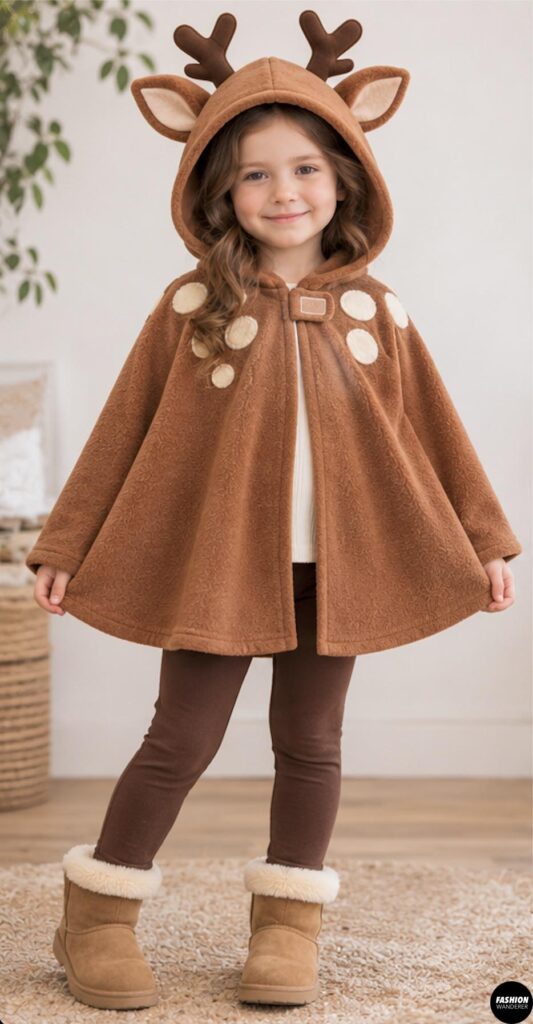
Bring a little woodland magic to your child’s wardrobe with this adorable DIY deer cape made from an old sweatshirt!
With soft fabric ears, tiny felt antlers, and a cozy hood, this playful cape is perfect for autumn adventures, woodland-themed birthday parties, and imaginative dress-up.
Materials You’ll Need
- Old oversized brown or tan sweatshirt
- Brown and cream felt
- Matching thread
- Fabric scissors
- Sewing machine
- Pins
- Lightweight fusible interfacing
- Sew-on snaps
- Fabric marker (optional)
Step-by-Step Tutorial
Step 1: Prepare Your Sweatshirt
Remove the sleeves and open the side seams.
Lay the remaining fabric flat.
Step 2: Cut the Cape
Cut one back piece and two front pieces, using your child’s shoulder width and desired length as guides.
Allow extra width toward the bottom for comfortable movement.
Step 3: Assemble the Cape
Place the front and back pieces right sides together.
Sew the shoulder seams with a ½-inch seam allowance.
Step 4: Create the Hood
Cut two hood pieces from the sweatshirt sleeves or leftover body fabric.
Sew the curved back seam, leaving the face opening free.
Step 5: Make Deer Ears and Antlers
Cut four leaf-shaped ear pieces from brown felt and two smaller inner-ear shapes from cream felt.
Sew the inner-ear shapes onto two outer pieces.
Stitch the ear pairs together, leaving the bases open.
Cut four small antler shapes from brown felt, reinforce them with interfacing, and stitch into two pairs.
Step 6: Attach the Details
Position the ears and soft antlers along the hood’s upper seam.
Baste them securely in place before sewing the hood seam.
Step 7: Finish Your Woodland Cape
Attach the hood to the neckline.
Hem the front and bottom edges using a narrow zigzag stitch.
Add sew-on snaps at the upper front opening.
For extra charm, sew small cream felt spots onto the cape’s back.
Creative Tip: Pair this adorable deer cape with brown leggings and little boots for a cozy woodland-inspired outfit.
Helpful Sewing Tips for Upcycling Kids’ Clothes Into Capes
Before starting your DIY cape project, keep these beginner-friendly sewing tips in mind:
- Prewash your materials: This removes dirt and helps prevent shrinkage after sewing.
- Choose lightweight fabrics: Heavy blankets and quilts can feel uncomfortable on small shoulders.
- Measure before cutting: Check neckline width, shoulder fit, and cape length.
- Use the correct needle: Ballpoint needles work well for many knits, while universal needles suit most woven fabrics.
- Secure every decoration: Make sure ears, antlers, and embellishments are firmly stitched.
- Prioritize safety: Avoid neck ties, dangling cords, and detachable small decorations. Use easy-release closures, keep capes short enough to prevent tripping, and supervise children while wearing them. Remove capes during sleep and playground activities.
Frequently Asked Questions About DIY Kids’ Capes
What is the easiest fabric for a beginner kids’ cape?
Fleece is one of the easiest fabrics because it resists fraying, requires minimal edge finishing, and is comfortable to sew.
Can I make a kids’ cape without a sewing pattern?
Absolutely! Oversized sweaters, sweatshirts, and blankets can be transformed into simple capes using basic measurements and curved cutting lines.
How much fabric do I need for a kids’ cape?
Depending on the child’s size and cape design, approximately 1–1½ yards of 60-inch-wide fabric is often enough. Hooded or full-circle styles may require more.
Are upcycled kids’ capes suitable for beginners?
Yes! Most of these projects use simple seams, basic hems, and easy closures, making them excellent beginner sewing projects.
Final Thoughts: Give Old Clothes a Magical Second Life!
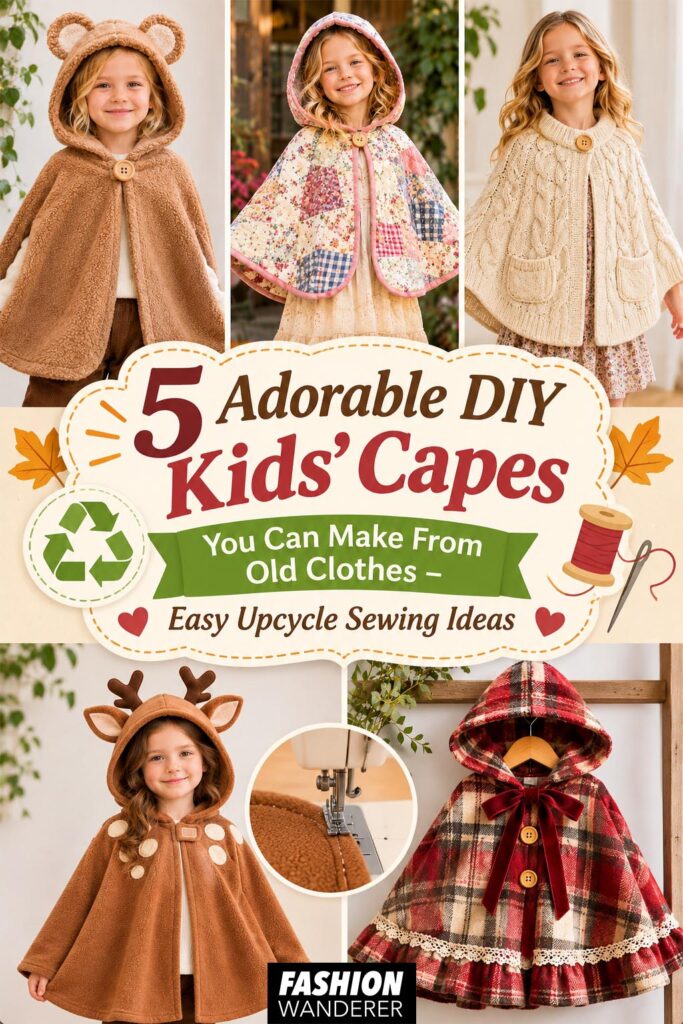
Who knew an old blanket, fleece jacket, vintage quilt, sweater, or sweatshirt could become something so adorable?
These five DIY kids’ capes made from old clothes prove that sustainable sewing can be creative, affordable, and surprisingly easy.
Whether you’re making a cottagecore plaid cape, a cuddly teddy bear hood, a vintage patchwork design, a quick knit cape, or a whimsical woodland deer costume, each project gives forgotten fabric a beautiful new purpose.
So grab those old clothes, dust off your sewing machine, and create a handmade cape your little one will love!