
You do not need an expensive costume pattern or yards of specialty fabric to create a memorable Renaissance Faire outfit. Some of the best DIY medieval costumes can be made from old clothes, thrift-store finds, and household textiles you already have.
A maxi dress can become a medieval princess gown, an oversized button-up can turn into a tavern maiden blouse, and even an old sweatshirt can become a surprisingly fun knight costume.
These easy Renaissance costume upcycles are perfect for beginners because you are starting with garments that are already constructed. Instead of sewing an entire costume from scratch, you can focus on simple details such as gathered sleeves, lace-up fronts, dramatic hoods, fabric armor panels, and medieval-inspired trims.
Whether you are dressing for a Renaissance Faire, Halloween, a fantasy festival, a school event, or a themed party, these five projects are budget-friendly, creative, and easy to customize.
1. Turn an Old Maxi Dress Into a Medieval Princess Gown – Easy Renaissance Costume Upcycle
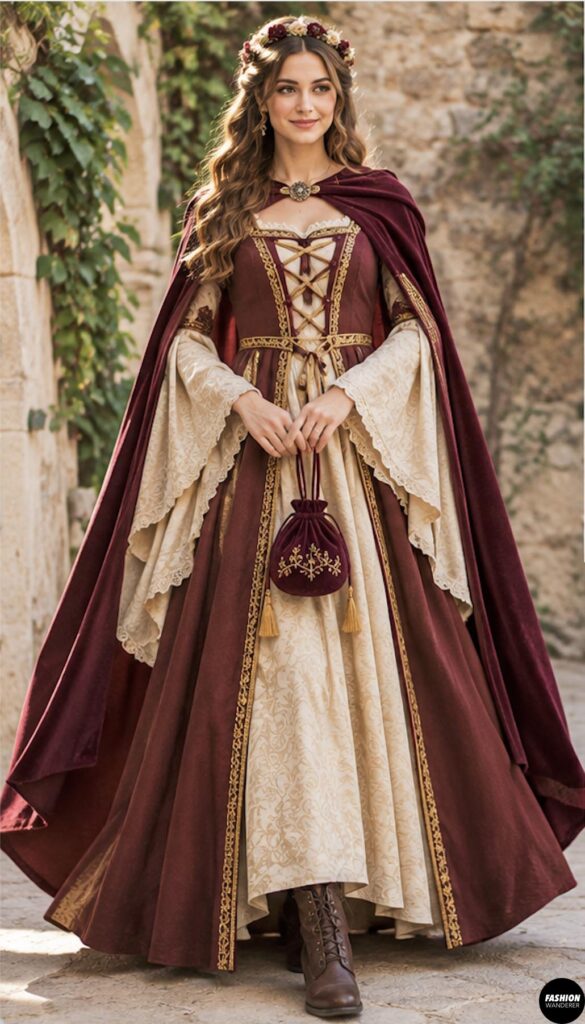
A long maxi dress is one of the easiest bases for a DIY medieval princess costume because the length and flowing silhouette are already there.
Materials
- Old maxi dress
- ½ to 1 yard coordinating fabric
- Ribbon or narrow trim
- Elastic
- Fabric scissors
- Sewing machine
- Matching thread
- Pins or sewing clips
- Optional lace or decorative braid
Step 1: Choose the Right Dress
Look for a maxi dress with a simple shape and a solid or muted color such as burgundy, forest green, navy, cream, plum, or dusty blue.
A sleeveless or short-sleeve dress works especially well because you can easily add dramatic medieval sleeves.
Step 2: Reshape the Neckline
If the neckline feels too modern, mark a softer scoop or square neckline.
Cut carefully, leaving about ½ inch extra for finishing.
Fold the raw edge inward twice and sew a narrow hem.
For a more decorative finish, sew ribbon or braided trim around the neckline.
Step 3: Add Flowing Sleeves
Cut two rectangles of lightweight fabric approximately 18 to 24 inches long.
Gather one short end of each rectangle until it matches the dress armhole or sleeve opening.
Sew the gathered edge into place.
Leave the lower edge wide and flowing for a classic medieval bell-sleeve look.
If desired, add lace or trim around the sleeve edge.
Step 4: Add a Lace-Up Waist Detail
Cut six to eight small fabric loops and sew them vertically along each side of the waist.
Thread ribbon through the loops in a crisscross pattern.
This gives the dress a more fitted medieval look without requiring complicated corset construction.
Step 5: Finish the Gown
Add a narrow belt, braided cord, or fabric sash around the waist.
Pair the dress with simple boots, a headband, or a braided hairstyle.
Your old maxi dress is now a romantic DIY medieval princess gown.
2. Old Button-Up Shirt to Medieval Tavern Maiden Blouse – Beginner-Friendly Renaissance Costume
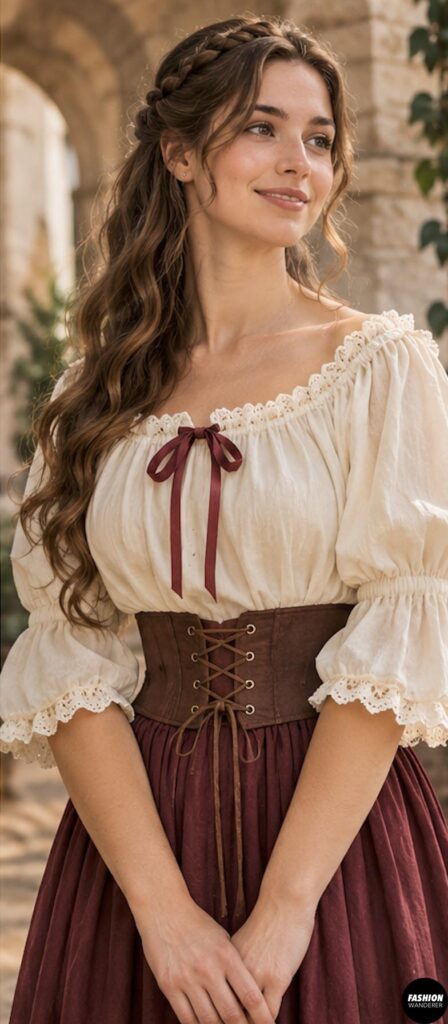
An oversized white or cream button-up shirt can easily become a peasant-style blouse for a tavern maiden, village costume, or Renaissance Faire outfit.
Materials
- Oversized button-up shirt
- ¼-inch elastic
- Lace trim
- Coordinating thread
- Sewing machine
- Fabric scissors
- Safety pin
- Pins or clips
Step 1: Remove the Collar
Cut carefully around the base of the shirt collar.
Leave enough fabric around the neckline to create a casing.
Fold the raw edge inward about ½ inch and then fold again.
Sew around the neckline, leaving a 1-inch opening.
Step 2: Add Elastic to the Neckline
Measure elastic loosely around your shoulders and upper chest.
Attach a safety pin to one end and feed it through the neckline casing.
Pull the elastic until the neckline gathers softly.
Join the elastic ends securely and close the opening.
The blouse can now sit on or slightly off the shoulders.
Step 3: Create Puffy Sleeves
If the sleeves are long, cut them to elbow length.
Fold the sleeve hem inward to create a narrow casing.
Thread elastic through each cuff.
Adjust until the sleeves gather comfortably around your arms.
Step 4: Add Decorative Trim
Sew lace or narrow trim along the neckline or sleeve edges.
You can also add a small ribbon bow at the center front.
Step 5: Style the Blouse
Wear the finished blouse with a long skirt, corset-style belt, or apron.
This simple medieval tavern maiden blouse also works as a base for pirate, peasant, fairy-tale, or cottagecore costumes.
3. Turn an Old Sweatshirt Into a Medieval Knight Costume – Easy DIY Armor Upcycle
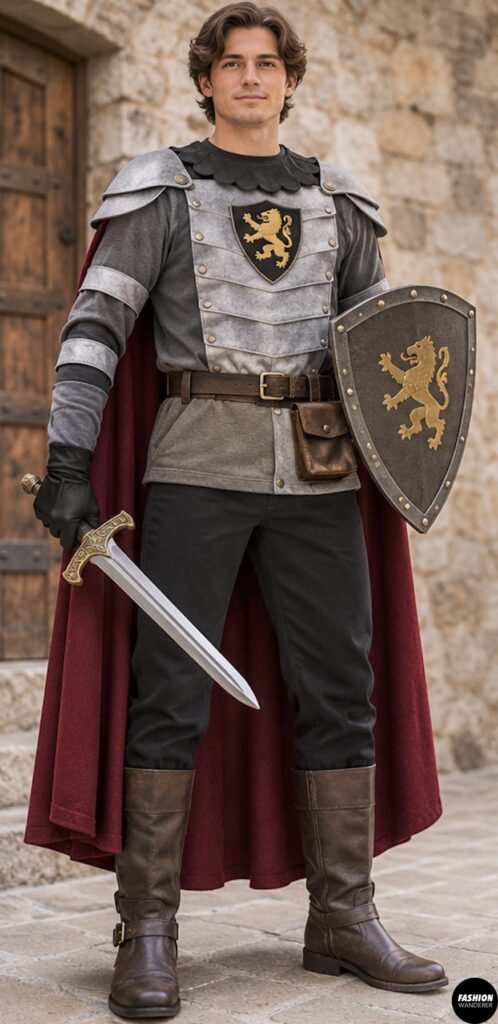
A plain gray, black, or navy sweatshirt can become a comfortable knight costume with a few fabric armor pieces.
Materials
- Old sweatshirt
- Gray felt, fleece, or faux leather
- Black felt
- Silver or gray fabric paint
- Fabric scissors
- Sewing machine
- Matching thread
- Optional foam or batting
Step 1: Create the Armor Panels
Cut two large shield-shaped pieces from gray felt or fleece.
One will sit on the front of the sweatshirt and one on the back.
The pieces should extend from the shoulders to slightly below the waist.
Step 2: Add a Knight Emblem
Cut a simple emblem from black or contrasting felt.
Ideas include a lion, cross, dragon, crown, or geometric shield shape.
Sew the emblem onto the front armor panel.
You can also use fabric paint to create simple decorative lines.
Step 3: Attach the Armor
Pin the front and back panels to the sweatshirt.
Sew across the shoulder area and along a small section at the sides.
Leave enough room for comfortable movement.
For a removable version, attach the panels using hook-and-loop tape.
Step 4: Make Shoulder Guards
Cut four curved pieces from felt.
Sew two pieces together for each shoulder.
Lightly stuff with batting if you want a more dimensional look.
Attach them at the shoulder seams.
Step 5: Finish the Knight Costume
Pair the sweatshirt with dark pants, boots, and a simple fabric belt.
Add a toy shield or homemade cardboard shield if desired.
This DIY medieval knight costume is especially useful for kids because the sweatshirt stays soft, warm, and comfortable.
4. Old Blanket to Medieval Forest Elf Hooded Cloak – Easy Fantasy Costume Sewing Upcycle
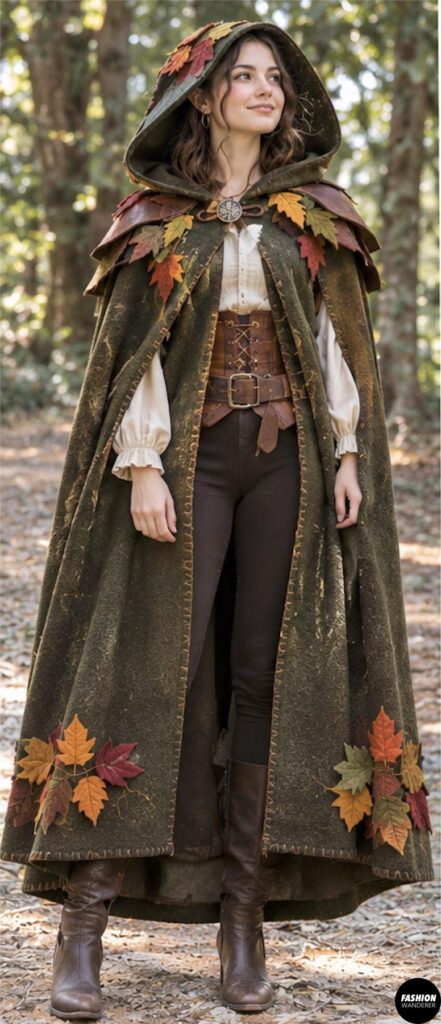
An old fleece, wool-look, or woven blanket can become a dramatic forest cloak with very little cutting.
Materials
- Old blanket
- Coordinating thread
- Sewing machine
- Fabric scissors
- Measuring tape
- Large button, toggle, or hook-and-loop closure
- Optional faux leather scrap
- Optional decorative trim
Step 1: Cut the Cloak Body
Fold the blanket in half.
Measure from your shoulders to your desired cloak length.
Trim the blanket if necessary.
For a softer shape, round the lower corners.
Step 2: Shape the Neckline
Mark the center of the folded top edge.
Cut a shallow curved neckline.
Avoid making the opening too wide.
Step 3: Make the Hood
Cut two rectangles approximately 15 x 18 inches.
Round one upper corner on each piece.
Place the pieces right sides together and sew along the curved back and top edge.
Leave the front and bottom open.
Step 4: Attach the Hood
Match the bottom of the hood to the cloak neckline.
Pin evenly.
If the hood is slightly larger, gather it gently.
Sew around the neckline using a ½-inch seam allowance.
Step 5: Add the Closure
Sew a large button, toggle, or fabric loop near the throat.
For a rustic fantasy look, cut a small faux leather tab and sew it over the closure area.
Step 6: Add Forest Details
Sew decorative trim around the hood edge.
You can also add leaf-shaped felt appliqués, embroidery, or narrow braided cord.
Pair the finished cloak with neutral clothing and boots for an easy medieval forest elf costume.
5. Old Velvet Dress to Gothic Medieval Noblewoman Costume – Dramatic Renaissance Sewing Upcycle
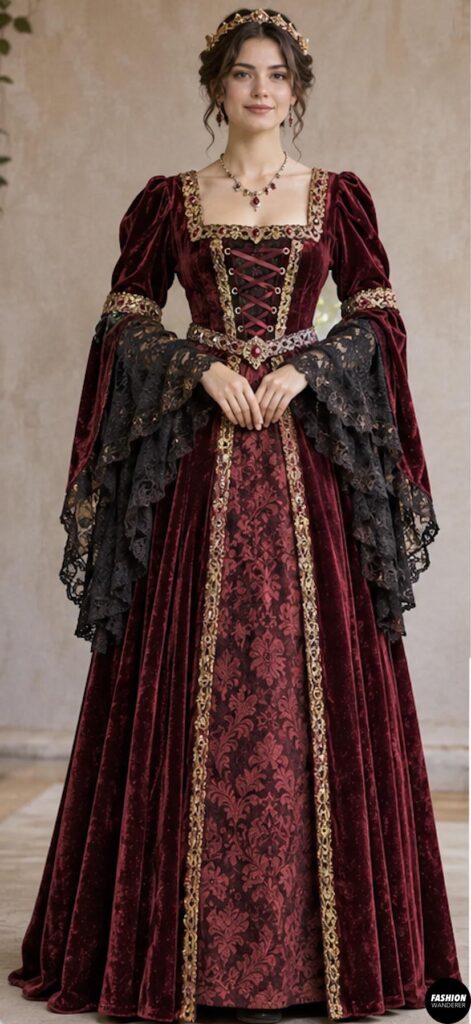
Velvet instantly creates a luxurious medieval look, making an old velvet dress perfect for a Gothic noblewoman costume.
Materials
- Old velvet dress
- Black lace
- Satin ribbon
- Decorative braid
- Matching thread
- Sewing machine
- Fabric scissors
- Pins or clips
- Optional brooch
Step 1: Adjust the Neckline
A square or deep scoop neckline works beautifully for a Gothic Renaissance style.
Mark the new neckline carefully.
Trim and finish the raw edge with bias tape, lace, or a narrow folded hem.
Step 2: Add Dramatic Sleeves
If the dress has short sleeves, add long lace or velvet sleeve extensions.
Cut two rectangles or tapered sleeve pieces.
Gather the upper edge and sew them into the existing sleeve opening.
For extra drama, make the cuffs wider than the upper sleeves.
Step 3: Add a Decorative Front Panel
Cut a long narrow panel from satin, brocade, or contrasting velvet.
Position it vertically down the center front of the dress.
Sew it in place.
Add decorative braid along both edges to create the look of a structured medieval overdress.
Step 4: Create a Lace-Up Back or Front
Sew small ribbon loops along both sides of the waist or bodice area.
Thread satin ribbon through the loops.
This adds a corset-inspired detail without building a real corset.
Step 5: Finish the Noblewoman Look
Add lace cuffs, a dark brooch, a velvet ribbon choker, or a long fabric belt.
Pair the dress with boots and a simple headpiece.
The result is a dramatic Gothic medieval noblewoman costume that looks far more elaborate than the amount of sewing involved.
Tips for Making DIY Renaissance Costumes From Old Clothes
The easiest way to make an upcycled costume look convincing is to focus on silhouette and texture rather than historical perfection.
Choose fabrics that feel natural or richly textured, including linen-look cotton, velvet, faux suede, woven blankets, lace, and matte knits.
Avoid overly modern details such as visible plastic zippers, bright logos, and sporty ribbing whenever possible.
You can often hide modern details with belts, trims, cloaks, patches, or decorative panels.
Most importantly, keep the costume comfortable. Try each garment on as you sew and make sure you can walk, sit, lift your arms, and move easily.
Final Thoughts
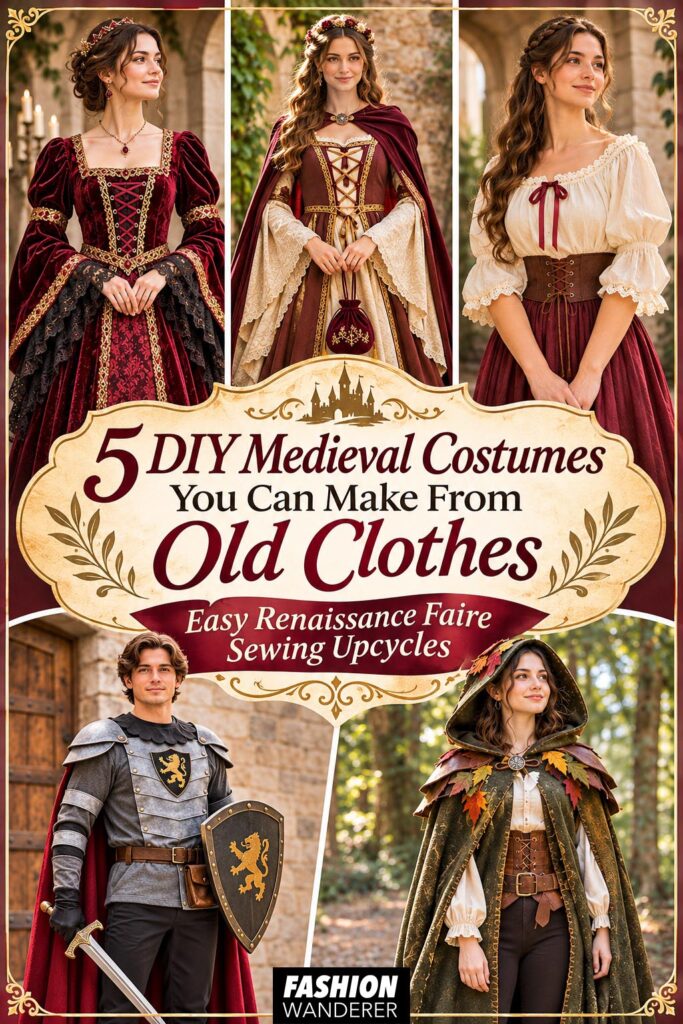
Making your own DIY medieval costumes from old clothes is one of the easiest ways to create an affordable Renaissance Faire outfit without starting from scratch.
Transform an old maxi dress into a medieval princess gown, turn a button-up shirt into a tavern maiden blouse, convert a sweatshirt into a knight costume, sew an old blanket into a forest elf cloak, or give an old velvet dress a Gothic noblewoman makeover.
These projects are beginner-friendly, inexpensive, and easy to personalize.
Before buying a costume, check your closet, linen cupboard, or local thrift store. With a few simple sewing techniques, those forgotten clothes may already contain the perfect Renaissance Faire outfit.