
If you love dramatic Halloween costumes, Renaissance-inspired fashion, and thrift-store sewing projects, this old velvet dress to Gothic medieval noblewoman costume is a beautiful way to transform something outdated into a show-stopping outfit.
Instead of sewing an entire historical gown from scratch, this project starts with a ready-made velvet dress and adds medieval-inspired details such as flared sleeves, a lace-up bodice, decorative trim, and a dramatic skirt panel.
The finished costume has a dark romantic look that works perfectly for Halloween, Renaissance fairs, fantasy events, costume parties, gothic photoshoots, or theatrical outfits.
This is also a great project for beginner and intermediate sewists because most of the difficult construction—like the zipper, bodice, and main skirt—is already finished.
In this step-by-step tutorial, you will learn how to turn an old velvet dress into a Gothic medieval costume using simple sewing techniques and inexpensive fabric scraps.
Materials You Will Need
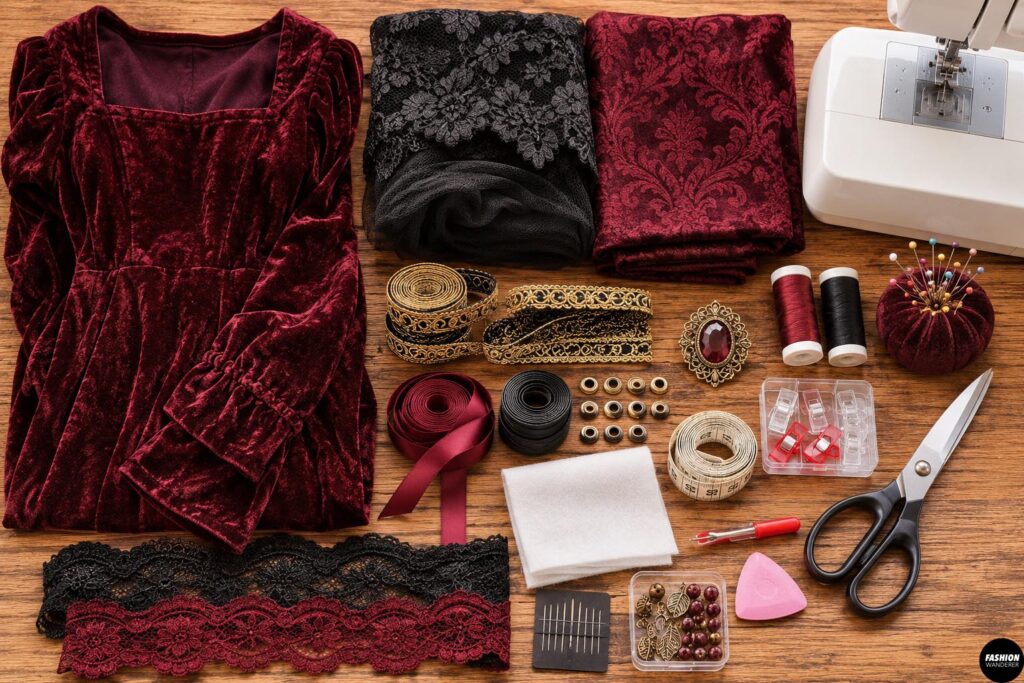
For this DIY Gothic medieval noblewoman costume, gather:
- 1 old velvet maxi or midi dress
- 1–2 yards black lace, chiffon, mesh, or lightweight velvet
- ½ yard contrasting fabric in burgundy, deep purple, dark green, or black
- Decorative braid, ribbon, or metallic trim
- 6–10 small metal eyelets or fabric loops
- Narrow satin ribbon or cord
- Coordinating thread
- Sewing machine
- Hand-sewing needle
- Fabric scissors
- Pins or sewing clips
- Measuring tape
- Tailor’s chalk
- Seam ripper
- Optional lightweight fusible interfacing
- Optional antique-style brooch
- Optional lace trim
- Optional beads or small decorative charms
A long velvet dress with a fitted or semi-fitted bodice works best.
Dark burgundy, black, forest green, navy, and deep plum are especially good colors for a gothic noblewoman look.
DIY Gothic Medieval Noblewoman Costume
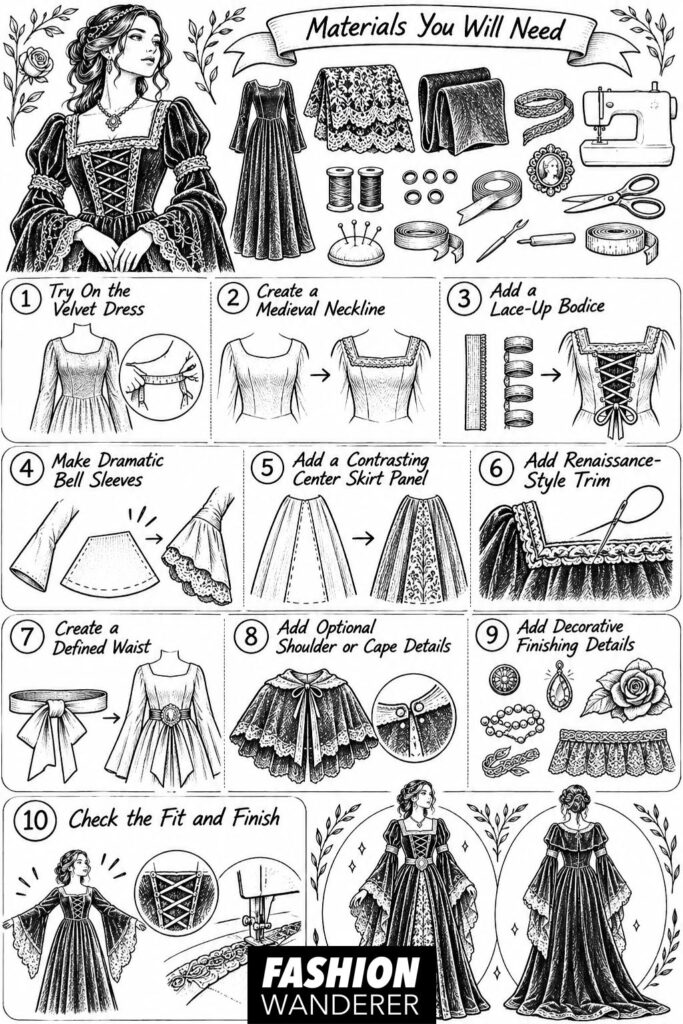
Step 1: Try On the Velvet Dress
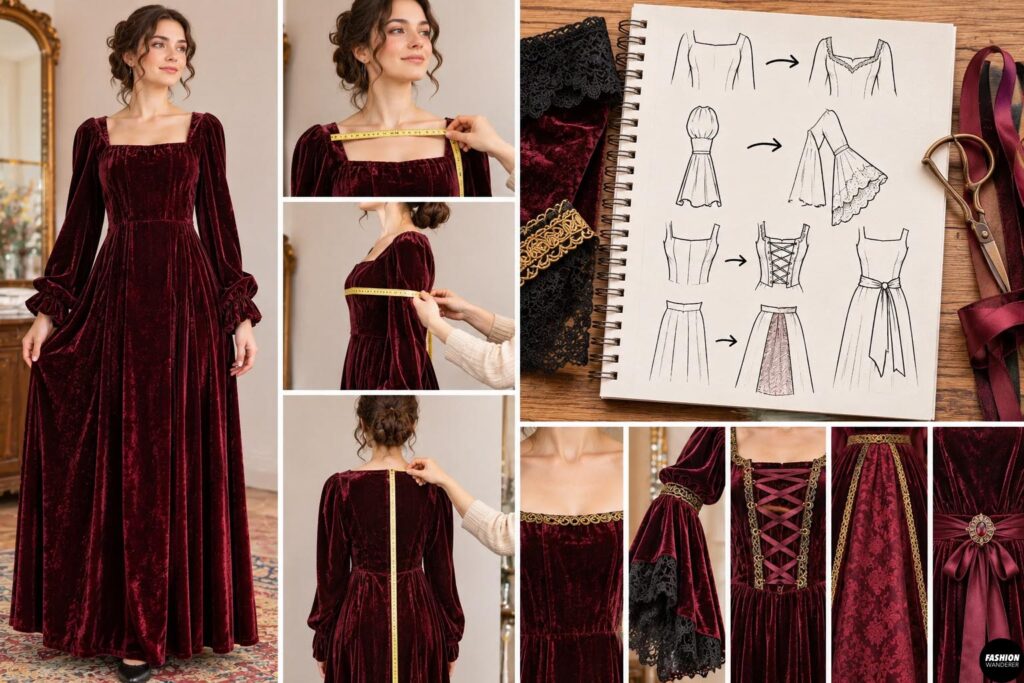
Put on the dress before making any changes.
Check the neckline, sleeves, waist, and overall length.
Decide which areas you want to transform.
For example, you might want to:
- Make the neckline deeper
- Add dramatic medieval sleeves
- Create a lace-up bodice
- Add a contrasting center skirt panel
- Add trim around the neckline
- Reshape the waist
Take a few quick measurements while wearing the dress.
This will help you avoid making unnecessary alterations.
Step 2: Create a Medieval Neckline
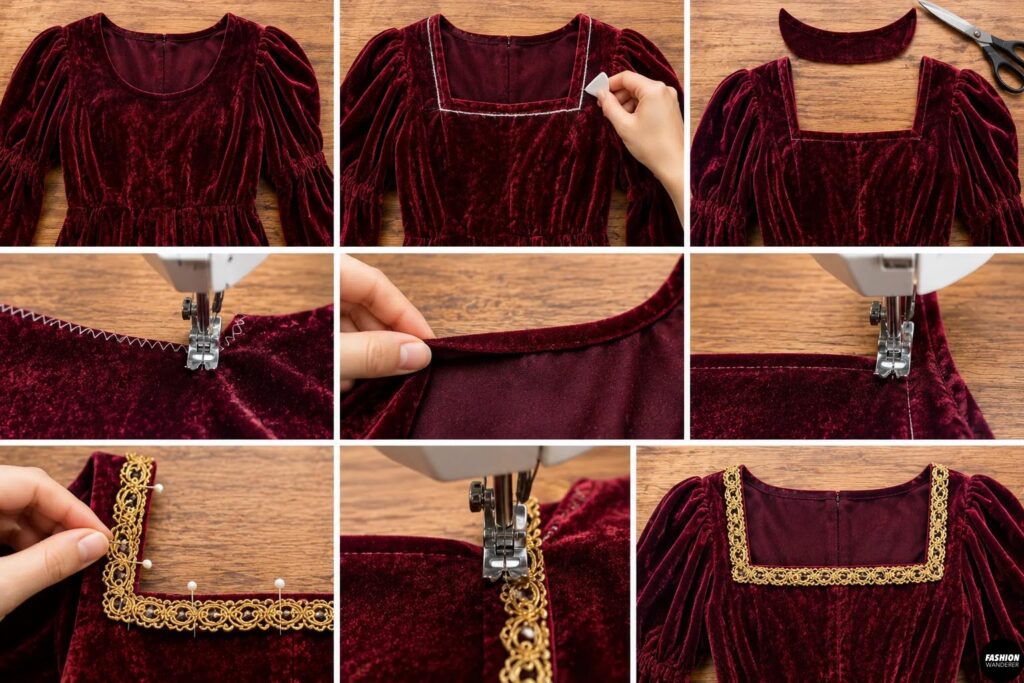
A square or softly rounded neckline instantly makes a plain velvet dress feel more Renaissance-inspired.
Use tailor’s chalk to mark your new neckline.
Keep the shape symmetrical.
Start conservatively—you can always cut more later.
Cut along the marked line.
If the velvet stretches or frays, finish the raw edge with a narrow zigzag stitch or serger.
Then fold the edge inward approximately ⅜ inch and sew.
For a more decorative finish, sew lace or metallic braid around the neckline.
Step 3: Add a Lace-Up Bodice Detail
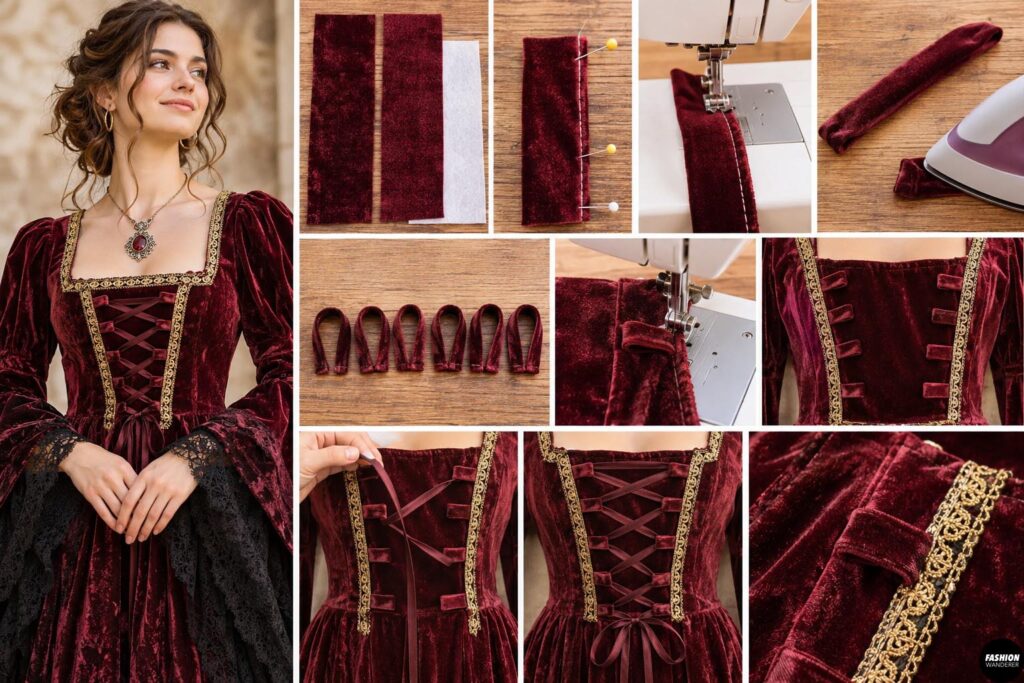
A corset-style front is one of the easiest ways to give the dress a medieval appearance.
Cut two narrow strips of matching or contrasting fabric approximately 2 inches wide and 10 to 14 inches long.
Fold the strips lengthwise with right sides together.
Sew along the long edge, turn right side out, and press.
Cut each strip into small loops approximately 2 inches long.
Fold each loop in half.
Arrange four or five loops vertically down each side of the center front.
Sew the raw ends securely to the dress.
Thread satin ribbon or cord through the loops in a crisscross pattern.
Tie it at the top or bottom.
For extra structure, place a small piece of fusible interfacing behind the loops before sewing them on.
Step 4: Make Dramatic Bell Sleeves
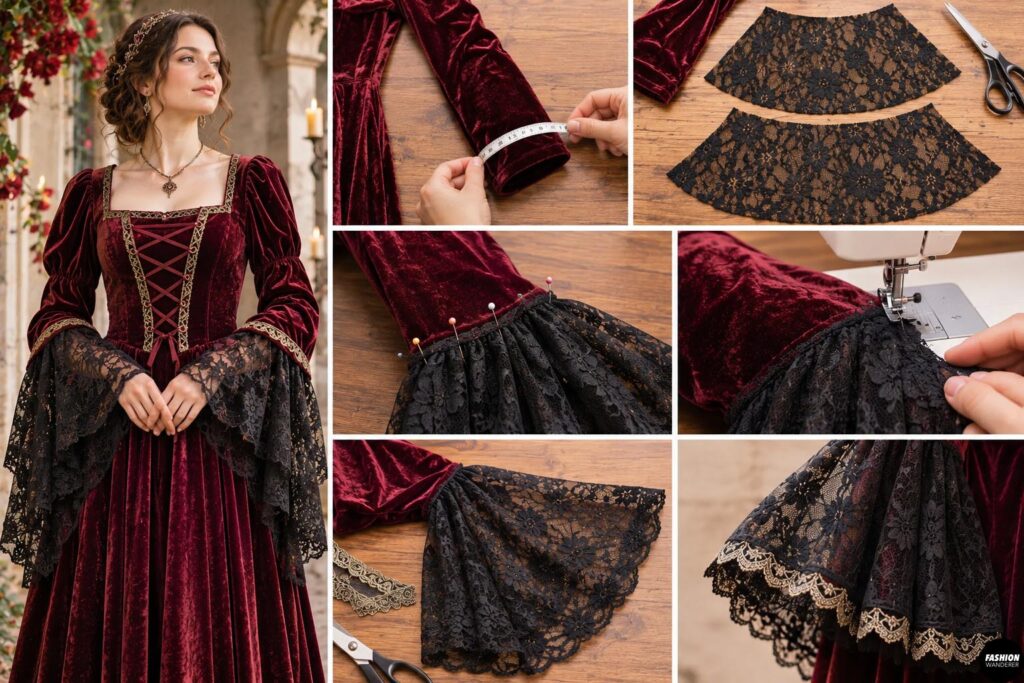
If your dress already has long sleeves, you can extend them rather than replacing them completely.
Measure around the sleeve opening near the wrist.
Cut two large semicircle or trapezoid pieces from lace, chiffon, mesh, or lightweight velvet.
The upper edge should match the wrist opening.
Make the lower edge wide and dramatic.
Place the upper edge of one sleeve extension right sides together with the dress sleeve opening.
Pin.
Sew using approximately a ⅜-inch seam allowance.
Repeat for the second sleeve.
Leave the lower edge raw if you are using lace or mesh that does not fray much.
Otherwise, finish it with a narrow rolled hem.
For even more drama, add lace trim around the bottom edge.
Step 5: Add a Contrasting Center Skirt Panel
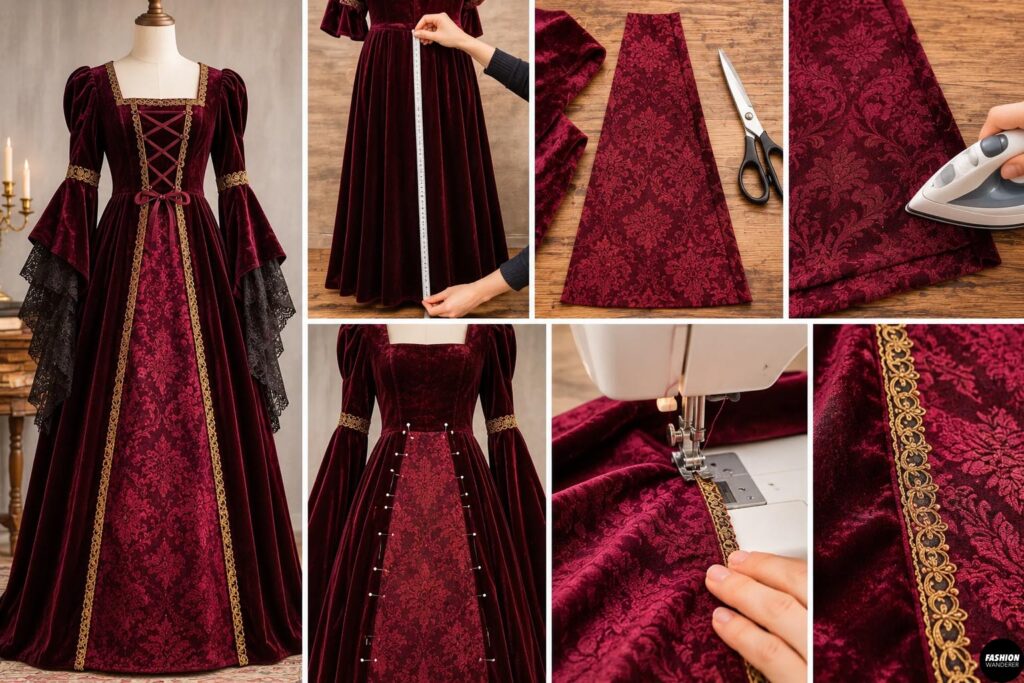
A center panel can make a basic dress look much more elaborate.
Measure from the waistline to the bottom hem.
Cut a long triangular or rectangular panel from your contrasting fabric.
The top should be narrow and the bottom wider.
Burgundy velvet, brocade, lace, or patterned satin works beautifully.
Fold the raw edges inward approximately ½ inch and press.
Position the panel vertically down the center front of the skirt.
Pin carefully.
Topstitch close to both side edges.
If you want the panel to look like an underskirt, sew decorative trim along each side.
Step 6: Add Renaissance-Style Trim
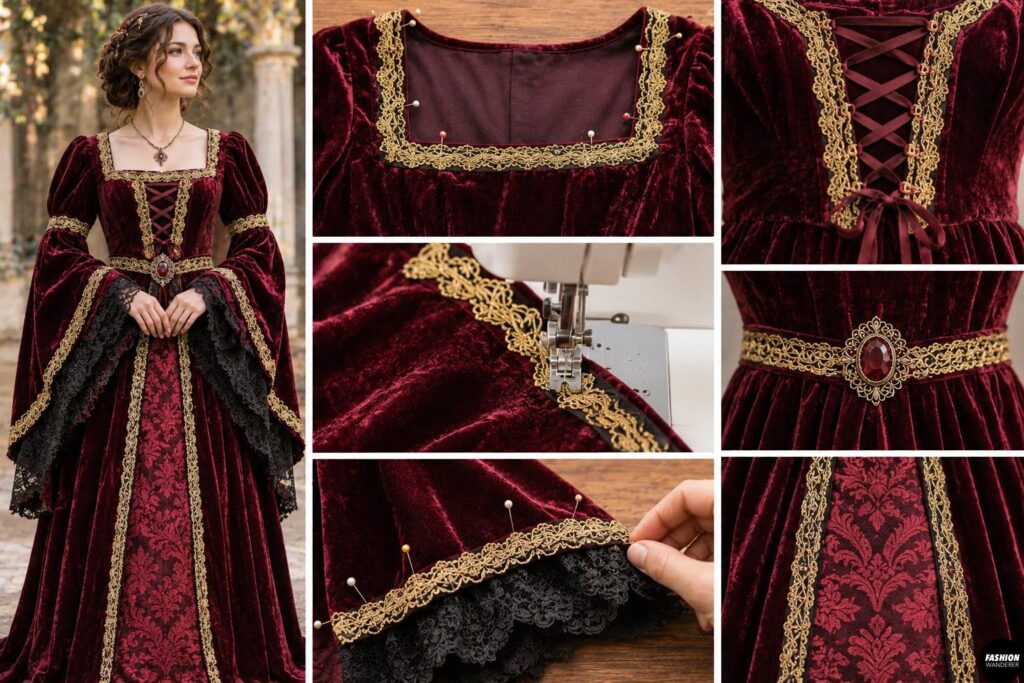
Decorative trim makes the costume look much more detailed without adding complicated sewing.
Apply braid, ribbon, or lace to:
- The neckline
- Sleeve seams
- Waistline
- Center skirt panel
- Sleeve cuffs
Pin the trim in place first.
Then sew slowly using a straight stitch.
Use matching thread if you want the stitching to disappear.
Metallic gold, antique brass, black, and deep burgundy trims all work well for a dark medieval aesthetic.
Step 7: Create a Defined Waist
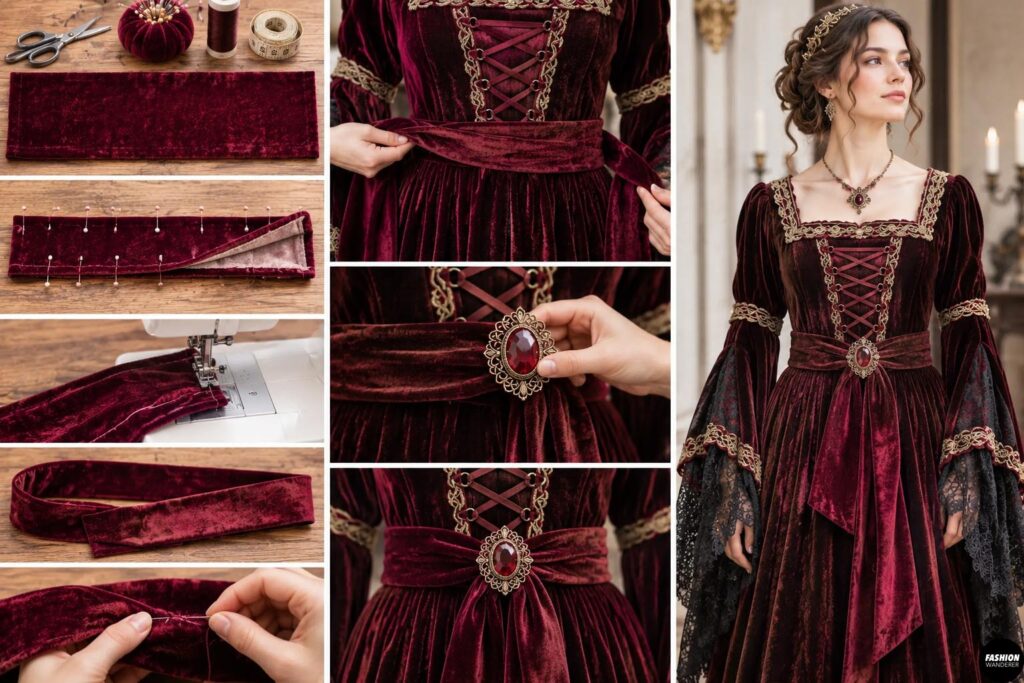
If the original velvet dress feels too loose, add a waist detail.
You can sew a simple sash from leftover fabric.
Cut a strip approximately 5 inches wide and long enough to wrap around your waist with extra length for tying.
Fold it in half lengthwise with right sides together.
Sew around the edges, leaving a small opening.
Turn right side out.
Press and close the opening.
Wear the sash around the natural waist.
You can also add a brooch at the center front for an aristocratic finish.
Step 8: Add Optional Shoulder or Cape Details
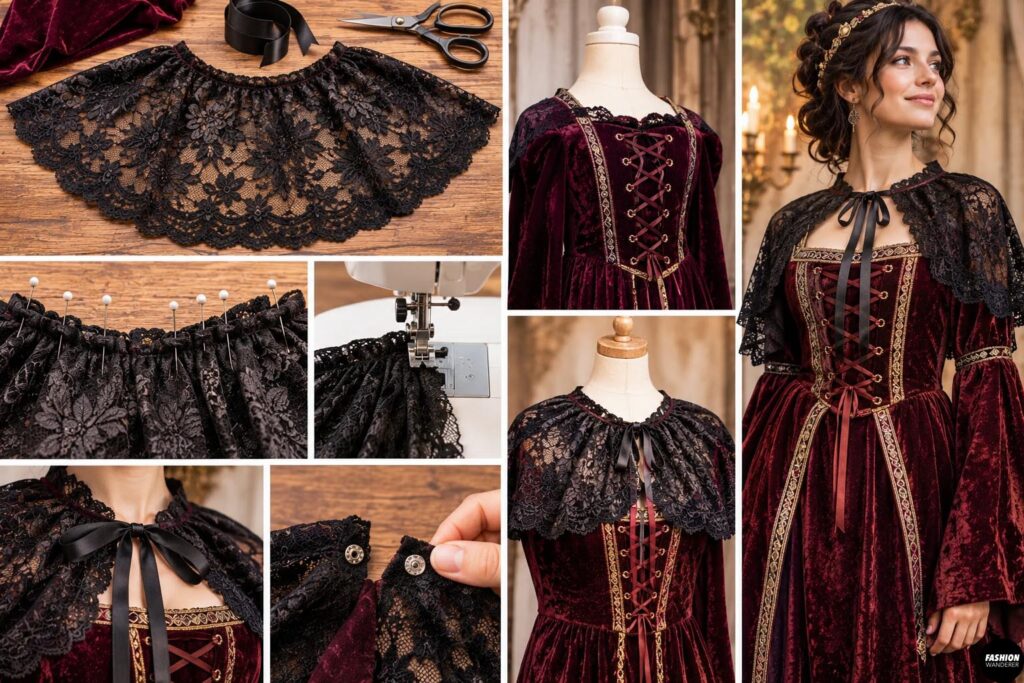
For an even more dramatic noblewoman look, make a small detachable shoulder cape.
Cut a semicircle from black lace, velvet, or chiffon.
Finish the curved edge.
Gather the top slightly so it sits across the shoulders.
Attach narrow ribbon ties or small snaps at the neckline.
A short cape works especially well if you want the costume to feel more gothic or fantasy-inspired.
Step 9: Add Decorative Finishing Details
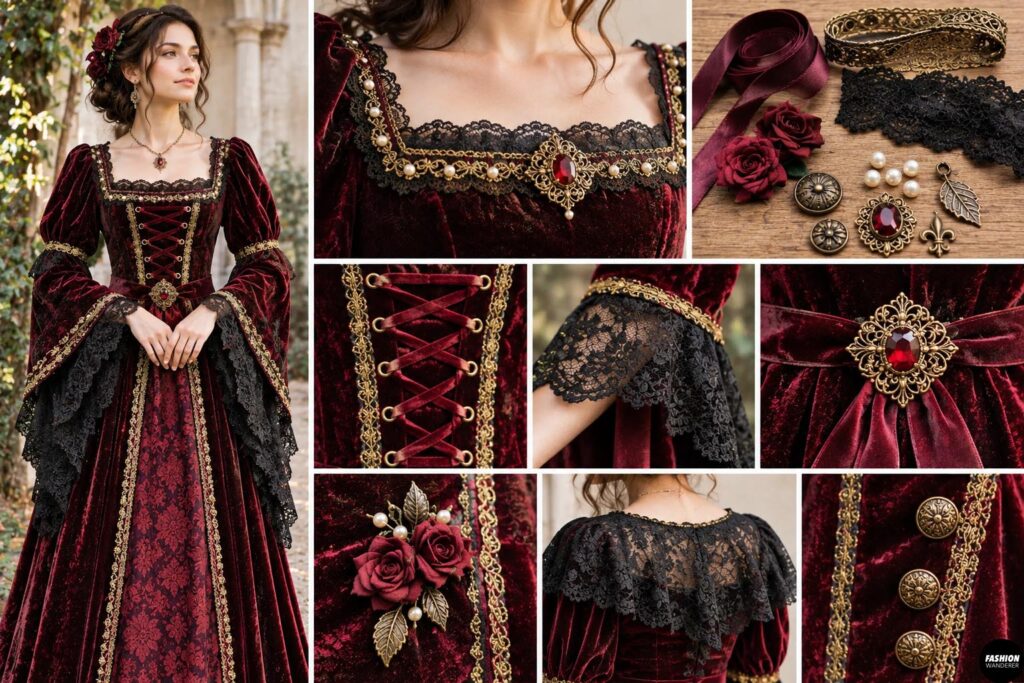
Now add the small details that make the costume feel special.
Try:
- Tiny antique-style buttons
- Pearl beads
- Decorative charms
- Black lace
- Velvet ribbon
- Metallic braid
- Faux gemstones
- Small fabric roses
Keep the embellishments concentrated around the neckline, bodice, or waist so the costume does not become too busy.
Step 10: Check the Fit and Finish
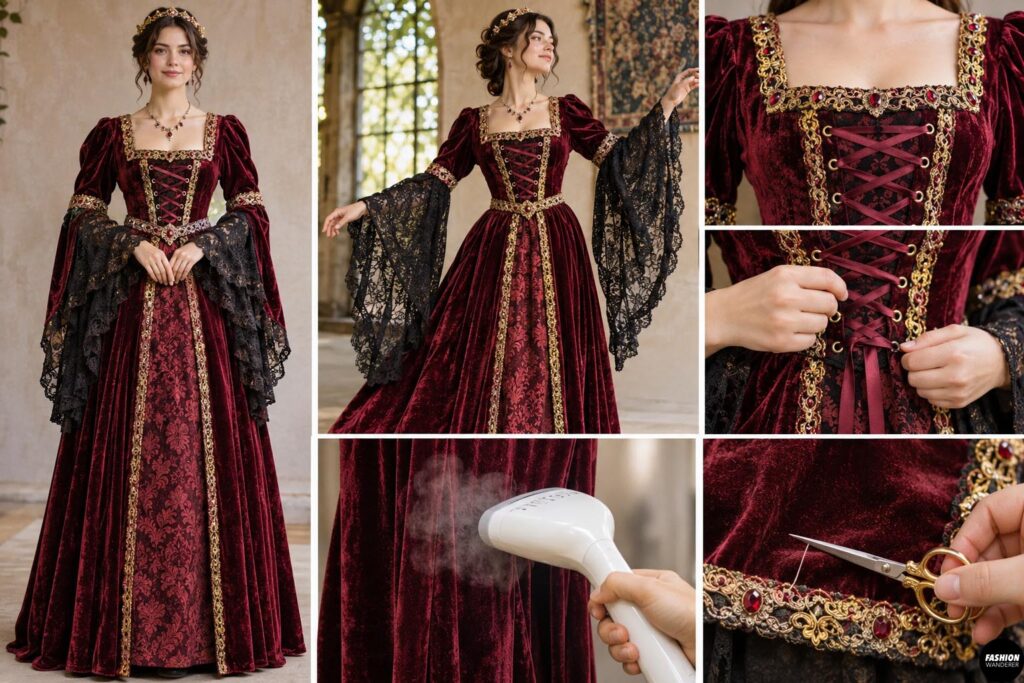
Try on the completed dress.
Raise your arms and make sure the new sleeves move comfortably.
Check that the lace-up bodice is secure but not too tight.
Make sure any trim or beads are firmly sewn.
Trim loose threads.
Steam the velvet gently from the wrong side if needed.
Avoid pressing velvet directly with a hot iron because it can crush the pile.
How to Style Your Gothic Medieval Noblewoman Costume
Pair your finished dress with:
- Black or brown boots
- A velvet choker
- Antique-style earrings
- Dark berry lipstick
- Braided or loosely curled hair
- A jeweled headband
- A small crown
- A dramatic cape
- Lace gloves
For Halloween, add slightly darker makeup and smoky eyes.
For a Renaissance fair, keep the styling more natural and add a belt pouch or small cloak.
Tips for Sewing Velvet
Velvet can shift while sewing, so use plenty of pins or sewing clips.
Sew slowly.
If the layers slide, hand-baste them before machine sewing.
Use a new sewing machine needle and avoid stretching the fabric while stitching.
Press velvet carefully from the wrong side using low heat and a pressing cloth.
Final Thoughts
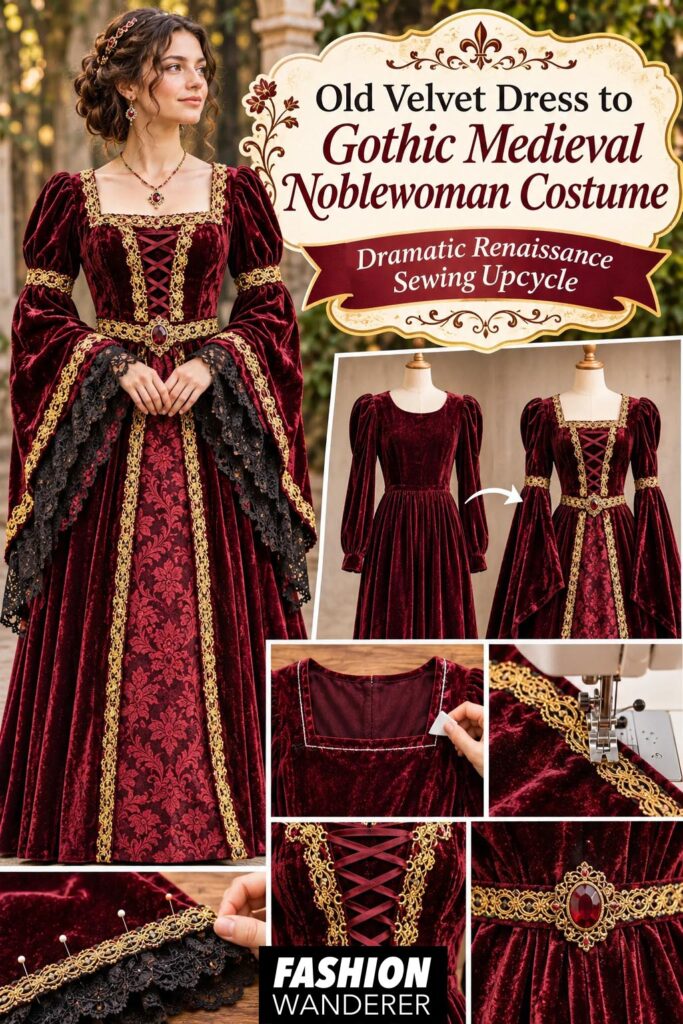
Turning an old velvet dress into a Gothic medieval noblewoman costume is an easy way to create a dramatic Renaissance-inspired outfit without starting from a complicated historical sewing pattern.
By adding a lace-up bodice, bell sleeves, decorative trim, and a contrasting skirt panel, you can completely change the look of an outdated thrifted dress.
This project is perfect for Halloween, Renaissance fairs, fantasy events, costume parties, or anyone who loves dark romantic fashion.
Best of all, the costume can be customized again and again. Change the trim, add a cape, swap the ribbon color, or add more embellishments to create your own unique medieval noblewoman look.
Instead of buying a mass-produced costume, give an old velvet dress a second life and create something dramatic, wearable, and completely one of a kind.