
Want to dress like your favorite K-Pop idol without spending a fortune on new clothes? Your next concert outfit might already be hiding in your closet!
From corset-inspired crop tops to adorable photocard bag charms, DIY K-Pop fashion upcycles are a fun, affordable way to recreate trendy Korean streetwear looks using old clothes and leftover fabric.
Whether you love the edgy styling of BLACKPINK, the playful Y2K aesthetic of NewJeans, or the oversized streetwear popular in K-Pop fashion, these beginner-friendly projects let you create something uniquely yours.
In this roundup, we’re sharing trendy K-Pop DIY upcycle ideas you can make from old jerseys, jeans, button-up shirts, hoodies, and fabric scraps.
Each project includes step-by-step sewing instructions, beginner tips, and styling ideas to help you create your own concert-ready wardrobe.
Why Make Your Own K-Pop Concert Outfits?
K-Pop fashion is all about creativity, layering, statement accessories, and unexpected combinations.
Instead of buying expensive outfits you’ll only wear once, try transforming clothes you already own.
These easy K-Pop sewing projects are perfect for:
- DIY K-Pop concert outfits and fan events
- Dance covers and performance costumes
- Y2K and Korean streetwear fashion
- Handmade gifts for K-Pop fans
- Sustainable fashion and thrift flips
Ready to turn your old clothes into idol-inspired fashion? Let’s get sewing!
1. Old Oversized Jersey to K-Pop Corset Crop Top – Easy Concert Outfit Upcycle
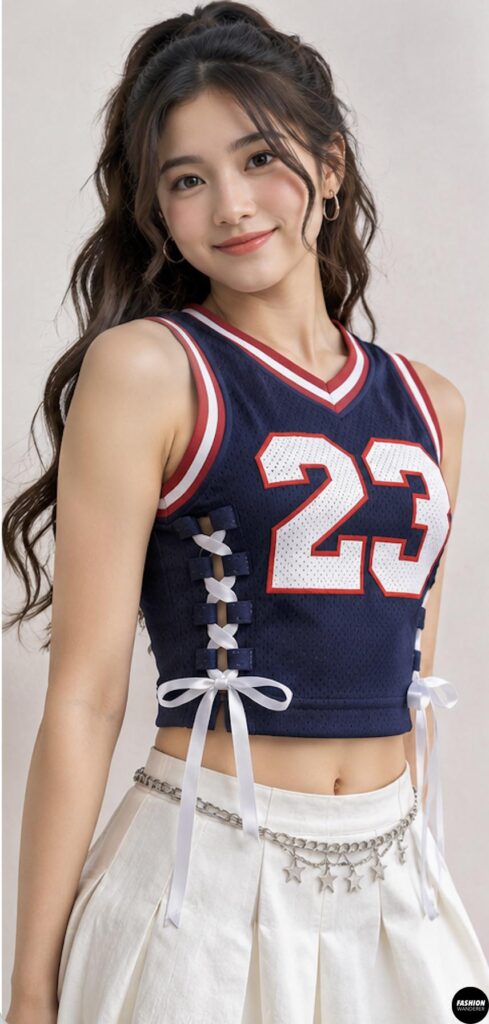
Oversized sports jerseys are a streetwear staple, but with a few simple sewing tricks, you can transform one into a fitted, corset-inspired crop top.
This DIY jersey corset top combines sporty styling with a feminine silhouette, making it perfect for concerts, dance performances, and Y2K-inspired outfits.
Difficulty: Beginner–Intermediate · Time: 60–90 minutes
Materials You’ll Need
- 1 oversized sports jersey
- Fitted tank top for sizing
- Fabric scissors
- Sewing machine
- Matching thread
- Fabric marker
- Measuring tape
- 4–6 small metal eyelets and setting tools, optional
- Ribbon or cotton cord for decorative lacing
Step-by-Step Tutorial
Step 1: Prepare the Jersey
Lay your oversized jersey flat with the front facing upward.
Smooth the fabric and decide where you want your crop top to end. Mark approximately 1 inch below your desired finished length to allow for hemming.
Step 2: Create the Fitted Shape
Turn the jersey inside out and place a fitted tank top over it.
Trace the tank’s side seams, leaving approximately ½ inch for seam allowances and comfortable movement.
Keep the jersey’s original neckline and shoulder seams whenever possible.
Step 3: Cut and Shape
Cut away the excess fabric along the marked sides and bottom.
For a corset-inspired silhouette, taper the waist slightly while keeping enough room around the bust and ribs.
Step 4: Sew the Side Seams
Pin the side seams with right sides together.
Sew using a narrow zigzag or stretch stitch with a ½-inch seam allowance.
Try on the top and adjust the fit before trimming excess fabric.
Step 5: Add Decorative Corset Lacing
For a simple beginner option, stitch two reinforced fabric strips vertically onto the front.
Add paired eyelets through the reinforced strips, or sew small fabric loops instead.
Thread ribbon through the openings in a crisscross pattern.
Keep the lacing decorative rather than tightly cinching stretchy jersey fabric.
Step 6: Finish the Hem
Fold the bottom edge inward by ½ inch and sew using a stretch stitch.
Style your finished jersey crop top with cargo pants, a pleated mini skirt, and chunky sneakers for an effortlessly cool K-Pop concert outfit.
2. Old Jeans to K-Pop Photocard Holder – Cute Denim Bag Charm Upcycle
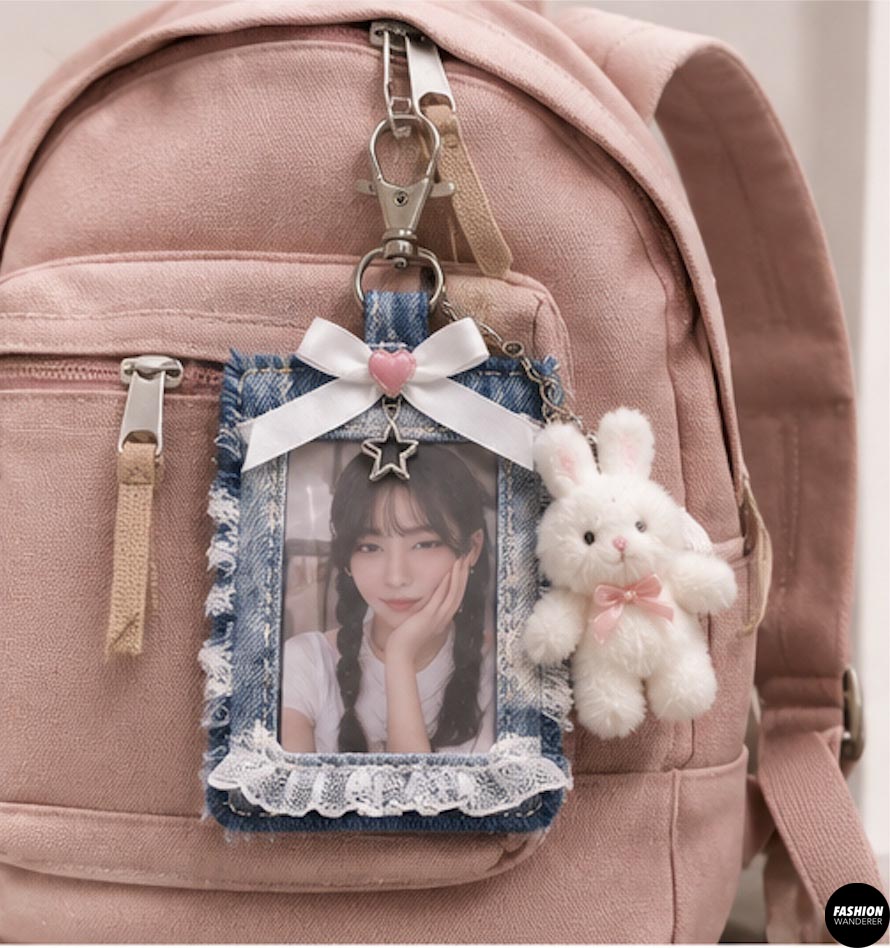
If you collect K-Pop photocards, this adorable DIY denim photocard holder is a must-try project!
Made from leftover jeans, this miniature bag charm lets you display your favorite idol photocard while adding a personalized touch to your everyday accessories.
Difficulty: Beginner · Time: 30–60 minutes
Materials You’ll Need
- Old jeans or denim scraps
- Clear flexible vinyl
- Fabric scissors
- Sewing machine
- Matching thread
- Small lobster clasp or keychain ring
- 1 × 2-inch denim strip
- Optional ribbon bows and charms
Step-by-Step Tutorial
Step 1: Cut the Denim
Cut two denim rectangles measuring 3.75 × 5 inches.
These will form the front and back of your photocard holder.
Step 2: Create the Window
On the front rectangle, mark a centered opening measuring approximately 2.25 × 3.5 inches.
Carefully cut out the center.
Step 3: Attach Clear Vinyl
Cut a 3 × 4.25-inch rectangle of clear vinyl.
Position it behind the window and secure it using sewing clips.
Stitch around the window approximately ⅛ inch from the opening.
Step 4: Assemble the Pocket
Place the front and back denim pieces wrong sides together.
Sew around the sides and bottom using a ¼-inch seam allowance, leaving the top open.
Finish the exposed edges with a zigzag stitch or narrow binding.
Step 5: Attach the Bag Charm Loop
Fold the small denim strip into a narrow strap and stitch along its edge.
Thread it through a lobster clasp, fold it in half, and securely sew both ends to the holder’s upper corner.
Step 6: Decorate and Insert Your Photocard
Add a tiny bow, embroidered heart, or star charm.
Slide your photocard into a properly sized acid-free, PVC-free protective sleeve before inserting it into the holder.
Styling idea: Clip your finished denim photocard charm onto a canvas tote or mini shoulder bag for a cute K-Pop fan accessory.
3. Old Button-Up to K-Pop Corset Top – Trendy Thrift Flip Sewing Tutorial
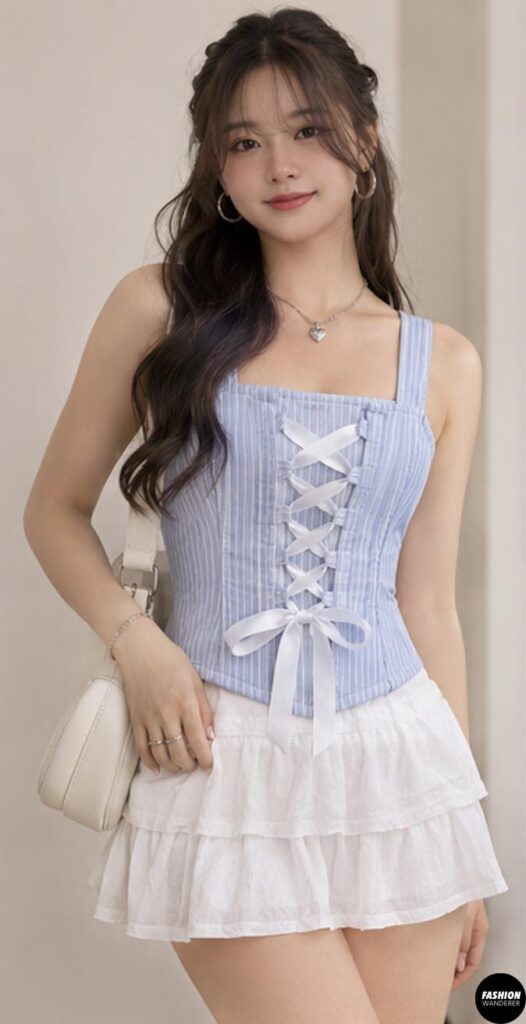
Have an oversized button-up shirt you never wear? Turn it into a structured DIY corset-inspired top with a flattering fitted waist.
This thrift flip creates a polished K-Pop-inspired look that’s perfect for pairing with mini skirts, baggy jeans, or tailored trousers.
Difficulty: Intermediate · Time: 1–2 hours
Materials You’ll Need
- 1 oversized button-up shirt
- Fitted top for reference
- Fabric scissors
- Sewing machine
- Measuring tape
- Fabric marker
- Pins or clips
- Matching thread
- Optional lightweight fusible interfacing
Step-by-Step Tutorial
Step 1: Prepare the Shirt
Button the shirt closed and lay it flat.
Decide whether to keep the collar and sleeves or create a sleeveless corset-style top.
For a classic K-Pop look, keep the collar and shorten the sleeves.
Step 2: Mark the Crop Length
Try on the shirt and mark your preferred finished length.
Add 1 inch for the hem allowance.
Remove the shirt and cut along your marked line.
Step 3: Shape the Waist
Turn the shirt inside out and try it on again.
Pin the side seams inward to create a fitted silhouette.
Make sure you can still breathe, sit, and move comfortably.
Step 4: Add Waist Darts
Mark two vertical darts on the front and two on the back, positioned to follow your natural body shape.
Pinch out excess fabric and sew each dart from its widest point toward a tapered end.
Press the darts toward the center.
Step 5: Create Corset-Inspired Seams
For a structured appearance, topstitch along the darts or add narrow decorative fabric strips.
You can also add lightweight interfacing to the front panels for extra stability.
Step 6: Finish the Top
Fold the bottom edge inward twice by ½ inch and sew.
Try on the finished top, checking that the button placket stays flat without pulling.
Pair it with wide-leg jeans, a pleated skirt, or platform boots for a chic K-Pop thrift flip outfit.
4. DIY K-Pop Photocard Bow Bag Charm From Fabric Scraps – Easy Zero-Waste Project
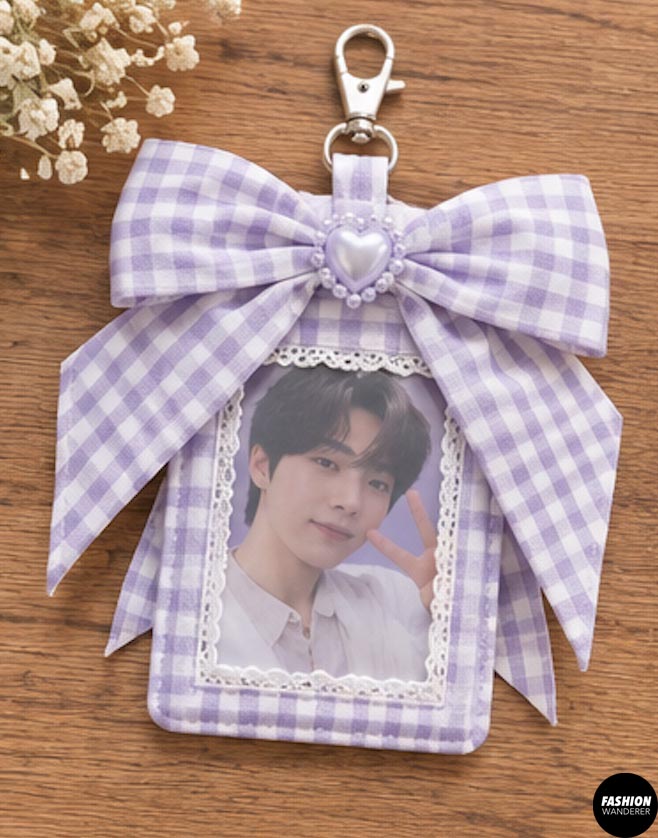
Tiny bows and bag charms are an adorable way to personalize your accessories.
This DIY K-Pop photocard bow bag charm uses leftover fabric to create a cute decorative bow with a small photocard pocket attached.
It’s also a thoughtful handmade gift for your K-Pop-loving bestie!
Difficulty: Beginner · Time: 30–45 minutes
Materials You’ll Need
- Fabric scraps
- Clear vinyl
- Sewing machine or needle
- Matching thread
- Fabric scissors
- Small keychain ring
- Ribbon
- Optional beads or charms
Step-by-Step Tutorial
Step 1: Cut the Bow Pieces
Cut one fabric rectangle measuring 8 × 5 inches.
Cut a second strip measuring 2 × 3 inches for the bow’s center.
Step 2: Sew the Bow
Fold the large rectangle in half lengthwise with right sides together.
Sew along the long edge using a ¼-inch seam allowance.
Turn right side out and press.
Fold the short ends toward the center, overlapping them slightly, and secure with a few stitches.
Step 3: Shape the Bow
Pinch the middle into small accordion folds.
Wrap the smaller fabric strip around the center and stitch it securely at the back.
Step 4: Make the Photocard Pocket
Cut two fabric rectangles measuring 3.5 × 4.75 inches.
Cut a centered 2.25 × 3.5-inch window in one rectangle.
Attach clear vinyl behind the opening.
Step 5: Assemble the Holder
Place the front and back pieces wrong sides together.
Sew the sides and bottom, leaving the top open.
Finish the raw edges with narrow binding or zigzag stitching.
Step 6: Attach the Bow and Keychain
Sew the bow onto the top corner of the holder without blocking the pocket opening.
Attach a reinforced fabric loop and keychain ring.
Insert a sleeved photocard and clip your finished charm onto your favorite bag.
Cute idea: Make matching bow charms in your favorite K-Pop group’s signature colors.
5. Old Hoodie to K-Pop Cat-Ear Hood & Arm Warmers – Cute Y2K Upcycle
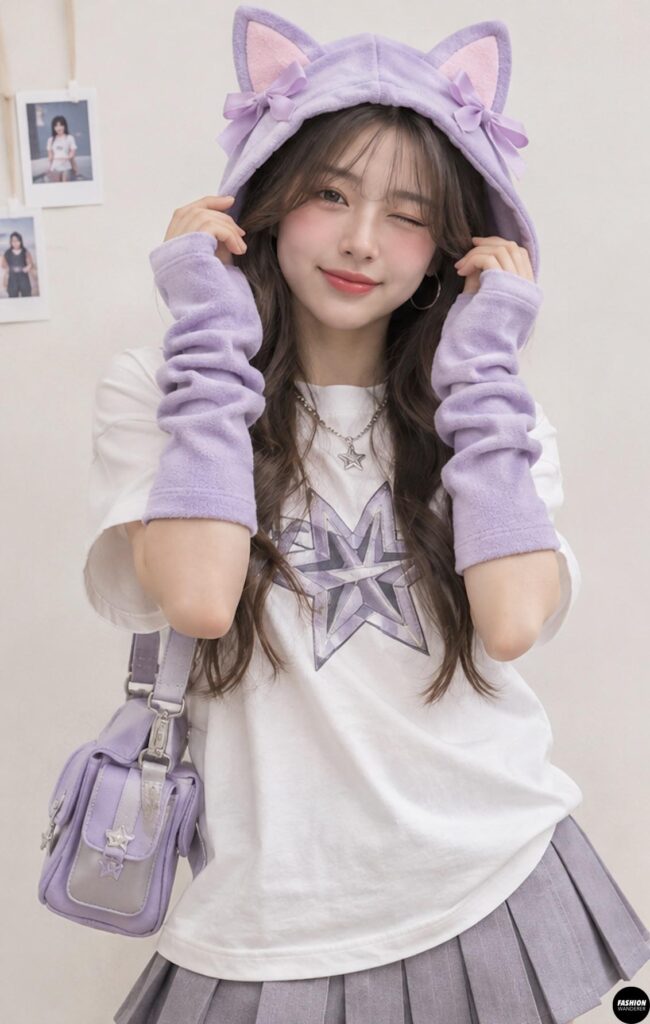
Cat-ear accessories and matching arm warmers are perfect for creating playful Y2K K-Pop streetwear outfits.
Instead of buying new accessories, transform an old hoodie into a matching set using its original hood and sleeves.
Difficulty: Beginner · Time: 1–2 hours
Materials You’ll Need
- 1 old oversized hoodie
- Fabric scissors
- Sewing machine
- Matching thread
- Fabric marker
- Paper for templates
- Scrap fleece or felt
- Optional ribbon bows and lace
Step-by-Step Tutorial
Step 1: Remove the Hood
Carefully detach the hood from the sweatshirt neckline using a seam ripper.
Remove any drawstrings and trim loose threads.
Step 2: Cut the Cat Ears
Draw a triangle measuring approximately 4 inches tall and 3 inches wide.
Use this template to cut four ear pieces from leftover sweatshirt fabric.
Step 3: Sew the Ears
Place two ear pieces right sides together.
Sew along the angled edges using a ¼-inch seam allowance, leaving the bottom open.
Turn right side out and repeat.
Add contrasting inner-ear fabric if desired.
Step 4: Attach the Ears
Mark two evenly spaced positions along the hood’s upper seam.
Open short sections of the seam and insert the ear bases.
Sew the openings closed securely, then finish the hood’s raw neckline edge with a narrow hem or knit binding.
Step 5: Cut the Arm Warmers
Cut the sweatshirt sleeves away from the body.
Measure approximately 12–16 inches from each original wrist cuff and cut both sleeves to matching lengths.
Step 6: Sew the Arm Warmers
Turn the sleeve pieces inside out.
Adjust the width if necessary and sew the side seams using a stretch stitch.
Fold the upper raw edges inward by ½ inch and hem.
Step 7: Add Thumbholes and Decorations
Carefully open a small section of each wrist cuff seam where your thumbs naturally rest.
Reinforce the ends of each opening.
Decorate the hood and arm warmers with tiny bows, embroidered stars, or lace trim.
Style your finished set with a mini skirt, oversized tee, and platform sneakers for an adorable K-Pop-inspired look.
Tips for Creating the Perfect DIY K-Pop Concert Outfit
Before heading to your next concert, remember that comfort matters just as much as style.
Choose breathable fabrics, secure all decorative charms, and test your outfit by sitting, walking, and dancing.
Avoid oversized accessories that could obstruct other fans’ views or get caught on bags.
For the cutest coordinated look, pick two or three colors and repeat them throughout your outfit.
You can also combine projects from this roundup. For example, pair the jersey corset crop top with the cat-ear hood and arm warmers, then finish the look with a matching denim photocard bag charm.
Final Thoughts
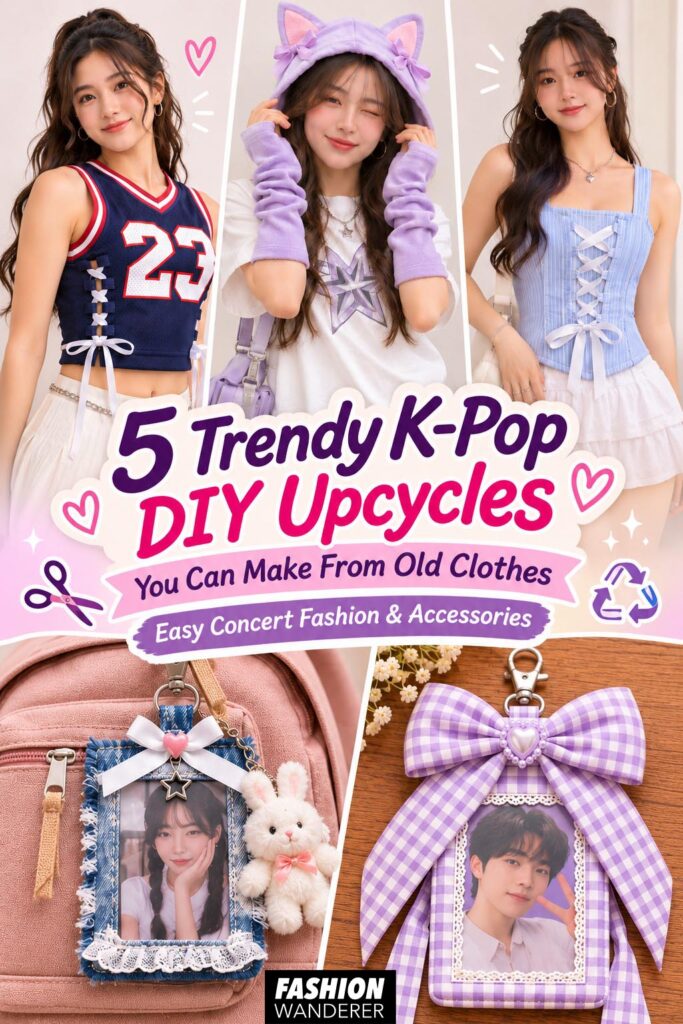
Creating your own K-Pop DIY outfits and accessories from old clothes is a fun way to express your personal style while reducing fashion waste.
From sporty corset crop tops and fitted button-up thrift flips to adorable photocard holders and Y2K cat-ear accessories, these five projects prove that you don’t need expensive clothing to create an eye-catching concert look.
Grab those forgotten jeans, oversized jerseys, and old hoodies, and turn them into something completely new.
Your next favorite K-Pop outfit might be just a few stitches away!