
Nothing says summer quite like a cheerful daisy bucket hat! Combining vintage-inspired granny squares with a trendy bucket hat silhouette, this project is perfect for sunny beach days, farmers markets, festivals, vacations, and everyday wear. A crochet daisy bucket hat is not only fashionable but also a fun stash-busting project that lets you play with bright colors and soft cotton yarn.
In this tutorial, you’ll learn how to crochet a daisy bucket hat using beginner-friendly stitches and easy granny squares. This free crochet pattern includes detailed written instructions and step-by-step guidance, making it a rewarding project for confident beginners and intermediate crocheters.
For more diy inspiration, check out these summer crochet projects that are on trend for every occasion!
Why You’ll Love This Crochet Daisy Bucket Hat
This handmade bucket hat is lightweight, breathable, and easy to customize with your favorite colors.
You’ll love it because it’s:
- Beginner-friendly
- Lightweight and breathable
- Perfect for summer vacations
- Stylish and trendy
- Great stash-busting project
- Foldable for travel
- Makes a thoughtful handmade gift
- Fun to customize with different flower colors
Skill Level
Easy to Intermediate
You’ll need to know these basic stitches:
- Chain (ch)
- Slip Stitch (sl st)
- Single Crochet (sc)
- Half Double Crochet (hdc)
- Double Crochet (dc)
- Magic Ring (MR)
Finished Size
Adult One Size
Approximate Measurements
- Head Circumference: 22–23 inches (56–58 cm)
- Crown Diameter: 6½ inches (16.5 cm)
- Brim Width: 2½ inches (6.5 cm)
The cotton yarn provides just enough structure while remaining comfortable.
Materials
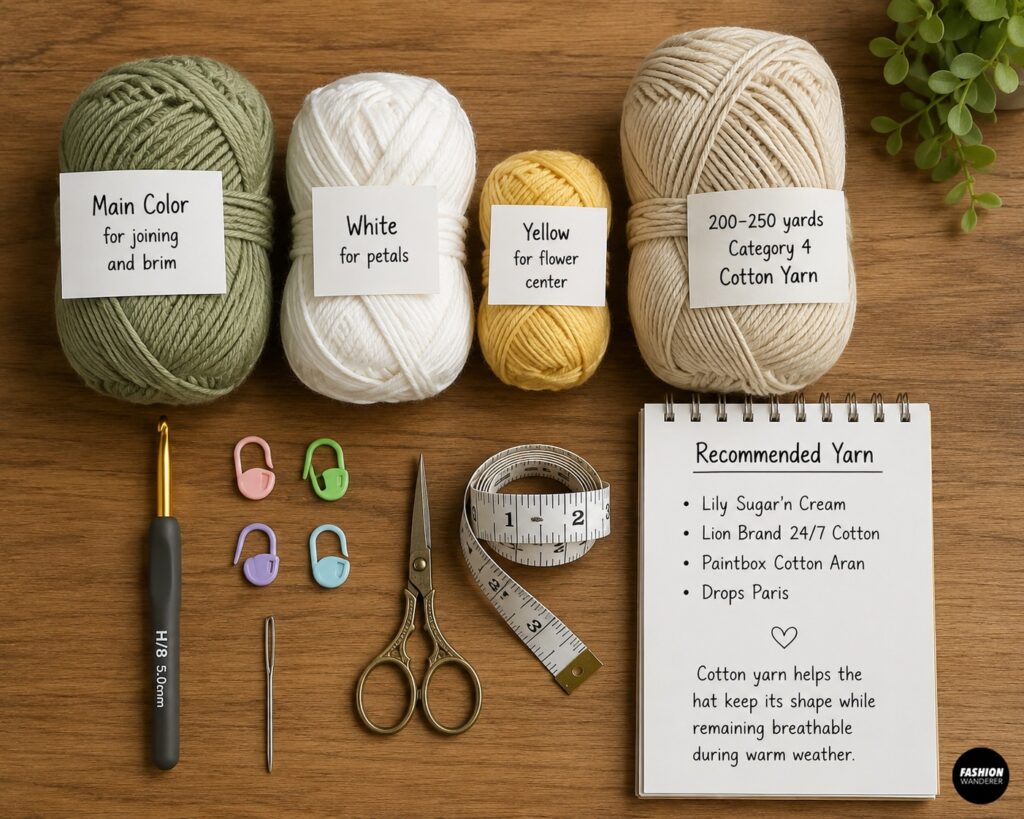
- 200–250 yards Category 4 cotton yarn
- Small amount of yellow yarn (flower center)
- Small amount of white yarn (petals)
- Main color yarn for joining and brim
- 5 mm (H/8) crochet hook
- Stitch markers
- Yarn needle
- Scissors
- Measuring tape
Recommended Yarn
Cotton yarn helps the hat keep its shape while remaining breathable during warm weather.
Crochet Abbreviations
- MR = Magic Ring
- ch = chain
- sl st = slip stitch
- sc = single crochet
- hdc = half double crochet
- dc = double crochet
- st = stitch
- rep = repeat
Gauge
4 × 4 inches
14 dc × 8 rows
Gauge isn’t extremely important, but maintaining consistent tension will help the squares fit together neatly.
Pattern Overview
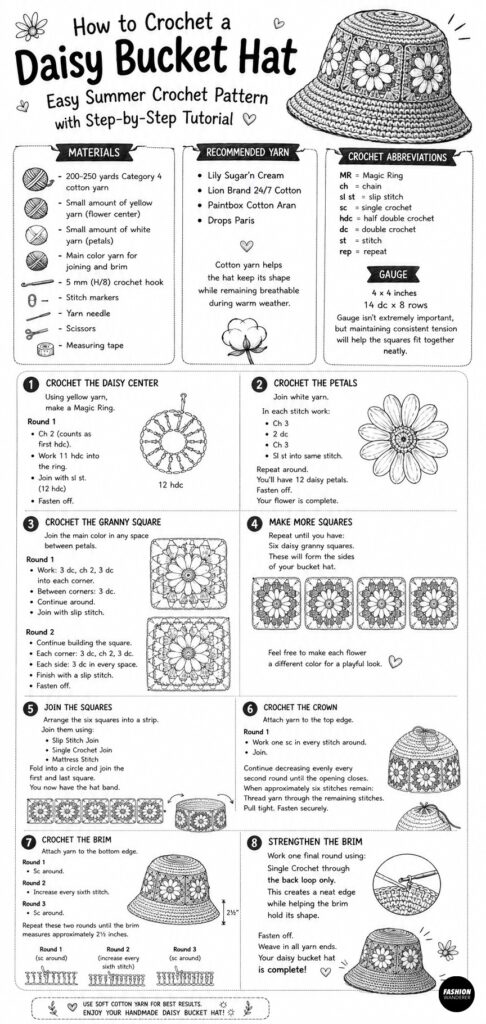
The hat is crocheted in five sections:
- Daisy Granny Squares
- Crown
- Side Band
- Brim
- Finishing
Step 1: Crochet the Daisy Center
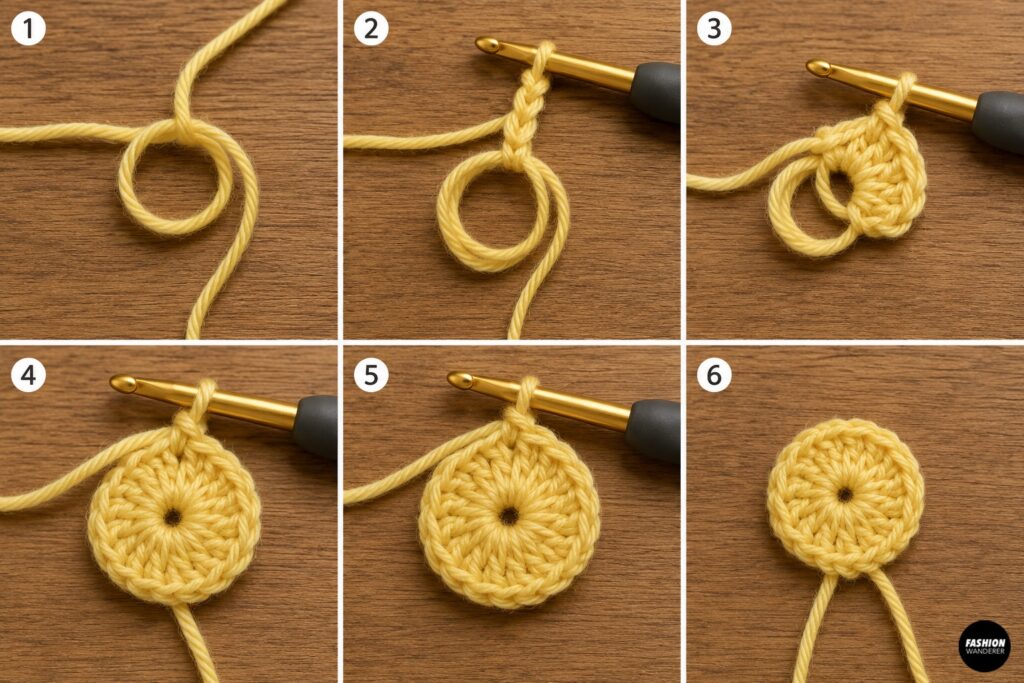
Using yellow yarn, make a Magic Ring.
Round 1
Ch 2 (counts as first hdc).
Work 11 hdc into the ring.
Join with sl st.
(12 hdc)
Fasten off.
Step 2: Crochet the Petals
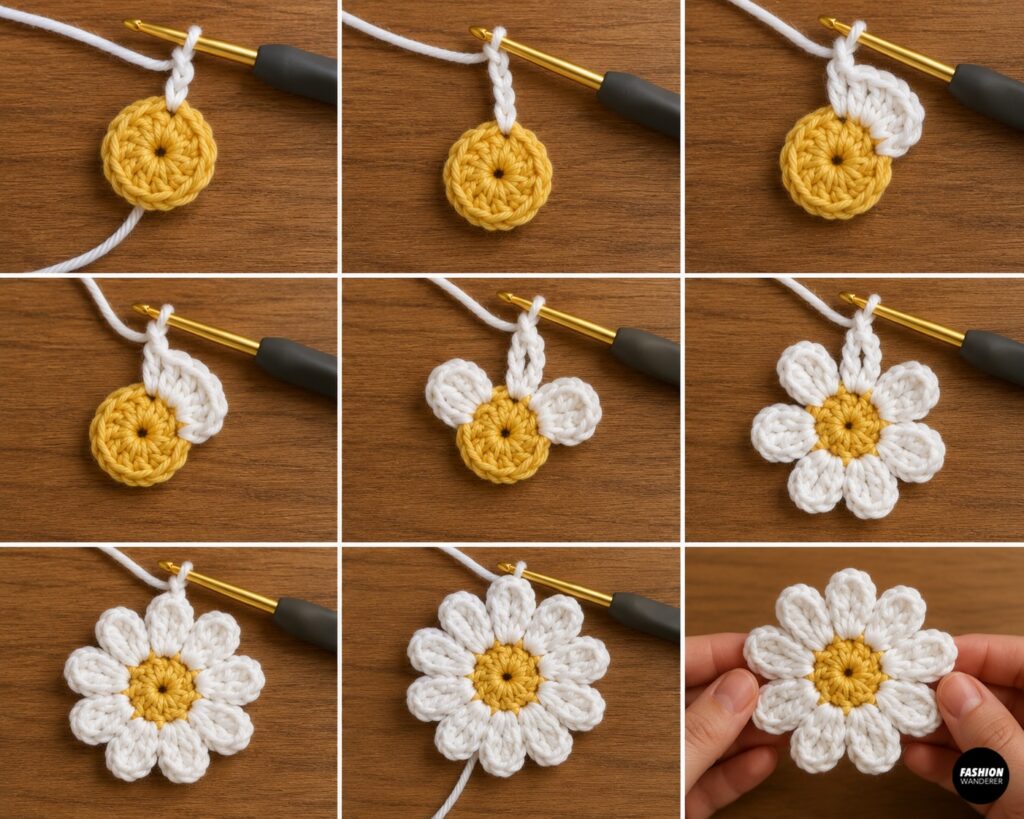
Join white yarn.
In each stitch work:
Ch 3
2 dc
Ch 3
Sl st into same stitch.
Repeat around.
You’ll have 12 daisy petals.
Fasten off.
Your flower is complete.
Step 3: Crochet the Granny Square
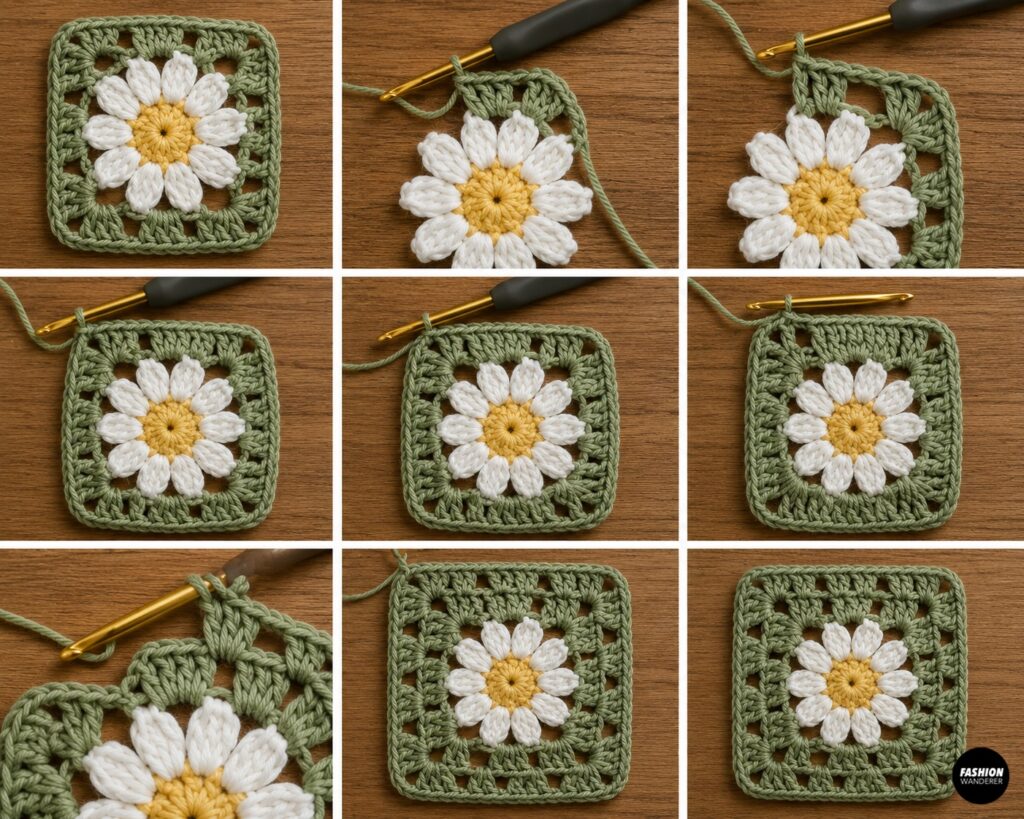
Join the main color in any space between petals.
Round 1
Work:
3 dc
Ch 2
3 dc
into each corner.
Between corners:
3 dc.
Continue around.
Join with slip stitch.
Round 2
Continue building the square.
Each corner:
3 dc
Ch 2
3 dc.
Each side:
3 dc in every space.
Finish with a slip stitch.
Fasten off.
Step 4: Make More Squares
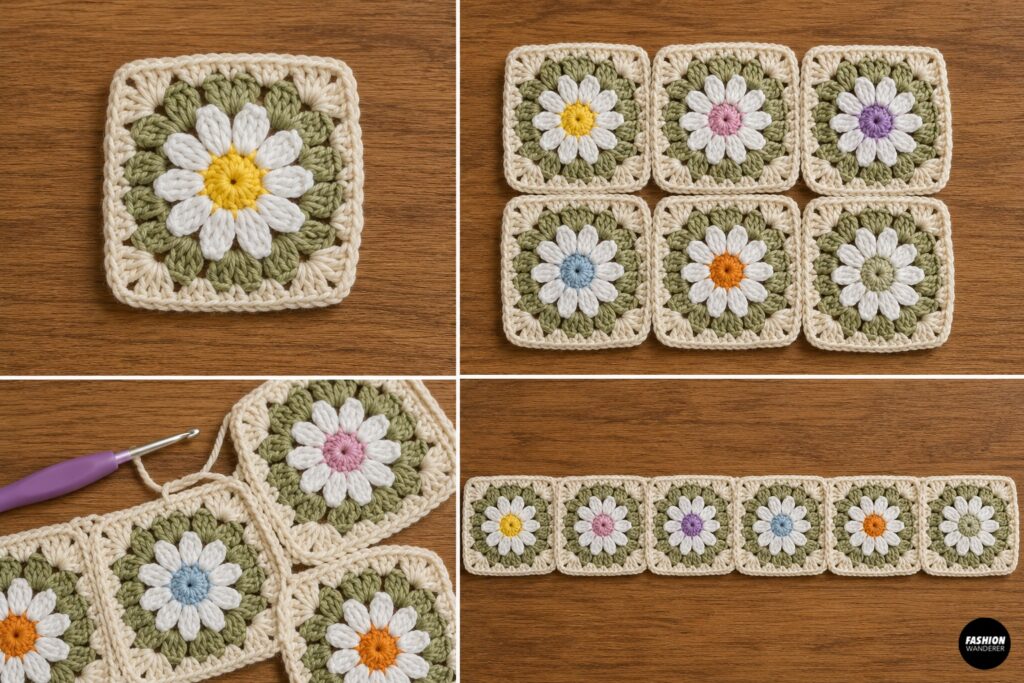
Repeat until you have:
Six daisy granny squares.
These will form the sides of your bucket hat.
Feel free to make each flower a different color for a playful look.
Step 5: Join the Squares
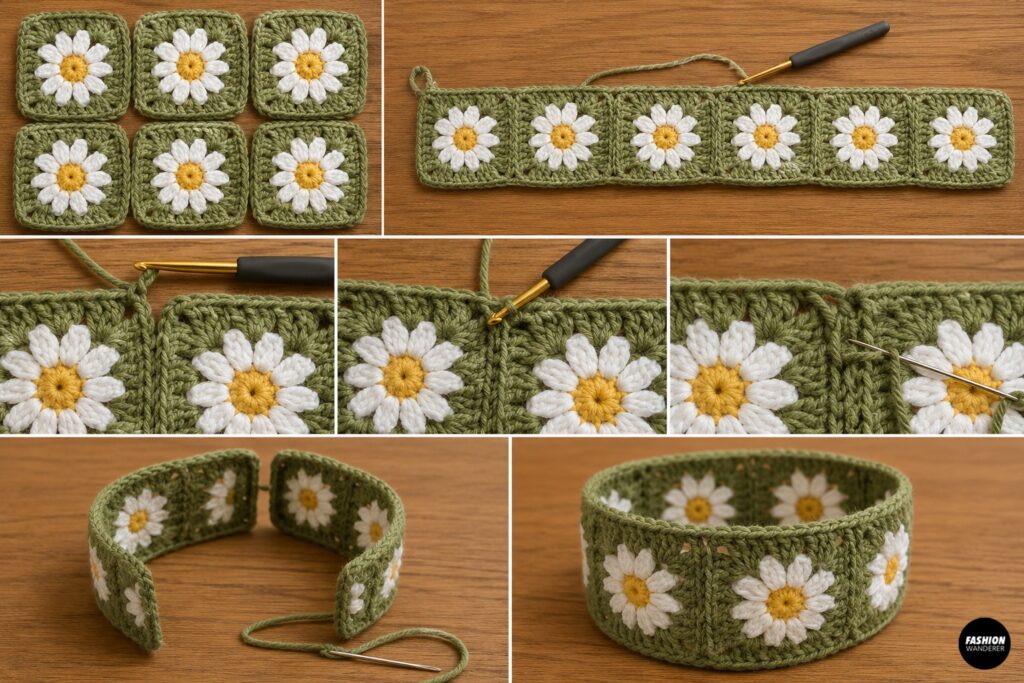
Arrange the six squares into a strip.
Join them using:
- Slip Stitch Join
- Single Crochet Join
- Mattress Stitch
Fold into a circle and join the first and last square.
You now have the hat band.
Step 6: Crochet the Crown
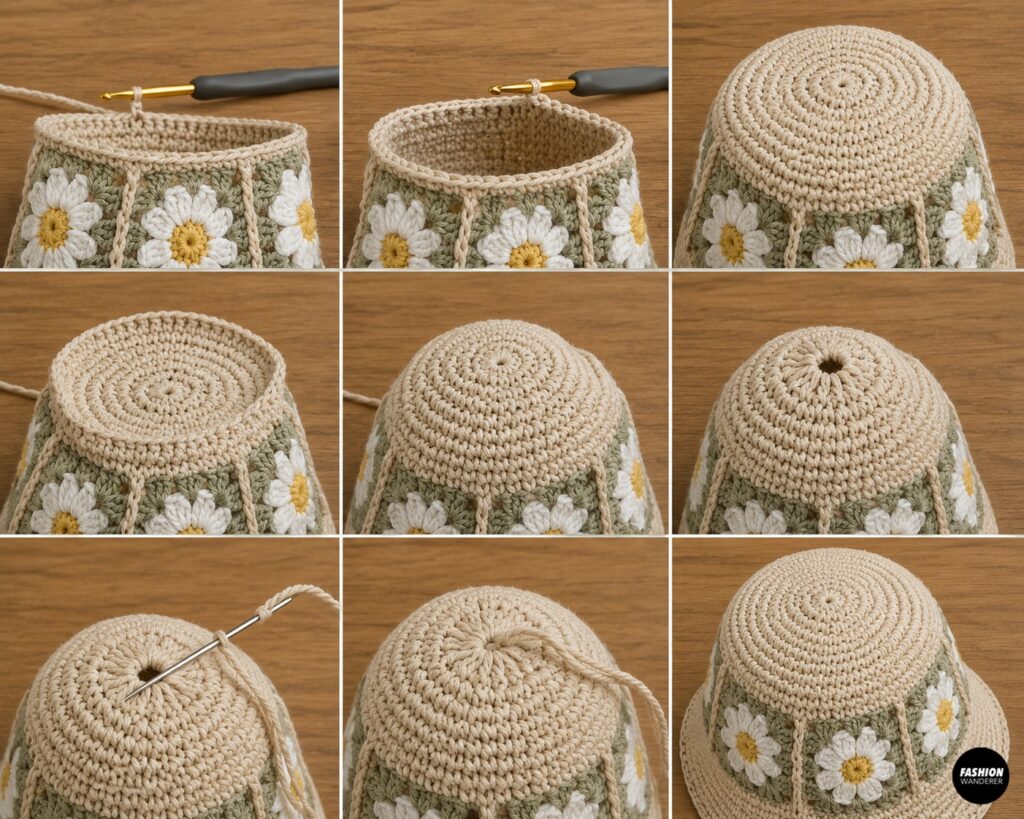
Attach yarn to the top edge.
Round 1
Work one sc in every stitch around.
Join.
Continue decreasing evenly every second round until the opening closes.
When approximately six stitches remain:
Thread yarn through the remaining stitches.
Pull tight.
Fasten securely.
Step 7: Crochet the Brim
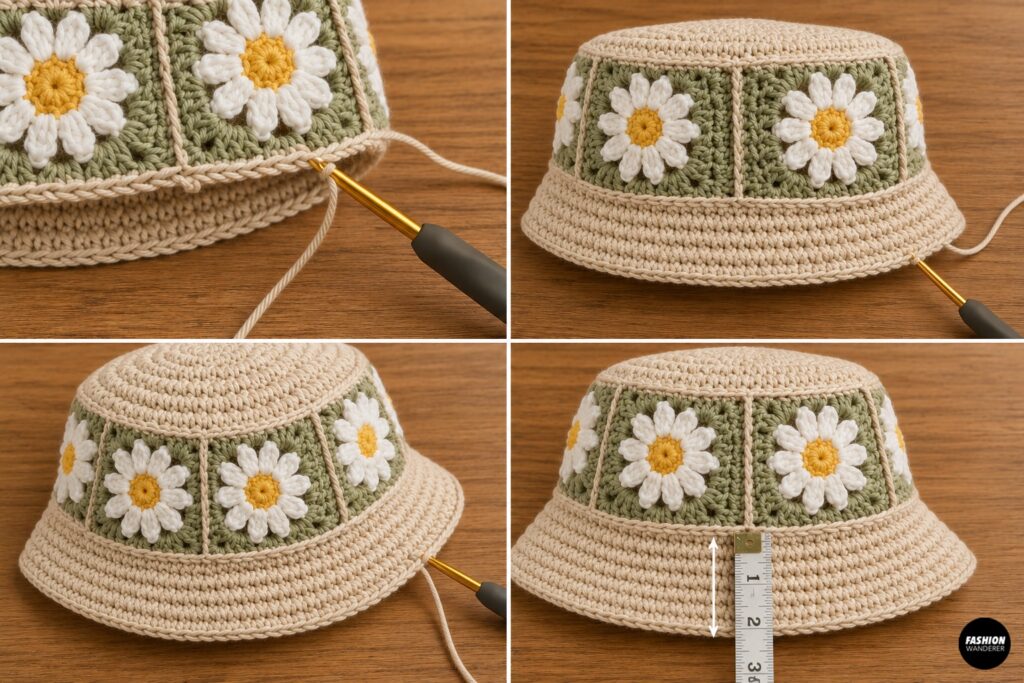
Attach yarn to the bottom edge.
Round 1
Sc around.
Round 2
Increase every sixth stitch.
Round 3
Sc around.
Repeat these two rounds until the brim measures approximately 2½ inches.
Step 8: Strengthen the Brim
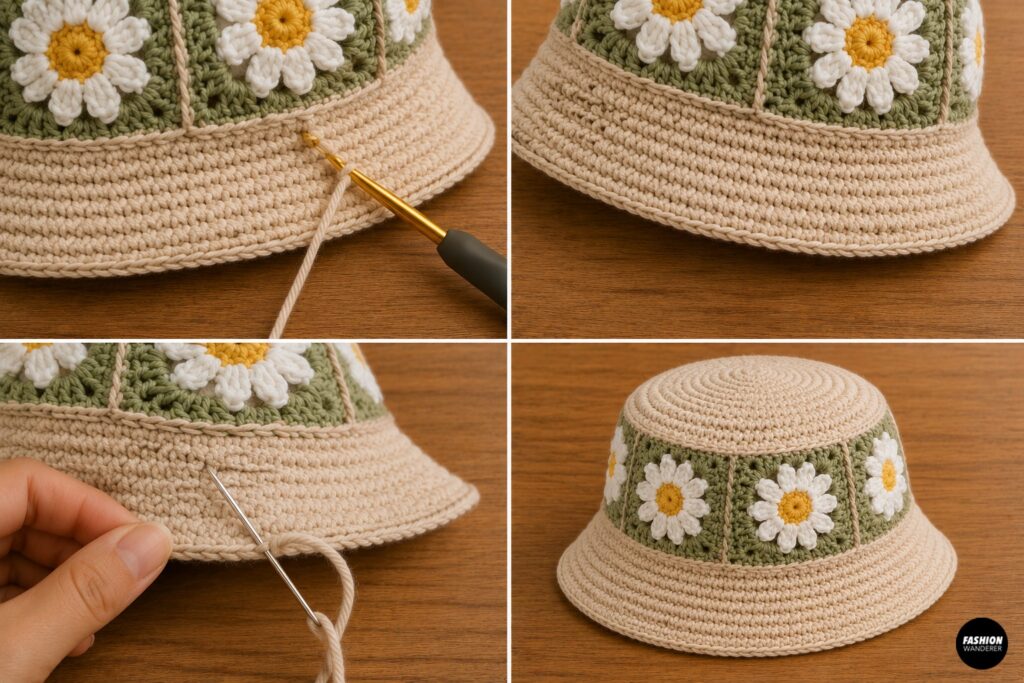
Work one final round using:
Single Crochet through the back loop only.
This creates a neat edge while helping the brim hold its shape.
Fasten off.
Weave in all yarn ends.
Your daisy bucket hat is complete!
Beginner Crochet Tips
Use cotton yarn rather than acrylic to help the hat maintain its structure and stay cool during warm weather.
Block your granny squares before joining them to ensure they are all the same size and create a smooth, professional-looking hat.
Use stitch markers to keep track of the beginning of each round when crocheting the crown and brim.
If you’d like a wider brim for extra sun protection, simply continue repeating the increase rounds until you reach your desired width.
Customization Ideas
Personalize your bucket hat by adding:
- Pastel daisy petals
- Rainbow flowers
- Sunflower granny squares
- Scalloped brim
- Contrasting border
- Embroidered leaves
- Decorative bow
- Crochet ladybugs or bees
Popular summer color combinations include:
- White & Butter Yellow
- Blush Pink & Cream
- Sage Green & Ivory
- Lavender & White
- Sky Blue & White
- Coral & Cream
- Mint & Daisy Yellow
Care Instructions
To keep your crochet bucket hat looking its best:
- Hand wash in cool water
- Use mild detergent
- Do not bleach
- Gently squeeze out excess water
- Reshape while damp
- Lay flat to dry
- Store flat to maintain the brim’s shape
Cotton yarn softens beautifully after washing while retaining excellent durability.
Ways to Style Your Daisy Bucket Hat
This cheerful hat pairs perfectly with:
- Sundresses
- Denim shorts
- Linen overalls
- Crochet beach cover-ups
- Swimsuits
- Tank tops
- Maxi skirts
- Lightweight cardigans
Complete your summer outfit with a crochet market tote, woven sandals, and oversized sunglasses for a relaxed coastal-inspired look.
Why You’ll Love Wearing It
A handmade daisy bucket hat adds personality to any summer wardrobe while offering lightweight sun protection. The charming floral granny squares bring a playful, vintage-inspired touch, and the breathable cotton construction keeps you comfortable on warm days. It’s the perfect accessory for festivals, vacations, beach trips, picnics, and everyday adventures.
Final Thoughts
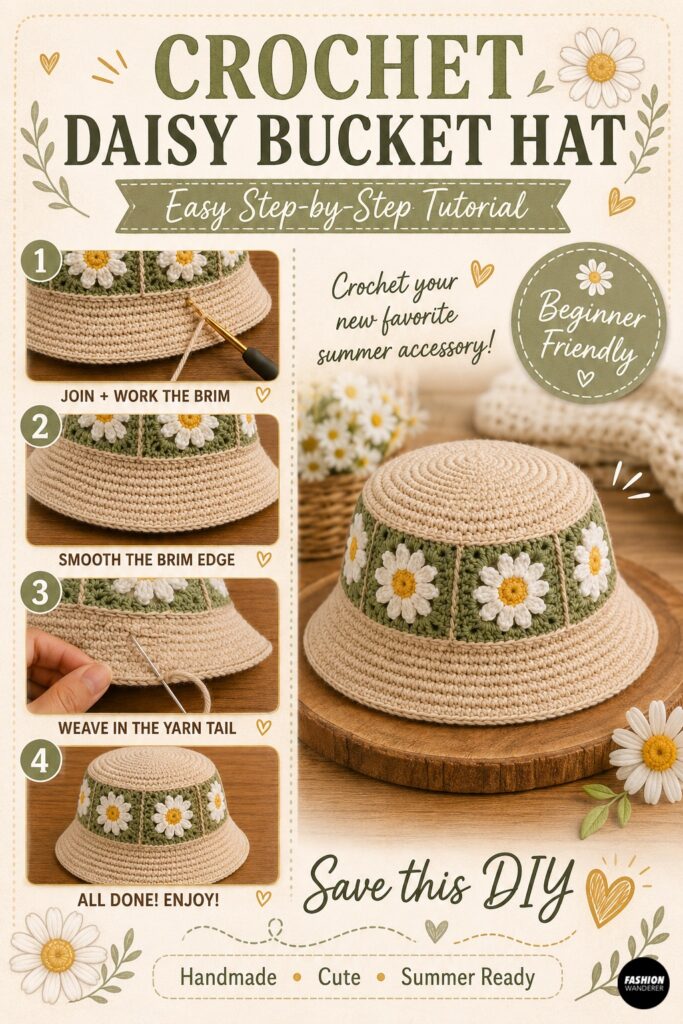
A Crochet Daisy Bucket Hat is a delightful project that combines classic granny squares with a modern summer accessory. Using simple stitches and easy construction, it’s an enjoyable pattern that works up quickly and gives you plenty of opportunities to experiment with color combinations.
Once you’ve completed your first hat, try creating matching accessories like a crochet market tote, daisy coasters, or a floral headband for a coordinated handmade collection. These bucket hats also make thoughtful gifts for birthdays, Mother’s Day, vacations, or anyone who loves handmade fashion.
Whether you’re heading to the beach, exploring a farmers market, or enjoying a sunny afternoon outdoors, your crochet daisy bucket hat will add charm, comfort, and a handmade touch to every summer adventure.
SEO Keywords: crochet daisy bucket hat, free crochet bucket hat pattern, granny square bucket hat, beginner crochet hat, crochet summer hat, daisy crochet pattern, cotton crochet bucket hat, easy crochet hat tutorial, DIY crochet bucket hat, summer crochet projects.