
Stay hydrated in style with a handmade crochet water bottle crossbody bag! This practical and fashionable accessory keeps your water bottle within easy reach while leaving your hands free for hiking, farmers markets, festivals, beach days, travel, or everyday errands. Lightweight, customizable, and beginner-friendly, this crochet project works up quickly and makes a thoughtful handmade gift.
In this tutorial, you’ll learn how to crochet a water bottle crossbody bag with detailed written instructions, a free crochet pattern, and beginner-friendly step-by-step guidance. The stretchy mesh body comfortably holds most standard reusable water bottles while the sturdy strap makes it easy to wear across your body.
Lookin for fashionable summer crochet projects to compliment the season? We got you covered!
Skill Level
Easy Beginner
You’ll practice:
- Chain stitch
- Single crochet
- Double crochet
- Slip stitch
- Working in rounds
- Creating mesh stitches
Materials
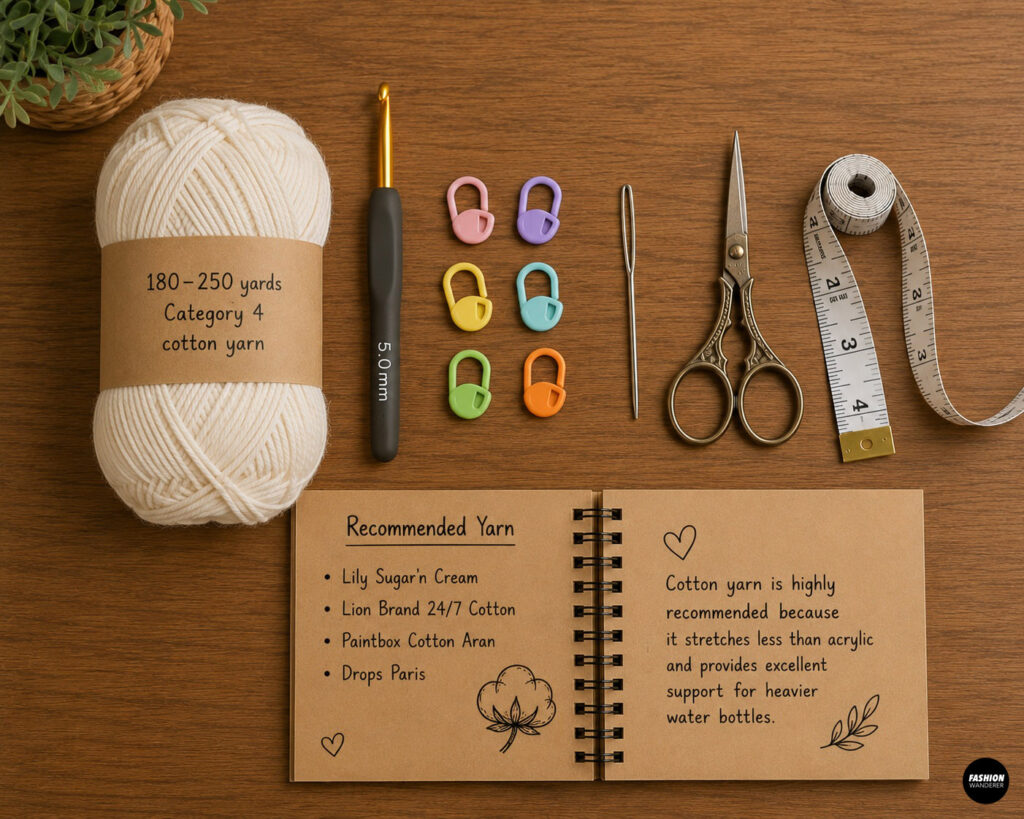
- 180–250 yards Category 4 cotton yarn
- 5 mm (H/8) crochet hook
- Stitch markers
- Yarn needle
- Scissors
- Measuring tape
Recommended Yarn
Cotton yarn is highly recommended because it stretches less than acrylic and provides excellent support for heavier water bottles.
Crochet Abbreviations
- ch = chain
- sl st = slip stitch
- sc = single crochet
- dc = double crochet
- st = stitch
- sk = skip
- rep = repeat
- sp = space
Finished Size
Approximately:
- 9 inches tall (before strap)
- Fits bottles measuring 2½–3½ inches in diameter
- Adjustable strap approximately 42–52 inches long
The mesh fabric naturally stretches to fit different bottle sizes.
Gauge
4 × 4 inches
14 dc × 8 rows
Exact gauge is not critical because the mesh stitch provides flexibility.
Pattern Overview
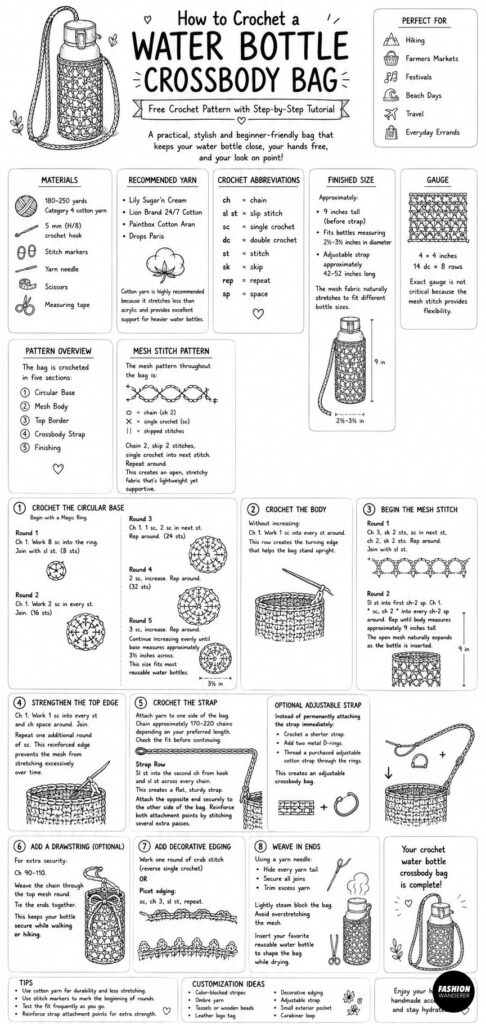
The bag is crocheted in five sections:
- Circular Base
- Mesh Body
- Top Border
- Crossbody Strap
- Finishing
Mesh Stitch Pattern
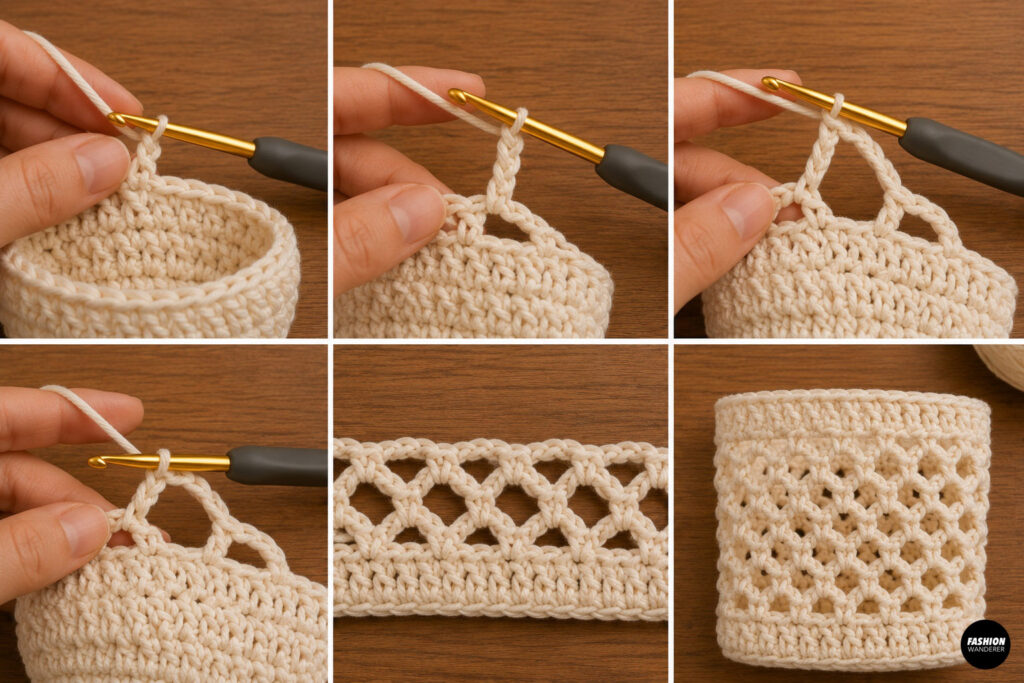
The mesh pattern throughout the bag is:
- Chain 2
- Skip 2 stitches
- Single crochet into next stitch
Repeat around.
This creates an open, stretchy fabric that’s lightweight yet supportive.
Step 1: Crochet the Circular Base
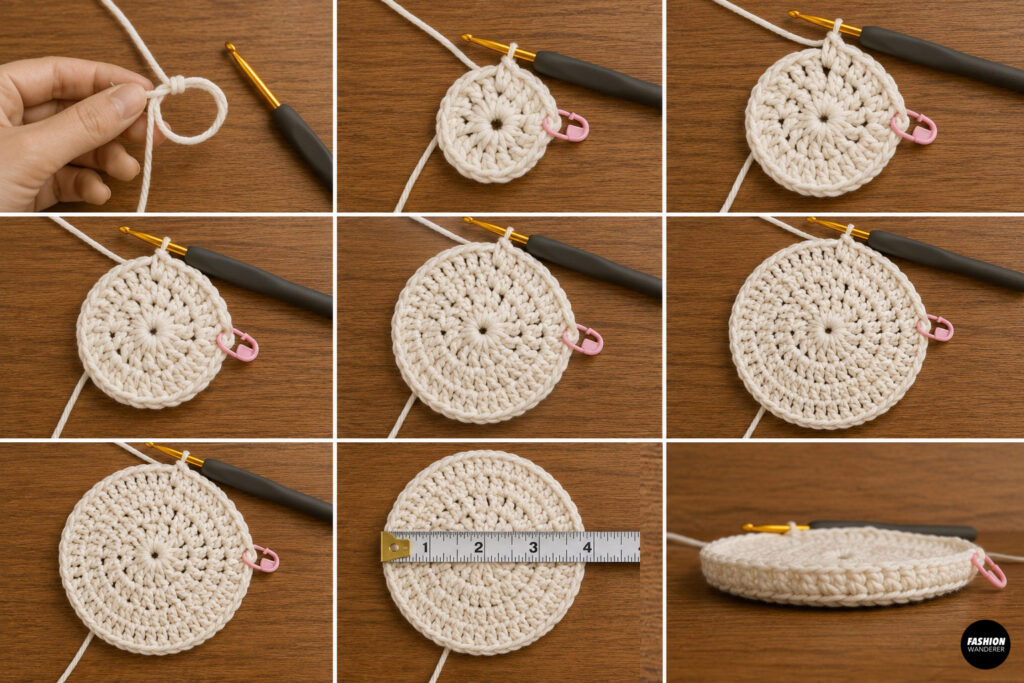
Begin with a Magic Ring.
Round 1
Chain 1.
Work 8 single crochet into the ring.
Join with slip stitch.
(8 stitches)
Round 2
Chain 1.
Work 2 single crochet into every stitch.
Join.
(16 stitches)
Round 3
Chain 1.
1 sc, 2 sc in next stitch.
Repeat around.
(24 stitches)
Round 4
2 sc, increase.
Repeat around.
(32 stitches)
Round 5
3 sc, increase.
Repeat around.
Continue increasing evenly until the base measures approximately:
3½ inches across.
This size fits most reusable water bottles.
Step 2: Crochet the Body
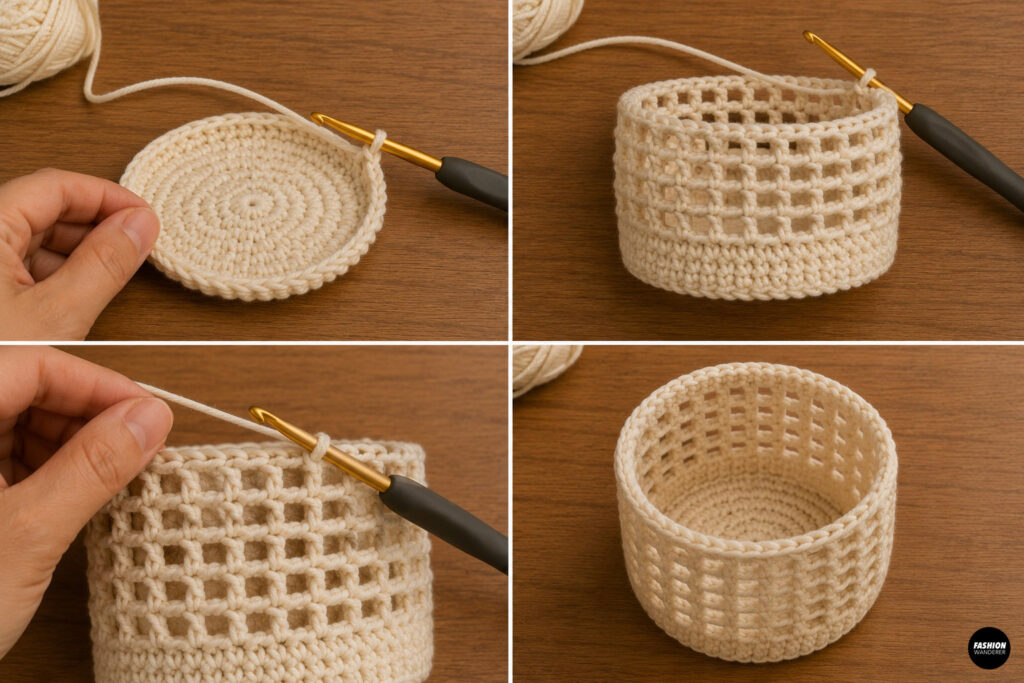
Without increasing:
Chain 1.
Work one single crochet into every stitch around.
This row creates the turning edge that helps the bag stand upright.
Step 3: Begin the Mesh Stitch
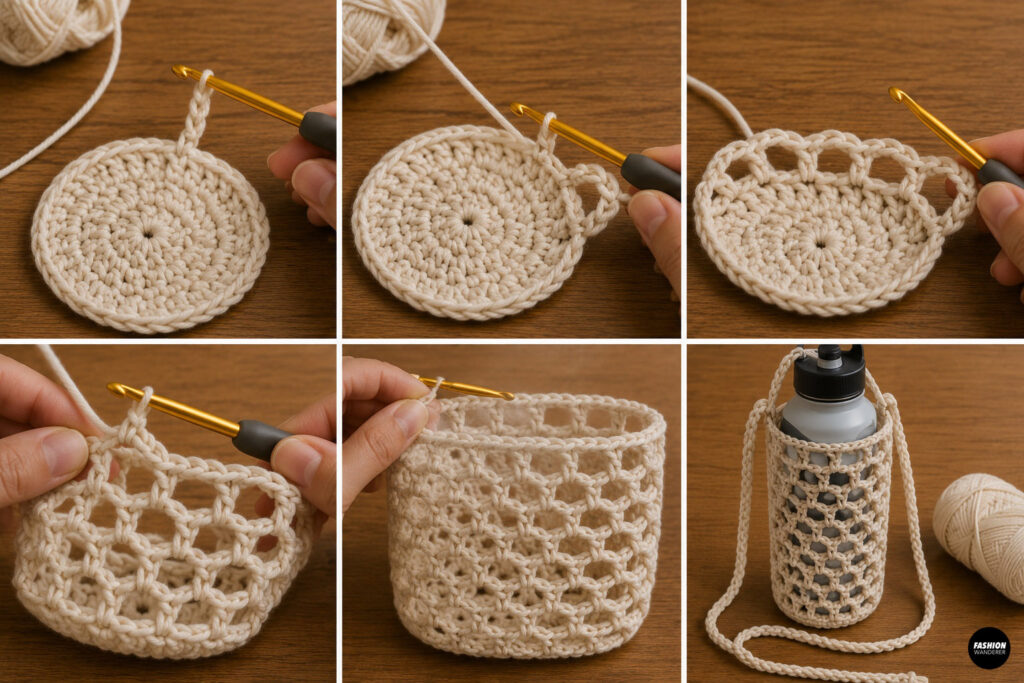
Round 1
Chain 3.
Skip 2 stitches.
Single crochet into the next stitch.
Chain 2.
Skip 2 stitches.
Repeat around.
Join with slip stitch.
Round 2
Slip stitch into the first chain space.
Chain 1.
Work:
Single crochet
Chain 2
into every chain-2 space around.
Repeat until the body measures approximately:
9 inches tall.
The open mesh naturally expands as the bottle is inserted.
Step 4: Strengthen the Top Edge
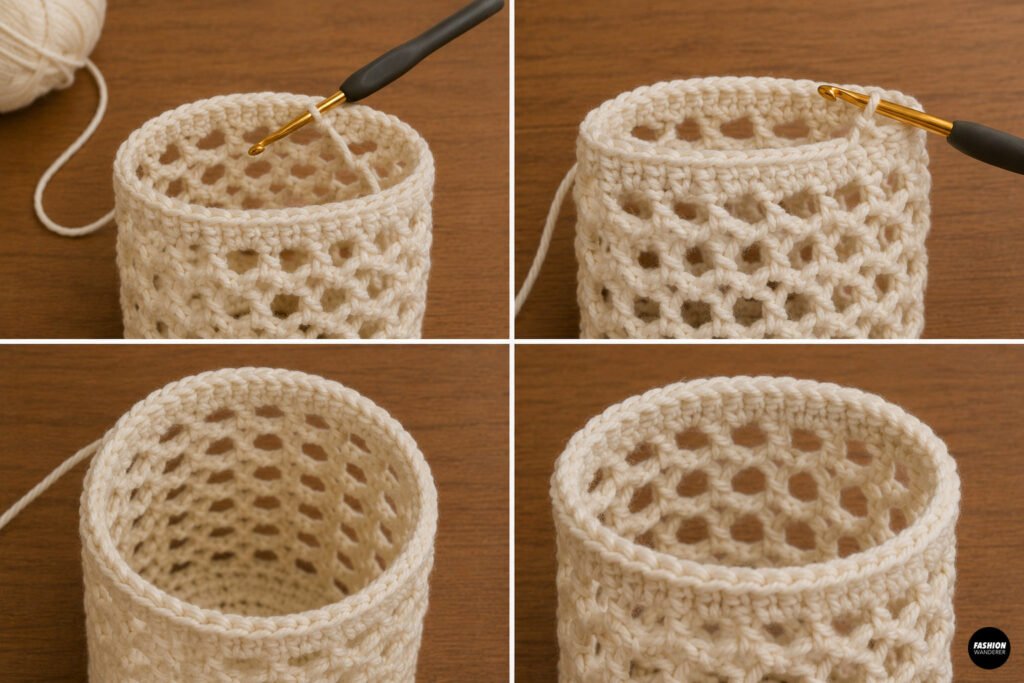
Chain 1.
Work one single crochet into every stitch and chain space around.
Join.
Repeat one additional round of single crochet.
This reinforced edge prevents the mesh from stretching excessively over time.
Step 5: Crochet the Strap
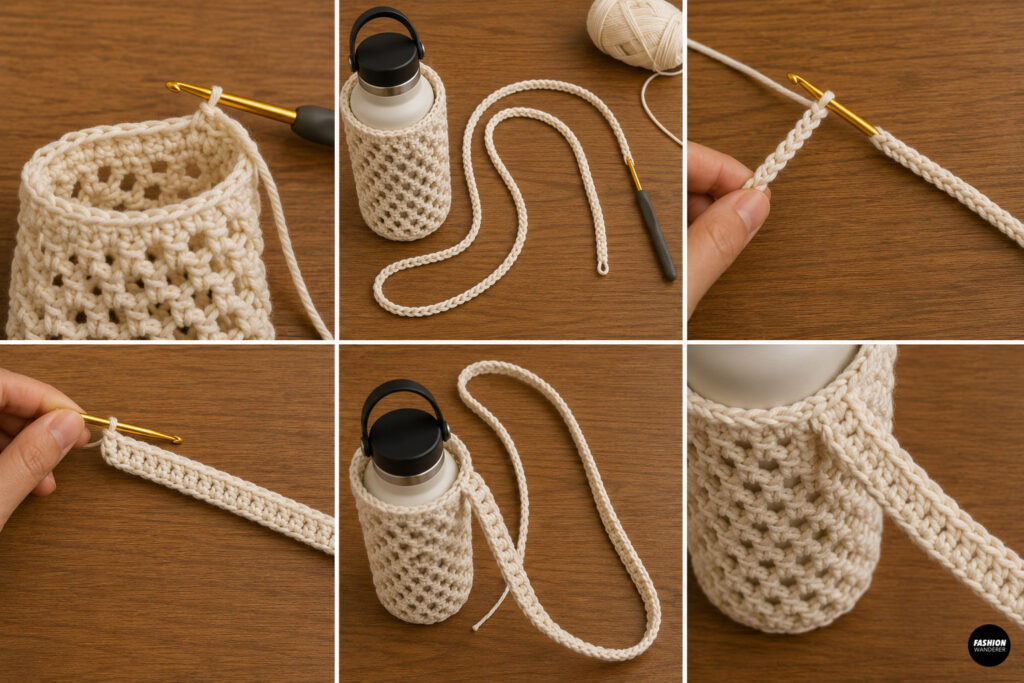
Attach yarn to one side of the bag.
Chain approximately:
170–220 chains
depending on your preferred crossbody length.
Check the fit before continuing.
Strap Row
Slip stitch into the second chain from hook.
Continue slip stitching across every chain.
This creates a flat, sturdy strap.
Attach the opposite end securely to the other side of the bag.
Reinforce both attachment points by stitching several extra passes.
Optional Adjustable Strap
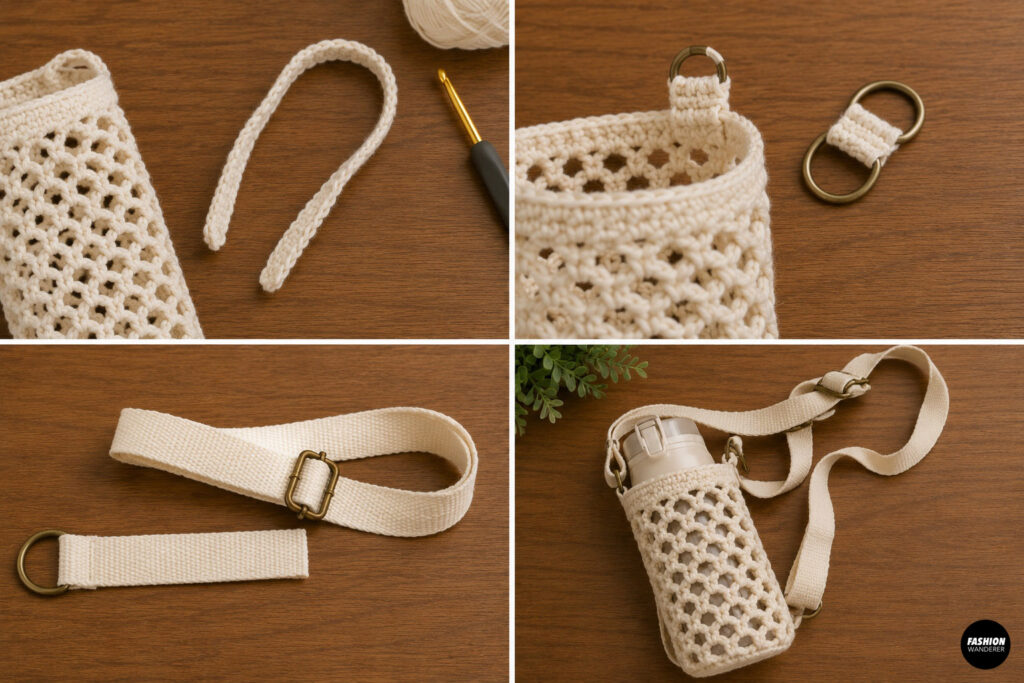
Instead of permanently attaching the strap immediately:
- Crochet a shorter strap.
- Add two metal D-rings.
- Thread a purchased adjustable cotton strap through the rings.
This creates an adjustable crossbody bag.
Step 6: Add a Drawstring (Optional)
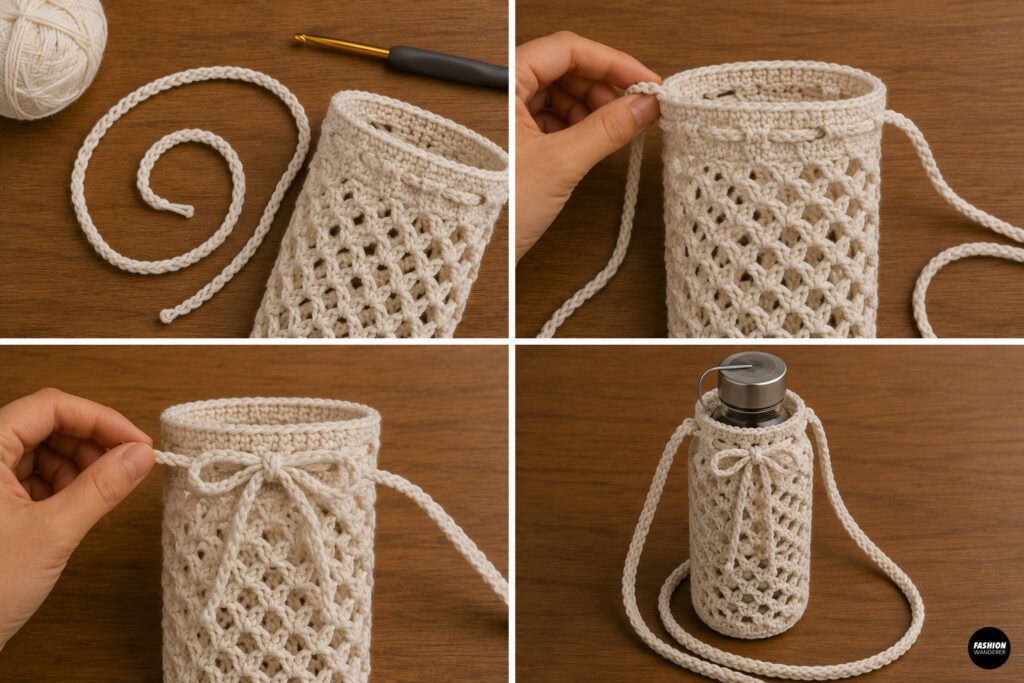
For extra security:
Chain 90–110.
Weave the chain through the top mesh round.
Tie the ends together.
This keeps your bottle secure while walking or hiking.
Step 7: Add Decorative Edging
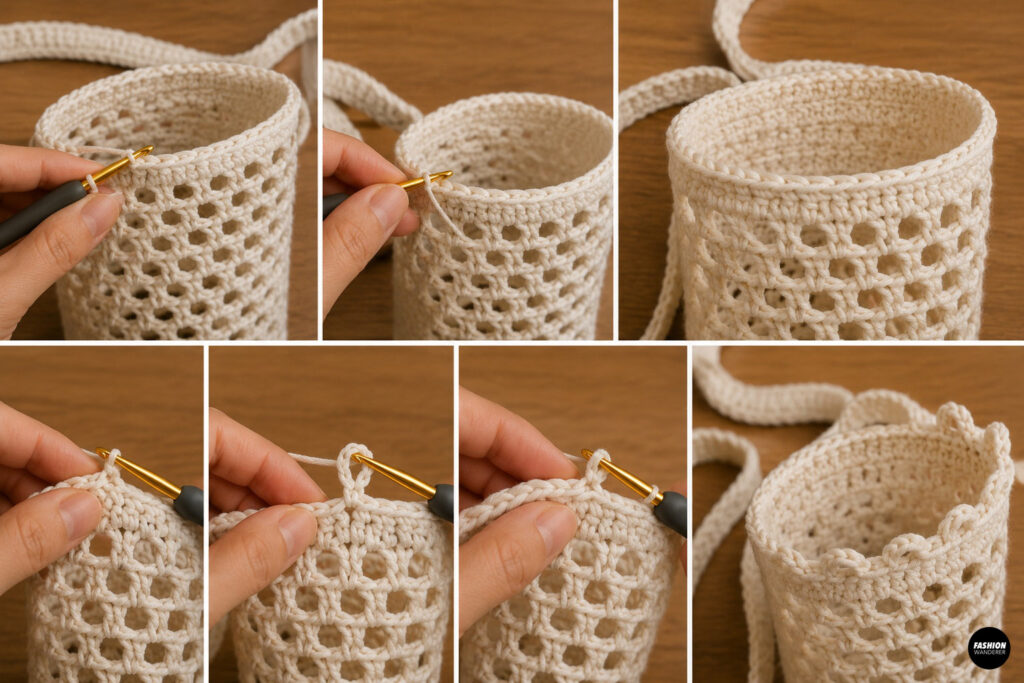
Work one round of crab stitch (reverse single crochet)
or
Picot edging:
- Sc
- Chain 3
- Slip stitch
- Repeat
This adds a polished handmade finish.
Step 8: Weave in Ends
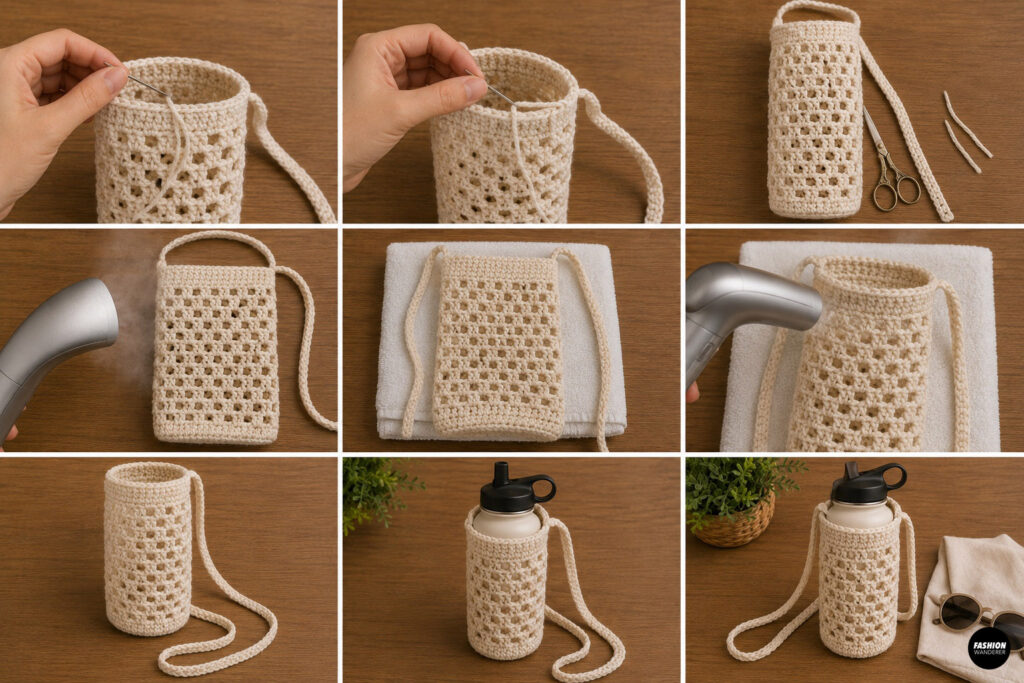
Using a yarn needle:
- Hide every yarn tail
- Secure all joins
- Trim excess yarn
Lightly steam block the bag.
Avoid overstretching the mesh.
Insert your favorite reusable water bottle to shape the bag while drying.
Your crochet water bottle crossbody bag is complete!
Beginner Tips
Use cotton yarn instead of acrylic to reduce stretching and improve durability.
Place stitch markers at the beginning of each round to help keep track of your progress.
Test the fit by inserting your water bottle several times during the project. If the body feels too loose or too snug, adjust the number of mesh rounds or base increases as needed.
When attaching the strap, reinforce the connection with several extra rows of stitching since these points will support the weight of a full bottle.
Customization Ideas
One of the best things about this crochet water bottle holder is how easy it is to personalize.
Try adding:
- Color-blocked stripes
- Ombre cotton yarn
- Tassels
- Wooden beads
- Leather logo tag
- Decorative shell stitch border
- Adjustable shoulder strap
- Small exterior pocket for keys or lip balm
- Carabiner loop for clipping to a backpack
You can also crochet matching accessories like a phone pouch, sunglasses case, or small coin purse using the same yarn for a coordinated handmade set.
How to Care for Your Crochet Water Bottle Bag
To keep your crochet bag looking its best:
- Hand wash or machine wash on a gentle cycle using cool water.
- Use mild detergent designed for cotton fibers.
- Reshape the bag while damp and lay it flat to air dry.
- Avoid hanging the bag while wet, as the weight can stretch the mesh.
- Store folded when not in use to help maintain its shape.
With proper care, your crochet water bottle crossbody bag will remain a durable and stylish companion for everyday adventures.
Final Thoughts
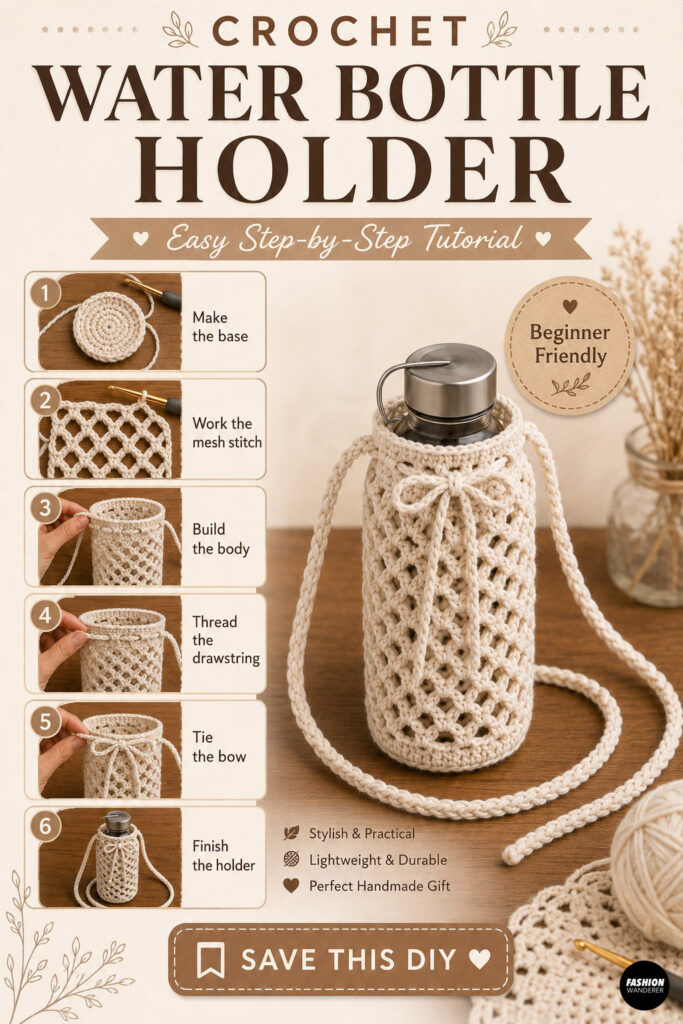
A crochet water bottle crossbody bag is a quick, practical project that combines function with handmade charm. The sturdy cotton base supports the bottle, while the airy mesh body keeps the bag lightweight and flexible.
With simple stitches, endless color possibilities, and easy customization, this beginner-friendly pattern is perfect for creating a reusable accessory you’ll reach for all year long—or gift to friends and family who love staying active and hydrated.