
Nothing says handmade summer fashion quite like a beautiful crochet shell stitch halter top. Featuring delicate shell stitch texture, an open back, and adjustable neck ties, this timeless design is perfect for beach vacations, music festivals, pool parties, or layering under a lightweight cardigan. Whether you’re creating your first wearable crochet project or looking for a relaxing weekend make, this halter top is both stylish and beginner-friendly.
In this tutorial, you’ll learn how to crochet a shell stitch halter top with detailed written instructions, easy-to-follow steps, and a free crochet pattern. The simple construction allows you to customize the fit while practicing one of the most popular crochet stitch patterns.
Here are more summer crochet projects to have you lookin fashionable for the remainder of the season!
Skill Level
Beginner to Easy Intermediate
You should know how to:
- Chain
- Single crochet
- Double crochet
- Slip stitch
- Count stitches
- Fasten off
Materials
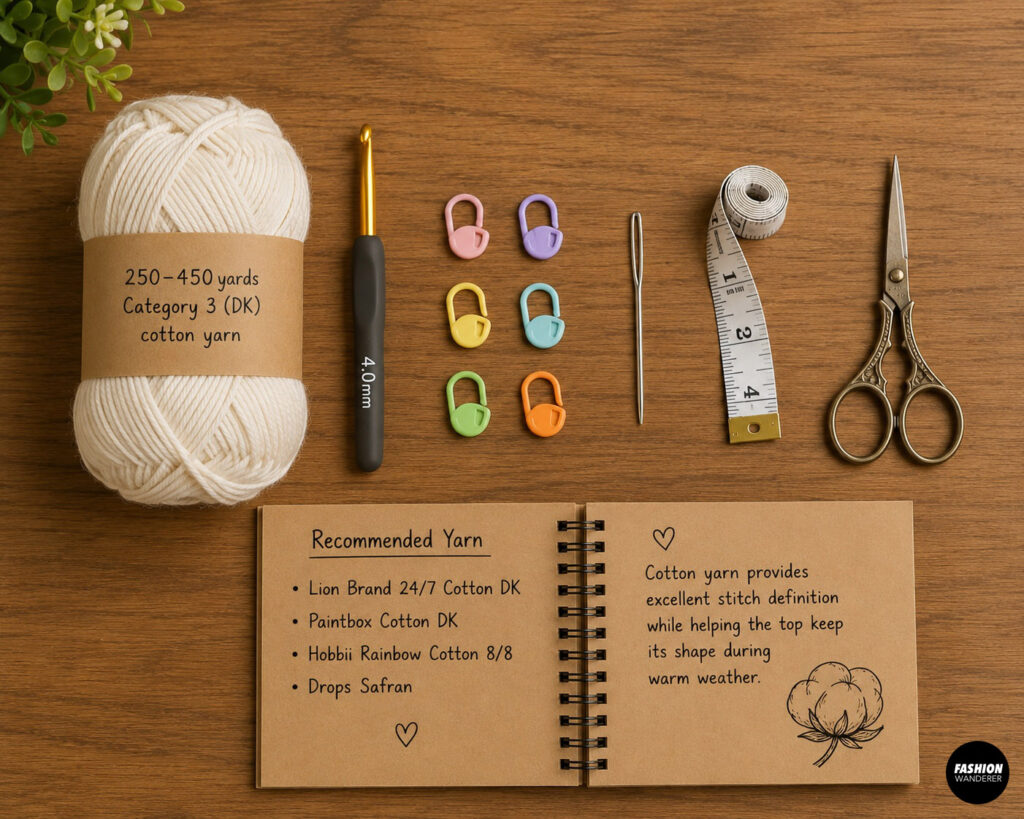
- 250–450 yards Category 3 (DK) cotton yarn
- 4 mm (G/6) crochet hook
- Stitch markers
- Yarn needle
- Measuring tape
- Scissors
Recommended Yarn
Cotton yarn provides excellent stitch definition while helping the top keep its shape during warm weather.
Crochet Abbreviations
- ch = chain
- sl st = slip stitch
- sc = single crochet
- dc = double crochet
- sk = skip
- st = stitch
- sp = space
- rep = repeat
Finished Sizes
- XS
- S
- M
- L
- XL
- 2XL
- 3XL
The top is designed with approximately 1–2 inches of negative ease. Simply work more or fewer rows to customize your coverage.
Gauge
4 × 4 inches
18 dc × 10 rows
Gauge is helpful for achieving the intended fit but isn’t critical since the neck and back ties are adjustable.
Pattern Overview
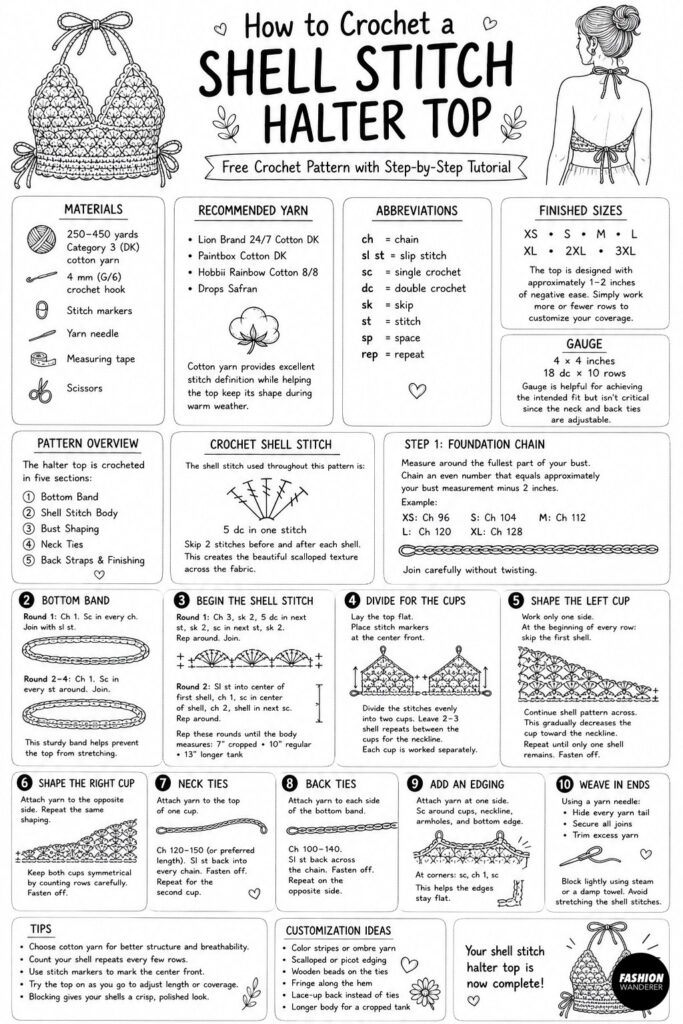
The halter top is crocheted in five sections:
- Bottom Band
- Shell Stitch Body
- Bust Shaping
- Neck Ties
- Back Straps & Finishing
Crochet Shell Stitch
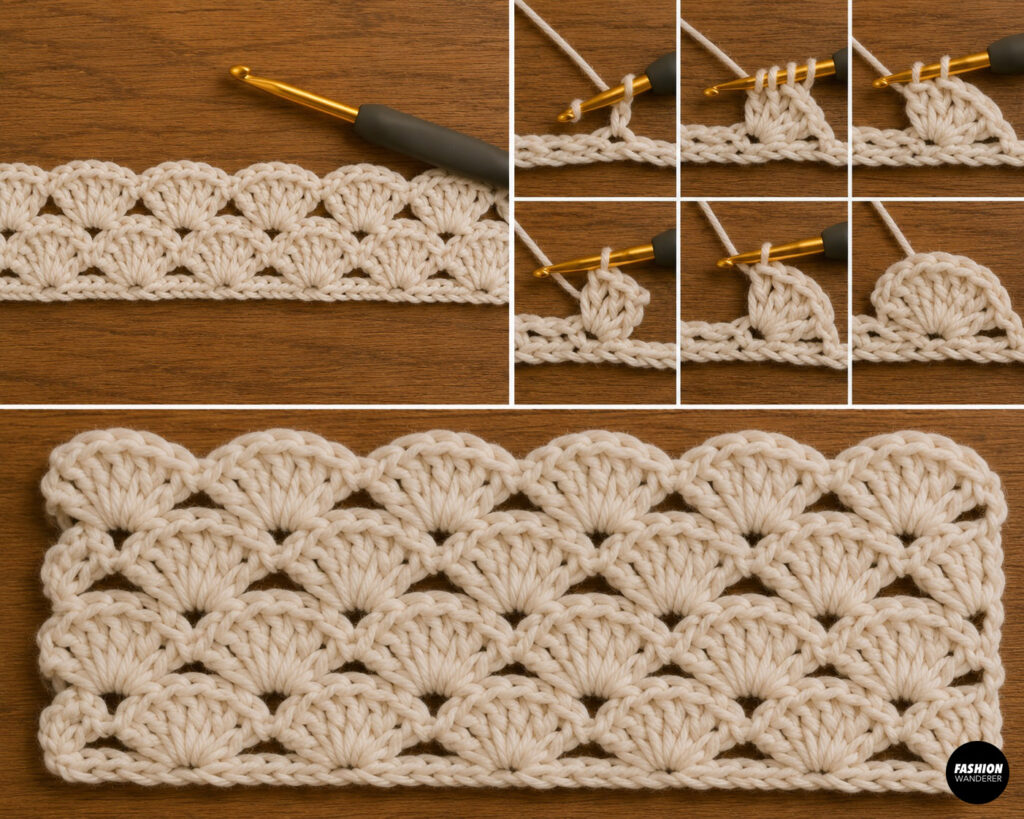
The shell stitch used throughout this pattern is:
5 dc in one stitch
Skip 2 stitches before and after each shell.
This creates the beautiful scalloped texture across the fabric.
Step 1: Crochet the Foundation Chain
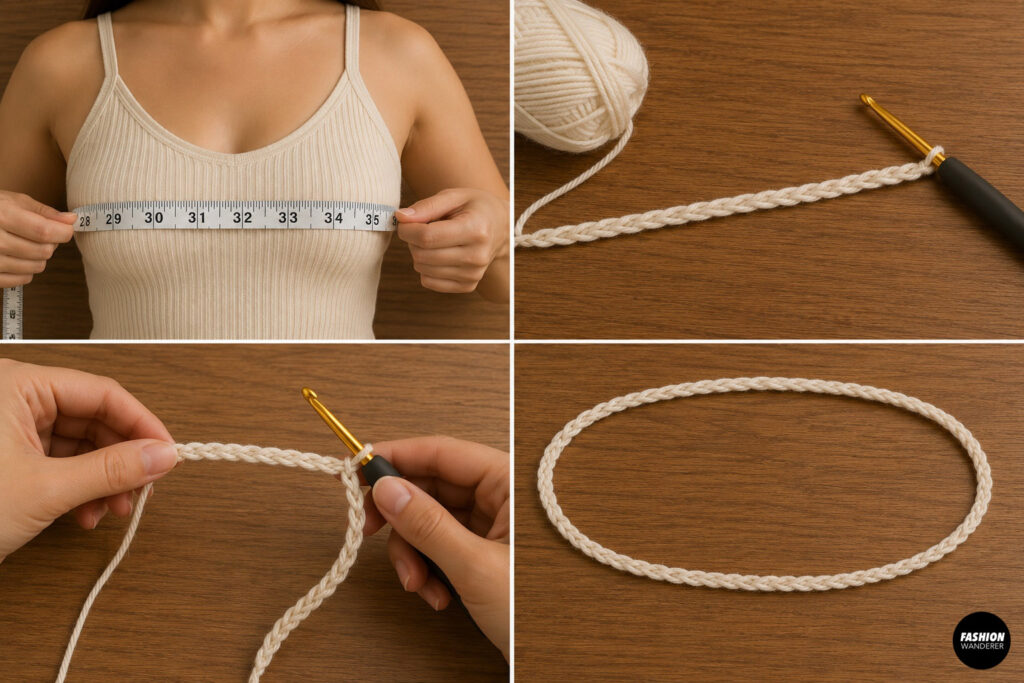
Measure around the fullest part of your bust.
Chain an even number that equals approximately your bust measurement minus 2 inches.
Example:
- XS: Ch 96
- S: Ch 104
- M: Ch 112
- L: Ch 120
- XL: Ch 128
Join carefully without twisting.
Step 2: Crochet the Bottom Band
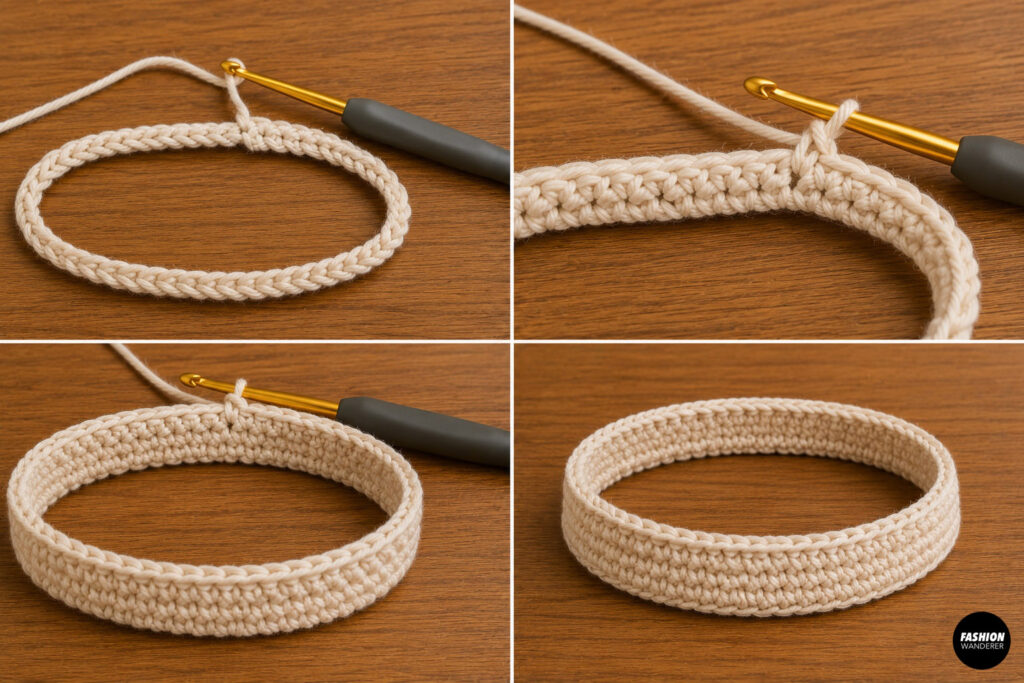
Round 1
Chain 1.
Work one single crochet into every chain.
Join with a slip stitch.
Round 2–4
Chain 1.
Single crochet in every stitch around.
Join.
This sturdy band helps prevent the top from stretching during wear.
Step 3: Begin the Shell Stitch
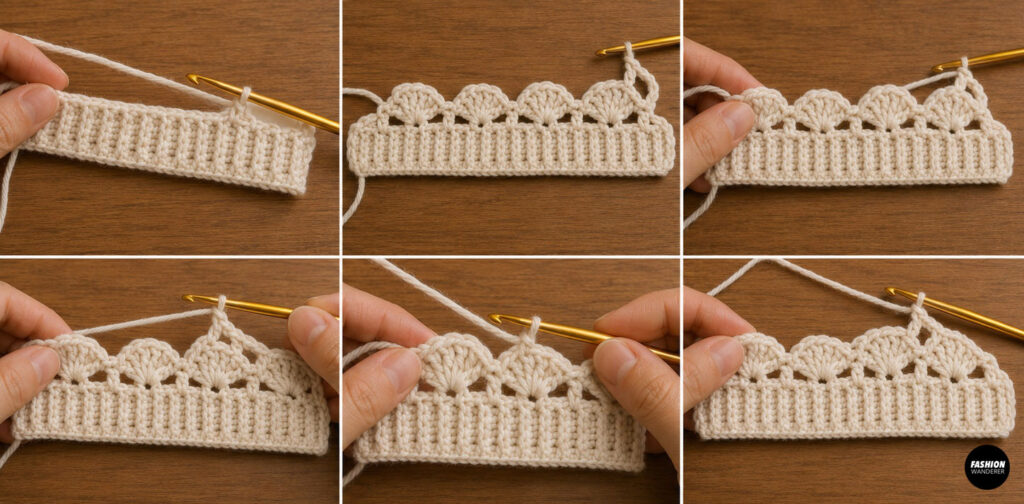
Round 1
Chain 3.
Skip 2 stitches.
Work:
5 dc into the next stitch.
Skip 2 stitches.
Work one single crochet.
Skip 2 stitches.
Repeat:
5 dc, skip 2, sc
Continue around.
Join with slip stitch.
Round 2
Slip stitch into the center of the first shell.
Chain 1.
Work one single crochet into the center of the shell.
Chain 2.
Work another shell into the next single crochet.
Repeat around.
Continue alternating shells and single crochet spaces.
Repeat these rounds until the body measures approximately:
- 7 inches for cropped version
- 10 inches for regular length
- 13 inches for longer tank style
Step 4: Divide for the Cups
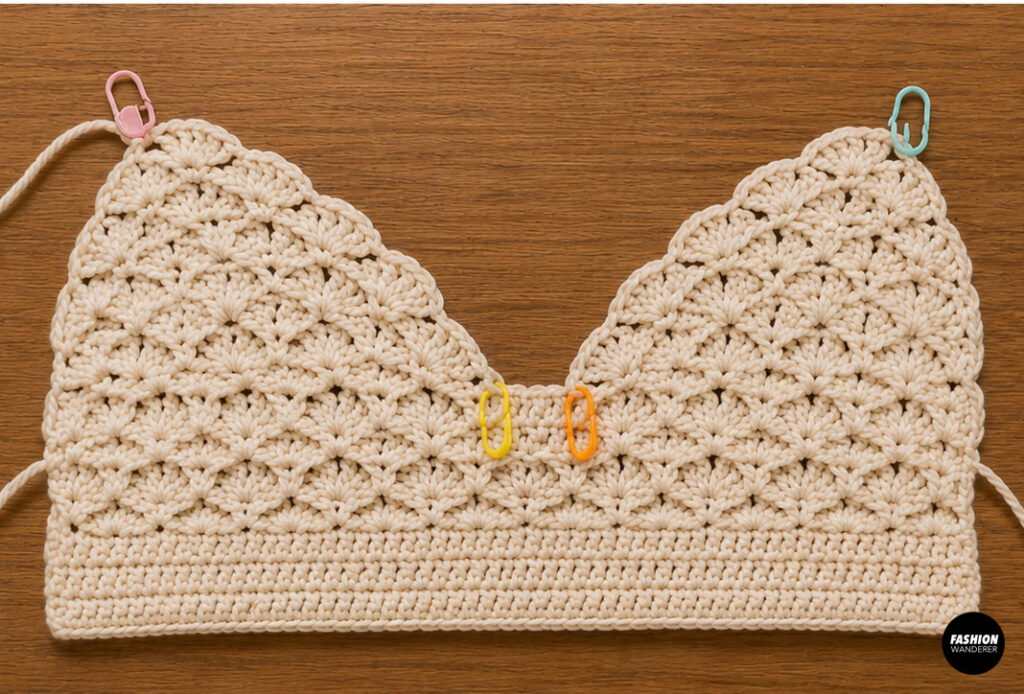
Lay the top flat.
Place stitch markers at the center front.
Divide the stitches evenly into two cups.
Leave approximately 2–3 shell repeats between the cups for the neckline.
Each cup is worked separately.
Step 5: Shape the Left Cup
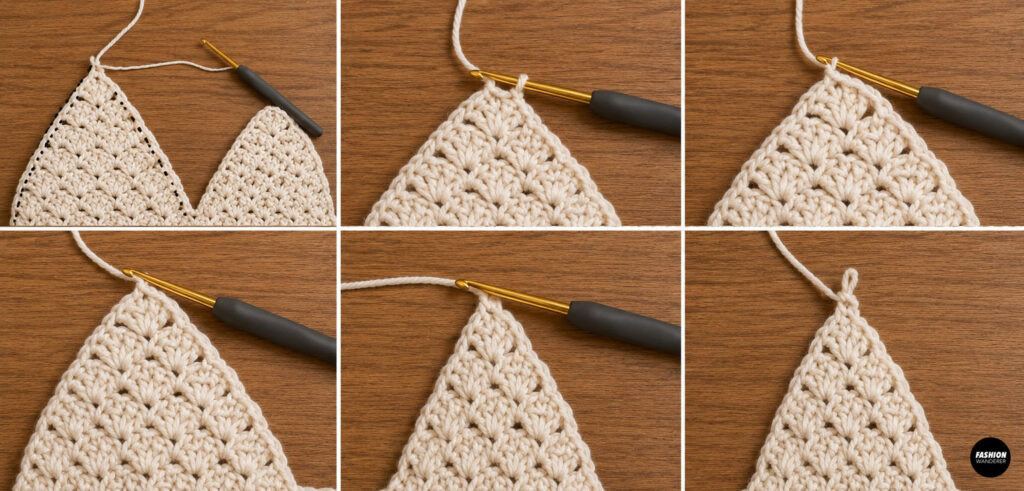
Continue working only one side.
At the beginning of every row:
Skip the first shell.
Continue shell pattern across.
This gradually decreases the cup toward the neckline.
Repeat until only one shell remains.
Fasten off.
Step 6: Shape the Right Cup
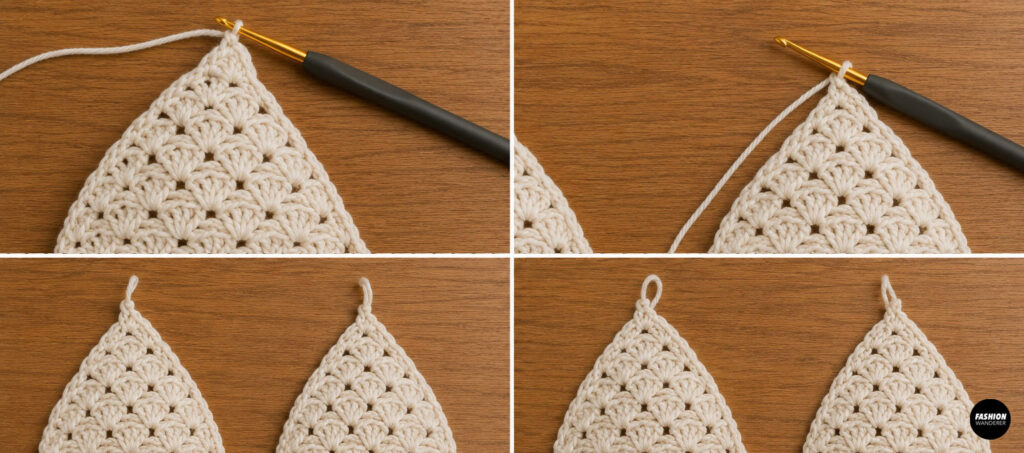
Attach yarn to the opposite side.
Repeat the same shaping.
Keep both cups symmetrical by counting rows carefully.
Fasten off.
Step 7: Crochet the Neck Ties
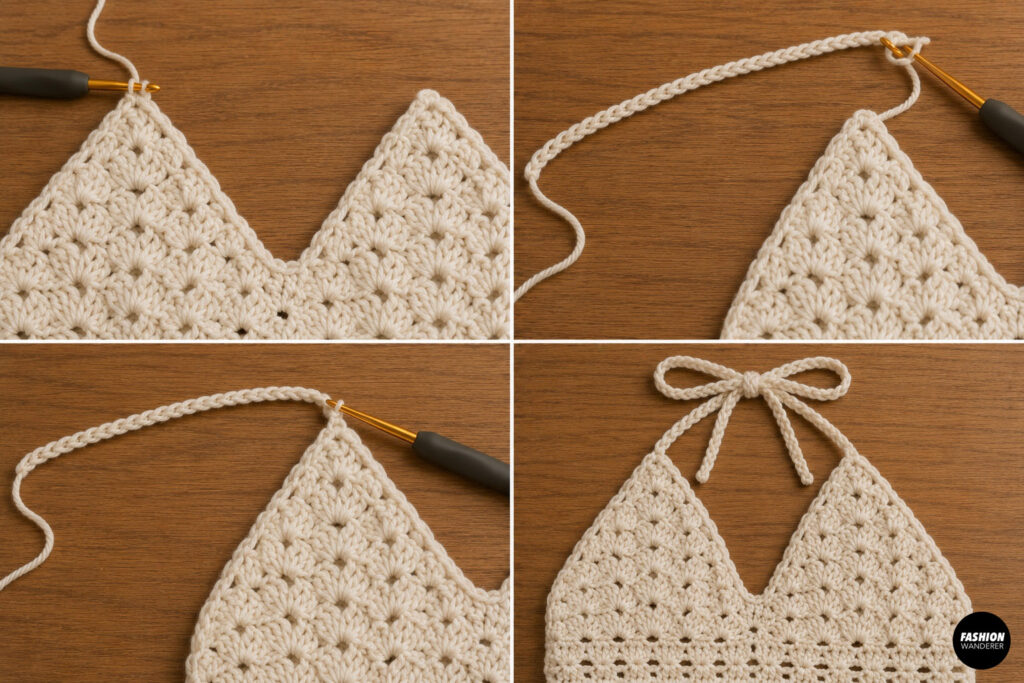
Attach yarn to the top of one cup.
Chain 120–150 depending on your preferred tie length.
Slip stitch back into every chain.
Fasten off.
Repeat for the second cup.
These adjustable straps allow you to customize the neckline height.
Step 8: Crochet the Back Ties
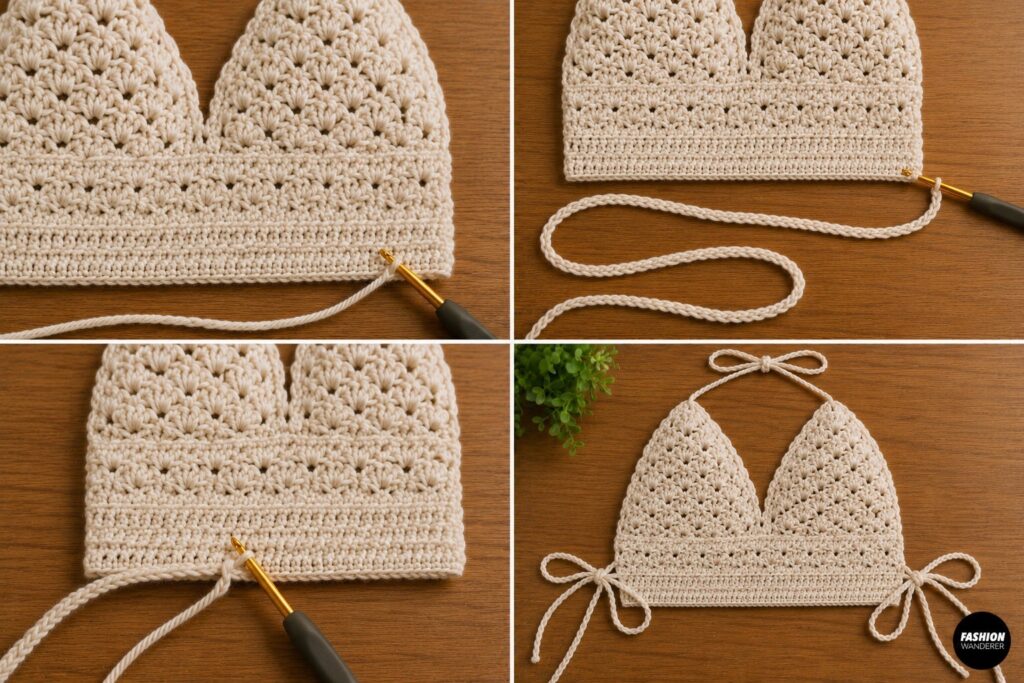
Attach yarn to each side of the bottom band.
Chain 100–140.
Slip stitch back across the chain.
Fasten off.
Repeat on the opposite side.
These long ties comfortably secure the halter around your back.
Step 9: Add an Edging
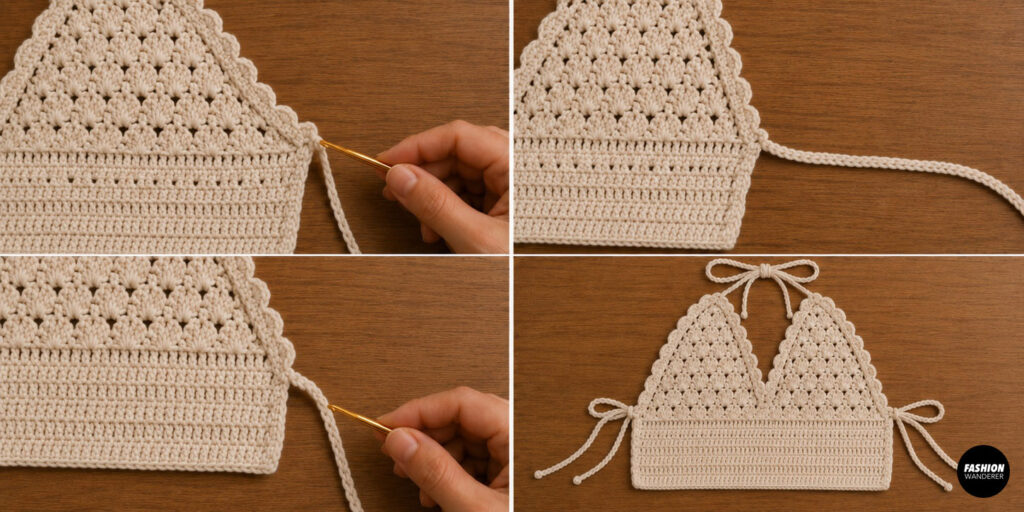
Attach yarn at one side.
Work one round of single crochet around:
- Cups
- Neckline
- Armholes
- Bottom edge
Whenever you reach a corner, work:
Sc, chain 1, sc
This helps the edges stay flat.
Step 10: Weave in Ends
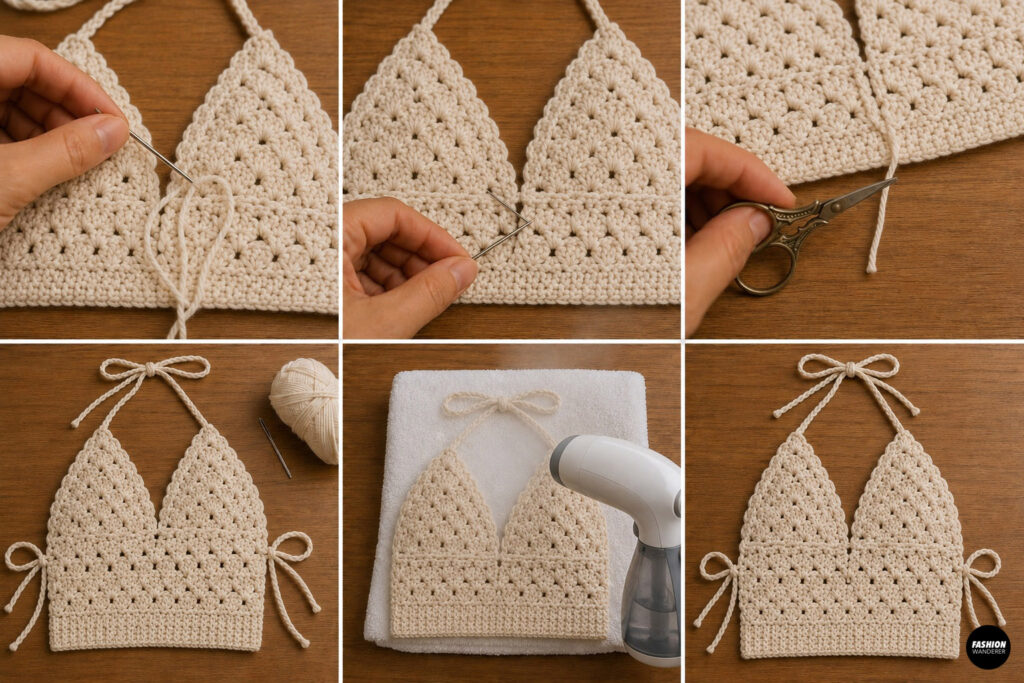
Using a yarn needle:
- Hide every yarn tail
- Secure all joins
- Trim excess yarn
Block lightly using steam or a damp towel.
Avoid stretching the shell stitches.
Your shell stitch halter top is now complete.
Beginner Tips
Choose cotton instead of acrylic for better structure and breathability.
Count your shell repeats every few rows to keep both sides identical.
Use stitch markers to mark the center front before shaping.
Try the top on throughout the project to adjust the length or cup coverage.
Blocking the finished garment helps smooth the stitches and gives the shells a crisp, polished appearance.
Customization Ideas
One of the best things about this crochet shell stitch halter top is how easy it is to personalize.
Try adding:
- Color stripes
- Ombre cotton yarn
- Scalloped edging
- Wooden beads on the ties
- Fringe along the hem
- Picot edging around the neckline
- Lace-up back instead of simple ties
- Longer body for a cropped tank
You can even make matching shorts, a beach skirt, or a lightweight cardigan using the same shell stitch pattern.
How to Care for Your Crochet Halter Top
To keep your handmade top looking beautiful:
- Hand wash in cool water with mild detergent.
- Gently squeeze out excess water without wringing.
- Lay flat on a towel to dry.
- Store folded instead of hanging to help maintain its shape.
- Avoid high heat when blocking or ironing cotton yarn.
With proper care, your shell stitch halter top will stay soft, breathable, and ready to wear all summer long.
Final Thoughts
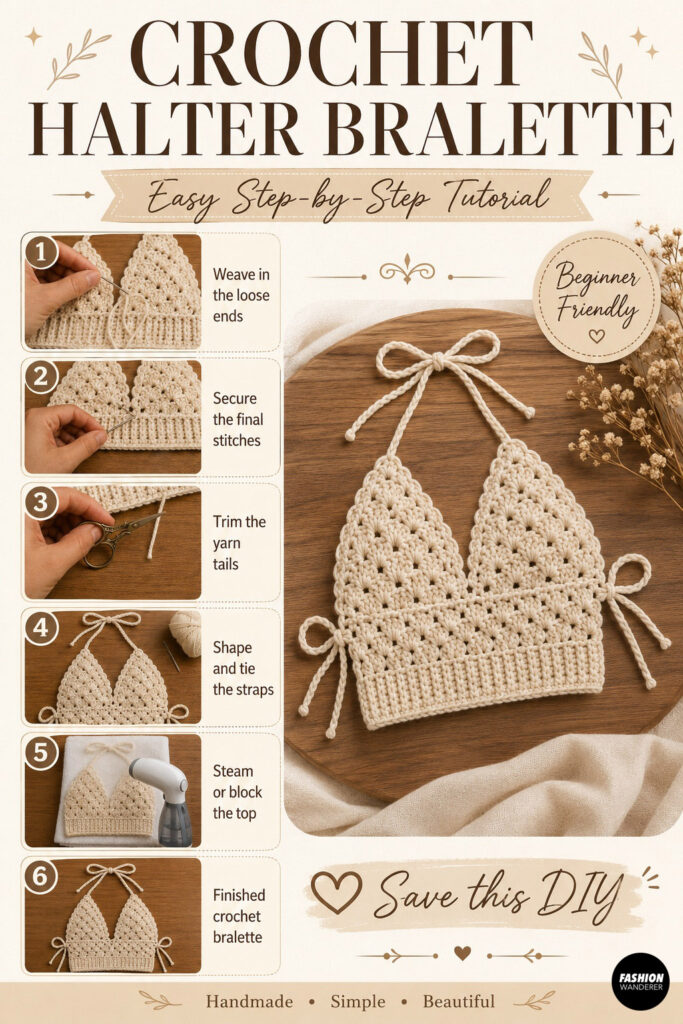
A crochet shell stitch halter top is a fun and rewarding project that combines elegant texture with simple construction. The repeating shell stitch creates a beautiful, feminine fabric, while the adjustable neck and back ties make it comfortable for a wide range of body types.
Once you’ve mastered this pattern, you can easily customize it with different colors, lengths, or decorative edging to create a one-of-a-kind summer wardrobe staple you’ll enjoy wearing year after year.