
Do you have a jacket sitting in your closet that feels… basic? Maybe it’s warm, maybe it’s practical, but it just doesn’t give that luxury vibe.
The secret? Fur trim. Faux fur detailing instantly transforms an everyday coat or jacket into something that looks straight off a designer runway. And here’s the best part—it’s a beginner-friendly DIY you can do at home in just a couple of hours.
In this post, I’ll show you step by step how to add fur trim to your jacket, the tools you’ll need, and styling tips so your refreshed outerwear looks chic, elevated, and expensive.
Why Add Fur Trim to Your Jacket?
Before we jump into the tutorial, let’s talk about why this simple upgrade works wonders:
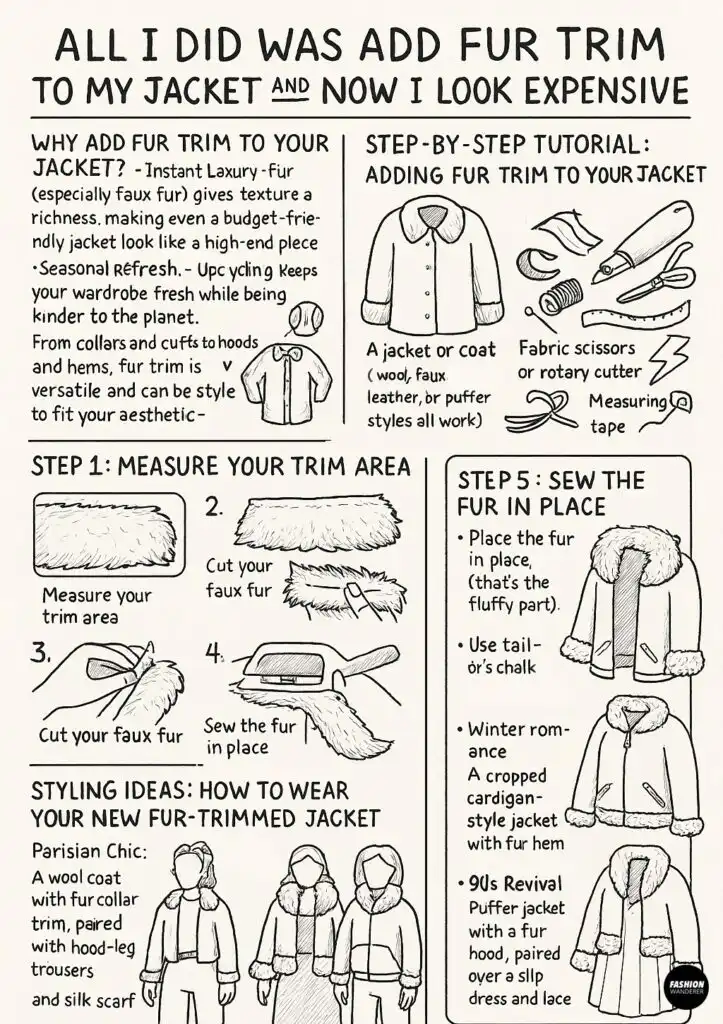
- Instant Luxury: Fur (especially faux fur) gives texture and richness, making even a budget-friendly jacket look like a high-end piece.
- Customizable: You choose the color, length, and placement of the trim—whether you want bold drama or subtle sophistication.
- Seasonal Refresh: Instead of buying a new coat, refresh your existing one for a fraction of the price.
- Sustainable Fashion: Upcycling keeps your wardrobe fresh while being kinder to the planet.
From collars and cuffs to hoods and hems, fur trim is versatile and can be styled to fit your aesthetic—coquette, vintage, street style, or minimalist chic.
Why This DIY is a Fashion Game-Changer
Adding fur trim is the perfect example of small changes with big results. With just a little fabric and some basic sewing, you’ve turned an ordinary jacket into something that looks custom, high-end, and designer-inspired.
It’s also a sustainable, affordable way to update your wardrobe without fast fashion spending. And because faux fur comes in so many colors and textures, you can create multiple trims and swap them for different outfits.
Step-by-Step Tutorial: Adding Fur Trim to Your Jacket

Materials You’ll Need

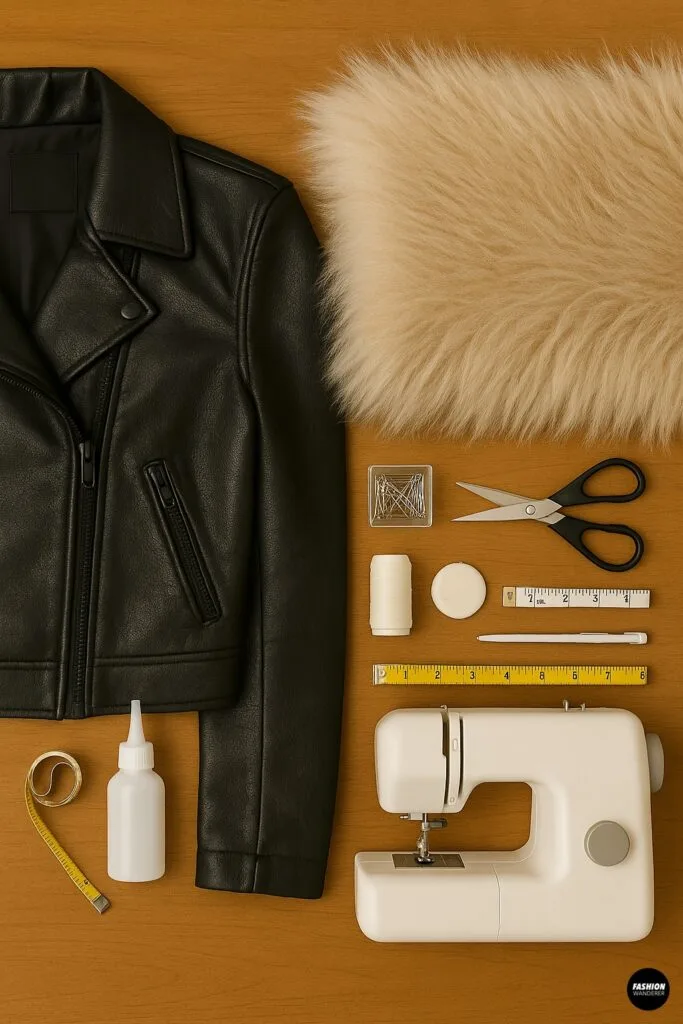
- A jacket or coat (denim, wool, faux leather, or puffer styles all work)
- Faux fur fabric (⅓ to ½ yard depending on trim placement)
- Fabric scissors or rotary cutter
- Sewing pins or clips
- Measuring tape
- Tailor’s chalk or washable marker
- Sewing machine (or needle for hand sewing)
- Matching thread
- Optional: Fabric glue (for a no-sew option)
Step 1: Decide Where to Add Fur

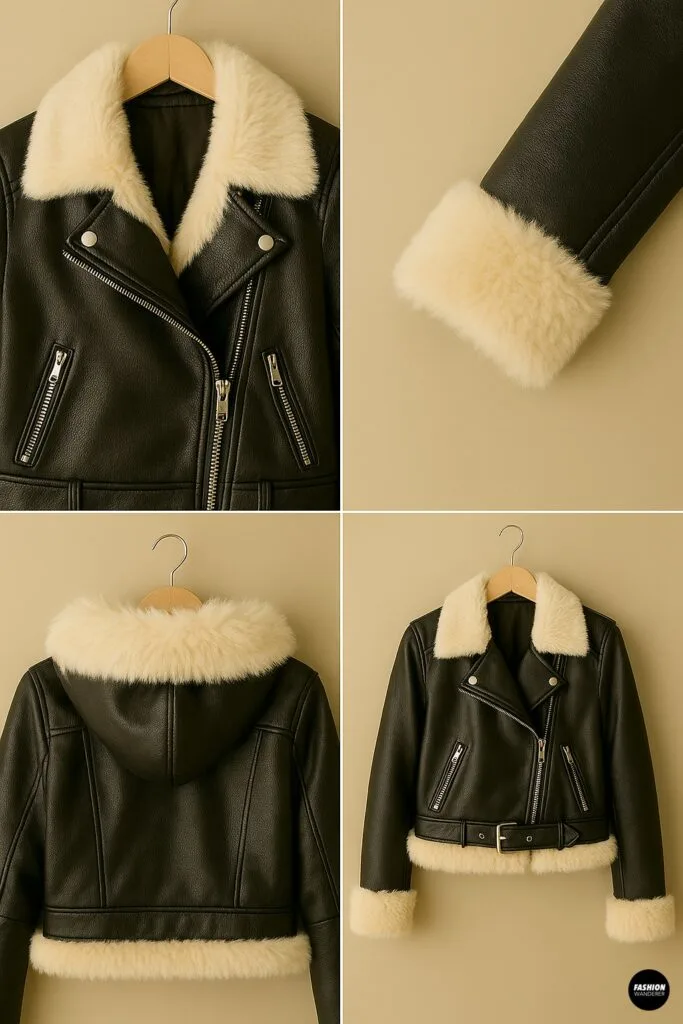
The placement of your fur trim makes a huge difference in the finished look. Popular options include:
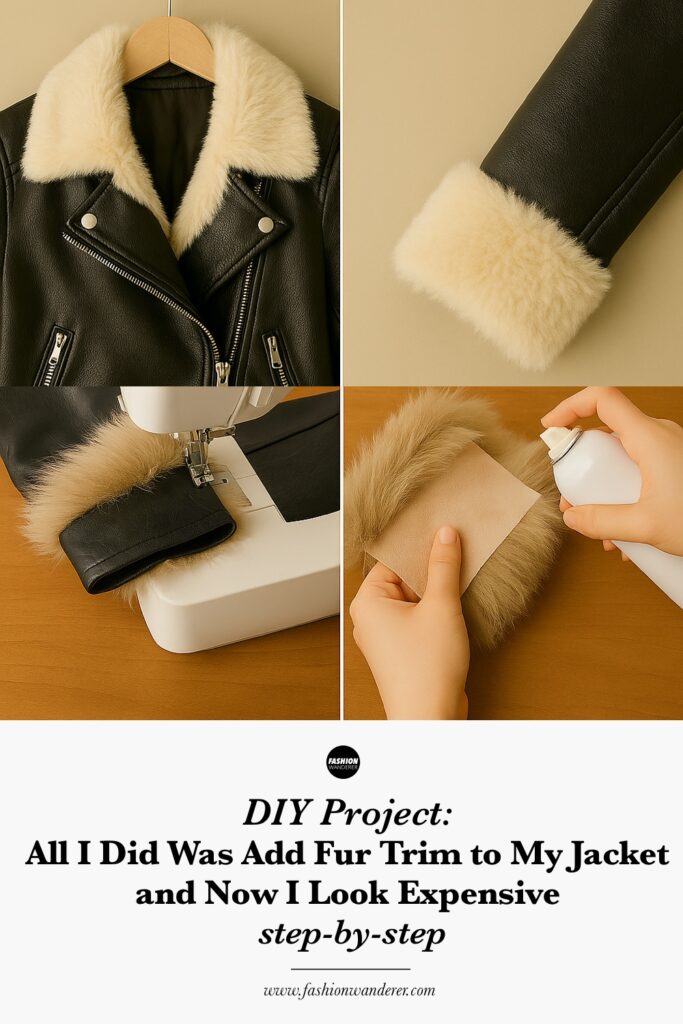
- Collar: Classic and cozy, adds instant elegance.
- Cuffs: Chic detail that feels very high fashion.
- Hood: Cozy and practical for winter wear.
- Hemline: A bold statement that works beautifully on cropped jackets.
👉 Pro tip: Start small. If you’re nervous, try cuffs first—they’re easy to sew and make a big visual impact.
Step 2: Measure Your Trim Area
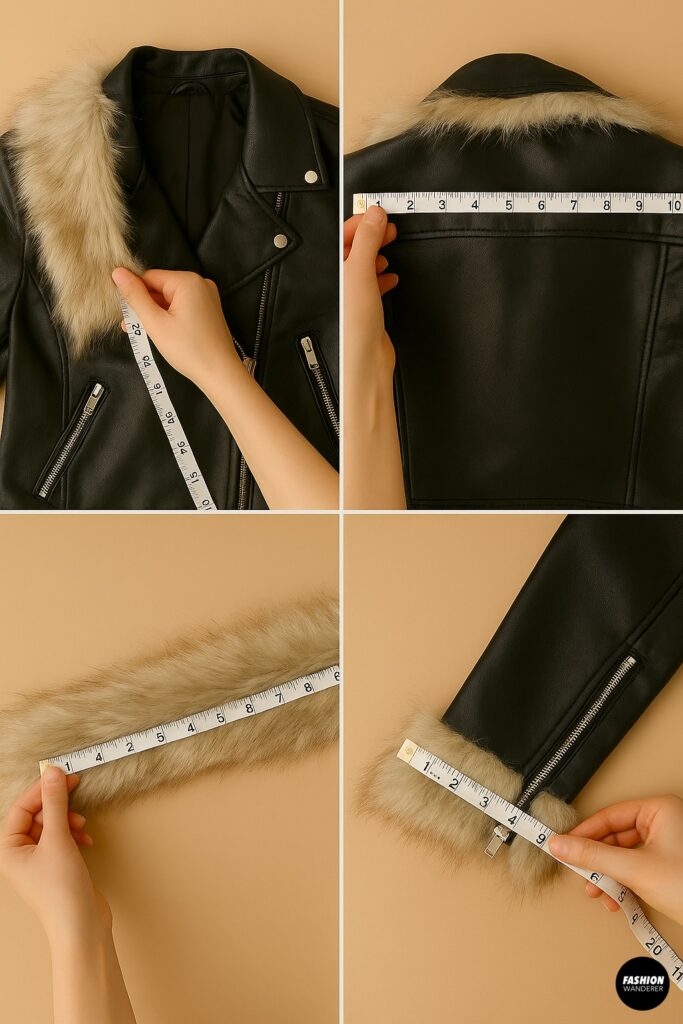

Using your measuring tape, carefully measure the length of the area where you’ll be adding fur. Add an extra inch to your measurement for seam allowance.
For example:
- A hood might measure 24 inches around. Cut your fur to 25 inches so you have wiggle room.
Step 3: Cut Your Faux Fur

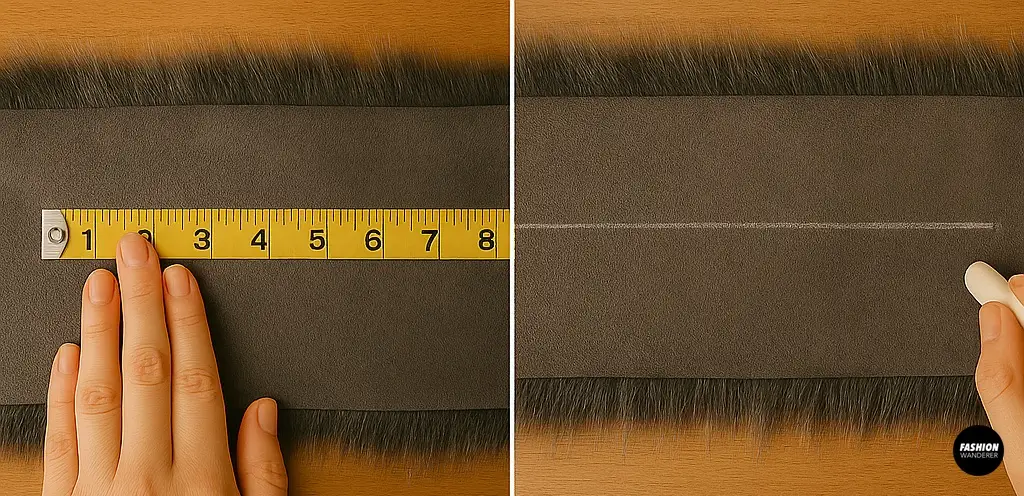
Lay the fur fabric pile-side down (that’s the fluffy part). Use tailor’s chalk to mark your measurements on the back.
✂️ Cutting tip: Instead of cutting straight through the fur with scissors (which can leave blunt edges), slide your scissors or rotary cutter just through the backing fabric. This way, the fur pile stays intact and looks natural when sewn on.
Step 4: Pin the Fur in Place

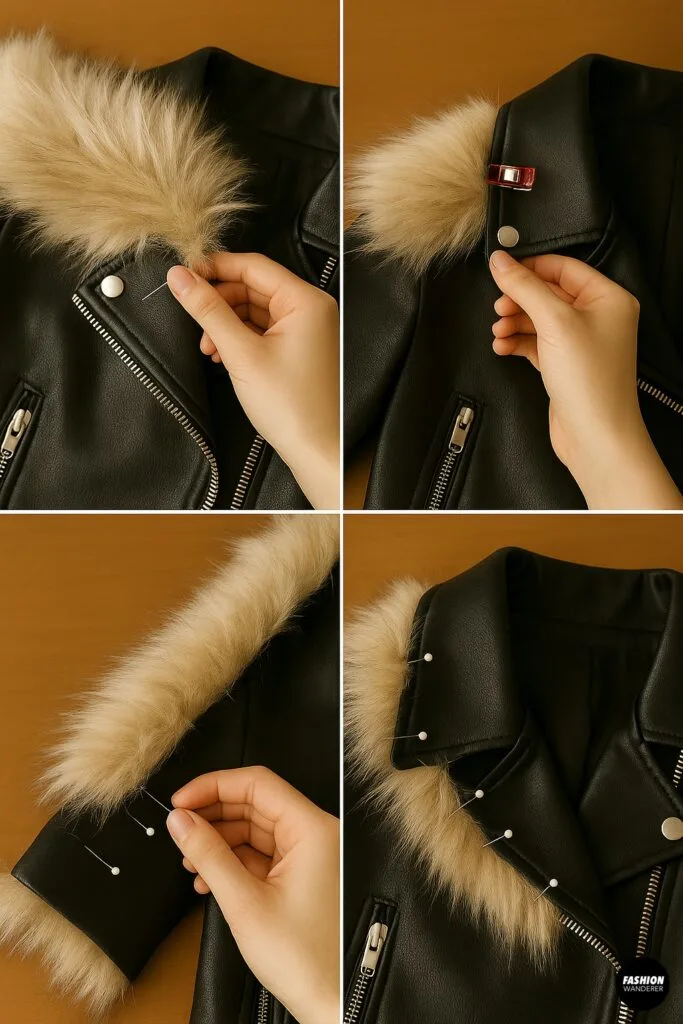
Place the fur strip along the edge of your jacket (collar, hood, cuff, etc.). Make sure the fur is facing outward. Pin or clip it securely in place.
For extra polish: Fold the raw edge of the fur slightly under before pinning. This hides the backing fabric and makes the trim look seamless.
Step 5: Sew the Fur Trim

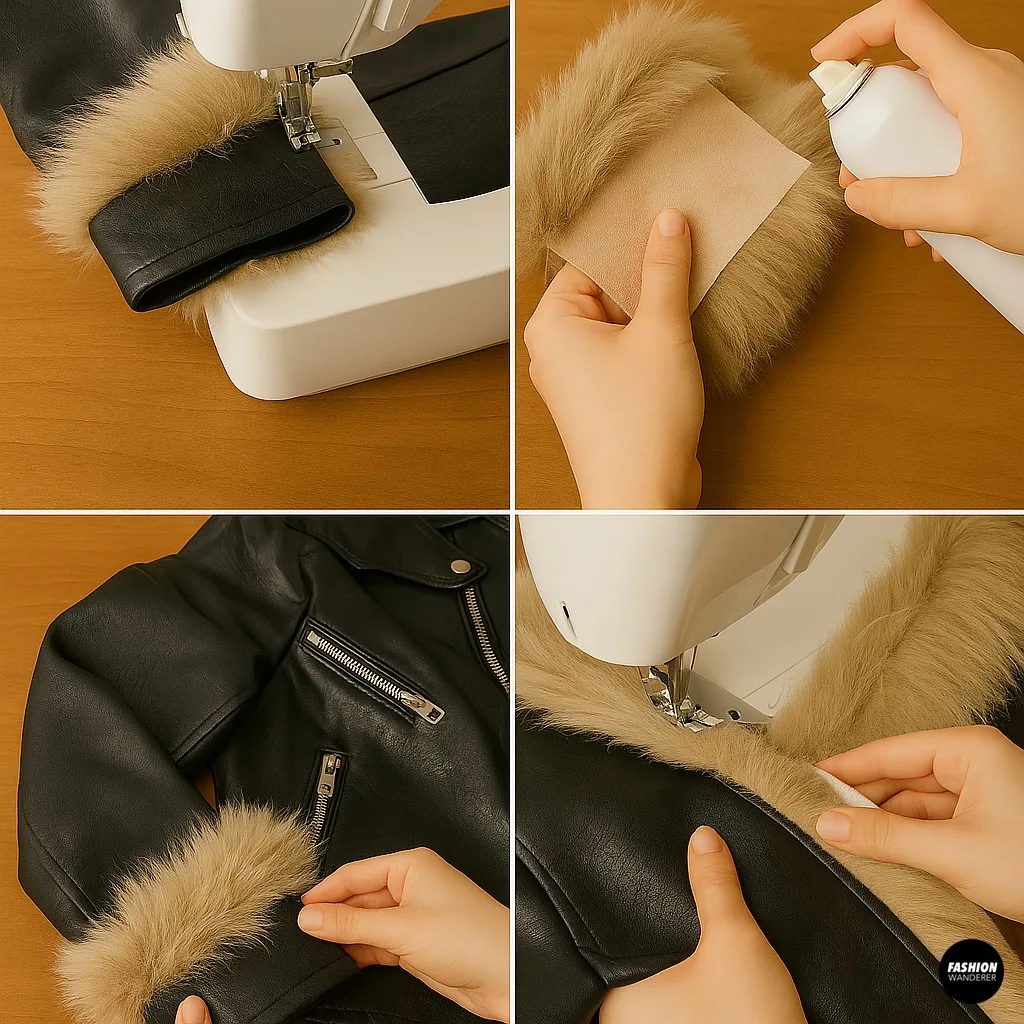
Using a sewing machine with a heavy-duty needle (or hand stitching with strong thread), sew the fur trim onto your jacket.
- Use a straight stitch close to the edge.
- Go slowly—fur is bulky and can shift as you sew.
- Shake out the fur pile after sewing to free any strands caught in the seam.
👉 No-sew option: Use fabric glue to attach the fur trim. Apply a thin line of glue along the backing, press in place, and let it dry completely. This works best for cuffs and hems but may not hold up as well on hoods or collars.
Step 6: Press and Fluff

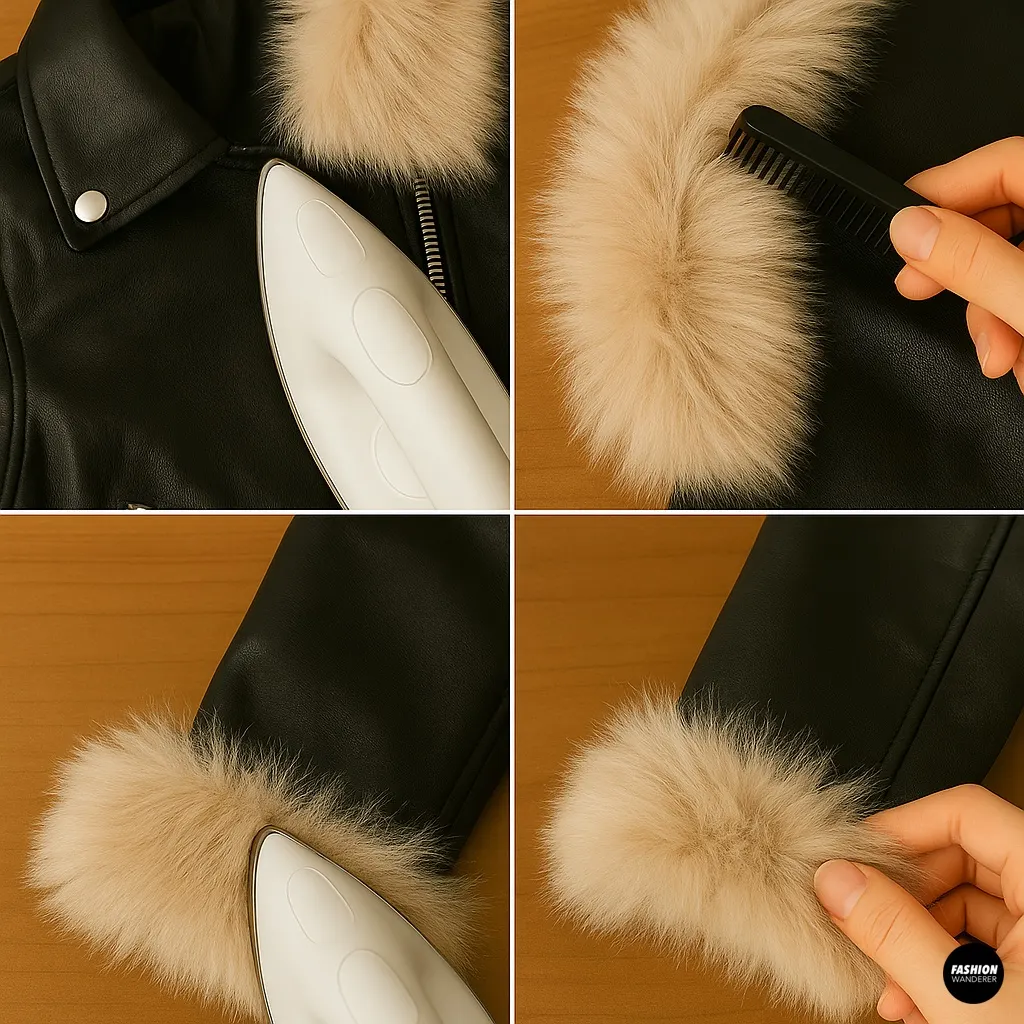
Once your trim is attached, give it a light press with an iron on the jacket fabric (not directly on the fur). Then use your fingers or a comb to fluff the fur back up for maximum volume.
Styling Ideas: How to Wear Your New Fur-Trimmed Jacket

Now that your jacket has had its glow-up, here’s how to style it for that expensive look:
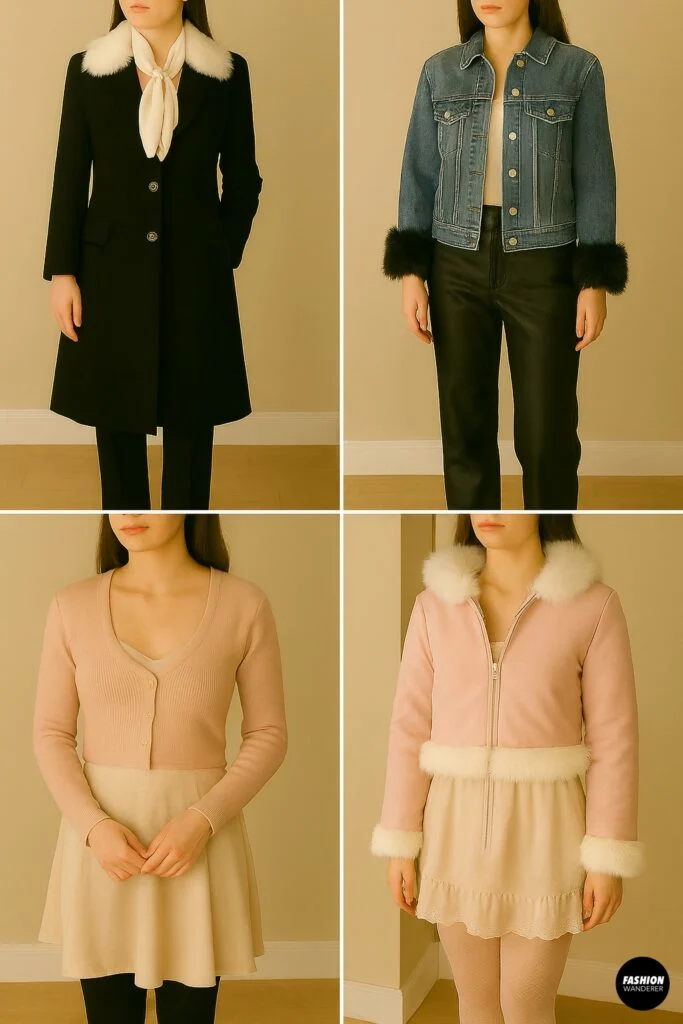
- Parisian Chic: A wool coat with fur collar trim, paired with wide-leg trousers and a silk scarf.
- Street Style Edge: A denim jacket with fur cuffs, worn with leather pants and chunky boots.
- Winter Romance: A cropped cardigan-style jacket with fur hem, styled with a midi skirt and lace camisole.
- 90s Revival: Puffer jacket with a fur hood, paired with high-waist jeans and sneakers.
- Coquette Core: Baby pink jacket with faux fur trim layered over a slip dress and lace tights.
Care and Maintenance of Faux Fur Trim
To keep your jacket looking luxe, follow these tips:
- Spot Clean: Use a damp cloth to gently wipe fur trim instead of machine washing.
- Fluff: Shake it out or use a cool hairdryer to restore volume.
- Storage: Hang your jacket so the fur keeps its shape and doesn’t get crushed.
Final Thoughts

All I did was add fur trim to my jacket—and now it looks expensive, stylish, and totally unique. This DIY is quick, beginner-friendly, and endlessly customizable. Whether you go bold with a full fur hood or subtle with chic cuff accents, you’ll love how luxe your jacket feels.
So, before you buy another winter coat, ask yourself: could a little faux fur be the upgrade you need? Chances are, the answer is yes—and your closet (and wallet) will thank you.
Trendy, Affordable Sewing Patterns for All Sizes


Tie Shoulder Jumpsuit Pattern


Palazzo Pants Sewing Pattern


Pocket Overall Romper Pattern


Wrap Maxi Skirt Sewing Pattern


Tie Back Top Sewing Pattern