
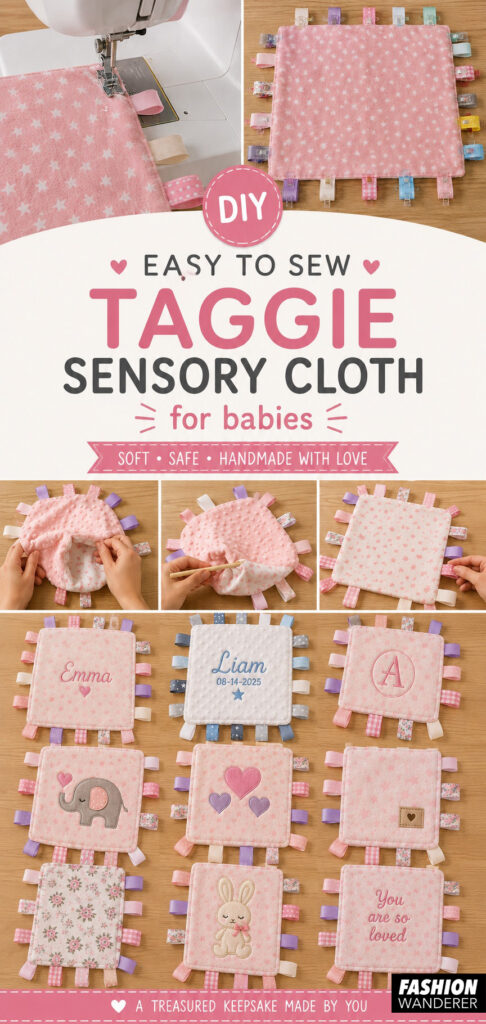
A Baby Taggie Security Blanket is one of the sweetest handmade gifts you can sew for a newborn or baby shower. Combining a soft cuddle blanket with colorful ribbon tags, this comforting toy encourages sensory exploration while giving babies a cozy companion to snuggle. Best of all, it’s a quick sewing project that even beginners can complete in about an hour.
In this step-by-step tutorial, you’ll learn how to sew a Baby Taggie Security Blanket using soft fabrics, colorful ribbon loops, and basic sewing techniques. This project is perfect for using fabric scraps and can easily be personalized with different colors, textures, and embroidery.
Looking for a sweet handmade baby gift that doesn’t require advanced sewing skills? These easy DIY baby gift ideas are beginner-friendly, useful, and adorable enough for baby showers, new arrivals, or your own little one.
Materials You’ll Need
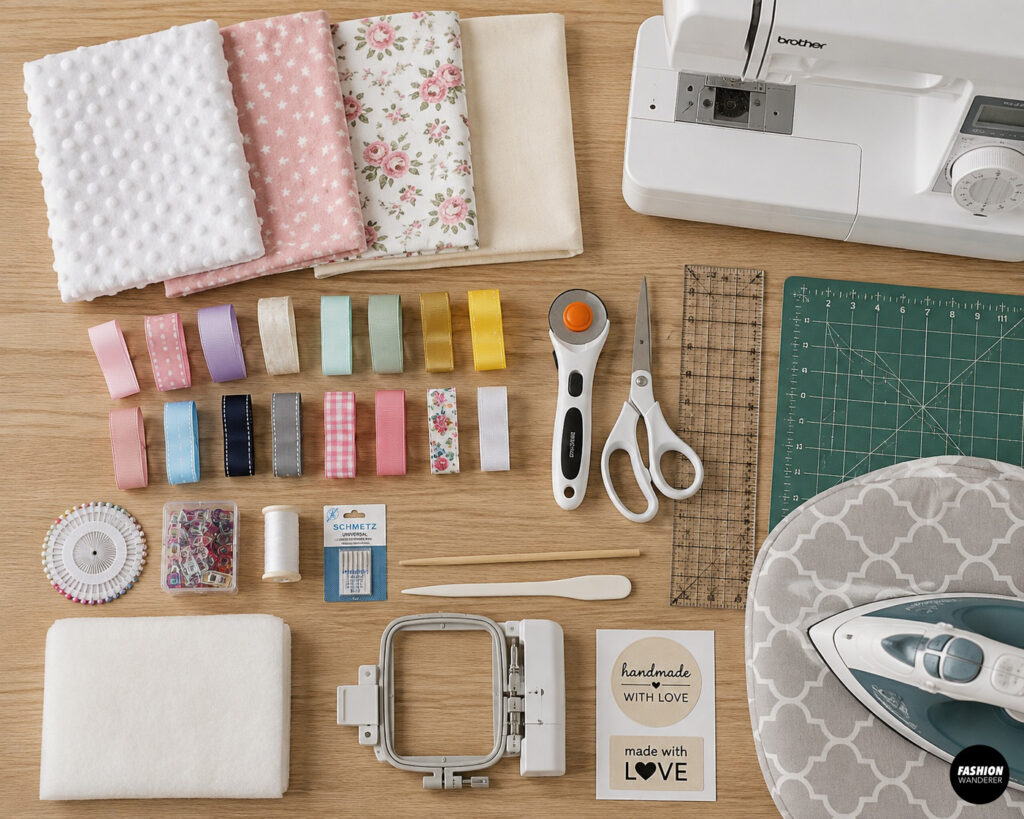
- Two 14″ × 14″ squares of fabric
- Minky fabric
- Cotton flannel
- Cotton quilting fabric
- Muslin
- 12–20 ribbon pieces (4″ long each)
- Fabric scissors or rotary cutter
- Cutting mat and ruler
- Sewing machine
- Universal needle (80/12)
- Polyester thread
- Sewing clips or pins
- Iron and ironing board
- Chopstick or point turner
- Optional: Lightweight batting for extra softness
- Optional: Embroidery machine or iron-on label
Finished Size
Approximately:
13″ × 13″
Perfect for babies to grasp with little hands.
Easy DIY Baby Taggie Security Blanket
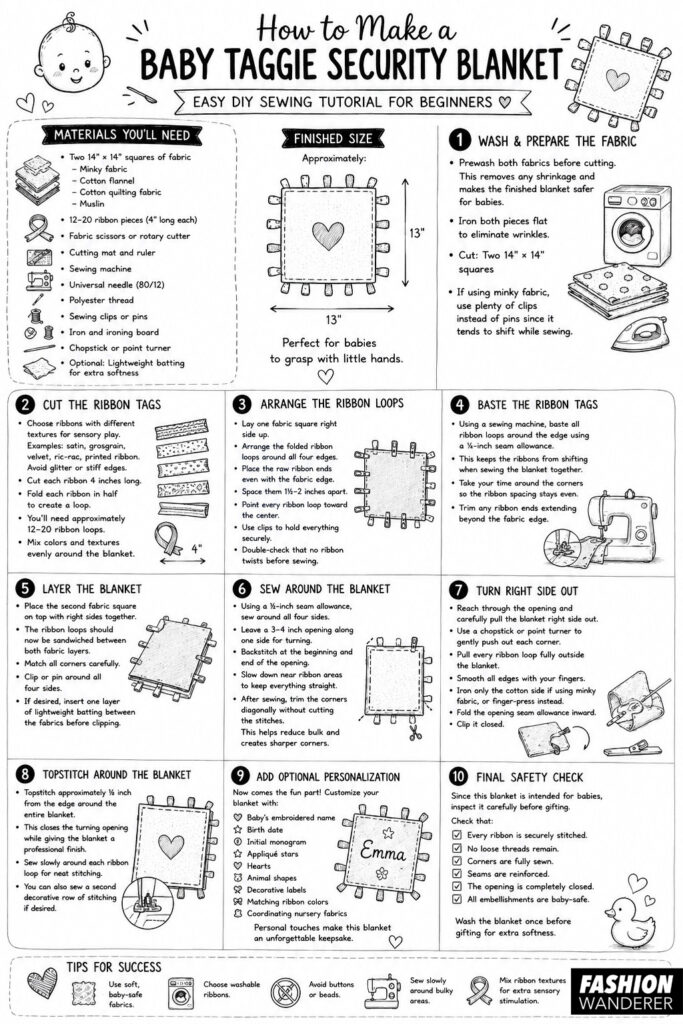
Step 1: Wash and Prepare the Fabric
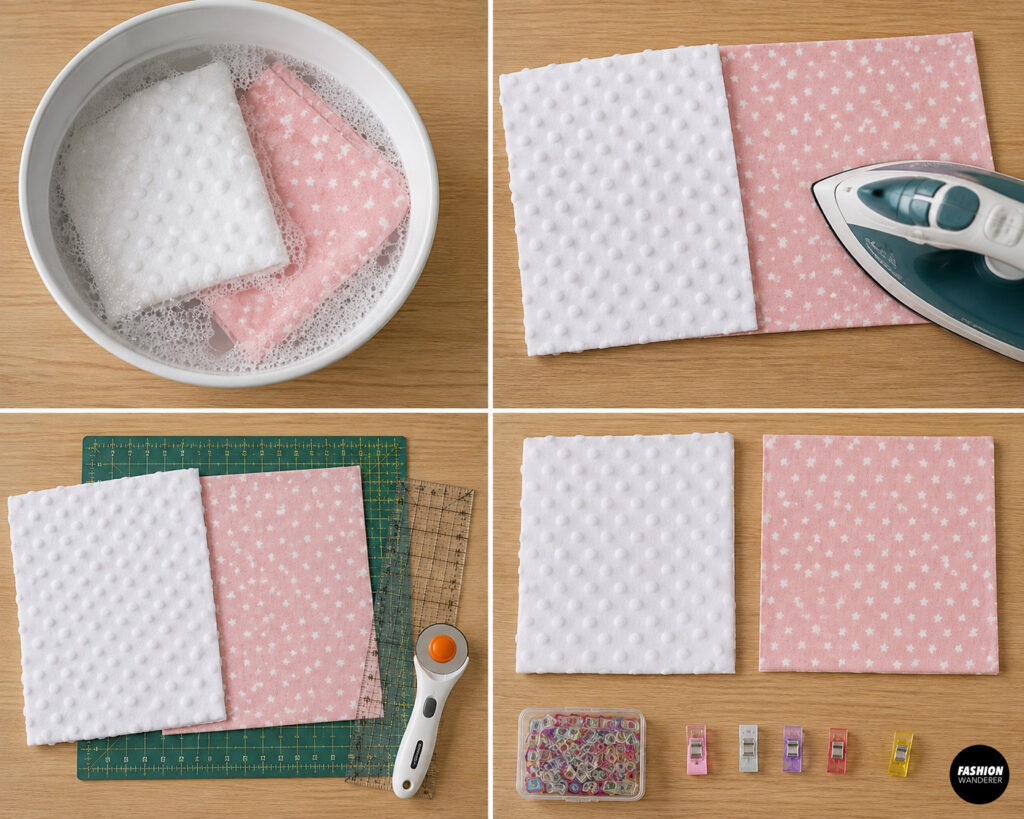
Prewash both fabrics before cutting. This removes any shrinkage and makes the finished blanket safer for babies.
Iron both pieces flat to eliminate wrinkles.
Cut:
- Two 14″ × 14″ squares
If using minky fabric, use plenty of clips instead of pins since it tends to shift while sewing.
Step 2: Cut the Ribbon Tags
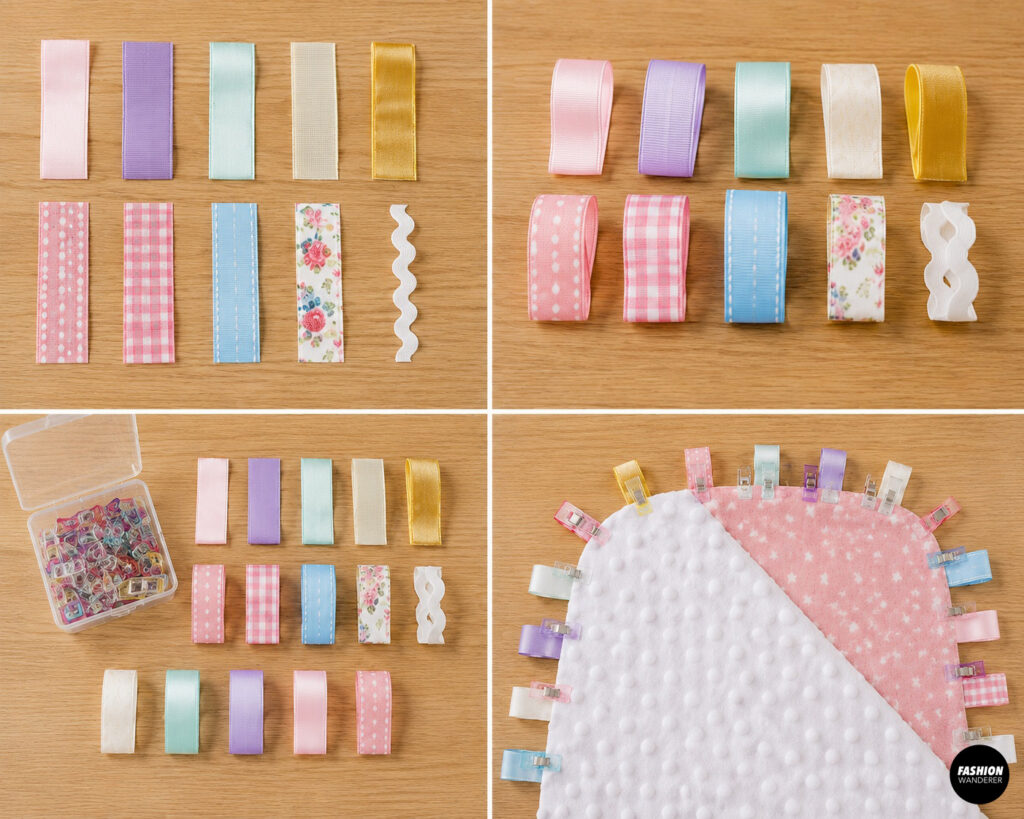
Choose ribbons with different textures for sensory play.
Examples include:
- Satin
- Grosgrain
- Velvet
- Ric-rac
- Printed ribbon
Avoid ribbons with glitter or stiff edges.
Cut each ribbon:
4 inches long
Fold each ribbon in half to create a loop.
You’ll need approximately:
12–20 ribbon loops
Mix colors and textures evenly around the blanket.
Step 3: Arrange the Ribbon Loops
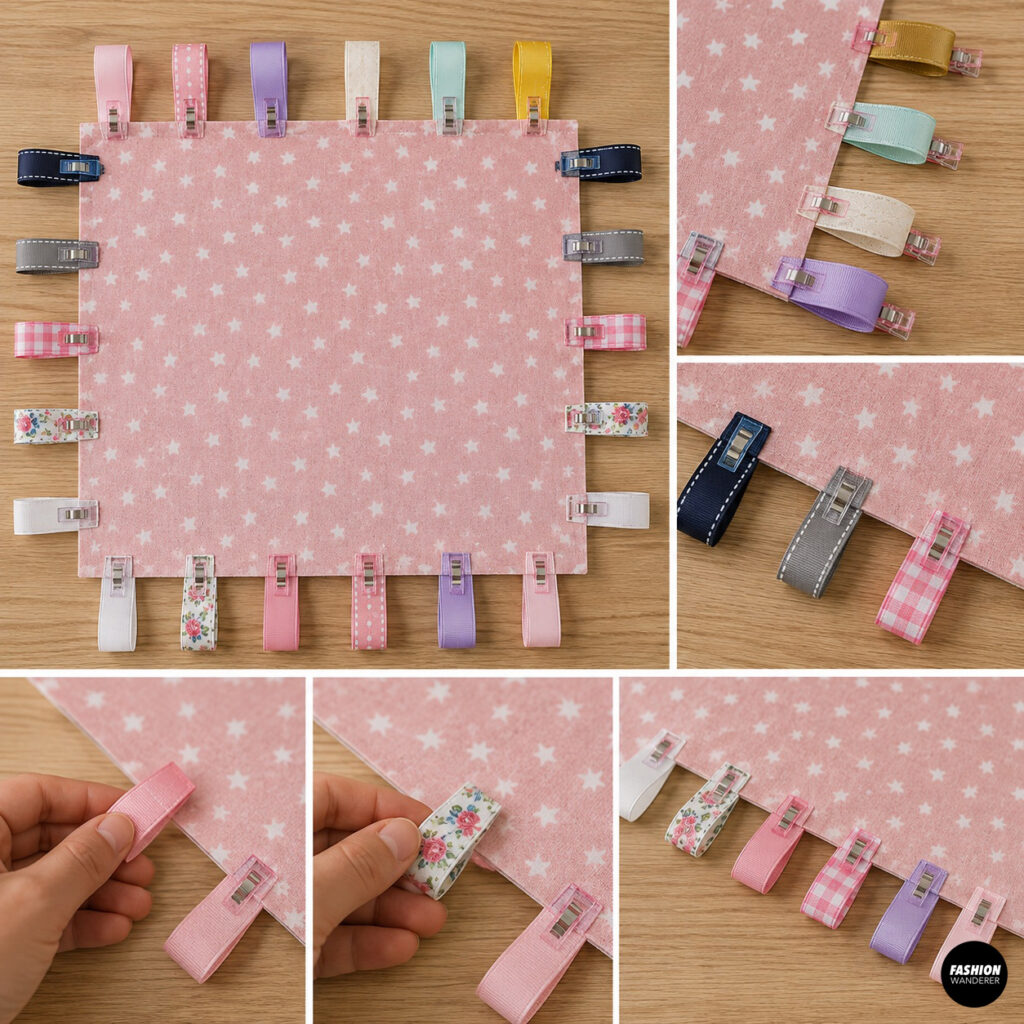
Lay one fabric square right side up.
Arrange the folded ribbon loops around all four edges.
Place the raw ribbon ends even with the fabric edge.
Space them approximately:
1½–2 inches apart.
Point every ribbon loop toward the center of the blanket.
Use clips to hold everything securely.
Double-check that no ribbon twists before sewing.
Step 4: Baste the Ribbon Tags
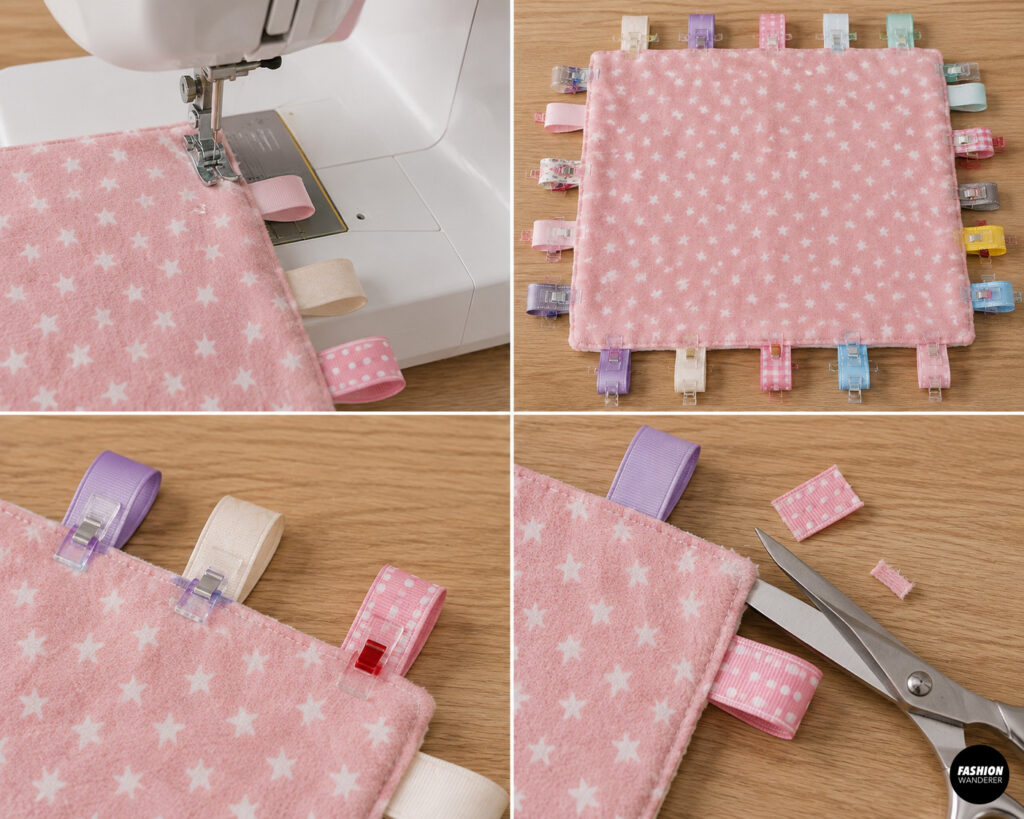
Using a sewing machine, baste all ribbon loops around the edge using a ¼-inch seam allowance.
This keeps the ribbons from shifting when sewing the blanket together.
Take your time around the corners so the ribbon spacing stays even.
Trim any ribbon ends extending beyond the fabric edge.
Step 5: Layer the Blanket
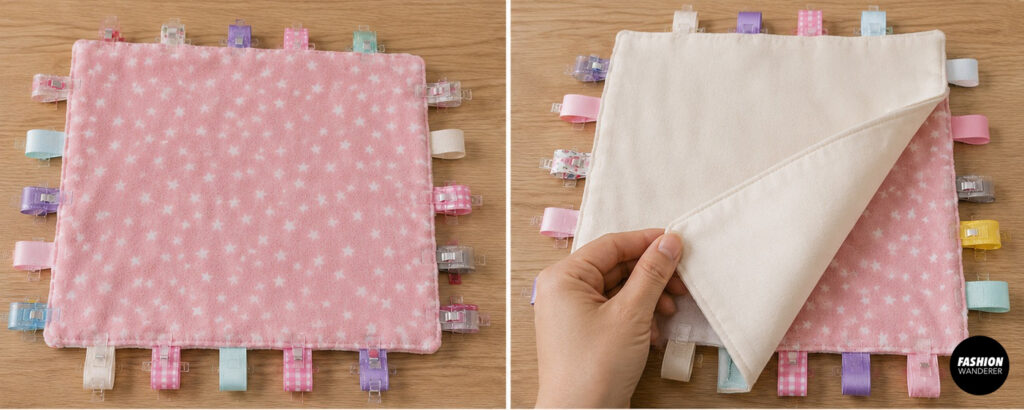
Place the second fabric square on top with right sides together.
The ribbon loops should now be sandwiched between both fabric layers.
Match all corners carefully.
Clip or pin around all four sides.
If desired, insert one layer of lightweight batting between the fabrics before clipping.
Step 6: Sew Around the Blanket
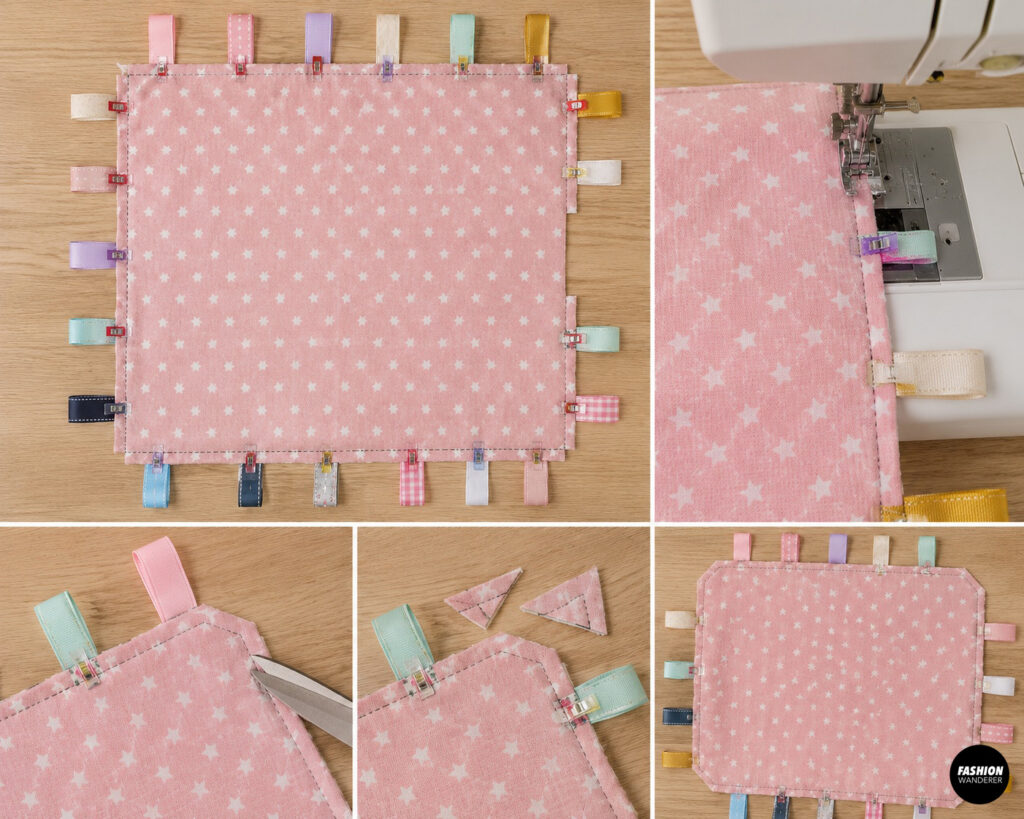
Using a ½-inch seam allowance, sew around all four sides.
Leave a 3–4 inch opening along one side for turning.
Backstitch at the beginning and end of the opening.
Slow down near ribbon areas to keep everything straight.
After sewing:
Trim the corners diagonally without cutting the stitches.
This helps reduce bulk and creates sharper corners after turning.
Step 7: Turn Right Side Out
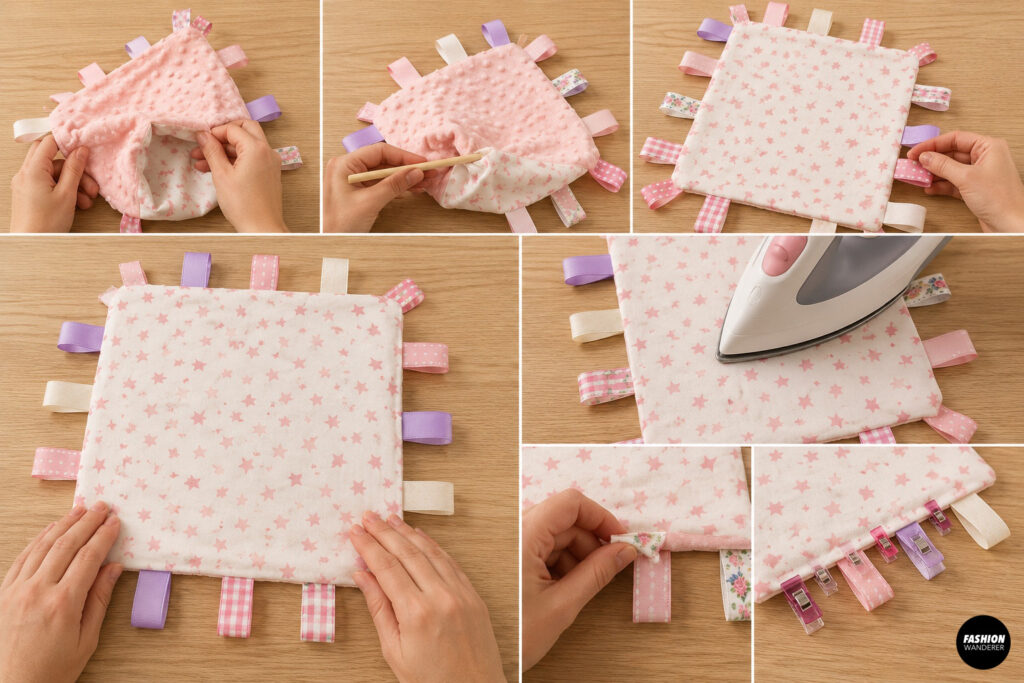
Reach through the opening and carefully pull the blanket right side out.
Use a chopstick or point turner to gently push out each corner.
Pull every ribbon loop fully outside the blanket.
Smooth all edges with your fingers.
Iron only the cotton side if using minky fabric, or finger-press the blanket instead.
Fold the opening seam allowance inward.
Clip it closed.
Step 8: Topstitch Around the Blanket
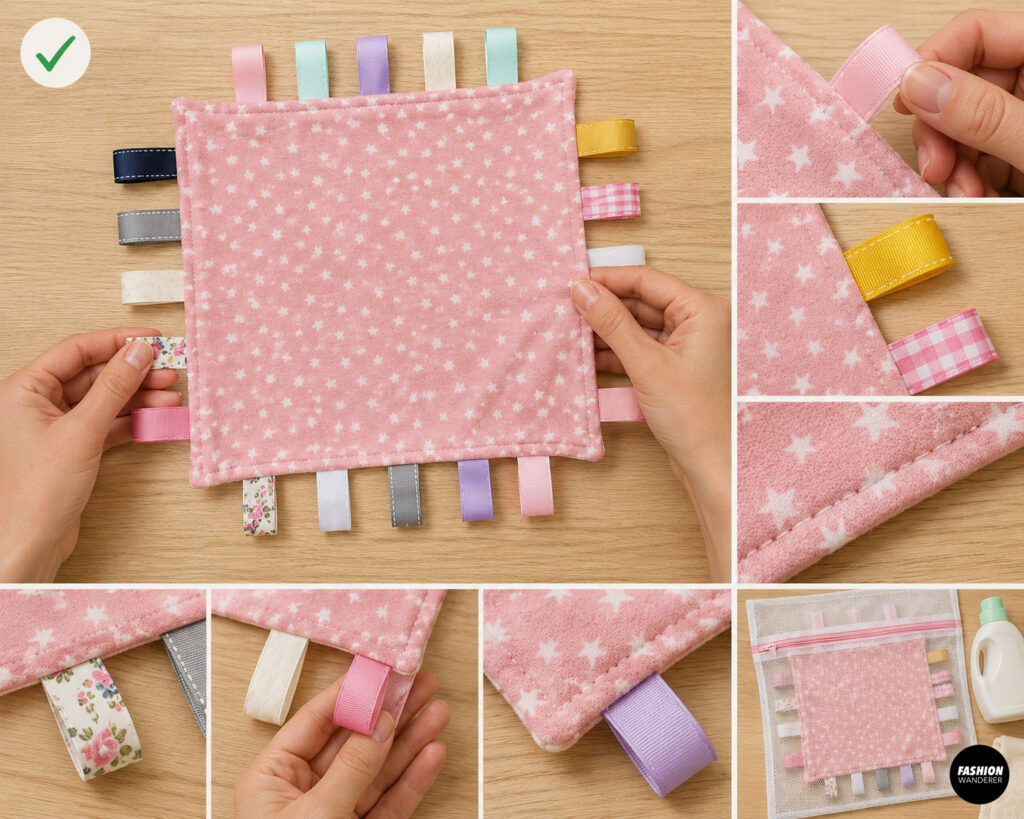
Topstitch approximately ⅛ inch from the edge around the entire blanket.
This closes the turning opening while giving the blanket a professional finish.
Sew slowly around each ribbon loop for neat stitching.
You can also sew a second decorative row of stitching if desired.
Step 9: Add Optional Personalization
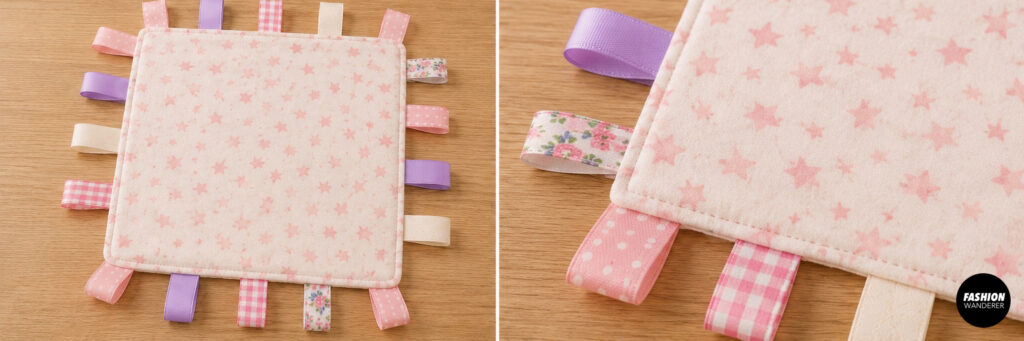
Now comes the fun part.
Customize your blanket with:
- Baby’s embroidered name
- Birth date
- Initial monogram
- Appliqué stars
- Hearts
- Animal shapes
- Decorative labels
- Matching ribbon colors
- Coordinating nursery fabrics
Personal touches make this blanket an unforgettable keepsake.
Step 10: Final Safety Check
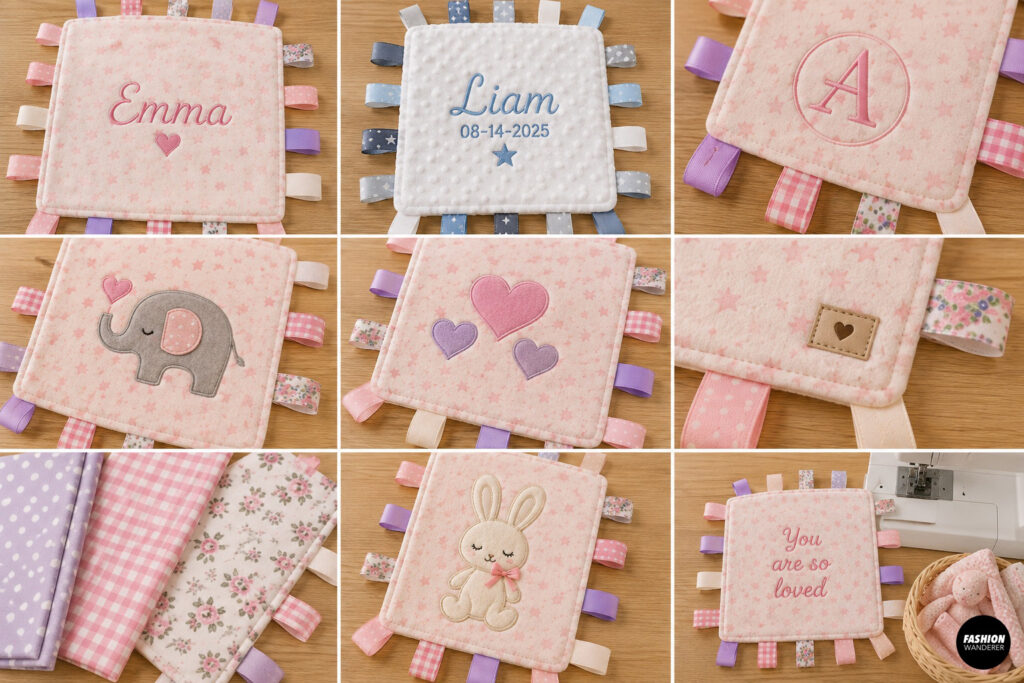
Since this blanket is intended for babies, inspect it carefully before gifting.
Check that:
- Every ribbon is securely stitched.
- No loose threads remain.
- Corners are fully sewn.
- Seams are reinforced.
- The opening is completely closed.
- All embellishments are baby-safe.
Wash the blanket once before gifting for extra softness.
Tips for Success
- Use soft, baby-safe fabrics.
- Choose washable ribbons.
- Avoid buttons or beads.
- Sew slowly around bulky ribbon areas.
- Mix ribbon textures for extra sensory stimulation.
- Make several blankets assembly-line style for baby shower gifts.
Fabric Recommendations
The softest results come from combining different textures.
Popular combinations include:
- Minky + Cotton
- Flannel + Flannel
- Muslin + Cotton
- Bamboo Jersey + Minky
- Double Gauze + Cotton
Using contrasting textures makes the blanket even more engaging for little hands.
Caring for Your Baby Taggie Blanket
Machine wash on a gentle cycle with mild detergent.
Tumble dry on low heat or lay flat to dry.
Avoid bleach and fabric softeners to help preserve the ribbons and fabric softness.
Final Thoughts
Learning how to make a Baby Taggie Security Blanket is a rewarding beginner sewing project that creates a practical and heartfelt handmade gift. With just a few fabric squares, colorful ribbon loops, and basic sewing supplies, you can create a soft sensory blanket that babies will love to cuddle, grasp, and explore.
Whether you’re sewing for your own little one, making baby shower gifts, or stocking your handmade shop, this easy DIY project is quick, customizable, and sure to become a treasured keepsake for years to come.