
Have an old pair of jeans sitting in the back of your closet? Instead of throwing them away, turn that sturdy denim into an adorable and practical DIY dog backpack! This easy upcycle sewing project transforms unwanted jeans into two small saddlebag-style pockets that attach to your dog’s existing harness.
The finished backpack is perfect for carrying a few lightweight walking essentials, such as empty waste bags or a small collapsible bowl. Best of all, the pockets are removable, so you can take them off whenever your dog doesn’t need them.
This DIY dog backpack from old jeans is a fun project for confident beginners and a clever way to give worn denim a completely new purpose.
Materials You’ll Need
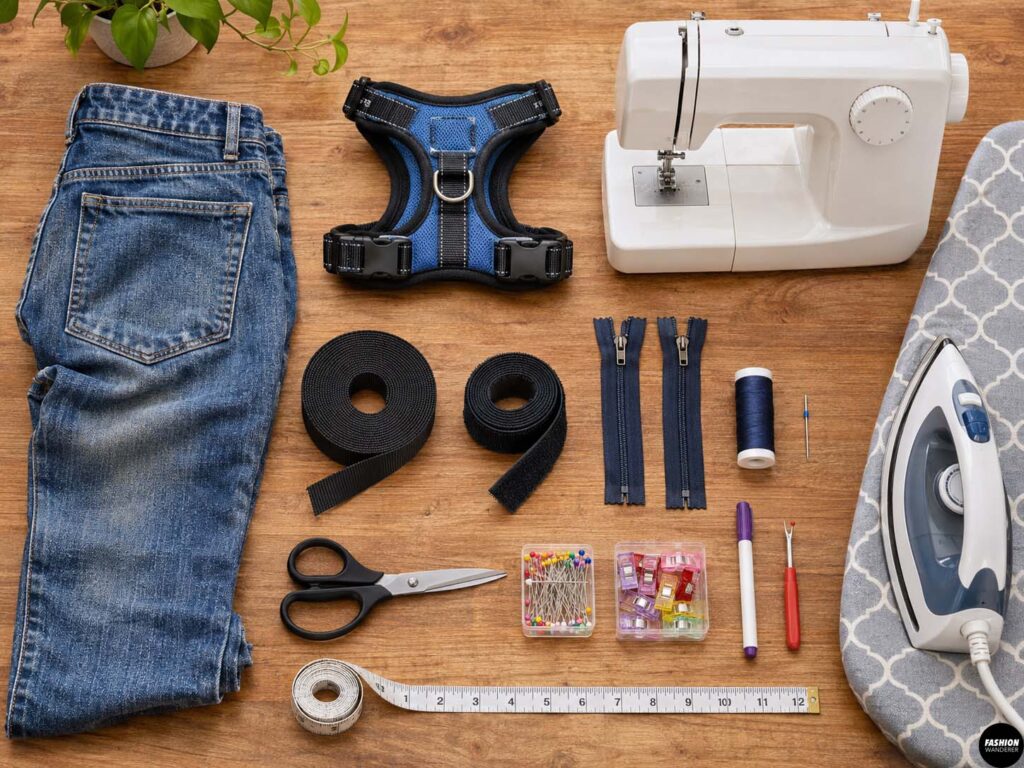
You don’t need much fabric for this project, which makes old jeans perfect.
- 1 pair of old jeans
- Your dog’s comfortable, properly fitted harness
- 1-inch nylon or polyester webbing
- 1-inch hook-and-loop tape
- Two 7-inch zippers
- Polyester sewing thread
- Sewing machine
- Denim or jeans sewing needle
- Fabric scissors
- Pins or sewing clips
- Measuring tape or ruler
- Fabric marker
- Seam ripper
- Iron and ironing board
Optional additions include reflective tape, lightweight lining fabric, swivel clips, D-rings, or small pieces of interfacing.
Seam allowance: Use a 1/2-inch seam allowance unless otherwise noted.
Upcycled Dog Backpack from Old Jeans
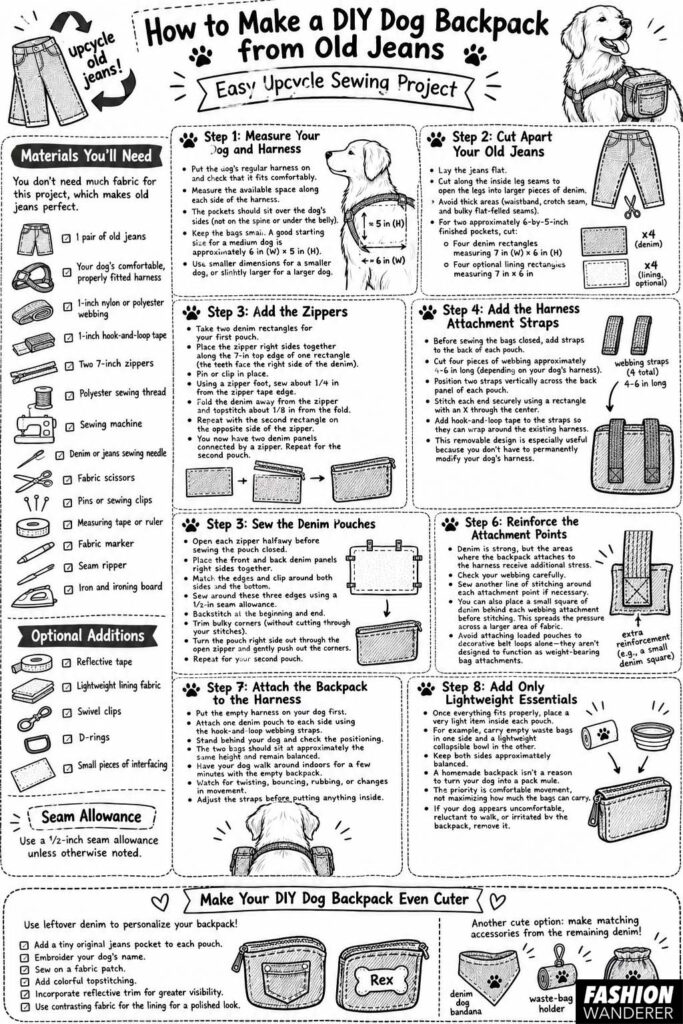
Step 1: Measure Your Dog and Harness
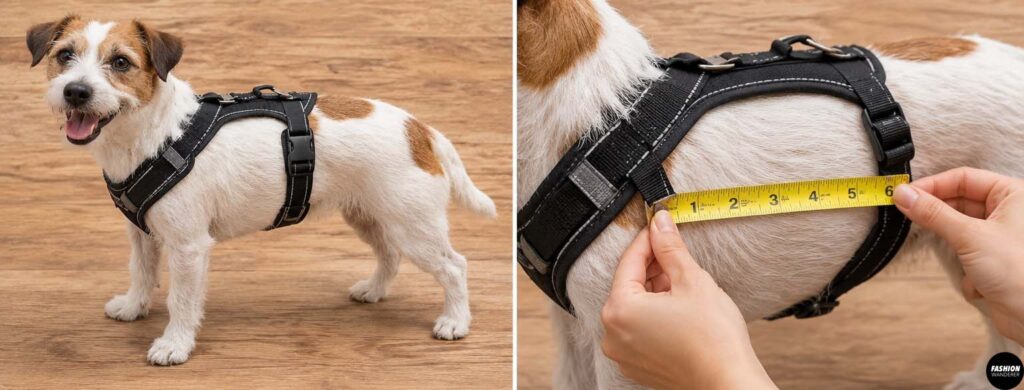
Before cutting your jeans, put the dog’s regular harness on and check that it fits comfortably.
Measure the available space along each side of the harness. The backpack pockets should sit over the dog’s sides rather than directly on the spine or underneath the belly.
Keep the finished bags relatively small. A good starting size for a medium dog is approximately 6 inches wide by 5 inches high.
For a smaller dog, reduce the dimensions. For a larger dog, you can increase them slightly.
The goal isn’t to create enormous saddlebags. Small, lightweight pockets will be more comfortable and less likely to bounce around during a walk.
Step 2: Cut Apart Your Old Jeans
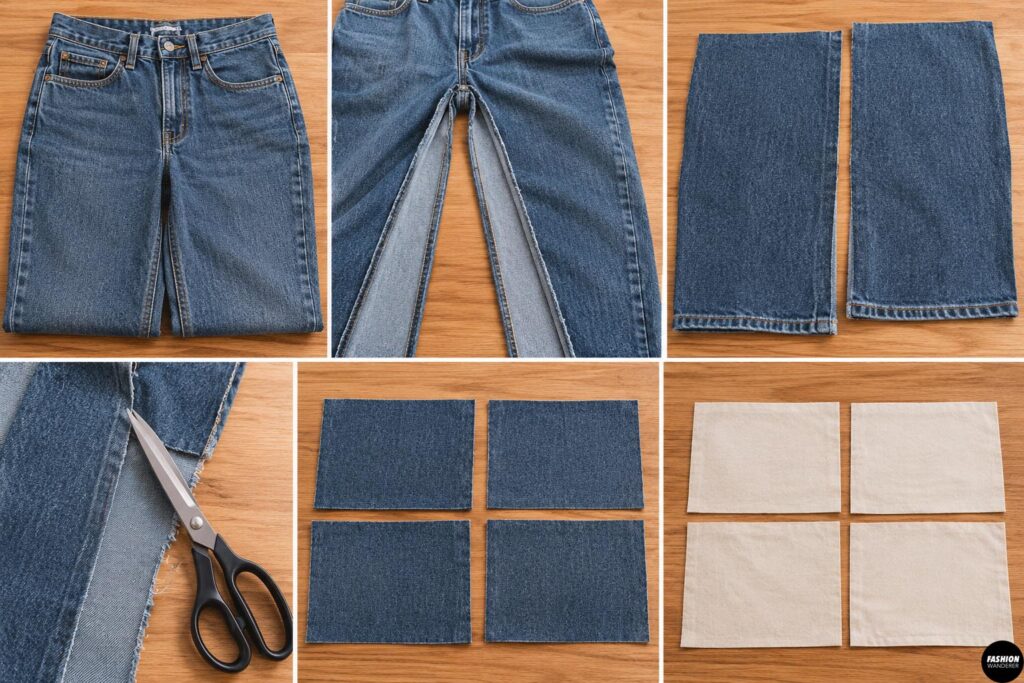
Lay the jeans flat.
Cut along the inside leg seams to open the legs into larger pieces of denim. Avoid excessively thick areas around the waistband, crotch seam, and bulky flat-felled seams.
For two approximately 6-by-5-inch finished pockets, cut:
- Four denim rectangles measuring 7 inches wide × 6 inches high
- Four optional lining rectangles measuring 7 × 6 inches
Two denim rectangles will make each backpack pouch.
Don’t throw away the remaining jeans yet. Belt loops and pockets can become decorative details later.
Step 3: Add the Zippers
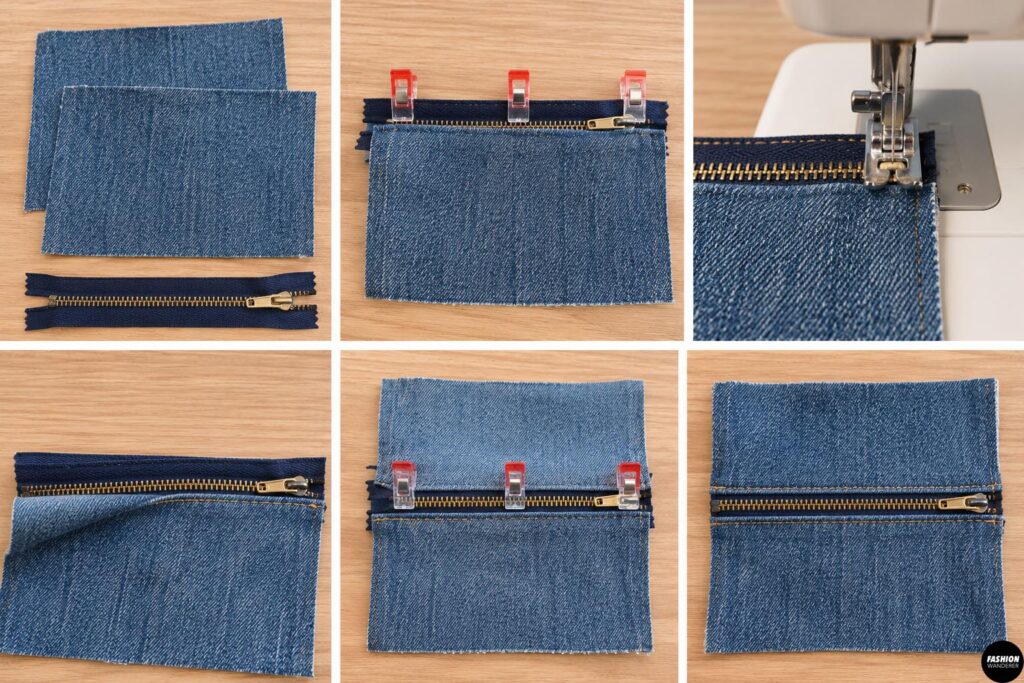
Take two denim rectangles for your first pouch.
Place the zipper right sides together along the 7-inch top edge of one rectangle. The zipper teeth should face the right side of the denim.
Pin or clip it in place.
Using a zipper foot, sew approximately 1/4 inch from the zipper tape edge.
Fold the denim away from the zipper and topstitch approximately 1/8 inch from the folded edge.
Repeat with the second rectangle on the opposite side of the zipper.
You should now have two denim panels connected by a zipper.
Repeat these steps to make the second pouch.
Step 4: Add the Harness Attachment Straps
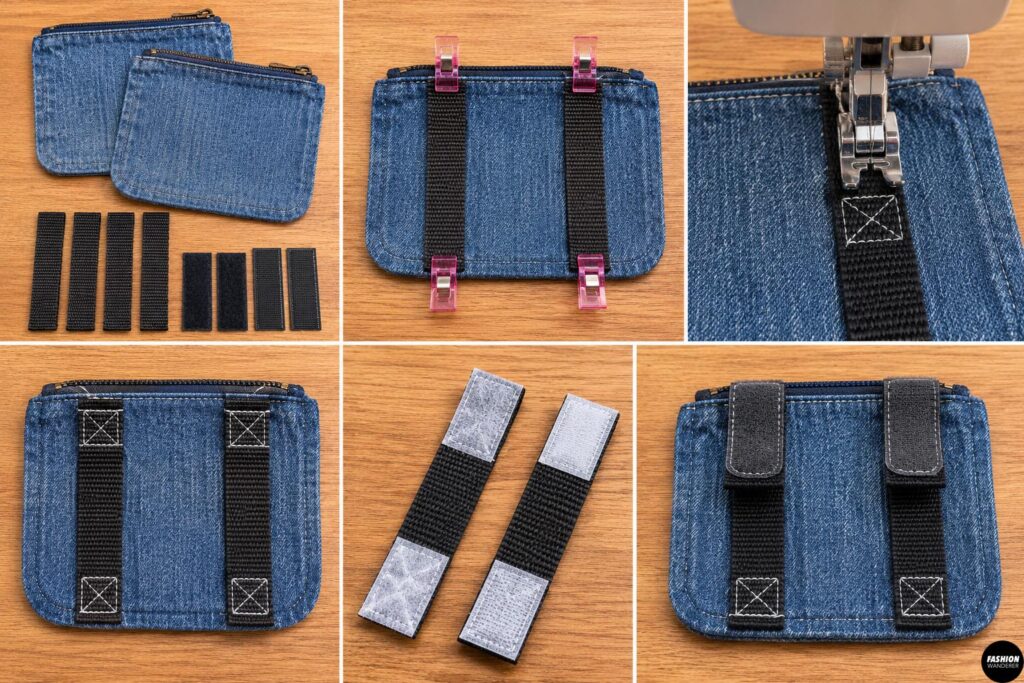
Before sewing the bags closed, add straps to the back of each pouch.
Cut four pieces of webbing approximately 4–6 inches long, depending on the width and shape of your dog’s harness.
Position two straps vertically across the back panel of each pouch.
Stitch each end securely using a rectangle with an X stitched through the center.
Add hook-and-loop tape to the straps so they can wrap around the existing harness.
This removable design is especially useful because you don’t have to permanently modify your dog’s harness.
Step 5: Sew the Denim Pouches
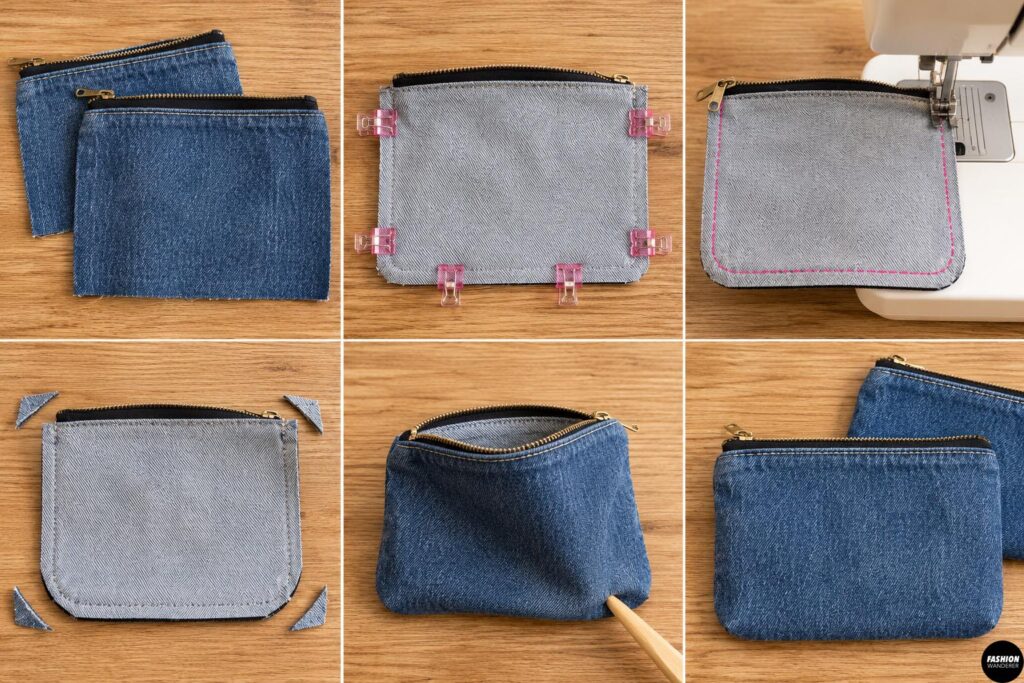
Open each zipper halfway before sewing the pouch closed. This is important because you’ll need the opening to turn the bag right side out.
Place the front and back denim panels right sides together.
Match the edges and clip around both sides and the bottom.
Sew around these three edges using a 1/2-inch seam allowance.
Backstitch at the beginning and end.
Trim bulky corners without cutting through your stitches.
Turn the pouch right side out through the open zipper and gently push out the corners.
Repeat for your second backpack pouch.
Step 6: Reinforce the Attachment Points
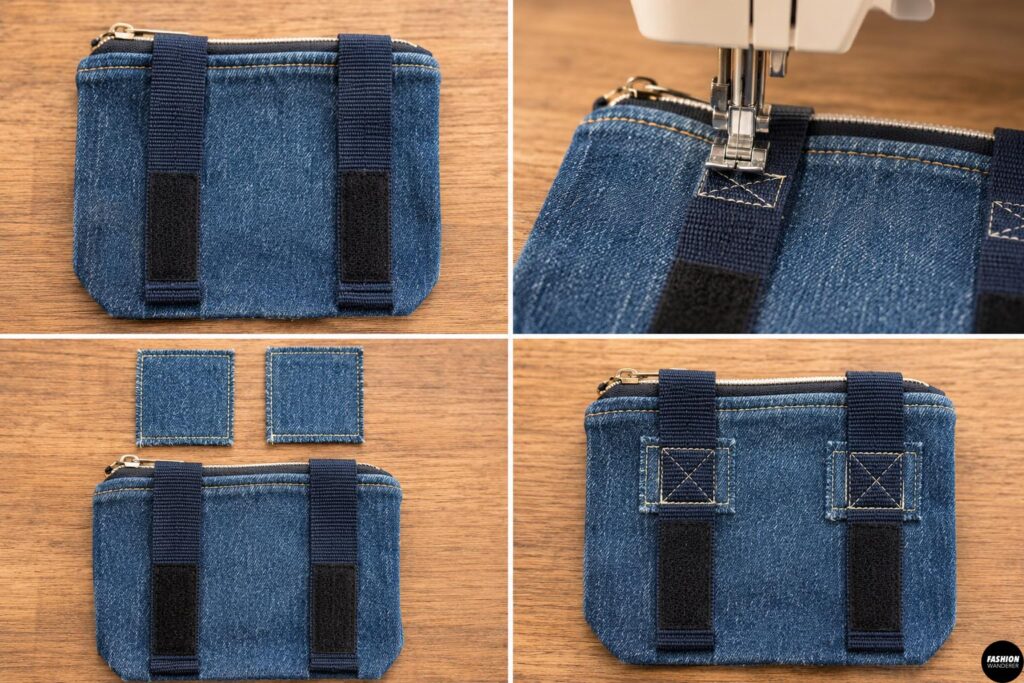
Denim is strong, but the areas where the backpack attaches to the harness receive additional stress.
Check your webbing carefully.
Sew another line of stitching around each attachment point if necessary.
You can also place a small square of denim behind each webbing attachment before stitching. This spreads the pressure across a larger area of fabric.
Avoid attaching loaded pouches to decorative belt loops alone—they aren’t designed to function as weight-bearing bag attachments.
Step 7: Attach the Backpack to the Harness
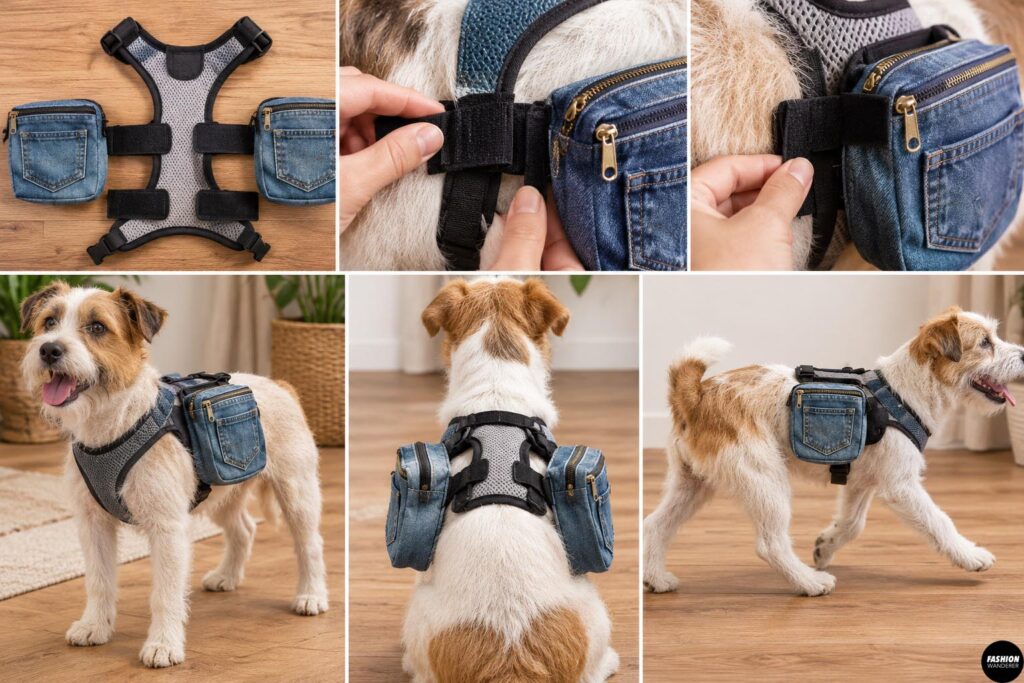
Put the empty harness on your dog first.
Attach one denim pouch to each side using the hook-and-loop webbing straps.
Stand behind your dog and check the positioning.
The two bags should sit at approximately the same height and remain balanced from side to side.
Have your dog walk around indoors for a few minutes with the empty backpack.
Watch for twisting, bouncing, rubbing, or changes in the dog’s normal movement.
Adjust the straps before putting anything inside.
Step 8: Add Only Lightweight Essentials
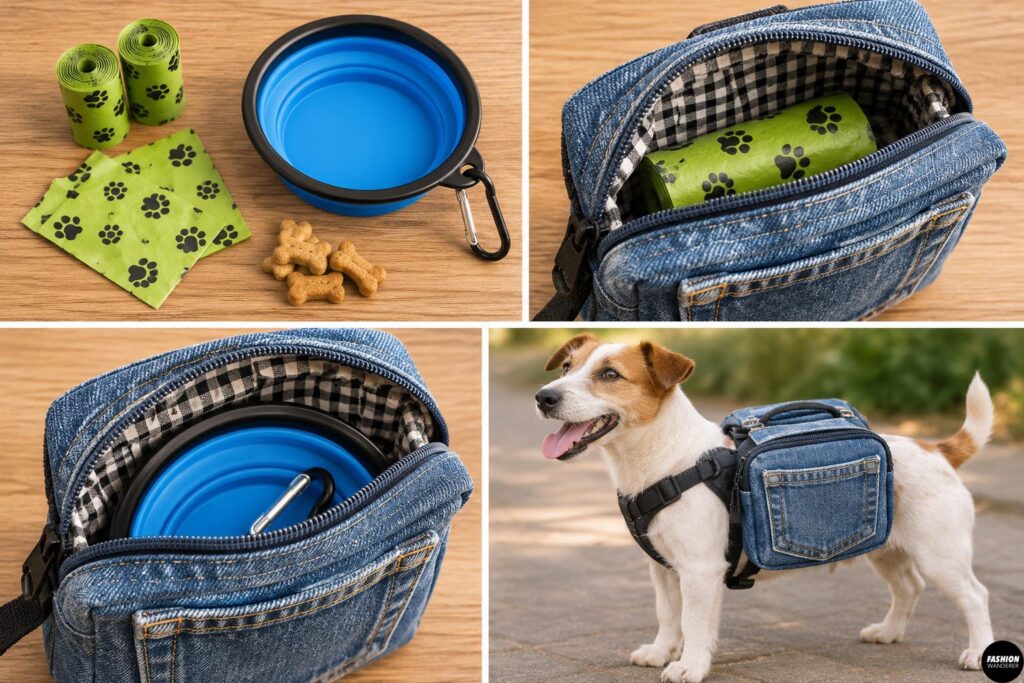
Once everything fits properly, place a very light item inside each pouch.
For example, you could carry empty waste bags in one side and a lightweight collapsible bowl in the other.
Keep both sides approximately balanced.
A homemade backpack isn’t a reason to turn your dog into a pack mule. The priority is comfortable movement, not maximizing how much the bags can carry.
If your dog appears uncomfortable, reluctant to walk, or irritated by the backpack, remove it.
Make Your DIY Dog Backpack Even Cuter
Now comes the fun part.
Because you’re working with old jeans, you can use the leftover pieces to personalize the backpack.
Try adding a tiny original jeans pocket to the front of each pouch. You could also embroider your dog’s name, sew on a fabric patch, add colorful topstitching, or incorporate reflective trim for greater visibility.
For an especially polished look, use contrasting fabric for the lining.
Another cute option is making matching accessories from the remaining denim. A denim dog bandana, waste-bag holder, or treat pouch would turn this simple project into an entire upcycled dog-walking set.
Final Thoughts
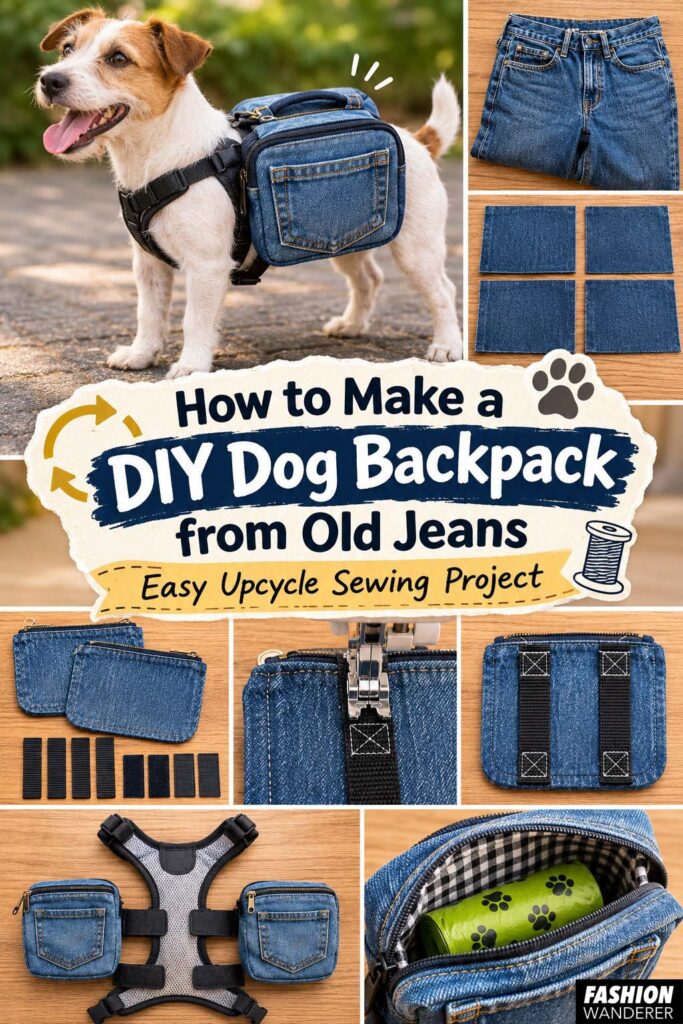
Turning unwanted jeans into a DIY dog backpack is an easy way to combine sewing, upcycling, and practical pet accessories in one project.
The sturdy denim creates adorable little saddlebags, while removable webbing straps allow you to attach the pockets to a harness your dog already wears comfortably.
It’s also a wonderfully flexible sewing project. Change the dimensions for your dog’s size, add a bright lining, reuse the original jean pockets, embroider a name, or add reflective details.
So before donating or tossing that old pair of jeans, grab your scissors and sewing machine. With a little cutting and stitching, those forgotten jeans can become a completely new upcycled dog accessory ready for your next walk or adventure.