
A handmade crochet bottle carrier is one of those small projects that is surprisingly useful. It keeps your hands free while walking, traveling, going to festivals, visiting farmers markets, or heading out for an afternoon hike. Better yet, a granny stitch design gives the carrier a colorful vintage look while keeping the project lightweight and quick to crochet.
This DIY granny stitch bottle carrier is beginner-friendly and can be customized for different water bottle sizes. The construction is simple: crochet a sturdy circular base, build the bottle holder upward using granny stitch clusters, then add a comfortable shoulder strap.
If you already know how to chain, slip stitch, and double crochet, you can make this project in an afternoon.
Materials You Will Need
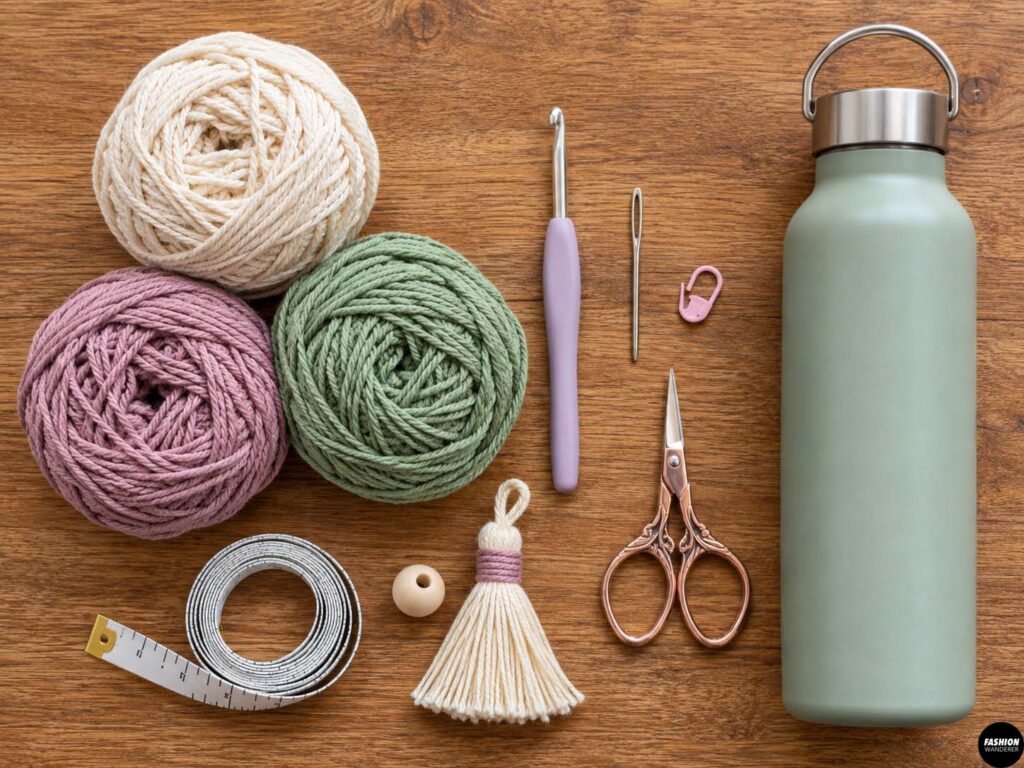
For one crochet bottle carrier, gather:
- 100–150 yards medium-weight cotton yarn
- 4 mm or 4.5 mm crochet hook
- Yarn needle
- Scissors
- Stitch marker
- Measuring tape
- Water bottle for checking the fit
- Optional contrasting yarn colors
- Optional wooden bead or tassel
Cotton yarn works especially well because it is durable, washable, and less stretchy than many acrylic yarns.
Choose two or three colors if you want a traditional granny-square-inspired look, or use one neutral color for a minimalist bottle carrier.
Recommended Crochet Stitches
This project uses:
- Chain stitch
- Slip stitch
- Single crochet
- Double crochet
- Granny stitch clusters
A basic granny cluster is made by working 3 double crochet stitches into the same space.
For this bottle holder, the granny clusters are worked around the body to create an open, flexible texture.
Finished Size
The sample bottle carrier is designed for a standard reusable bottle approximately:
- 2¾ to 3¼ inches wide
- 9 to 10 inches tall
The finished carrier measures approximately:
- 3½ inches across the base
- 8 to 9 inches tall
- 40 to 46 inch shoulder strap
Always test the fit against your actual bottle while crocheting.
Easy Crochet Water Bottle Holder Pattern
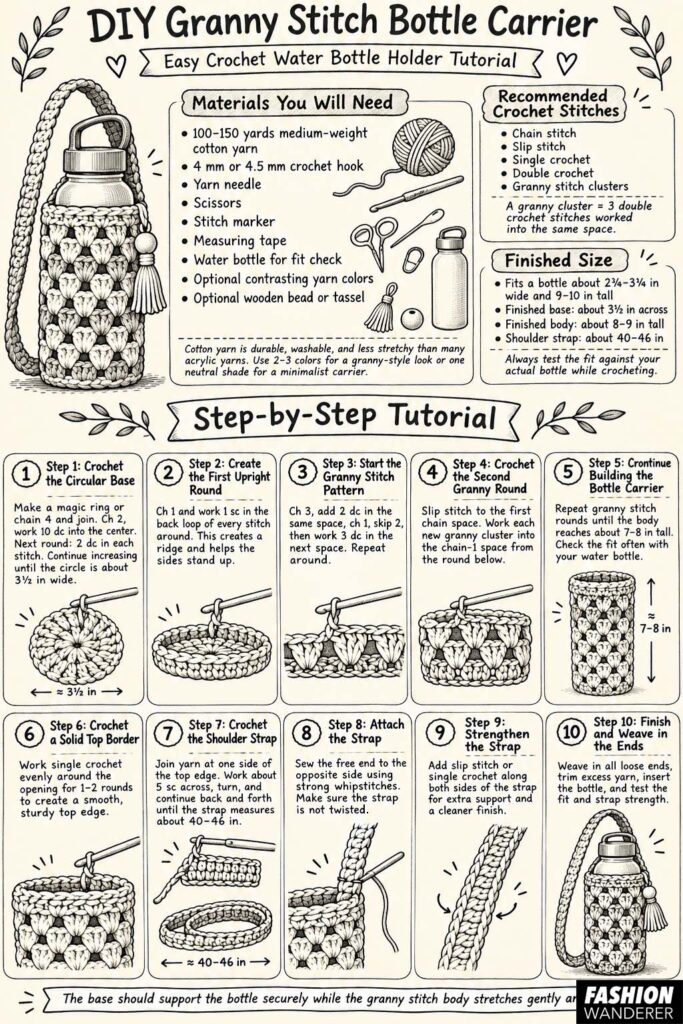
Step 1: Crochet the Circular Base
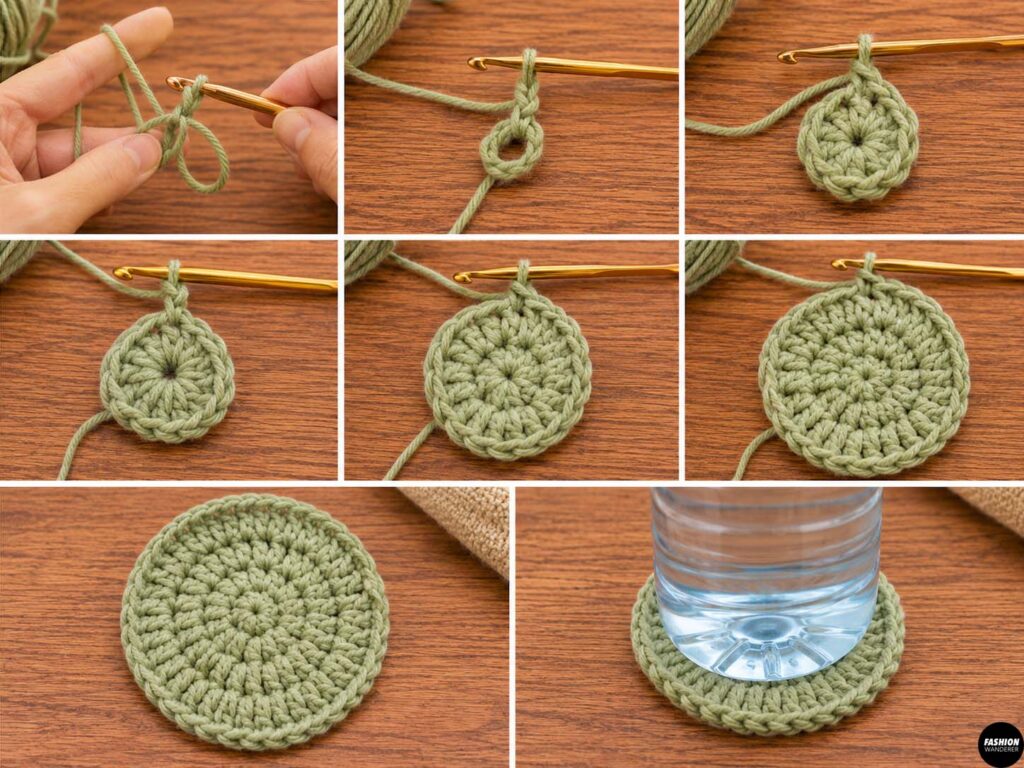
Begin by making a magic ring.
If you do not like using a magic ring, chain four stitches and slip stitch into the first chain to form a small circle.
Chain two.
Work 10 double crochet stitches into the center.
Slip stitch into the top of the first double crochet to close the round.
For the next round, chain two and work two double crochet stitches into each stitch around.
You should now have 20 stitches.
Slip stitch to join.
For the third round, increase gradually by working one double crochet into the first stitch and two double crochet stitches into the next stitch.
Repeat this pattern around.
Continue increasing until your circle is approximately 3½ inches wide.
Place your water bottle on top of the circle.
The base should be approximately the same width as the bottom of the bottle or just slightly larger.
Step 2: Create the First Upright Round
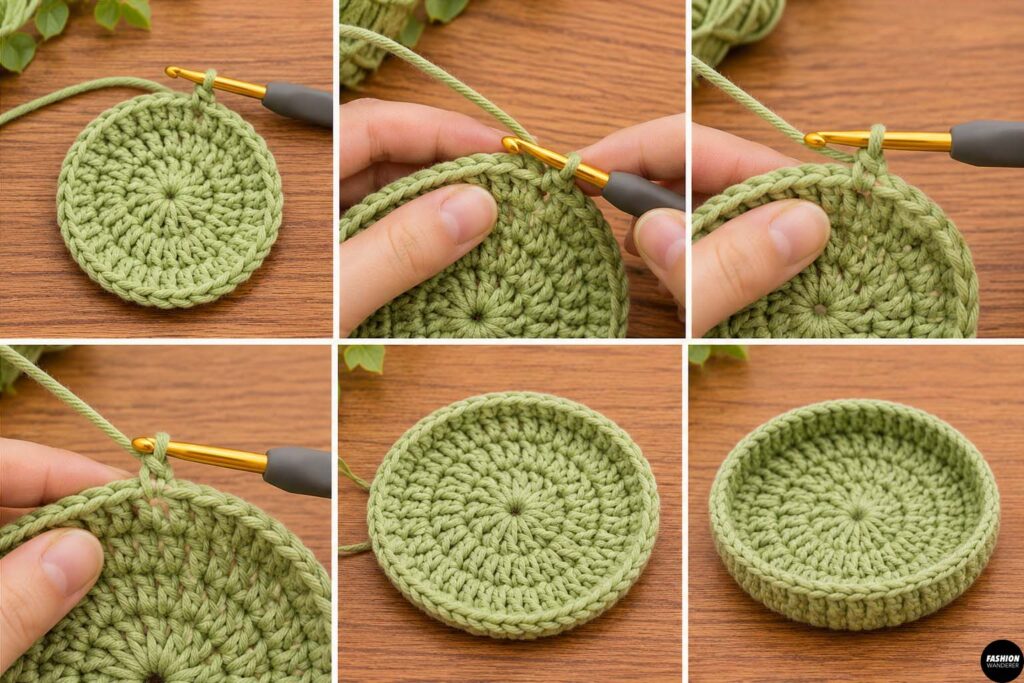
Now you need to turn the flat circle into the body of the bottle carrier.
Chain one.
Work one single crochet into the back loop of every stitch around.
Working through the back loop creates a subtle ridge around the base and helps the sides begin standing upright.
Slip stitch into the first single crochet.
Do not increase during this round.
Step 3: Start the Granny Stitch Pattern
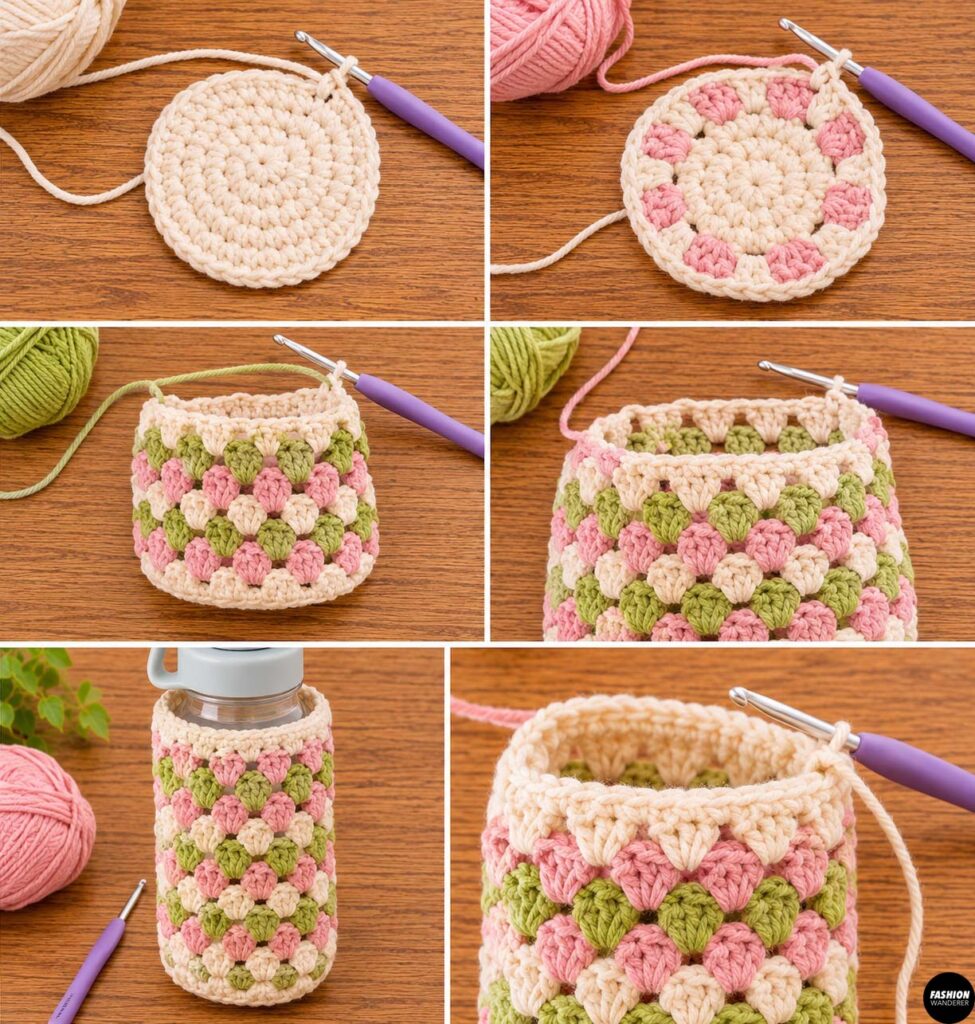
Chain three. This counts as your first double crochet.
Work two more double crochet stitches into the same stitch or space.
Chain one.
Skip two stitches.
Work three double crochet stitches into the next stitch.
Chain one.
Continue repeating:
3 double crochet, chain 1, skip 2
around the bottle holder.
Adjust the spacing slightly at the end of the round if necessary.
Slip stitch into the top of the beginning chain three.
You should now see the familiar granny stitch texture beginning to form.
Step 4: Crochet the Second Granny Round
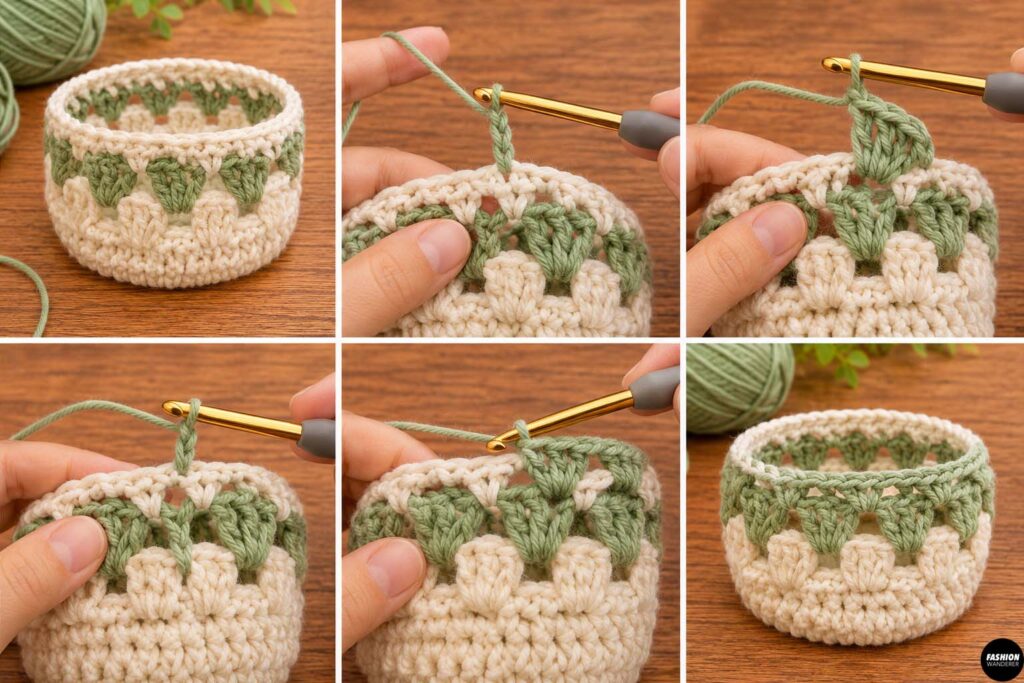
Slip stitch across the top of the first granny cluster until you reach the chain-one space.
Chain three.
Work two double crochet stitches into the same space.
Chain one.
Move to the next chain-one space.
Work three double crochet stitches into that space.
Chain one.
Continue around.
From this point forward, each granny cluster is worked into the chain space between the clusters from the previous round.
Slip stitch to close the round.
Step 5: Continue Building the Bottle Carrier
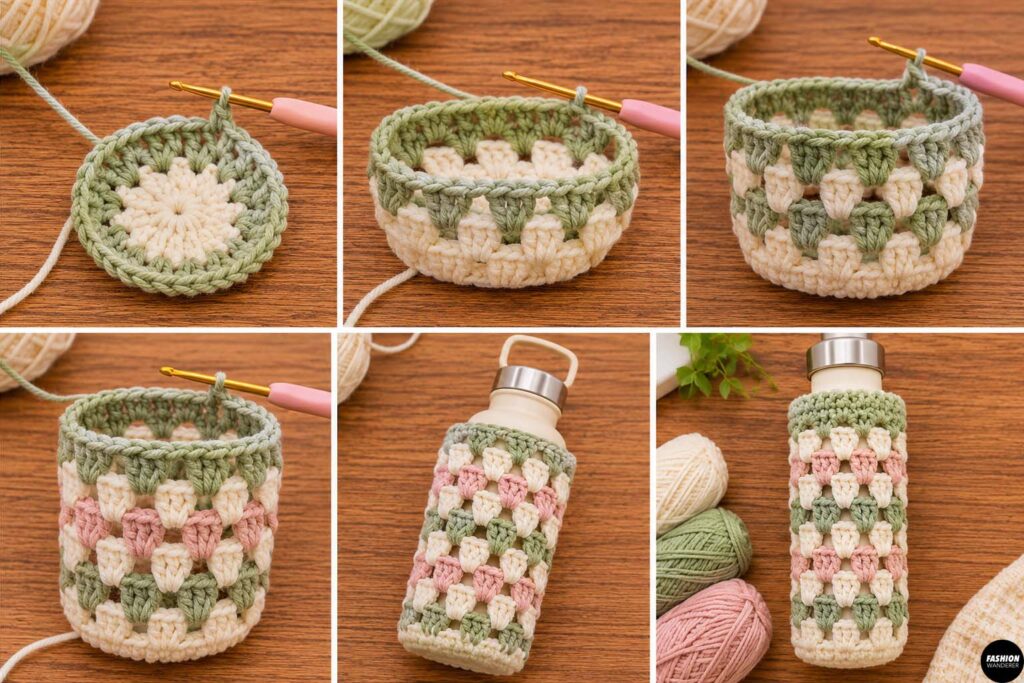
Repeat the granny stitch round until the carrier reaches approximately 7 to 8 inches tall.
Place your water bottle inside every few rounds to check the fit.
The crochet fabric should sit comfortably around the bottle without being extremely tight.
If your carrier feels loose, switch to a slightly smaller crochet hook.
If it feels too tight, use a larger hook or add another granny cluster.
You can change yarn colors every two or three rounds for a colorful retro effect.
For clean color changes, complete the final yarn-over of your last stitch using the new yarn color.
Step 6: Crochet a Solid Top Border
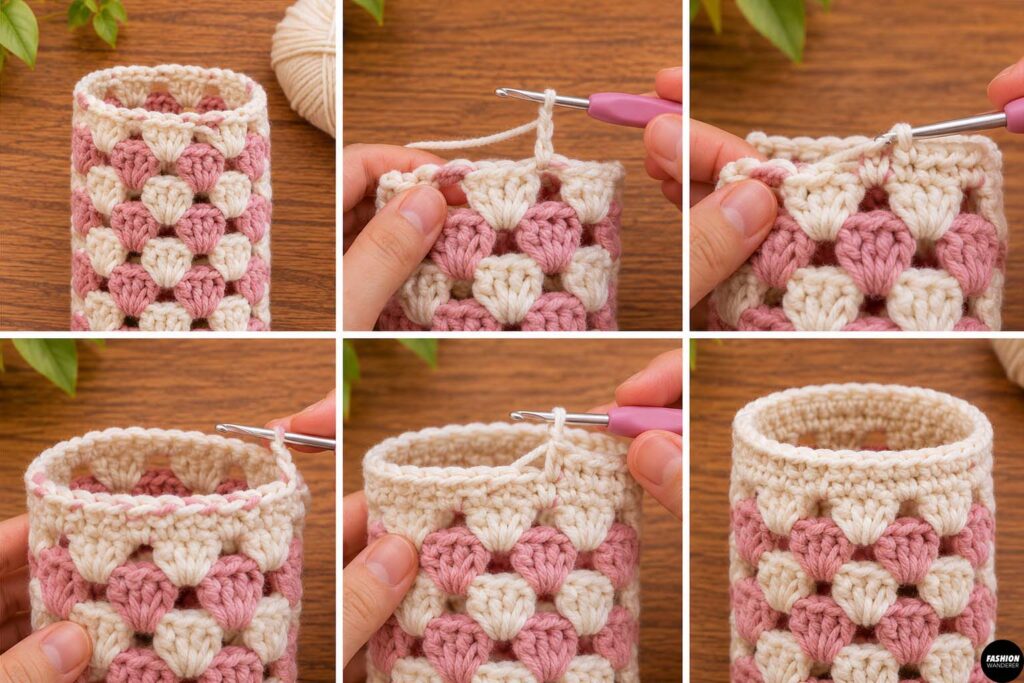
Once the granny stitch body reaches near the shoulder of your bottle, create a stronger upper edge.
Chain one.
Work single crochet evenly around the entire opening.
Place approximately one or two single crochet stitches into each chain space and one stitch into the top of each double crochet as needed.
The goal is to create a smooth, sturdy border.
Work one additional round of single crochet.
Slip stitch and fasten off if you plan to make the strap separately.
Step 7: Crochet the Shoulder Strap
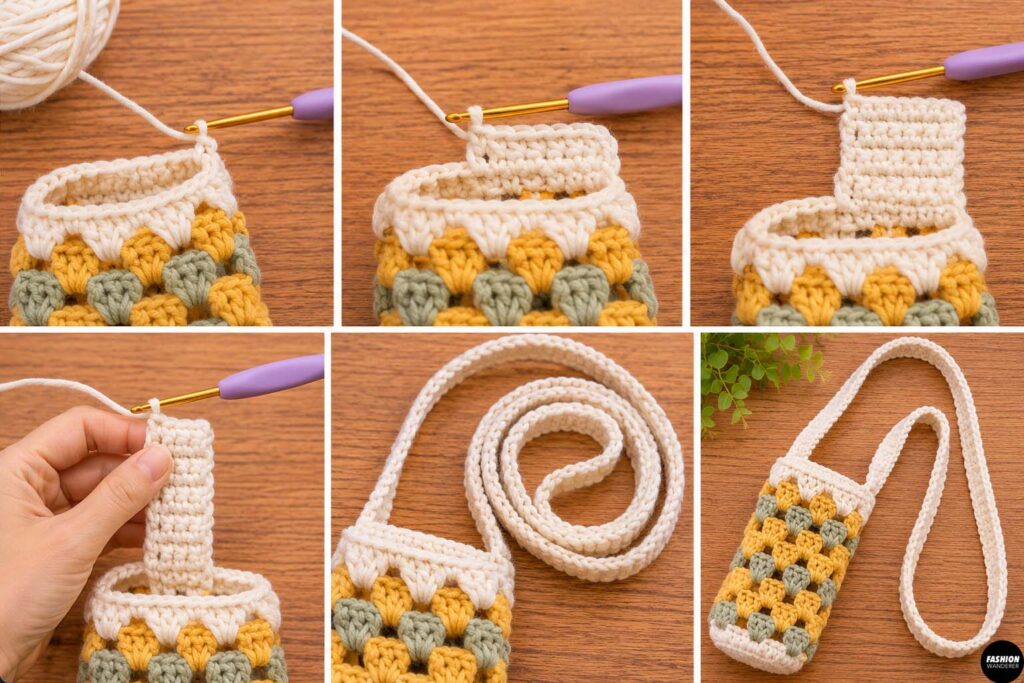
Choose the side where you want the strap to begin.
Join your yarn to the top edge.
Chain one and work approximately five single crochet stitches across.
Turn.
Chain one and single crochet across.
Continue working back and forth until the strap measures approximately 40 to 46 inches long.
For a crossbody bottle carrier, you may want a strap closer to 46 to 50 inches.
For a shorter shoulder strap, approximately 30 to 36 inches may be enough.
Remember that cotton crochet can stretch slightly once the bottle is filled.
Step 8: Attach the Strap
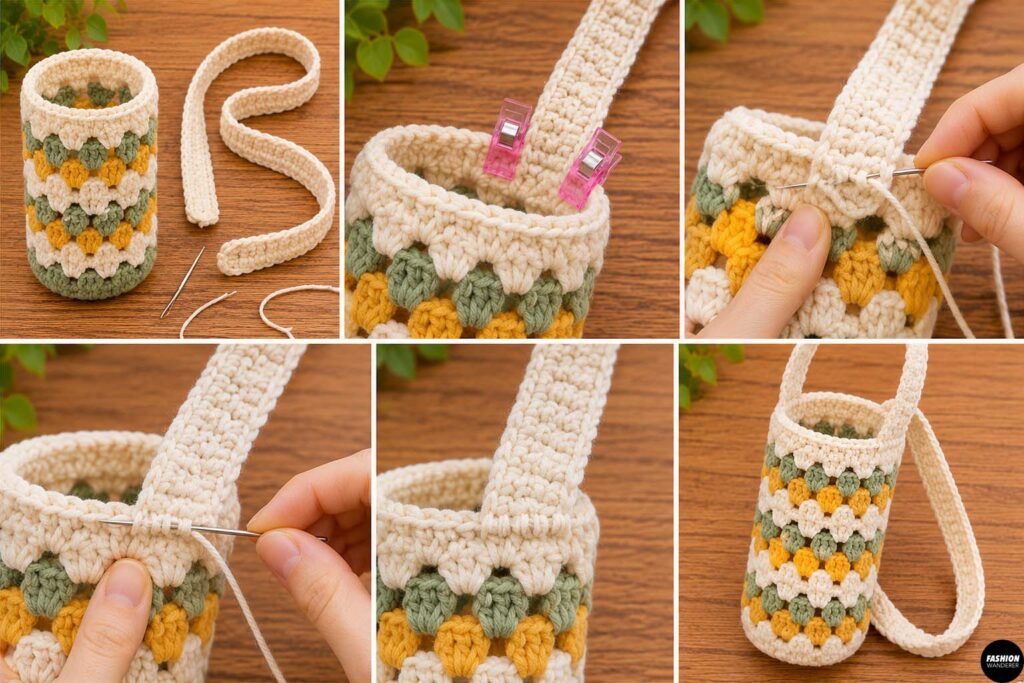
Position the free end of the strap directly opposite the starting point.
Use stitch markers to hold it in place.
Make sure the strap is not twisted.
Thread a yarn needle with a long piece of matching yarn.
Sew the strap securely to the top edge using several strong whipstitches.
Go through the connection multiple times because this area will carry the weight of the filled bottle.
Weave the yarn tail securely into the stitches.
Step 9: Strengthen the Strap
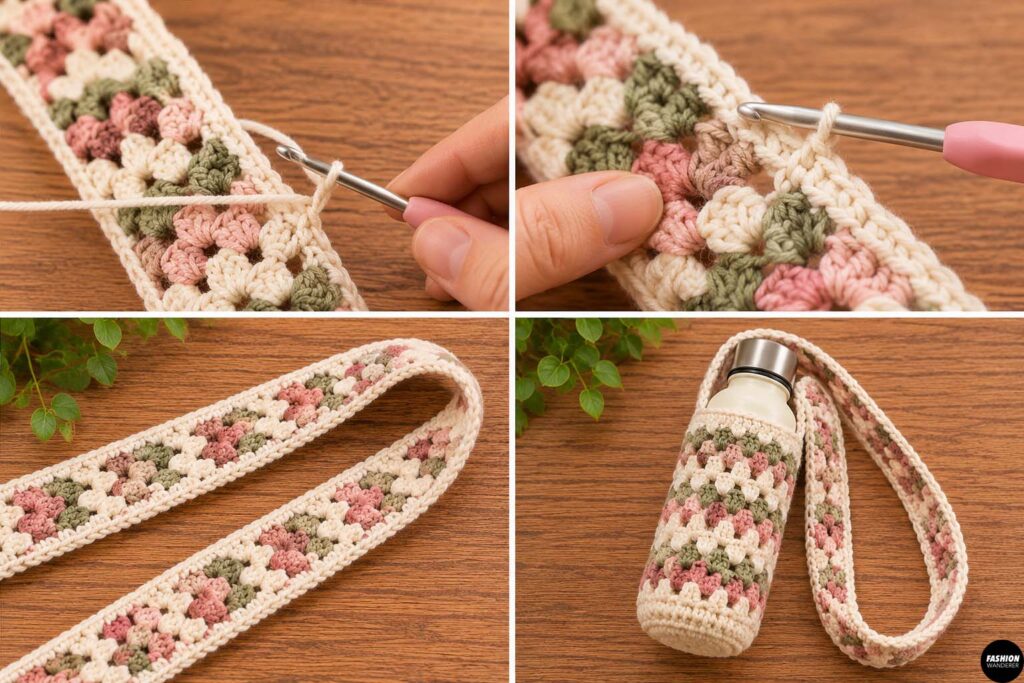
If you plan to carry a heavy reusable bottle, add a slip stitch or single crochet border along both sides of the strap.
This helps reduce stretching and gives the strap a cleaner finished appearance.
You can also crochet the strap slightly shorter than your desired finished length because cotton yarn may loosen with use.
Step 10: Finish and Weave in the Ends
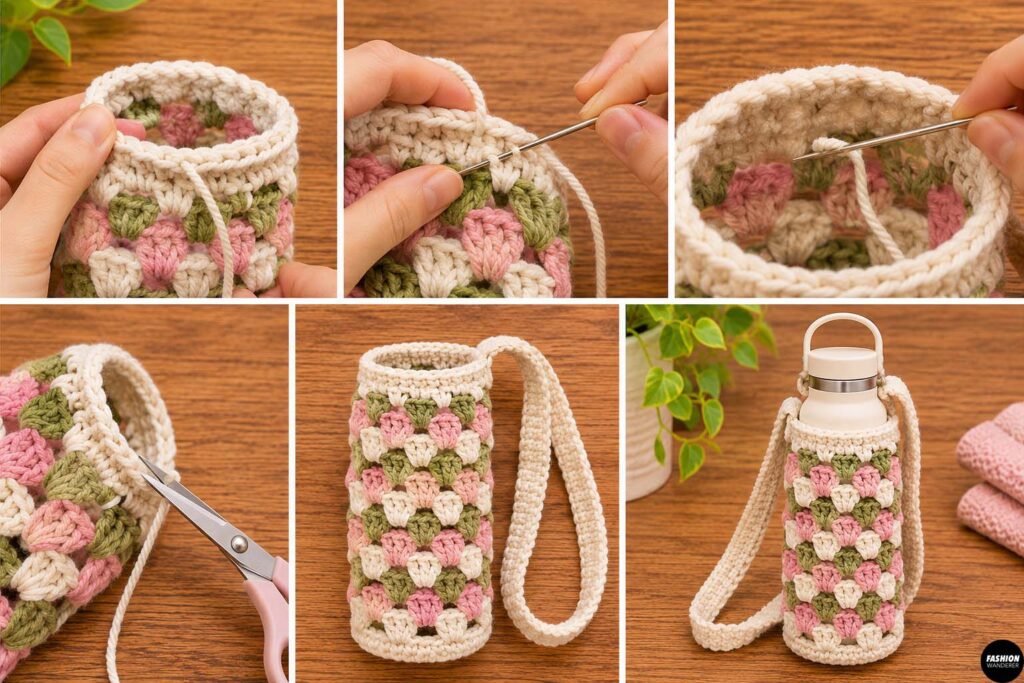
Use a yarn needle to weave every loose yarn tail into the inside of the carrier.
Trim the excess yarn carefully.
Place your bottle inside and check the fit.
The base should support the bottle securely while the granny stitch body stretches gently around it.
Test the strap before wearing the carrier outside.
Optional Decorative Ideas
Once the basic carrier is finished, customize it with:
- Small crochet flowers
- Tassels
- Wooden beads
- Color-block stripes
- Contrasting top border
- Crochet charms
- Mini granny-square pockets
You can even add a small pocket to the front for keys, lip balm, or earbuds.
Final Thoughts
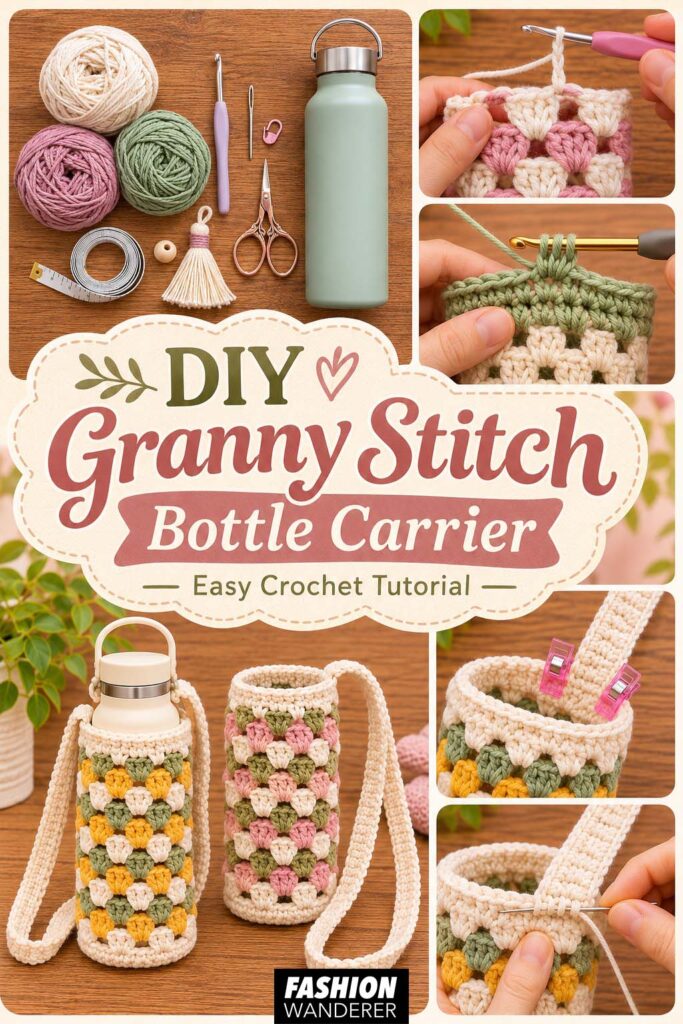
This DIY granny stitch bottle carrier is a quick crochet project that combines function with a fun handmade look. The open granny stitch pattern keeps the carrier lightweight, while the solid base and reinforced strap provide enough structure for everyday use.
It is also an excellent scrap-yarn project because each round can be worked in a different color.
Make one for your favorite reusable water bottle, crochet several as handmade gifts, or experiment with different color palettes for summer, fall, festivals, and travel. Once you understand the basic construction, it is easy to adjust the pattern for coffee tumblers, smaller bottles, or oversized insulated water bottles.