
Crochet water bottle bags are one of those projects that are practical, beginner-friendly, and surprisingly fun to customize. Whether you want a lightweight bottle sling for walking, a colorful festival accessory, or a cute handmade gift, a crochet bottle holder is a quick project that does not require much yarn.
These 6 crochet water bottle bag ideas range from classic granny stitch designs to checkerboard patterns, rainbow stripes, daisies, boho tassels, and adorable animal-themed bottle carriers. Most can be adjusted to fit reusable bottles, stainless-steel tumblers, or smaller drink bottles simply by changing the base size and height.
If you have leftover cotton yarn sitting in your stash, this roundup is a great way to turn it into something useful.
Basic Supplies for Crochet Bottle Bags
Most of these projects use similar materials:
- Medium-weight cotton or cotton-blend yarn
- 4 mm to 4.5 mm crochet hook
- Yarn needle
- Scissors
- Stitch markers
- Measuring tape
- Reusable water bottle for checking fit
Cotton yarn works especially well because it is durable, washable, and holds its shape better than many stretchy acrylic yarns.
A standard bottle bag usually measures about 3½ to 4½ inches wide, 8 to 10 inches tall, with a 40 to 48-inch strap.
1. DIY Granny Stitch Bottle Carrier
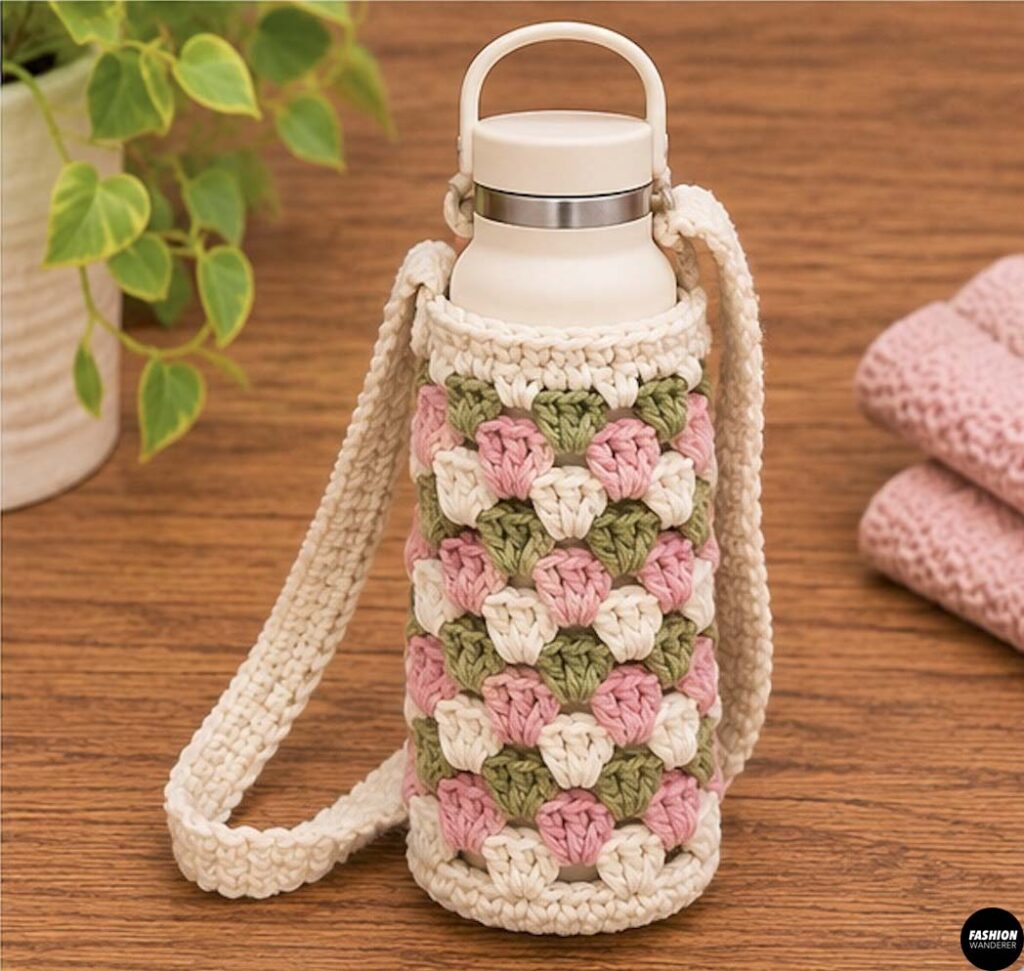
A granny stitch bottle carrier is perfect if you love classic crochet texture. The open clusters make the bag lightweight while still giving enough support to carry a reusable water bottle.
Step 1: Crochet the Base
Make a magic ring.
Work 10 double crochet stitches into the ring and join with a slip stitch.
For the next round, work two double crochet stitches into each stitch.
Continue increasing evenly until the circle measures approximately 3½ inches across.
Place your bottle on the circle to check the size.
Step 2: Turn the Base Upward
Chain one and work one single crochet into the back loop of every stitch around.
This creates a ridge and helps the bottle bag begin forming its side walls.
Do not increase.
Step 3: Begin the Granny Pattern
Chain three and work two more double crochet stitches into the same space.
Chain one, skip approximately two stitches, then work three double crochet stitches into the next stitch.
Repeat around.
On the following rounds, work each granny cluster into the chain-one spaces from the previous row.
Continue until the body reaches about 7 to 8 inches tall.
Step 4: Finish the Top
Work two rounds of single crochet around the opening to create a sturdy edge.
Step 5: Make the Strap
Work five single crochet stitches across one side of the opening.
Turn and continue working rows until the strap measures approximately 40 to 46 inches.
Sew the free end securely to the opposite side.
Weave in your ends and your easy granny stitch bottle carrier is finished.
2. DIY Boho Bottle Bag With Tassels
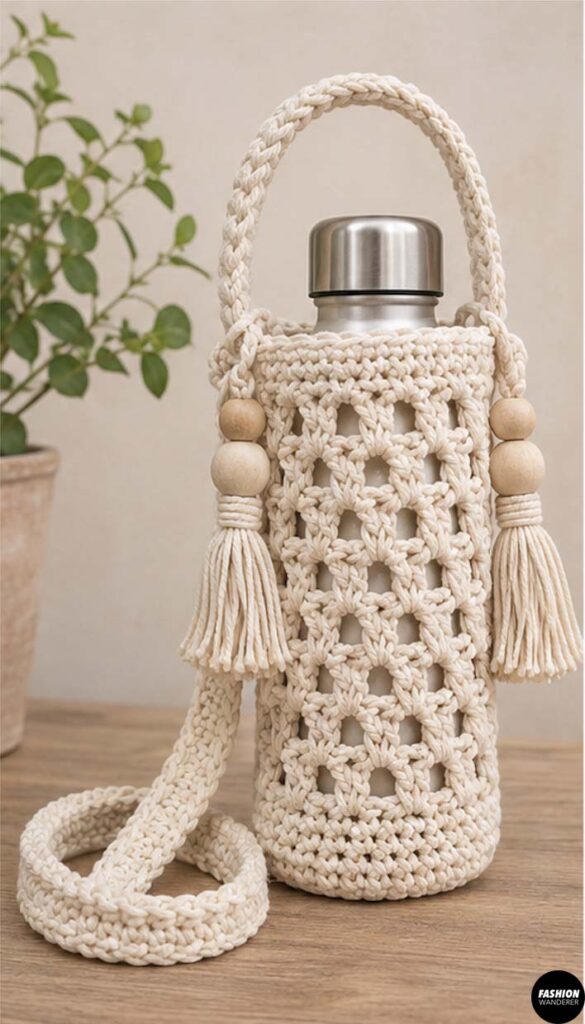
This boho crochet bottle bag combines an airy mesh body with oversized tassels for a relaxed handmade look.
Natural beige, cream, rust, mustard, sage, or dusty rose yarn works beautifully.
Step 1: Make the Round Base
Create a magic ring and crochet eight single crochet stitches into the center.
Increase evenly over several rounds until the base measures approximately 3½ to 4 inches.
Step 2: Start the Side Wall
Work one round of single crochet through the back loops only.
Follow with one regular round of single crochet.
Step 3: Crochet the Mesh Body
Chain four.
Skip one stitch and double crochet into the next stitch.
Continue working:
chain one, skip one, double crochet
around the bag.
On following rounds, place each double crochet into the chain space below.
Continue until the mesh body reaches about 8 inches tall.
Step 4: Add the Top Border
Work two rounds of single crochet around the opening.
Step 5: Crochet the Strap
Chain enough stitches for a 42 to 48-inch crossbody strap.
Single crochet back across the chain.
For a stronger strap, work another row.
Attach the opposite end securely.
Step 6: Make Tassels
Wrap yarn around a 4-inch piece of cardboard approximately 25 to 35 times.
Tie the bundle at the top, cut through the lower loops, and wrap another piece of yarn around the top section.
Trim evenly.
Attach one tassel to each side of the bottle bag.
Optional wooden beads make this project look even more polished.
3. DIY Checkerboard Bottle Bag
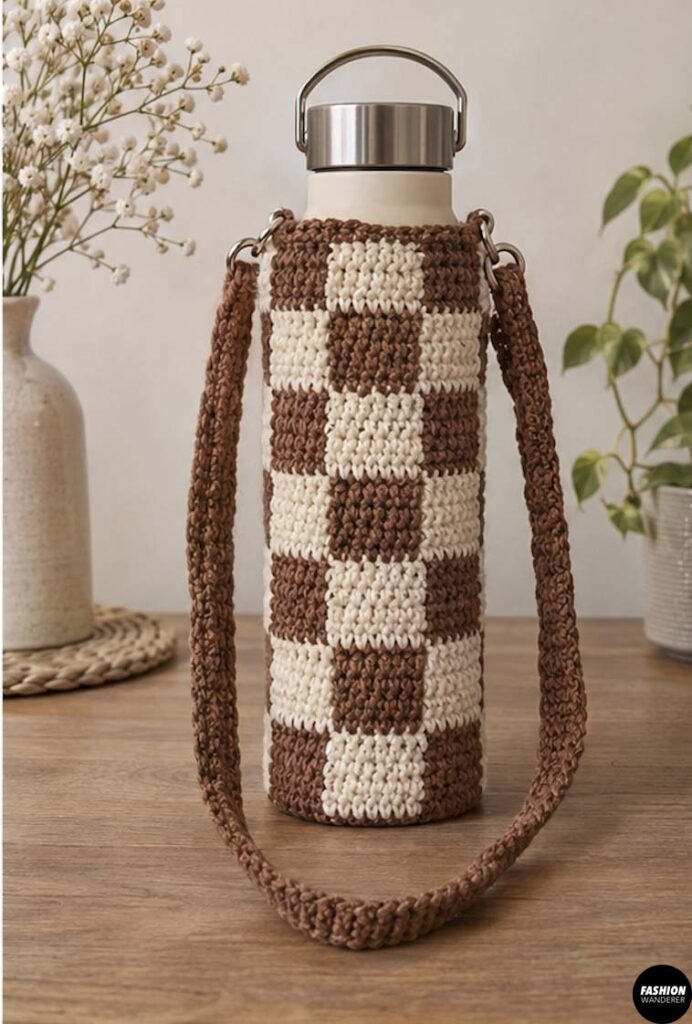
Checkerboard crochet is ideal if you want a modern, slightly retro water bottle bag.
Black and cream is classic, but you could also try pink and red, sage and ivory, or brown and beige.
Step 1: Crochet the Bottom
Use your main color to make a flat circular base approximately 3½ inches wide.
Work single crochet rounds with evenly spaced increases.
Step 2: Create the First Checkerboard Row
Begin working the body without increases.
For a simple checkerboard pattern, divide the total stitch count into equal color sections.
For example, work four or five stitches in Color A, then the same number in Color B.
Carry the unused yarn loosely behind your stitches.
Step 3: Alternate the Squares
Work several rounds using the same color placement.
Then switch the placement so Color A sits above Color B and Color B sits above Color A.
This creates the checkerboard effect.
Continue alternating blocks until the bag measures approximately 8 to 9 inches tall.
Step 4: Add the Top Edge
Work two solid rounds of single crochet in one color.
Step 5: Make the Strap
Crochet a long strap using single crochet or half double crochet.
For an especially fun look, make the strap checkerboard as well.
Attach both ends firmly and weave in all yarn tails.
4. DIY Rainbow-Striped Bottle Sling
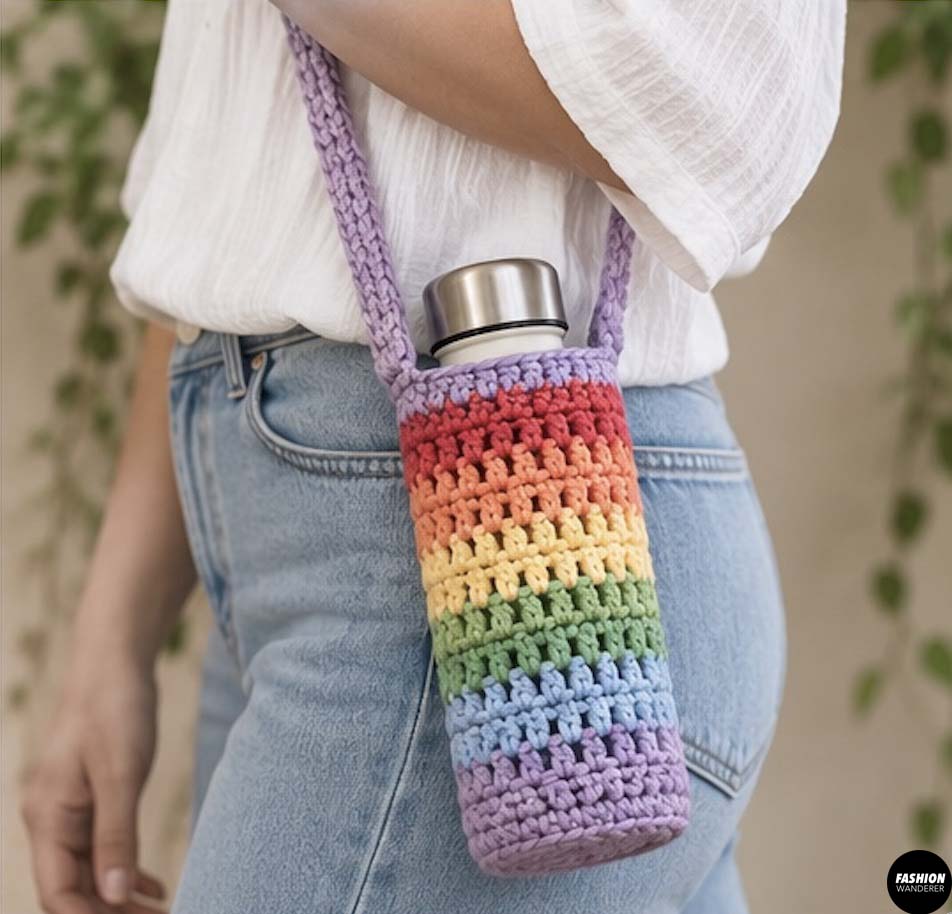
A rainbow-striped bottle sling is cheerful, colorful, and perfect for using small amounts of leftover yarn.
Step 1: Crochet a Solid Base
Choose your first color and make a circular base sized to your bottle.
Step 2: Work the First Stripe
Once you stop increasing, crochet two or three rounds in the first color.
Step 3: Change Colors
Join your next yarn color at the end of the round.
Work another two or three rounds.
Continue changing colors as you move upward.
Try a classic rainbow sequence or use muted colors such as dusty pink, mustard, sage, rust, and cream.
Step 4: Keep Checking the Height
Place the bottle inside every few rounds.
Stop when the bag reaches just below the bottle neck.
Step 5: Add a Strong Border
Work two single crochet rounds around the opening.
Step 6: Crochet the Sling Strap
Work a 40 to 48-inch strap.
You can make the strap one solid color or repeat your stripe pattern.
Sew it securely to opposite sides of the bottle holder.
This is one of the easiest crochet water bottle bag ideas for using scrap yarn.
5. DIY Floral + Daisy Bottle Bag
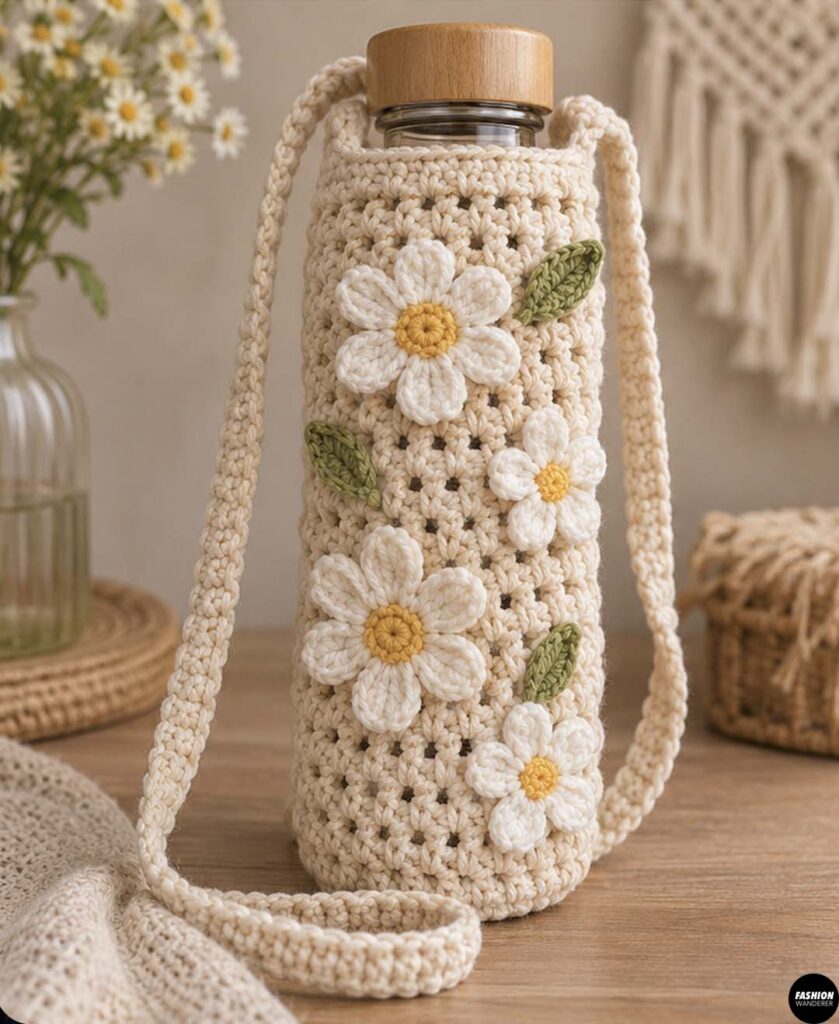
This floral bottle holder adds small crochet daisies to a simple bottle bag for a cute spring-and-summer look.
Step 1: Crochet the Bottle Bag
Make a simple single crochet or mesh-style bottle holder.
Create a circular base, work upward until it reaches approximately 8 inches, and finish with a solid top border.
Step 2: Make Small Daisy Centers
Using yellow yarn, make a magic ring.
Work six single crochet stitches into the ring and join.
Step 3: Crochet the Petals
Switch to white yarn.
Into each stitch, work:
chain three, double crochet, chain three, slip stitch
Repeat around to create six small petals.
Fasten off.
Step 4: Make Several Flowers
Create approximately five to nine daisies depending on how decorated you want the bottle bag.
You can also add leaves using green yarn.
Step 5: Attach the Flowers
Arrange the daisies around the lower half or front section of the bottle carrier.
Use a yarn needle and matching yarn to sew each flower securely in place.
Step 6: Finish the Strap
Crochet a simple shoulder or crossbody strap and reinforce both attachment points.
The finished bag has a sweet handmade look that also makes a lovely gift.
6. DIY Cute Animal-Themed Bottle Bag
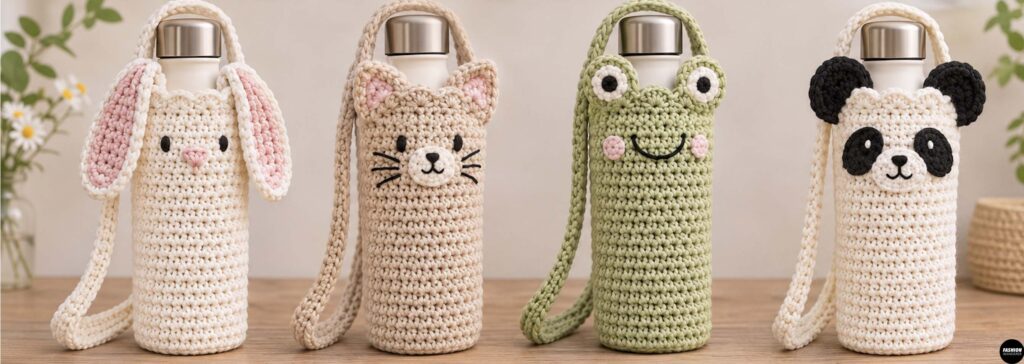
An animal-themed crochet bottle bag is especially fun for kids, gifts, markets, or anyone who loves kawaii accessories.
You can turn a basic bottle carrier into a frog, bear, cat, bunny, duck, or panda.
Step 1: Crochet the Main Bottle Bag
Start with a circular base.
Continue crocheting upward in single crochet until the carrier reaches about 8 to 9 inches tall.
Choose a base color that matches your animal.
Try green for a frog, yellow for a duck, brown for a bear, or cream for a bunny.
Step 2: Make the Eyes
For raised eyes, crochet two small circles using white yarn.
Add smaller black circles in the center.
Stuff lightly if you want a plush appearance.
Sew them near the top of the bag.
Step 3: Add Ears or Other Features
For a bear or cat, crochet two small ears.
For a bunny, make two longer oval ears.
For a frog, use raised eye shapes instead.
For a duck, crochet a small orange beak.
Sew each detail securely onto the carrier.
Step 4: Add the Face
Use black yarn and a yarn needle to embroider a smile, nose, whiskers, or other facial details.
Pink crochet circles can become adorable cheeks.
Step 5: Make the Strap
Crochet a sturdy strap in the same main color.
Work at least two rows of single crochet to reduce stretching.
Attach securely to both sides.
Now your ordinary bottle holder has become an adorable animal accessory.
Tips for Making Crochet Bottle Bags Stronger
A filled water bottle can be surprisingly heavy, so durability matters.
Use cotton yarn whenever possible and reinforce strap attachment points with several passes of yarn. Make the strap slightly shorter than your ideal length because crochet fabric may stretch during use.
For heavier stainless-steel bottles, crochet two or three rows across the strap rather than using a simple chain.
You can also sew narrow cotton webbing or ribbon underneath the crochet strap for additional support.
Final Thoughts
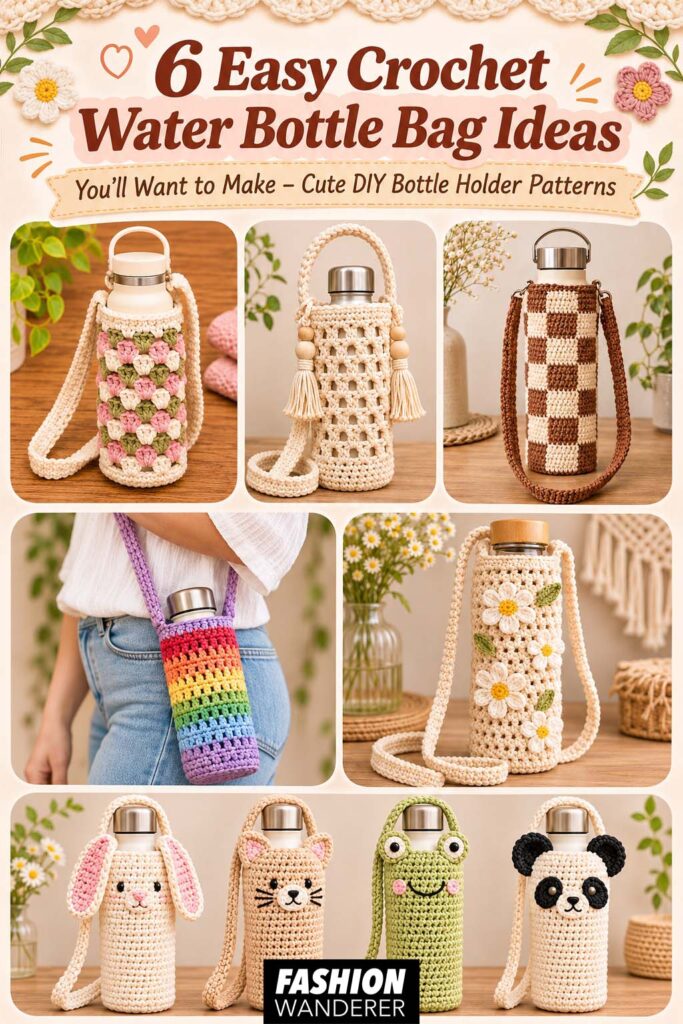
These 6 crochet water bottle bag ideas prove that practical crochet projects do not have to look boring. A granny stitch carrier gives you a traditional handmade style, while checkerboards and rainbow stripes create a more modern look. Tassels add a boho touch, daisies make the design playful, and animal faces turn an everyday bottle holder into something genuinely adorable.
Best of all, most of these DIY crochet water bottle holders require only a small amount of yarn and can easily be adjusted for different bottle sizes.
Start with one basic bottle carrier pattern, then experiment with colors, stitch patterns, straps, flowers, tassels, or animal details. Once you understand the basic construction, you can create dozens of completely different crochet bottle bags from the same simple idea.