
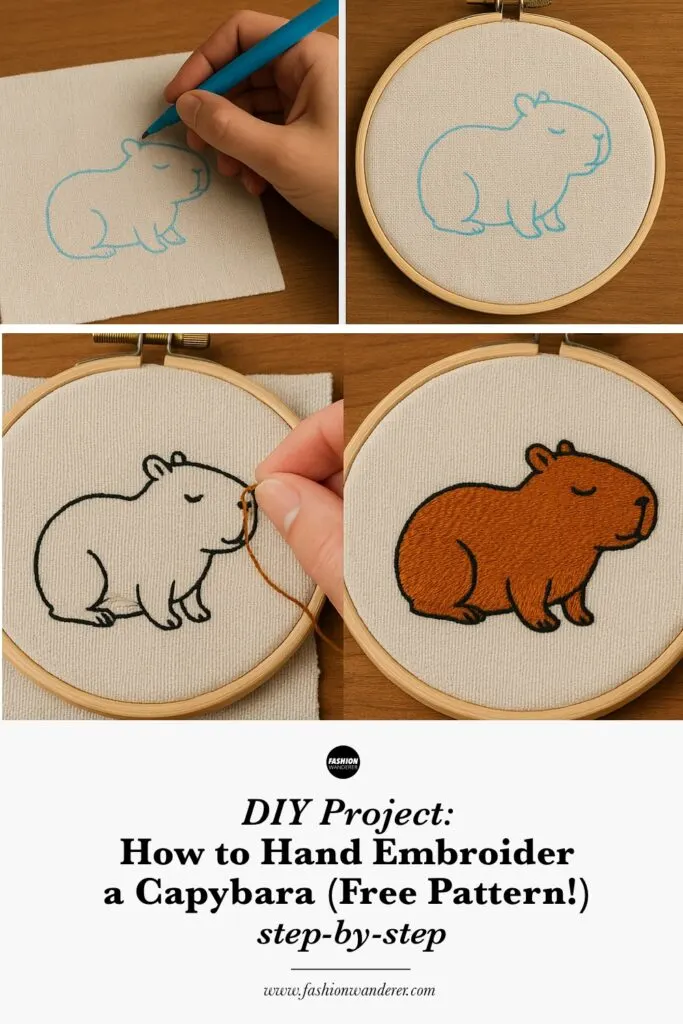
If you’re looking for a fun and adorable hand embroidery project, a capybara design is the perfect choice! Capybaras, the gentle giants of the rodent world, make charming and cute motifs that look fantastic stitched on anything from tote bags to jackets and home decor.
In this tutorial, I’ll guide you through how to create your own hand embroidered capybara, even if you’re a complete beginner. Plus, I’ll share tips on stitches, materials, and finishing techniques to help you make a beautiful, lasting piece.
Why Choose a Capybara for Your Embroidery?
Capybaras are beloved for their calm nature and quirky appearance, making them a popular subject in embroidery. Their rounded shapes and simple features translate well to embroidery patterns, offering a sweet yet achievable design.
Embroidering a capybara also gives you the opportunity to practice common embroidery hand stitches such as backstitch, satin stitch, and French knots, all while working on a manageable-sized project.
Why Hand Embroidery Is Worth Trying
Hand embroidery is a relaxing, creative hobby that results in unique, personalized art. Unlike machine embroidery, it allows you to add charming imperfections and customize designs easily. Plus, stitching a cute animal like a capybara is a great way to make your sewing projects special and gift-worthy.
DIY Capybara Hand Embroidery

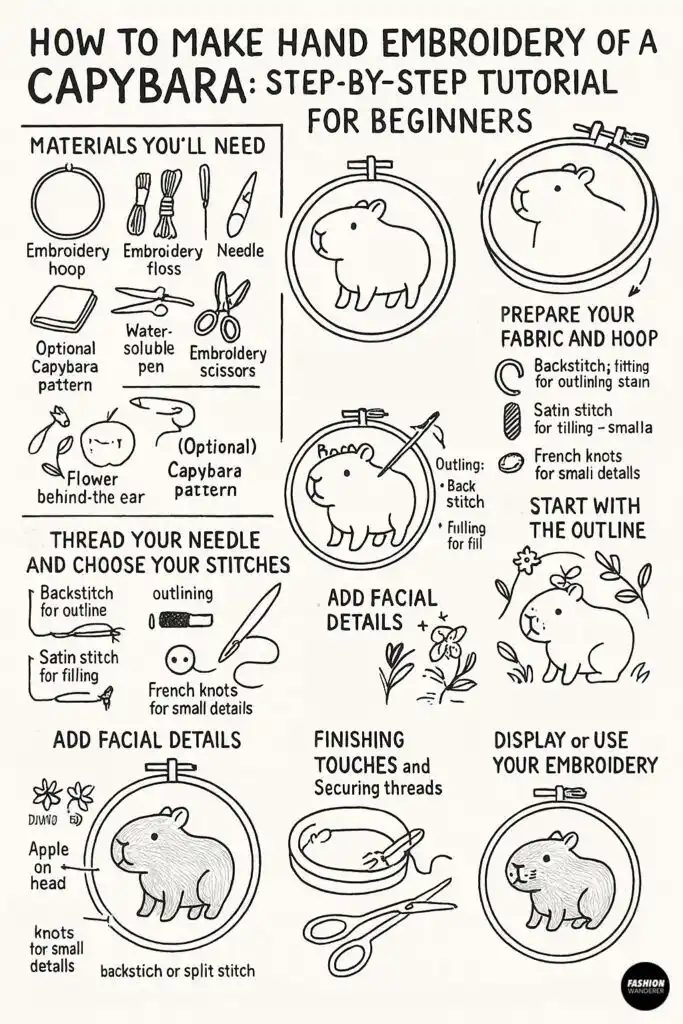
Materials You’ll Need

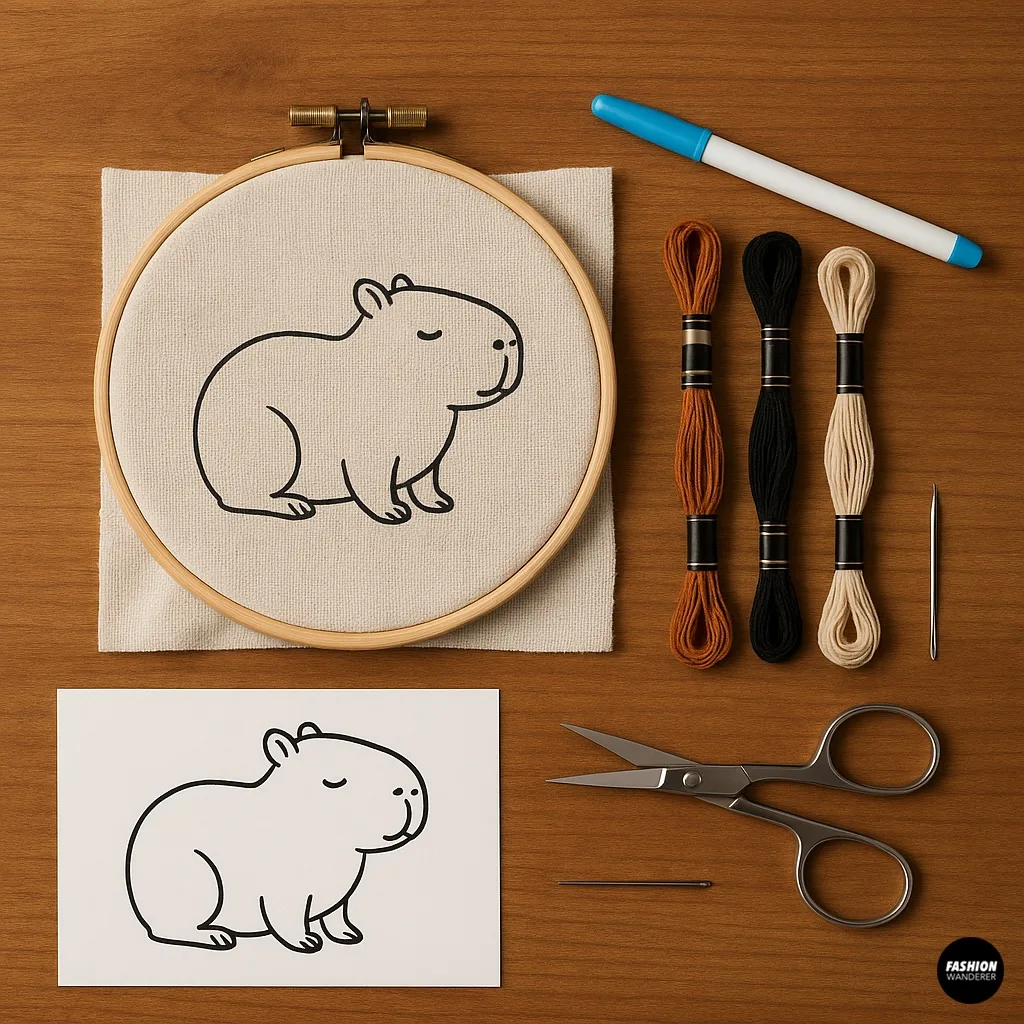
Before we start stitching, make sure you have the right supplies:
- Embroidery Hoop (6-8 inch) – Keeps your fabric taut and easier to work on
- Fabric – A light to medium-weight cotton or linen works best for beginners
- Embroidery Floss – Choose 2-3 colors for your capybara (browns, creams, black, and a highlight color for details)
- Embroidery Needle – Size 7 or 9 sharp needle
- Water-soluble fabric pen or pencil – For transferring the design
- Embroidery scissors – Small and sharp for clean thread cuts
- Capybara embroidery pattern – Download the free PDF printable or hand-drawn (optional)
Step 1: Prepare Your Fabric and Hoop

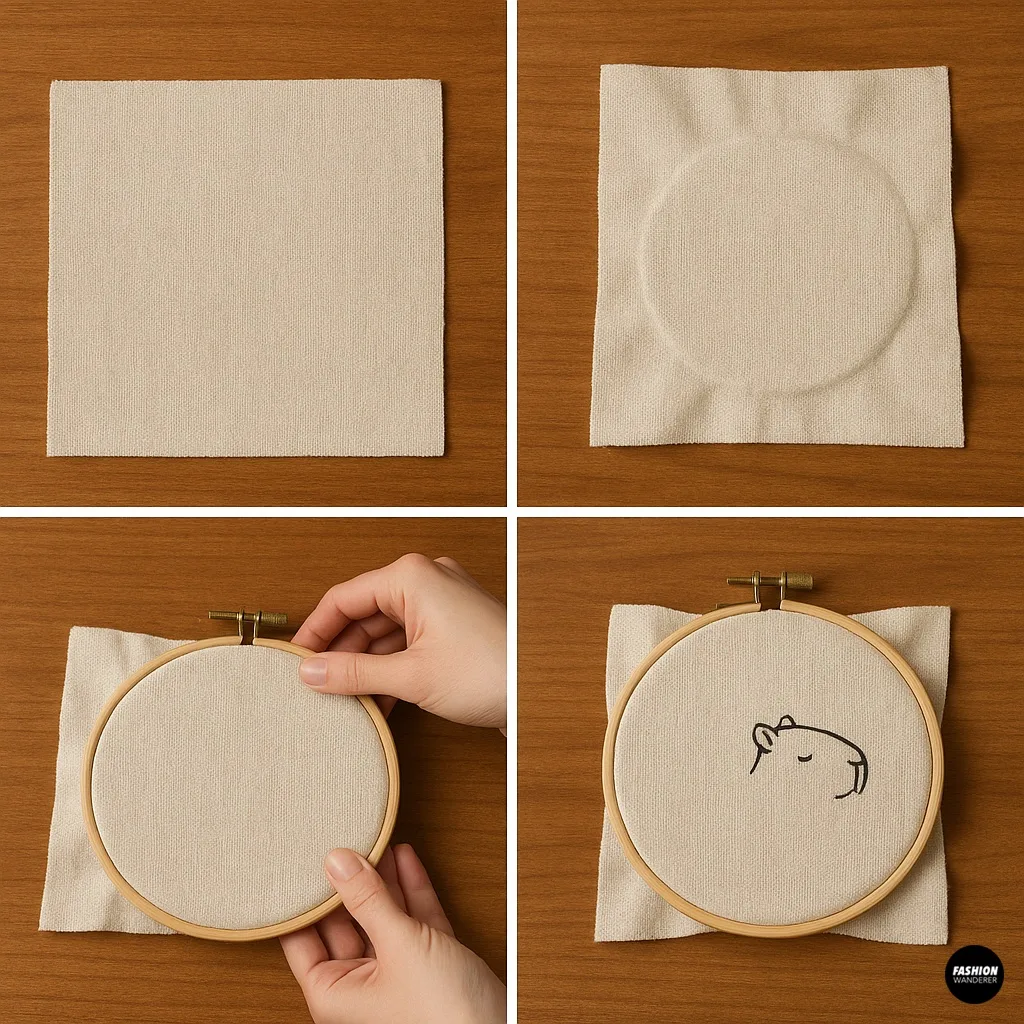
- Cut your fabric to a size slightly larger than your hoop.
- Place the fabric over the inner hoop.
- Loosen the screw on the outer hoop, place it on top of the fabric and inner hoop, then tighten the screw to secure the fabric firmly.
- Make sure the fabric is taut but not stretched out of shape.
Step 2: Transfer the Capybara Design

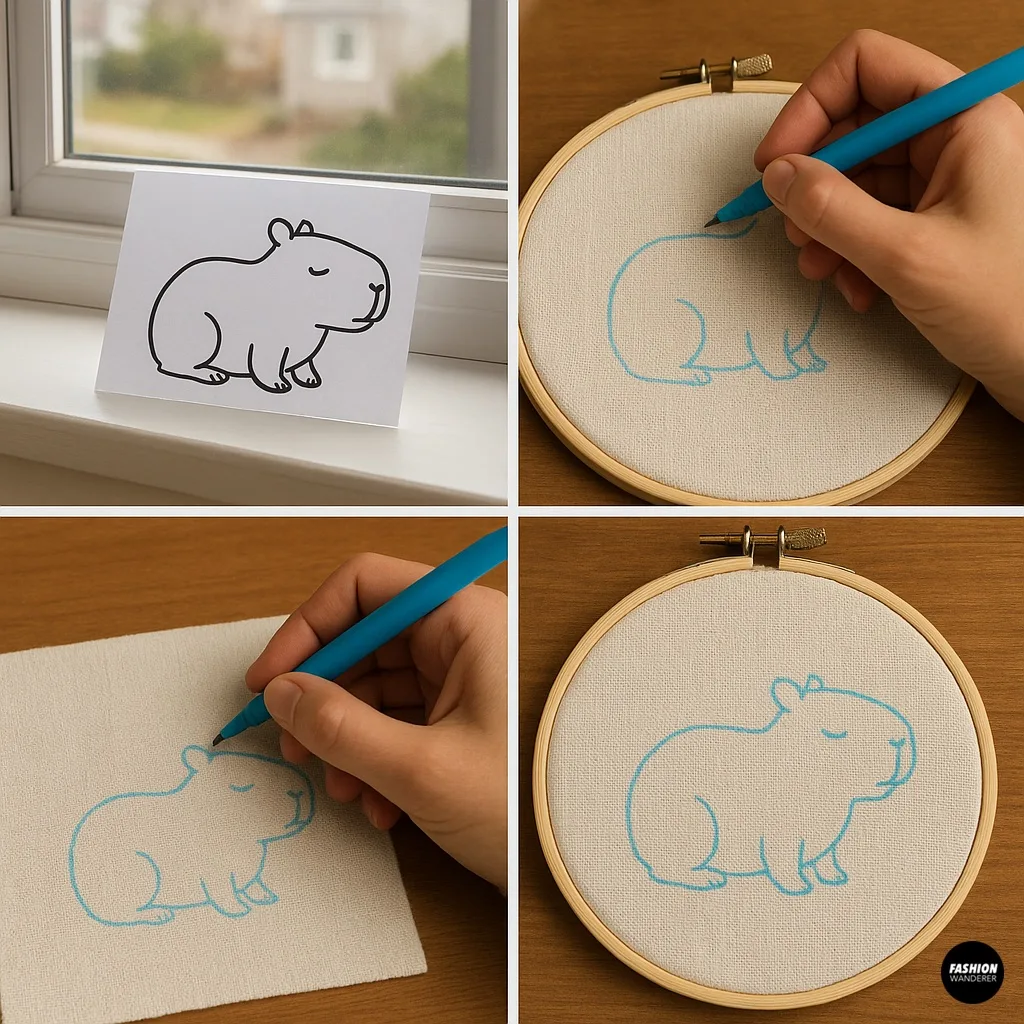
If you have a printable pattern, use a lightbox or a bright window to trace the design onto your fabric using a water-soluble pen. Alternatively, you can draw a simple capybara outline freehand directly on the fabric.
Key features to include:
- Rounded body shape
- Small ears and stubby legs
- Facial details like eyes, nose, and whiskers
Step 3: Thread Your Needle and Choose Your Stitches

For a basic capybara embroidery, download the free pdf pattern and then you’ll use these stitches:
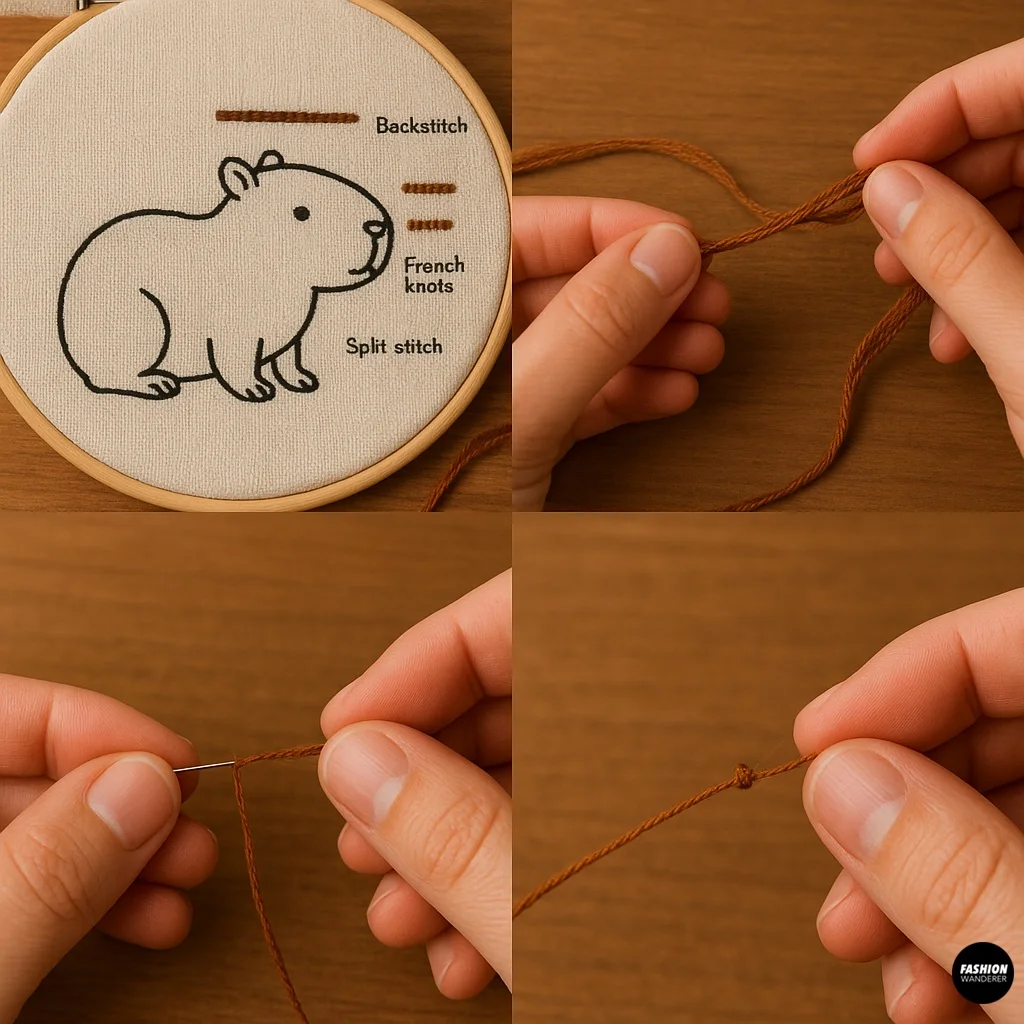
- Backstitch: For outlining the shape and facial features.
- Satin Stitch: For filling in larger solid areas like the body.
- French Knots: For small details like eyes or nose.
- Split Stitch: Optional for texture on the body.
Cut about 18 inches of embroidery floss and separate 2-3 strands (depending on desired thickness). Thread your needle and tie a small knot at the end.
Step 4: Start with the Outline

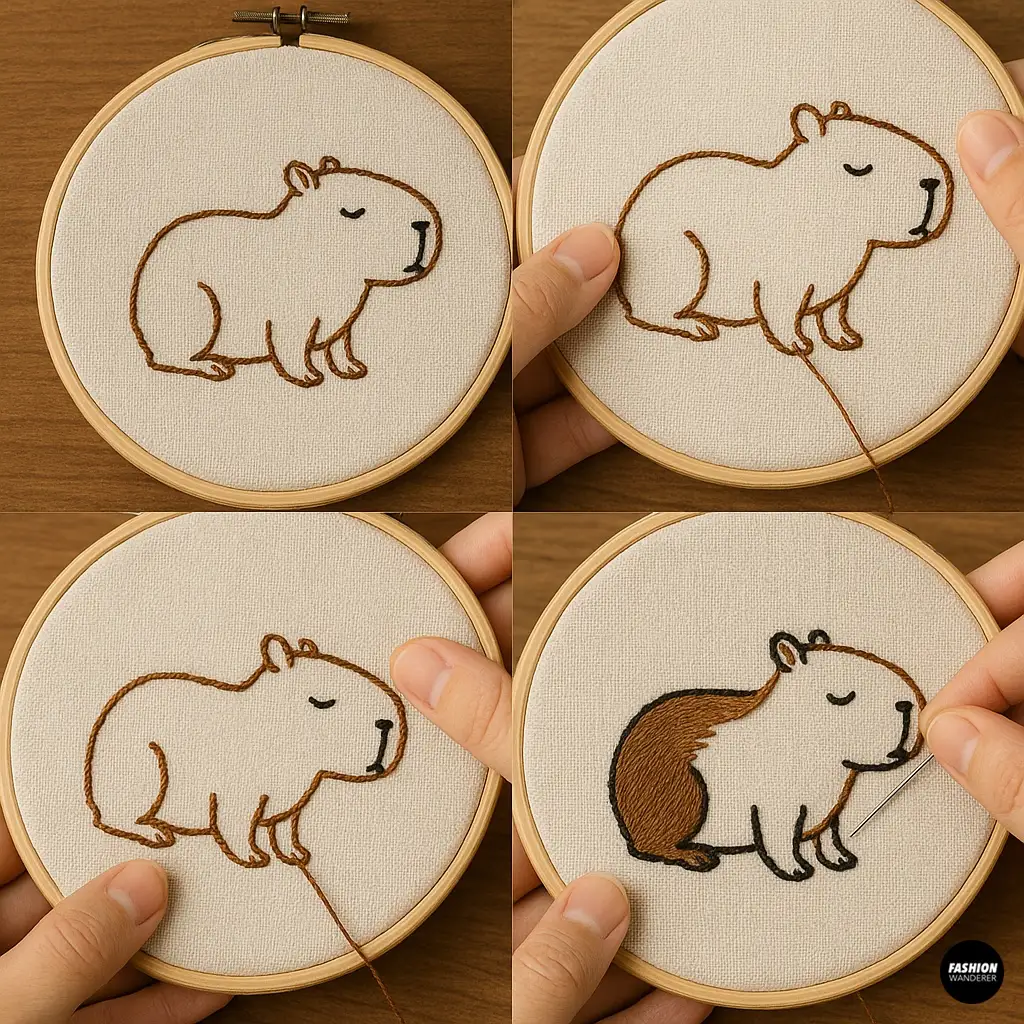
- Using backstitch, carefully follow the capybara’s outer lines.
- Work slowly to keep the stitches even and tight.
- For curves, take smaller stitches and pivot the needle at each stitch to keep the line smooth.
- Use the backstitch for ears, legs, and the face outline too.
Step 5: Add Facial Details


Use French knots for the eyes and nose:
- Bring the needle up where the eye should be.
- Wrap the floss around the needle twice.
- Insert the needle back close to where it came up and pull through slowly.
- Make one French knot for each eye and one for the nose.
For the mouth and whiskers, use backstitch or split stitch for a delicate look.
Step 6: Fill the Body

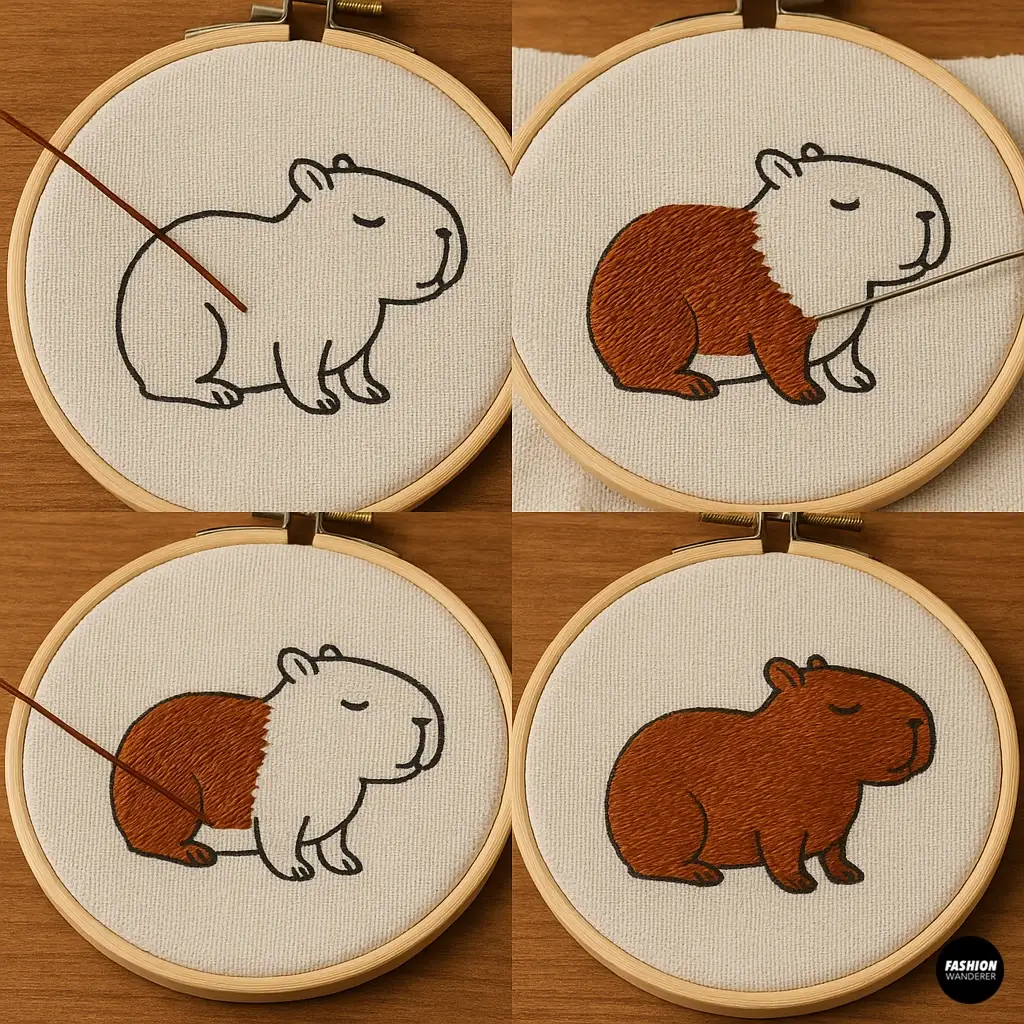
For the capybara’s body, satin stitch works best:
- Bring the needle up at one edge of the body area.
- Insert it directly opposite on the other edge and pull through.
- Continue making parallel stitches side-by-side, filling the entire body.
- Keep stitches close together for a smooth, dense fill.
- To add dimension, use a lighter shade of brown for highlights and a darker shade for shadows on the edges or belly.
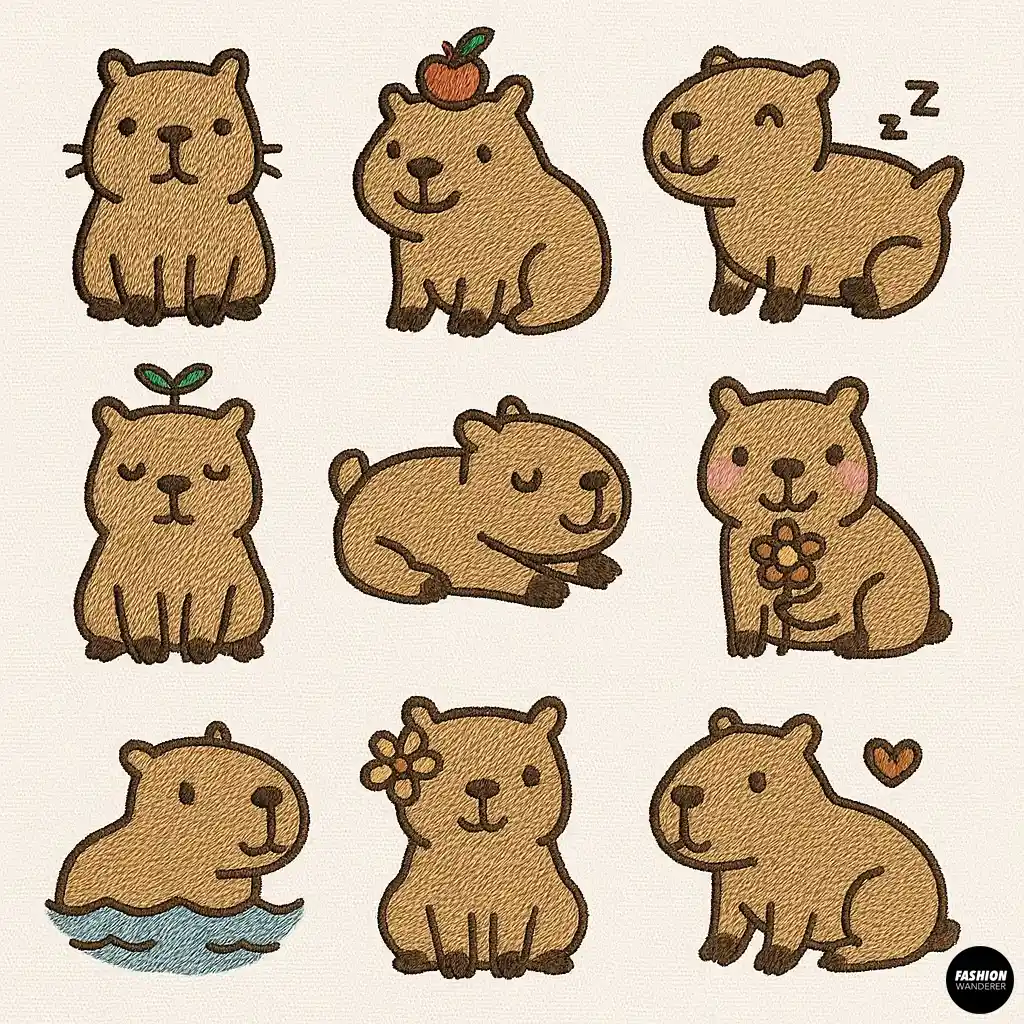
Step 7: Add Optional Decorations

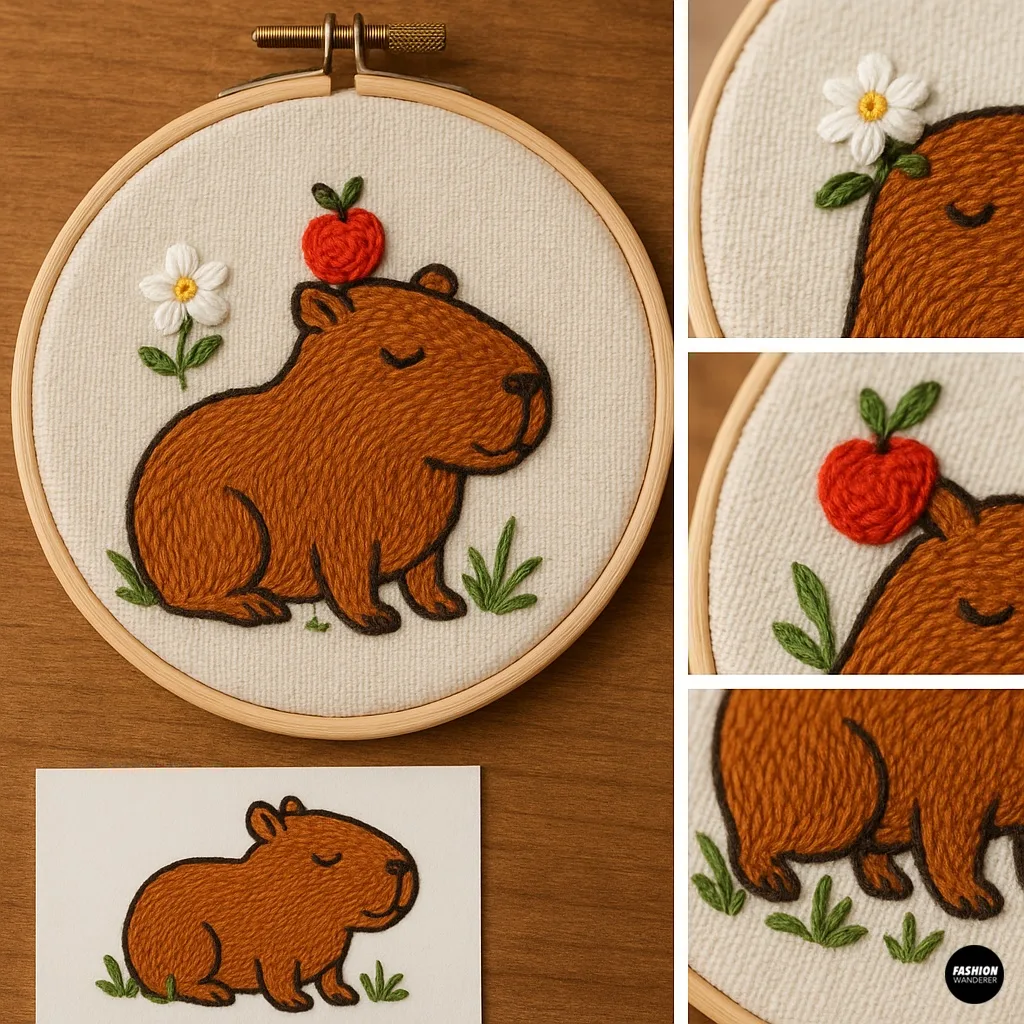
You can personalize your capybara embroidery with accessories like:
- A flower behind the ear (use lazy daisy stitch for petals)
- An apple on the head (small satin stitches in red and green)
- Leaves or grass around the feet (straight stitches in green)
Step 8: Finishing Touches and Securing Threads

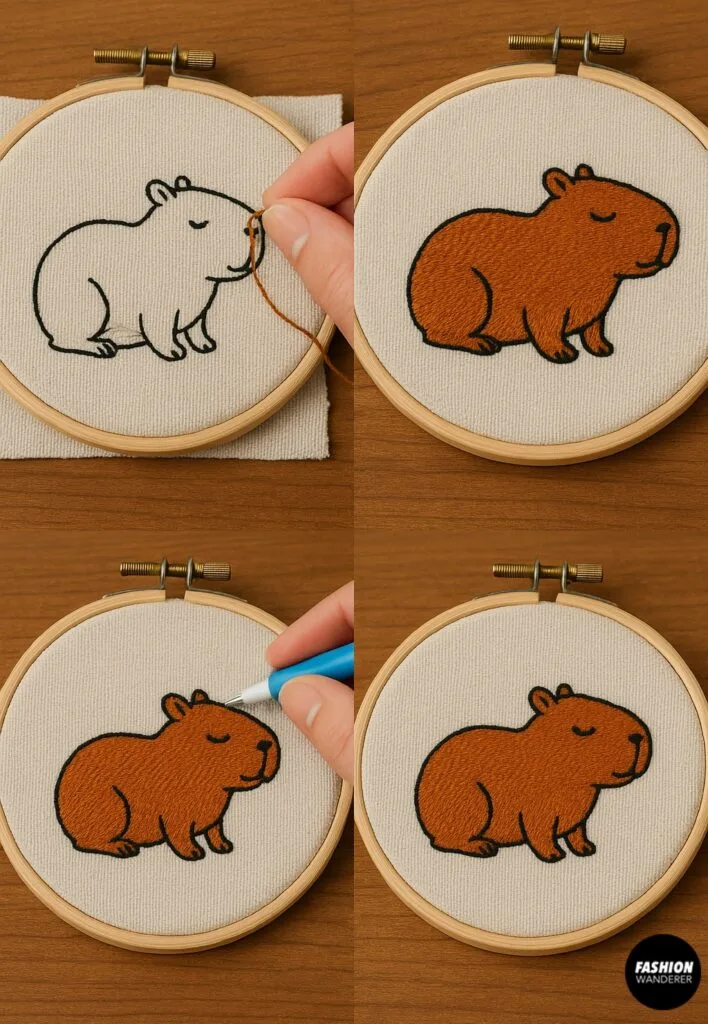
- When your stitching is complete, tie off the thread at the back with a small knot.
- Trim any excess thread.
- If you used a water-soluble pen, dampen the fabric gently to erase the marks.
- Let the fabric dry flat.
Step 9: Display or Use Your Embroidery

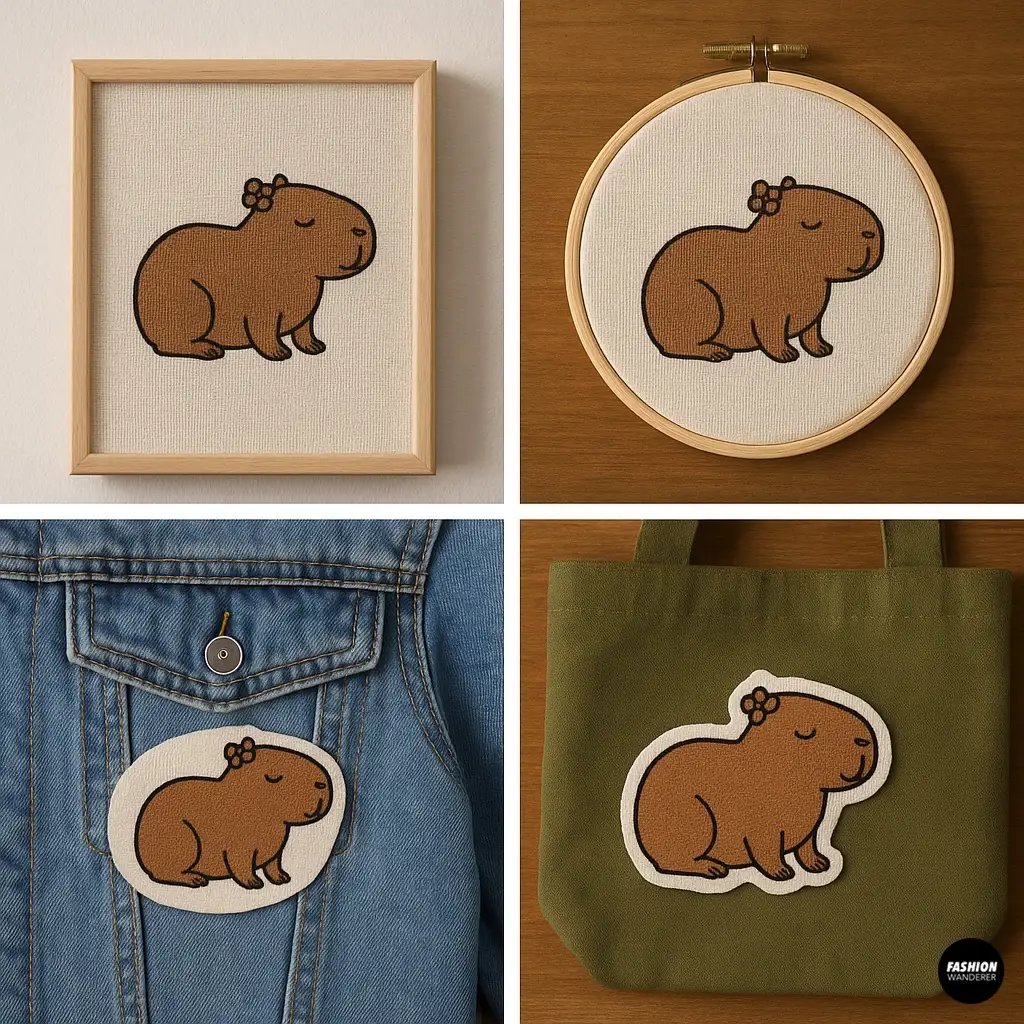
Your capybara embroidery can now be framed, sewn onto clothing or bags, or turned into patches. For framing, stretch the fabric over a canvas or place it in an embroidery hoop as a display.
Helpful Tips for Beginners


- Start small: Don’t overwhelm yourself with a large piece; capybara designs work great in small hoops.
- Practice stitches: Try each stitch on scrap fabric first.
- Keep your thread tension even: Too tight will pucker the fabric, too loose will look messy.
- Use good lighting: A bright workspace makes stitching easier and more enjoyable.
- Be patient: Hand embroidery takes time but is very rewarding.

Final Thoughts

Making a hand embroidered capybara is a delightful and doable project for stitchers of all levels. With just a few basic materials and stitches, you can create a charming embroidered animal that brings personality and warmth to your accessories or home.
Follow the free capybara embroidery pattern, step-by-step instructions, practice your stitches, and don’t be afraid to add your own unique touches. Happy stitching!
Trendy, Affordable Sewing Patterns for All Sizes


Tie Shoulder Jumpsuit Pattern


Palazzo Pants Sewing Pattern


Pocket Overall Romper Pattern


Wrap Maxi Skirt Sewing Pattern


Tie Back Top Sewing Pattern