
If you’ve ever stared at an old curtain and thought, “This fabric is too good to waste”—you’re not alone.
Upcycling curtains into clothing has been a hidden treasure in the sewing world for decades. And today, we’re turning that vintage floral, crisp linen, or dramatic damask into a stylish pleated mini skirt that will have everyone asking where you bought it.
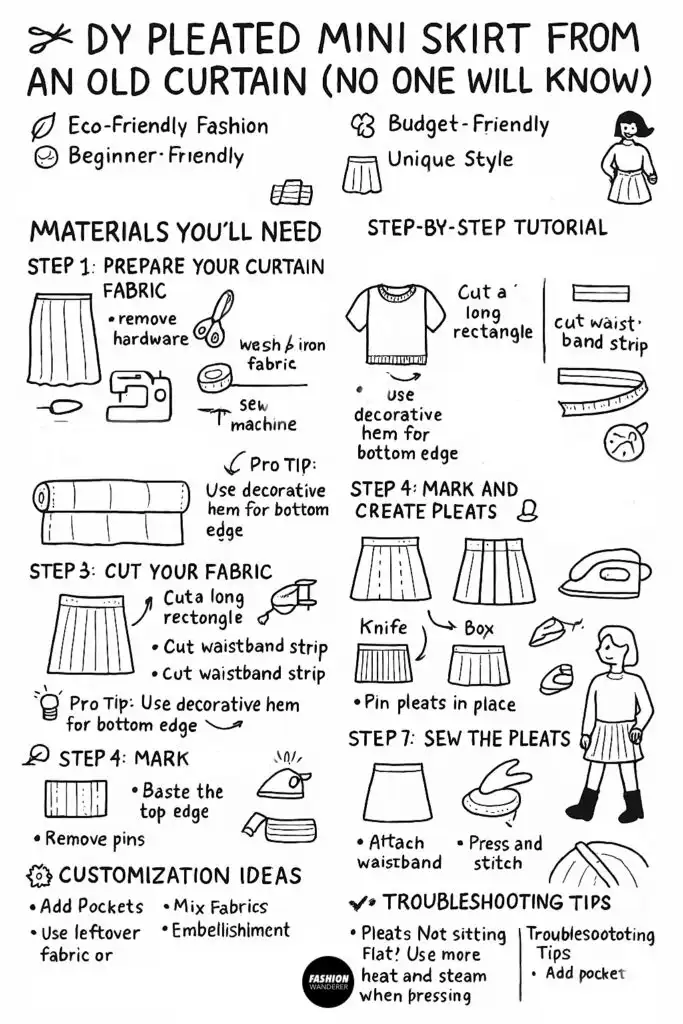
The best part? No one will know it used to hang in your living room. This beginner-friendly tutorial will guide you through making a perfectly fitted pleated skirt from scratch—without complicated patterns.
Why Make a Pleated Mini Skirt from a Curtain?
- Eco-Friendly Fashion – Reusing fabric reduces waste and gives new life to textiles.
- Budget-Friendly – No need to buy expensive yardage; curtains often have plenty of material.
- Unique Style – Curtain fabrics often have bold prints and textures you won’t find in ready-to-wear skirts.
- Beginner-Friendly Sewing Project – Straight seams, simple pleats, and an elastic or zipper closure.
Why This DIY Works So Well
Curtains are perfect for pleated skirts because they’re usually made from structured fabrics that hold shape, yet soft enough for comfortable wear. They also tend to have generous yardage, which means you have enough material for full pleats—something store-bought yardage might not provide at a low cost.
Step-by-Step Tutorial

Materials You’ll Need

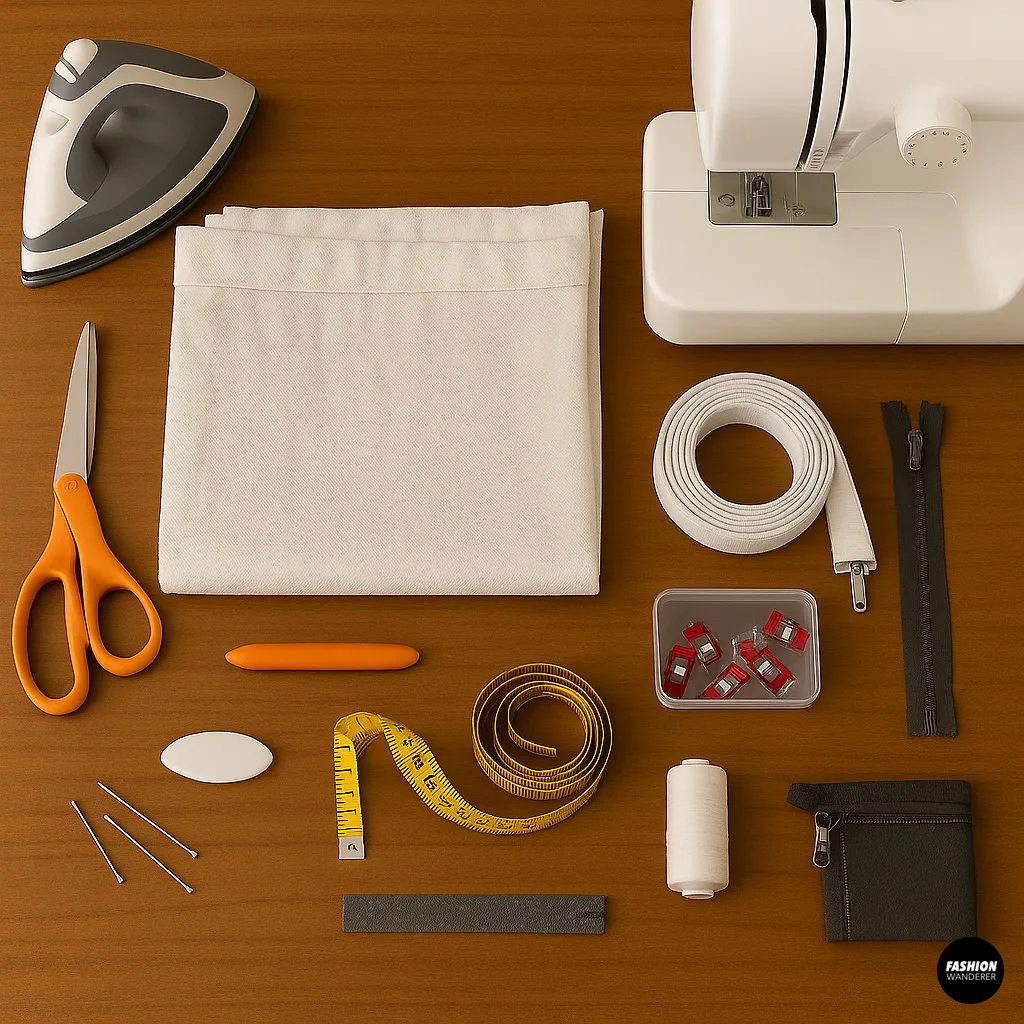
Before diving in, gather the essentials:
- Old curtain (medium-weight cotton, linen, or poly-cotton blend works best)
- Fabric scissors or rotary cutter
- Measuring tape
- Pins or sewing clips
- Sewing machine (or hand sewing needle)
- Matching thread
- Iron and ironing board
- 1–2 inch wide elastic (for an easy waistband) or zipper & hook-and-eye (for a fitted waistband)
- Tailor’s chalk or washable fabric marker
Step 1 – Prepare Your Curtain Fabric


- Remove any curtain hardware – Take off hooks, grommets, or rings.
- Wash and dry the fabric – Curtains can hold dust or sizing that makes them stiff.
- Iron the fabric – A smooth surface will make cutting and sewing easier.
- Check for damage – Avoid sections with sun damage or stains.
💡 Pro Tip: If your curtain is lined, separate the lining and save it for another project—it can make great pockets or a matching scrunchie.
Step 2 – Take Your Measurements

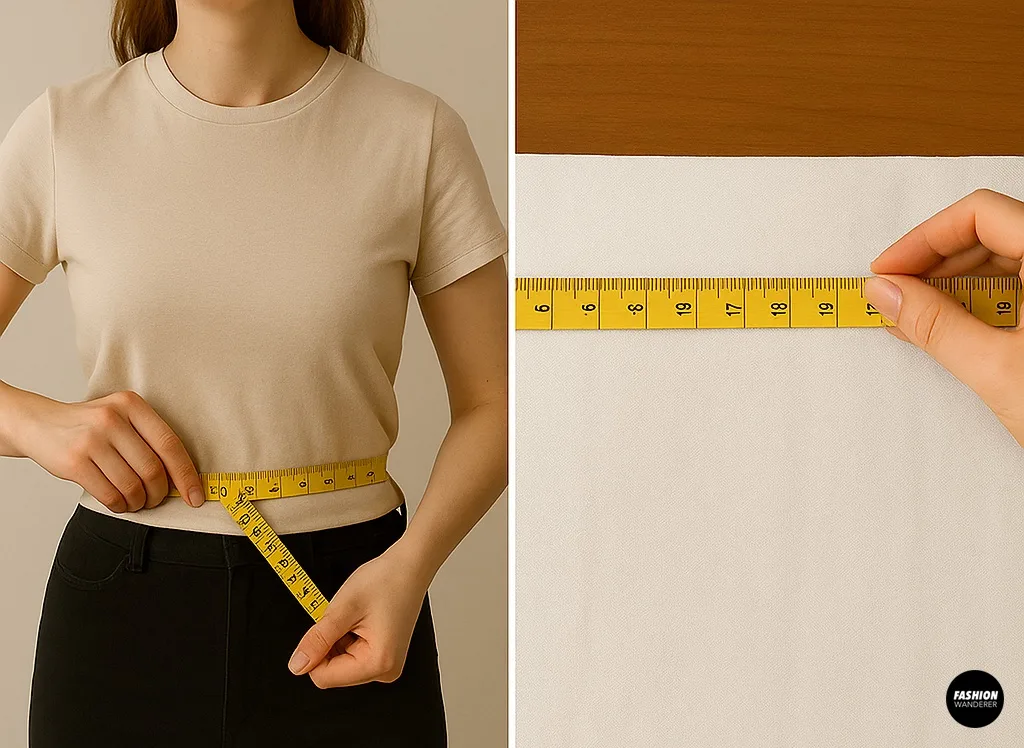
- Waist Measurement – Measure around your natural waist where you want the skirt to sit.
- Length – Decide how short or long you want your mini skirt (usually 14–18 inches from waist to hem).
- Pleat Allowance – Pleats require extra fabric. For box pleats or knife pleats, add 2–3 times your waist measurement.
Example:
- Waist: 30 inches
- Skirt length: 16 inches
- Fabric width needed: ~90 inches (3x waist for full pleats)
Step 3 – Cut Your Fabric

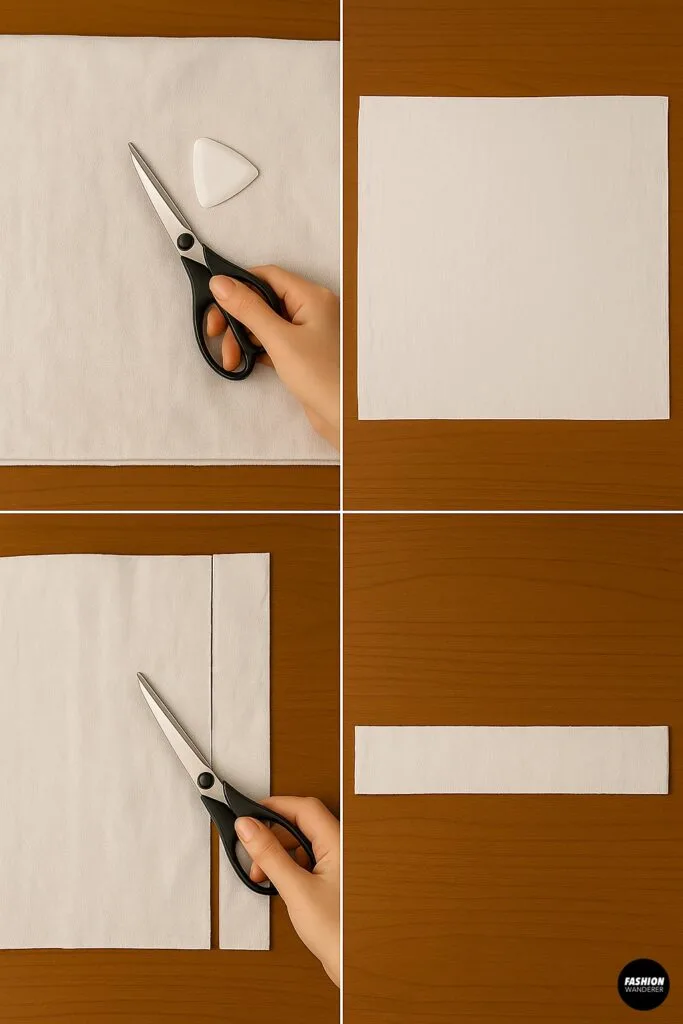
- Cut one long rectangle – Width = pleat allowance, Height = desired skirt length + 2 inches (1 inch waistband allowance, 1 inch hem).
- Cut waistband strip – Length = waist measurement + 1 inch (for seam allowance), Width = 3 inches (for a 1-inch finished waistband).
💡 Pro Tip: If your curtain has decorative hems, use them for the bottom of your skirt to save hemming time.
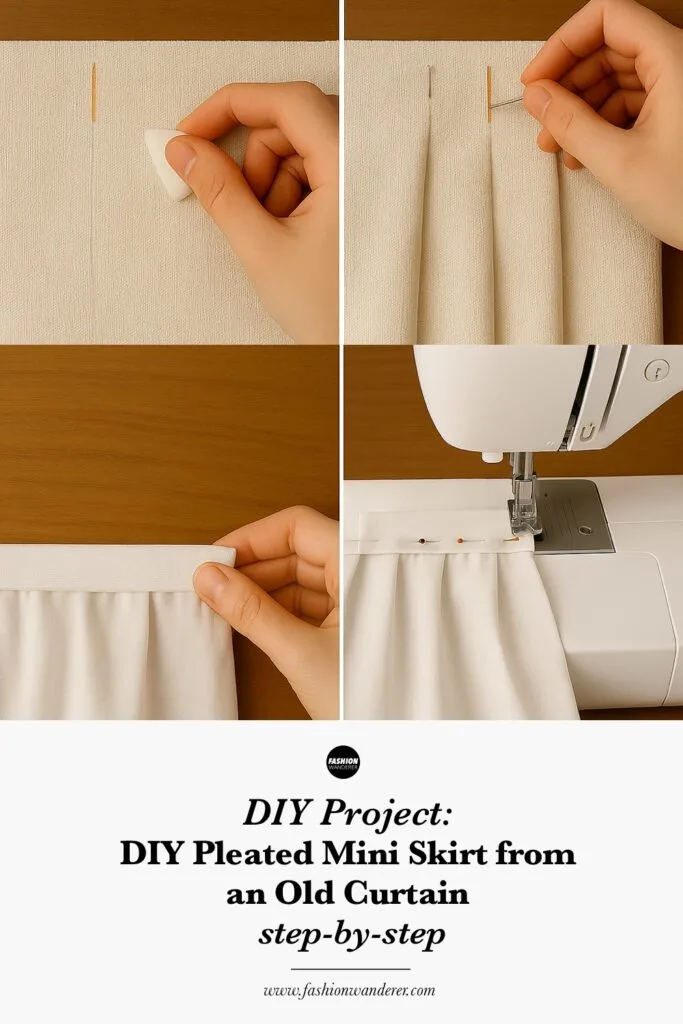
Step 4 – Mark and Create Pleats

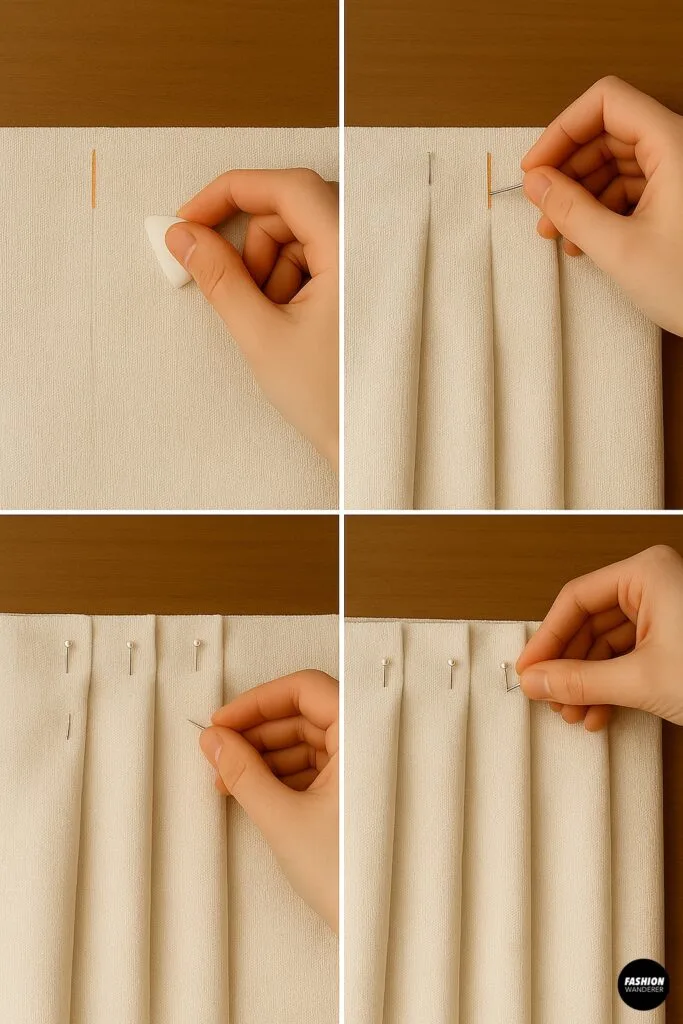
- Mark pleat placement – Use chalk to mark every 3–4 inches along the top edge of the fabric.
- Form pleats – Fold fabric at each mark, pinning in place.
- Knife pleats: All folds go in the same direction.
- Box pleats: Folds face each other for a fuller look.
- Adjust for fit – Pleats should bring the total width of the fabric to match your waist measurement.
💡 Pro Tip: Iron pleats before sewing for crisp, professional folds.
Step 5 – Sew the Pleats in Place


- Baste the top edge – Sew a straight stitch ¼ inch from the edge to secure pleats.
- Remove pins – Once basted, the pleats will hold their shape.
Step 6 – Attach the Waistband
For Elastic Waistband:

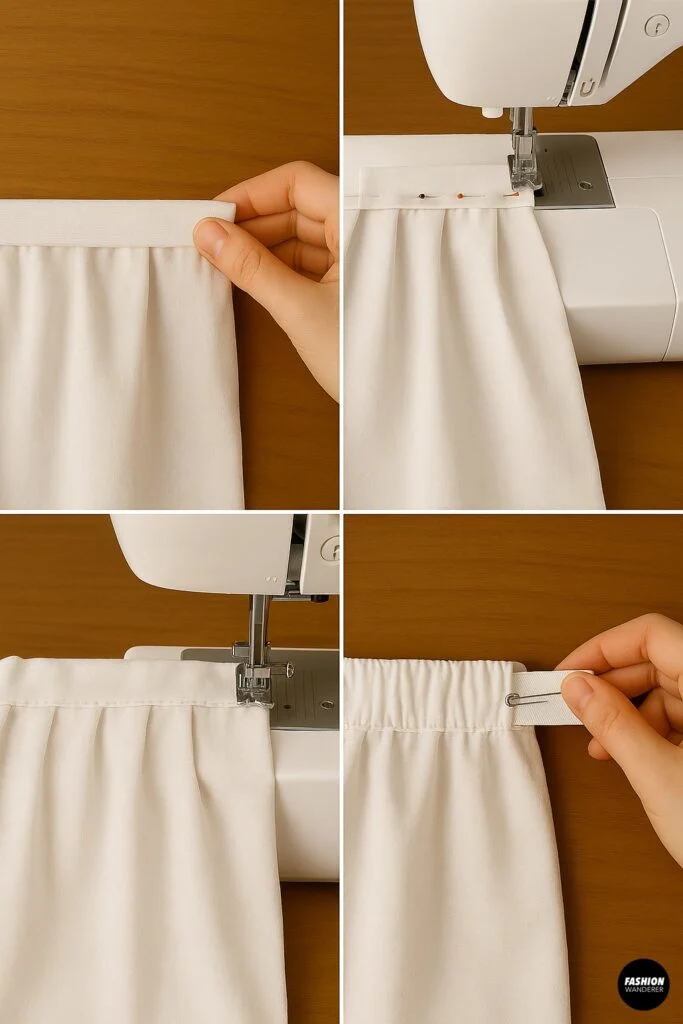
- Fold waistband strip in half lengthwise (wrong sides together) and press.
- Pin the raw edges of the waistband to the top edge of the skirt (right sides together).
- Sew with a ½ inch seam allowance.
- Leave a small opening to insert elastic.
- Thread elastic through with a safety pin, overlap ends by 1 inch, and sew together.
- Close the opening.
For Zipper Waistband:

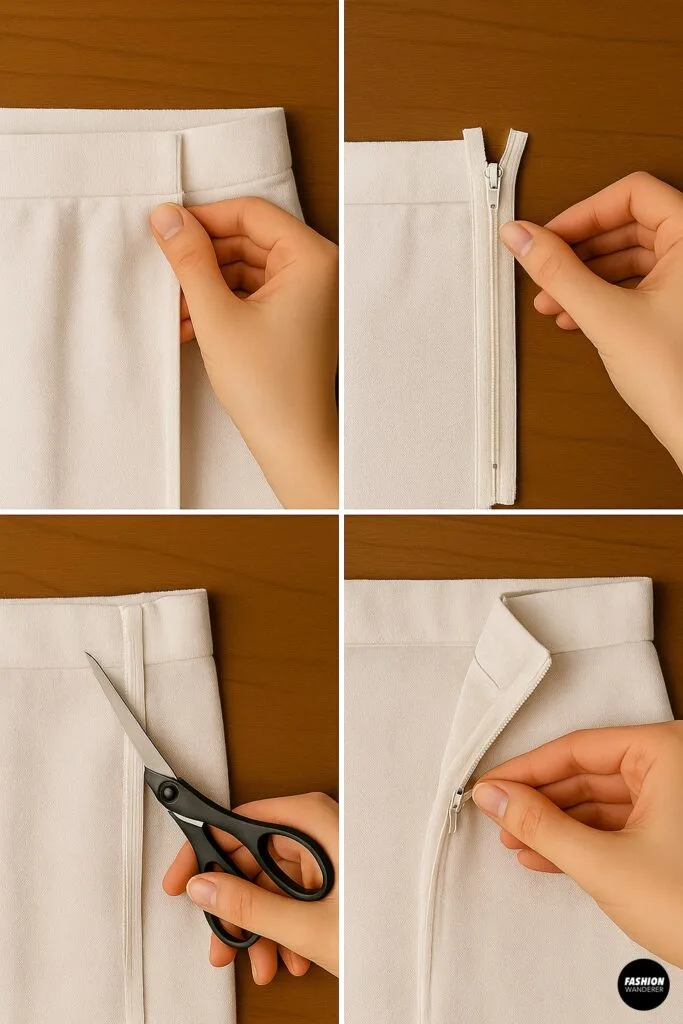
- Sew waistband to skirt top edge (right sides together).
- Insert zipper at the side seam.
- Fold waistband to inside, enclosing raw edges, and stitch down.
Step 7 – Hem the Skirt

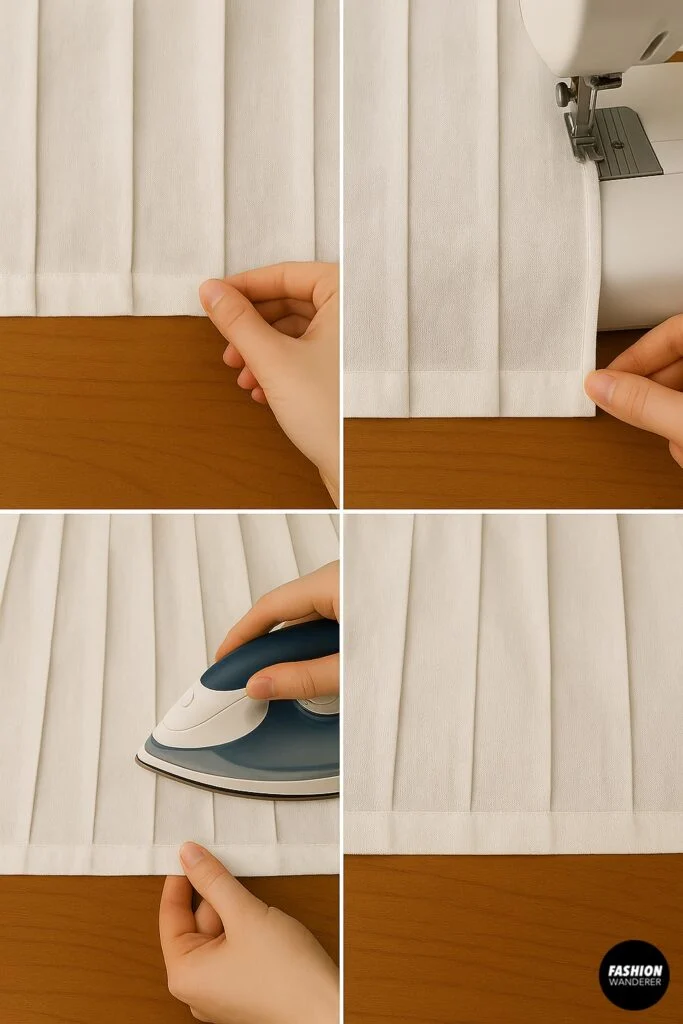
- Fold the bottom edge up by ½ inch, press, then fold again by ½ inch.
- Stitch close to the inner folded edge.
- Press the hem flat.
Step 8 – Final Press and Styling

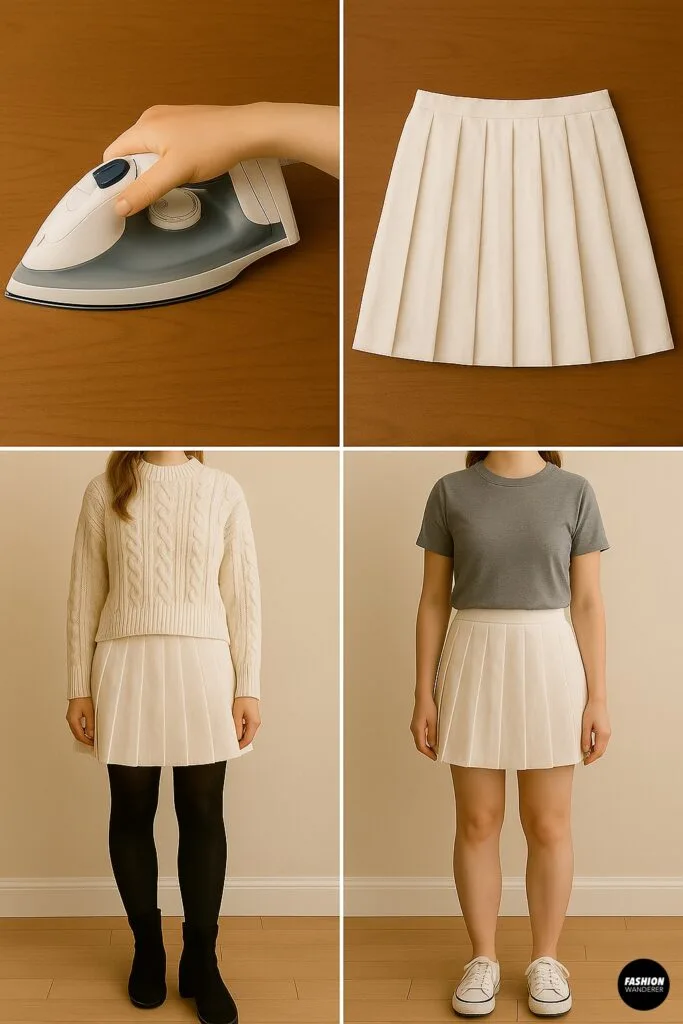
- Give your skirt a final press for sharp pleats.
- Pair with boots and a cozy sweater for fall, or sneakers and a tee for a casual look.
Customization Ideas


- Add Pockets: Use leftover fabric or lining for hidden side pockets.
- Mix Fabrics: Use two different curtains for a color-blocked pleated skirt.
- Embellishments: Add lace trim to the hem or decorative buttons along the waistband.
- Mini to Maxi: Use the same method but adjust the length for a pleated maxi skirt.
Troubleshooting Tips
- Pleats Not Sitting Flat? Use more heat and steam when pressing, or topstitch 1–2 inches down from the waistband to lock them in place.
- Skirt Too Big? Add extra pleats or increase pleat depth to reduce the width.
- Fabric Frays Easily? Zigzag stitch or serge raw edges before sewing.
Final Thoughts

With a few basic sewing skills and an old curtain, you can create a chic pleated mini skirt that looks like it came from a high-end boutique. Whether you go bold with vintage prints or keep it neutral for everyday wear, this project proves that sustainable fashion can be stylish, affordable, and fun.
So next time you think about tossing that old curtain, think again—you might just be one afternoon away from your new favorite skirt.
Trendy, Affordable Sewing Patterns for All Sizes


Tie Shoulder Jumpsuit Pattern


Palazzo Pants Sewing Pattern


Pocket Overall Romper Pattern


Wrap Maxi Skirt Sewing Pattern


Tie Back Top Sewing Pattern