
If you’ve ever looked at an old sweater and thought, “This could be something cuter”, you’re in the right place. One rainy afternoon, I grabbed my scissors, did a little experimenting, and ended up with the coziest, most flattering DIY sweater vest—and you can too!
This project is beginner-friendly, no fancy sewing skills required, and it’s the perfect upcycle for that too-snug, stretched-out, or thrifted sweater hiding in your closet.
In this post, I’ll walk you through:
- What materials you’ll need
- How to cut and shape your sweater
- Optional finishing techniques to make it look store-bought
- Styling tips for your brand-new sweater vest
🌱 Why This DIY Works So Well
- Budget-friendly: Costs almost nothing if you’re upcycling.
- Beginner-friendly: Simple cuts, minimal sewing.
- On-trend: Sweater vests are back in 2025 with a modern twist—cropped styles, bold textures, and layering versatility.
- Sustainable: Extends the life of your clothing and keeps textiles out of landfills.
Step-by-Step Tutorial

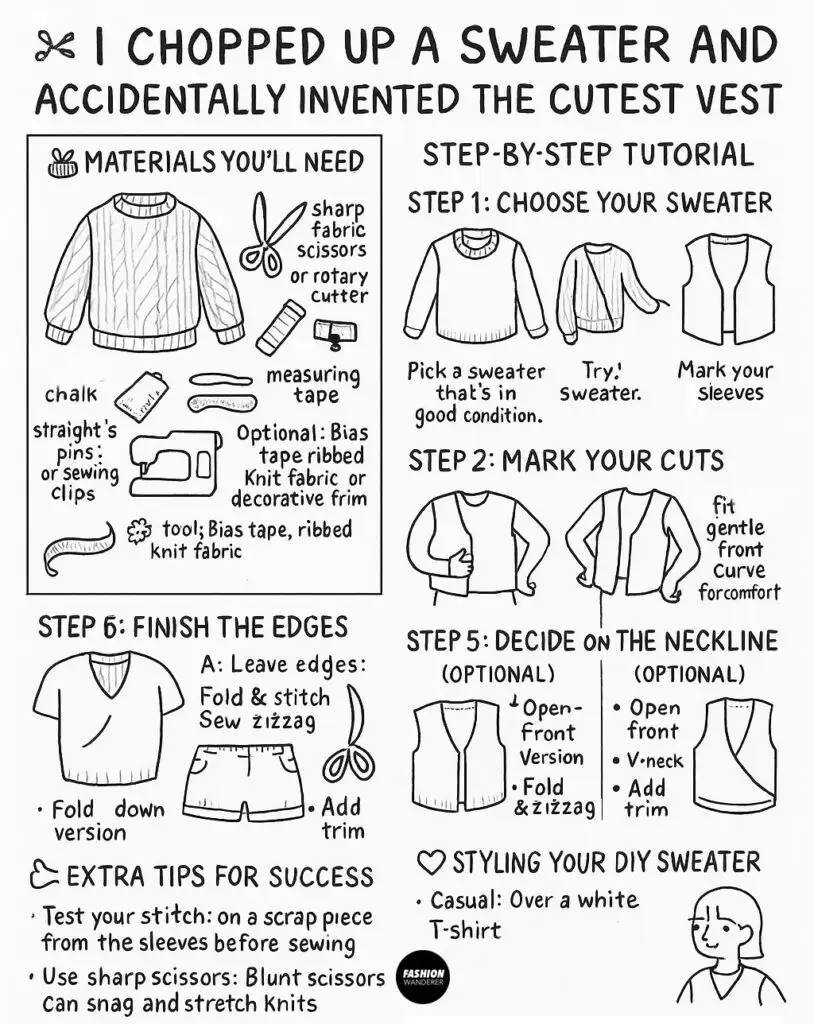
🧵 Materials You’ll Need

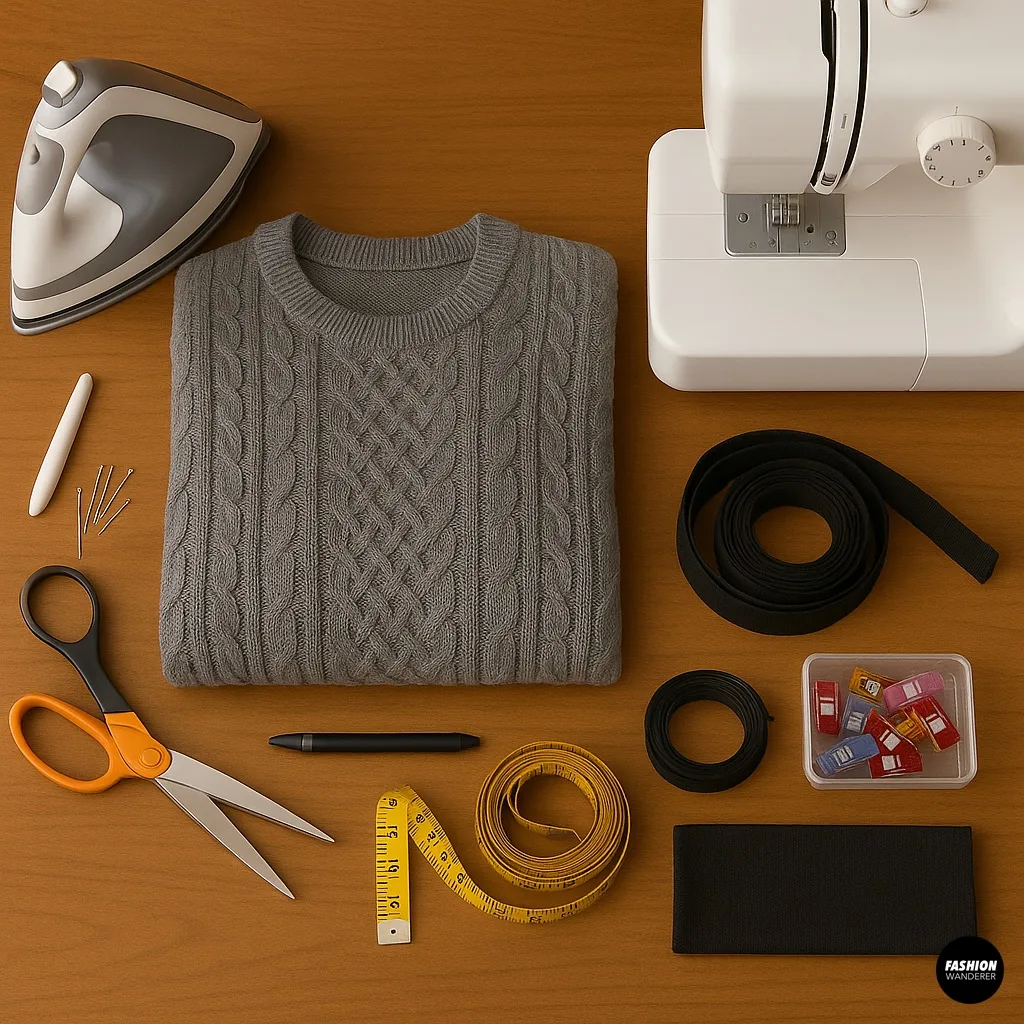
Before we start, gather these supplies:
- One old sweater – knit or cable-knit works best
- Sharp fabric scissors or rotary cutter
- Tailor’s chalk or washable fabric marker
- Straight pins or sewing clips
- Sewing machine (or needle and thread if you’re hand-stitching)
- Measuring tape
- Iron & ironing board
- Optional: Bias tape, ribbed knit fabric, or decorative trim for edges
Step 1: Choose Your Sweater

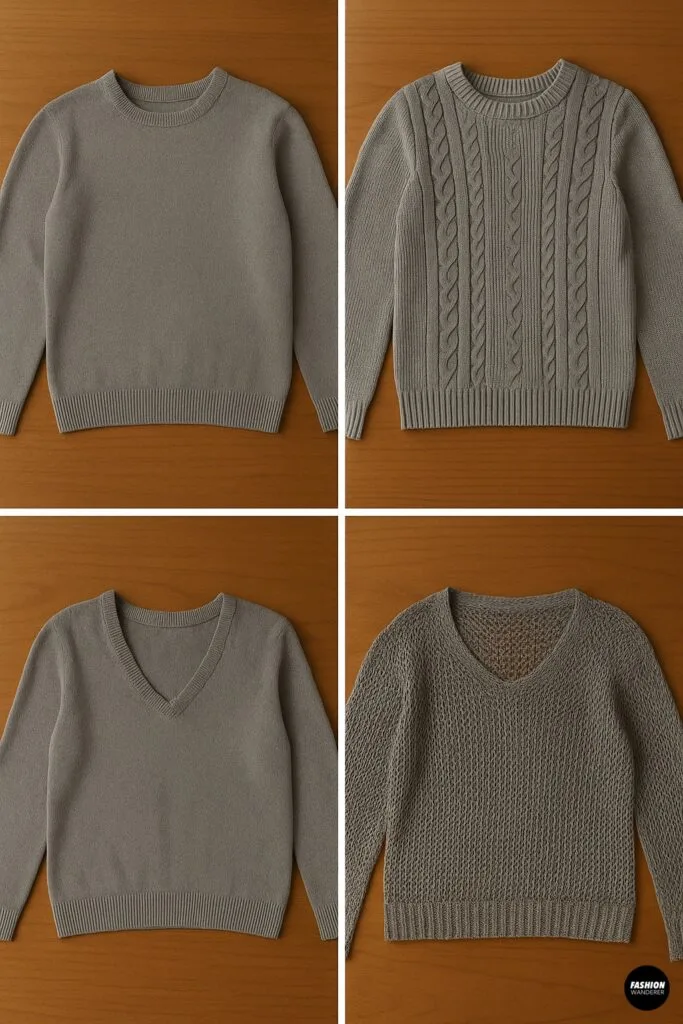
Pick a sweater that’s in good condition but maybe not your favorite as-is.
- Best choices: Medium-weight knits hold shape without curling. Cable knits add texture.
- Avoid: Very loose, open-weave sweaters—they can unravel too easily.
Pro tip: If you’re shopping thrift stores for this project, look for 100% cotton or wool blends for warmth and structure.
Step 2: Mark Your Cuts

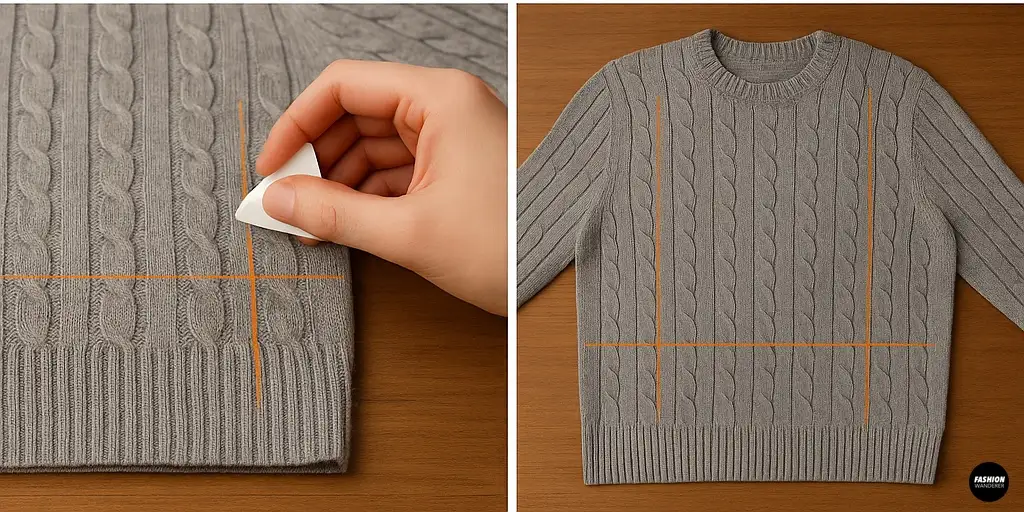
Lay your sweater flat on a large table or cutting mat, smoothing out wrinkles.
- With tailor’s chalk, mark a straight line across where you want the bottom hem to end. For a classic vest, aim for hip or waist length.
- Mark two vertical lines where the sleeves meet the body—these will be your armholes.
- If you want a deeper armhole for layering over bulky shirts, extend the cut 1–2 inches into the body.
Step 3: Remove the Sleeves

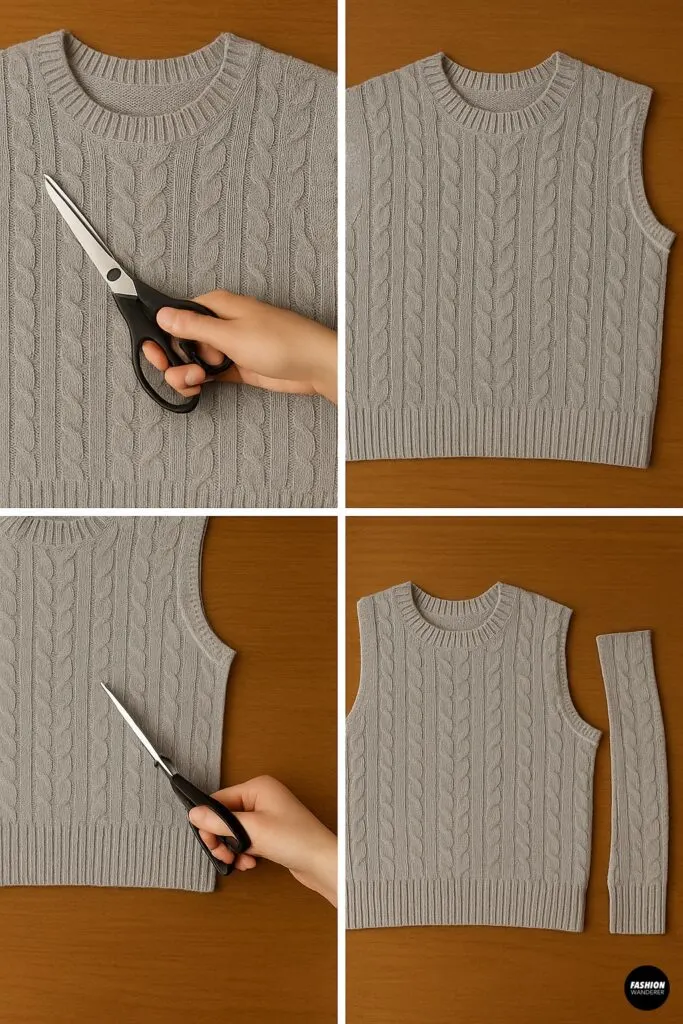
Using sharp fabric scissors:
- Start at the armpit seam.
- Cut along the sleeve seam, following your chalk line.
- Repeat on the other side.
Tip: Cutting along the seam helps prevent fraying and keeps the edges neat.
Step 4: Shape the Armholes

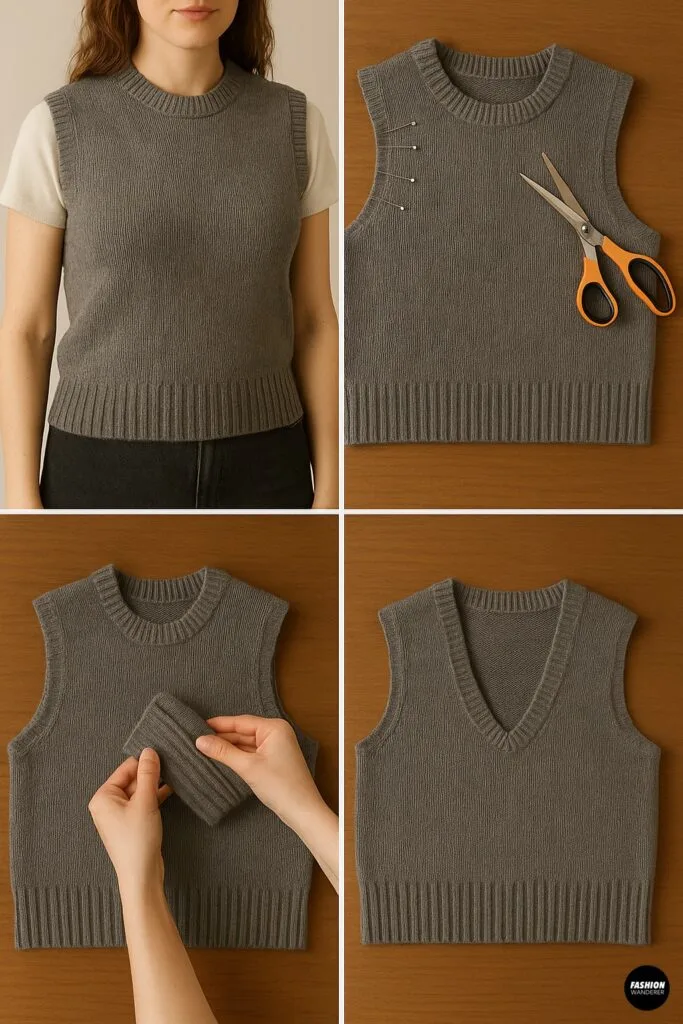
This is where your vest starts to take shape.
- Try it on and check the armhole fit.
- If it feels tight, trim a gentle curve into the front armhole area for more comfort.
- Keep both sides symmetrical—fold the sweater in half lengthwise and trim both armholes at once for evenness.
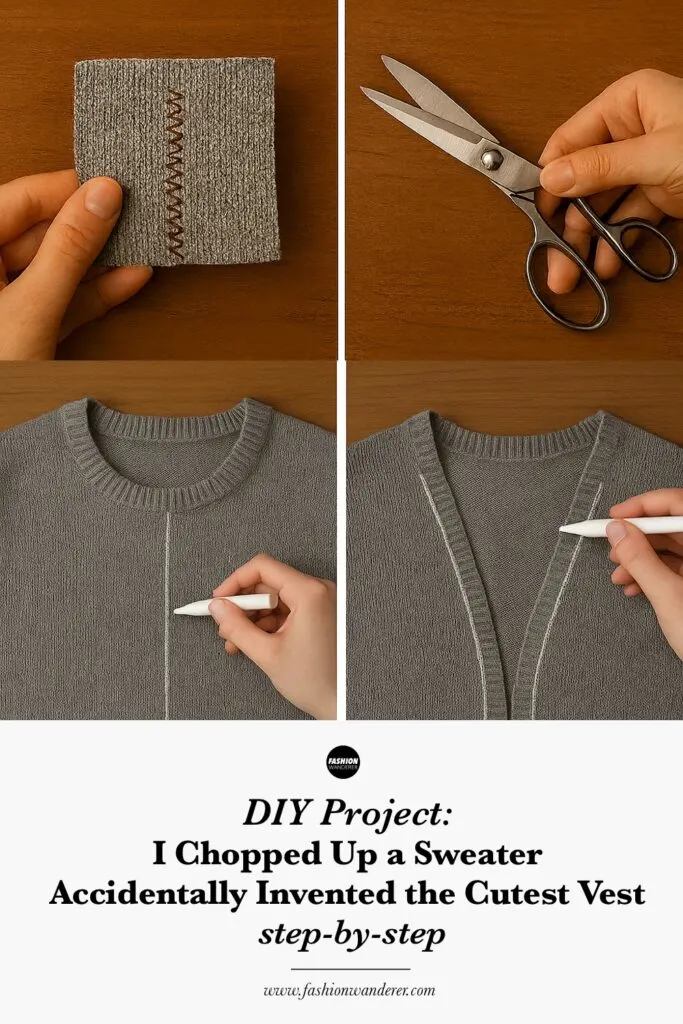
Step 5: Decide on the Neckline (Optional)

If your sweater already has a neckline you like, skip this step.
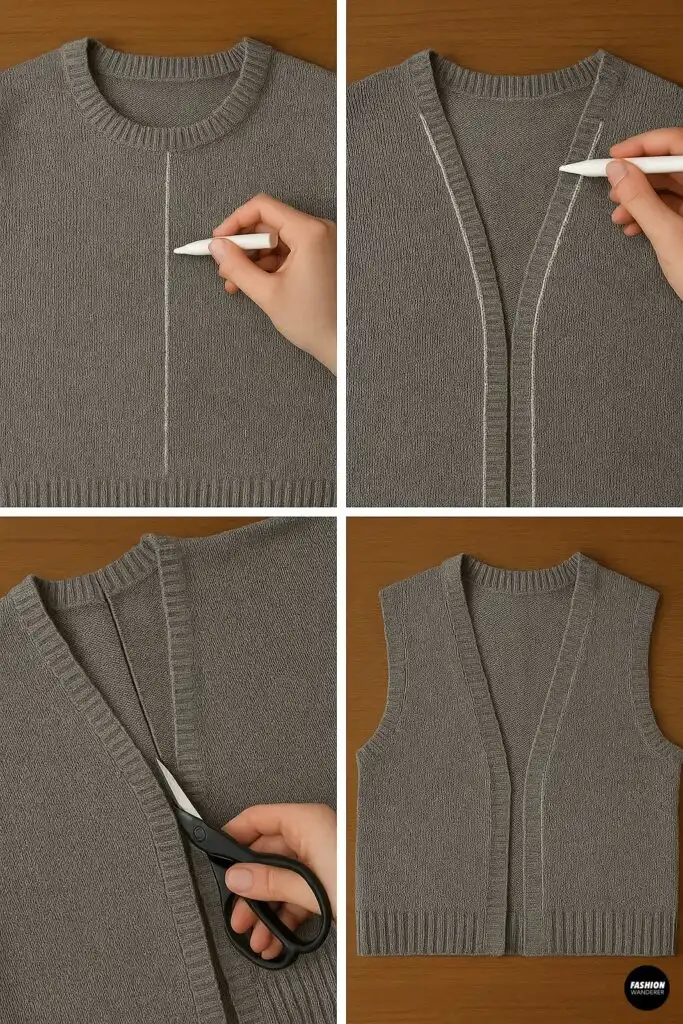
For a vest with a modern, open-front or deep-V look:
- Mark a vertical center line on the front.
- Cut straight down the center to create an open vest.
- For a V-neck, mark a point a few inches below the collarbone and cut diagonally from each shoulder to meet at that point.
Step 6: Finish the Edges

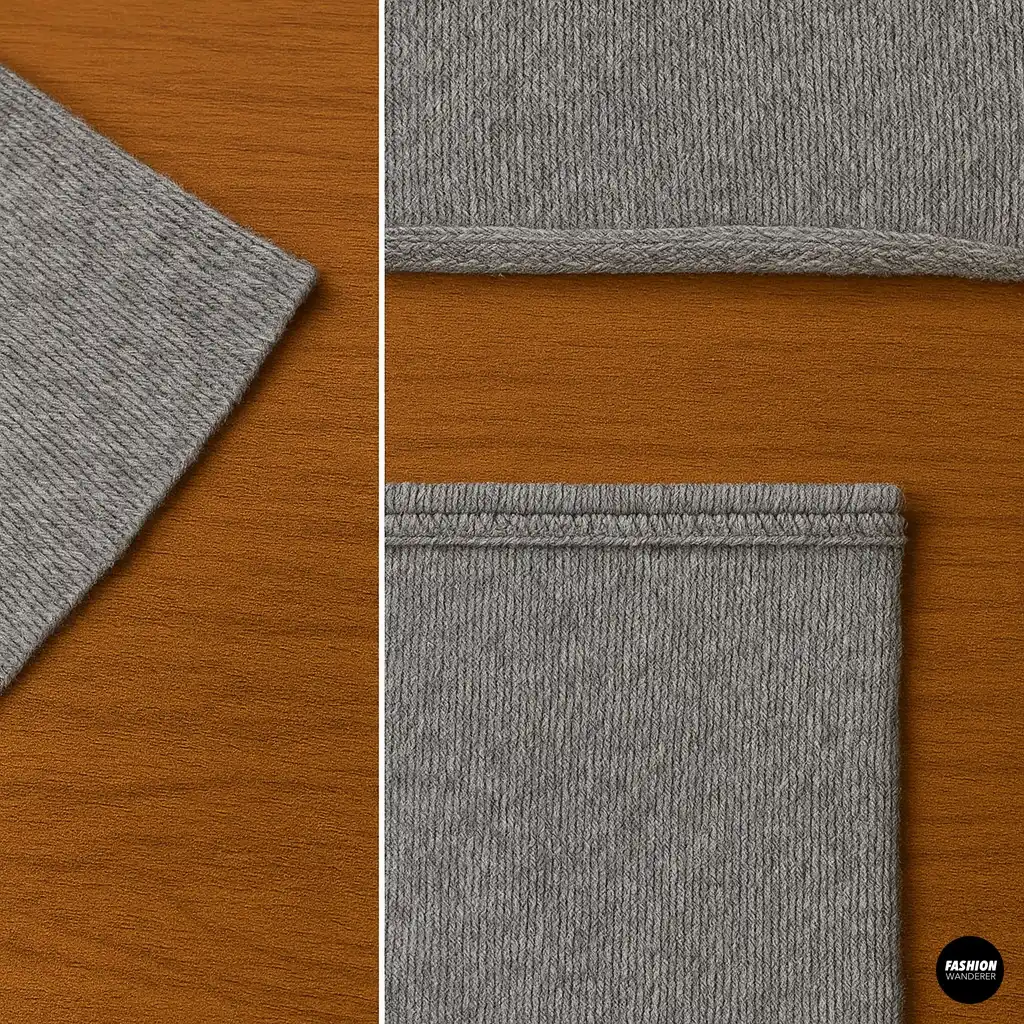
This step takes your project from “homemade” to “handcrafted.” You have three main options:
Option A: Leave Raw Edges (for knits that don’t fray)
- Some sweater knits naturally roll inwards, creating a casual finish.
Option B: Fold & Stitch
- Fold the edge under about ¼ inch. Pin or clip in place.
- Sew with a zigzag stitch or stretch stitch to allow movement.
Option C: Add Trim
- Use bias tape, ribbed knit fabric, or decorative trim to bind edges for a polished look.
- This is especially great for open-front vests or if the knit frays easily.
Step 7: Press Your Vest

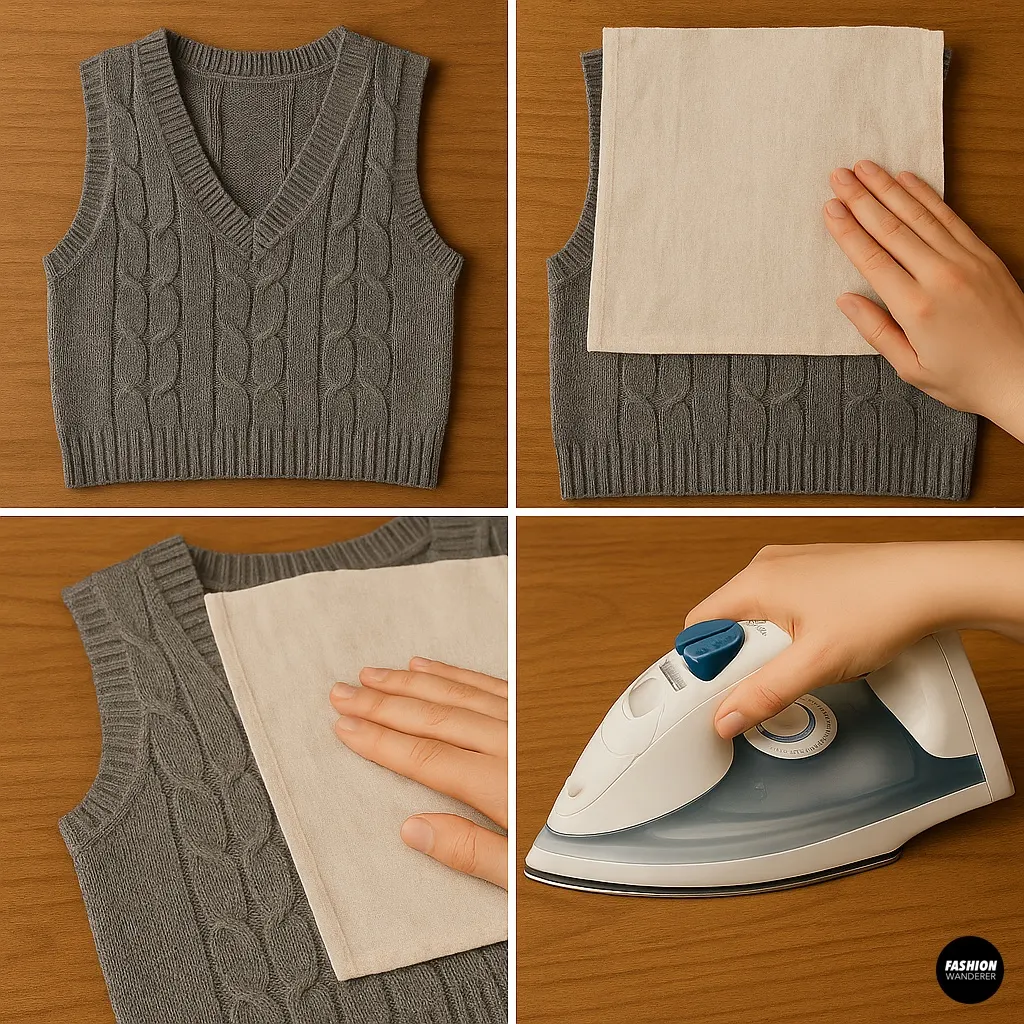
Gently press seams and edges with an iron on low heat.
- For wool or delicate knits, use a pressing cloth to avoid damage.
- Pressing not only makes it look neat but also helps set the new shape.
🧡 Styling Your DIY Sweater Vest

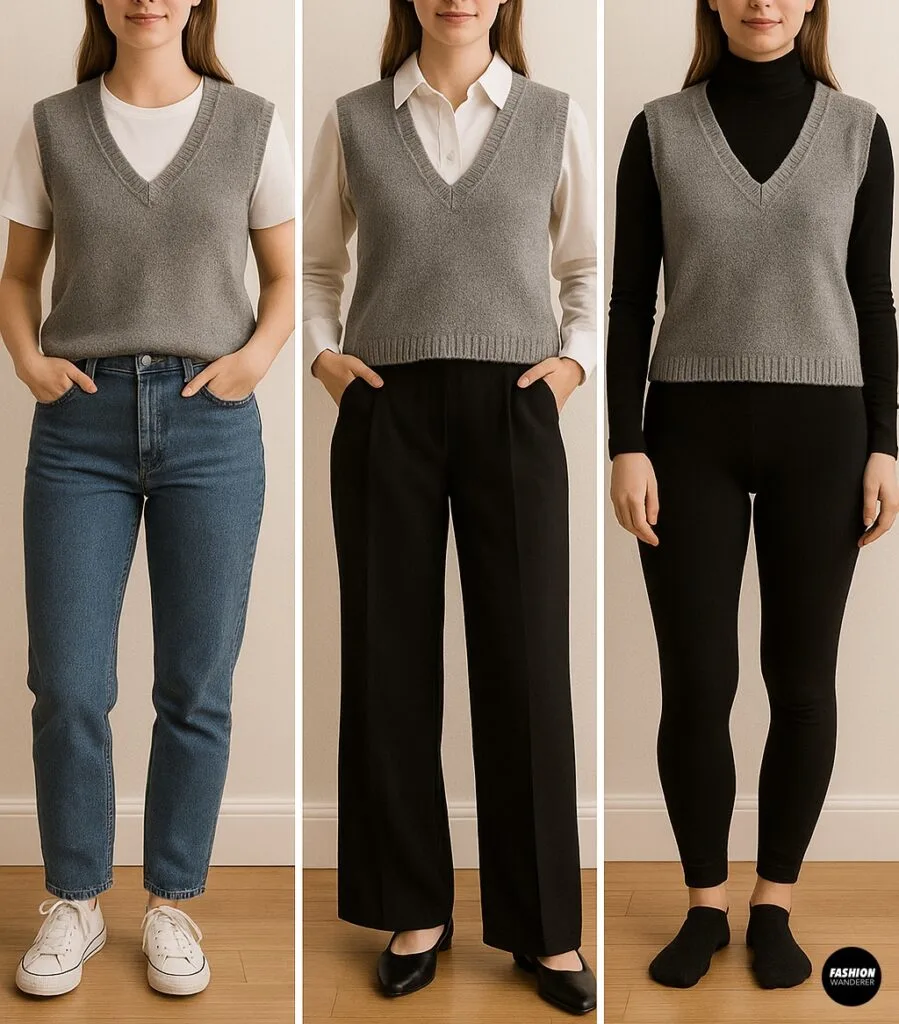
Once your vest is finished, here’s how to wear it:
- Casual: Over a white T-shirt with jeans and sneakers.
- Chic: Layer over a collared shirt with wide-leg trousers.
- Cozy: Pair with leggings and a long-sleeve tee for a lounge-at-home vibe.
🔧 Extra Tips for Success

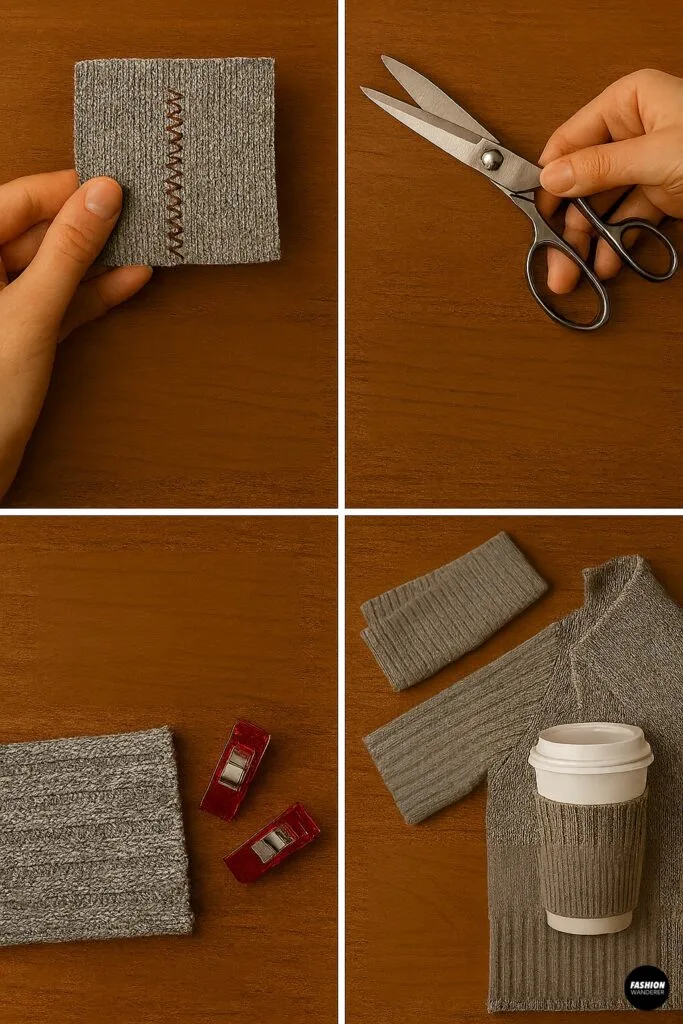
- Test your stitch: On a scrap piece from the sleeves before sewing the main vest.
- Use sharp scissors: Blunt scissors can snag and stretch knits.
- Work slowly: Knit fabrics can shift, so pin or clip well before sewing.
- Save the sleeves: Turn them into leg warmers, headbands, or coffee cup cozies.
✨ Final Thoughts

Transforming a sweater into a vest is one of those accidental DIY wins you’ll actually wear all season. With just a few snips and simple stitches, you can create a piece that’s unique, versatile, and totally on-trend for 2025.
So, the next time you’re cleaning out your closet and come across a sweater that’s almost perfect, remember—sometimes all it needs is a little creative chop to become your new favorite wardrobe staple.
Trendy, Affordable Sewing Patterns for All Sizes


Tie Shoulder Jumpsuit Pattern


Palazzo Pants Sewing Pattern


Pocket Overall Romper Pattern


Wrap Maxi Skirt Sewing Pattern


Tie Back Top Sewing Pattern
Mijick
Tuesday 17th of February 2026
Great idea, thanks for sharing!