
There’s something iconic about a varsity jacket. It instantly transports you to teen movie hallways, pep rallies, and that effortless cool vibe that never goes out of style.
But what if you don’t have the budget—or simply don’t want—a store-bought jacket with pre-made patches? The good news: you can DIY your own varsity jacket patches and create a look that’s as unique as you are.
In this tutorial, I’ll show you exactly how I made my own varsity jacket patches from scratch and transformed a plain jacket into a statement piece. With just a few affordable supplies, you’ll feel like you walked straight out of a classic teen rom-com.
Why DIY Varsity Jacket Patches?
Before we jump into the tutorial, here’s why making your own patches is a total game-changer:
- Customizable: You decide the shapes, letters, numbers, or icons you want. Make it personal!
- Budget-friendly: Pre-made patches can be pricey, but DIY versions cost a fraction.
- Creative freedom: Mix colors, fabrics, and textures that match your style.
- Beginner-friendly: No fancy sewing machine needed—hand-sewing or fabric glue works too.
- Trendy: Varsity jackets are timeless, but a customized one feels totally fresh.
Why You’ll Love This DIY
When I finished attaching my patches and tried on my jacket, I felt like I belonged in every teen movie I grew up watching. It’s bold, fun, and totally personalized. Instead of spending $$$ on a trendy varsity jacket, I created one that feels like it was made just for me.
And the best part? Every time someone asks where I got it, I get to say, “I made it myself!”
Materials You’ll Need

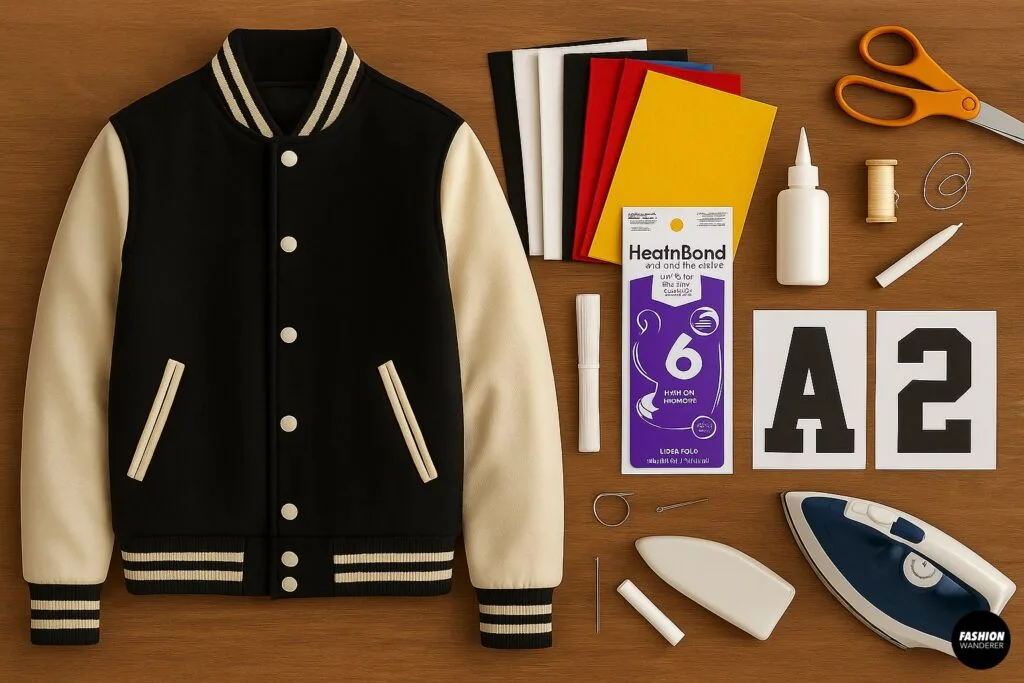
To get started, gather these supplies:
- 1 varsity-style jacket (plain or with minimal details)
- Felt or twill fabric (classic colors like white, black, red, blue, yellow work best)
- Iron-on adhesive (such as HeatnBond)
- Scissors
- Fabric glue (optional, for no-sew method)
- Needle and thread (or sewing machine for extra durability)
- Chalk or washable fabric marker
- Iron and ironing board
- Templates for letters, numbers, or designs (you can print them out for easy tracing)
Step-by-Step Tutorial: DIY Varsity Jacket Patches


Step 1: Choose Your Patch Designs

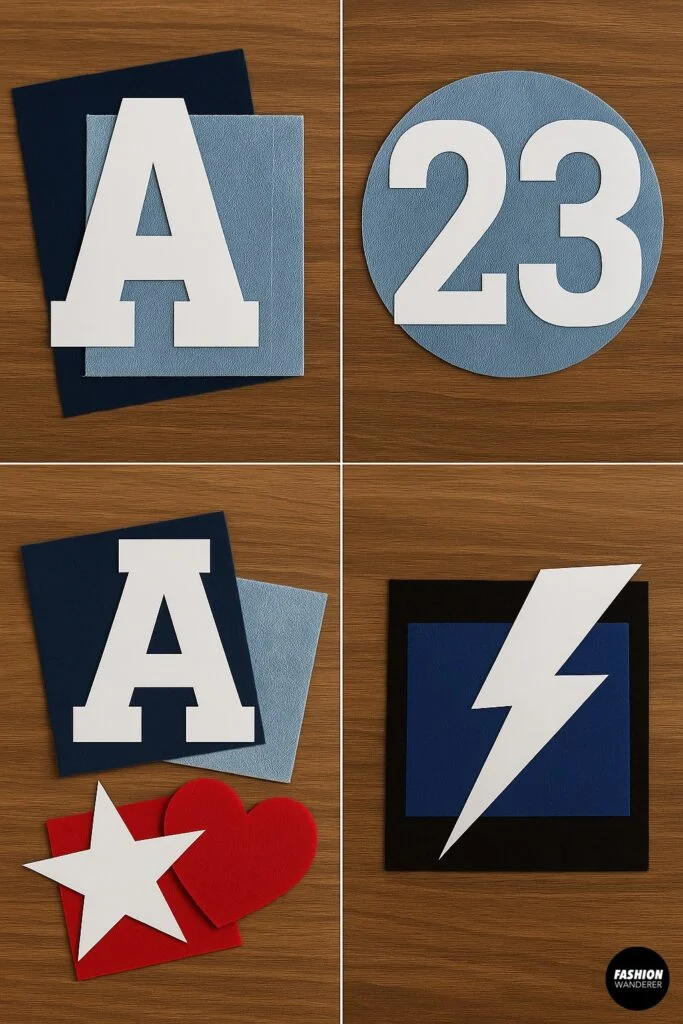
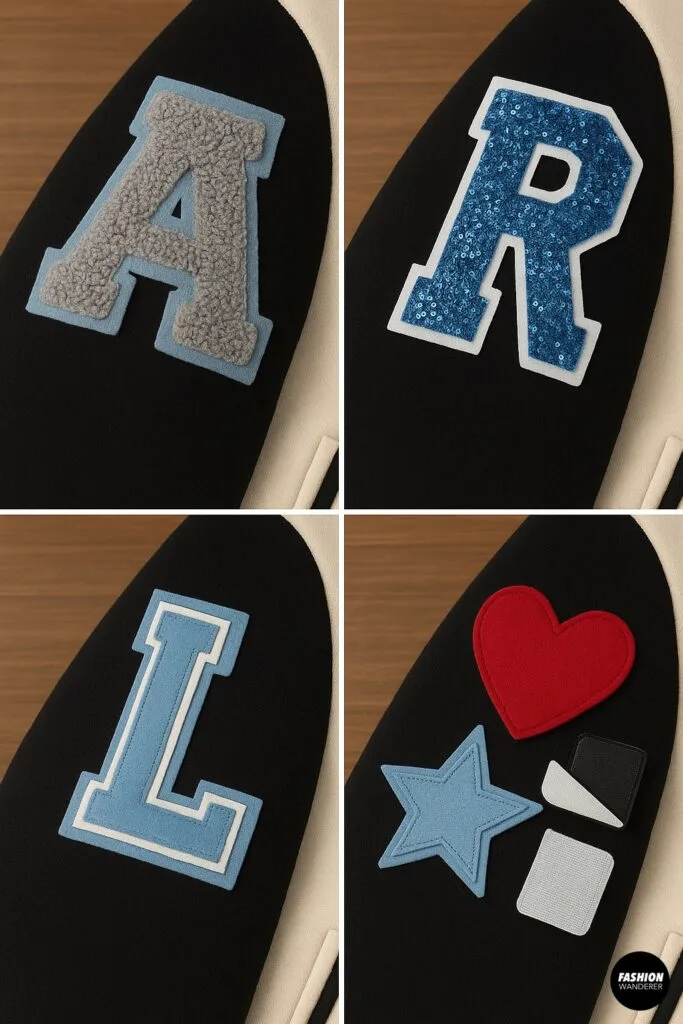
Start by deciding what patches you want. Varsity jackets usually feature:
- Letters or initials (your name, school, or nickname)
- Numbers (graduation year, lucky number, or sports number)
- Icons (stars, hearts, lightning bolts, mascots, etc.)
Print out or draw templates in the size you’d like your patches to be.
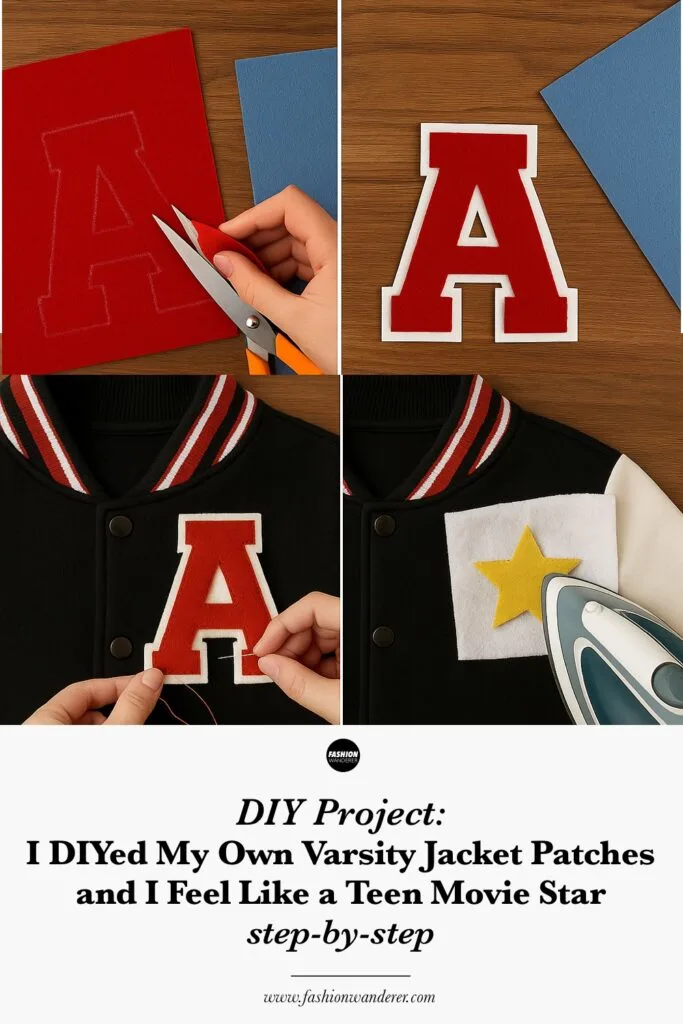
Step 2: Cut Out the Fabric Pieces

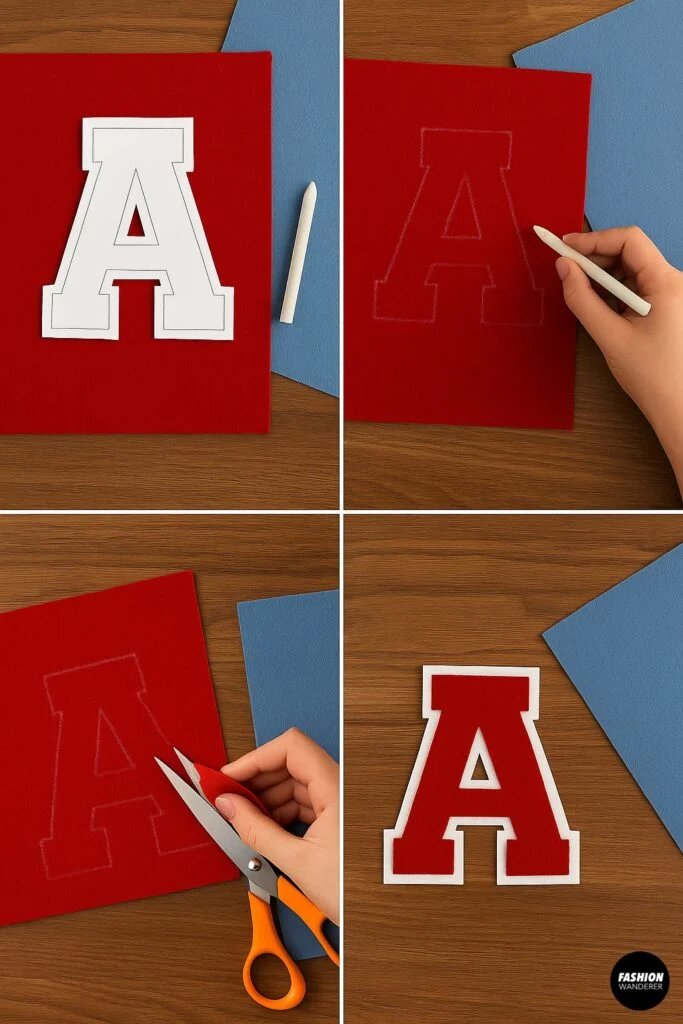
Take your felt or twill fabric and trace your templates onto the back using chalk or a washable marker. For a layered look (like a letter with a border), cut one shape slightly larger in a contrasting color and the smaller shape in your main color.
Example: A red “A” with a white outline.
Step 3: Add Iron-On Adhesive

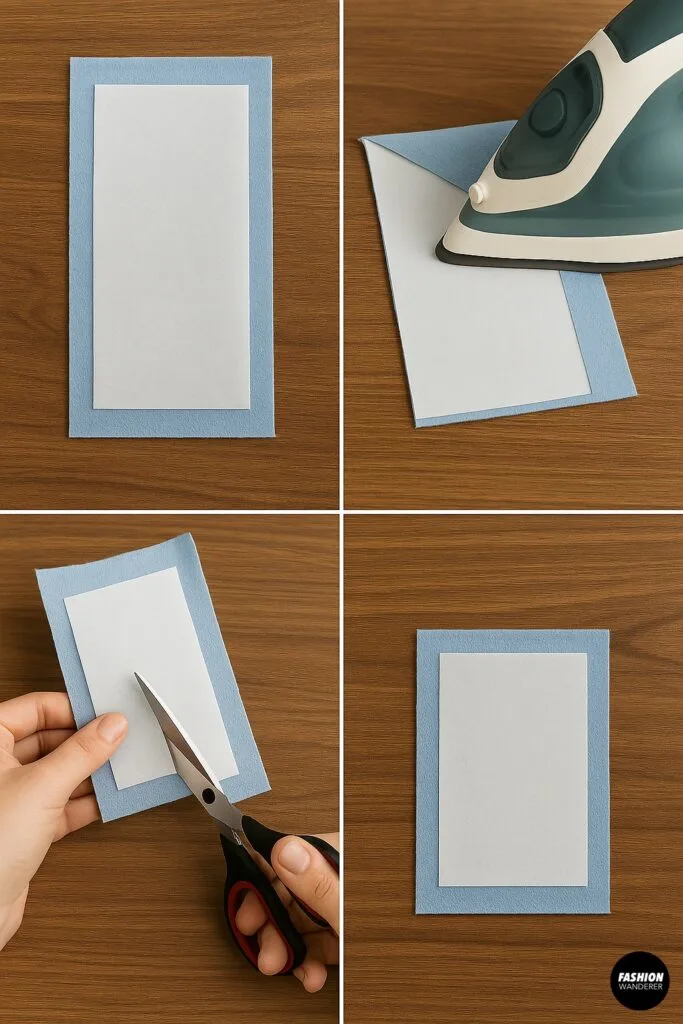
For crisp, durable patches, use iron-on adhesive like HeatnBond:
- Place the adhesive sheet onto the back of your fabric piece.
- Follow the instructions to iron it on securely.
- Cut around the edges to finish your patch.
This adhesive helps the patch stick flat and gives it structure.
Step 4: Layer and Assemble Patches

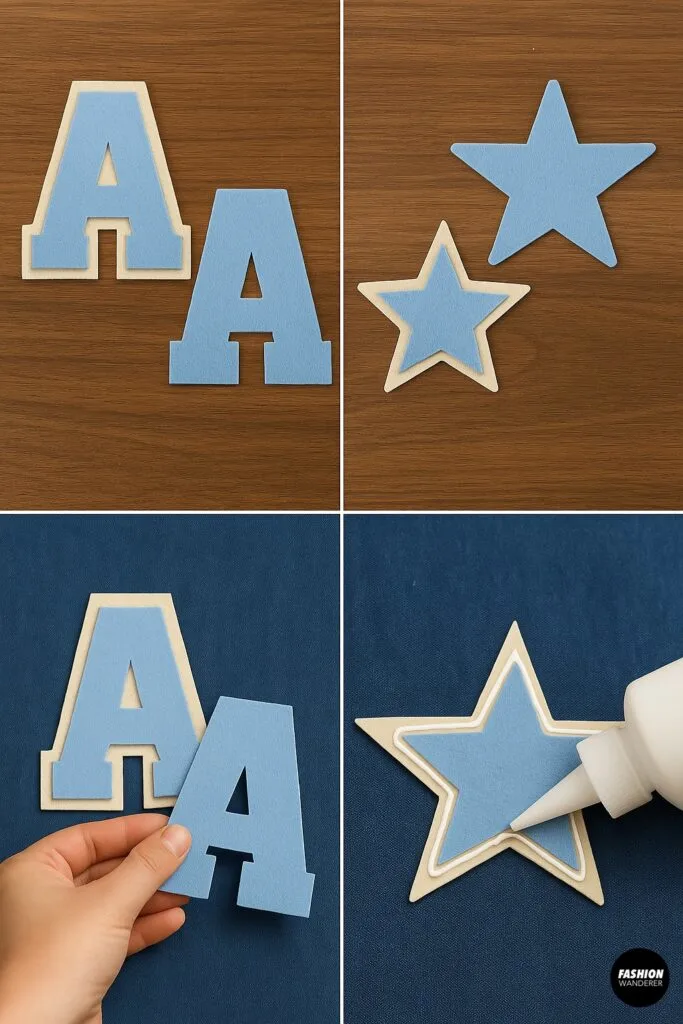
If you’re making two-layer patches, iron or glue the smaller top shape onto the larger bottom shape. Press firmly to secure.
Step 5: Attach the Patches to Your Jacket

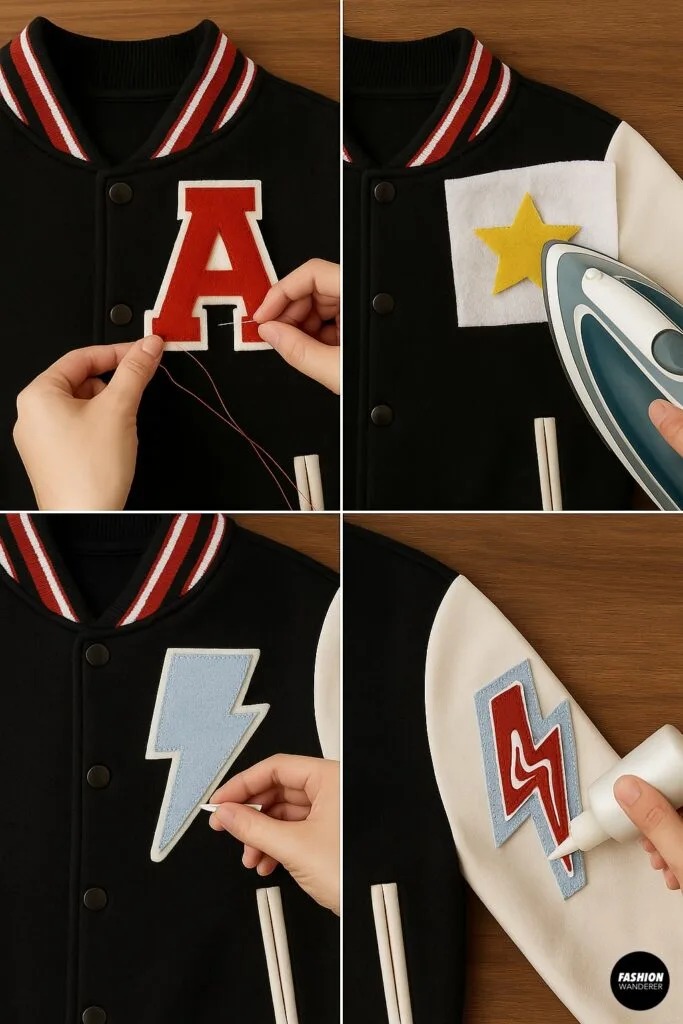
You have a few options here:
Sewing Method (Most Durable)
- Pin the patch in place on your jacket.
- Use a straight stitch or zigzag stitch around the edges to secure it.
- Hand-sew if you don’t have a machine, using small, even stitches.
Iron-On Method (Quick and Easy)
- Place the patch with the adhesive side down on the jacket.
- Cover with a pressing cloth and iron for 10–15 seconds.
- Let it cool completely before moving the jacket.
Fabric Glue Method (No-Sew)
- Apply fabric glue evenly on the back of the patch.
- Press onto the jacket and let it dry for 24 hours.
Step 6: Add More Patches and Play With Placement

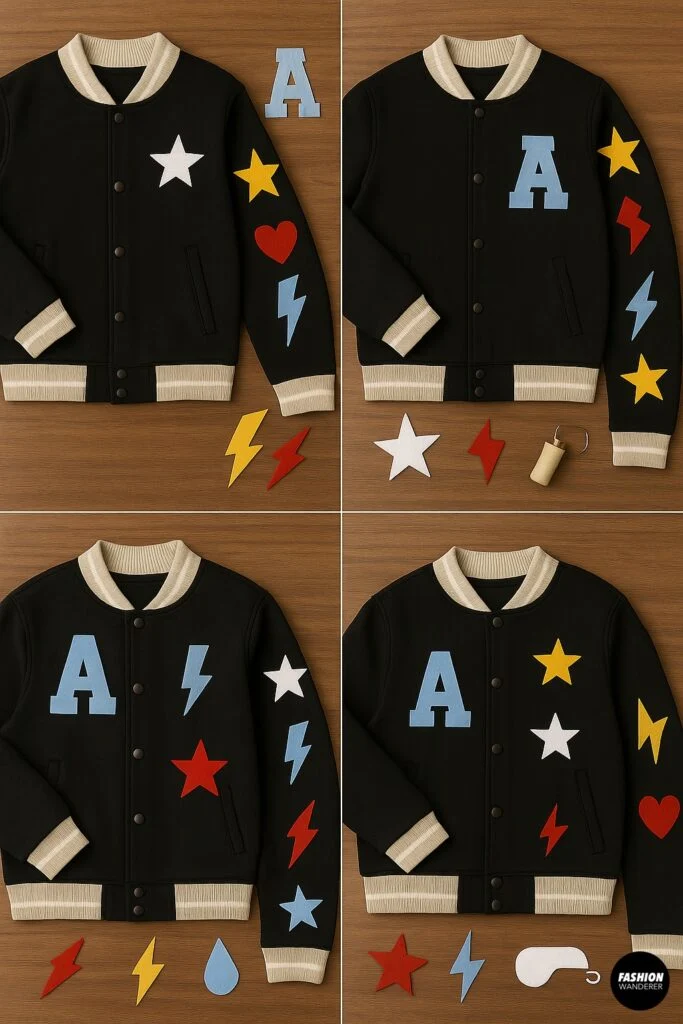
The beauty of DIY is that you can go all out. Try mixing a big letter patch on the chest with smaller icon patches on the sleeves. Play around until you get a balanced, stylish look.
Step 7: Final Touches

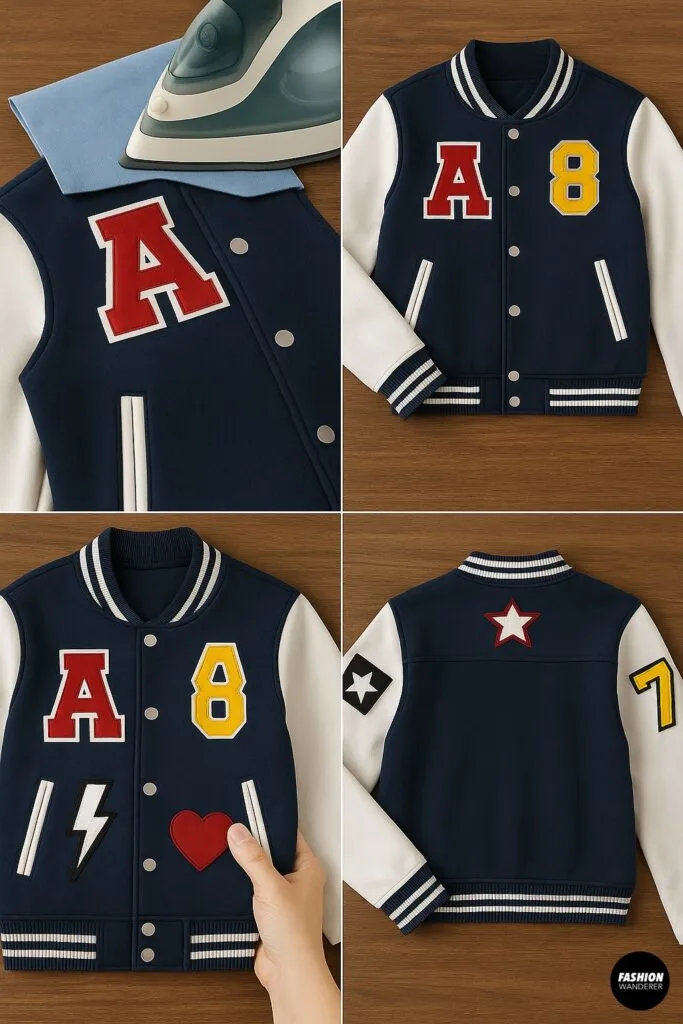
Once all your patches are attached, give the jacket a gentle press with an iron (avoiding direct heat on the patches if glued). Your varsity jacket is ready to wear!
Styling Your DIY Varsity Jacket

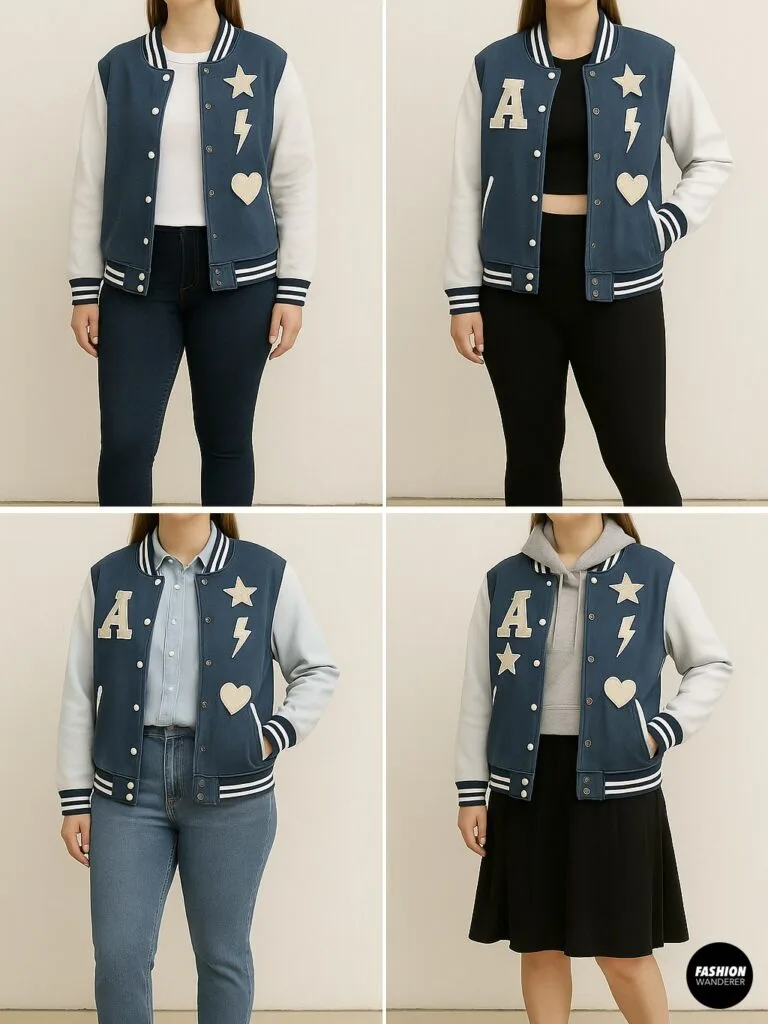
Now comes the fun part—styling! Here are a few outfit ideas to make your patch-covered varsity jacket the star of your wardrobe:
- Classic Casual: Pair with skinny jeans, a plain tee, and sneakers.
- Sporty Chic: Throw over leggings and a crop top with chunky sneakers.
- Retro Vibes: Combine with high-waisted mom jeans and Converse.
- Edgy Twist: Layer over a hoodie with ripped jeans and combat boots.
- Girly Cool: Style with a pleated skirt and ankle boots for a teen-movie vibe.
Variations to Try

Once you’ve mastered the basics, get creative with your patches:
- Chenille Texture: Use fluffy chenille fabric for that authentic varsity patch feel.
- Sequins or Glitter: Add sparkle to your letters or icons.
- Embroidered Details: Stitch around the edges for a polished, professional finish.
- Seasonal Patches: Swap in hearts for Valentine’s Day or stars for summer festivals.
- Removable Patches: Use Velcro backing to change up your jacket design anytime.
Tips for Success
- Test your adhesive or glue first on scrap fabric to avoid damage.
- Balance your design—don’t crowd all patches on one side.
- Use high-quality felt or twill for patches that won’t fray.
- Secure edges with stitching if you want the patches to last through washing.
- Go bold with colors—contrast makes patches pop.
Final Thoughts

DIYing your own varsity jacket patches is a creative, affordable, and empowering project. With just a few supplies and an afternoon, you can turn a plain jacket into an iconic fashion statement. Whether you’re going for classic preppy, retro sporty, or a bold modern look, your jacket will be as unique as your personality.
So grab some felt, fire up the iron, and start cutting those patches. Trust me—once you slip on your jacket, you’ll feel like a teen movie star too.
Trendy, Affordable Sewing Patterns for All Sizes


Tie Shoulder Jumpsuit Pattern


Palazzo Pants Sewing Pattern


Pocket Overall Romper Pattern


Wrap Maxi Skirt Sewing Pattern


Tie Back Top Sewing Pattern