
If you have always wanted to learn how to knit but felt overwhelmed by complicated patterns, this easy knitted scarf pattern for beginners is the perfect first project.
You only need to know one basic stitch, and there is no shaping, increasing, decreasing, or complicated counting involved. The entire scarf is worked back and forth in simple rows, making it ideal for anyone picking up knitting needles this fall for the first time.
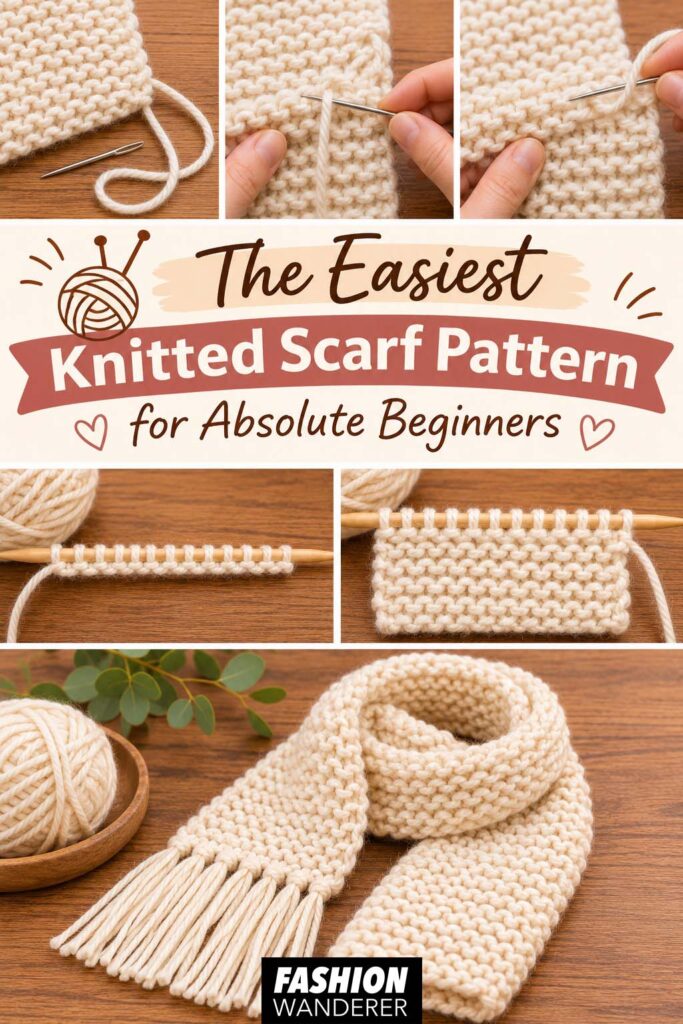
This beginner scarf uses the garter stitch, which simply means knitting every stitch of every row. The result is a soft, stretchy fabric with a cozy textured finish that looks good on both sides.
Best of all, you can easily customize the scarf by changing the yarn color, width, length, or adding fringe at the ends.
Skill Level
Absolute beginner.
This project is perfect if you are learning:
- How to cast on stitches
- How to make the knit stitch
- How to work rows back and forth
- How to bind off
- How to weave in yarn ends
You do not need to know how to purl.
Finished Scarf Size
The finished scarf measures approximately:
Width: 7–8 inches
Length: 60–65 inches
You can easily make the scarf shorter or longer depending on your preference.
For a chunky oversized scarf, cast on additional stitches and continue knitting until the scarf reaches your desired length.
Materials You’ll Need
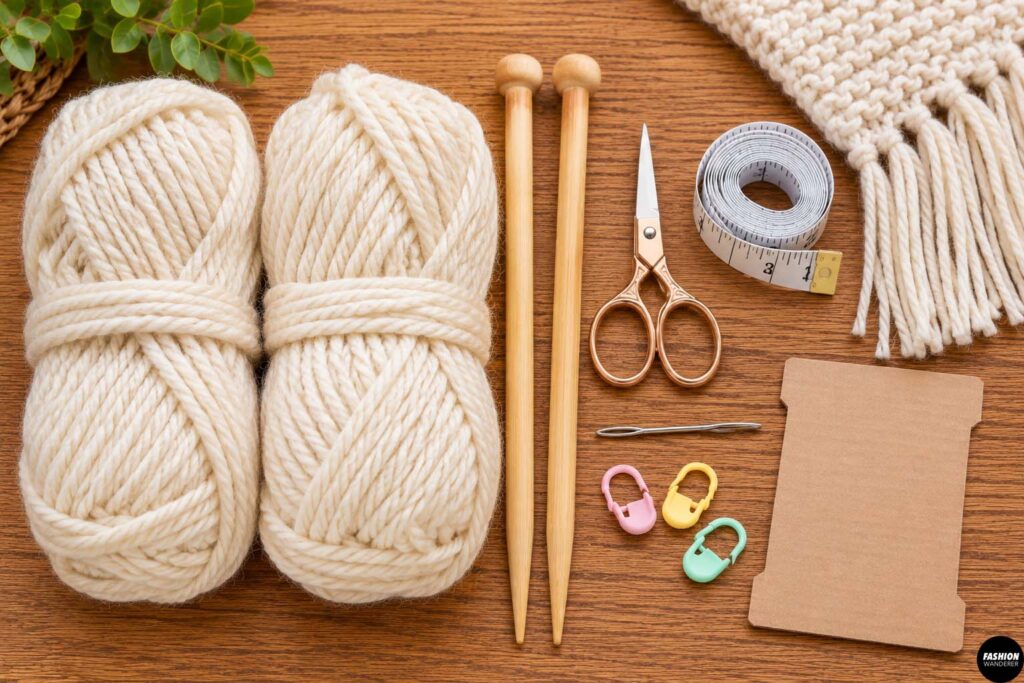
For one beginner knitted scarf, gather:
- Approximately 350–450 yards of medium or bulky yarn
- US size 10–11 knitting needles
- Scissors
- Yarn needle
- Measuring tape
- Optional stitch markers
- Optional cardboard for making fringe
A soft acrylic, wool blend, or washable wool yarn works beautifully for this project.
Beginners may find light-colored yarn easier to work with because individual stitches are easier to see.
Avoid fuzzy, eyelash, or extremely dark yarn for your first project because it can make it difficult to see where the needle should enter the stitch.
DIY Easy Knitted Scarf Pattern
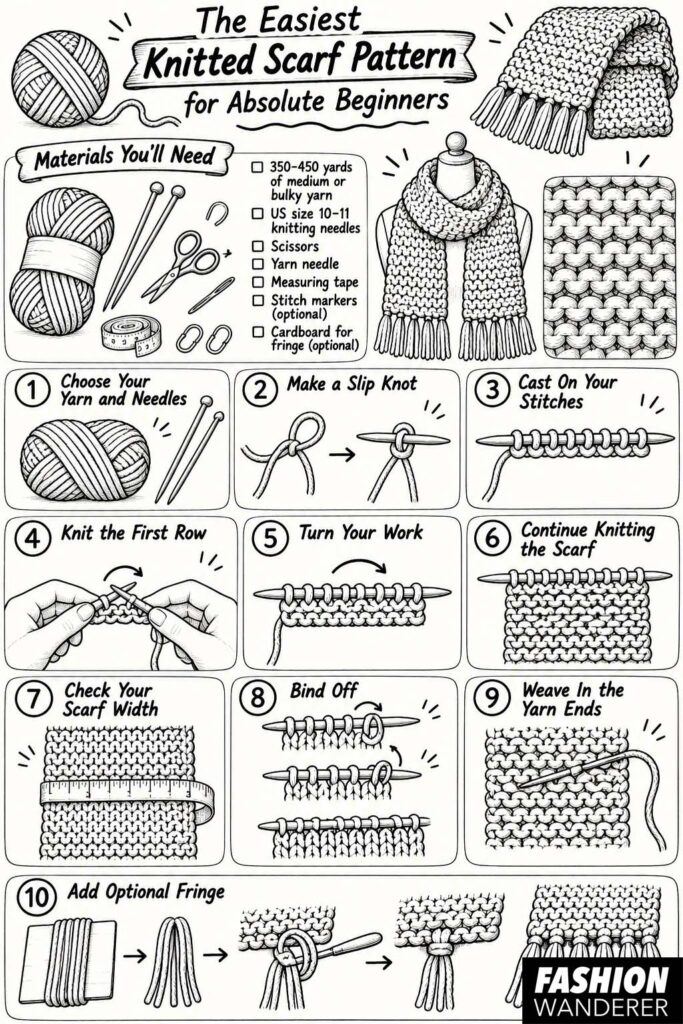
Step 1: Choose Your Yarn and Needles
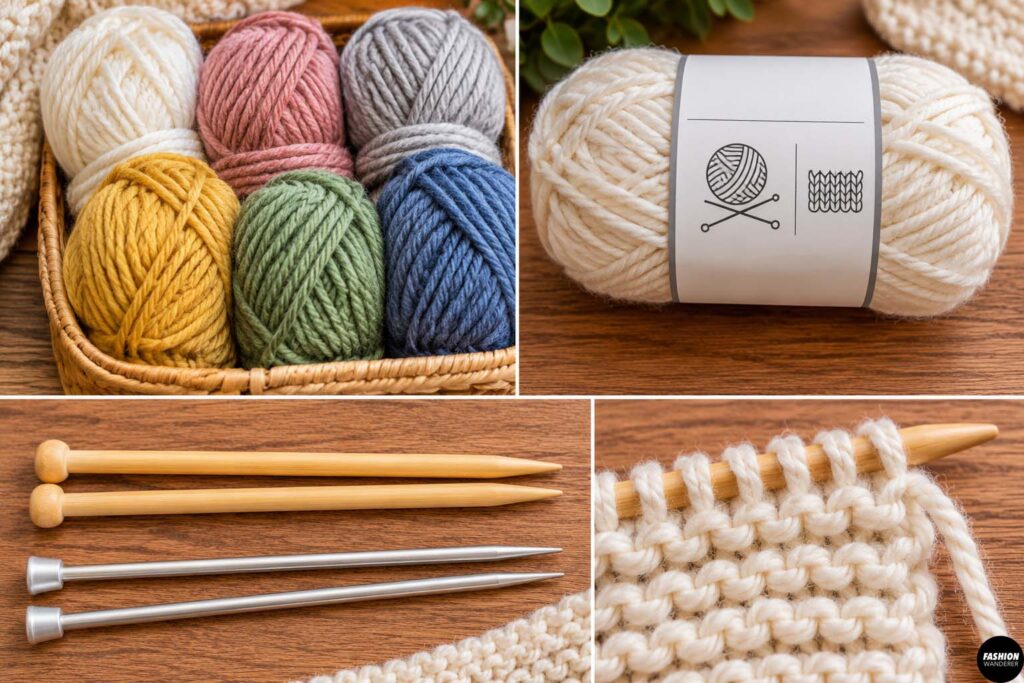
Start by choosing a soft medium-weight or bulky yarn.
Bulky yarn is especially beginner-friendly because the stitches are larger and easier to see.
Check the yarn label for the recommended knitting needle size. A needle around US size 10 or 11 works well for many beginner scarves.
Wood or bamboo needles can also be helpful because they are slightly less slippery than metal needles.
Step 2: Make a Slip Knot
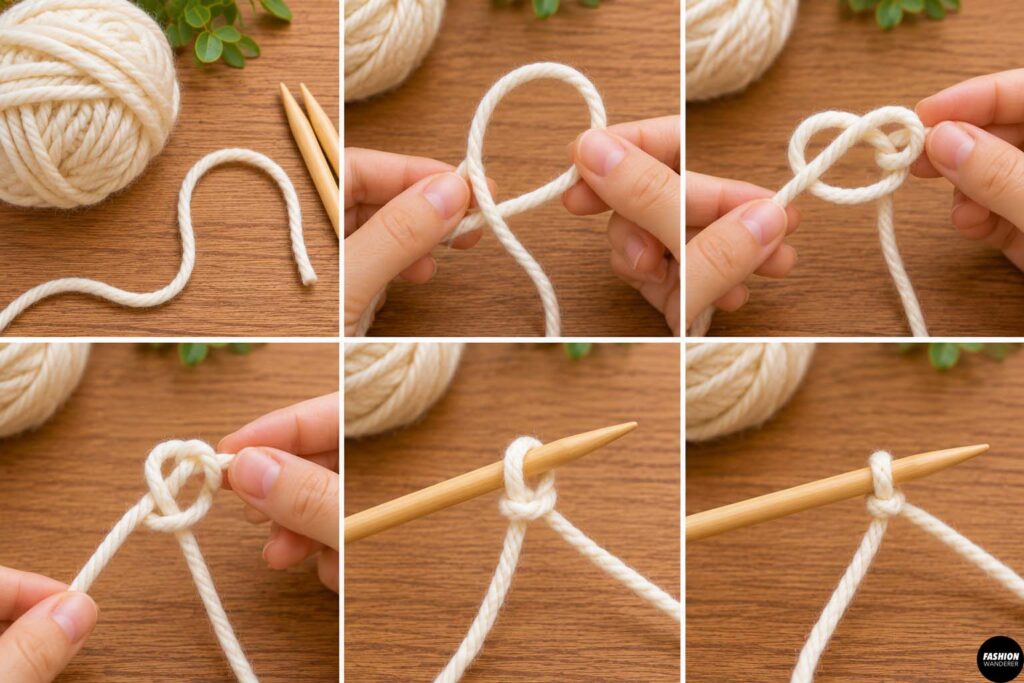
Pull approximately 8 inches of yarn from the ball.
Create a loop with the yarn and pull another small loop through the center.
Place the loop onto one knitting needle.
Gently pull the yarn tail and working yarn until the loop fits comfortably around the needle.
Do not tighten the slip knot too much. The loop should slide easily along the needle.
This slip knot counts as your first stitch.
Step 3: Cast On Your Stitches
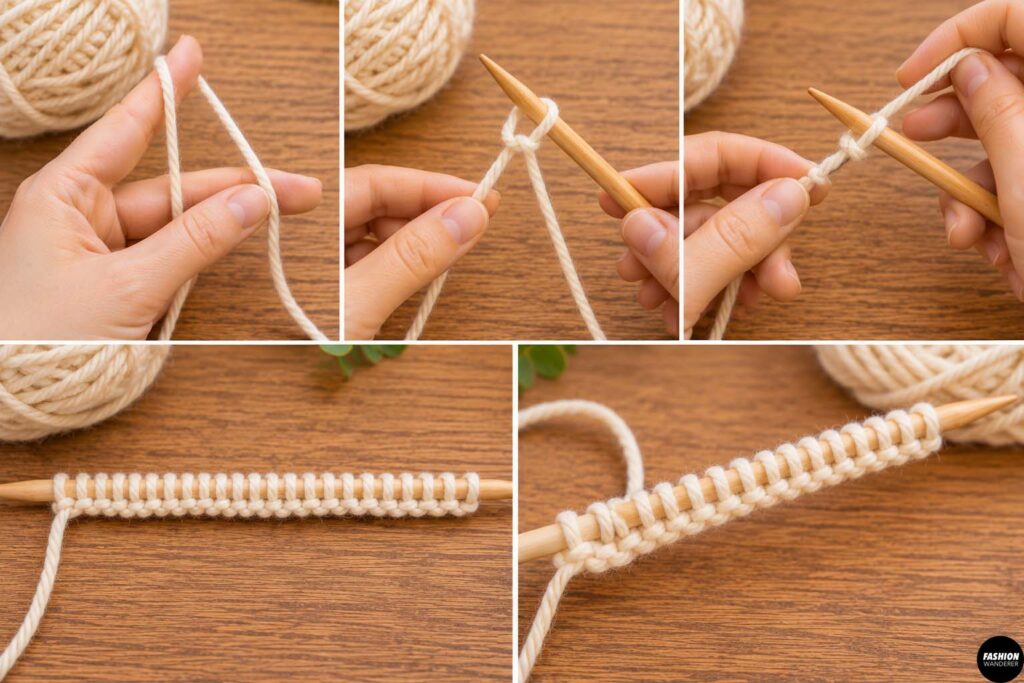
For a scarf approximately 7 to 8 inches wide, cast on around 24 to 28 stitches.
The exact number will depend on your yarn thickness and knitting tension.
Use the long-tail cast-on or simple backward-loop cast-on method.
For complete beginners, the backward-loop method is easy to learn, although the long-tail cast-on creates a stronger and neater edge.
Once the stitches are on your needle, spread them out slightly.
Make sure they are not extremely tight because you need enough room to insert your second needle.
Step 4: Knit the First Row
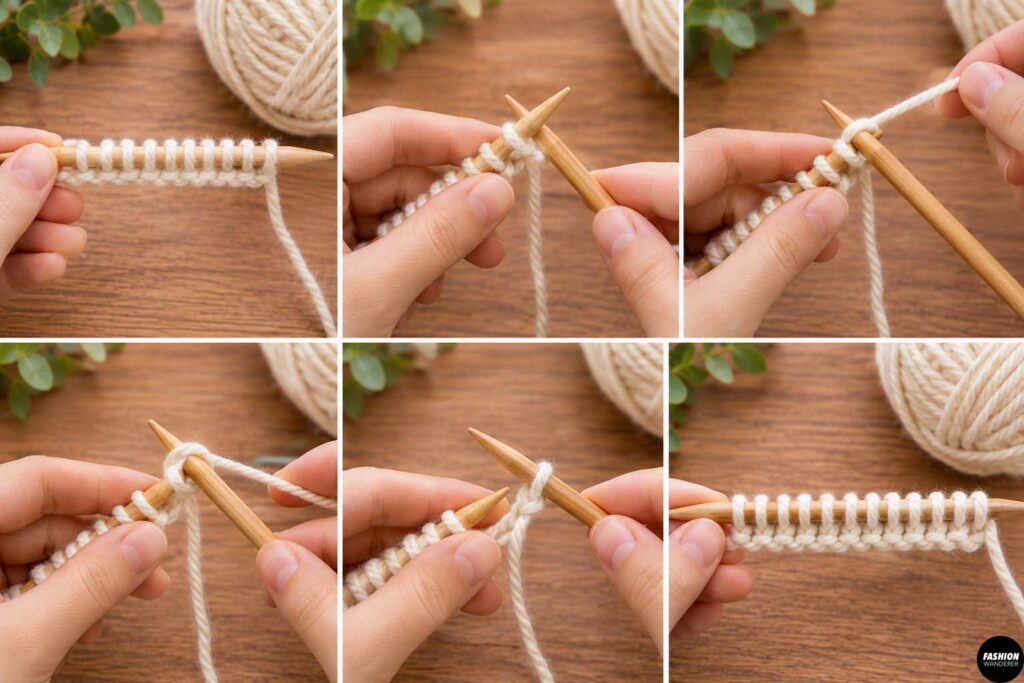
Hold the needle containing the stitches in your left hand.
Hold the empty needle in your right hand.
Insert the right needle through the front of the first stitch from left to right.
Wrap the working yarn around the right needle.
Use the right needle to pull the new loop through the original stitch.
Slide the original stitch off the left needle.
You have completed one knit stitch.
Repeat this process across the entire row.
When you reach the end, all of your stitches should now be on the right needle.
Step 5: Turn Your Work
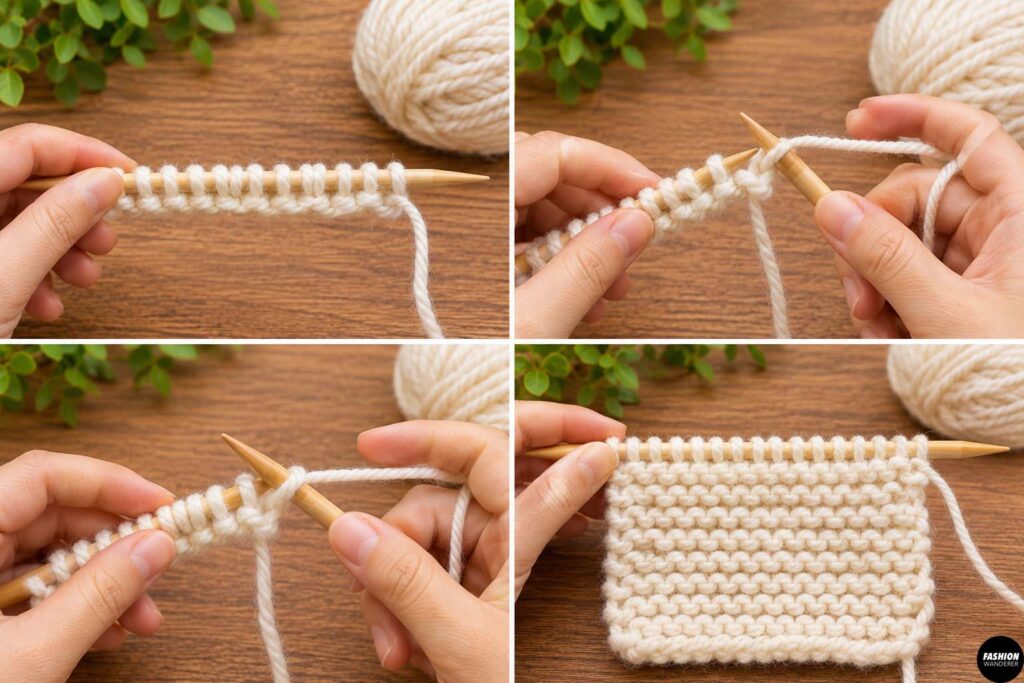
Switch the needle containing the stitches back to your left hand.
Place the empty needle in your right hand.
You are now ready to work the next row.
Knit every stitch across again.
Because you are knitting every row, your scarf will automatically create a textured garter stitch pattern.
This is one of the easiest knitting patterns for beginners because there is no need to remember complicated stitch sequences.
Step 6: Continue Knitting the Scarf
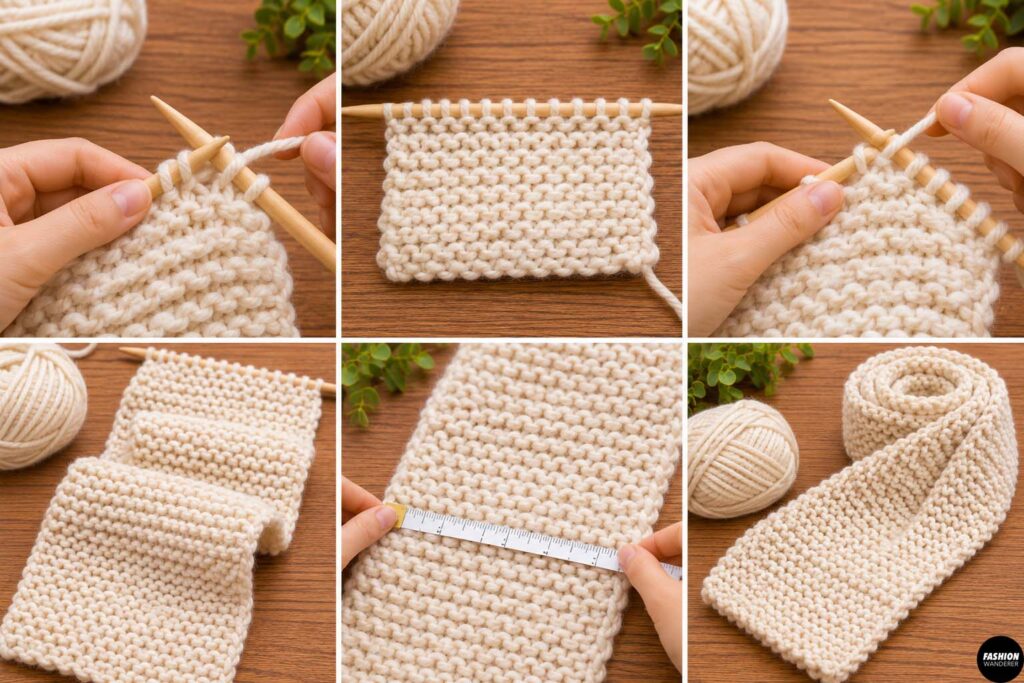
Continue repeating the same process:
Turn your work.
Knit every stitch across.
Turn again.
Knit every stitch across.
Continue until the scarf reaches approximately 60 to 65 inches long.
Use a measuring tape occasionally to check your progress.
Do not worry if your first few rows look slightly uneven. Beginner knitting often becomes more consistent as your hands become comfortable holding the yarn and needles.
Try to keep your tension relaxed.
If your stitches are extremely tight, loosen your grip slightly.
If they are very loose, gently tighten the yarn after forming each stitch.
Step 7: Check Your Scarf Width
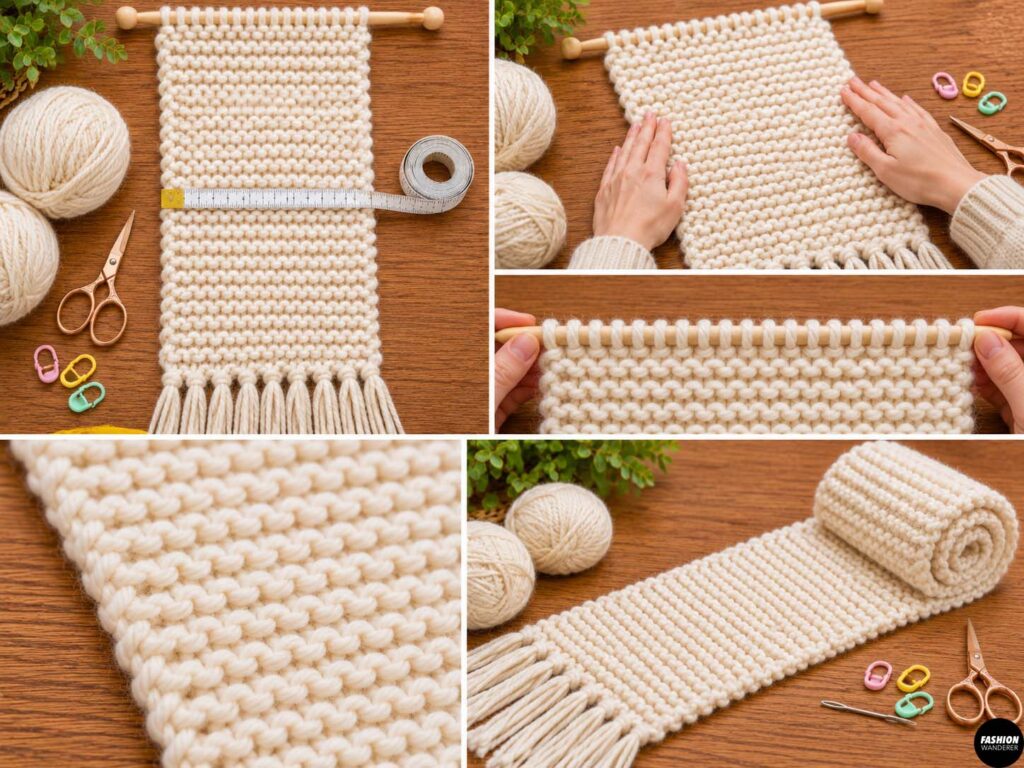
After knitting several inches, lay your scarf flat on a table.
Check the edges.
If your scarf seems to be getting wider, you may accidentally be creating extra stitches.
Count the stitches on your needle.
You should still have the same number you originally cast on.
If you started with 26 stitches, for example, you should continue having 26 stitches throughout the project.
Counting occasionally is one of the easiest ways to catch mistakes early.
Step 8: Bind Off
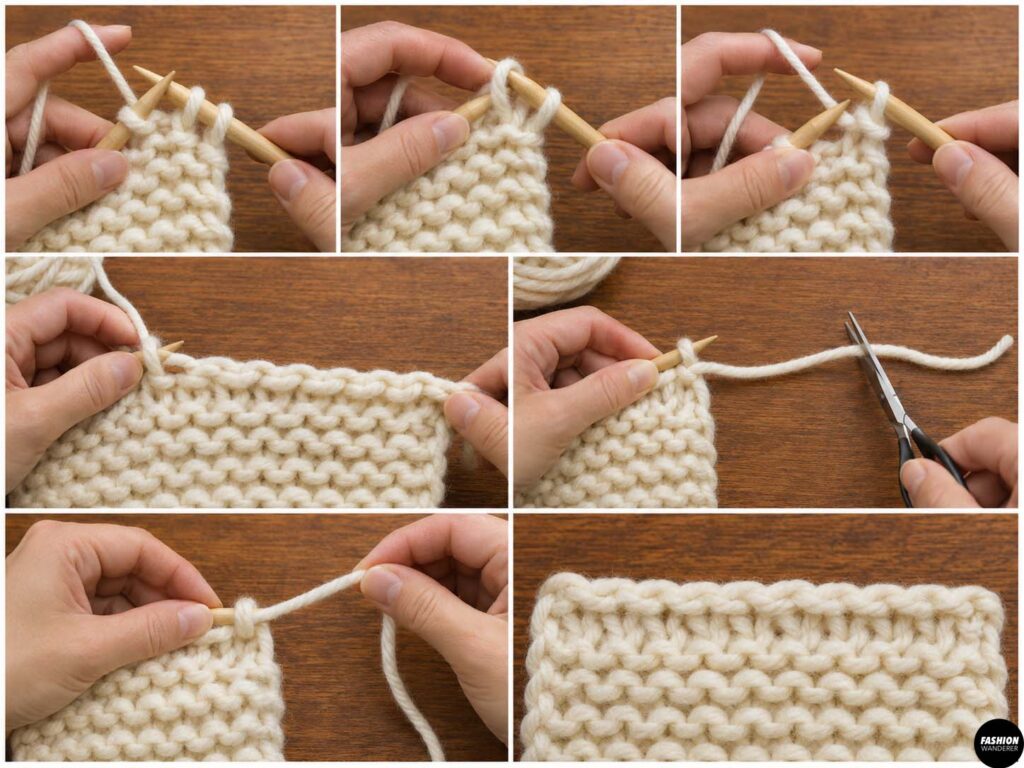
Once your scarf reaches your preferred length, it is time to bind off.
Knit the first two stitches normally.
You should now have two stitches on your right needle.
Use the left needle to lift the first stitch over the second stitch and off the needle.
Knit another stitch.
Again, lift the previous stitch over the new stitch.
Continue this process across the entire row.
When only one stitch remains, cut the yarn leaving approximately a 6-inch tail.
Pull the yarn tail through the final loop and gently tighten.
Your scarf is now secure.
Step 9: Weave In the Yarn Ends
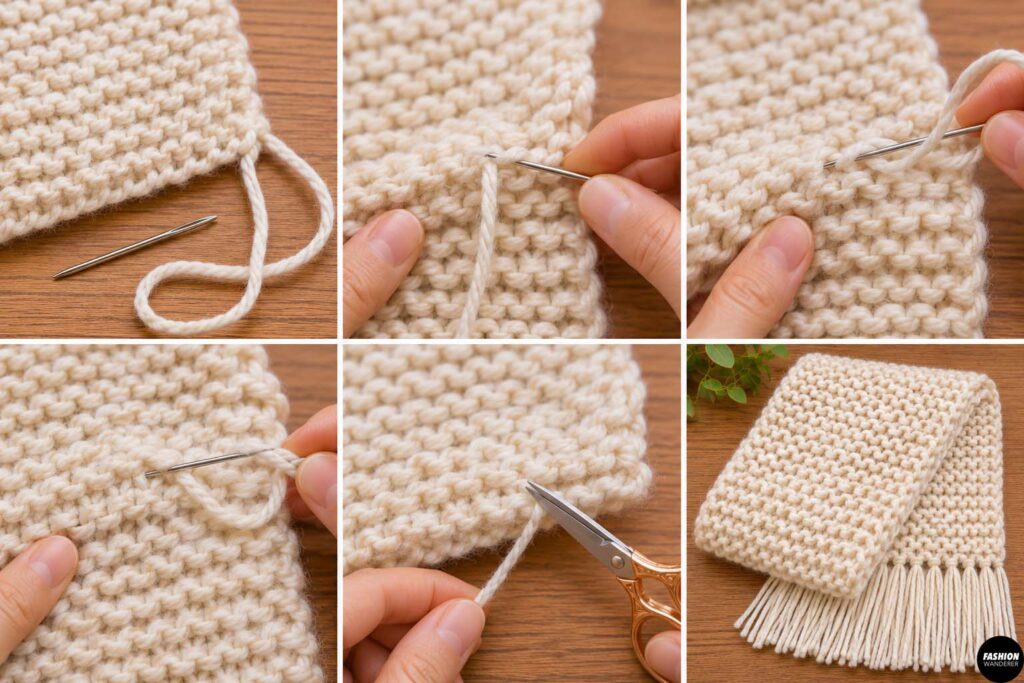
Thread the yarn tail through a yarn needle.
Weave the tail through several nearby stitches on the wrong side of the scarf.
Change direction once or twice to help secure the yarn.
Trim the excess.
Repeat with the yarn tail at the beginning of the scarf.
Because garter stitch looks nearly identical on both sides, you do not have to worry much about choosing a front or back.
Step 10: Add Optional Fringe
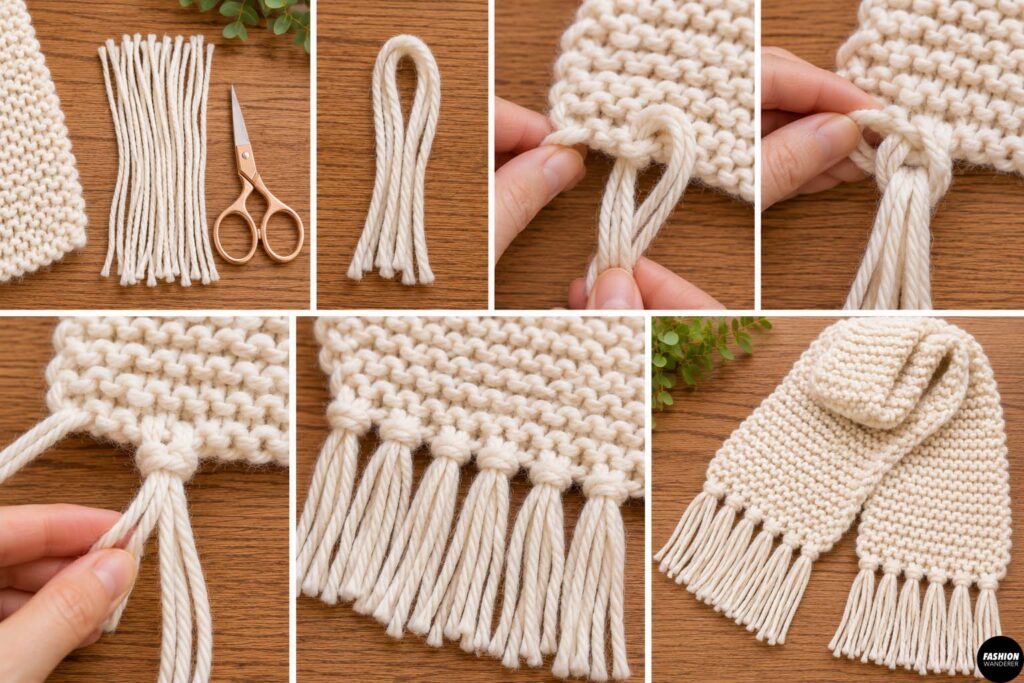
For an extra cozy finish, add fringe to both ends of the scarf.
Cut several pieces of yarn approximately 10 to 12 inches long.
Group two or three strands together.
Fold them in half.
Use a crochet hook or your fingers to pull the folded loop through the edge of the scarf.
Pull the loose yarn ends through the loop.
Tighten gently.
Repeat evenly across both ends.
Trim the fringe so all strands are approximately the same length.
Beginner Knitting Tips
If you drop a stitch, do not panic. Place a stitch marker near the area so the loop does not unravel further.
Keep your first scarf simple rather than trying to make every stitch perfect.
Your knitting tension will naturally improve with practice.
Choose yarn that feels pleasant in your hands, and take breaks if your fingers or wrists become tired.
You can also make the scarf more interesting by switching yarn colors every 10 to 20 rows.
Easy Ways to Customize Your Knitted Scarf
Once you understand the basic pattern, you can make several variations.
Try using two colors for a striped scarf, a neutral oatmeal yarn for a minimalist look, or a chunky cream yarn for an oversized winter scarf.
You can also make the scarf narrower for a lightweight accessory or wider for a blanket-style wrap.
This simple garter stitch scarf is one of the best beginner knitting projects because it teaches the basic movements you will use in many future patterns.
After finishing this scarf, you will already understand how to cast on, knit stitches, turn rows, bind off, and finish yarn ends.
That makes this easy knitted scarf pattern for absolute beginners a great first step into knitting—and a cozy handmade accessory you can actually wear when you’re finished.