
Hoodies are cozy, casual, and timeless—but sometimes they can feel a little too plain. If you’re looking for an easy, budget-friendly way to transform your everyday hoodie into a chic, feminine statement piece, lace trim is your best friend.
Adding lace instantly softens the sporty vibe of a hoodie, giving it that coquette meets casual energy—perfect for campus, coffee dates, or a weekend stroll. This project requires minimal sewing skills and can be done in under an hour.
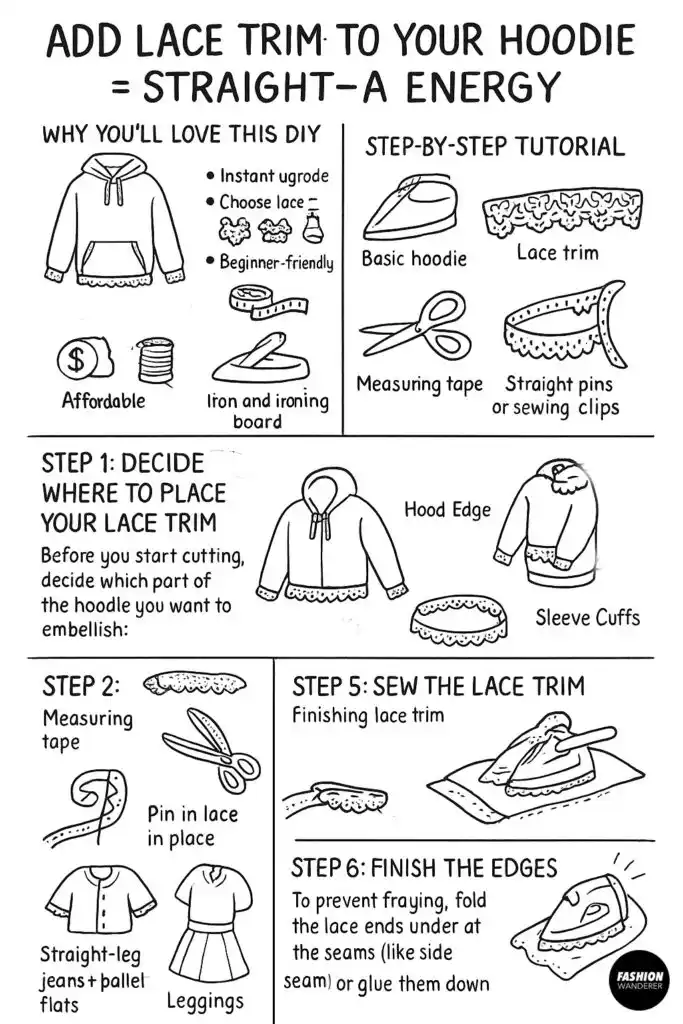
In this step-by-step tutorial, you’ll learn how to add lace trim to your hoodie’s hem, sleeves, or hood. Whether you’re going for subtle detail or full-on romantic vibes, this DIY will take your hoodie from “basic” to Straight-A energy.
Why You’ll Love This DIY
- Instant Upgrade: A simple trim makes a hoodie look stylish and intentional.
- Customizable: Choose from delicate lace, bold crochet trim, or colorful scalloped lace to match your vibe.
- Beginner-Friendly: No advanced sewing needed—just a straight stitch (or even fabric glue for a no-sew version).
- Affordable: Lace trims are inexpensive and available in every craft store or online.
Step-by-Step Tutorial

Materials You’ll Need

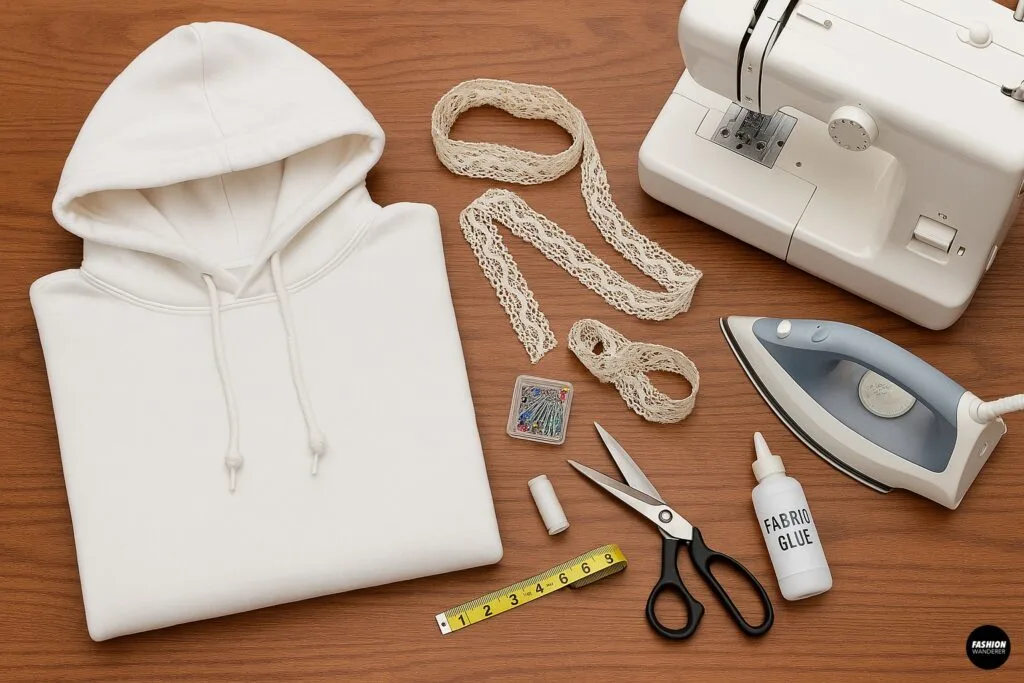
- 1 basic hoodie (any color works, oversized is especially cute)
- Lace trim of your choice (measure around hem, sleeves, or hood)
- Fabric scissors
- Measuring tape
- Straight pins or sewing clips
- Sewing machine (or needle and thread)
- Matching thread
- Iron and ironing board
- Optional: Fabric glue (if you prefer a no-sew version)
Step 1: Decide Where to Place Your Lace Trim

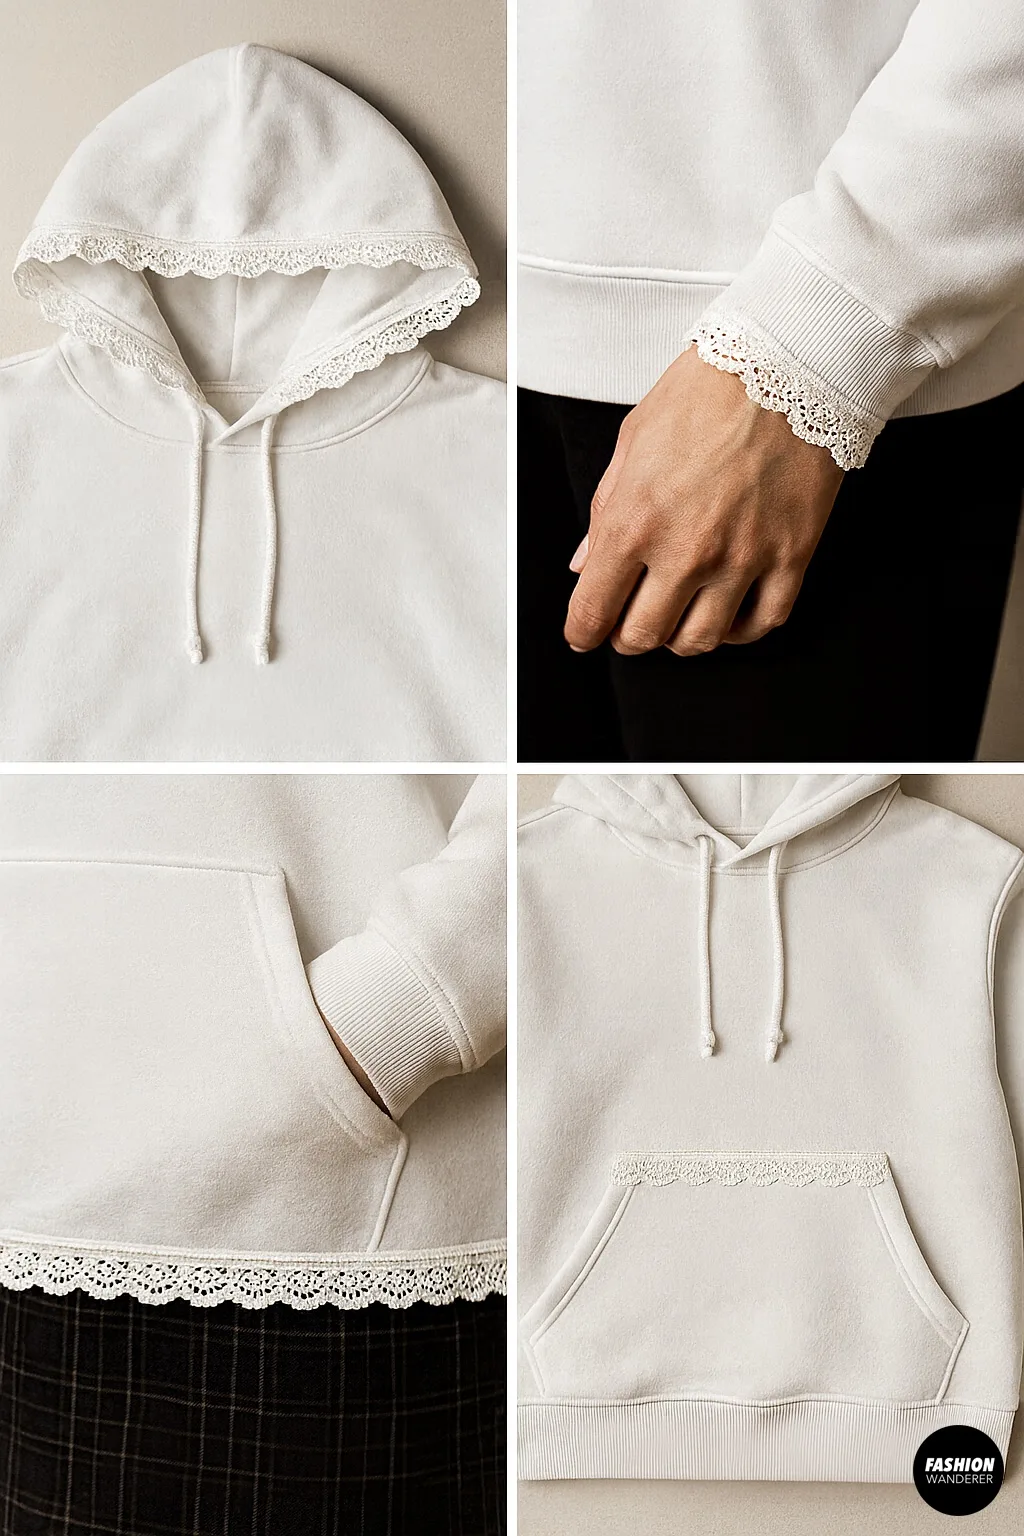
Before you start cutting, decide which part of the hoodie you want to embellish:
- Hood Edge: Adds a delicate halo around your face.
- Sleeve Cuffs: Perfect for a peek-a-boo detail when you move your arms.
- Hemline: Creates a feminine finish that pairs well with skirts or leggings.
- Kangaroo Pocket: Adds a cute accent to the front.
👉 Pro Tip: Start with one section (like the hem) before moving on to multiple areas. Too much lace can overwhelm the hoodie.
Step 2: Measure Your Hoodie

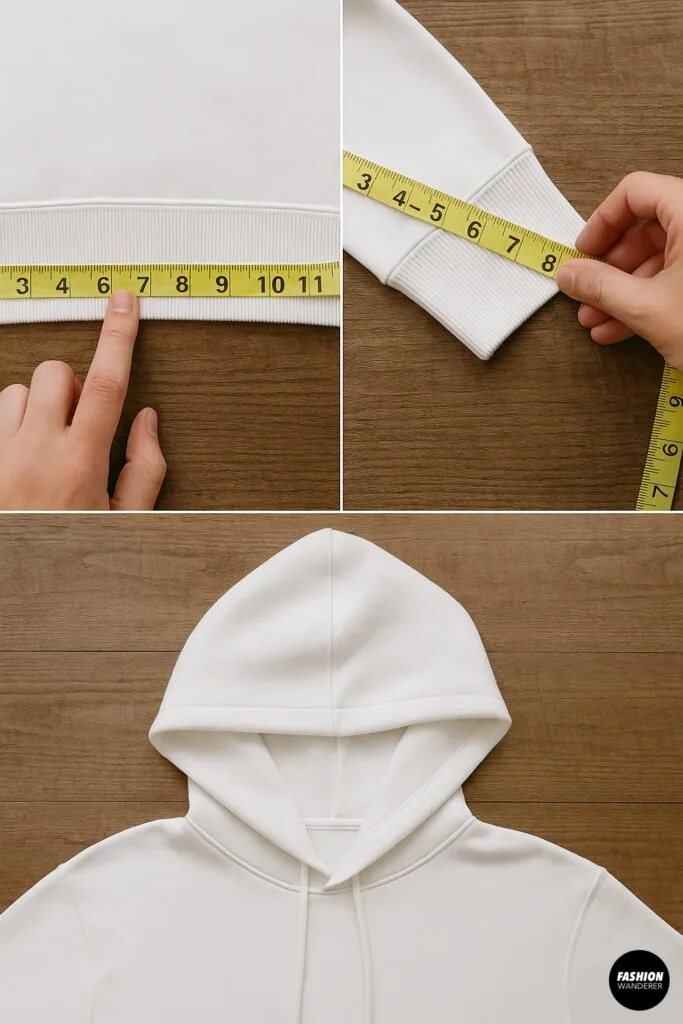
Use your measuring tape to measure the area you’re trimming. Add 1–2 extra inches of lace for seam allowance.
- Hemline: Measure all the way around the bottom.
- Sleeves: Measure each cuff separately.
- Hood: Measure along the outer edge.
Write these down so you don’t forget while shopping for lace.
Step 3: Cut Your Lace Trim

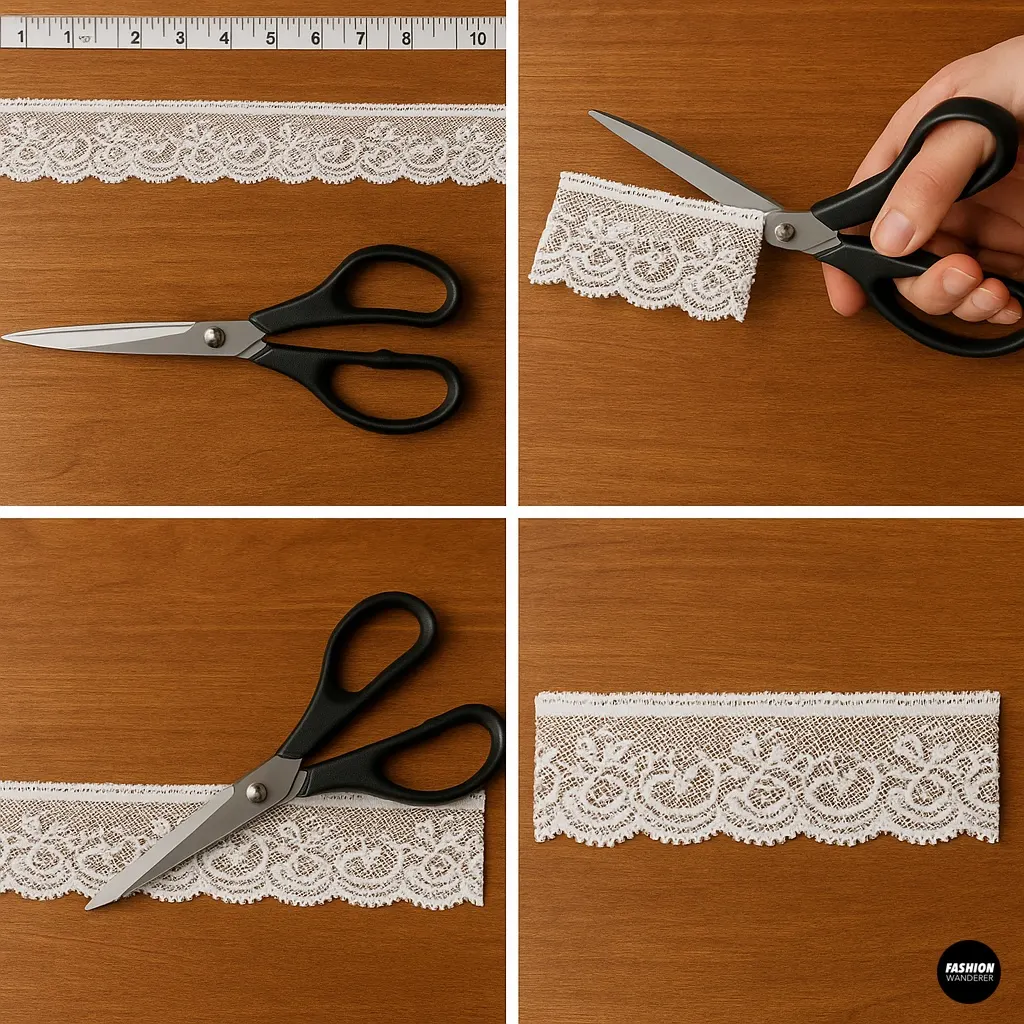
Lay your lace flat and cut to the measurements you recorded. Always add those extra inches so you can fold the edges under neatly.
👉 Pro Tip: If your lace has a decorative edge, make sure you cut along the plain side so the pretty scallops remain intact.
Step 4: Pin the Lace in Place

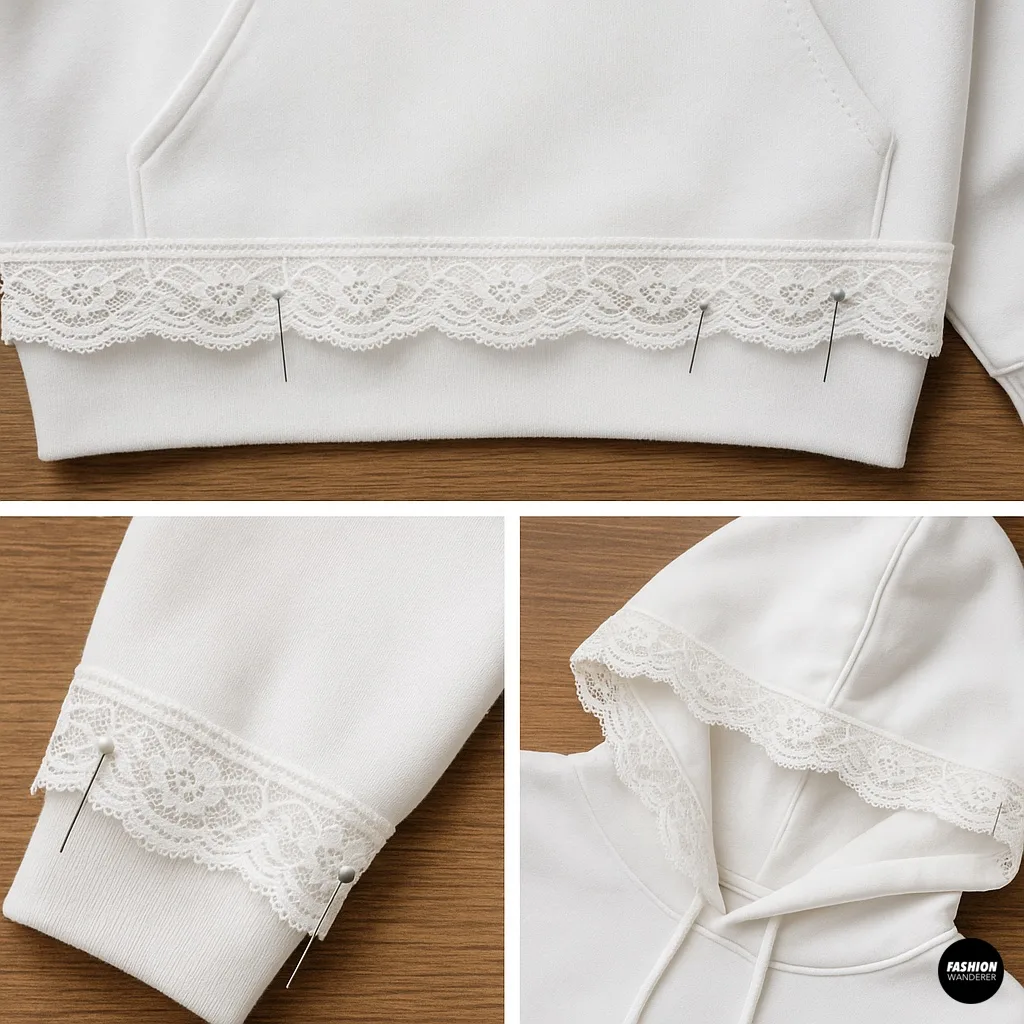
Lay your hoodie on a flat surface. Align the lace trim along the area you’re decorating. Pin or clip it in place every 2–3 inches to keep it secure.
- For hems, align the lace slightly below the hoodie fabric so the lace peeks out.
- For sleeves, wrap the lace around evenly, ensuring both cuffs match.
- For the hood, gently curve the lace to follow the shape.
Step 5: Sew the Lace Trim

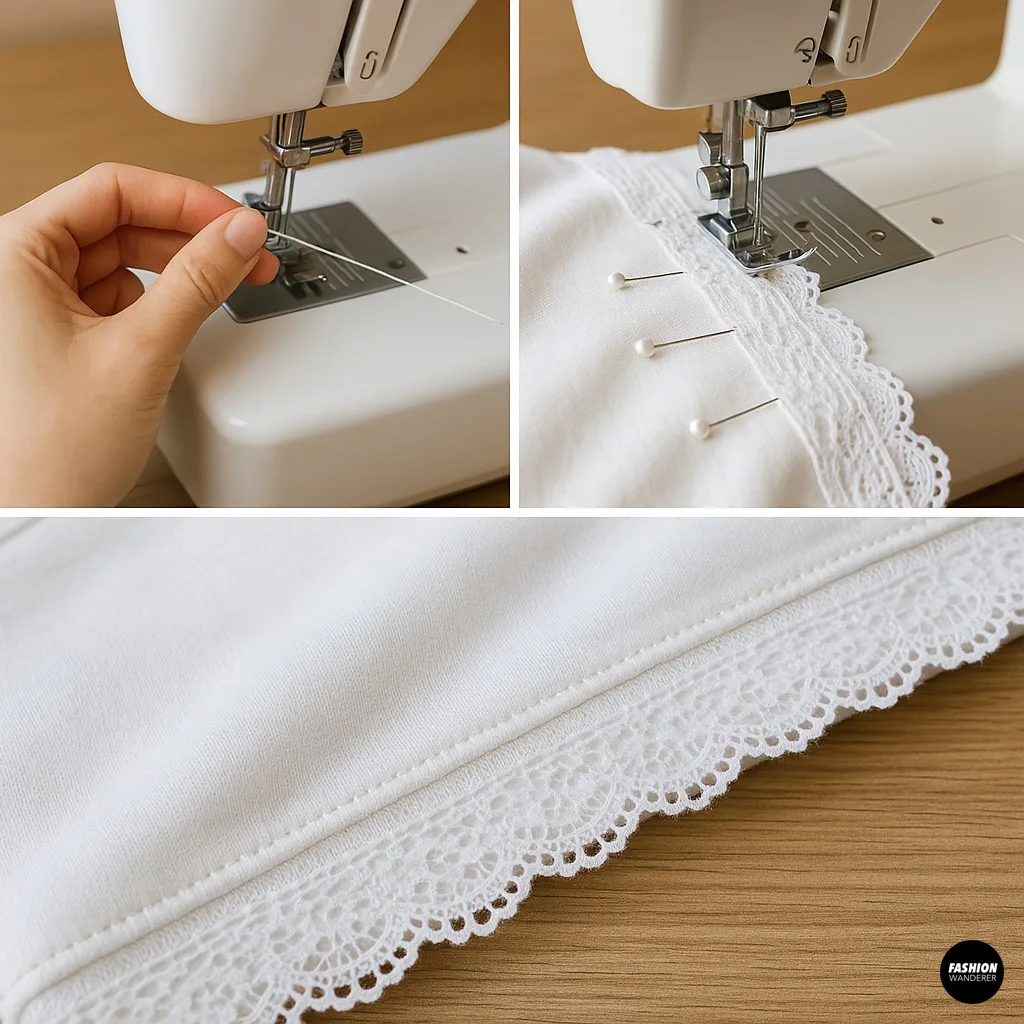
Now it’s time to stitch!
- Thread your machine (or needle) with matching thread.
- Use a straight stitch close to the lace’s inner edge.
- Sew slowly, removing pins as you go.
- Backstitch at the beginning and end to secure.
👉 Beginner Option: If sewing feels intimidating, use fabric glue instead. Simply apply a thin line of glue along the edge of your hoodie, press the lace into place, and let it dry completely.
Step 6: Finish the Edges

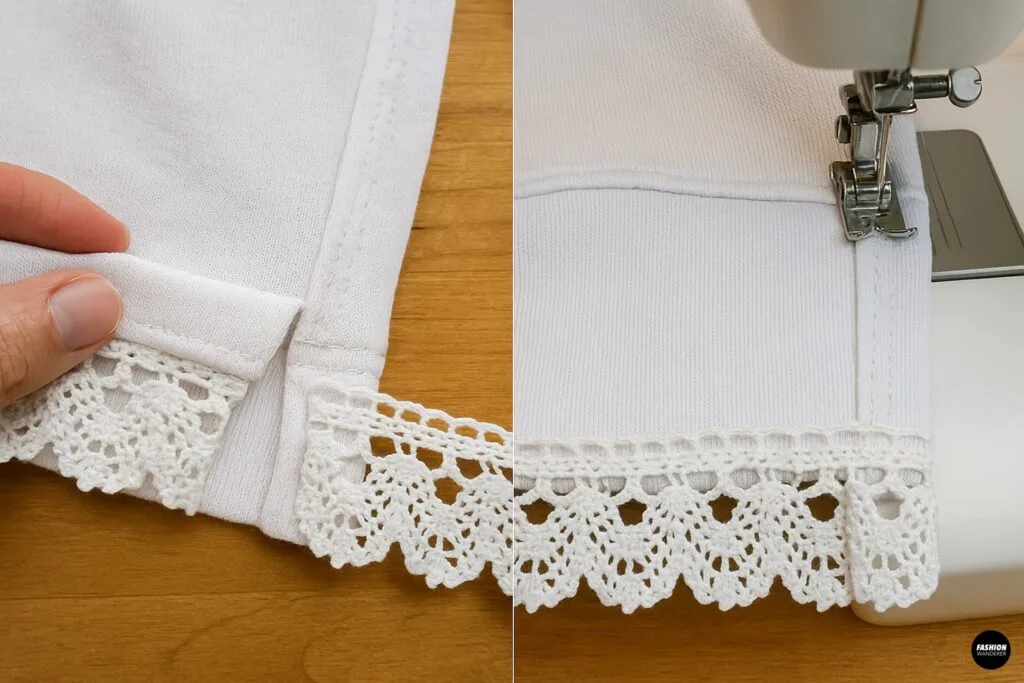
To prevent fraying, fold the lace ends under at the seams (like the side seam of your hoodie hem). Sew or glue them down neatly. This gives your project a polished, professional look.
Step 7: Press and Style

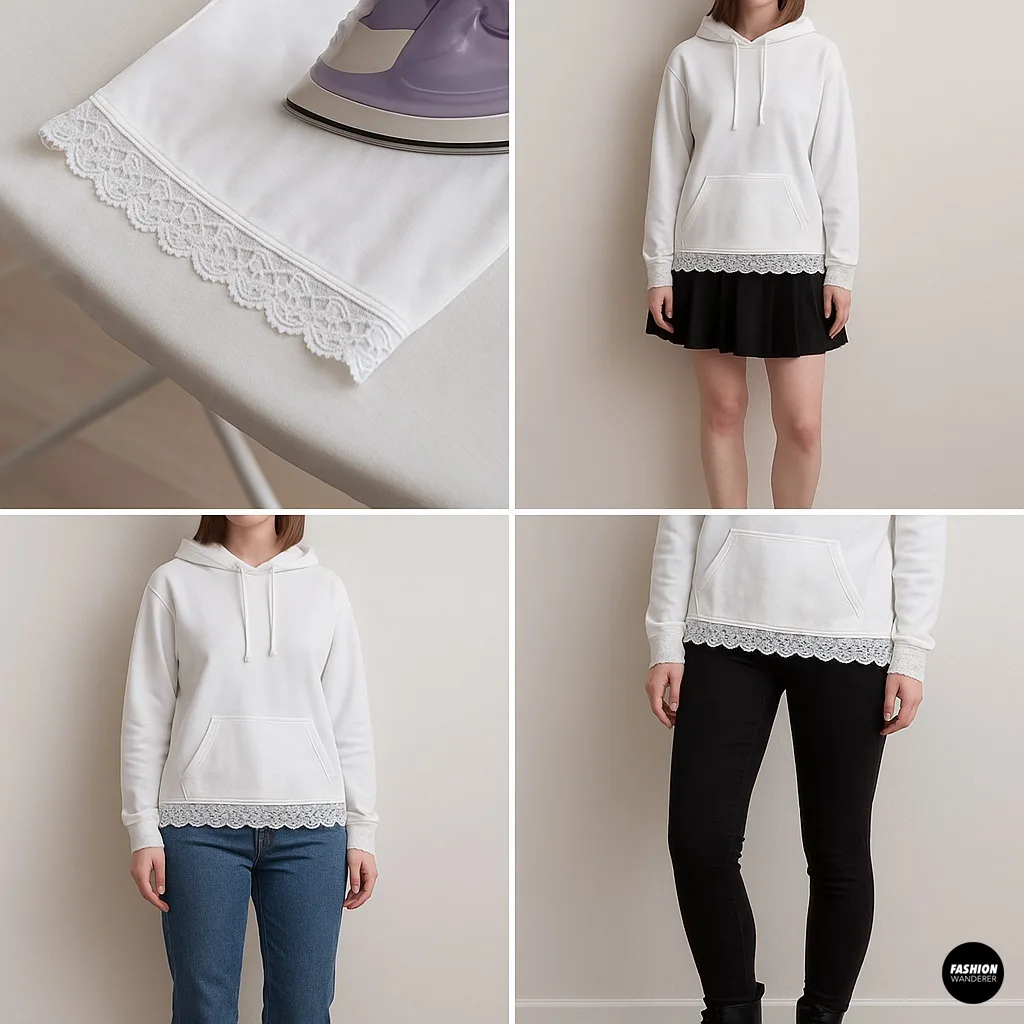
Iron the lace lightly to smooth out wrinkles and help it lay flat. Once done, your hoodie is ready to wear!
Pair your lace-trimmed hoodie with:
- Pleated skirt + sneakers for a schoolgirl vibe.
- Straight-leg jeans + ballet flats for casual chic.
- Leggings + chunky boots for contrast.
Style Variations


Want to take it further? Here are a few creative spins:
- Double Trim: Add lace to both the hem and sleeves for a balanced look.
- Color Contrast: White lace on a black hoodie = dramatic coquette vibes.
- Ruffled Lace: Choose gathered lace trim for extra volume and romantic energy.
- Layered Effect: Sew lace on top of ribbon or bias tape for a bold statement.
Care Tips
- Wash your lace-trim hoodie on delicate cycle or hand wash to protect the trim.
- Avoid tumble drying—air dry flat to keep lace intact.
- If lace starts to fray, apply a tiny bit of clear nail polish to the raw edge.
Common Mistakes to Avoid
- Not Measuring Properly: Always double-check your measurements before cutting lace.
- Skipping the Pinning Step: Lace can shift easily, so pinning is essential for clean results.
- Using Too Much Glue: If you go the no-sew route, apply sparingly—excess glue can stiffen the fabric.
Final Thoughts


Adding lace trim to a hoodie is one of those why didn’t I do this sooner? DIY projects. It’s quick, affordable, and gives your hoodie that mix of comfy and polished that screams Straight-A energy. Whether you’re dressing for class, brunch, or just want a cute upgrade for your loungewear, this hack is a winner.
Next time you’re thrifting or cleaning out your closet, grab that basic hoodie and give it a lace glow-up. With just a few stitches (or a little glue), you’ll transform a plain sweatshirt into something effortlessly stylish—and totally unique.
Trendy, Affordable Sewing Patterns for All Sizes


Tie Shoulder Jumpsuit Pattern


Palazzo Pants Sewing Pattern


Pocket Overall Romper Pattern


Wrap Maxi Skirt Sewing Pattern


Tie Back Top Sewing Pattern