
Backpacks are a must-have for daily life—whether you’re heading to class, running errands, or packing light for a weekend adventure. But what if you don’t have one handy, or you want something fun, quick, and budget-friendly? Enter the 5-minute T-shirt backpack DIY.
With just a few cuts and knots, you can transform an old T-shirt into a fully functional drawstring-style backpack—no sewing machine required! This beginner-friendly project is perfect for upcycling worn-out tees, creating a lightweight bag for the gym, or even making personalized party favors.
Let’s dive into this step-by-step tutorial on how to make a backpack from a T-shirt in just minutes.
Why You’ll Love This DIY
- Fast & Easy: You can complete it in under 5 minutes.
- Eco-Friendly: Upcycle old tees instead of tossing them.
- No Sewing Required: Just scissors and a little creativity.
- Customizable: Choose tees with fun graphics or logos for a unique look.
- Lightweight & Portable: Perfect for books, snacks, or quick trips.
Where to Use Your T-Shirt Backpack

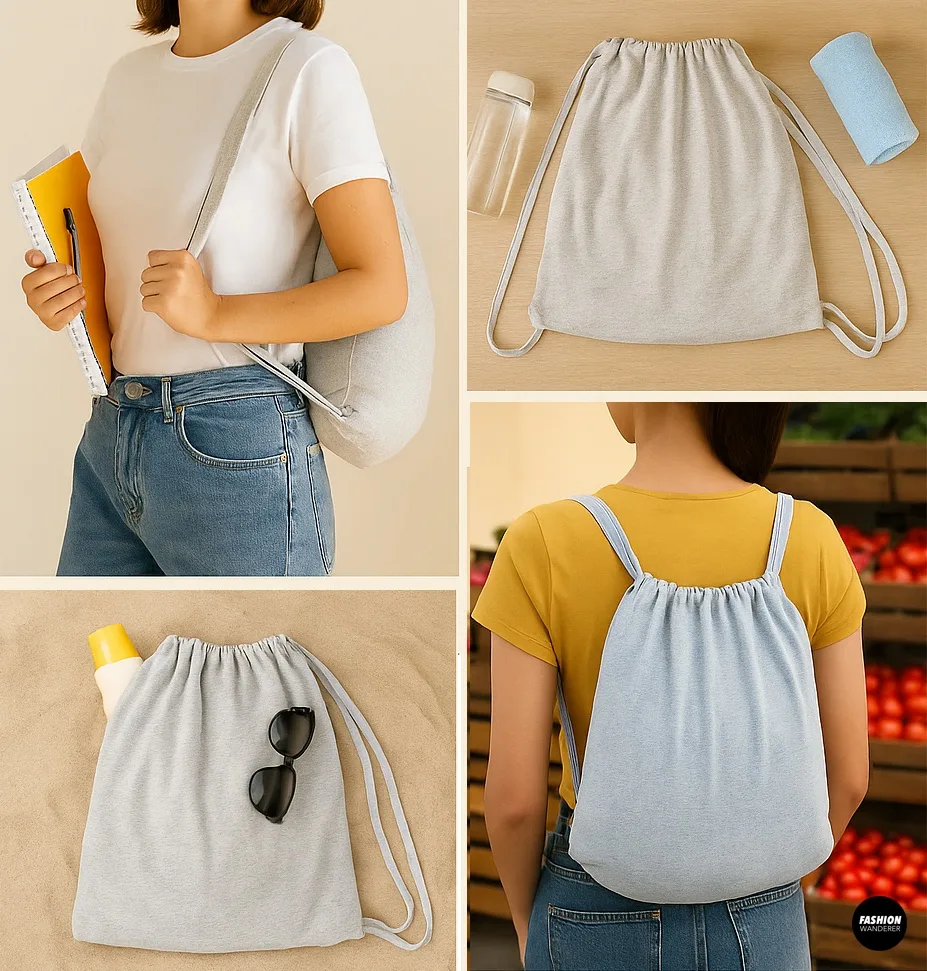
- School or College: Carry notebooks, pens, and small essentials.
- Gym Bag: Perfect for a water bottle and workout gear.
- Beach Day: Toss in sunscreen, a towel, and sunglasses.
- Farmers Market: Use it as a lightweight grocery tote.
- Travel: Pack it flat in your suitcase as an extra bag.
Materials You’ll Need

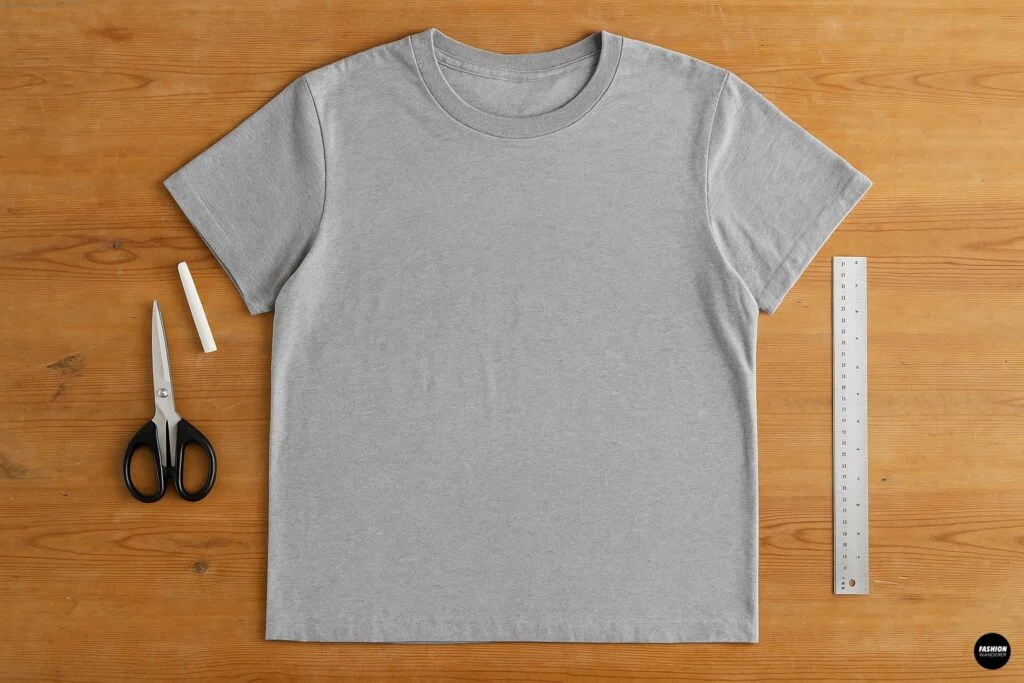
- 1 old T-shirt (the larger, the better)
- Sharp fabric scissors
- Ruler or measuring tape (optional)
- Chalk or washable marker (optional for neat lines)
Step-by-Step Tutorial

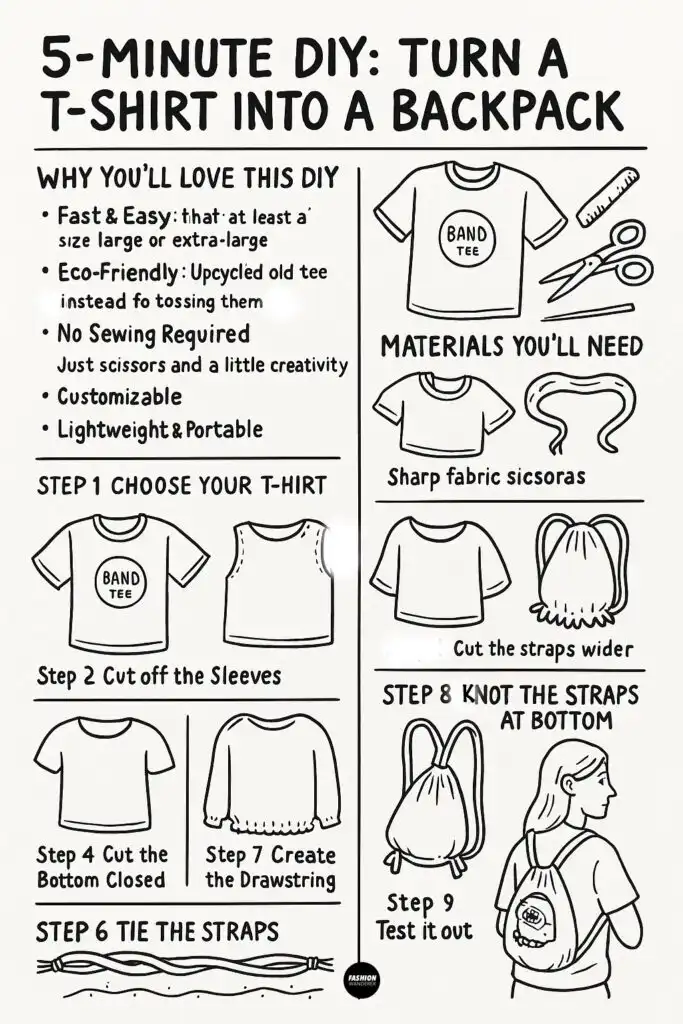
Step 1: Choose Your T-Shirt

Pick a T-shirt that’s at least a size large or extra-large. The bigger the shirt, the larger your backpack will be. Thicker cotton works best for durability, but even lightweight tees will hold small items.
👉 Pro Tip: Graphic tees make great statement backpacks—your favorite band tee could now carry your books!
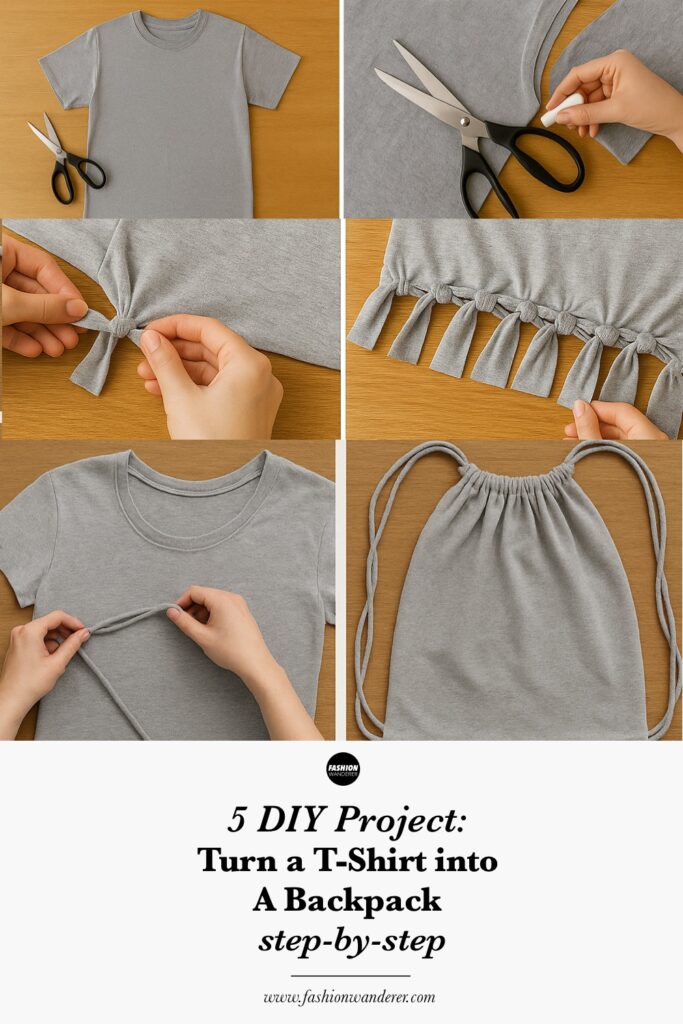
Step 2: Cut Off the Sleeves

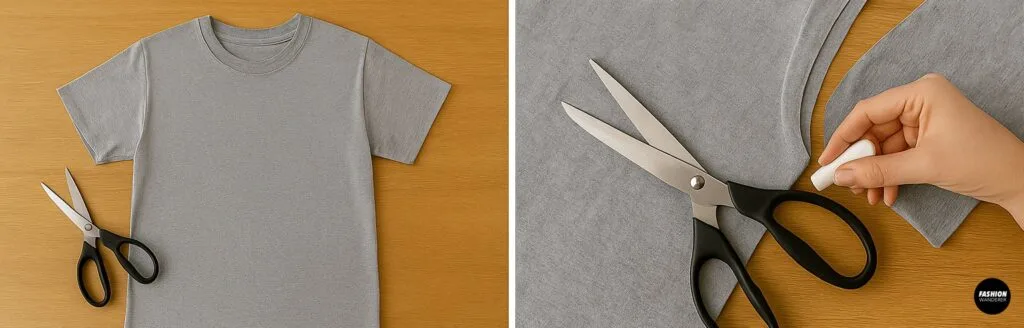
Lay your T-shirt flat on a table. Use fabric scissors to cut off both sleeves along the seam. This creates symmetrical armholes that will later serve as the bag’s opening.
If you want a cleaner look, trace along the sleeve seam with chalk before cutting.
Step 3: Cut the Neckline Wider

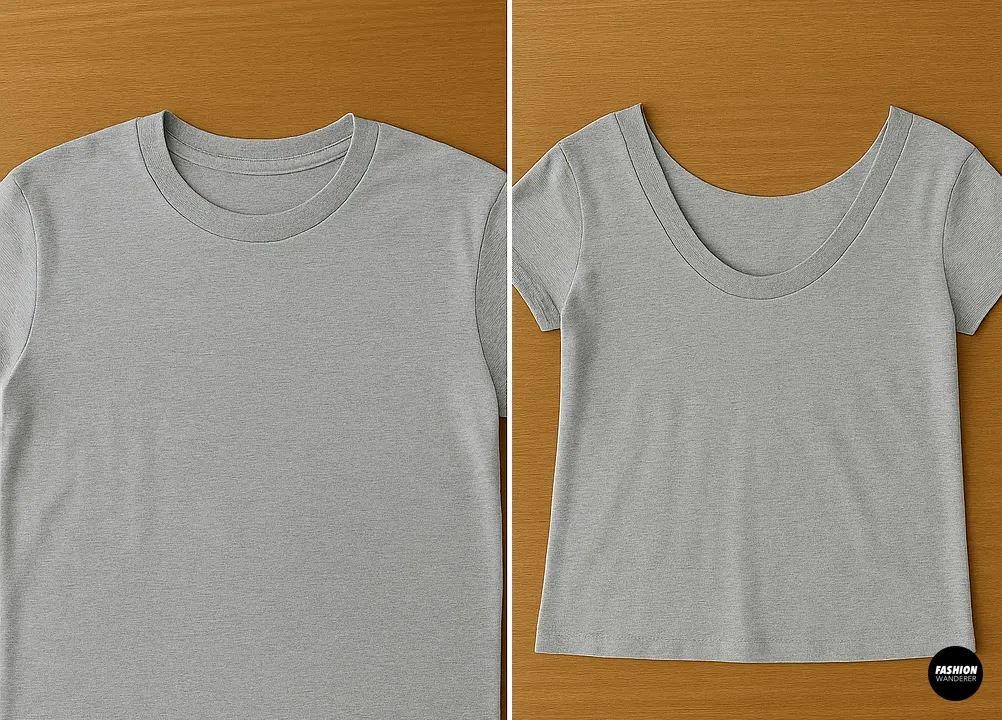
Next, cut around the neckline to widen the opening. This will become the top of your backpack where you’ll put things in. A wider scoop makes it easier to cinch the bag closed later.
Step 4: Turn the T-Shirt Inside Out

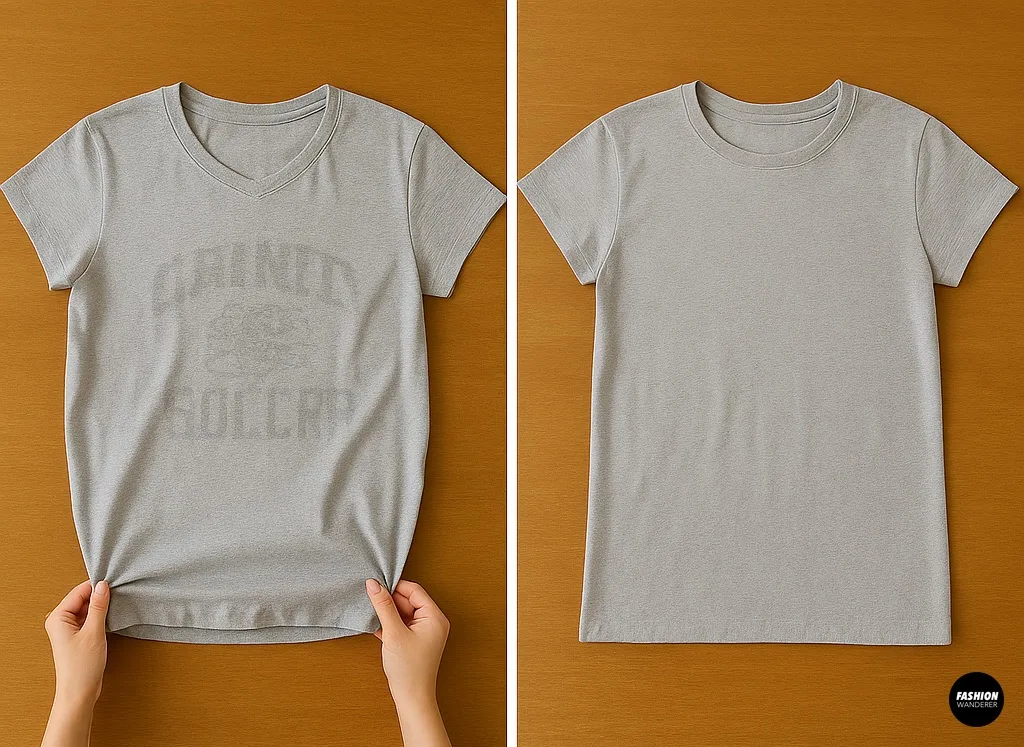
Flip the T-shirt so the graphic or outer side is facing in. This way, when you tie the bottom closed, the knots will be hidden inside the bag.
Step 5: Cut Slits Along the Bottom Hem

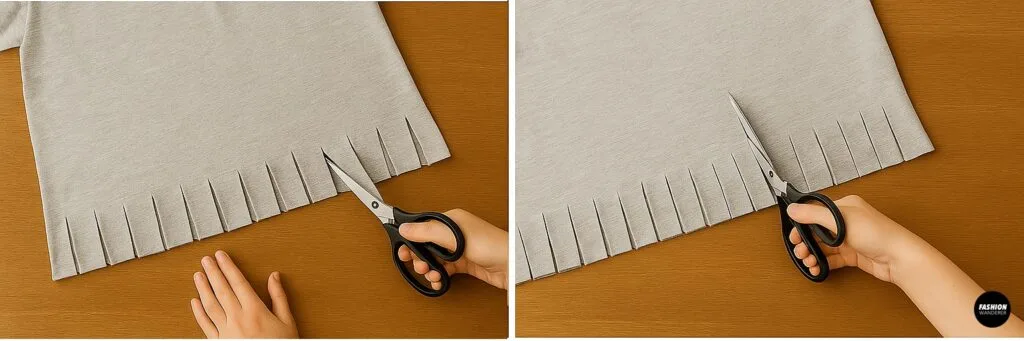
Along the bottom of the T-shirt, cut slits about 1 inch wide and 2–3 inches deep, all the way across the hem. You’ll now have a fringe of strips along both the front and back layers of the shirt.
Make sure you cut evenly so the strips line up between the front and back layers.
Step 6: Tie the Bottom Closed

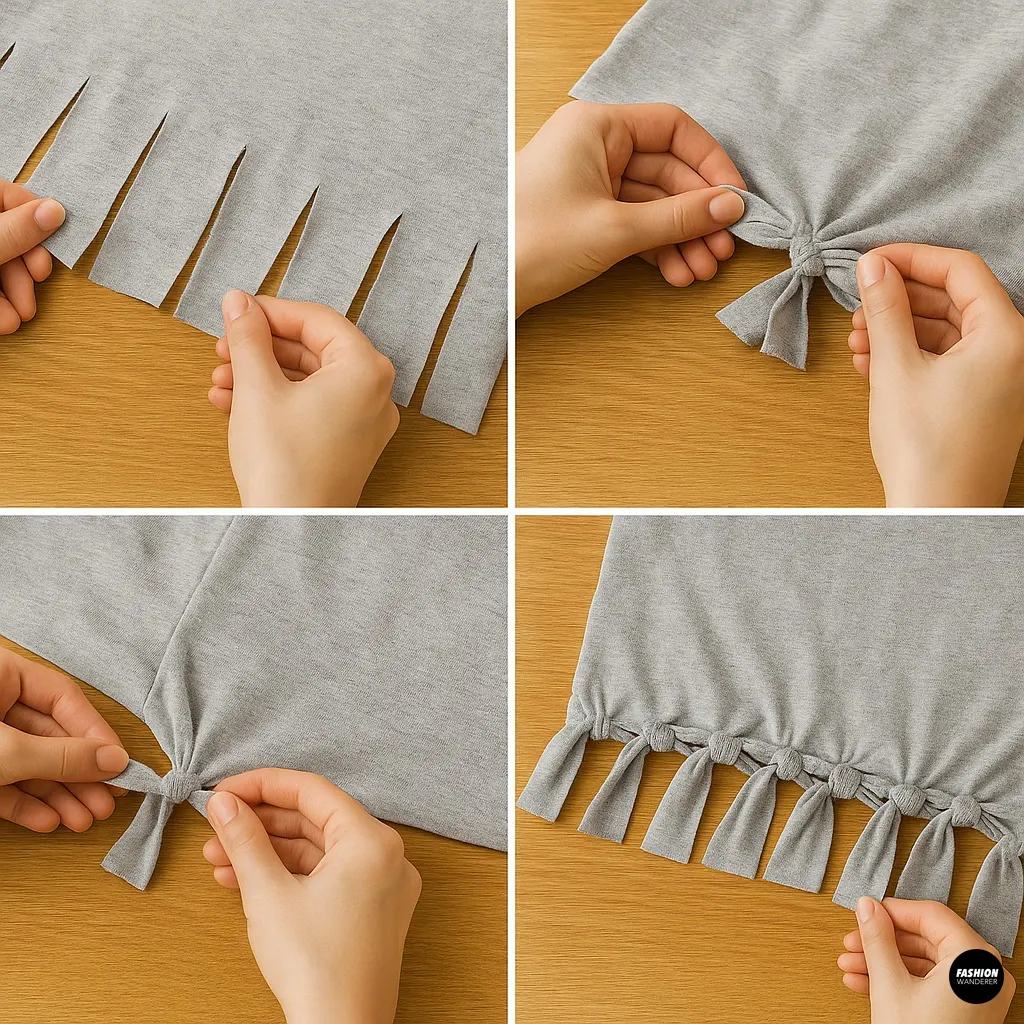
Now, tie each front strip to its matching back strip in a tight double knot. Continue across the bottom until all strips are tied. This closes the base of your backpack securely.
👉 Pro Tip: For extra durability, after tying front-to-back knots, tie diagonal knots (e.g., front strip 1 with back strip 2) to prevent gaps.
Step 7: Create the Drawstring Straps

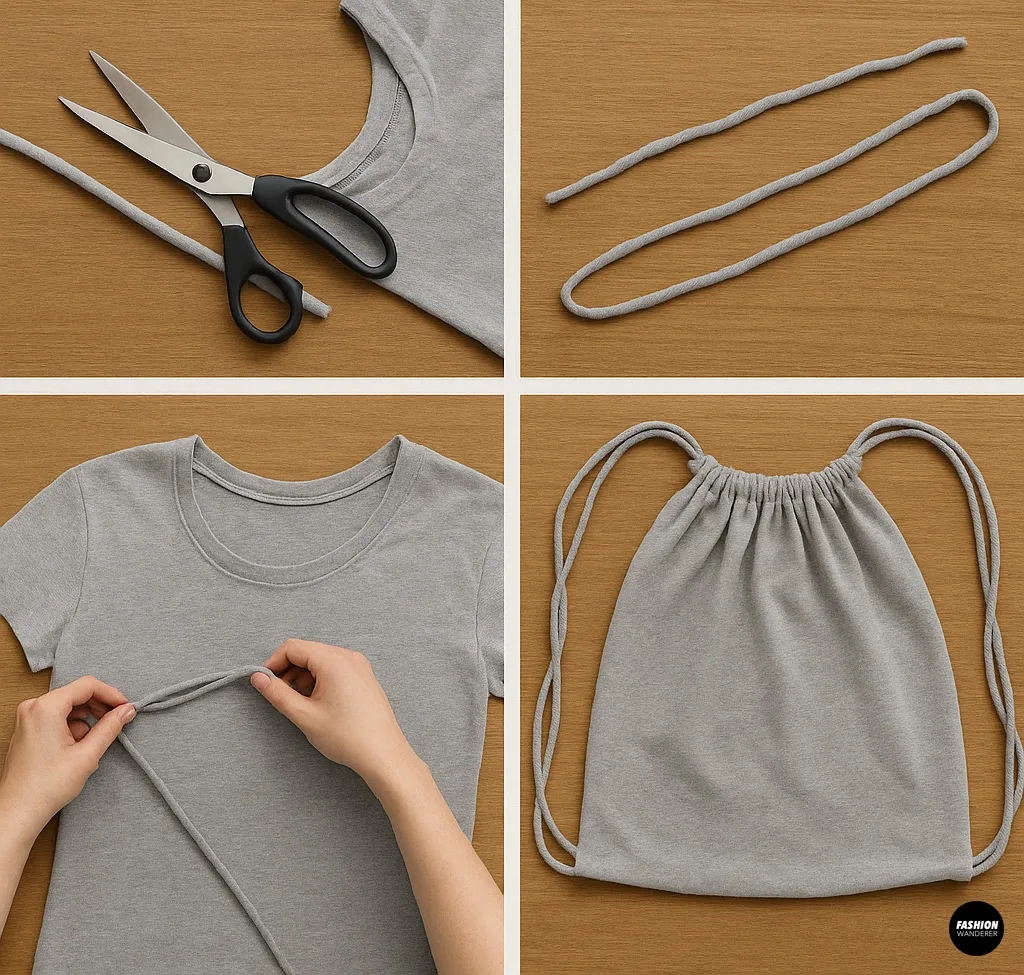
Here’s the genius part: You’ll use the armholes and neckline to create straps.
- Cut two long strips from the leftover sleeve fabric (or from the bottom hem of the T-shirt before you tied it). Each strip should be about 1–2 inches wide.
- Stretch the strips gently so they curl into rope-like strings.
- Thread one strip through the left armhole, across the neckline, and out the right armhole.
- Do the same with the second strip, but start on the opposite side.
You now have two loops running through the top of your bag—pulling the ends will cinch it closed like a drawstring.
Step 8: Knot the Straps at the Bottom


Turn your bag right-side out. Take the ends of each strap and tie them to the bottom corners of your backpack (where the side seams meet the fringe knots).
Double-knot each side for strength. Adjust strap length as needed.
Step 9: Test It Out
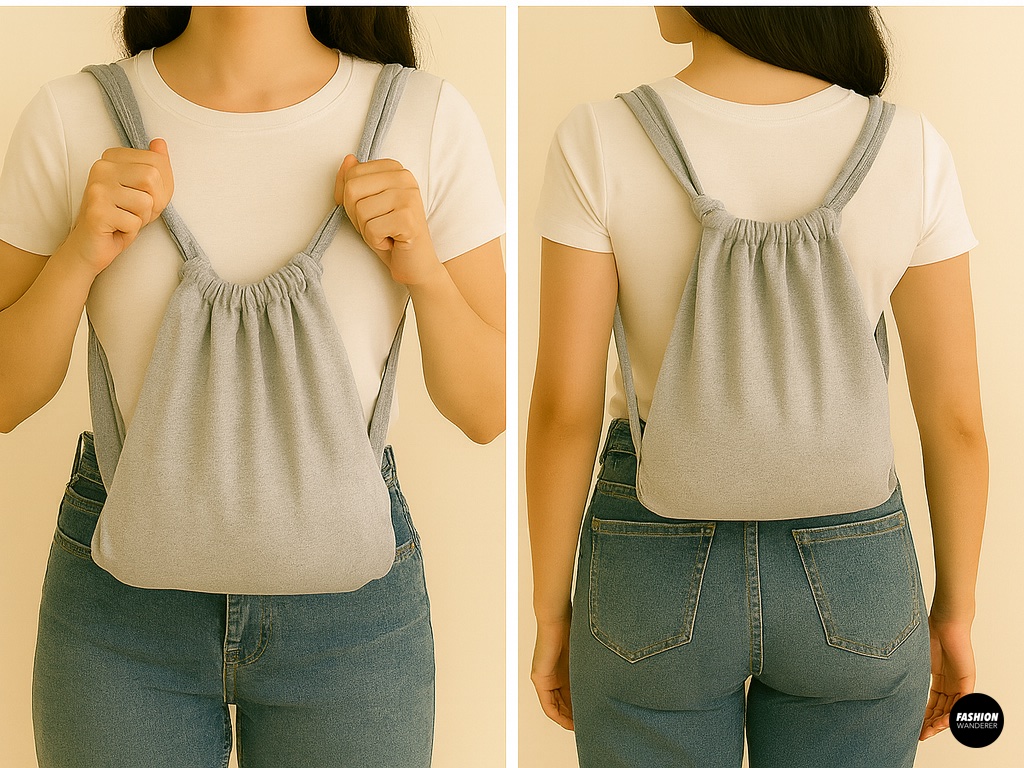

Pull on the straps to cinch the top closed. Slip the loops over your shoulders, and voilà—you now have a functional, upcycled backpack made entirely from a T-shirt!
Styling & Customization Ideas
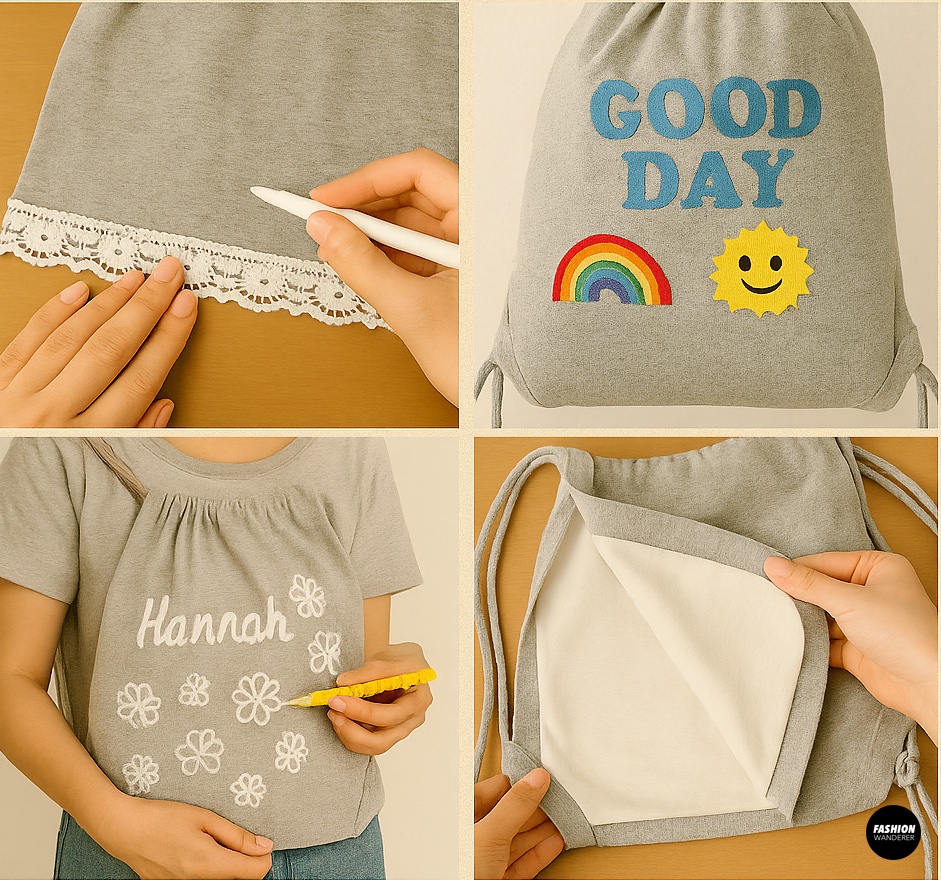

Want to make your DIY backpack stand out? Try these fun tweaks:
- Add Lace Trim: Sew or glue lace trim along the bottom for a coquette aesthetic.
- Fabric Paint Designs: Personalize by t-shirt painting your name, doodles, or stencils.
- Patchwork: Add iron-on patches or embroidery for a trendy look.
- Double Layer: Insert a lining from another old tee for extra strength.
- Beads & Charms: Thread beads onto the straps for a playful vibe.
Care Tips
- Wash Gently: Turn inside out and wash on a delicate cycle.
- Air Dry: Avoid high heat in the dryer to prevent the fabric from warping.
- Re-Tie if Needed: Knots may loosen after washing; retie them for security.
Common Mistakes to Avoid
- Using a Shirt That’s Too Small: The backpack will be tiny and won’t hold much.
- Cutting Strips Unevenly: This can cause gaps at the bottom. Take your time when cutting.
- Forgetting to Double Knot: Loose knots can unravel under weight. Always double tie.
- Thin Straps: If your fabric strips feel flimsy, braid two together for strength.
Final Thoughts

In just five minutes, you can turn an old T-shirt into a functional, stylish backpack. This DIY is perfect for beginners, eco-conscious makers, or anyone who loves quick fashion hacks.
Plus, it’s endlessly customizable—each backpack can reflect your personality, whether you keep it minimalist or dress it up with trims and designs.
So next time you’re about to donate or toss an old tee, stop! Grab your scissors and give it new life as a backpack. It’s the ultimate mix of sustainability, creativity, and convenience.
Trendy, Affordable Sewing Patterns for All Sizes


Tie Shoulder Jumpsuit Pattern


Palazzo Pants Sewing Pattern


Pocket Overall Romper Pattern


Wrap Maxi Skirt Sewing Pattern


Tie Back Top Sewing Pattern