
If you’ve been craving a trendy puffer vest but don’t want to splurge on store-bought fast fashion, this project is for you!
Instead of tossing that old duvet that’s taking up space in your closet, why not upcycle it into a stylish, warm, and on-trend bomber vest? Puffy vests are perfect for layering over hoodies, turtlenecks, or long-sleeve tees, making them a versatile year-round wardrobe staple.
In this tutorial, I’ll walk you through how to transform a duvet into a puffy bomber vest—no sewing pattern required. Whether you’re a beginner or an experienced sewist, you’ll love this budget-friendly, eco-friendly fashion hack.
Why Make a Bomber Vest from a Duvet?
Before diving into the steps, let’s talk about why this project is such a win:
- Sustainable Fashion – Upcycling keeps old bedding out of landfills and gives it a new life.
- Budget-Friendly – No need to buy expensive quilted or padded fabric—you already have it.
- Trendy & Functional – Bomber vests are back in style, blending comfort and cool streetwear vibes.
- Customizable – Adjust length, fit, and details like zippers or ribbing to match your style.
Materials You’ll Need

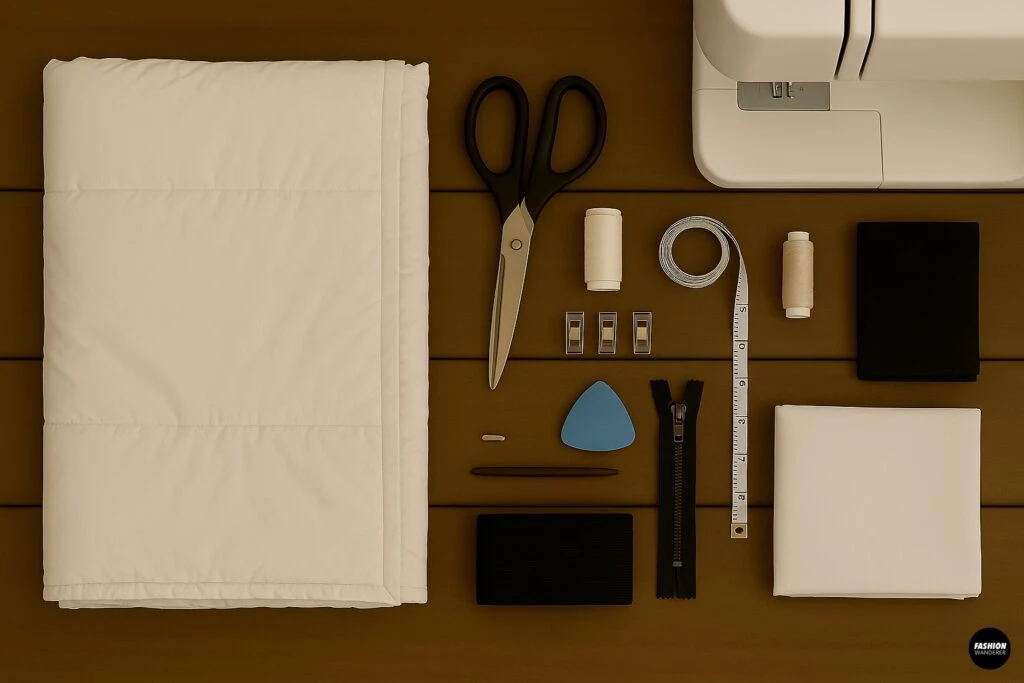
- 1 old duvet (preferably lightweight or medium weight for easier sewing)
- Fabric scissors or rotary cutter
- Measuring tape
- Tailor’s chalk or washable fabric marker
- Sewing pins or clips
- Sewing machine (or needle and thread for hand-sewing)
- Matching thread
- Zipper (front closure, around 16–22 inches depending on length)
- Ribbed knit fabric (for collar, armholes, and hem)
- Optional: lining fabric for a polished inside finish
DIY Old Duvet into Puffy Bomber Vest


Step 1: Prepare the Duvet

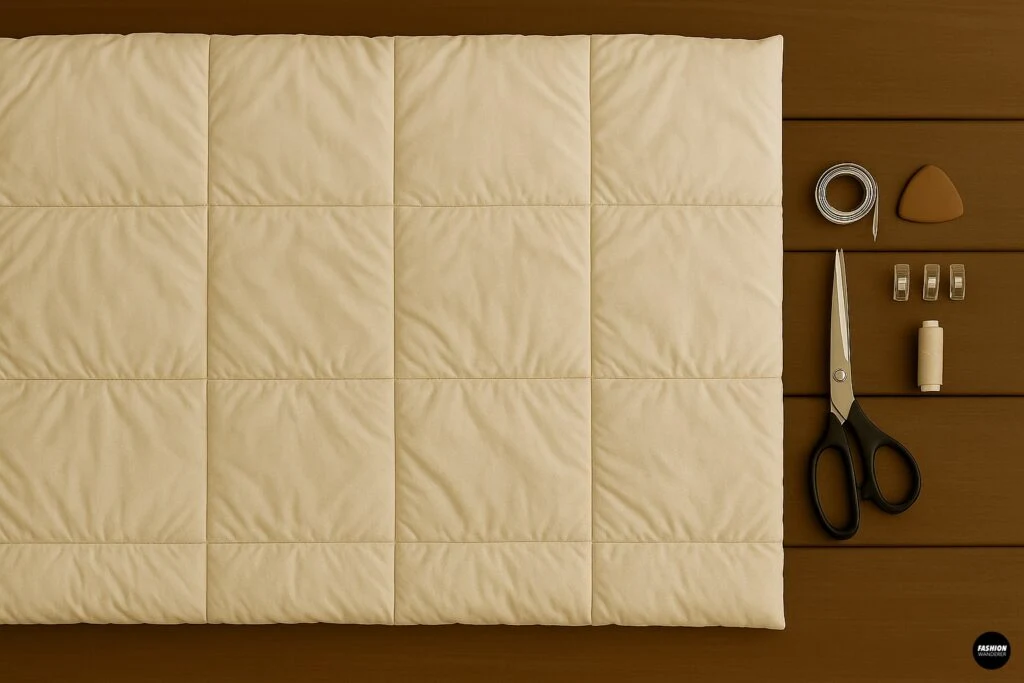
Lay your duvet out flat on a large surface. If your duvet is extra thick, you may want to remove some inner filling to make it easier to work with. Keep the layers smooth and even—this will help when cutting.
Pro Tip: Choose a duvet with quilted sections, as this mimics the puffer vest look.
Step 2: Take Your Measurements


To get the right fit for your bomber vest, measure:
- Chest circumference – around the fullest part of your bust.
- Length – decide if you want a cropped puffer vest, waist-length, or hip-length.
- Shoulder width – measure from one shoulder tip to the other.
Add 1–2 inches of ease for comfort and seam allowance.
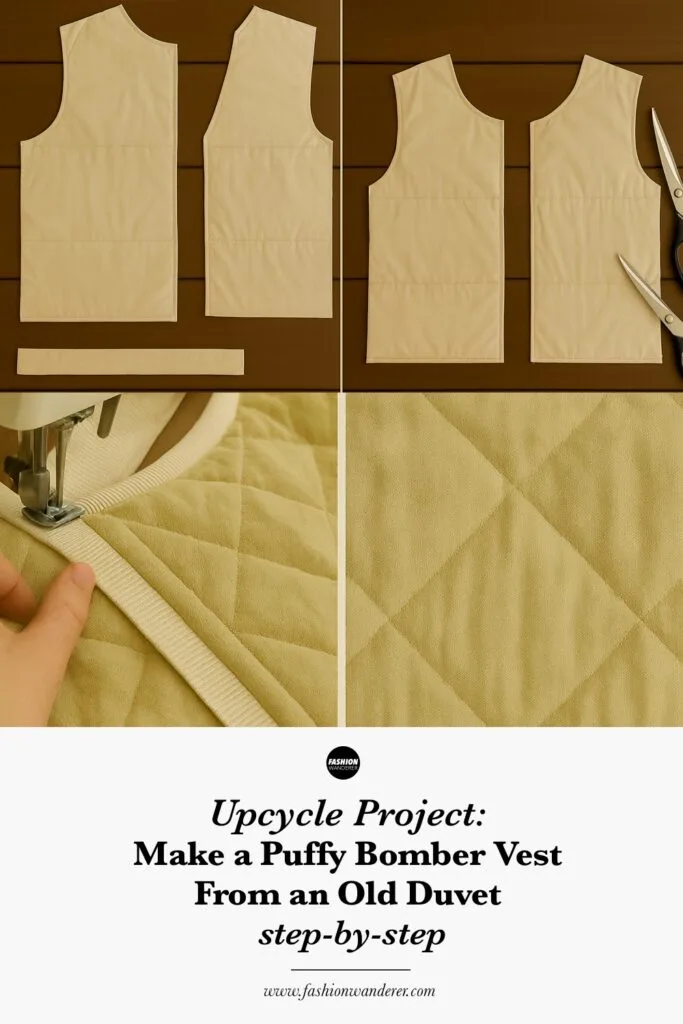
Step 3: Cut the Vest Pieces


Using tailor’s chalk, outline your vest pieces directly onto the duvet:
- Back panel – one large rectangle with slightly sloped shoulders.
- Front panels – two mirror image pieces, each half the width of the back panel.
- Optional collar piece – cut a rectangle of ribbed knit if you want a bomber-style neckline.
Carefully cut along the marked lines, making sure the duvet layers stay together.
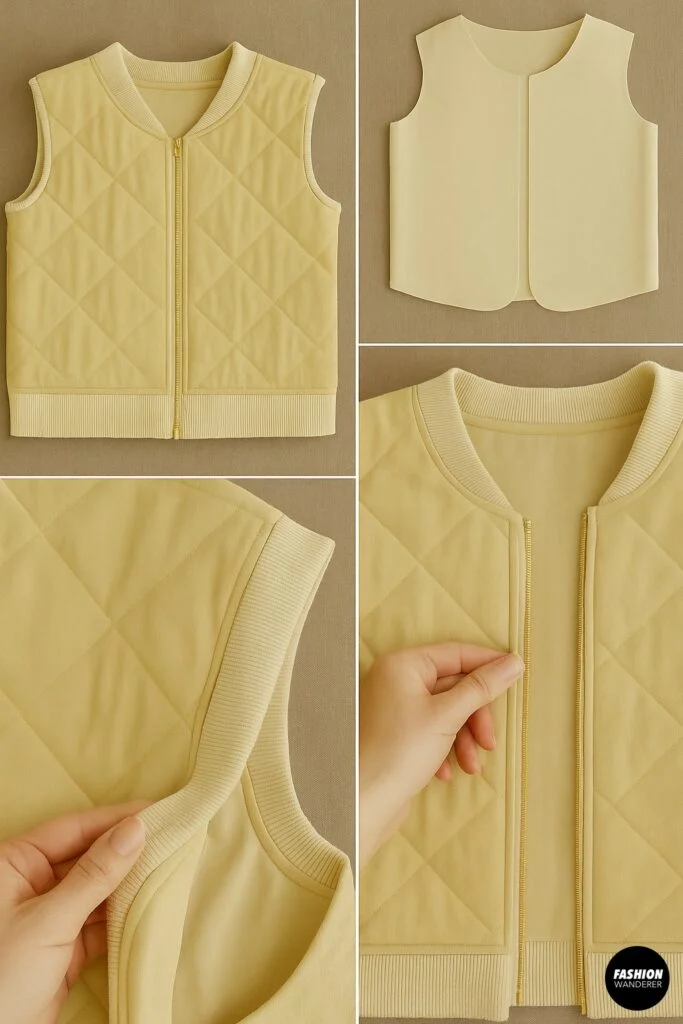
Step 4: Assemble the Body

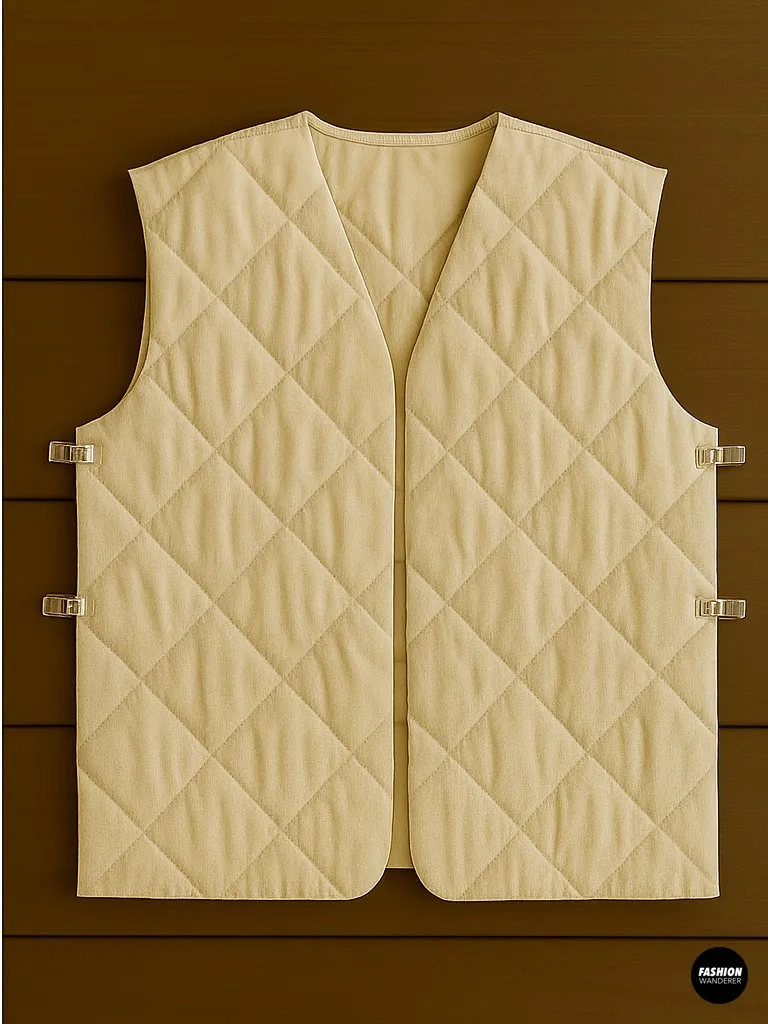
Place the two front panels on top of the back panel, right sides together. Pin along the shoulder seams and side seams. Sew using a straight stitch, then press the seams flat.
At this stage, you should have a vest shape without the finishing details. Try it on to check fit and adjust if needed.
Step 5: Add the Zipper


The zipper is the key detail that gives this vest a polished bomber look.
- Align the zipper along the center front edges of the vest.
- Pin or clip in place.
- Using a zipper foot on your sewing machine, stitch the zipper to each side.
Pro Tip: Choose a chunky metal zipper for a streetwear vibe or a hidden zipper for a sleeker finish.
Step 6: Attach Ribbing

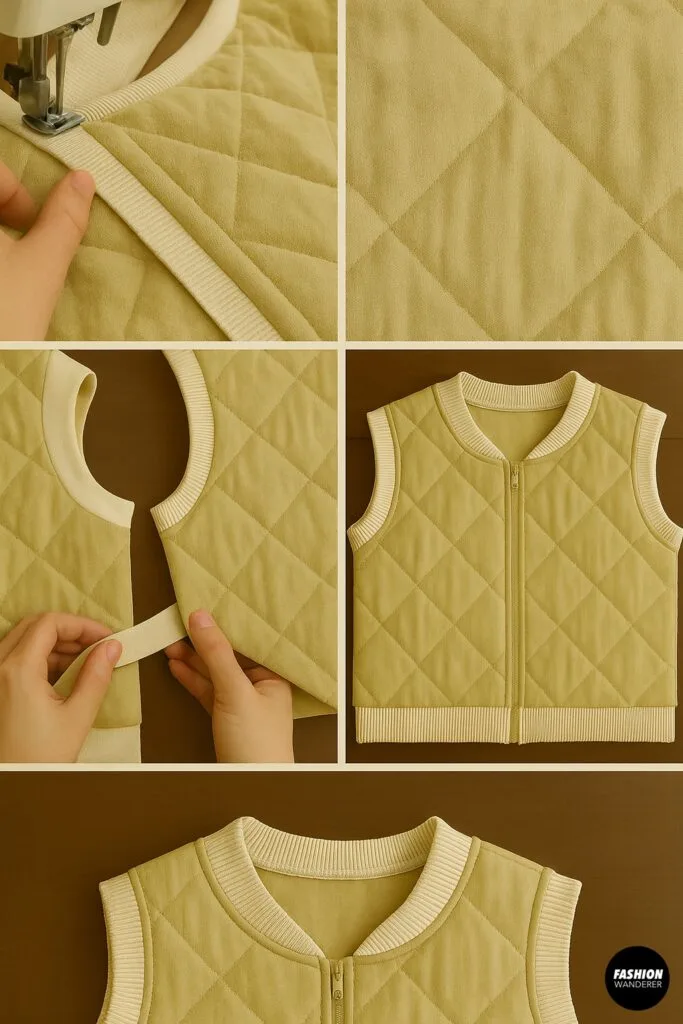
To achieve that classic bomber vest look, add ribbed knit to the collar, hem, and armholes:
- Collar – Cut a strip of ribbing slightly shorter than the neckline. Fold in half lengthwise and sew to the neckline, stretching slightly as you go.
- Armholes – Do the same with smaller ribbing strips for the sleeves.
- Hem – Cut a long strip of ribbing the width of the vest bottom. Fold in half and attach.
This not only looks stylish but also makes the vest more comfortable to wear.
Step 7: Optional Lining

If you’d like a clean interior, cut the same vest pieces from lining fabric. Sew them together and attach inside the vest along the neckline and zipper. This step is optional but adds durability and a professional finish.
Step 8: Try It On & Adjust

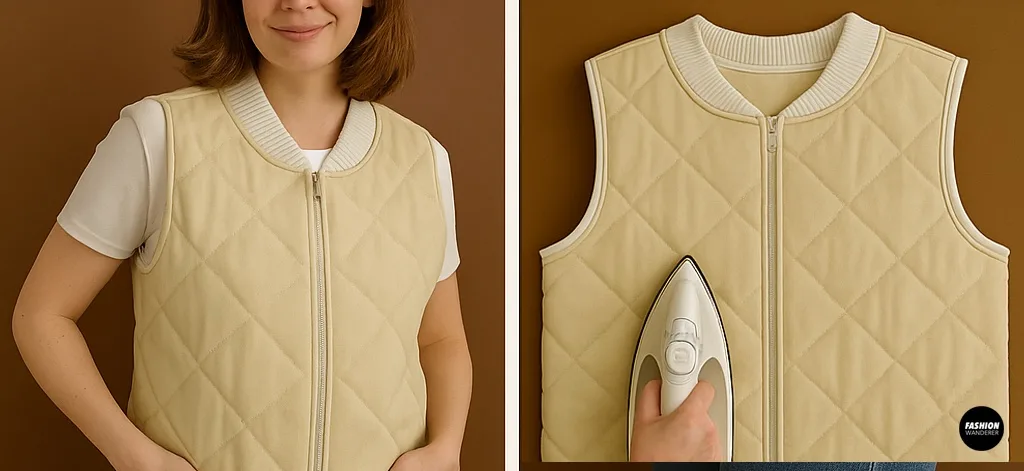
Zip up your new bomber vest and try it on. Make any necessary adjustments to the hem, ribbing, or fit. Give it a final press with an iron on low heat (avoid high heat if your duvet is synthetic).
Congratulations—you’ve just made a DIY puffy bomber vest from an old duvet!
Styling Ideas for Your Puffy Bomber Vest

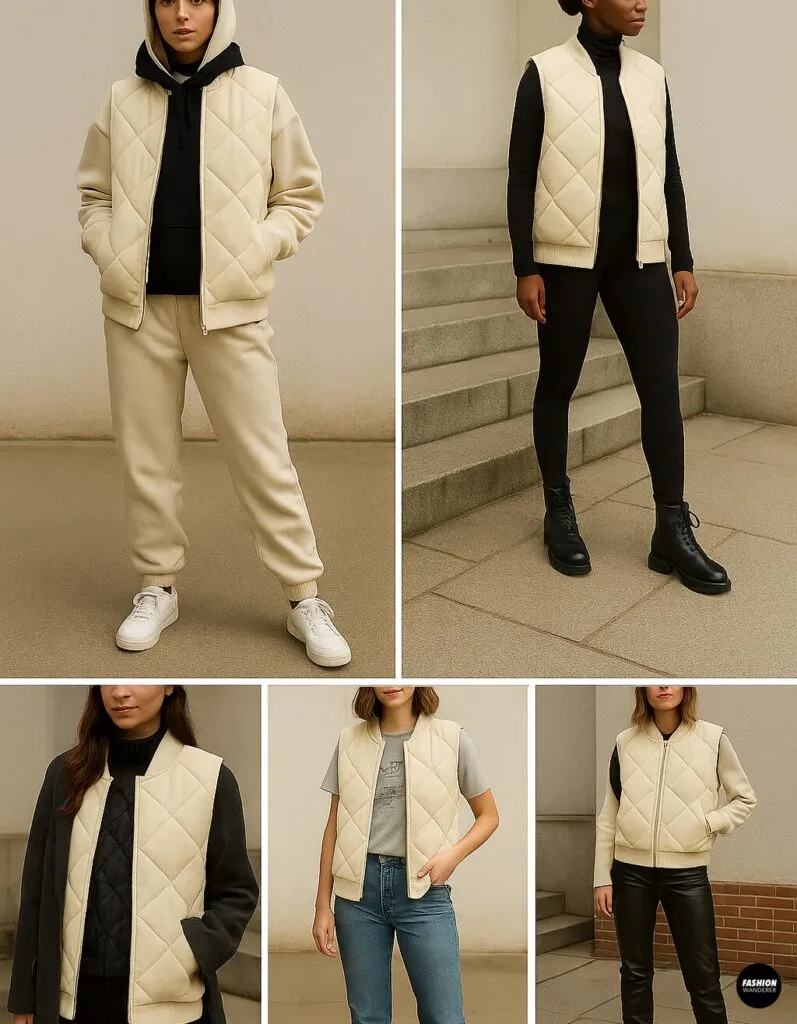
This versatile vest can be styled in countless ways:
- Streetwear Cool – Pair with joggers, sneakers, and a hoodie.
- Sporty Layering – Wear over a fitted turtleneck with leggings and boots.
- Casual Everyday – Style with jeans, a graphic tee, and slip-on sneakers.
- Winter Layering – Add under a coat for extra warmth without bulk.
- Edgy Look – Pair with leather pants and chunky boots.
Care Tips
To keep your bomber vest in great shape:
- Wash on a gentle cycle in cold water.
- Zip up before washing to protect the zipper.
- Hang dry or tumble dry low.
- Avoid ironing directly on ribbing—use a pressing cloth.
Final Thoughts

This project proves that DIY fashion can be stylish, practical, and sustainable. Instead of throwing away an old duvet, you’ve transformed it into a trendy puffy bomber vest that rivals anything you’d find in stores. Not only did you save money, but you also contributed to reducing textile waste.
Whether you make it cropped for a modern streetwear look or longer for extra warmth, this bomber vest is sure to become one of your go-to layering pieces. So grab those scissors, fire up your sewing machine, and give your duvet a fashionable second life!
Trendy, Affordable Sewing Patterns for All Sizes


Tie Shoulder Jumpsuit Pattern


Palazzo Pants Sewing Pattern


Pocket Overall Romper Pattern


Wrap Maxi Skirt Sewing Pattern


Tie Back Top Sewing Pattern