
Do you have an old pillowcase lying around and a desire to add a trendy new skirt to your wardrobe? You’re in luck! In this step-by-step guide, we’ll show you how to transform a simple pillowcase into a stylish no-sew mini skirt.
This beginner-friendly project is quick, affordable, and perfect for anyone who wants to upcycle home textiles into fashionable pieces—without ever touching a sewing machine.
Whether you’re aiming for a casual everyday look, a fun night-out piece, or a unique addition to your DIY fashion collection, this tutorial will walk you through the entire process.
Why You’ll Love This DIY Project
- Budget-friendly: Costs next to nothing if you’re using an old pillowcase.
- Quick to make: You can finish this project in under 30 minutes.
- Beginner-friendly: Absolutely no sewing skills required.
- Unique fashion piece: Each pillowcase skirt is one-of-a-kind.
- Sustainable: A creative way to upcycle and reduce waste.
Why a Pillowcase Works for DIY Clothing
Before we jump into the steps, let’s talk about why a pillowcase is the perfect candidate for this project:
- Pre-sewn edges: Pillowcases are already hemmed and neatly finished on all sides, which eliminates the need for sewing.
- Durable fabric: Most pillowcases are made from sturdy cotton or poly-cotton blends that drape well as a skirt.
- Versatility: From plain whites to bold prints, pillowcases come in endless designs that can match your personal style.
- Eco-friendly: Repurposing household textiles reduces waste and gives new life to unused items.
Materials You’ll Need

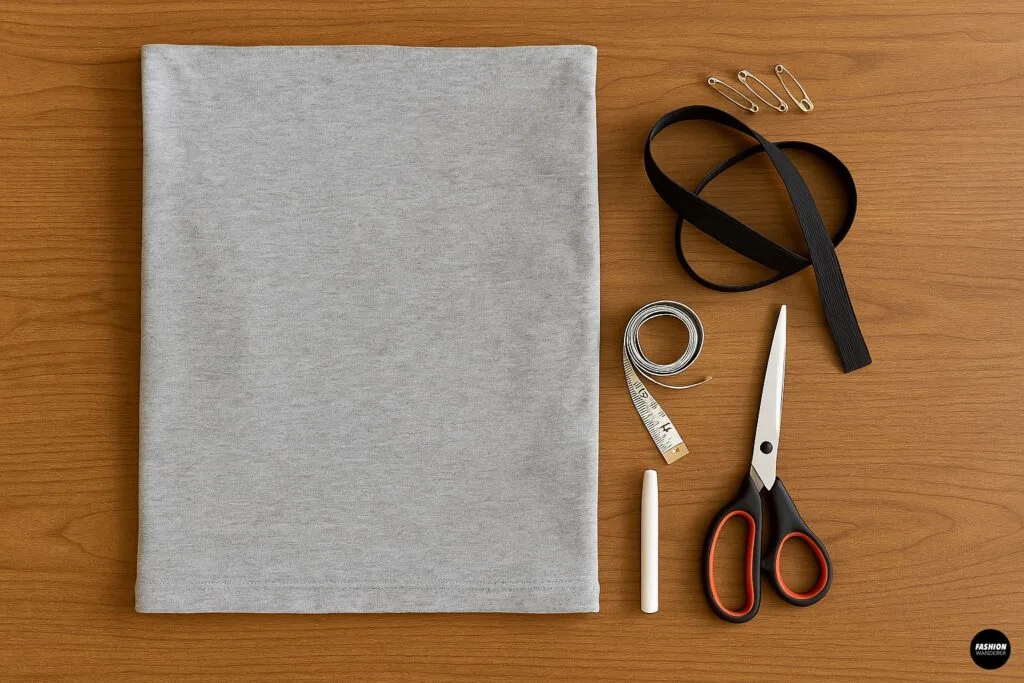
This is a true no-sew DIY, so the materials are minimal and inexpensive. Gather the following:
- 1 pillowcase (standard or queen size works best)
- Fabric scissors
- Elastic waistband or wide stretchy band (optional for comfort)
- Safety pins or fabric glue (for finishing adjustments)
- Measuring tape
- Chalk or washable fabric marker
Step-by-Step Tutorial: No Sew Mini Skirt from a Pillowcase
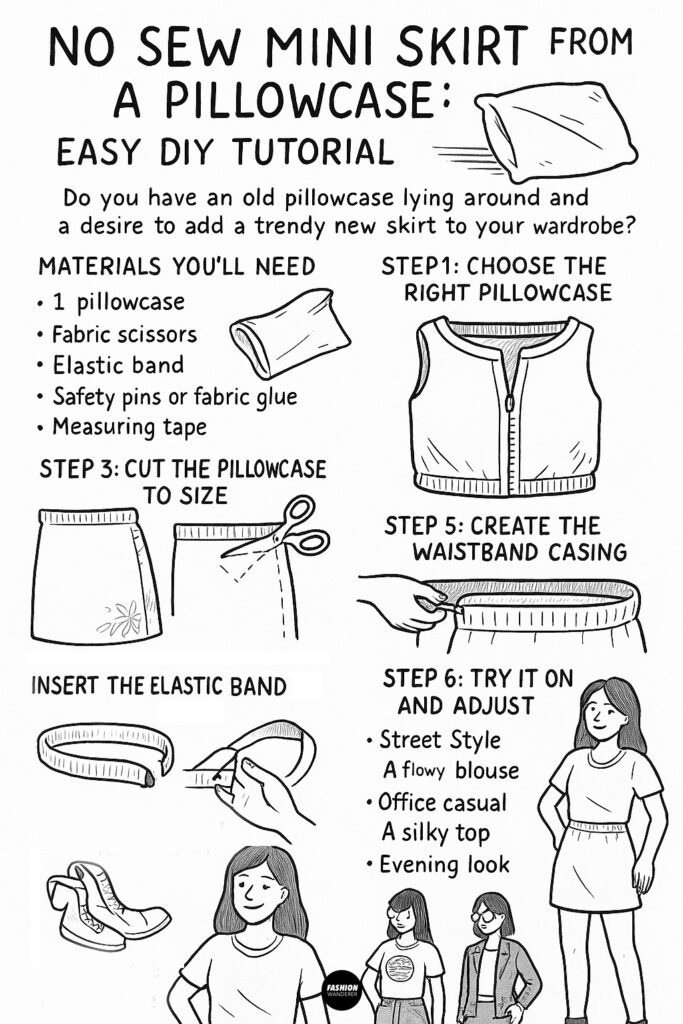

Step 1: Choose the Right Pillowcase

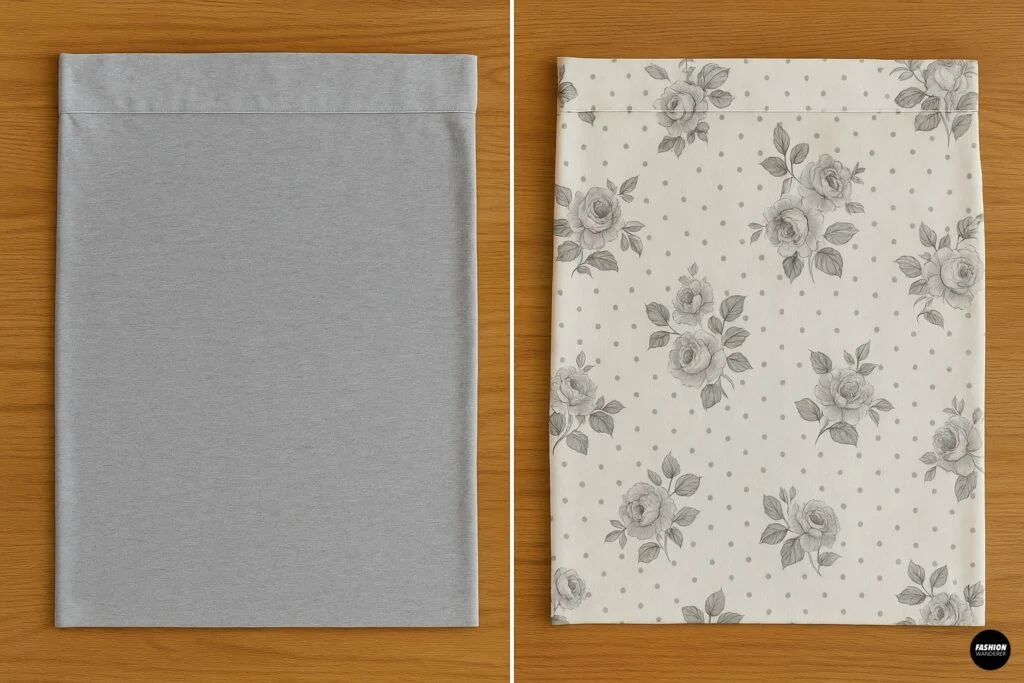
Pick a pillowcase that matches your style. Solid colors create a sleek, minimalist look, while patterned pillowcases add playful or vintage vibes. Make sure the pillowcase fabric isn’t too sheer—if it is, consider layering with a slip underneath.
Step 2: Measure and Mark Your Skirt Length

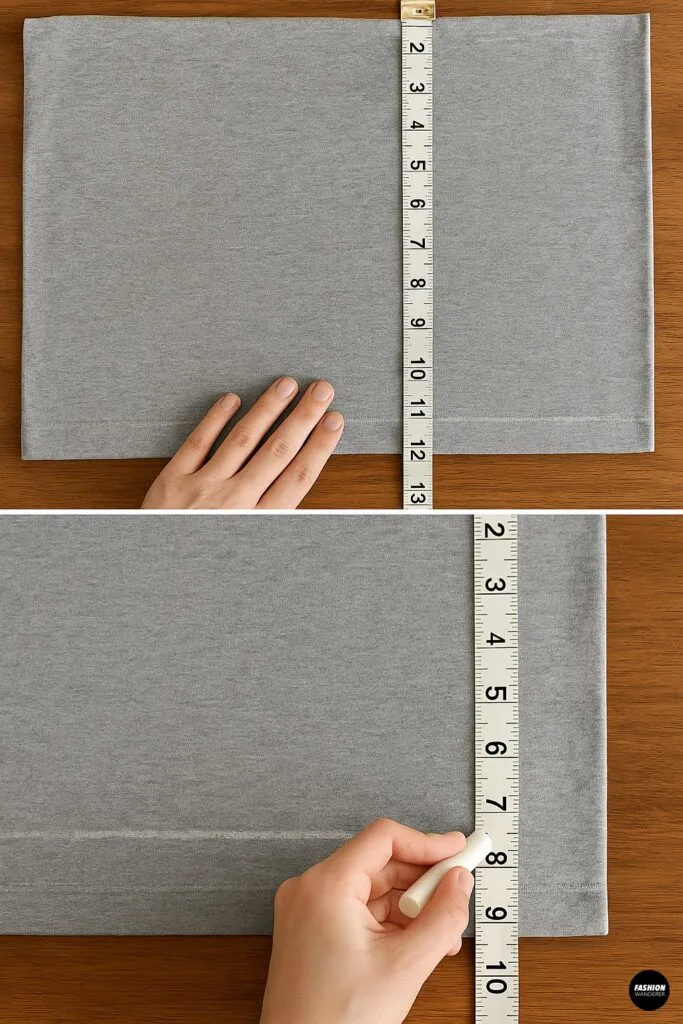
Decide how short you want your mini skirt to be. Use a measuring tape to mark your desired length from the bottom hem of the pillowcase upward. Add about 2 inches of allowance at the top for folding over a waistband. Mark your cutting line with chalk.
Pro Tip: If you’re unsure, cut it longer—you can always trim more later.
Step 3: Cut the Pillowcase to Size

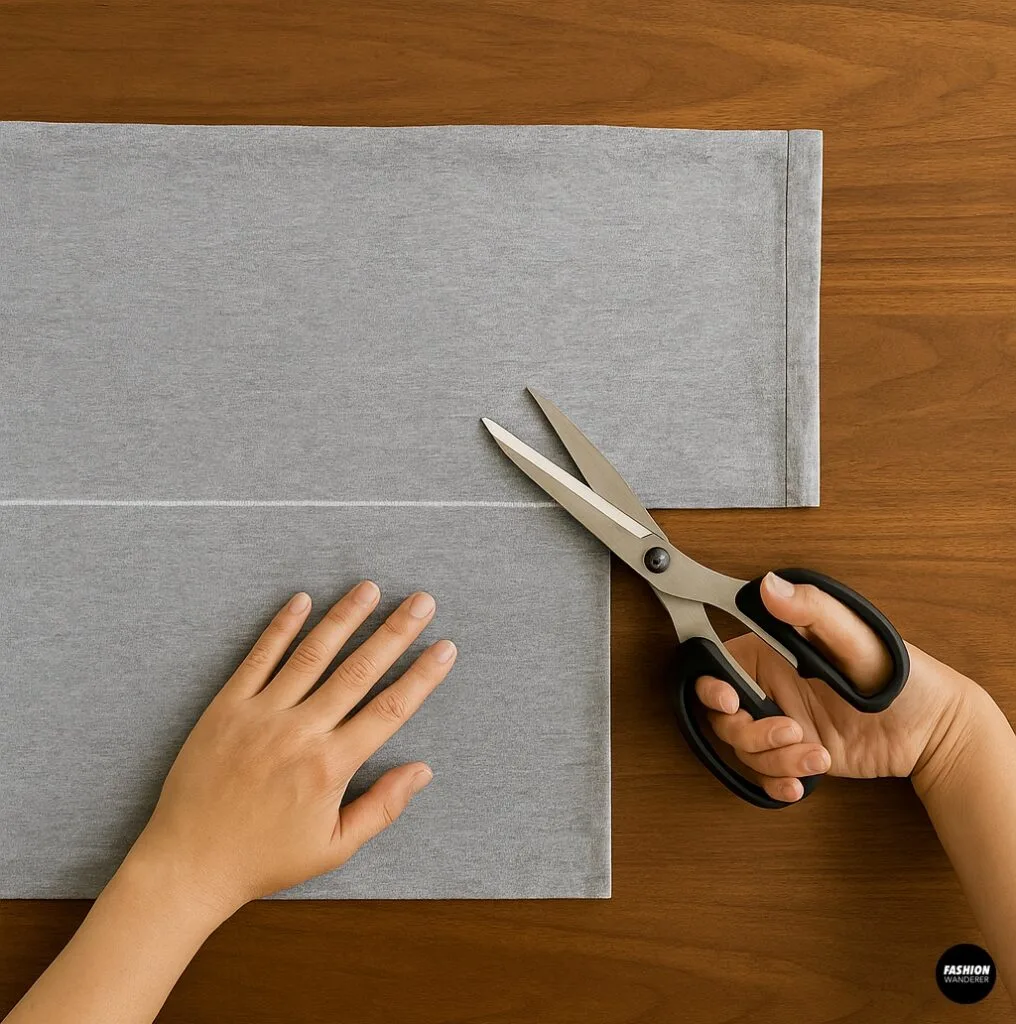
Lay your pillowcase flat and carefully cut along the marked line. The bottom hem of the pillowcase will serve as the finished hem of your mini skirt, giving you a polished look without any sewing.
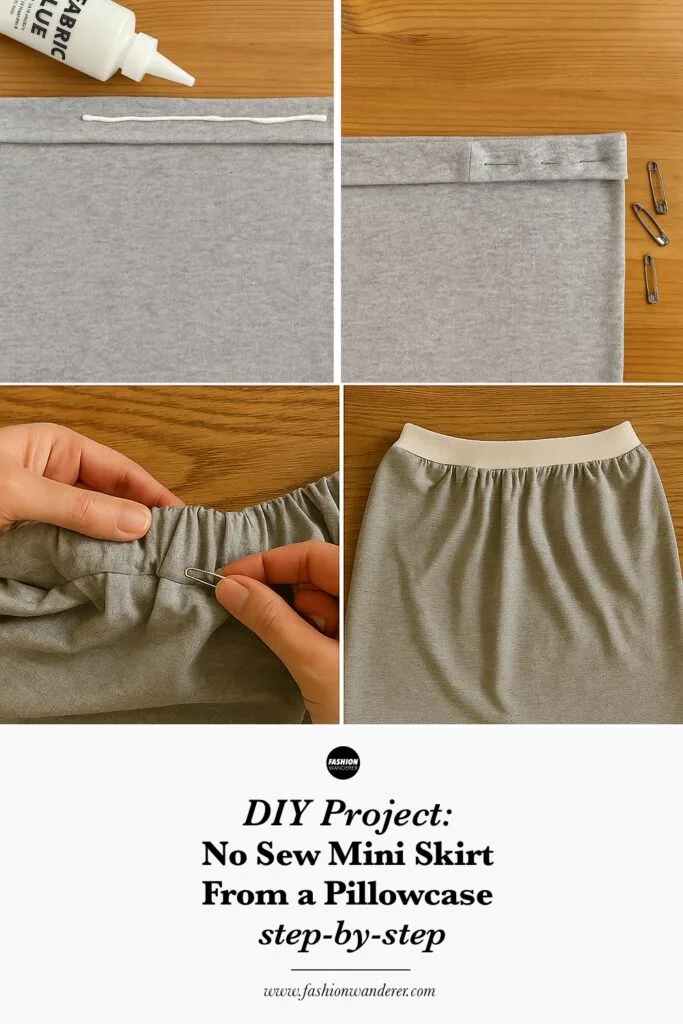
Step 4: Create the Waistband Casing

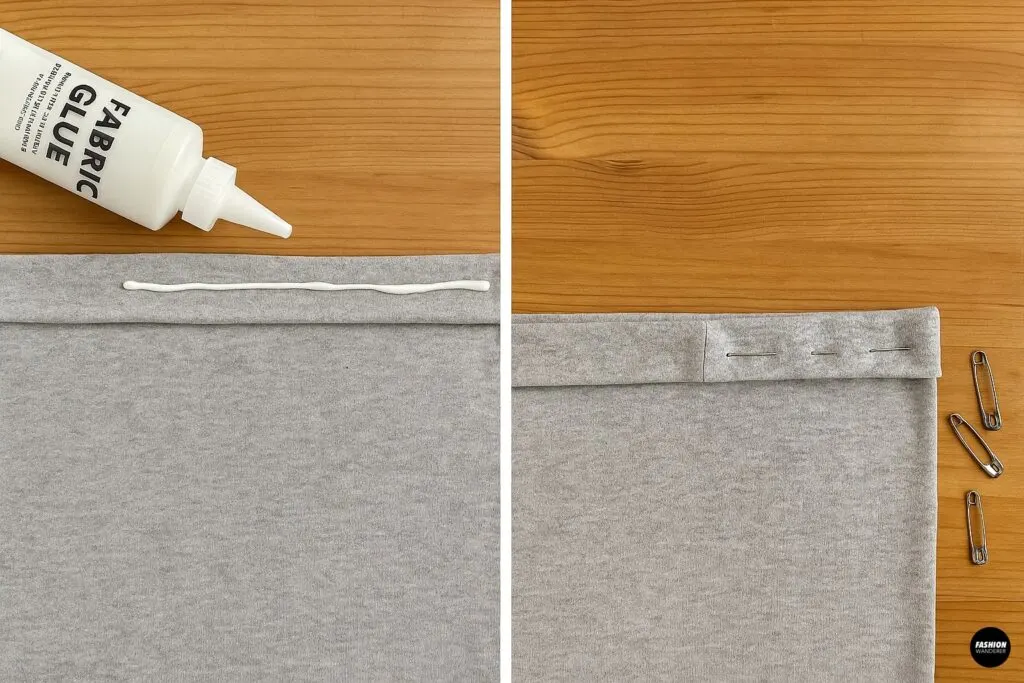
Flip the top edge of your pillowcase skirt inward about 1.5–2 inches to form a casing for the waistband. You can secure this fold in one of two no-sew ways:
- Fabric glue method: Apply a line of fabric glue along the folded edge, leaving a small opening to insert the elastic band. Let it dry completely before proceeding.
- Safety pin method: Use multiple safety pins to hold the fold in place, spacing them about 1 inch apart. Make sure the pins are on the inside of the skirt so they don’t show.
Step 5: Insert the Elastic Band

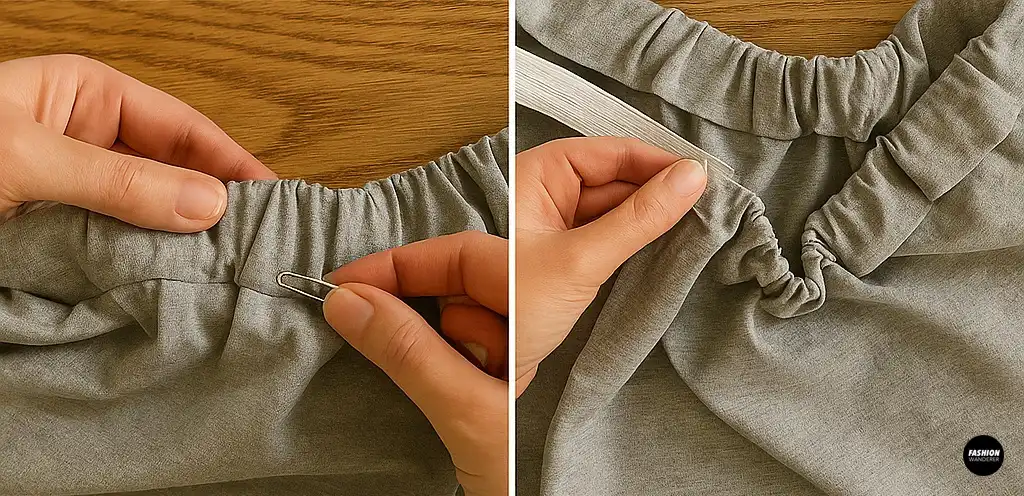
Measure your waist and cut the elastic band slightly smaller for a snug fit. Attach a safety pin to one end of the elastic and thread it through the casing you created at the top of your skirt. Work it all the way around until it comes out the other side.
Overlap the ends of the elastic by about an inch and secure them together with strong safety pins or fabric glue. Adjust the gathers of the fabric evenly around the waistband.
Step 6: Try It On and Adjust

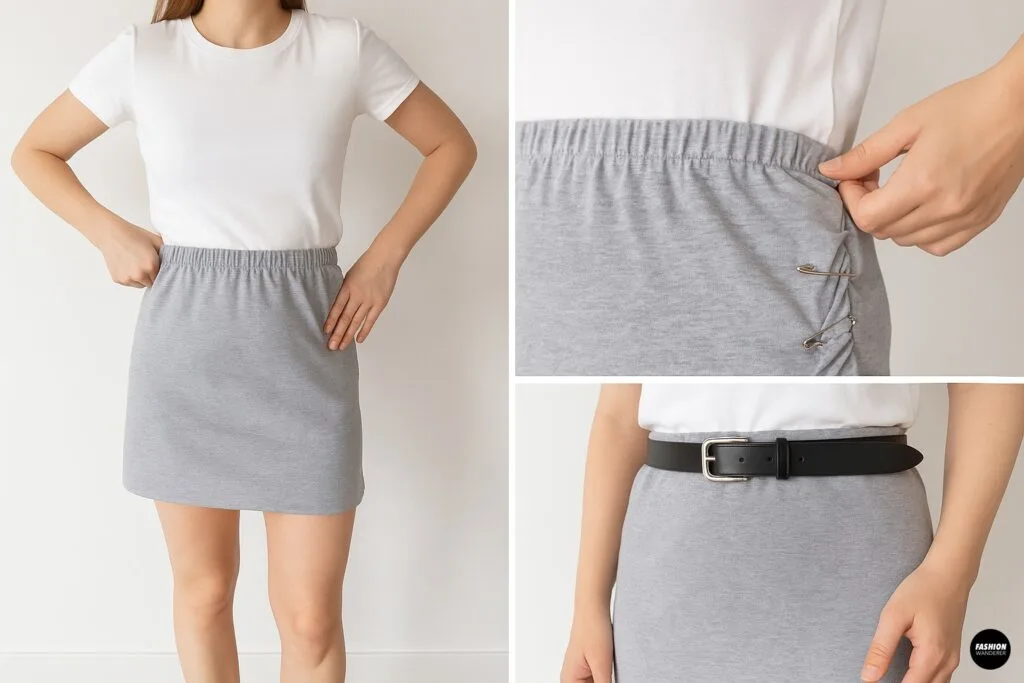
Slip the skirt on and check the fit. If it feels too loose, shorten the elastic band slightly. If you want a more form-fitting silhouette, you can gather the sides with safety pins or use a belt for styling.
Styling Your No Sew Mini Skirt

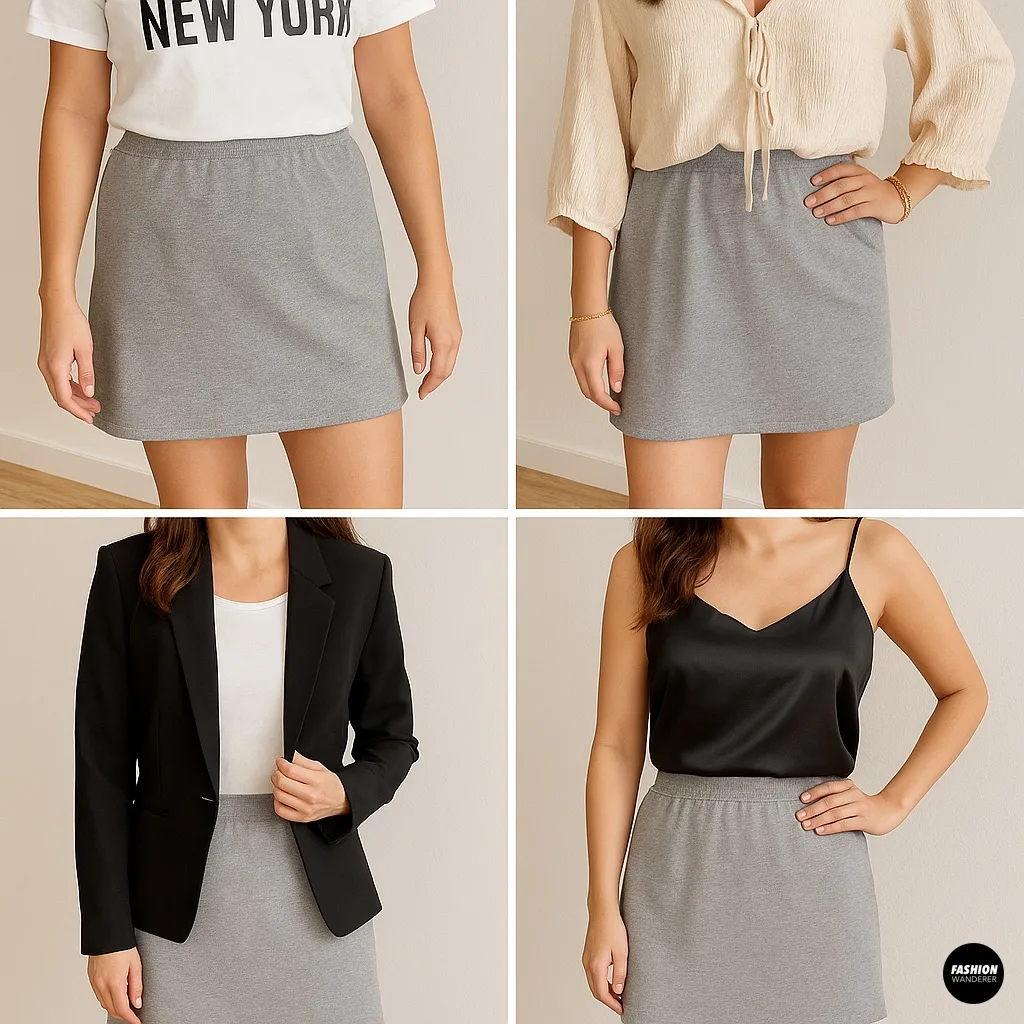
The beauty of this pillowcase skirt is its versatility. Here are some easy styling ideas:
- Street Style: Pair with a tucked-in graphic tee and chunky sneakers.
- Boho Vibes: Add a flowy blouse, layered jewelry, and sandals.
- Office Casual: Style with a fitted blazer and ballet flats for a chic work outfit.
- Evening Look: Combine with a silky cami and ankle boots for a night out.
Variations to Try

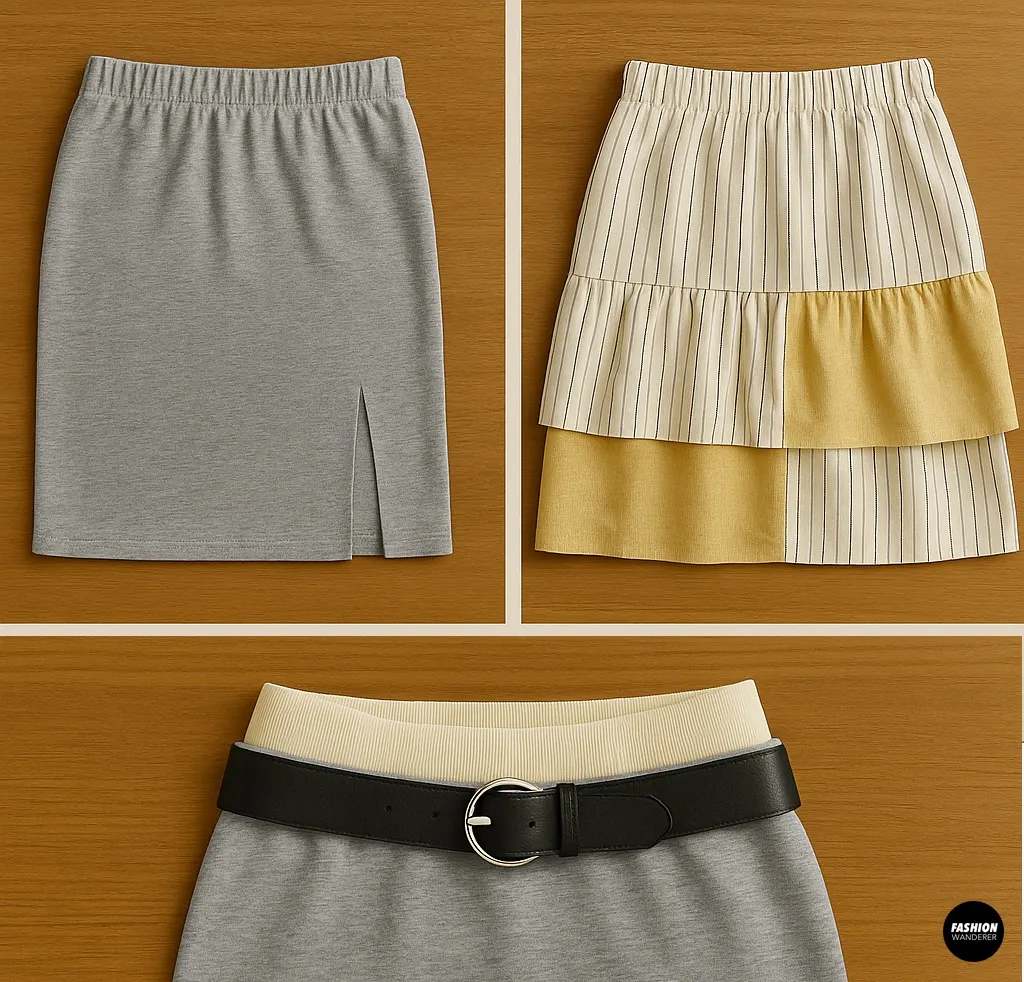
Once you’ve mastered this simple no-sew project, you can experiment with fun variations:
- Side Slit Skirt: Cut a small slit up the side of the pillowcase before finishing the waistband for a flirty detail.
- Tiered Skirt: Use two pillowcases of different colors or prints, cut them into panels, and layer them for a tiered effect.
- Belted Look: Skip the elastic and simply use a wide belt to cinch the waist, leaving the top raw edge tucked inside.
Tips for Success
- Choose the right fit: Standard pillowcases work best for petite or slim skirts, while queen-size or king-size pillowcases provide more fabric for looser fits.
- Secure edges neatly: If you want extra durability, iron fabric tape onto the folds instead of using glue.
- Play with textures: Satin pillowcases make elegant skirts, while cotton creates a casual everyday piece.
- Layer if needed: For lighter pillowcases, pair your mini skirt with opaque tights or biker shorts underneath.
Final Thoughts

Making a no-sew mini skirt from a pillowcase is one of the easiest and most satisfying DIY fashion projects you can try. With just a few simple steps, you’ll have a chic, custom skirt that reflects your creativity and personal style.
Whether you’re a seasoned DIY enthusiast or a complete beginner, this project is proof that sustainable, fashionable clothing doesn’t have to cost much—or require sewing skills.
So, grab that pillowcase and start crafting your new favorite mini skirt today!
Trendy, Affordable Sewing Patterns for All Sizes


Tie Shoulder Jumpsuit Pattern


Palazzo Pants Sewing Pattern


Pocket Overall Romper Pattern


Wrap Maxi Skirt Sewing Pattern


Tie Back Top Sewing Pattern