
Fall is the season of cozy layers, pumpkin spice, and chilly evenings when all you want is something soft to wrap around your shoulders.
Instead of spending money on new outerwear or home décor, why not transform old blankets into stylish no-sew capes, throws, and ponchos? This beginner-friendly DIY project is budget-conscious, sustainable, and takes less than 30 minutes to complete—no sewing machine required.
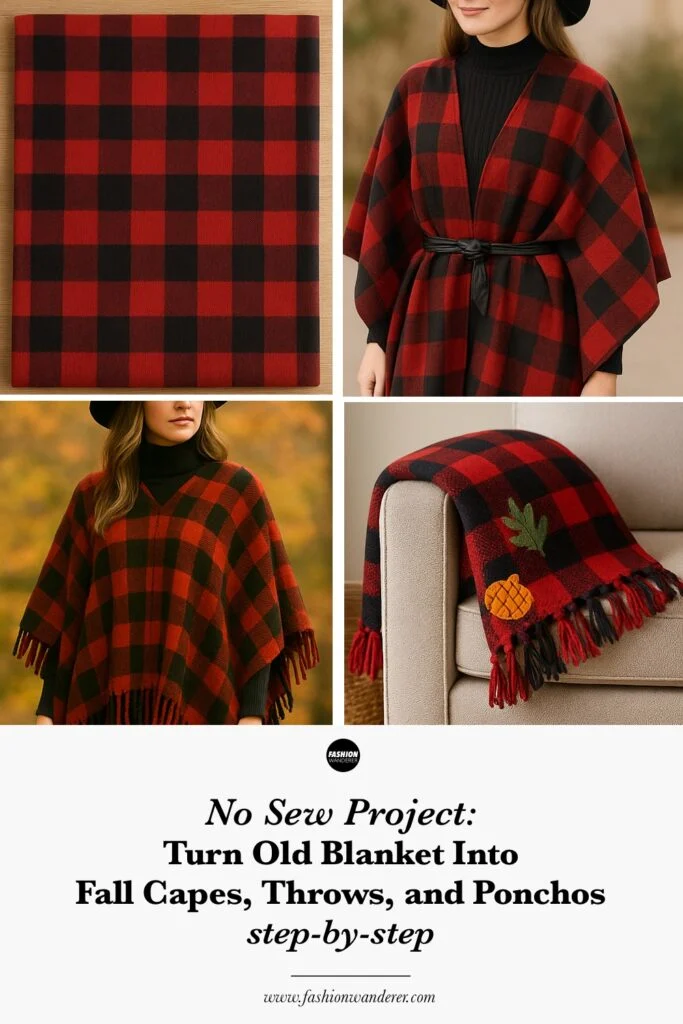
In this guide, I’ll walk you step by step through three different ways to repurpose old blankets: a chic cape, a trendy poncho, and a cozy throw. Whether you’re upgrading your wardrobe or refreshing your living space, these no-sew projects are the perfect fall craft.
Why Repurpose Old Blankets?
Before we dive into the tutorials, here are a few reasons why this project is worth trying:
- Eco-friendly: Upcycle old textiles instead of tossing them out.
- Budget-friendly: Save money by using what you already have.
- Beginner-friendly: No sewing machine, patterns, or advanced skills required.
- Versatile: Works with fleece, wool, knit, or flannel blankets.
- Customizable: Add fringe, fabric paint, or trim for a personal touch.
Materials You’ll Need

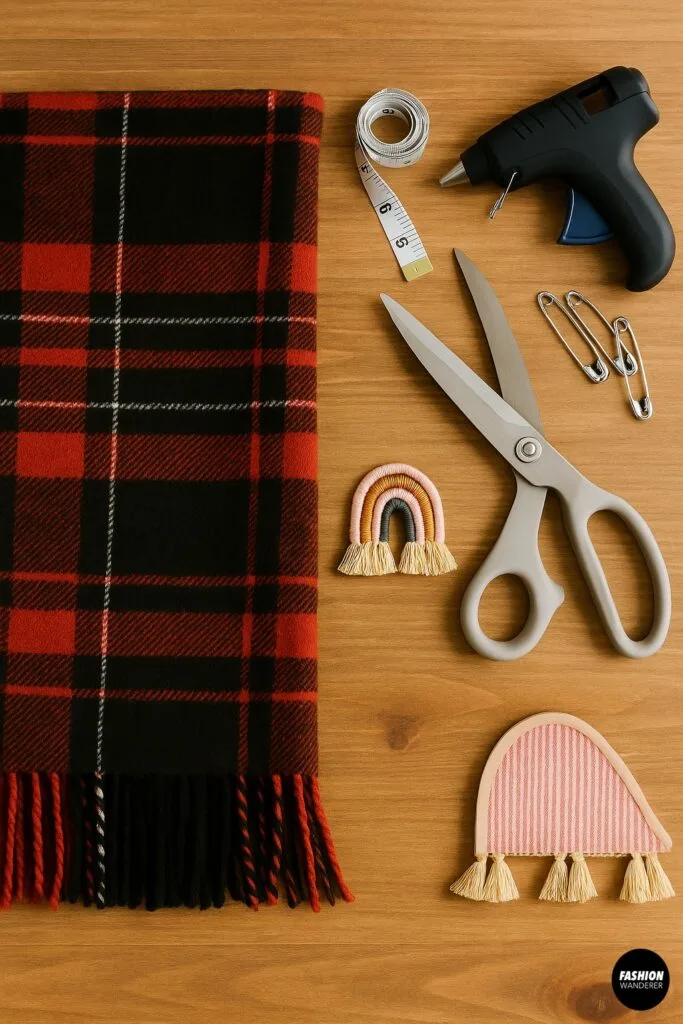
For each project, gather the following supplies:
- 1 old blanket (fleece, knit, flannel, or wool)
- Fabric scissors or rotary cutter
- Measuring tape or ruler
- Fabric glue or hot glue gun (optional for edges)
- Safety pins or brooch (for capes/ponchos)
- Optional embellishments: fringe trim, patches, tassels, or fabric paint
DIY No-Sew Projects Using Old Blankets

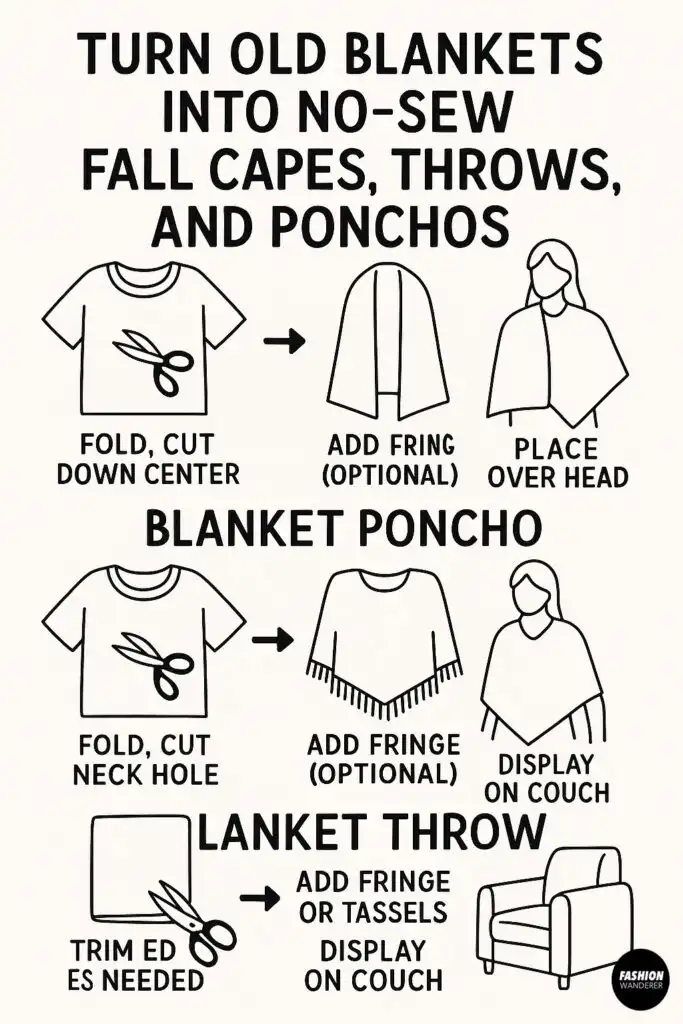
DIY No-Sew Blanket Cape

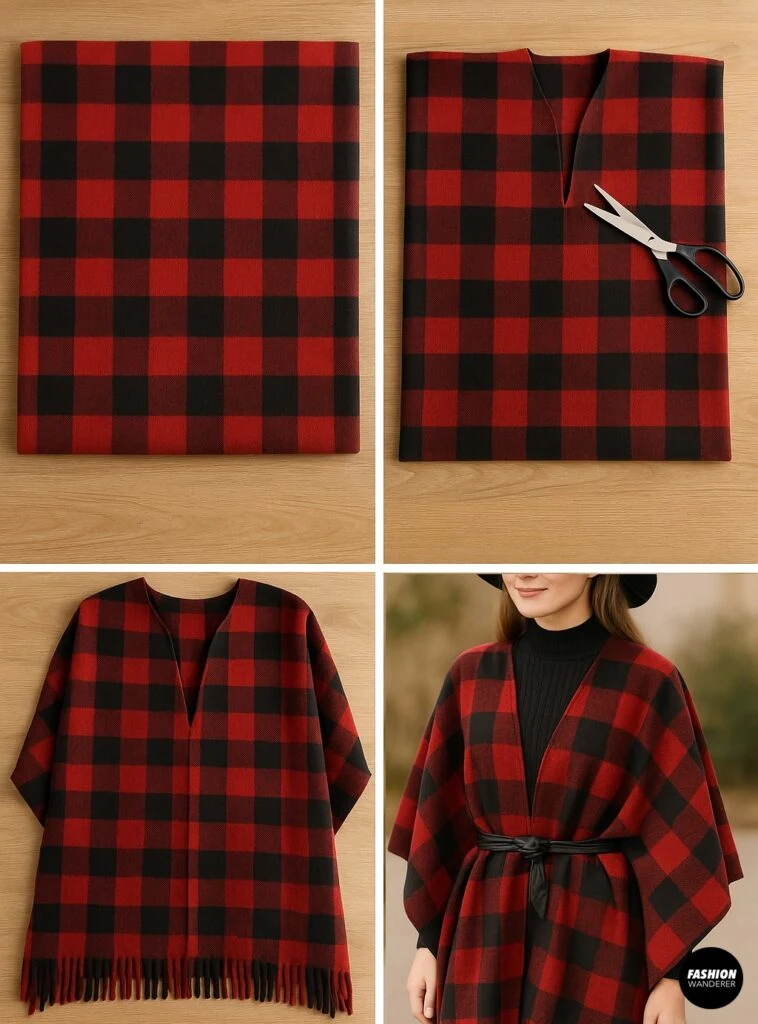
Capes are a timeless layering piece that can dress up any fall outfit. Pair it with jeans and boots for casual days, or drape it over a dress for a polished evening look.
Step 1: Choose Your Blanket
Select a medium-weight blanket, preferably around 50″ x 60″. Fleece or wool works best because it drapes beautifully. Wash and dry the blanket beforehand for a clean finish.
Step 2: Fold and Cut the Opening
Lay the blanket flat on a table. Fold it in half width-wise, then mark the center of the folded edge. Using your scissors, cut a straight line down about 12–14 inches to create an opening. This will form the front opening of your cape.
Step 3: Smooth and Shape
Unfold the blanket and try it on. The cut should allow the cape to drape over your shoulders with an open front. If the edges look uneven, trim them slightly.
Step 4: Style and Secure
Wear the cape open, or secure it with a belt at the waist for a structured look. You can also add a brooch or safety pin at the neckline for extra flair.
DIY No-Sew Blanket Poncho


Ponchos are practical, stylish, and warm—perfect for cozying up at football games, farmers markets, or fall bonfires.
Step 1: Select Your Blanket
Choose a larger blanket (60″ x 70″) so it fully covers your torso. Fleece or knit blankets are ideal since they have natural stretch.
Step 2: Fold and Cut the Neck Hole
Fold the blanket in half lengthwise. At the center fold, mark a 6–8 inch slit. Cut carefully to create a head opening. Test the fit and adjust as needed.
Step 3: Add Fringe (Optional)
For a boho vibe, cut small vertical strips (about ½ inch wide and 4 inches long) along the bottom edge of the poncho to create fringe.
Step 4: Wear It With Layers
Slip the poncho over your head and let it drape. Pair it with skinny jeans, leggings, or boots. Add a wide-brim hat to complete the fall look.
DIY No-Sew Blanket Throw


Sometimes the best way to refresh your space is with a cozy throw blanket that looks store-bought but costs you nothing.
Step 1: Choose and Trim
Pick a soft blanket you don’t mind displaying on your couch or bed. If the edges are frayed, trim them evenly with scissors.
Step 2: Add Fringe or Tassels
To upgrade a plain blanket, cut 3–4 inch strips along the edges and tie them into knots for homemade fringe. Alternatively, glue on pre-made tassel trim for a chic upgrade.
Step 3: Embellish (Optional)
Use fabric paint to add fall motifs like leaves, pumpkins, or plaid patterns. Iron-on patches can also personalize the throw.
Step 4: Display It
Drape the finished throw over the arm of your sofa, fold it neatly at the foot of your bed, or roll it into a basket for easy access during chilly evenings.
Extra Styling Ideas

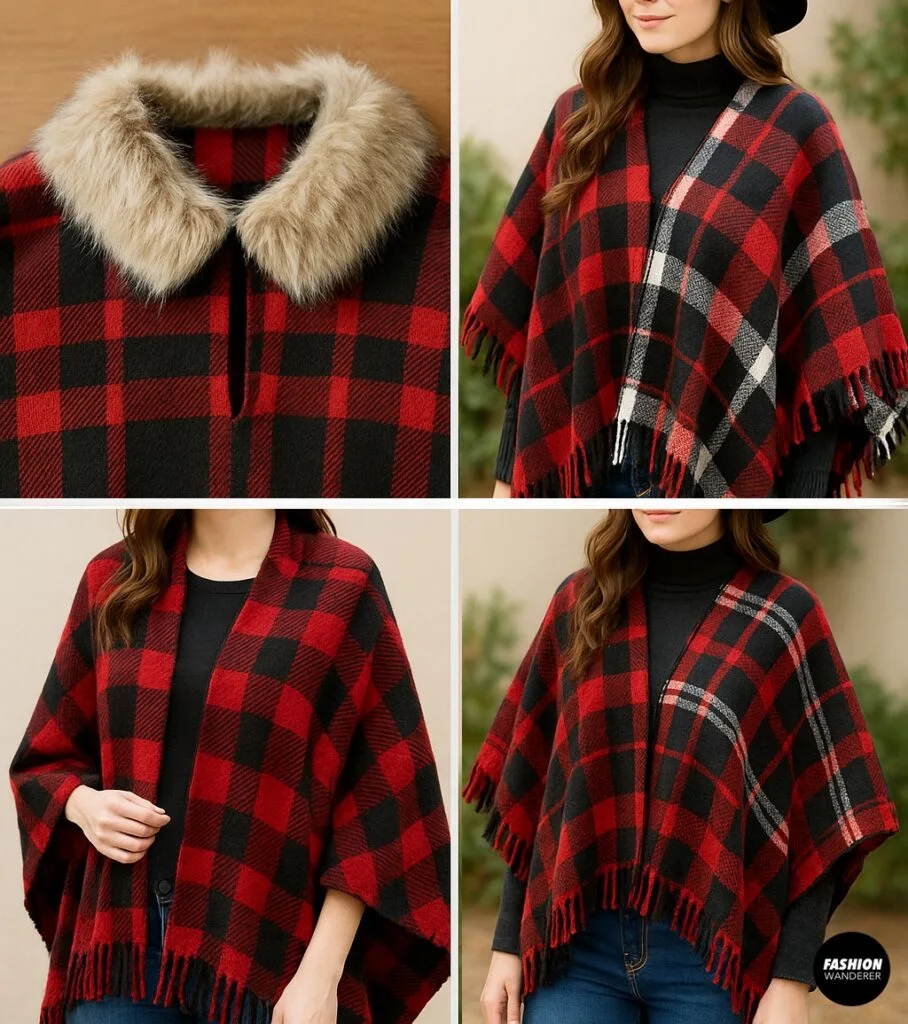
- Add a Collar: Glue faux fur trim around the neckline of your cape or poncho.
- Make It Reversible: Use two thin blankets glued together back-to-back for a double-sided look.
- Use a Blanket Scarf: Large plaid scarves can be styled the same way as blankets.
- Holiday Gifting: Turn old blankets into handmade capes or throws as eco-friendly gifts.
Tips for Success With No-Sew Blanket Projects
- Choose Non-Fraying Fabrics: Fleece and knits won’t unravel, making them ideal.
- Use Fabric Glue Sparingly: Apply thin lines and let it dry completely.
- Keep Cuts Straight: Use a ruler or chalk line before cutting.
- Test the Fit: Try on your cape or poncho after each cut to avoid trimming too much.
- Upcycle Creatively: Old picnic blankets, thrift store finds, or even oversized scarves can work.
Final Thoughts

Turning old blankets into no-sew fall capes, throws, and ponchos is one of the easiest and most rewarding DIY projects for the season. With just a pair of scissors and a little creativity, you can transform forgotten linens into stylish wardrobe staples or home décor. These projects not only save money but also give new life to items that might otherwise go to waste.
So before you head to the store for new fall essentials, check your closet or linen cabinet—you might already have the perfect blanket waiting to be transformed. Cozy, chic, and sustainable, these no-sew projects prove that fall fashion and home décor can be both affordable and fun.
Trendy, Affordable Sewing Patterns for All Sizes


Tie Shoulder Jumpsuit Pattern


Palazzo Pants Sewing Pattern


Pocket Overall Romper Pattern


Wrap Maxi Skirt Sewing Pattern


Tie Back Top Sewing Pattern